


Piaggio is conocido por muchos “sólo” as the mayor manufacturer scooters del mundo. La Vespa, the marca más destacada de Piaggio, ha dejado una marca duradera en la imagen de la empresa de Pontedera. Sin embargo, al principio Piaggio también fabricaba vagones de ferrocarril, barcos y motores de avión de gran éxito (hacia 1940, el P.XV de 18 cilindros en doble estrella con sobrealimentación multietapa, 1500 CV de potencia de despegue), así como aviones muy innovadores (1938, el P.111 with cabina presurizada para un techo de service de 12.000 m). In actuality, the Grupo Piaggio Aerospace will also have a construction of innovative aircraft like the P180 Avanti, located in the Hermosa Italian Riviera. El avión de doble helice más rapido del mundo, with a velocidad de crucero de 600 km/h.
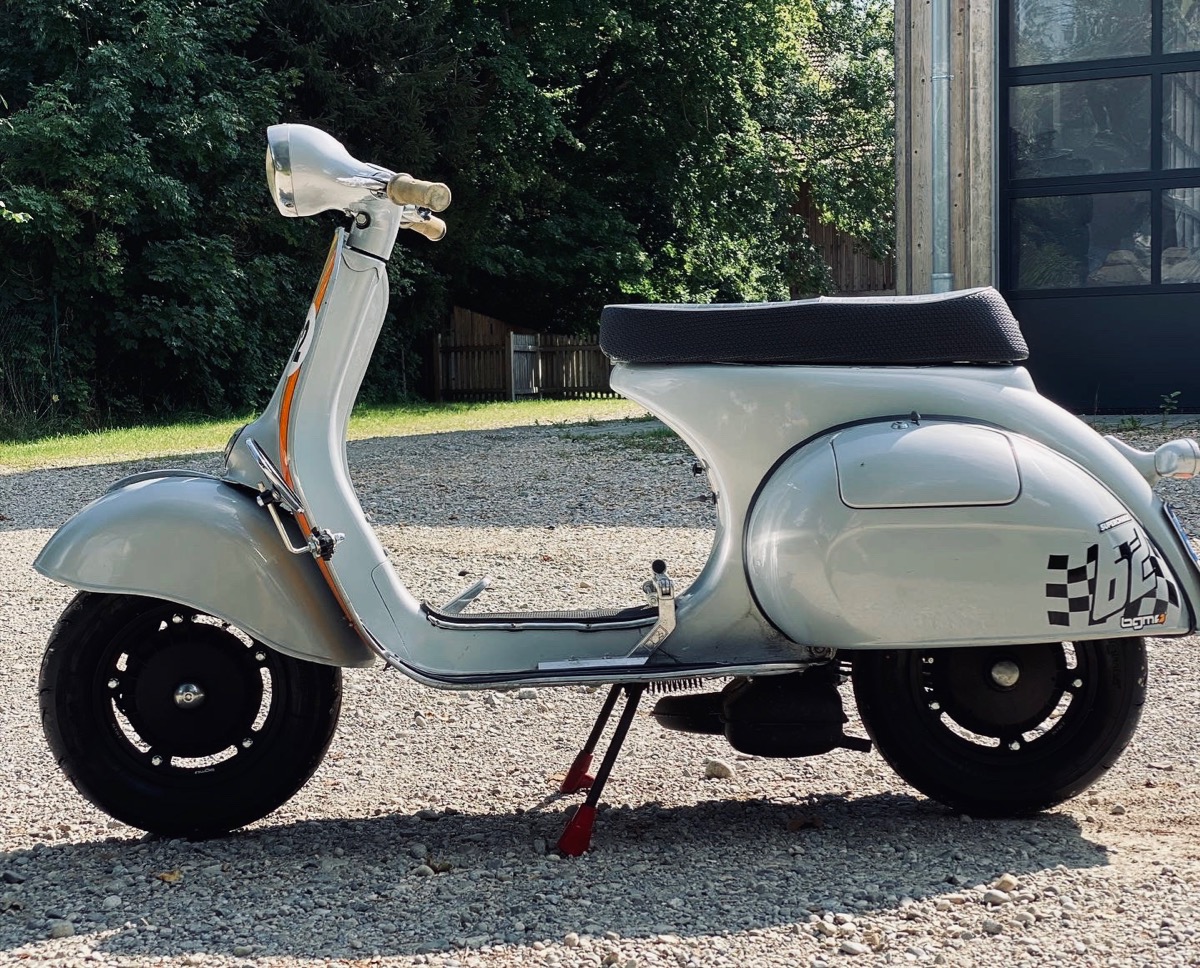
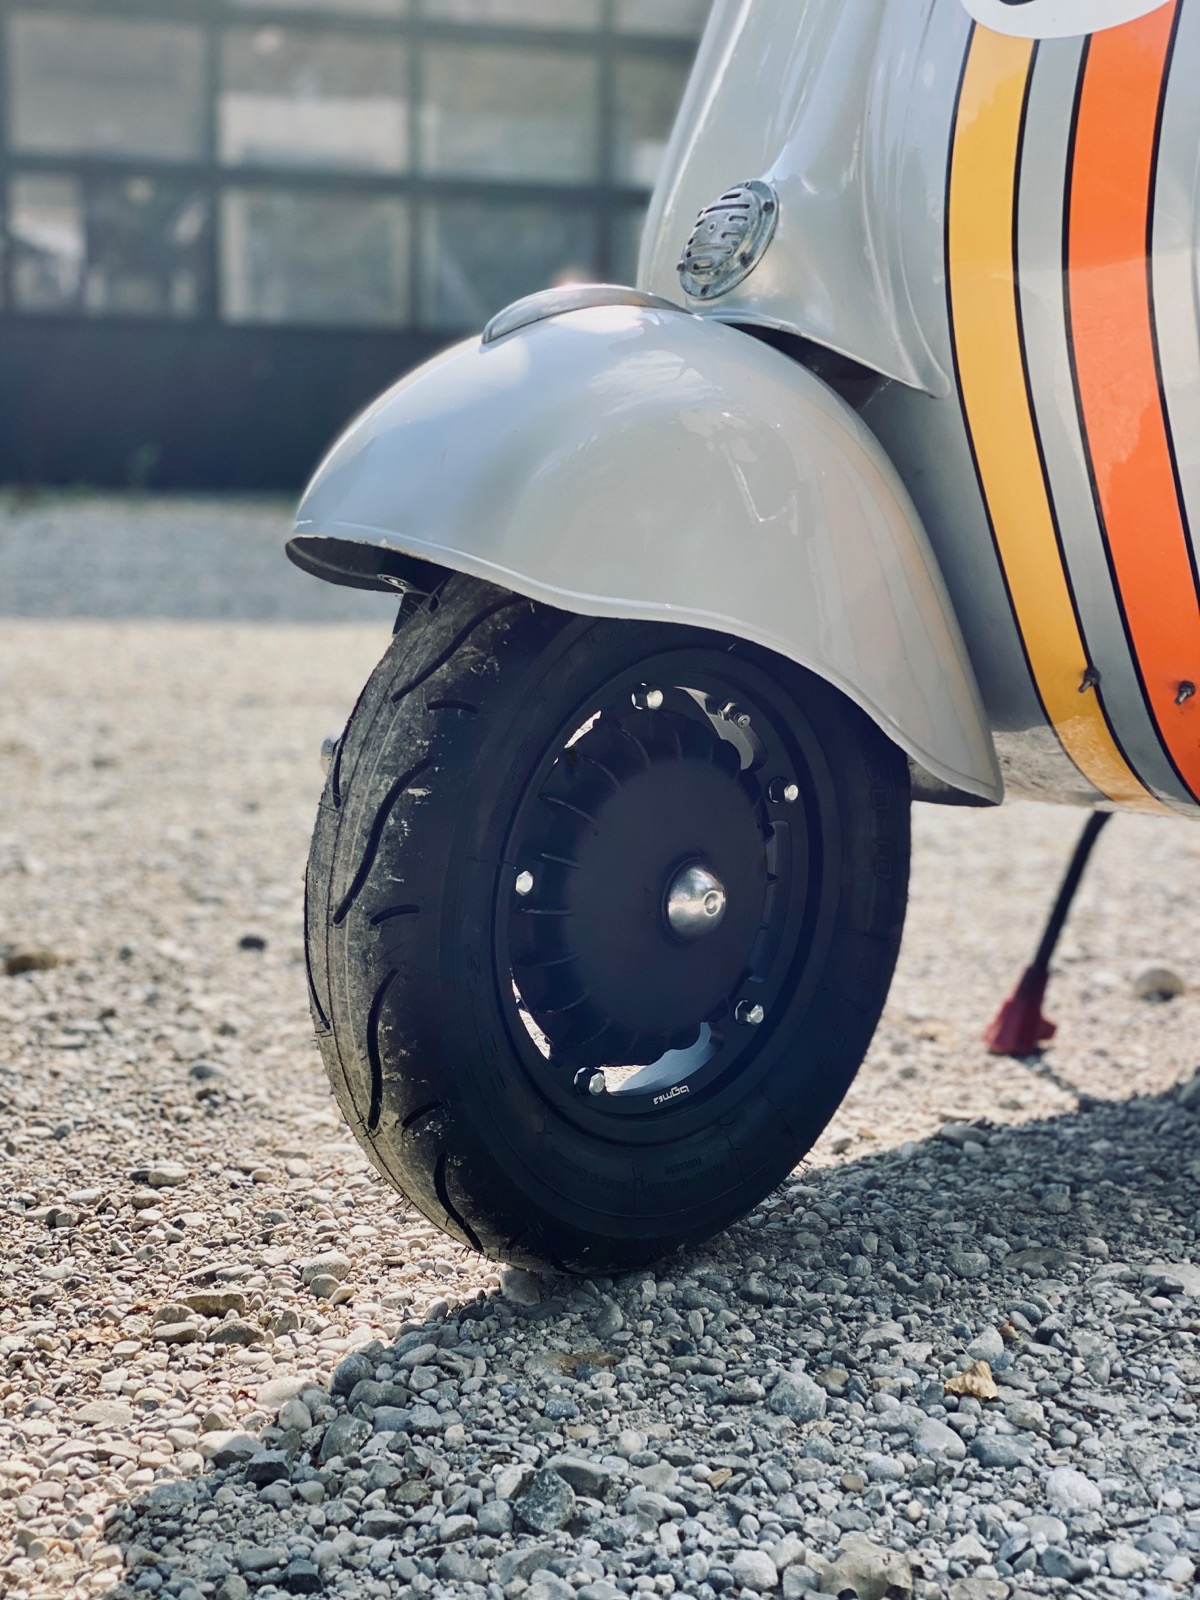
What does all this have to do with chassis parts for old Vespa scooters? Piaggio has always been high tech. You often hear disrespectful things like, 'the Italians just took what was lying in the corner'. Piaggio's greatest achievement, however, is the one that is almost completely unnoticed: the highest possible technical simplification with maximum efficiency, stability and the best economy. One of Piaggio's secrets, why the group is so successful to this day. Many things about Vespa scooters are brilliant technical solutions precisely because they are so simple. However, the structural performance behind it is usually significantly higher than with a more complex solution. The one-sided front wheel suspension, as used in a simple form on the Piaggio P148/149 training aircraft, is a good example of this.
The one-sided wheel suspension enables quick wheel removal, has fewer parts than a two-sided wheel control and is also designed to be so stable that even generations later can continue to use the material and also often put much more stress on it than originally intended. Who would have thought during the construction of the front swing arm in Piaggio's engineering office that 60 years later(!) people would still be driving around twice as fast with this material and sometimes with 5-6 times the engine power? It's hard to imagine that someone will be driving around with today's Vespa GTS300 in 60 years with 100 hp and 240 km/h, isn't it? The fact that all of this works wonderfully is thanks to the technical foresight of the Piaggio designers, who still worked with the product quality standards of the time and multiple guarantees with regard to the component dimensions. So the old original Piaggio parts are still a 'bench' in terms of dimensional accuracy and resilience (a fact that unfortunately can no longer be fully applied to today's original parts).
But what to do if the original part is damaged, worn out or even missing? Clear case, a new part is needed. However, many parts for early Vespa models are no longer available from Piaggio. Fortunately, the Vespa fever is a worldwide phenomenon and therefore the sources for spare parts are limitless in the best sense of the word. A fact that also raises problems at the same time... True to the motto 'many cooks spoil the broth', the qualitative selection of a product is also blessed with many pitfalls. Regardless of whether a repro component comes from Italy, the Far East or Germany, the quality has to be right.
However, some parts are often only available from a single source and then it's 'take it or leave it'? Shouldn't you offer a product at all because it doesn't quite match the quality of the original? Or do you sell it and point it out, at the risk that the pointer will not be noticed and a bad product review will follow?
A situation that is unsatisfactory for all parties. This also applies to the highly stressed components on the old Vespa steering tubes and swing arm.
Our solution: We analyse, measure and draw new components exactly according to the original Piaggio model and have them precisely manufactured in Germany by a specialized company. In doing so, we go one step further than Piaggio did back then. Not only do we use higher quality material, we also have it heat treated...
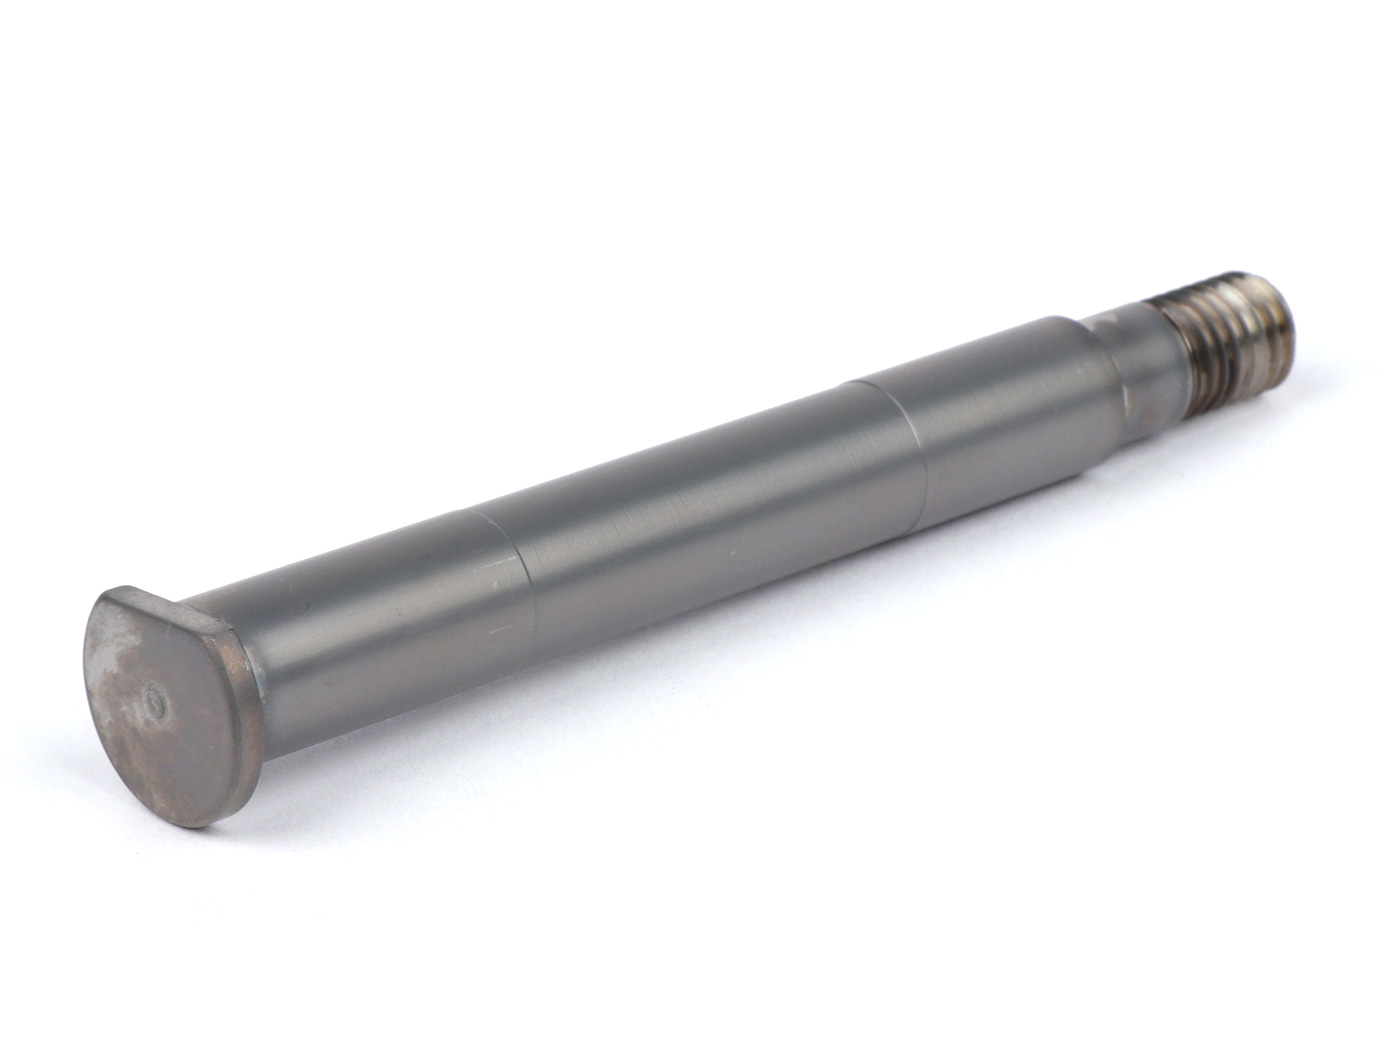
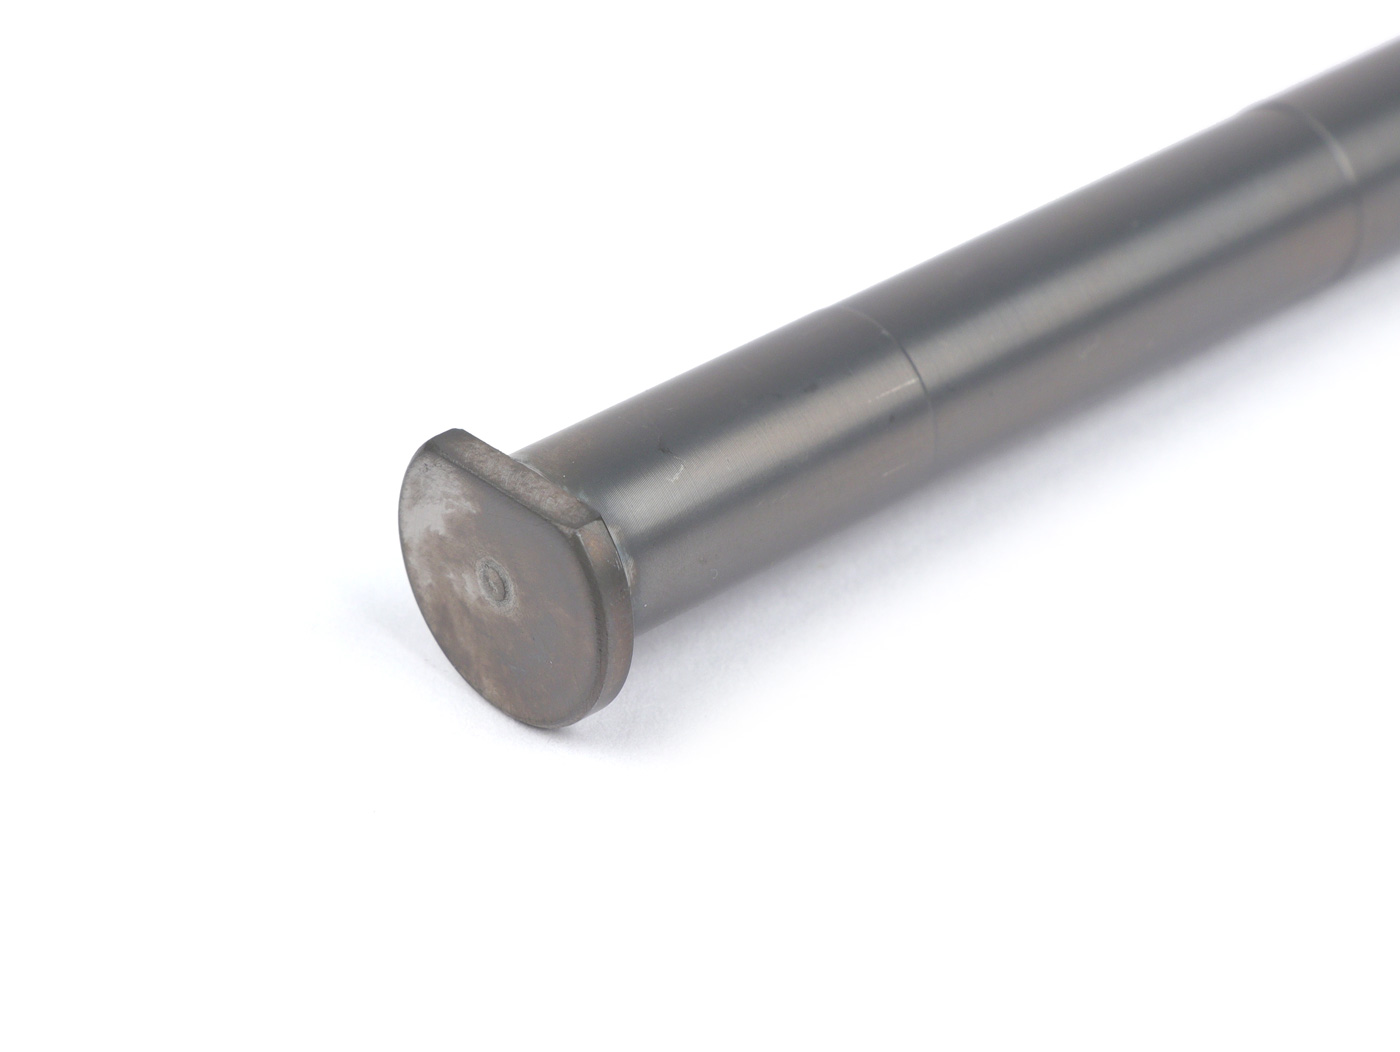
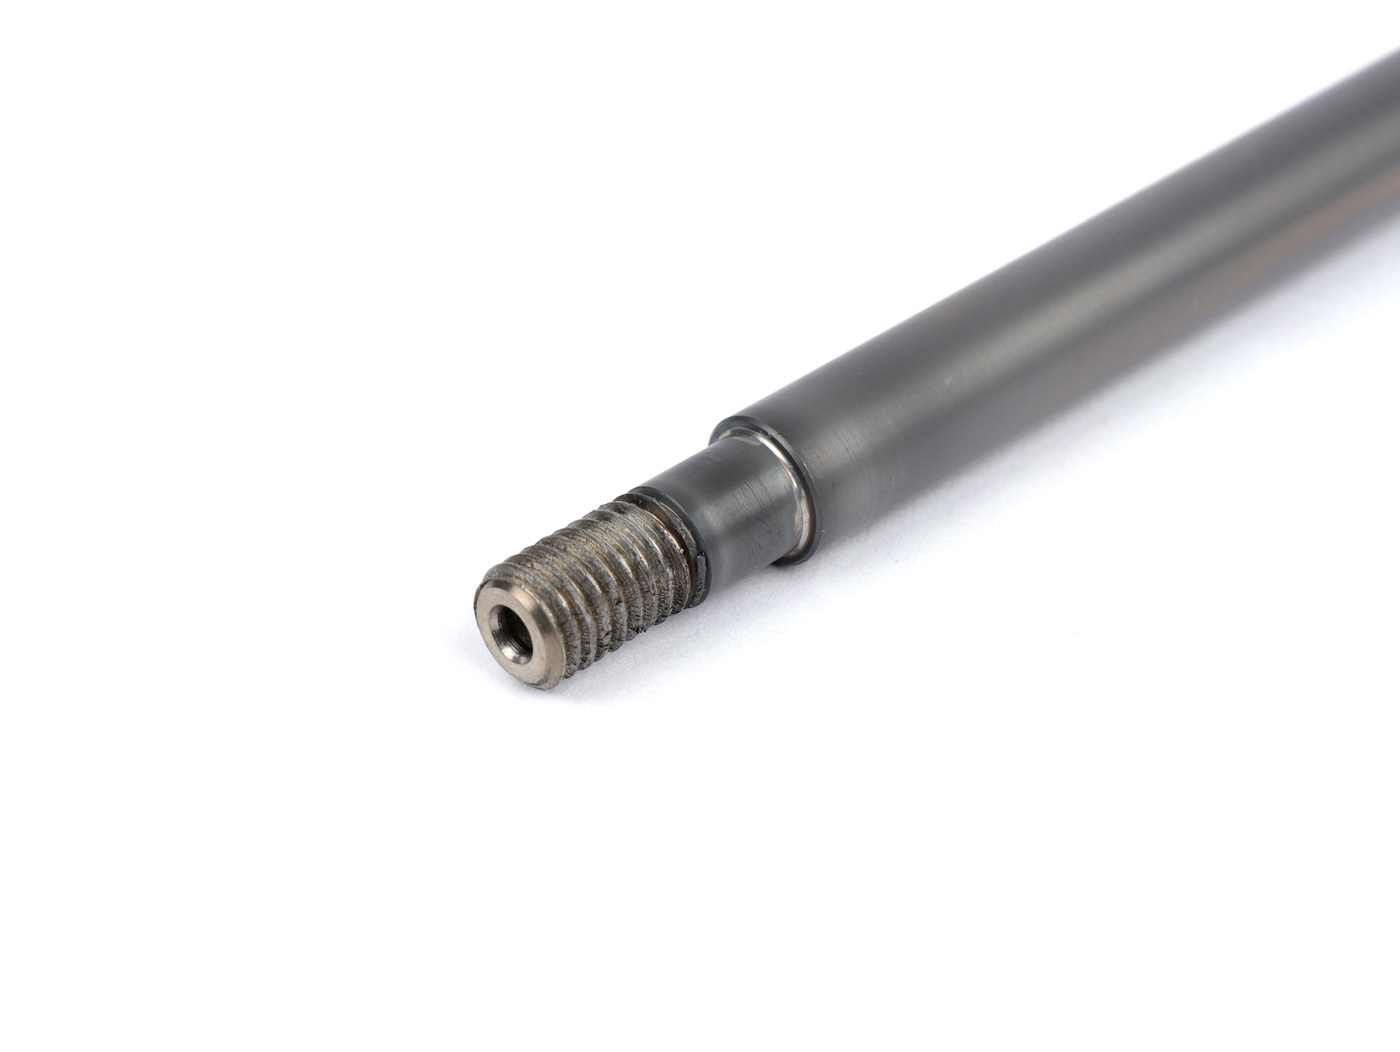
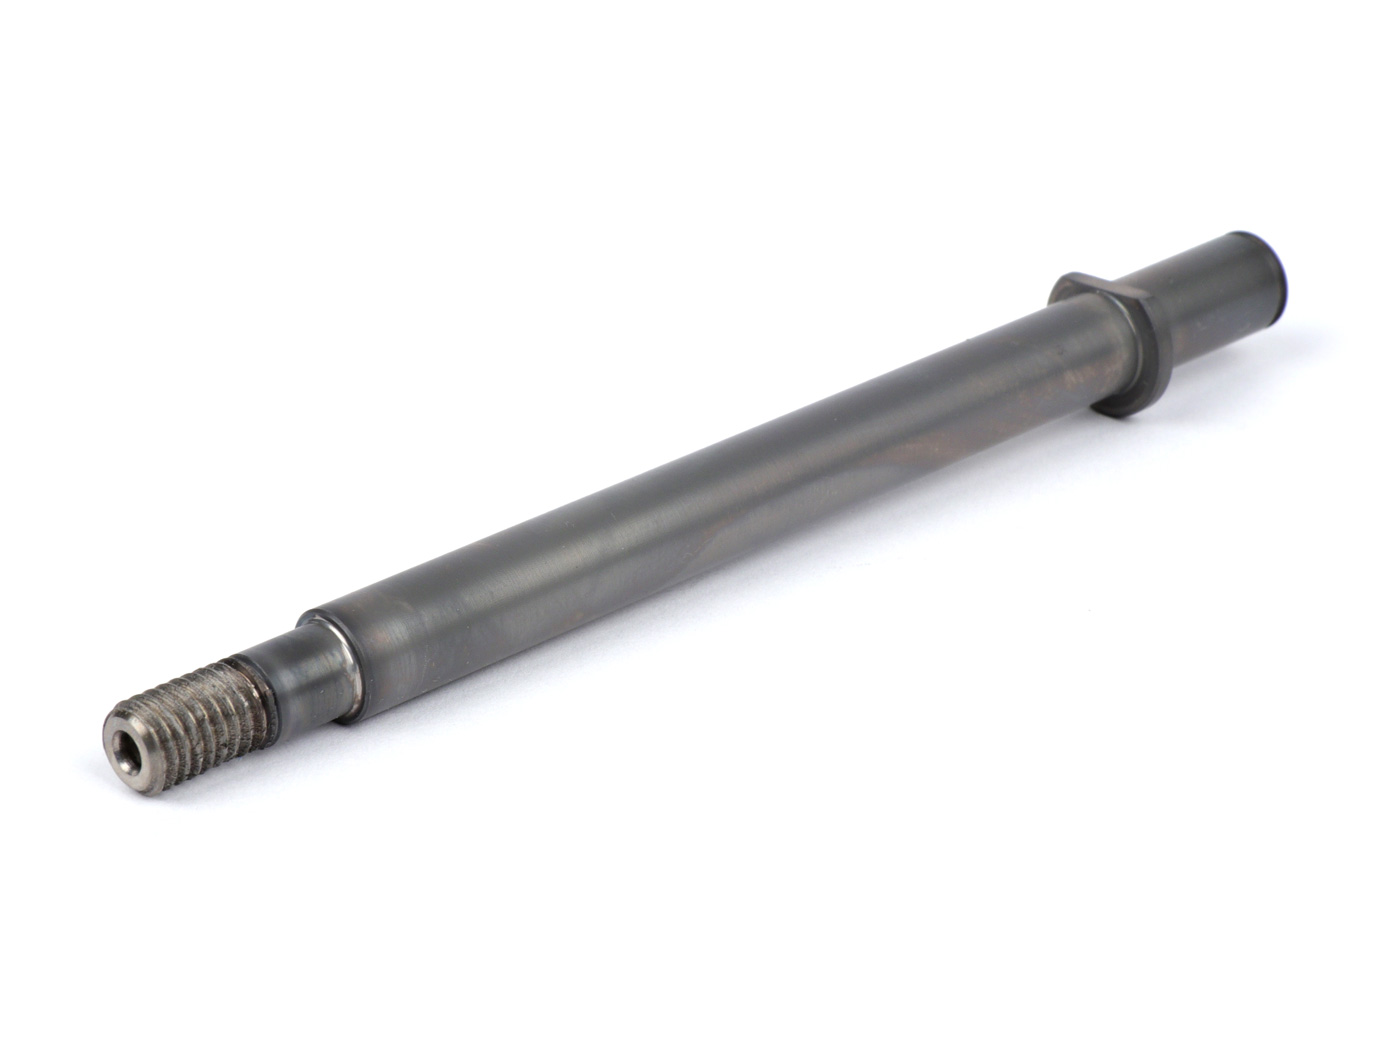
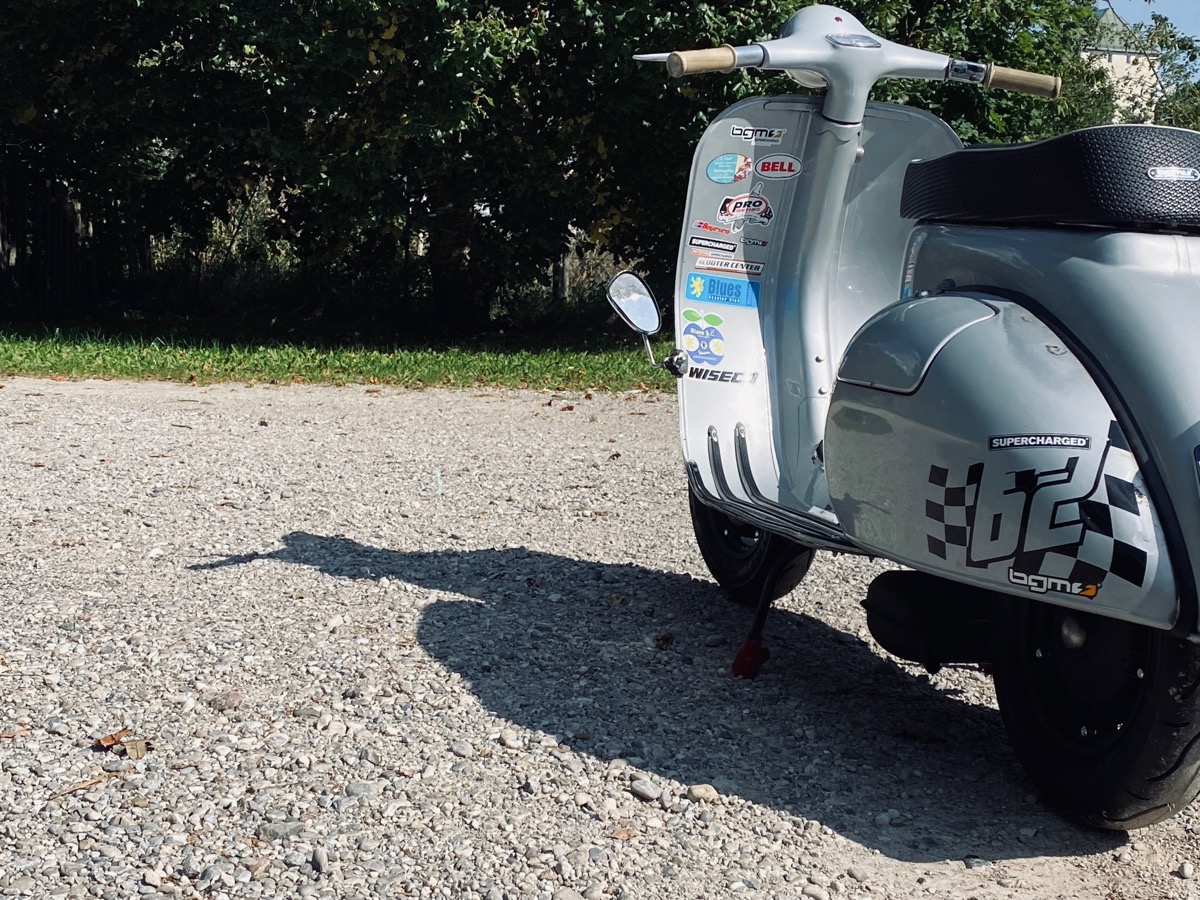
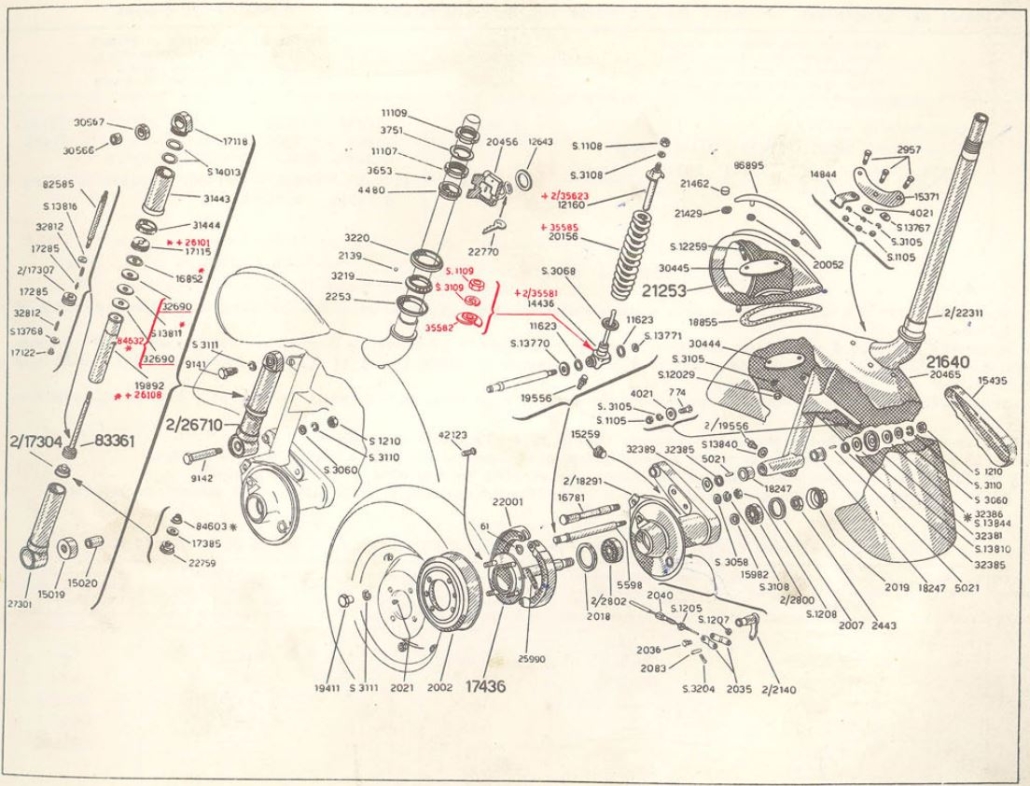
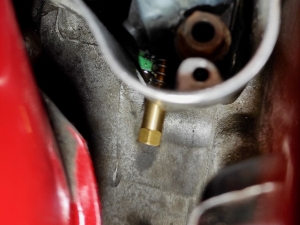
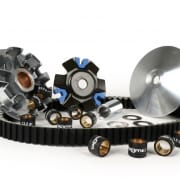
A difficult word to read and yet so important. This component connects the steel steering tube (also known as the head tube or fork) with the aluminum swing arm. The latter guides the wheel and also connects the damping/suspension to the steering tube. Any wheel force, any steering movement, any up and down movement of the wheel is transmitted via this axle.
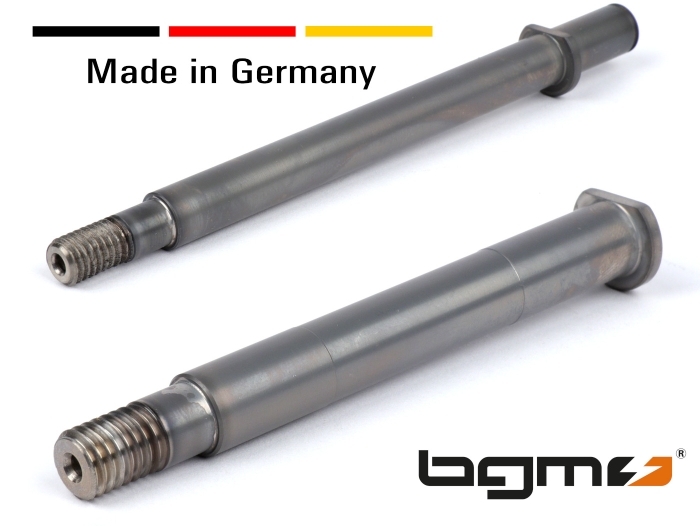
In order to not only do justice to all of this, but also to take care of today's demands, we have the BGM PRO swing arm bearing axles made of high-strength premium steel (1.4112 alternative designation X90CrMoV18). We attach great importance to precise compliance with dimensional accuracy. The axes are precision turned to a surface finish of 0.2-0.4RA:
The material quality, surface and corrosion resistance would already make the axle stand out from any mass-produced product and even from an original Piaggio part.
However, we also have the axles plasma-nitrided. This gives the axles a harder surface and the bearing points will certainly not run in over the life of the scooter. The nitration also gives them their characteristic matt coloring (however, this can also be polished away). In summary, the BGM PRO swing arm bearing axles are without exaggeration the best on the market and, with their high quality, offer great security, especially for performance-enhanced vehicles.
The dynamic loads on a vehicle often do not increase linearly with speed, but often even quadratically. If you drive a vehicle twice as fast as originally intended by the manufacturer, you can generate loads that are four times as high. Another reason to be on the safe side with the BGM PRO swingarm bearing axle.
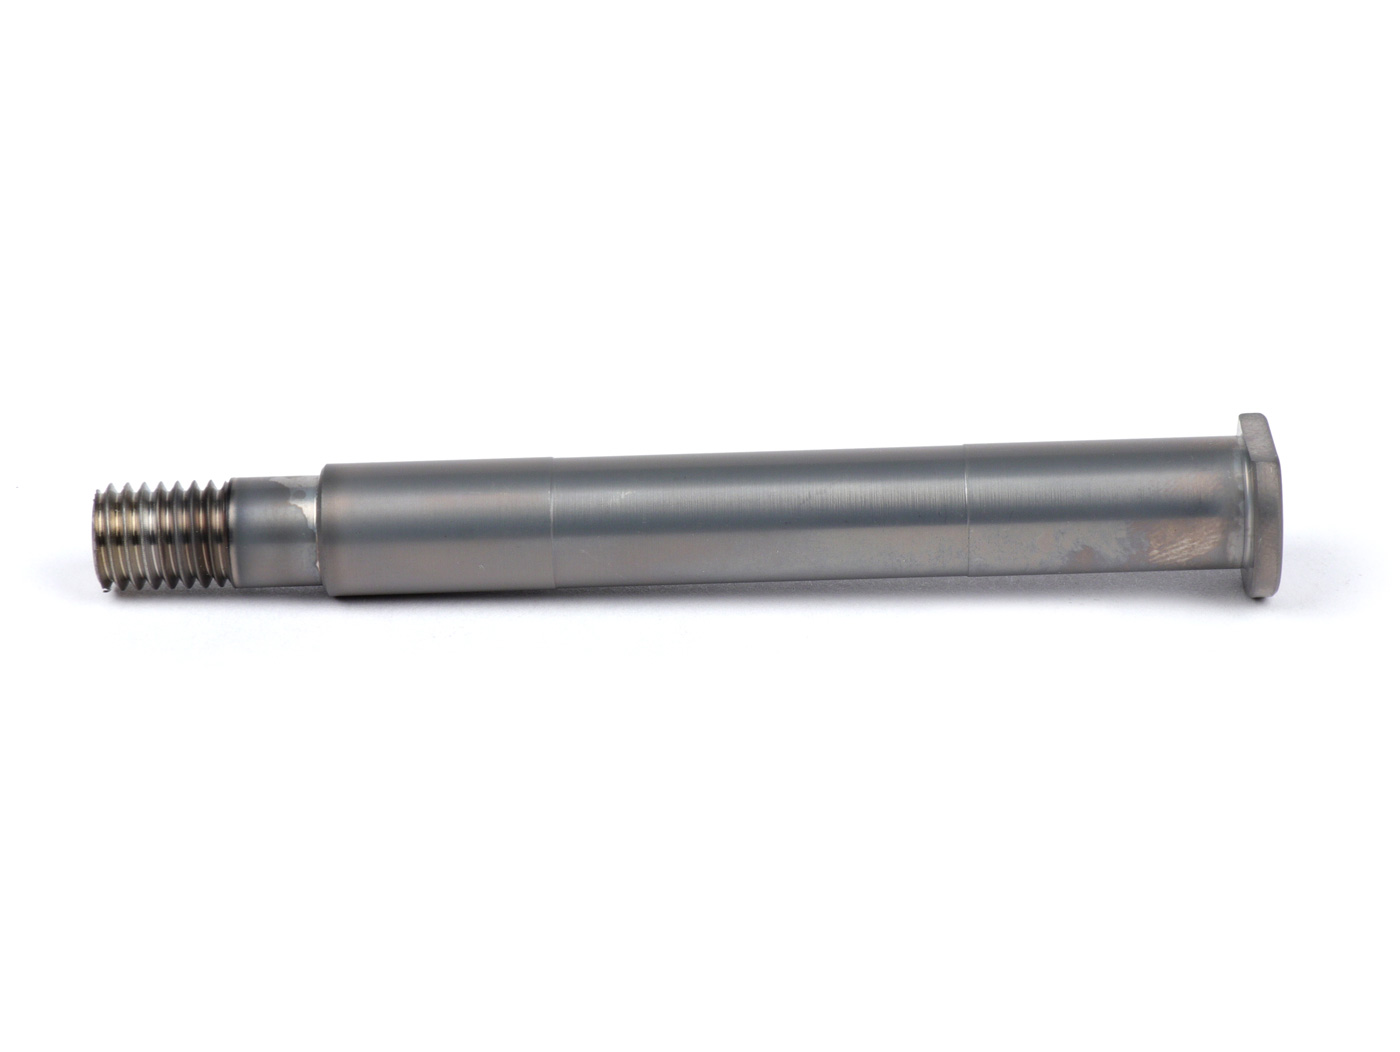
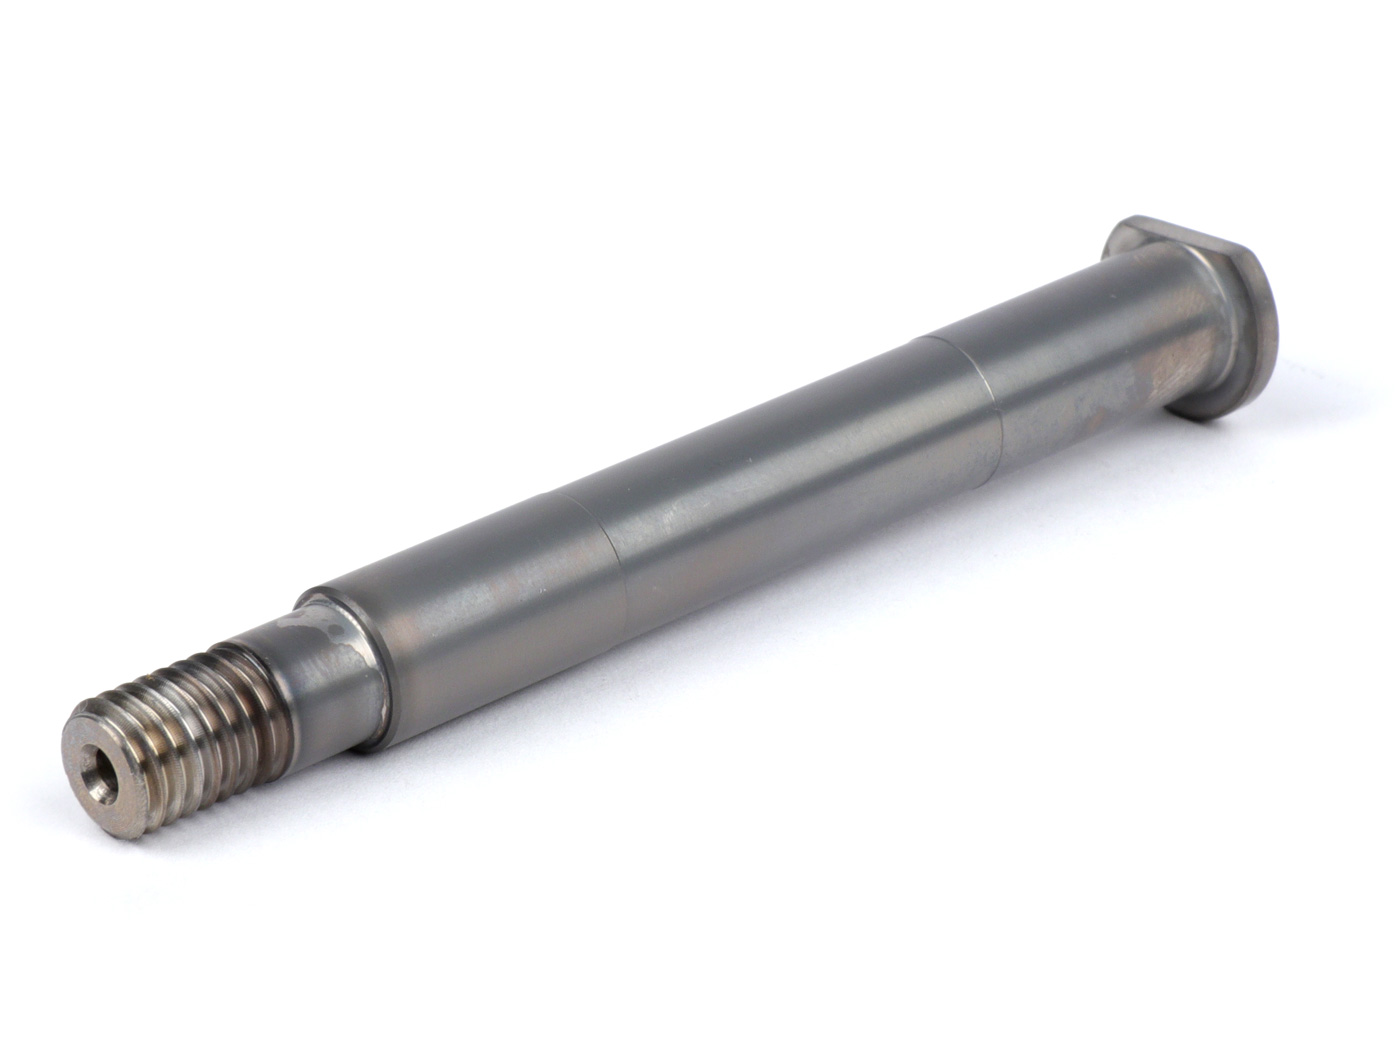
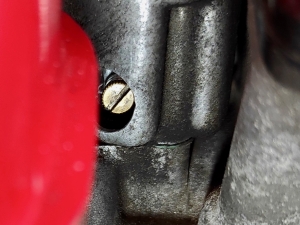
What sounds relatively harmless here is also a component that deserves closer attention. The pad bolt is much more than its name would suggest. It forms the support for the chassis spring on the swing arm. Where relatively soft springs were used at the factory, today there are taut sport springs and greatly increased speeds as well as often one or the other stunt, such as riding on the rear wheel. The often rough touchdown of the front wheel after such a wheelie makes it difficult for the brake pad bolt. It is not particularly large ex works, but it has a grease nipple. This can be used to regularly lubricate the highly stressed point between the spring retainer and the brake pad bolt. This should also be done as far as possible, but how many people with such vehicles do you know who even have a grease gun that is necessary for such purposes?
That is why the same effort was put into this as with the swingarm bearing axle; Extremely high-quality material whose surface has been further refined to be even more durable than the original component. In the case of the bolts for the later models with clamping plates (from around 1969) we have also eliminated another annoyance of many replica bolts; The lack of dimensional accuracy with regard to the length of the bolts and the inappropriate shape of the recess in the clamping plate. Many bolts are often a few tenths of a millimeter too long or short. This is solved once and for all with the BGM PRO brake pad bolt:
This is always the right length*. Actually everything is a matter of course, but in the case of cheap reproductions, they go over the edge for cost reasons. Like the swingarm bearing axle, the brake pad bolt is also finely turned from high-strength premium steel (1.4112 alternative designation X90CrMoV18) and then plasma-nitrided. With these products, we want to give a new face to the sometimes overused phrase 'Made in Germany'. That this is not possible at prices like in the Far East can certainly be understood. In return, we can offer a product that is unique and of extremely high quality, and we are sure that every customer will enjoy it as much as we do.
*NOTE: Spanish (Motovespa) and French (ACMA) vehicles have a slightly different length measurement at the pad stud. Here the fastening nut can be lined with an M8x1mm washer to guarantee a perfect frictional connection.
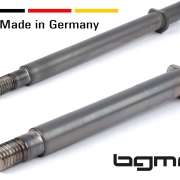
BGM4310- swingarm pivot Vespa 1953-1962
BGM4311- Pad bolt Vespa 1949-1962


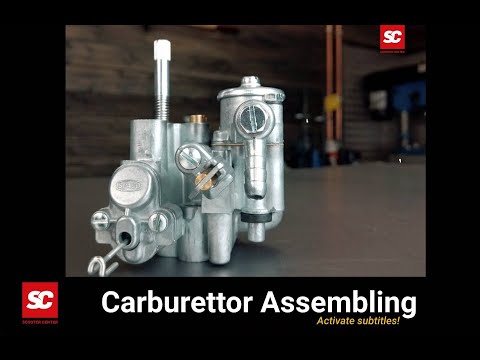
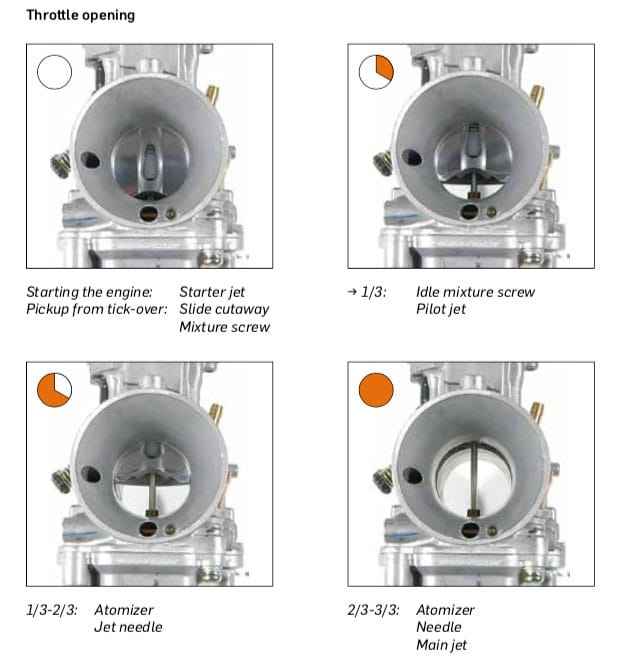
For adjust del encendido hay herramientas increíbles like el buzzwangle or Wal, que indican la posición exacta del encendido y facilitan el trabajo. Sin embargo la sincronización correcta del carburador, constituye una de las partes difíciles en la afinación o tuning the motor de una Vespa or Lambretta.
Si configurar the mezcla de aire y gasolina puede ser para algunos un juego de niños, determinar que tamaños de boquilla son los correctos según the configuración individual de cada motor, será más dispendioso. Aquí entran a jugar las agujas del carburador y el conjunto de boquillas / chicleres: el de alta y el de baja. Sincronizarlos perfectamente dará como resultado una configuración limpia.
Si eliges una boquilla demasiado pequeña, el motor tendrá una mezcla “pobre”, se calentará demasiado y it inevitable que se produzcan daños graves. Al igual que una boquilla demasiado grande y un adjusted demasiado “rico” también provocaran daños, perdiendo tiempo y dinero literalmente en ajustes complejos.
Para ejemplificar, hemos preparado este PDF con explicaciones y photos detalladas para ajustar el carburador de una Lambretta.
Obténlo free aquí: boquillas de Lambretta por Scooter Center
This tutorial, what happens in this moment?
Los chicleres DellOrto por ejemplo, there are marcados con un number that have referencia al diámetro. It asi como un chiclé 100 tiene un diámetro de 1 mm, una chiclé 115 mide 1,15 mm (!!) ¡solo una pequeña cantidad 0,15 mm más grande!
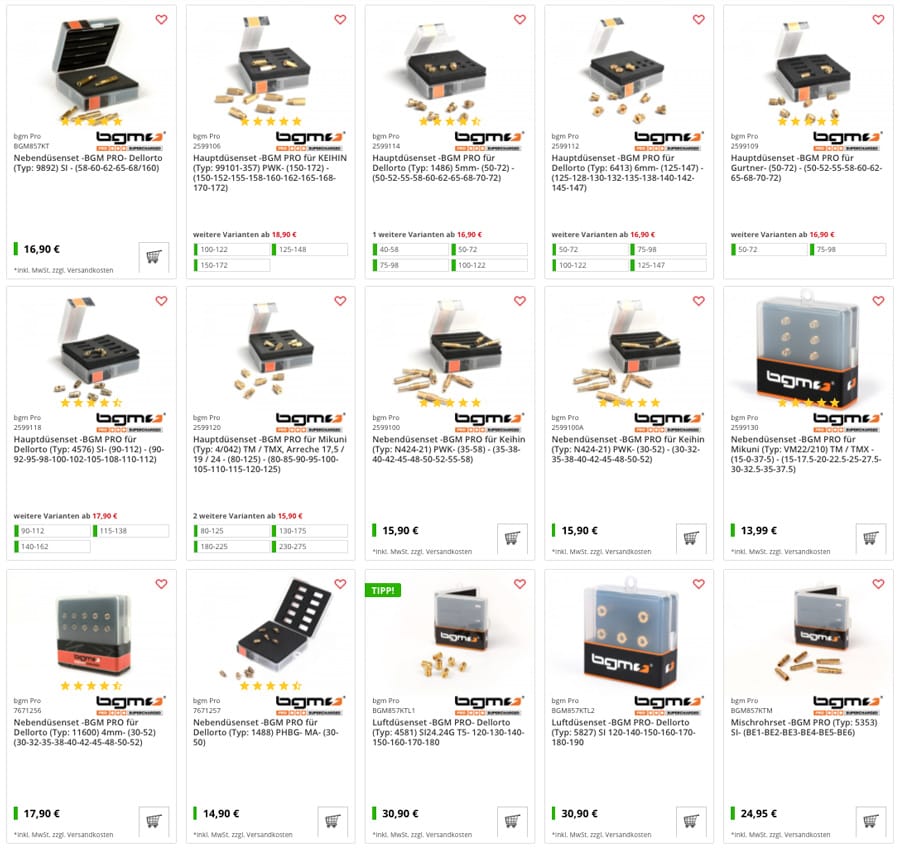
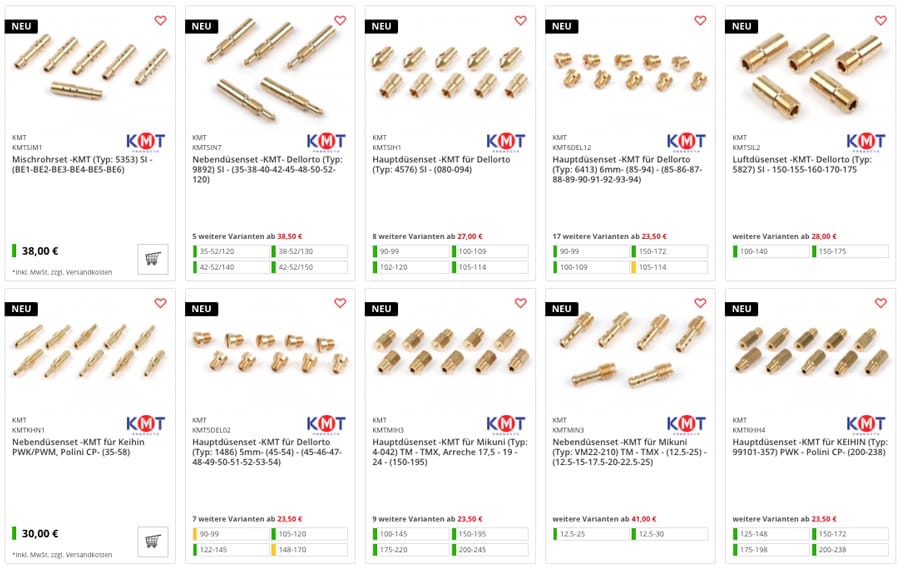
If you want it to be safe and secure in a high-precision syntonization, you will be recommended to use the boquillas bgm PRO o KMT. These games are boquillas that are characterized by:
Si eres de los que tiene el dinero, el tiempo y el amor para invertir en el motor, debes tener en cuenta que poner a punto tu vespa o Lambretta con los mejores componentes, no sirve de mucho, si el motor no funciona con suavidad o si un carburador mal ajustado no permite una combustión óptima. Para poder ajustar el motor correctamente, las boquillas de carburador de alta precisión son un requisito previo muy importante, que te puede facilitar la vida.
Las nuevas boquillas para carburador de bgm PRO fueron controladas con un instituto dedicado a ello. Aquí puedes ver un Chiclé 118 cuya medida es de 1,1779mm con una desviación de tan solo una milésima de milímetro en el área verde, por lo tanto… ¡está bien!

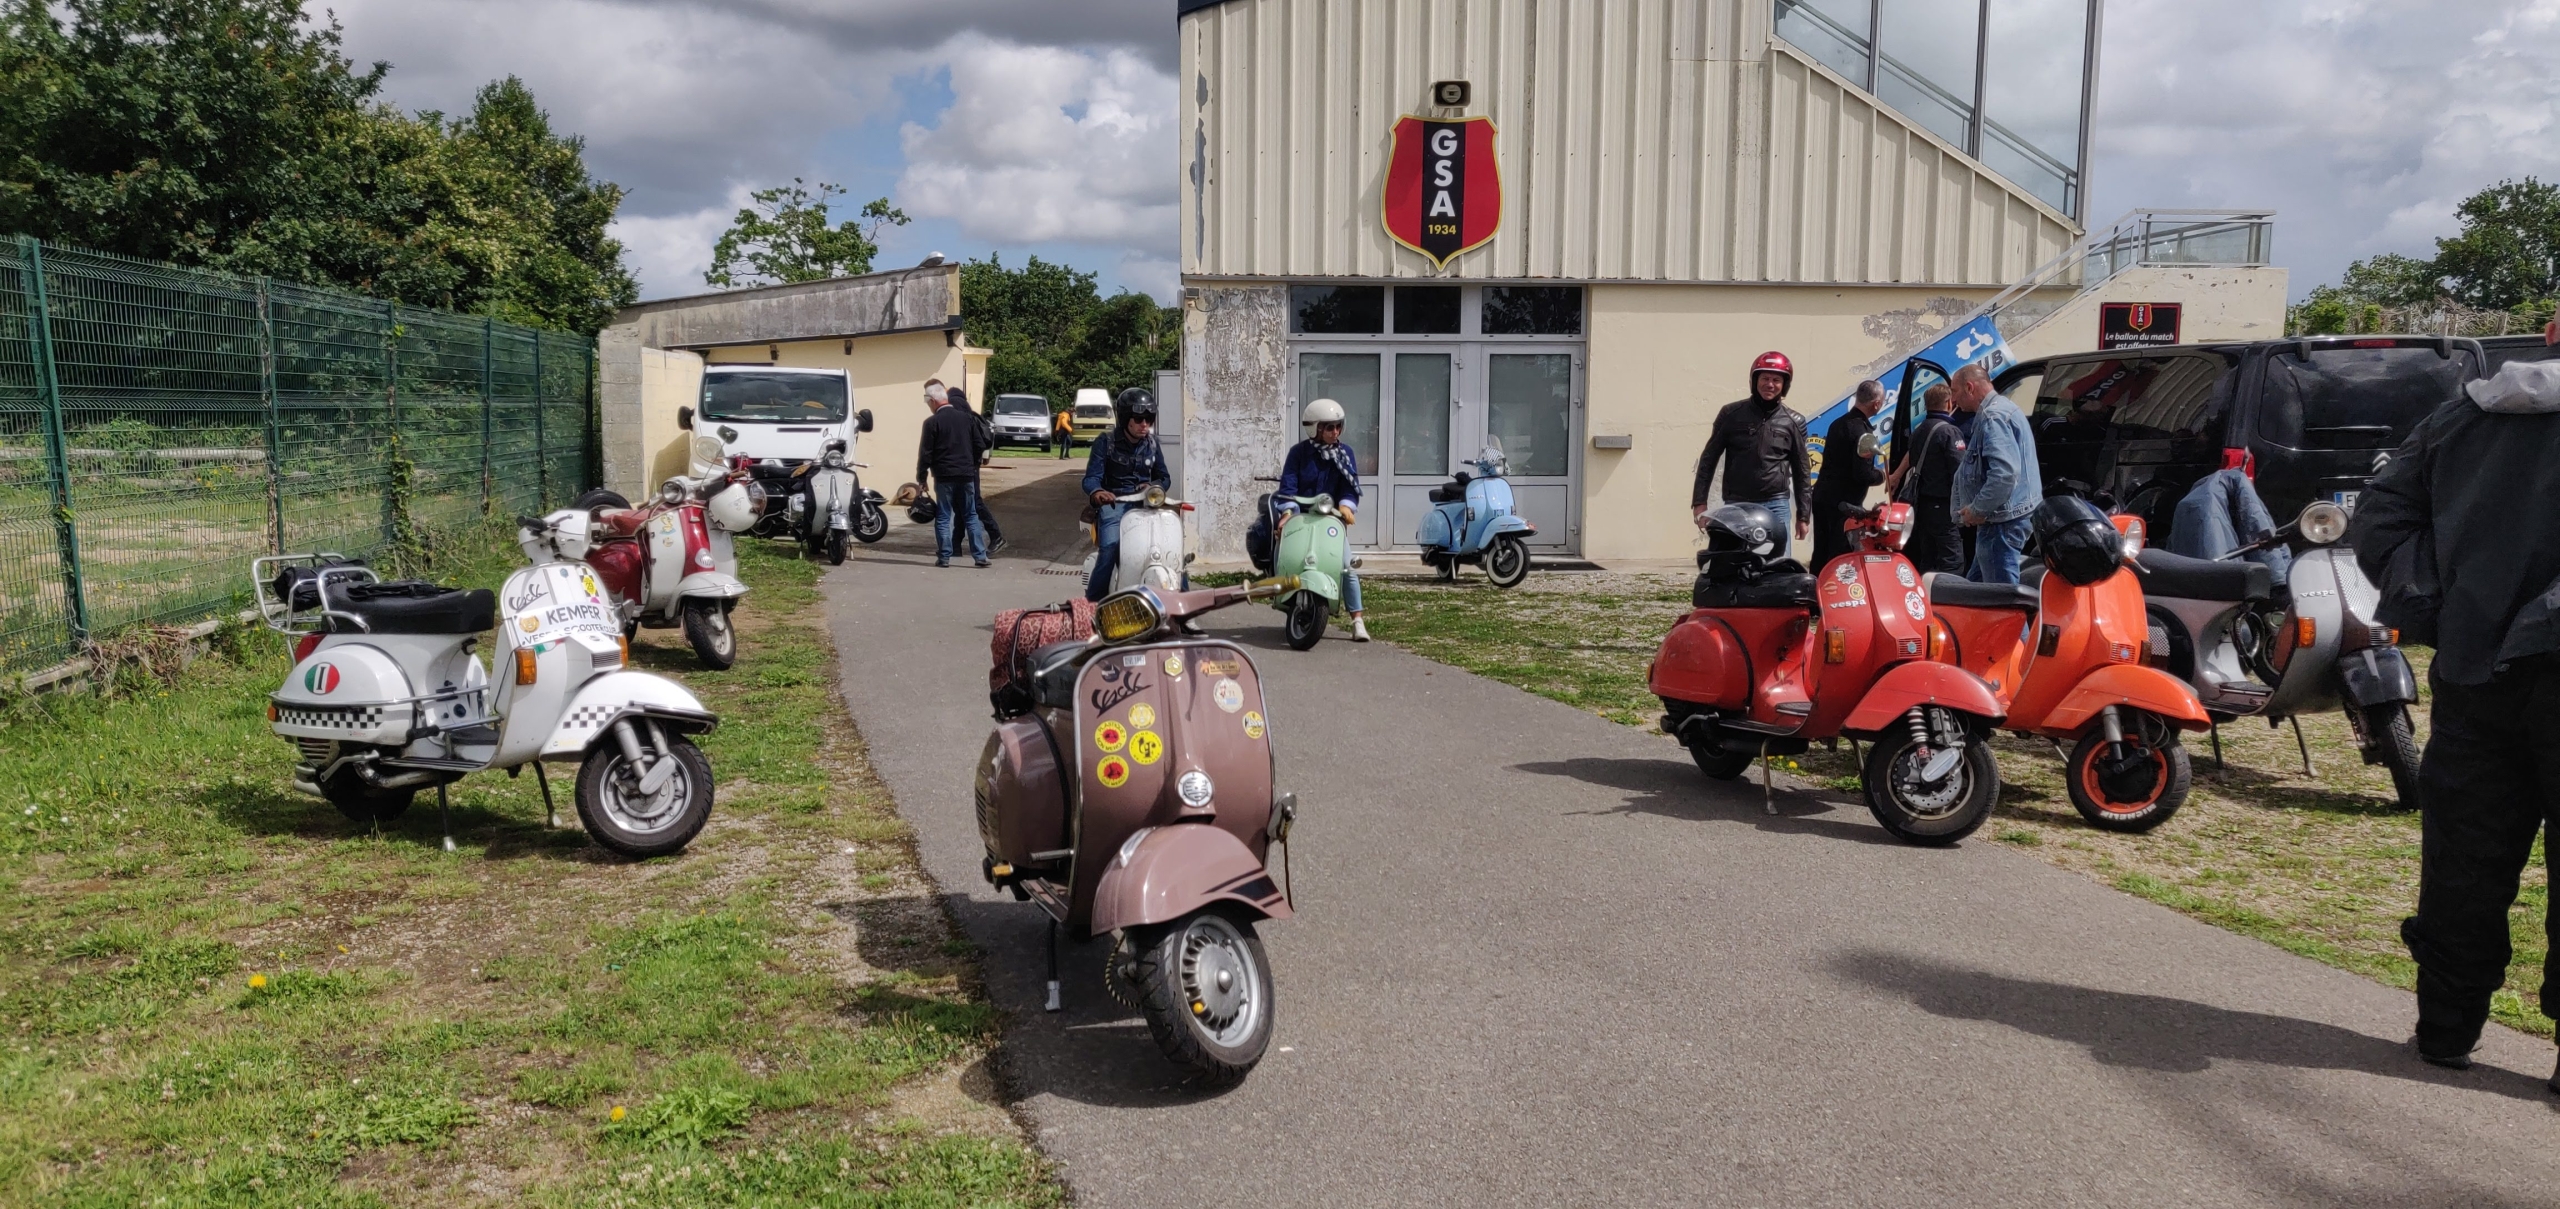
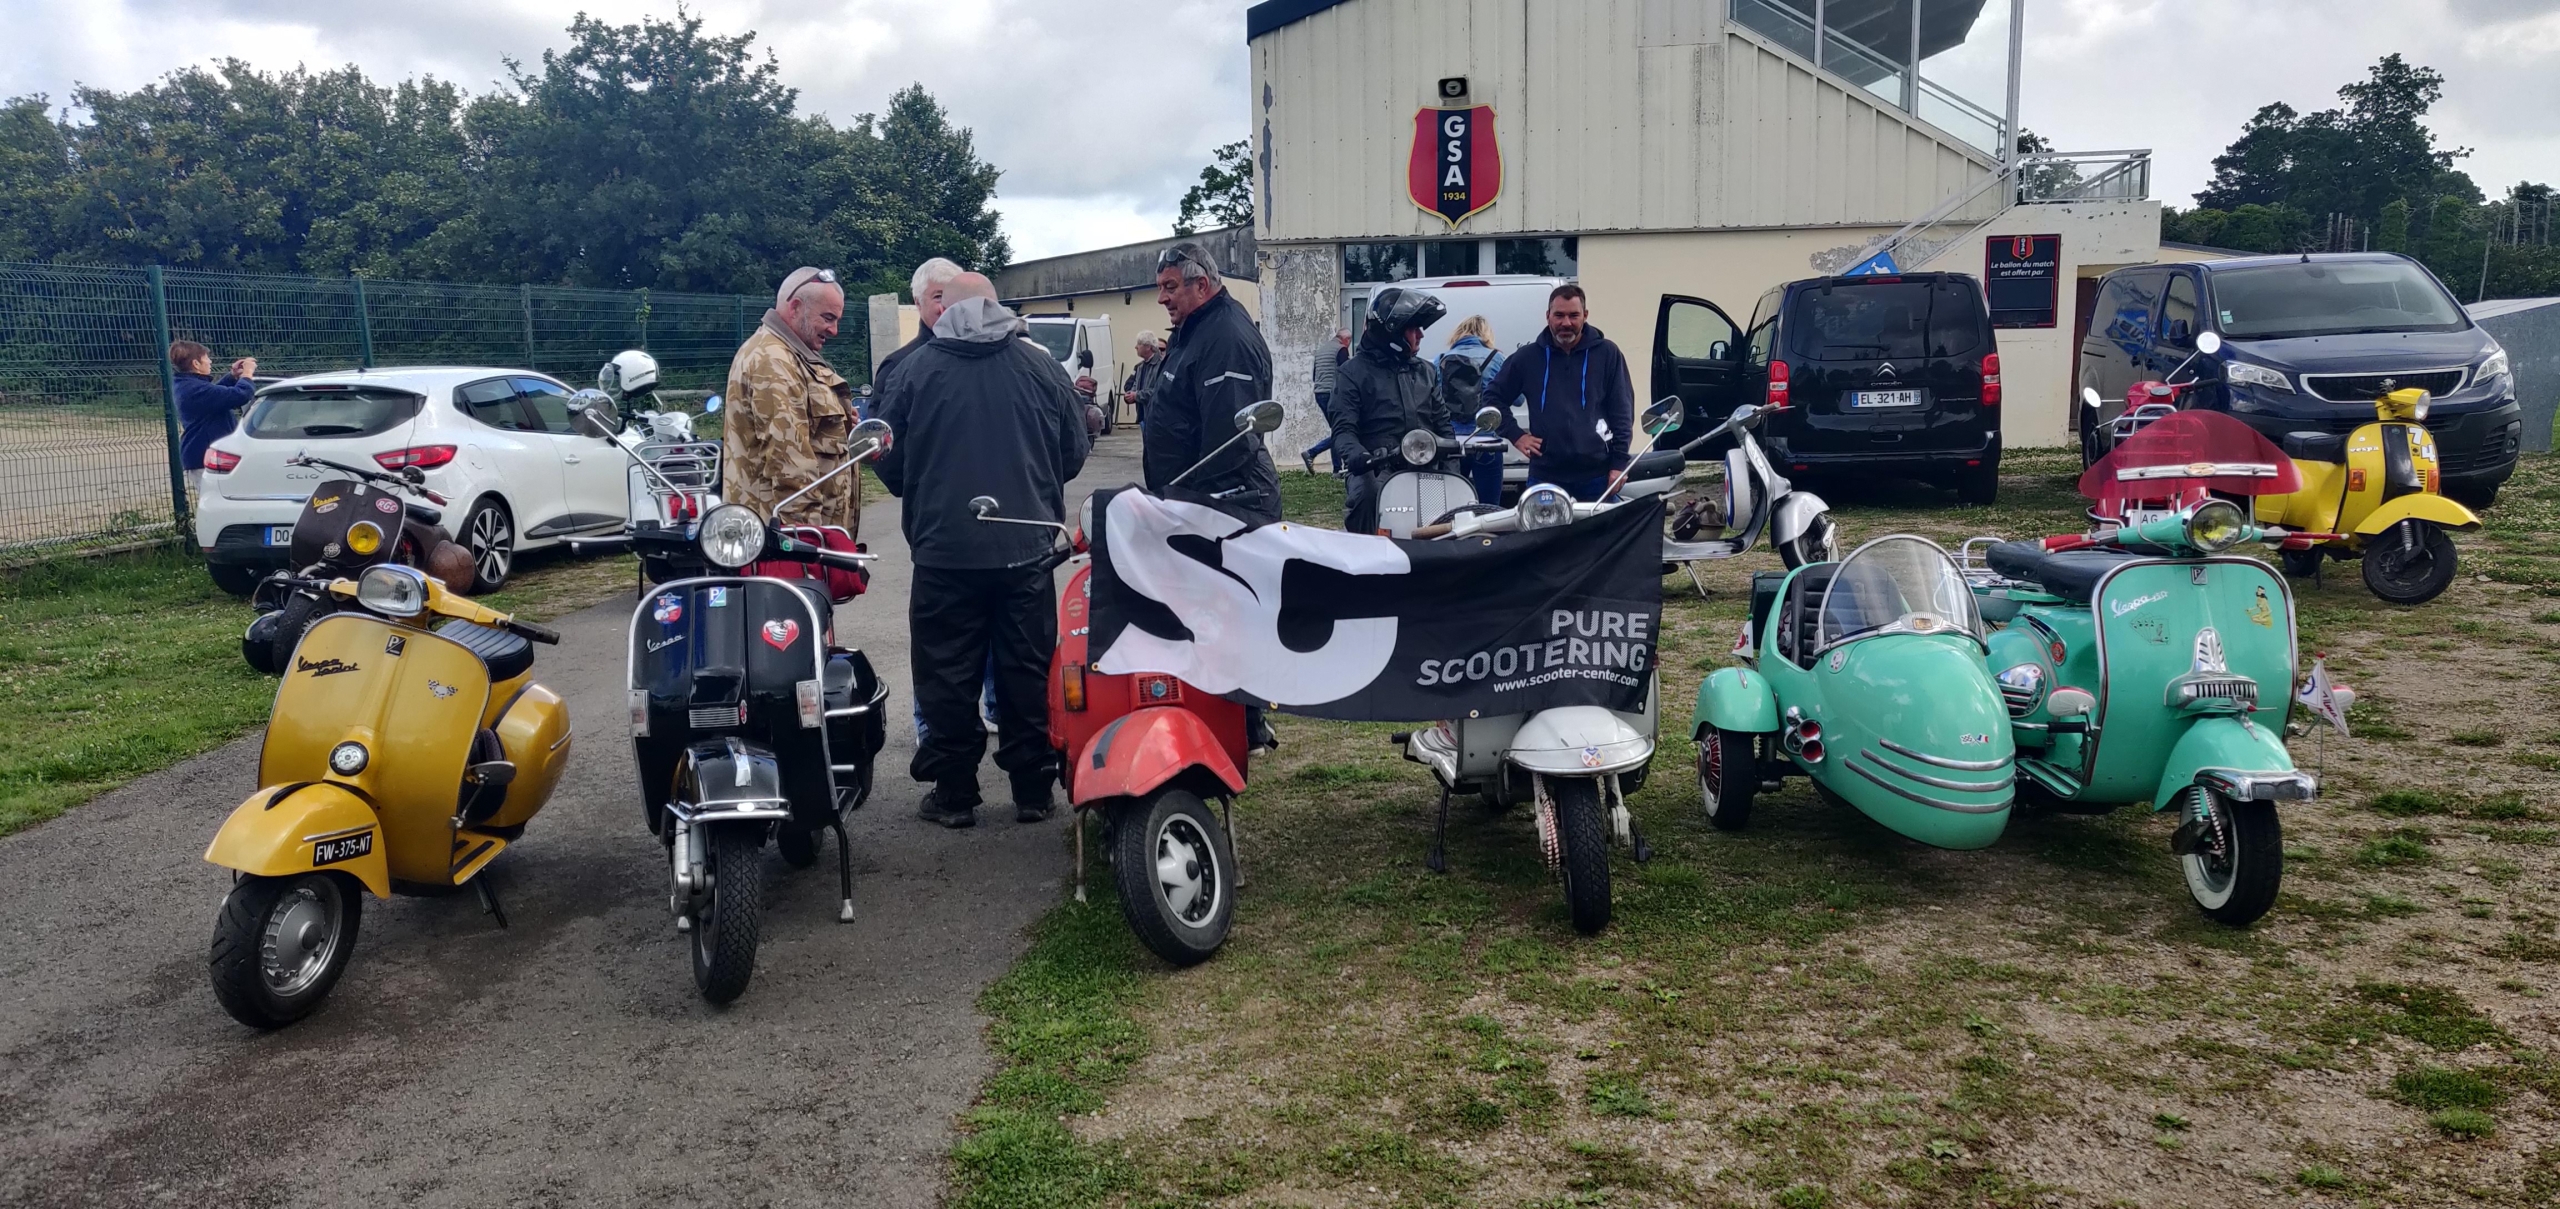
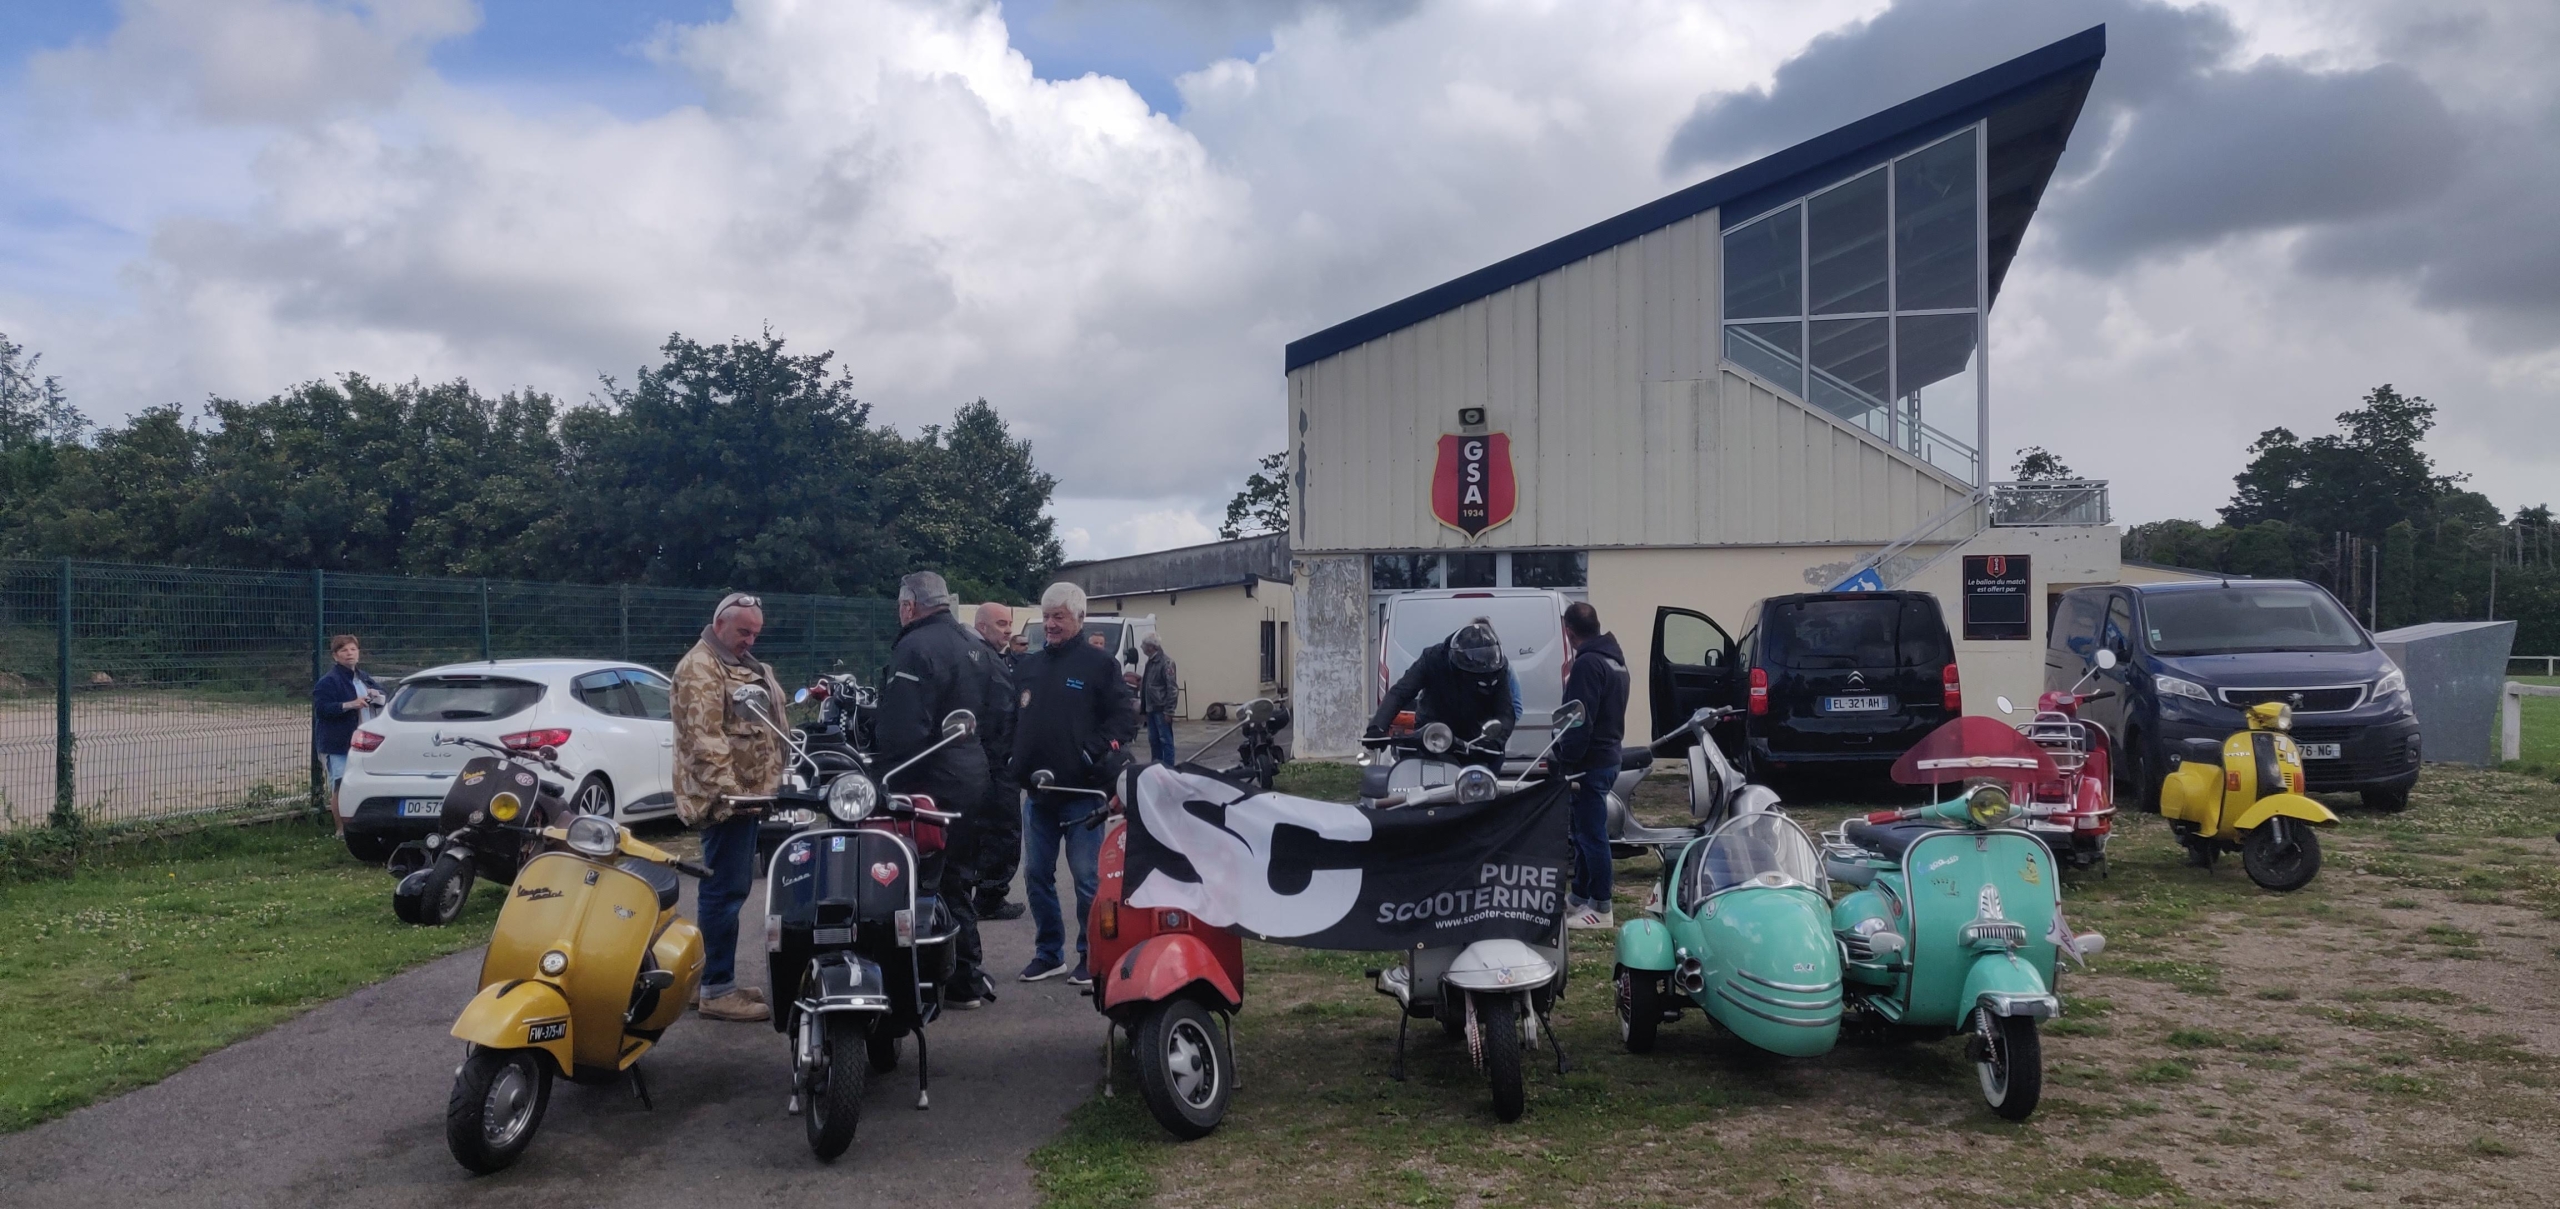
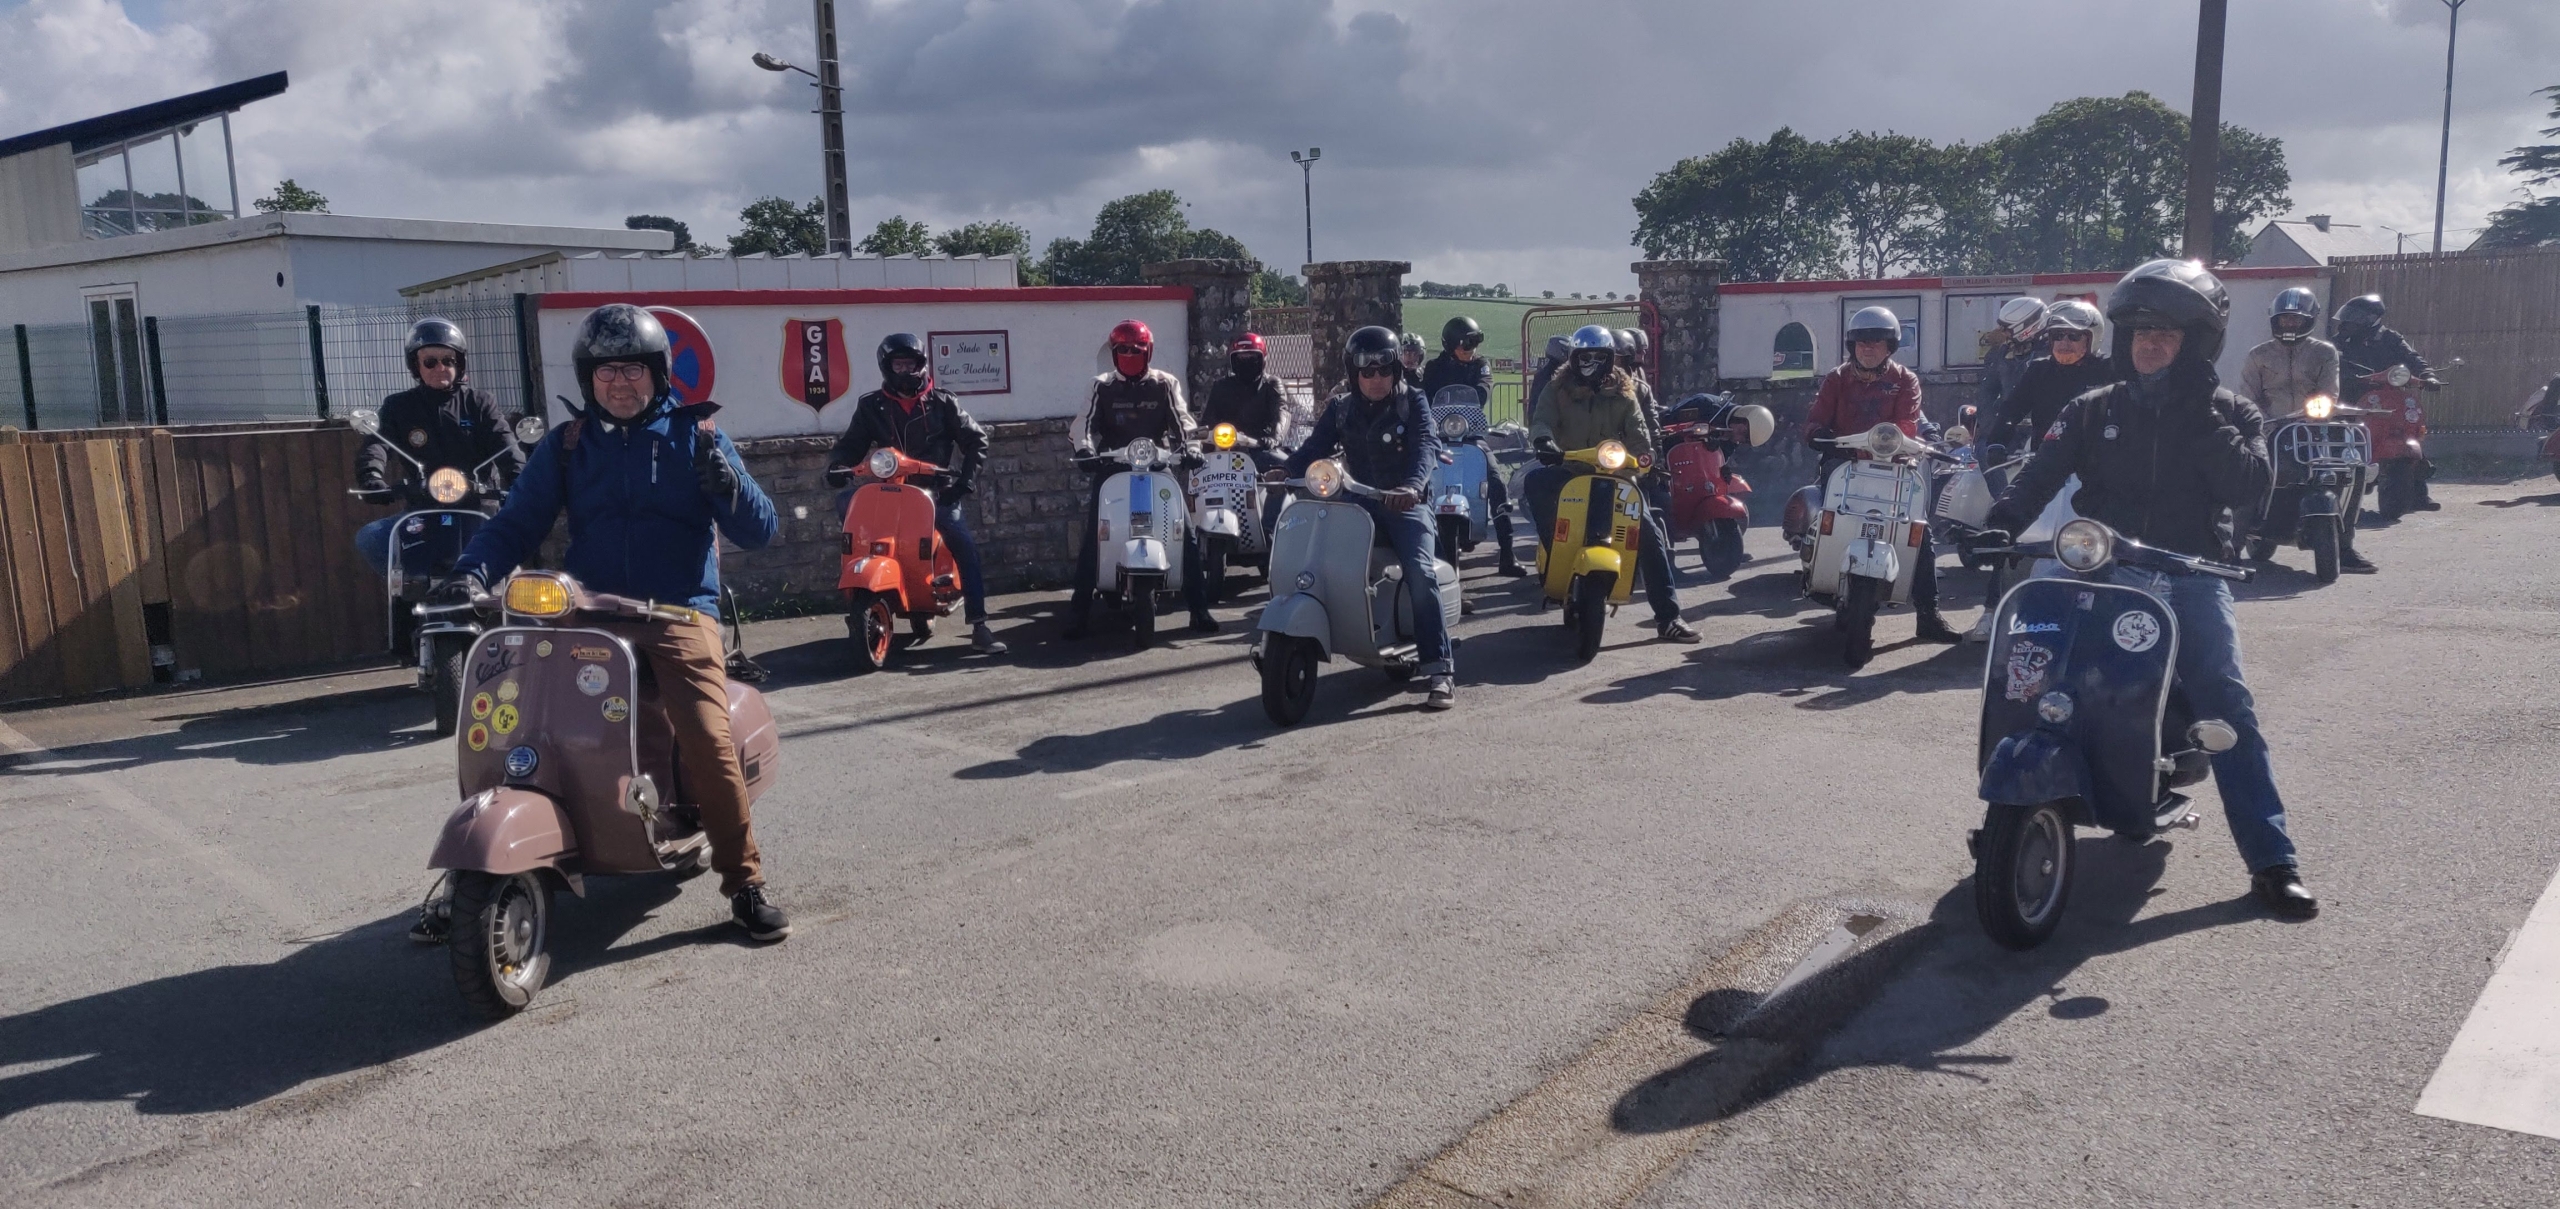
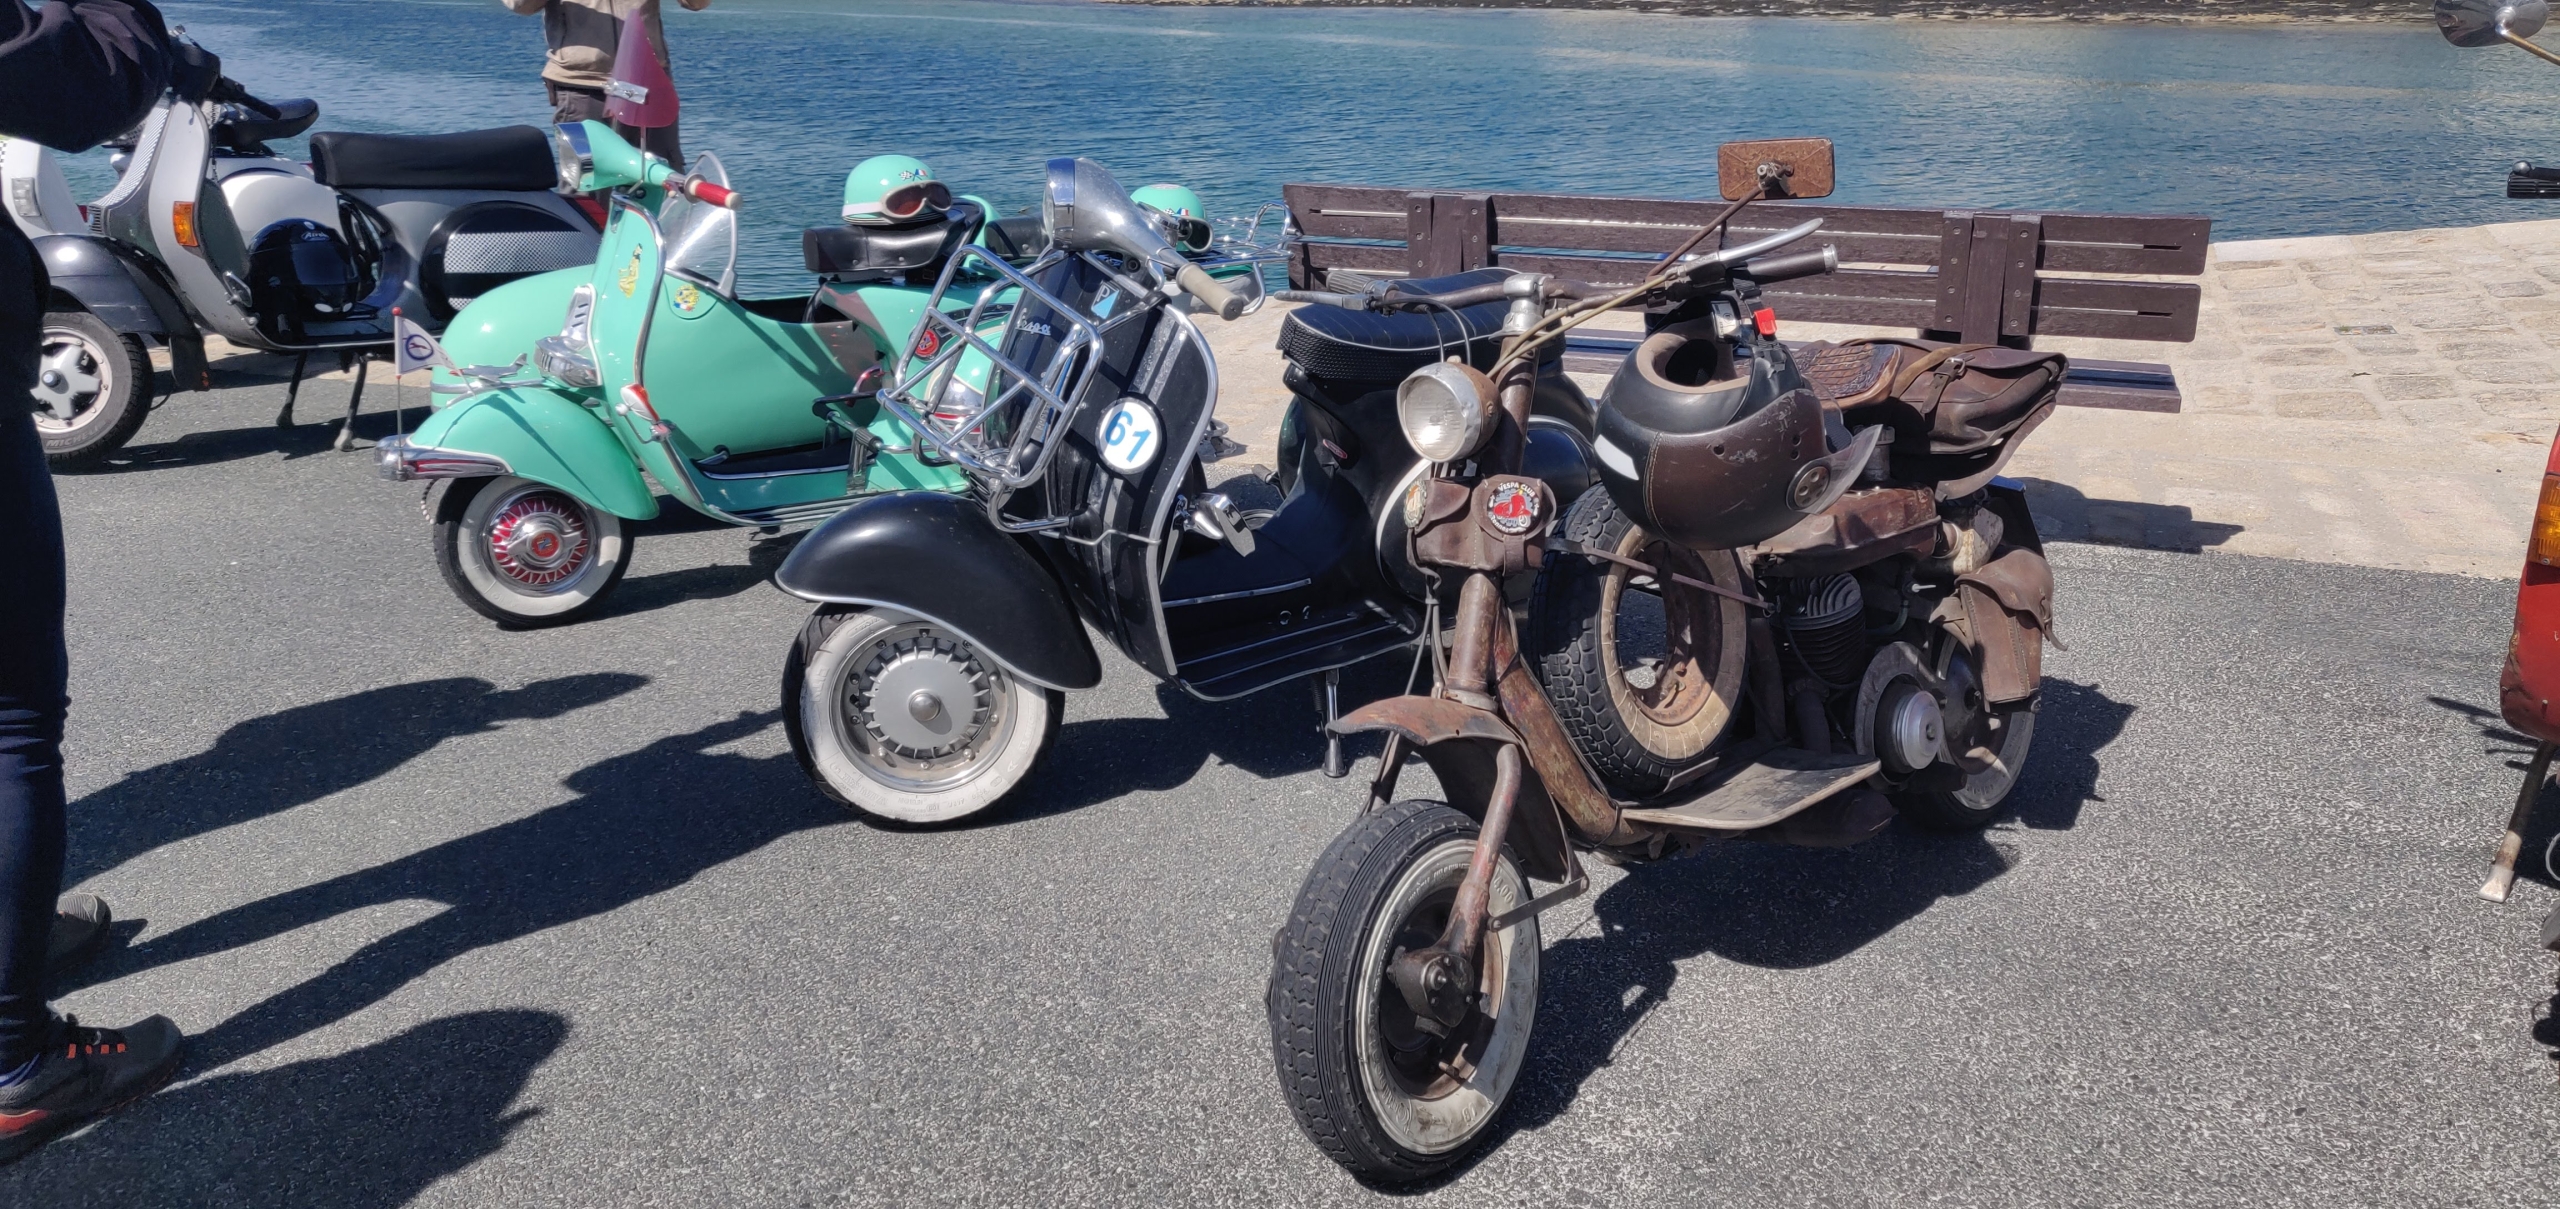
En nuestro Open Day, los empedernidos fanáticos dos tiempistas tuvieron la oportunidad de acceder a pruebas de manejo de una clásica Vespa. ¡Igual, pero muy diferente! estamos hablando de las Vespas de EvoRetrofit equipadas con motores eléctricos, que estuvieron available este día para despejar curiosidades y sorprender a los más atrevidos.
EvoRetrovit logró conceptualizar un motor netamente electrónico, de quitar y poner (o mejor conocido como Plug & Play) dispuesto perfectamente en el chasis original de las Vespas clásicas - a con certificado de desplazamiento (TÜV)! Una antigua V50 with 45 km / h registrados puede con el nuevo funcionamiento alcanzar including going 55 km / h. Las baterias extraíbles y se pueden cargar cómodamente en casa o en el garage.
The kit de modificación de evo para la Smallframe it is the primer kit that cuenta con la certificación de tránsito. Para muchos modelo ya se puede obtener el kit correspondiente y la modificación es sencilla y reversible, el chasis no se verá afectado; ahora el siguiente paso, serán las versiones Largeframe, pues el equipo ya está trabajando en ello: Precios y more information Enter here.
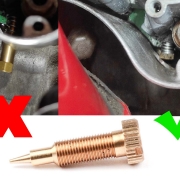
Tornillo de ajuste de mezcla bgm PRO para la conversión de carburadores Dell'Orto SI con tornillo de ajuste de mezcla hexagonal largo a tornillo ranurado corto. Este tornillo de adjust the mezcla de aire de la conversión bgm PRO se utiliza para utilizar carburadores con tornillo de ajuste de la mezcla de hexágono largo también en los motores más antiguos (con pernos para el montaje del carburador). Sustituye el tornillo de ajuste demasiado largo de los nuevos carburadores Spaco y Dell'Orto SI y permite una instalación sin problemas del carburador. Gracias al tornillo más corto, la cuba del carburador puede dejarse original Se adapta a todos los carburadores con tornillo hexagonal largo de ajuste de la mezcla. (Utilizado en los modelos PX a partir de 1989 y en todos los nuevos carburadores Dell'Orto / Spaco SI)
Además un carburador es una pieza de desgaste ya veces no basta con limpiar un carburador, necesitas uno nuevo. Especialmente si quieres un poco more de potencia y ajustas the configuración de tu engine, it cuando normalmente necesitas un nuevo carburador más grande. To continue with the instructions for the installation of the carburador SI. 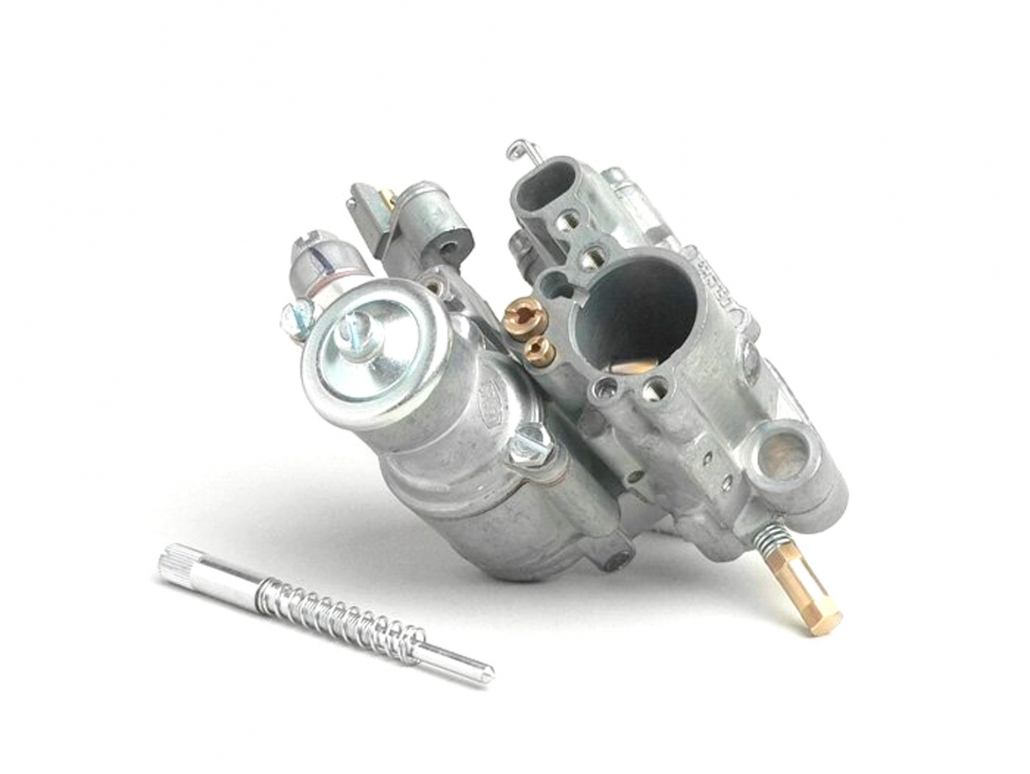
Hoy en día todos los carburadores nuevos vienen de SPACO, aunque ponga Dell'Orto. Los carburadores SI nuevos, ya sean de Dell'Orto o de Spaco, se suministran siempre con un tapón hexagonal de ajuste de la mezcla largo (de color latón). La excepción son nuestros carburadores bgm PRO Faster Flow - pero más sobre esto a continuación.
In the case of the carburetors of the carburadores for motors sin lubricación separada, esto nos plantea un pequeño problema, porque:
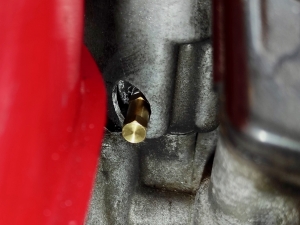
Ahora podrías tener la idea y simplemente atornillar el viejo tornillo de mezcla de aire corto en el carburador nueve. Lamentablemente esto no funciona, porque las roscas de los nuevos carburadores Lusso son differentes. Por favor, no intente forzarlo, el diferente paso de rosca destruirá la rosca fina del nuevo carburador y hará imposible la puesta a punto. El remedio es nuestro tornillo de conversión: Con nuestro Tornillo de ajuste de la mezcla corta para destornilladores de ranura puede solucionar the problema de forma barata, fácil y rápida. 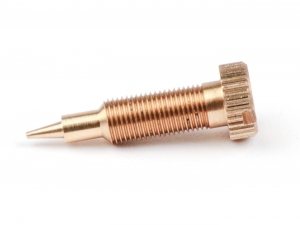
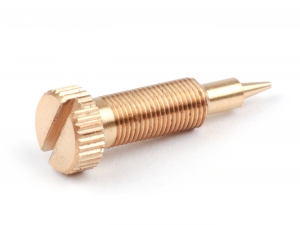
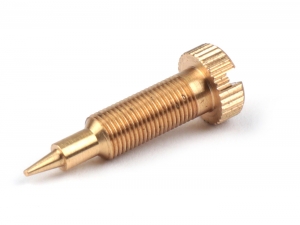
Como alternative, puede utilizar directamente un carburador bgm Faster Flow si pide uno nuevo de todos modos, aquí ya hemos proporcionado la actualización ahora. Los carburadores bgm vienen, para los models sin lubricación separately, directamente con el tornillo de conversion corto. 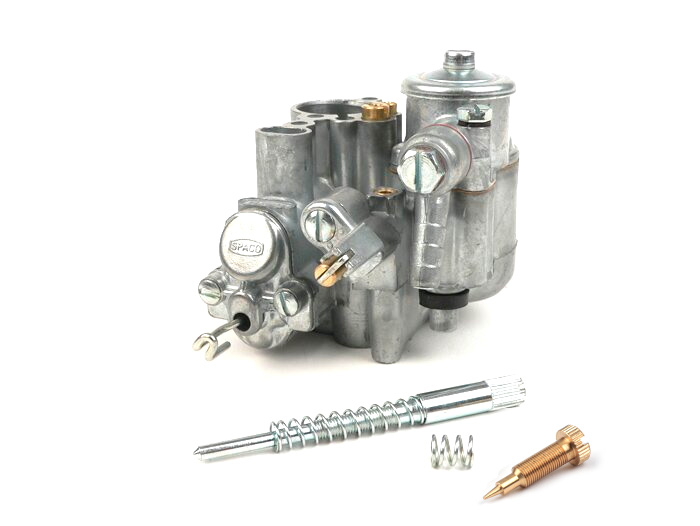

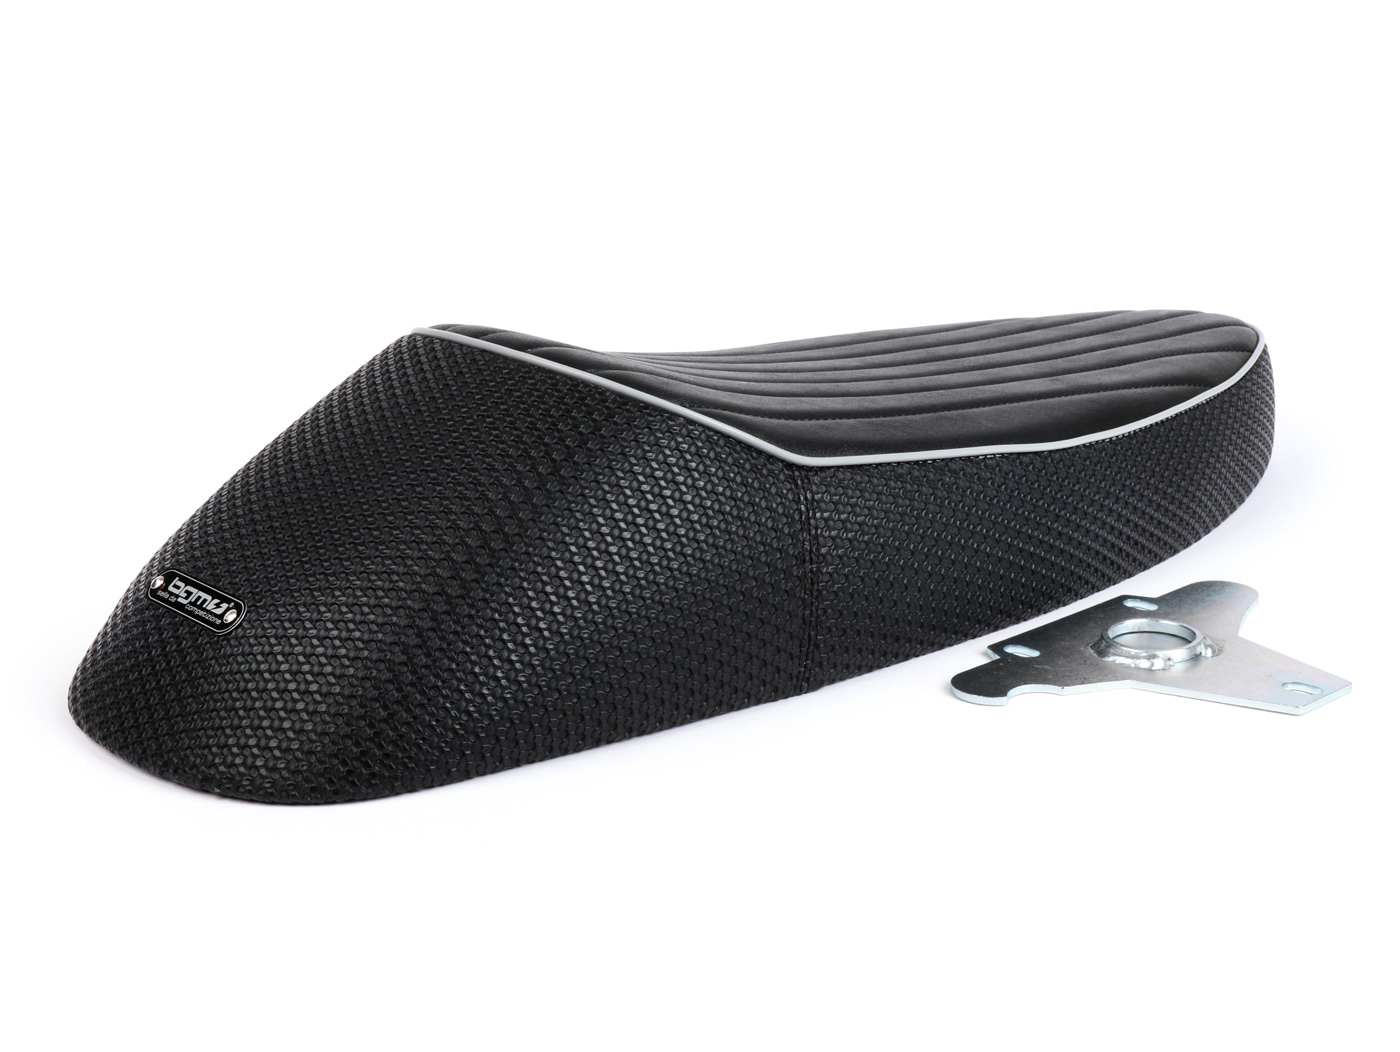
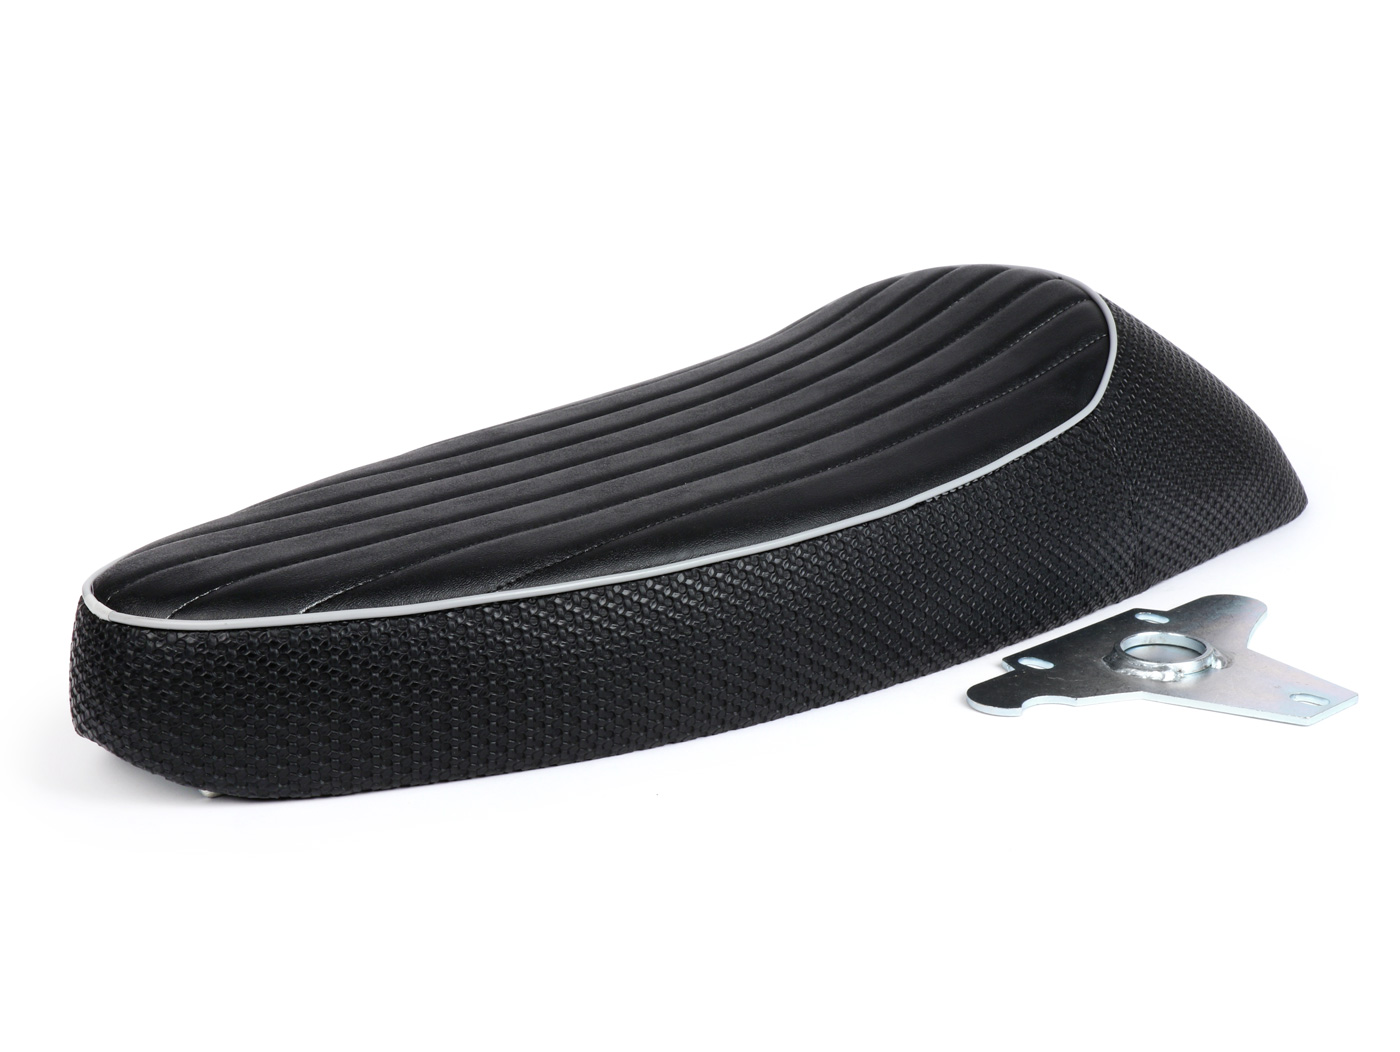
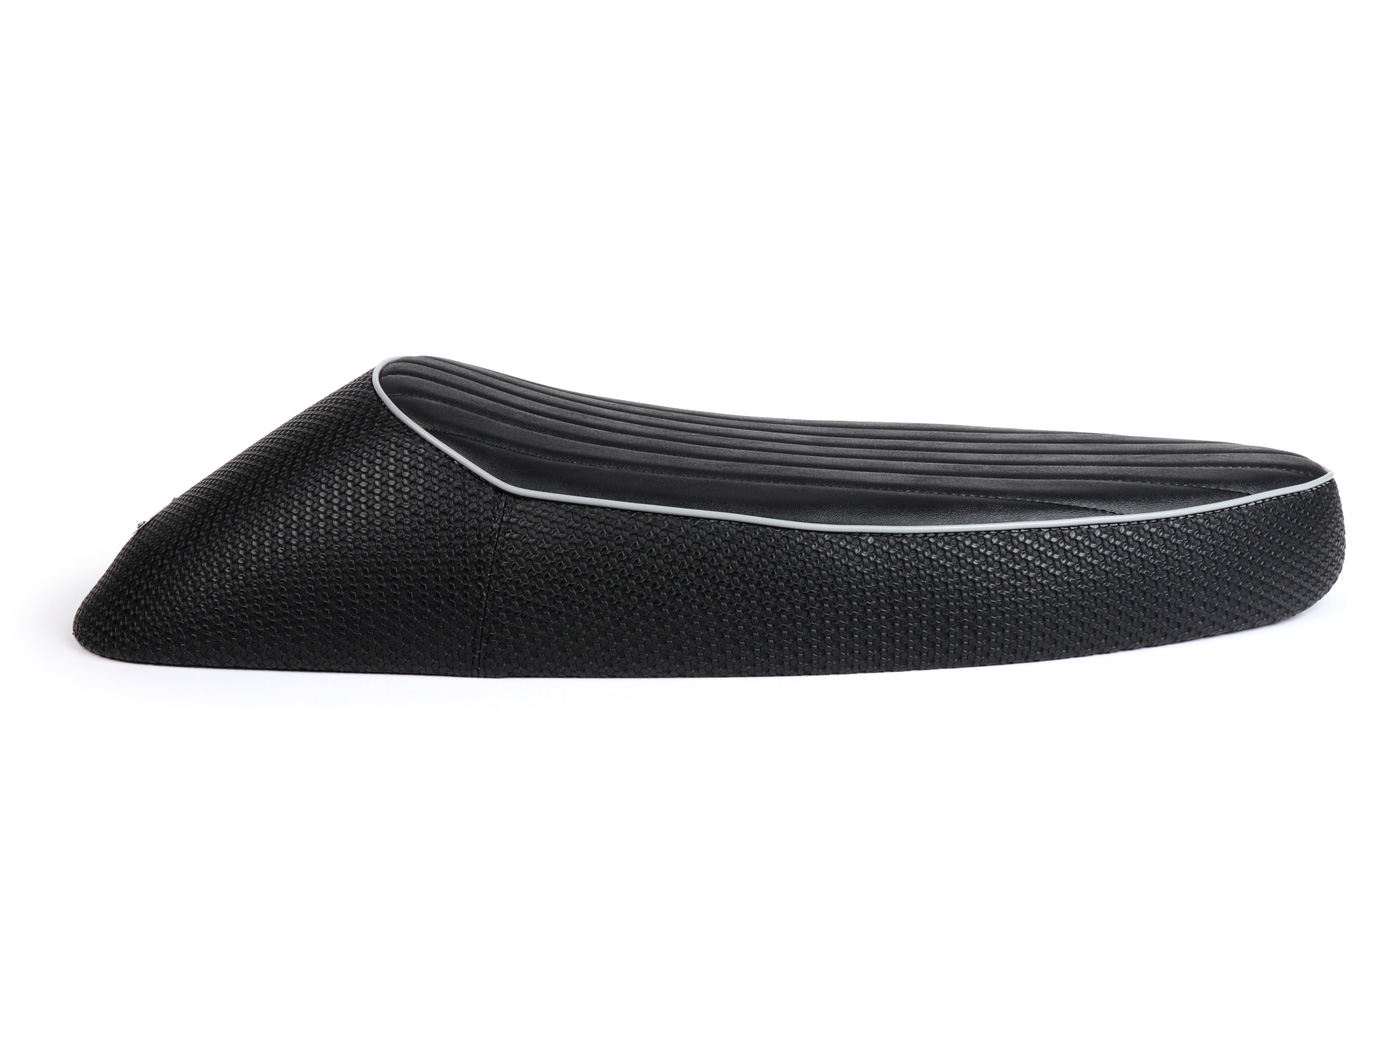
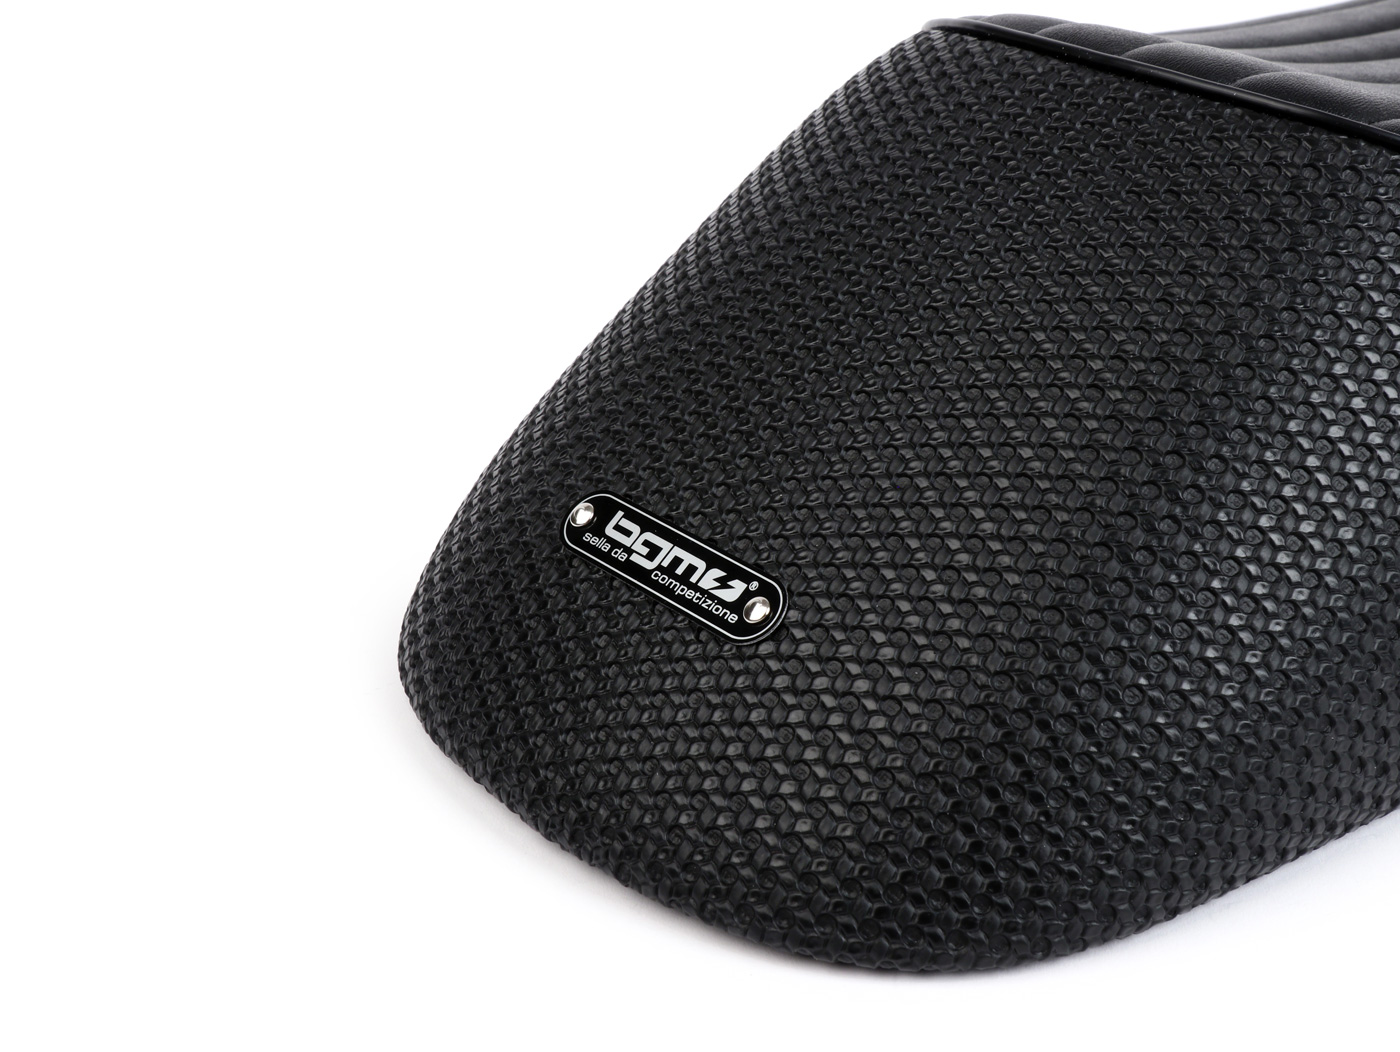
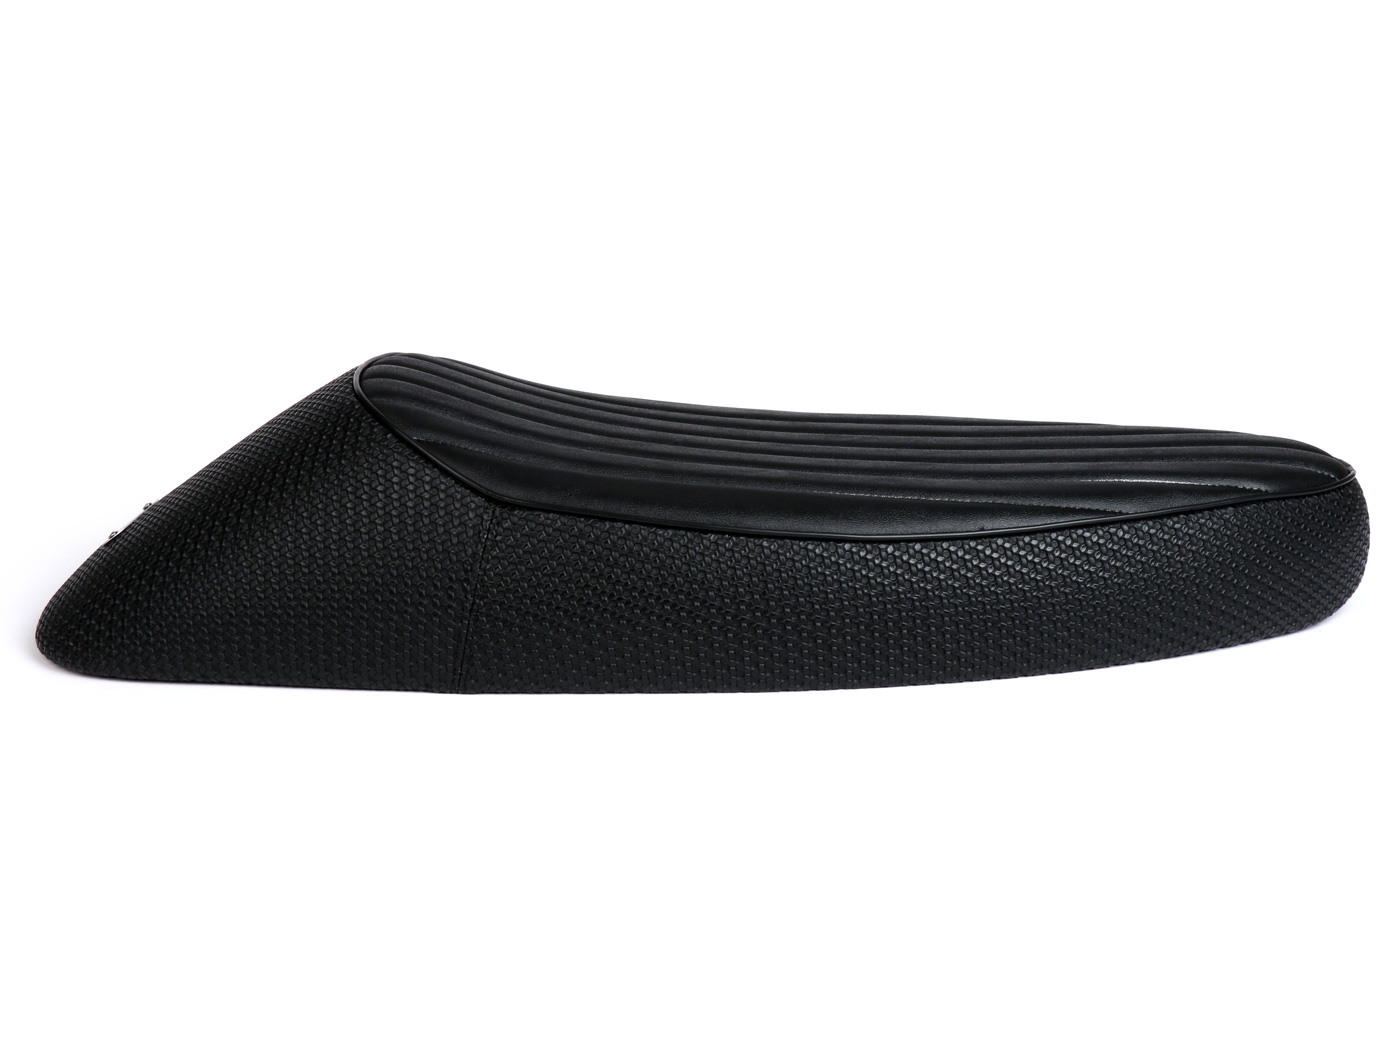
Basado en el muy popular asiento Nisa 'Sport 20', hemos diseñado un asiato deportivo para las Vespas clásicas en el diseño bgm y hemos hecho que el fabricante italiano de asientos NISA lo fabrique como version bgm. El nuevo asiento deportivo bgm PRO is available for Vespa Largeframe y Vespa Smallframe y is available in the version:
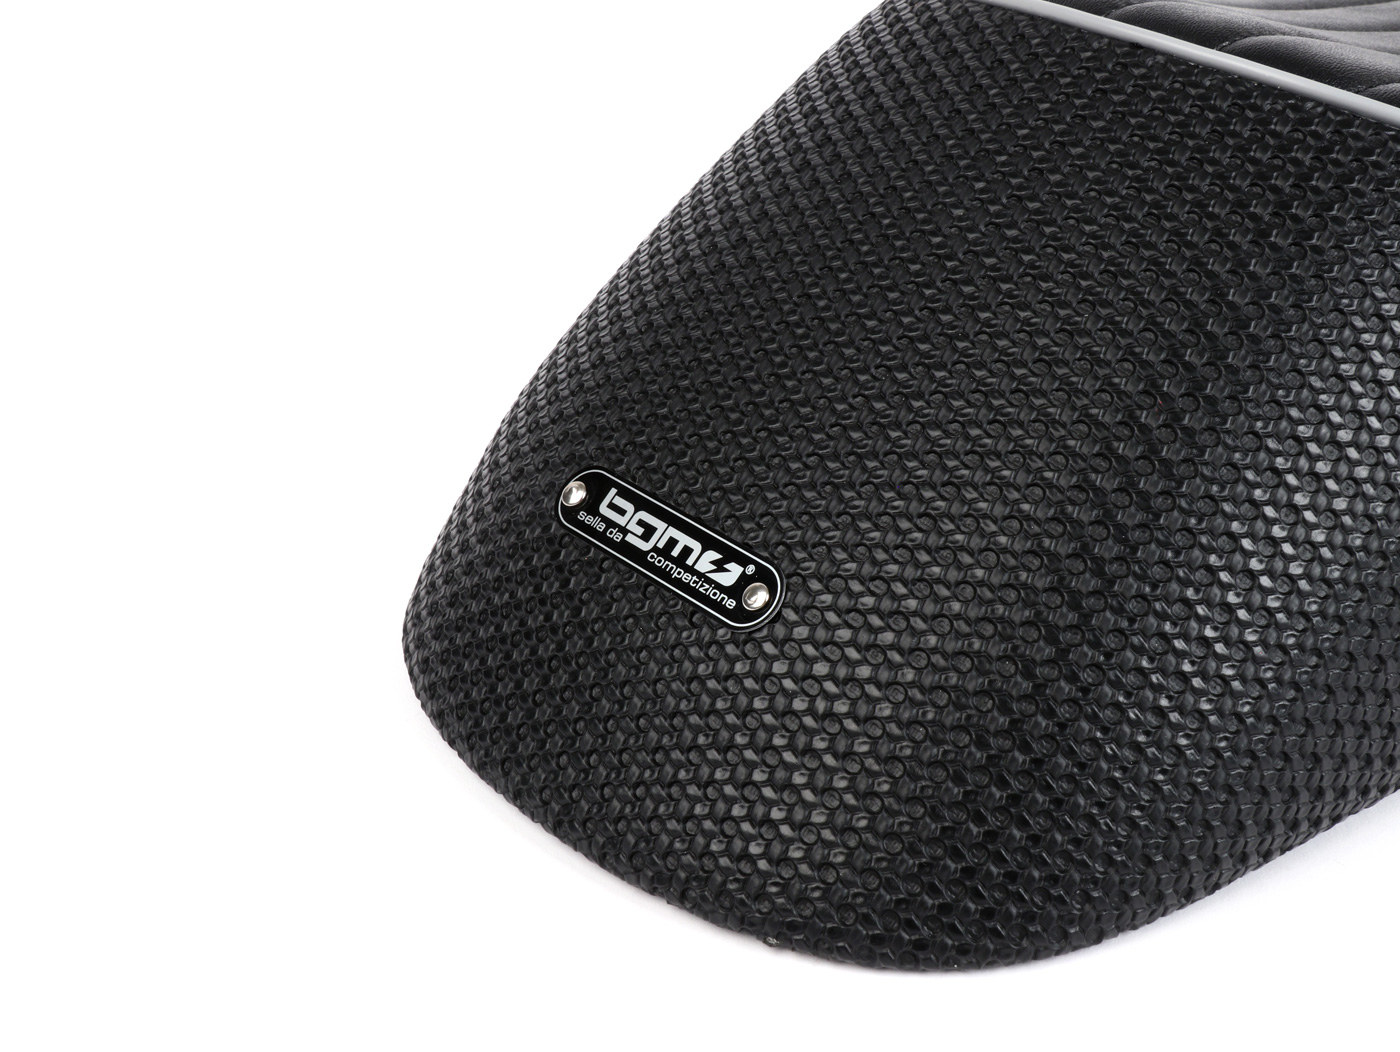
El asiento BGM Pro Sport tiene una hermosa cubierta de Alfatex (patrón de gofres en relieve) en los lados y la parte trasera y también está available with ribetes grises. El asiento también tiene una cubierta lisa con costuras longitudinales paralelas. Para que la superficie sea impermeable, están grabados en relieve, no cosidos. Así, the BGM Pro Sport recuerda fuertemente en su aspecto a las clásicas jorobas de asiento de los años 70 y transmite un fresco aire de competición incluso estando de pie.
También puede Finderar el asiento en el Configurator del asiato central del ScooterThe asiento de su modelo de Vespa:
In el uso práctico diario es, a pesar de su aspecto deportivo, muy buena para conducir. The banco tiene un acolchado de espuma de tamaño agradable en el que incluso los recorridos largos son divertidos. Una característica agradable es la joroba completamente acolchada. Ofrece un buen apoyo cuando se conduce en solitario, pero también puede utilizarse como asiento del pasajero en caso de necesidad.
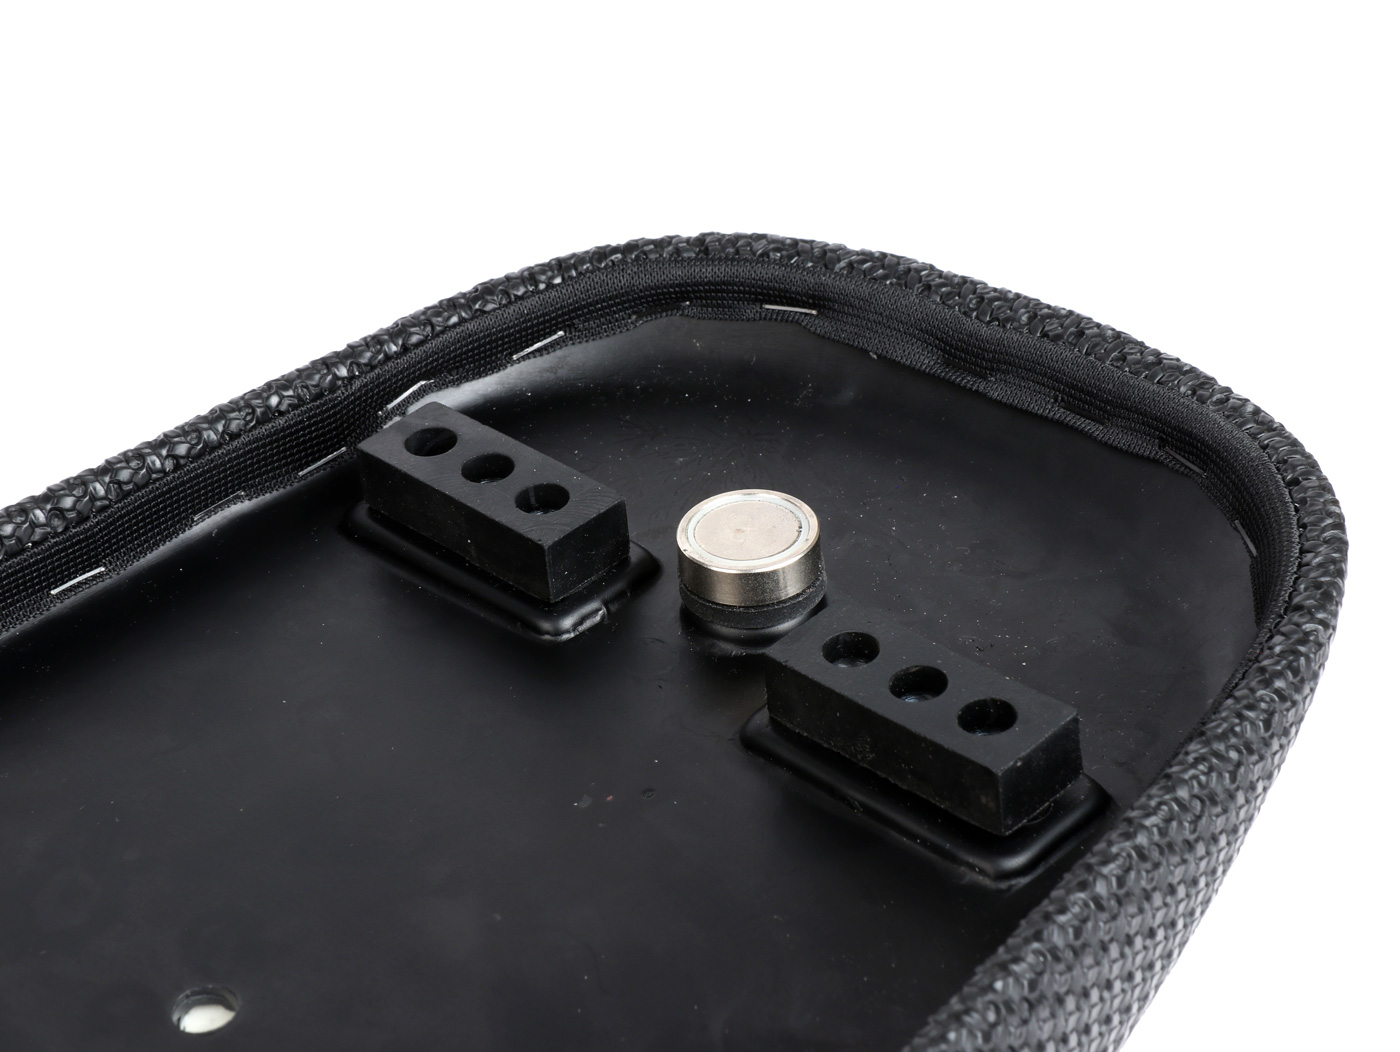
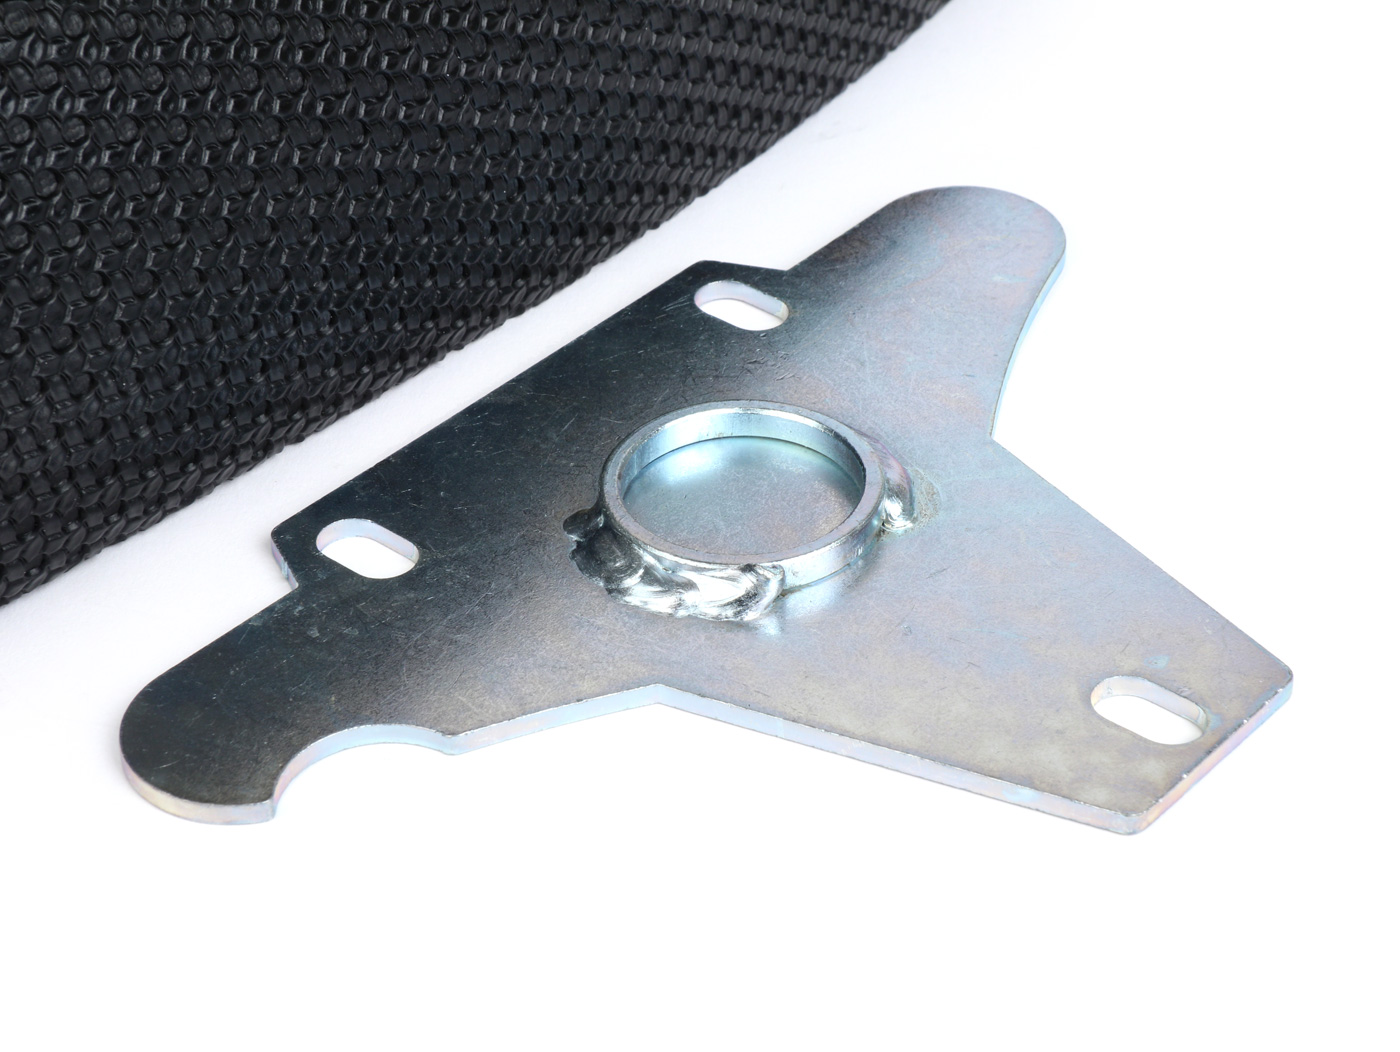
Otra característica inteligente es el cierre magnético del banco mediante un imán de neodimio extremadamente potent. Esto permite que el banco se abra fácilmente con una mano, pero sigue sujetándose mejor que muchos cierres de gancho clásicos. La mayor ventaja de la tecnología magnética es que el banco se apoya sin traqueteos en la placa de montaje suministrada, que está firmemente atornillada al bastidor. La fuerza magnética es tan alta que los desconocidos que intentan abrir el asiento suponen que éste está bloqueado.
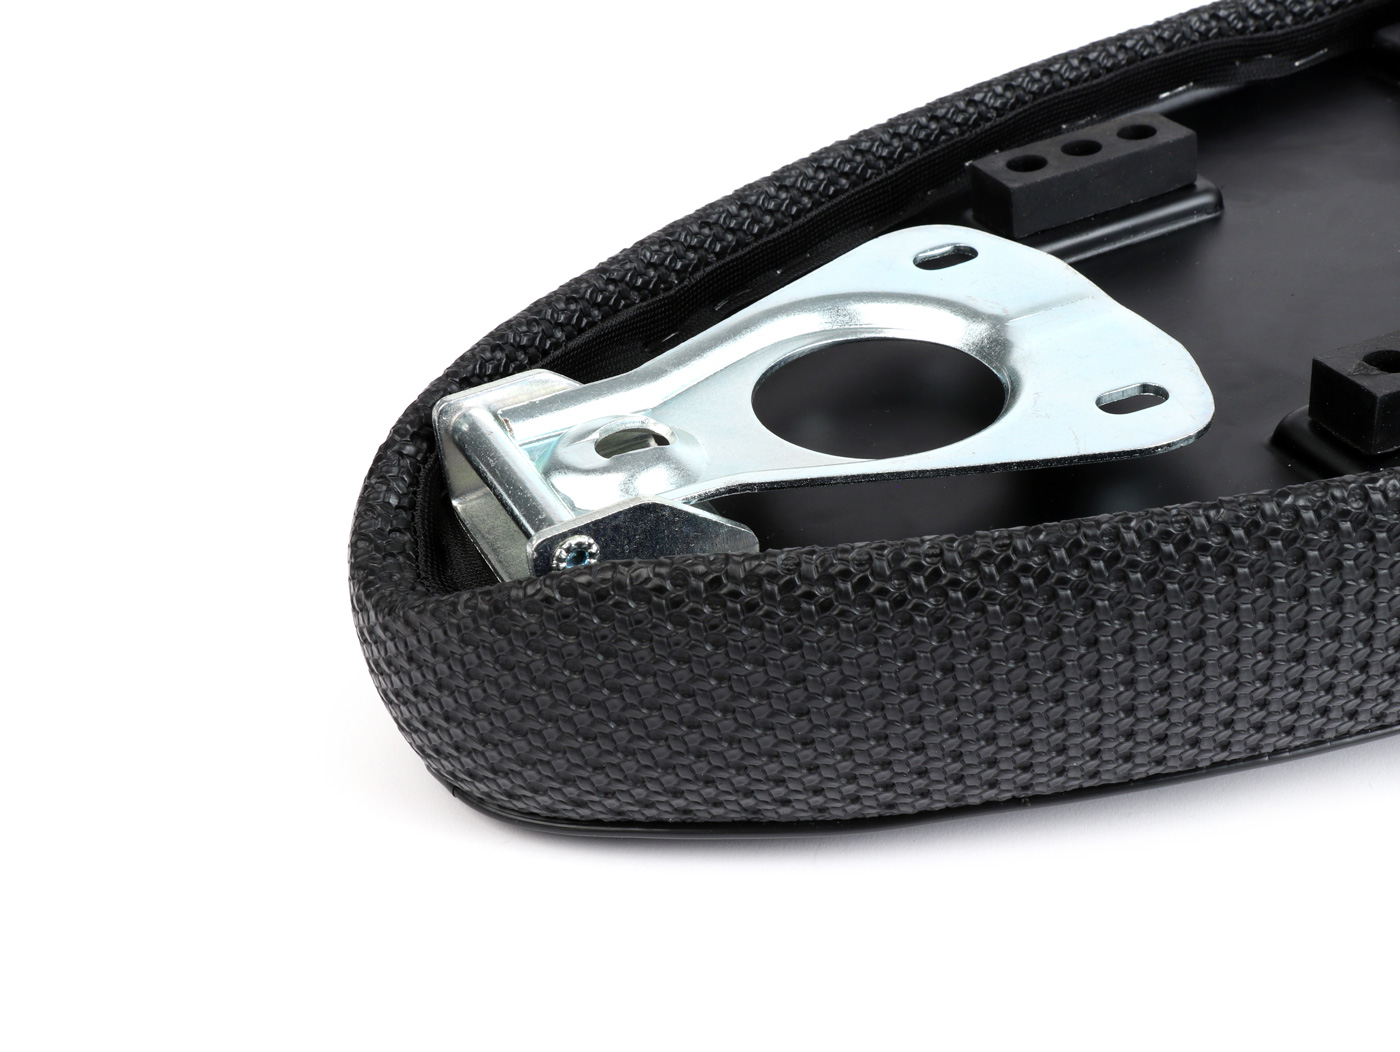
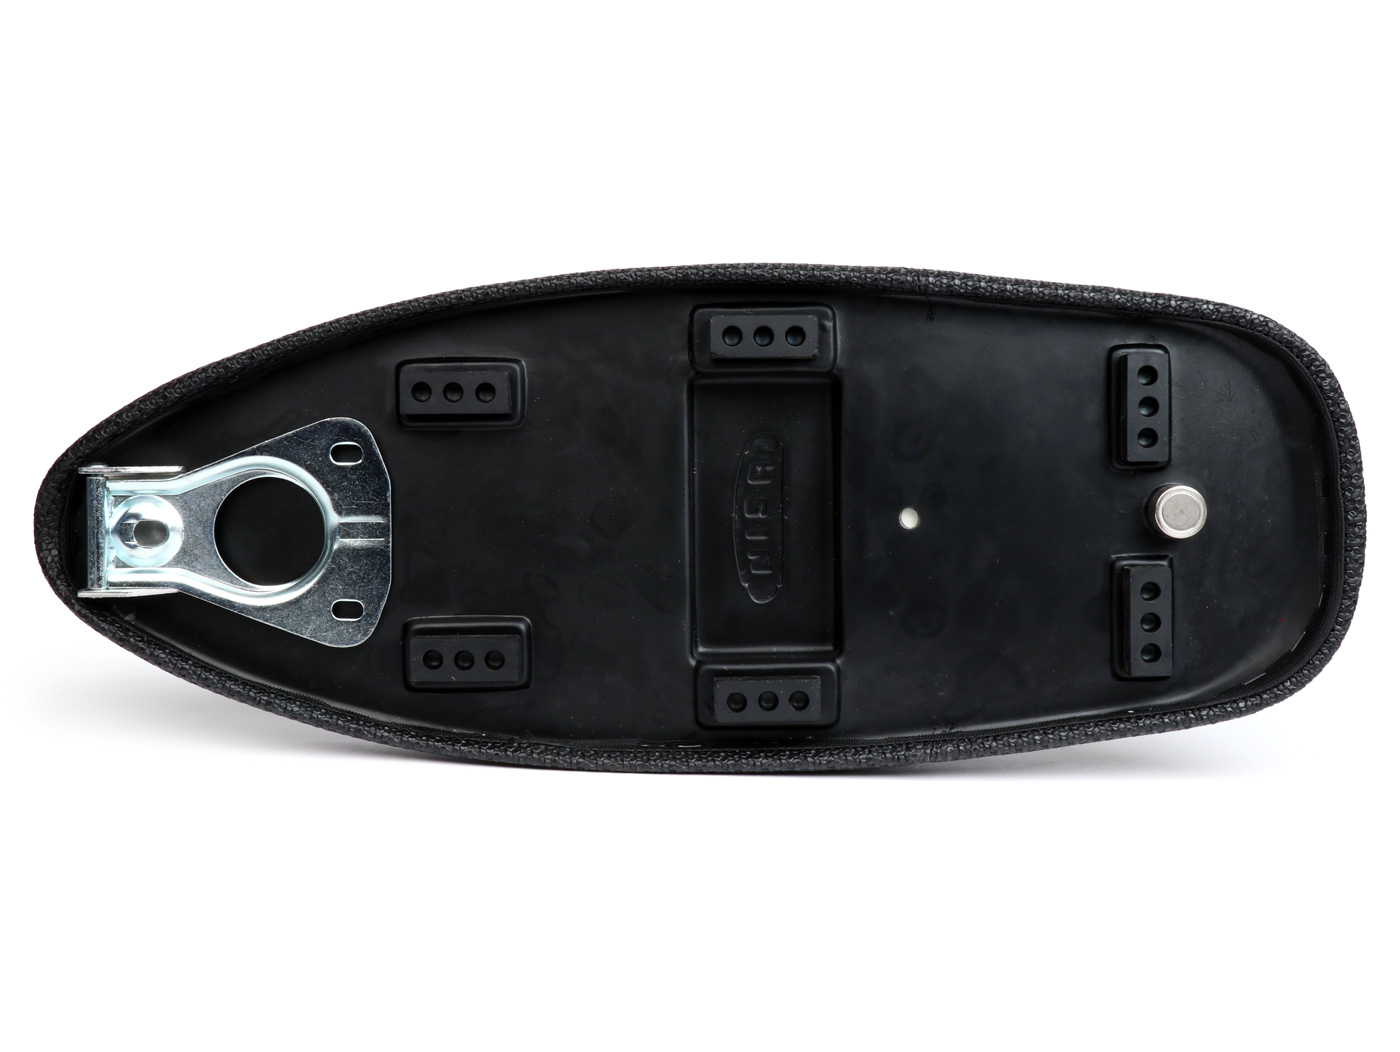
El marco del banco está hecho de plástico ABS resistant a los impactos y duradero. La cubierta está grapada en todo su contorno y, por lo tanto, sujeta de forma muy segura y permanente (en lugar de simplemente pegada, como suele ser el caso). El bastidor está equipado con seis almohadillas de goma. Esto distribuye la carga muy bien sobre todo el marco y da al banco una sensación de asiento muy sólida y complete. La bisagra del banco es típicamente Nisa muy maciza y sólida y, por tanto, muy resistant. Además, está atornillada y puede ser sustituida (en el caso muy improbable de un defecto). Available para Vespa Smallframe y Largeframe (go modelos Largeframe con depósito alto (GS160, SS180, Rally180 / 200 necesitan el depósito plano de los modelos Sprint / PX sin depósito de aceite)
Nota para la version Largeframe and Vespa PX Para los modelos PX, so apto para las versiones de depósito con tapa compatible. No apto para modelos Lusso / vehículos con depósito de aceite. Pide el asiento:

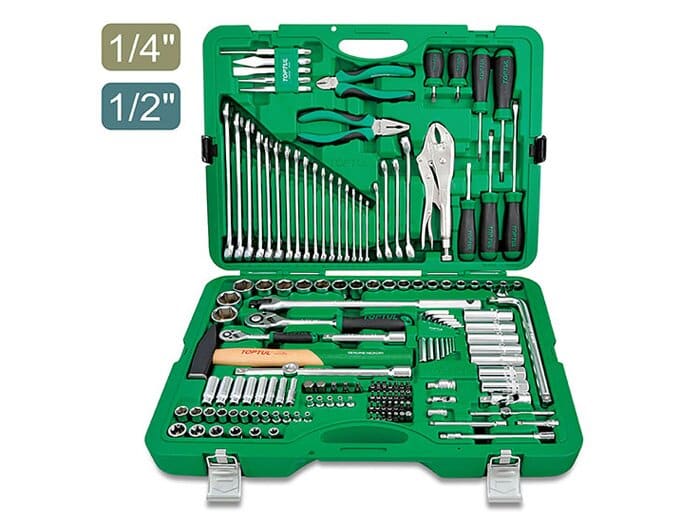
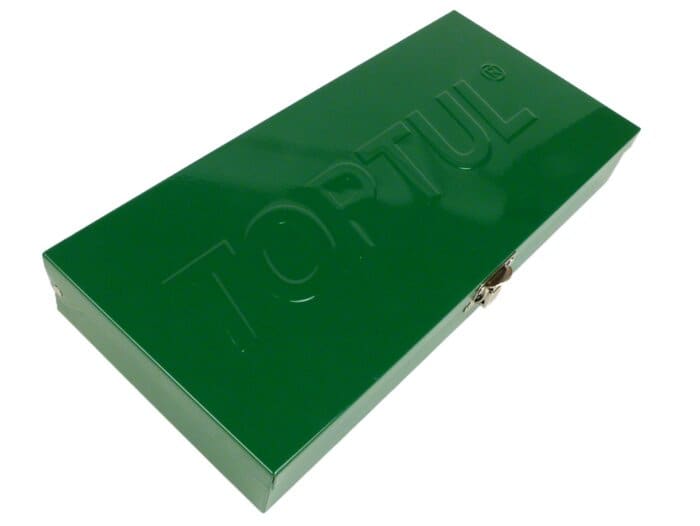
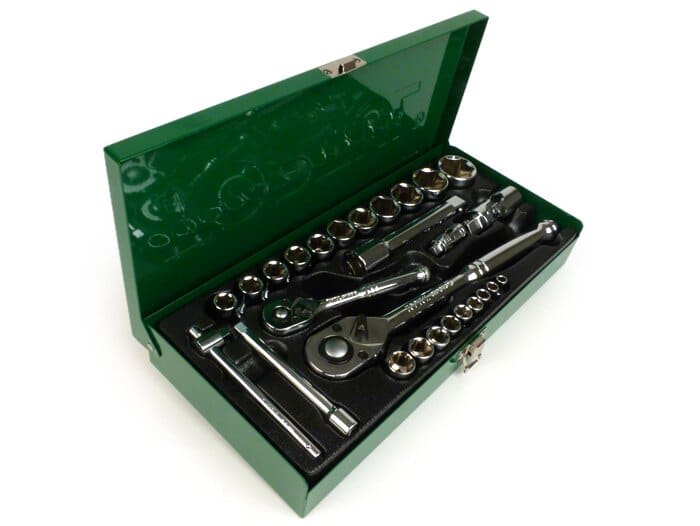
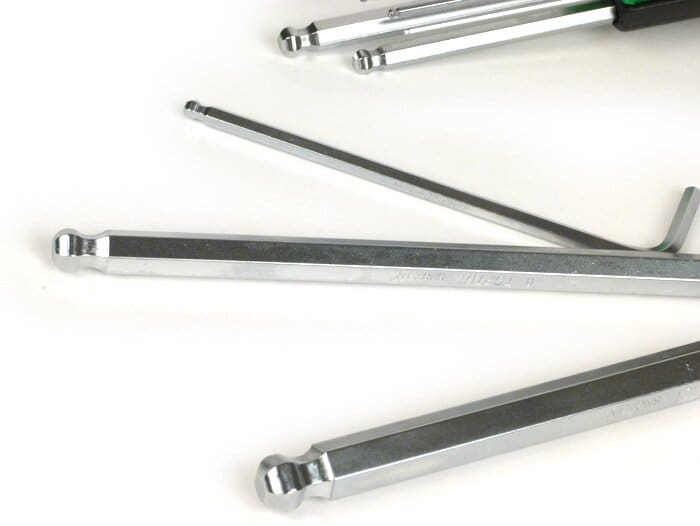
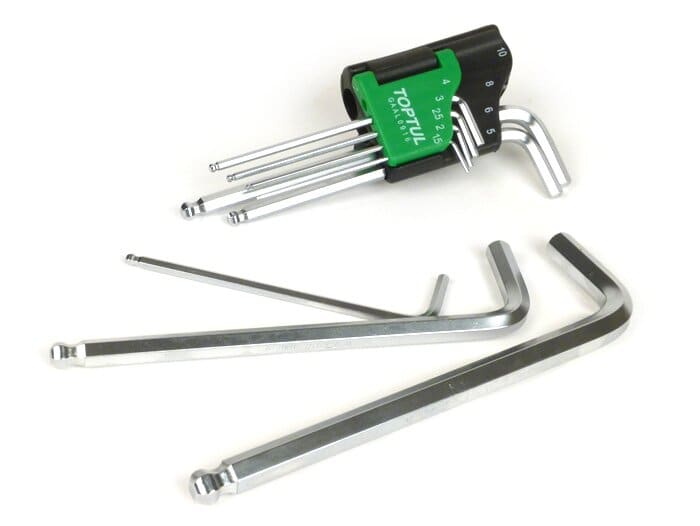
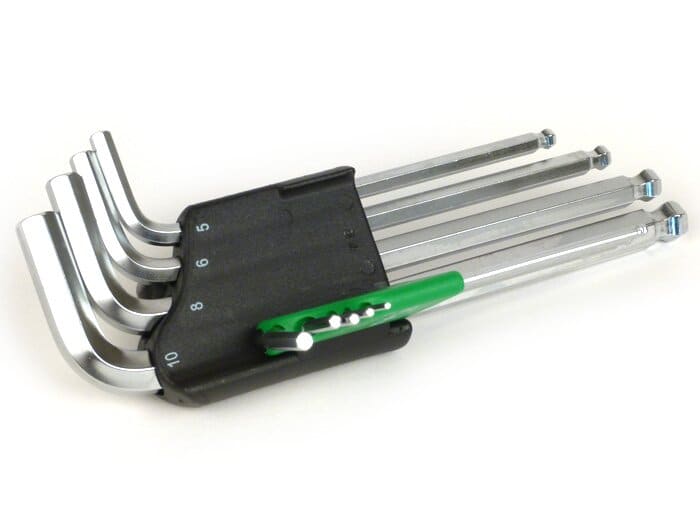
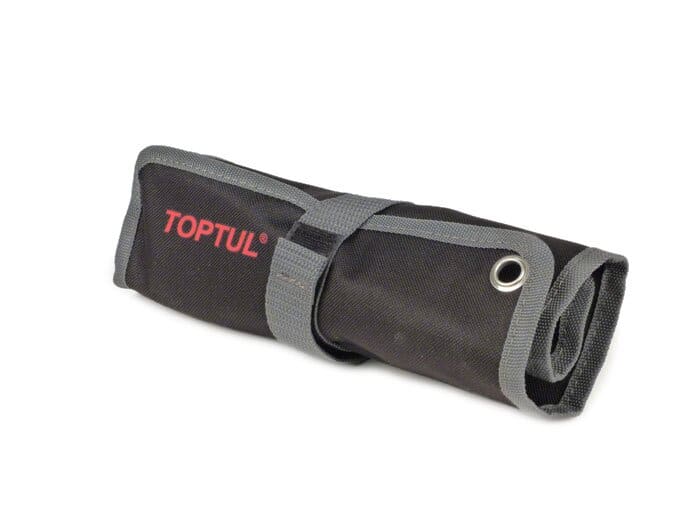
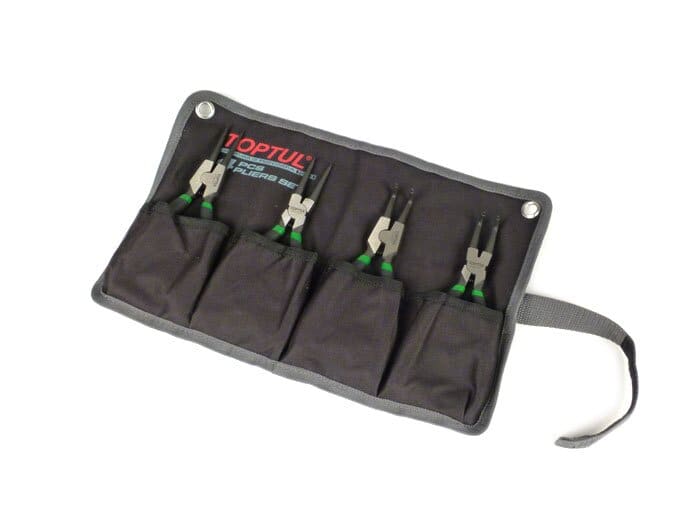
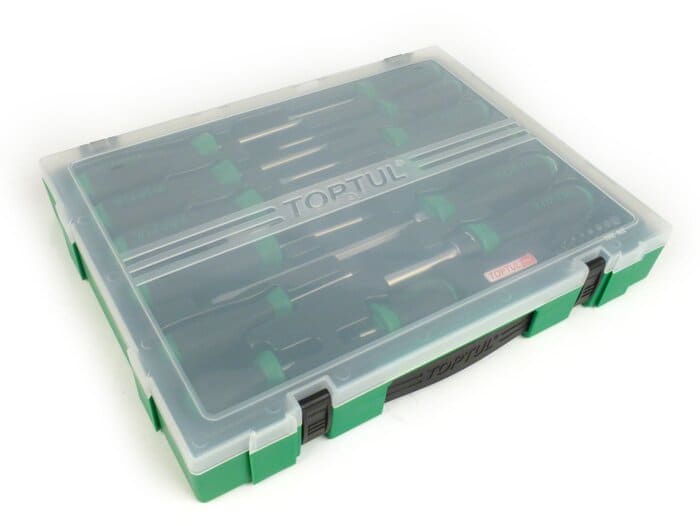
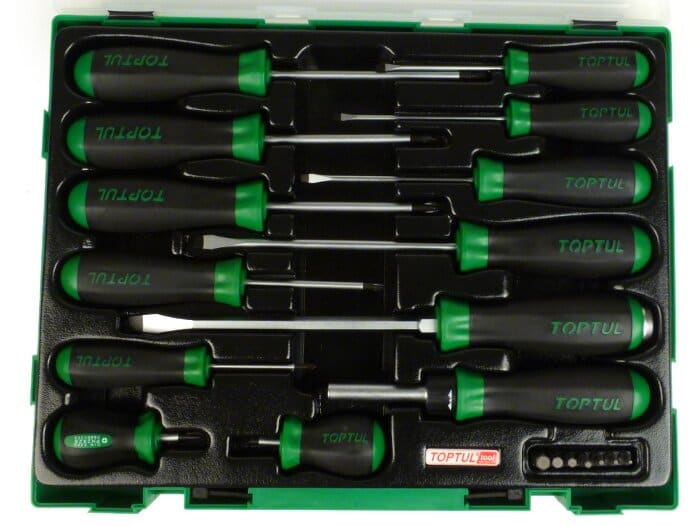
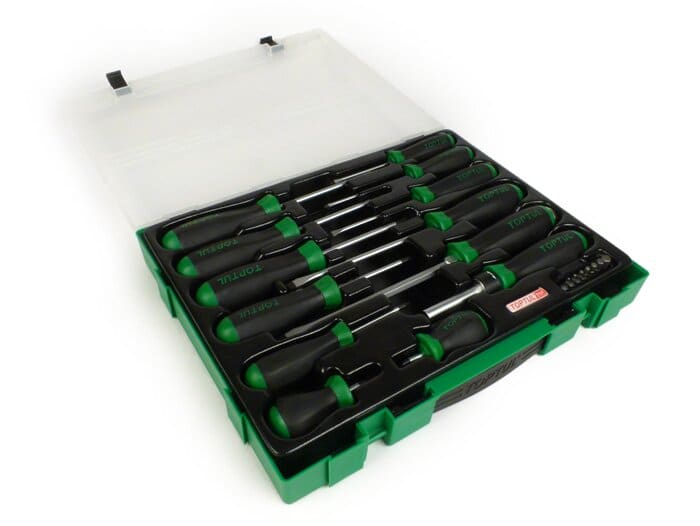
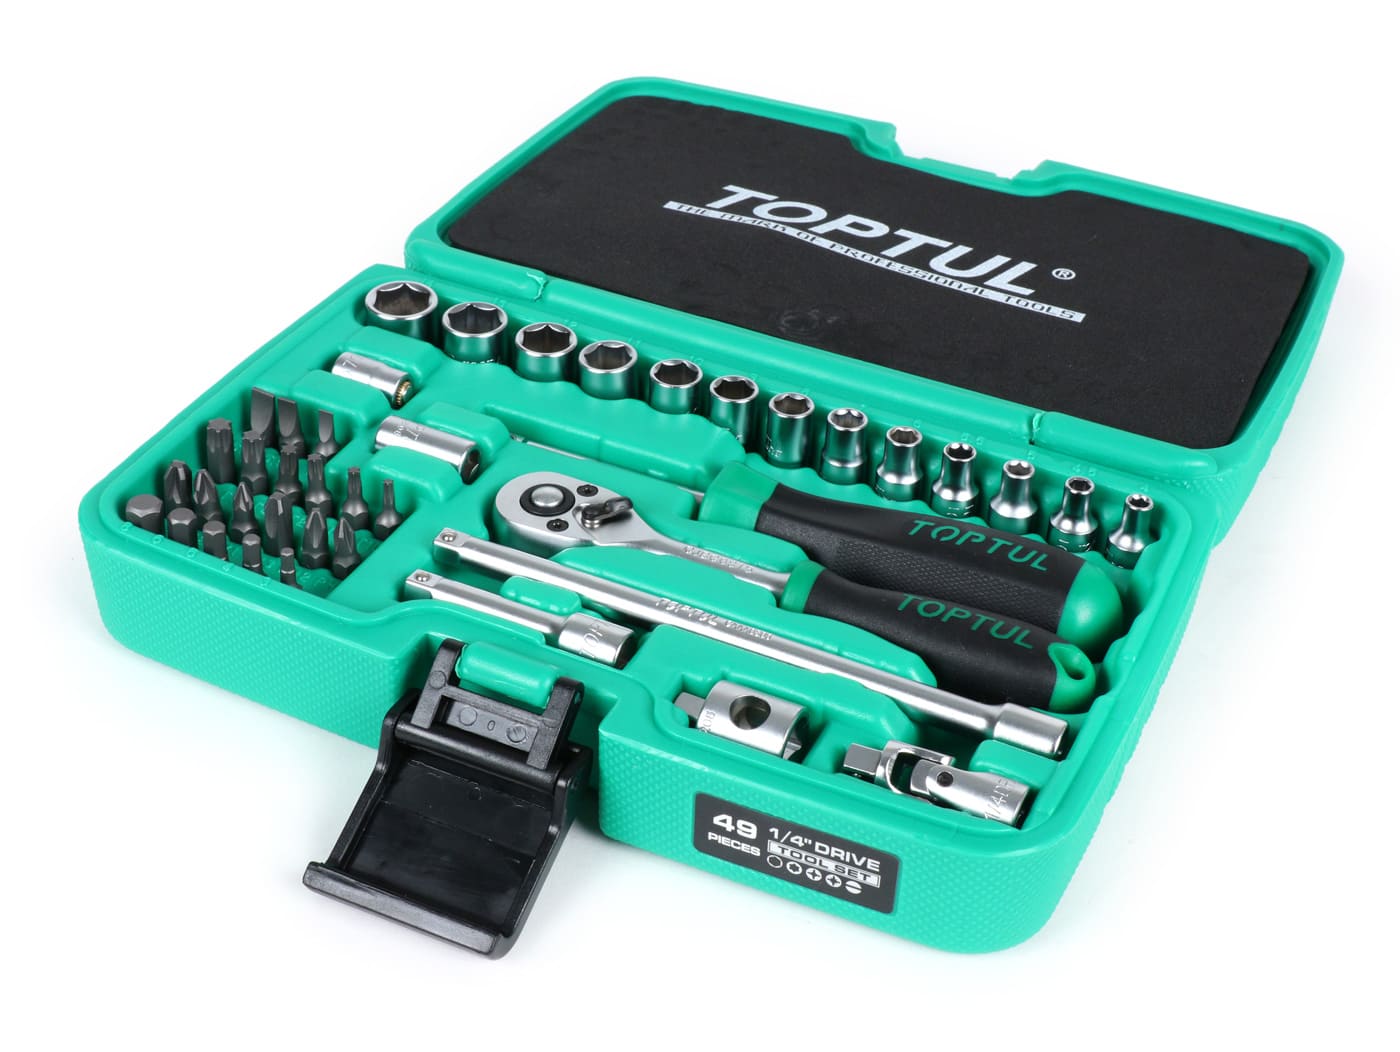
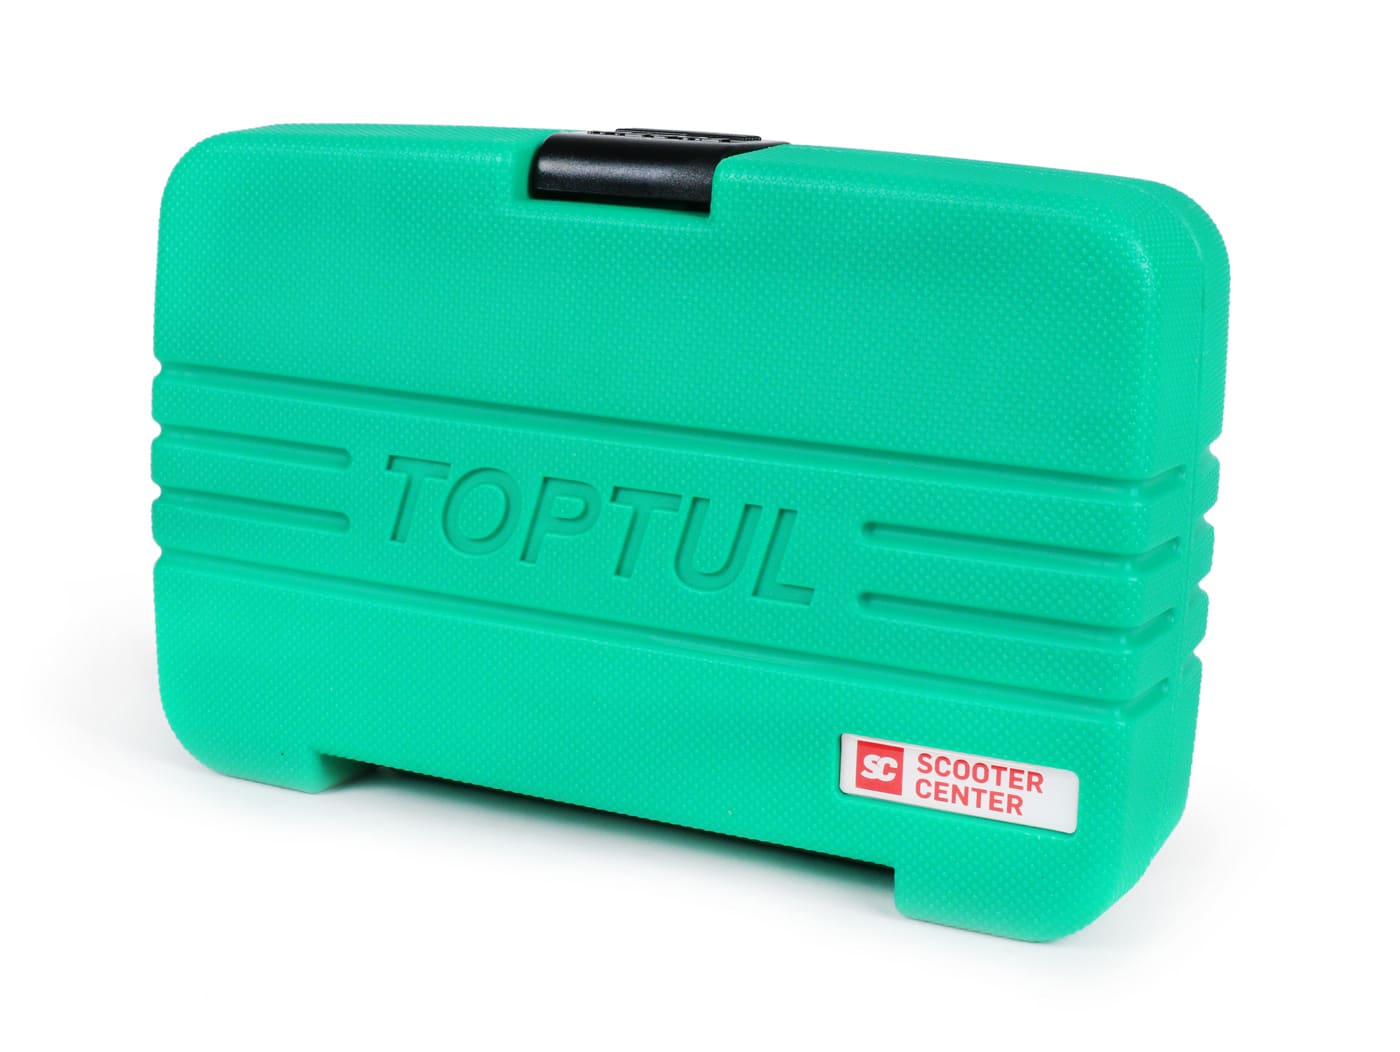
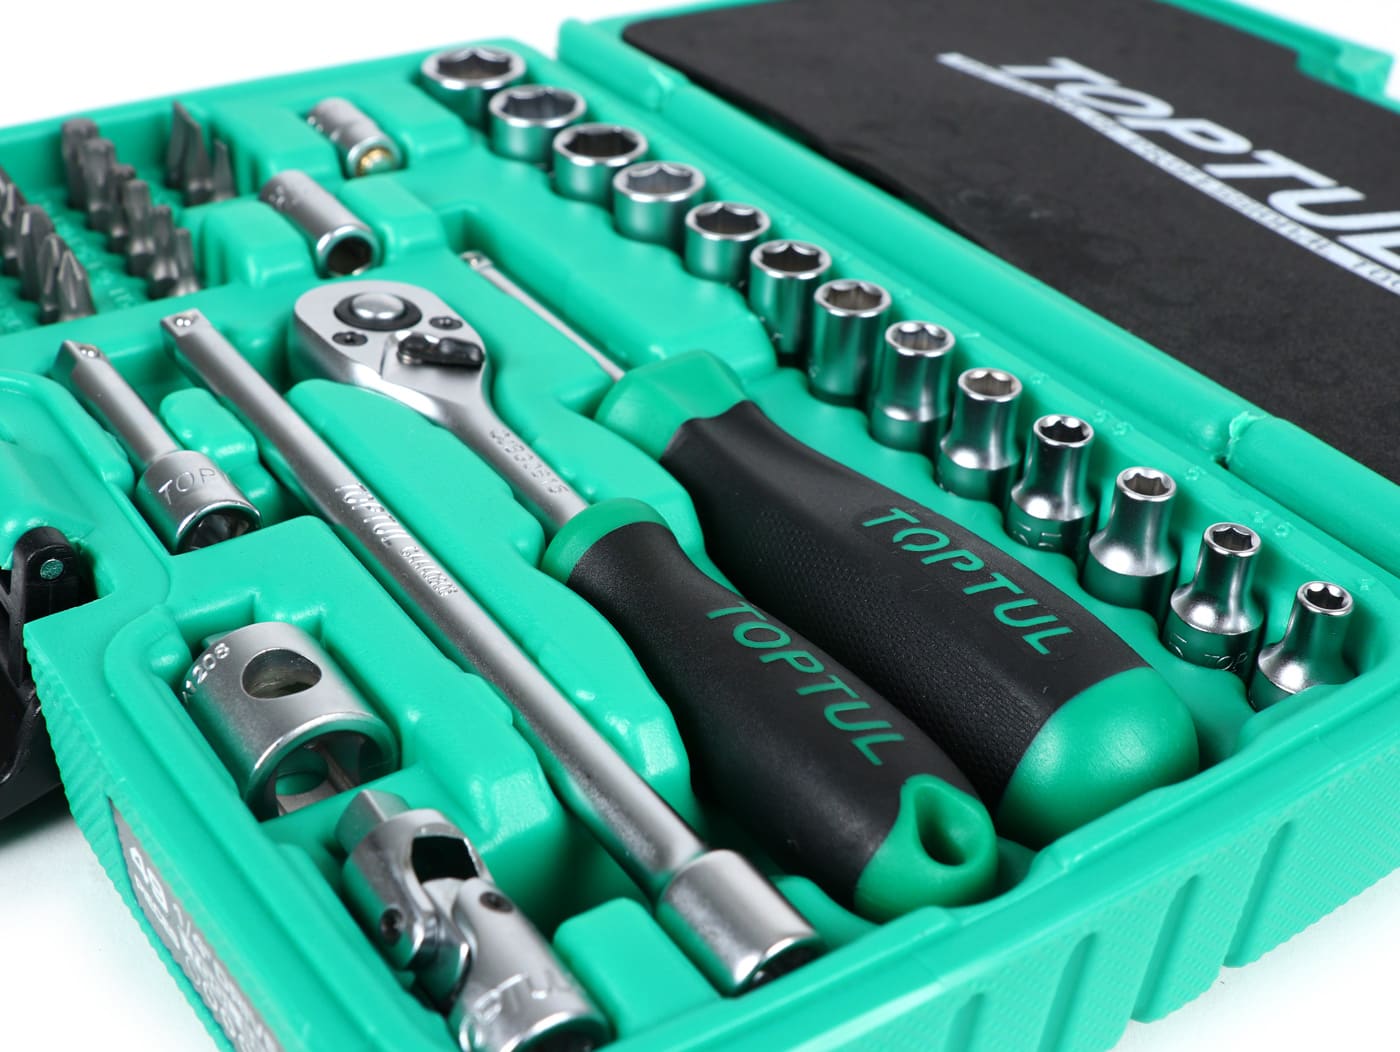
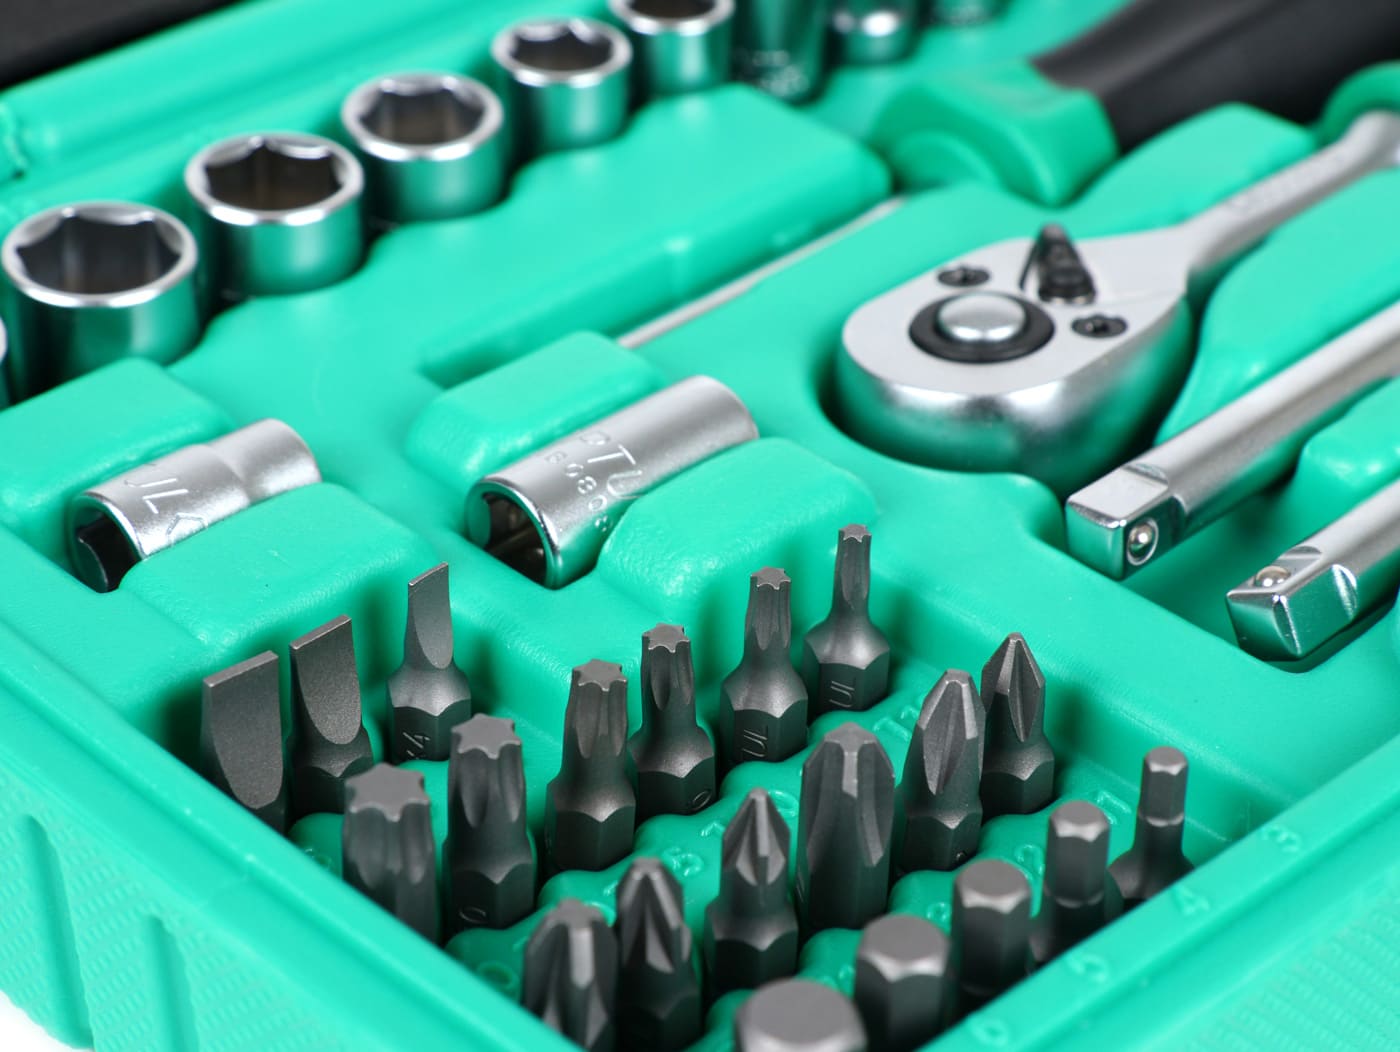
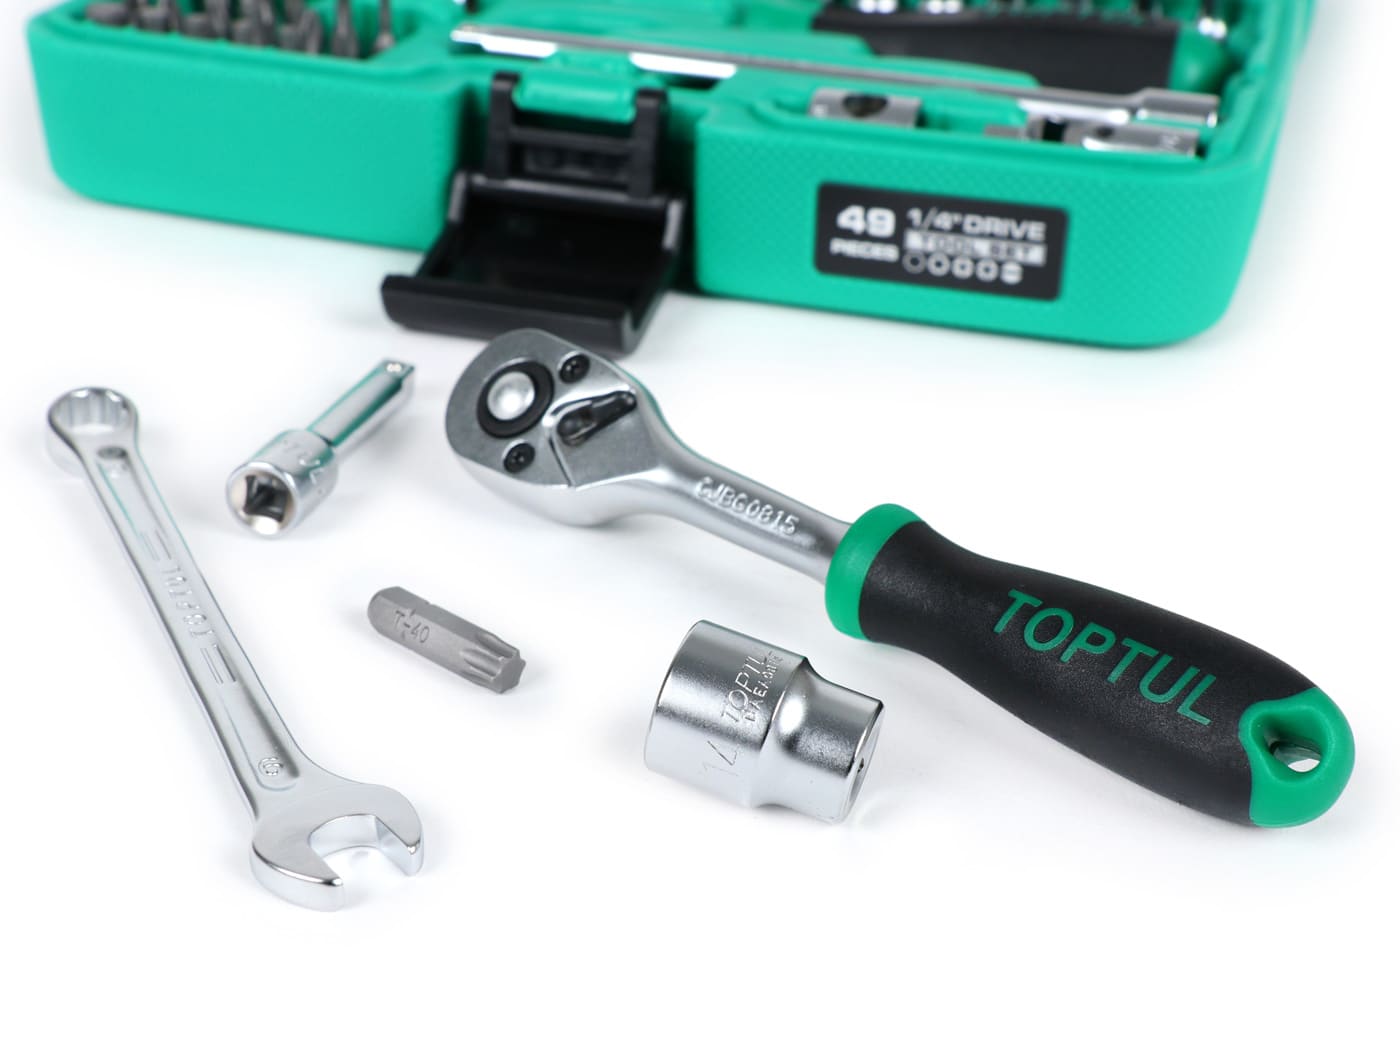
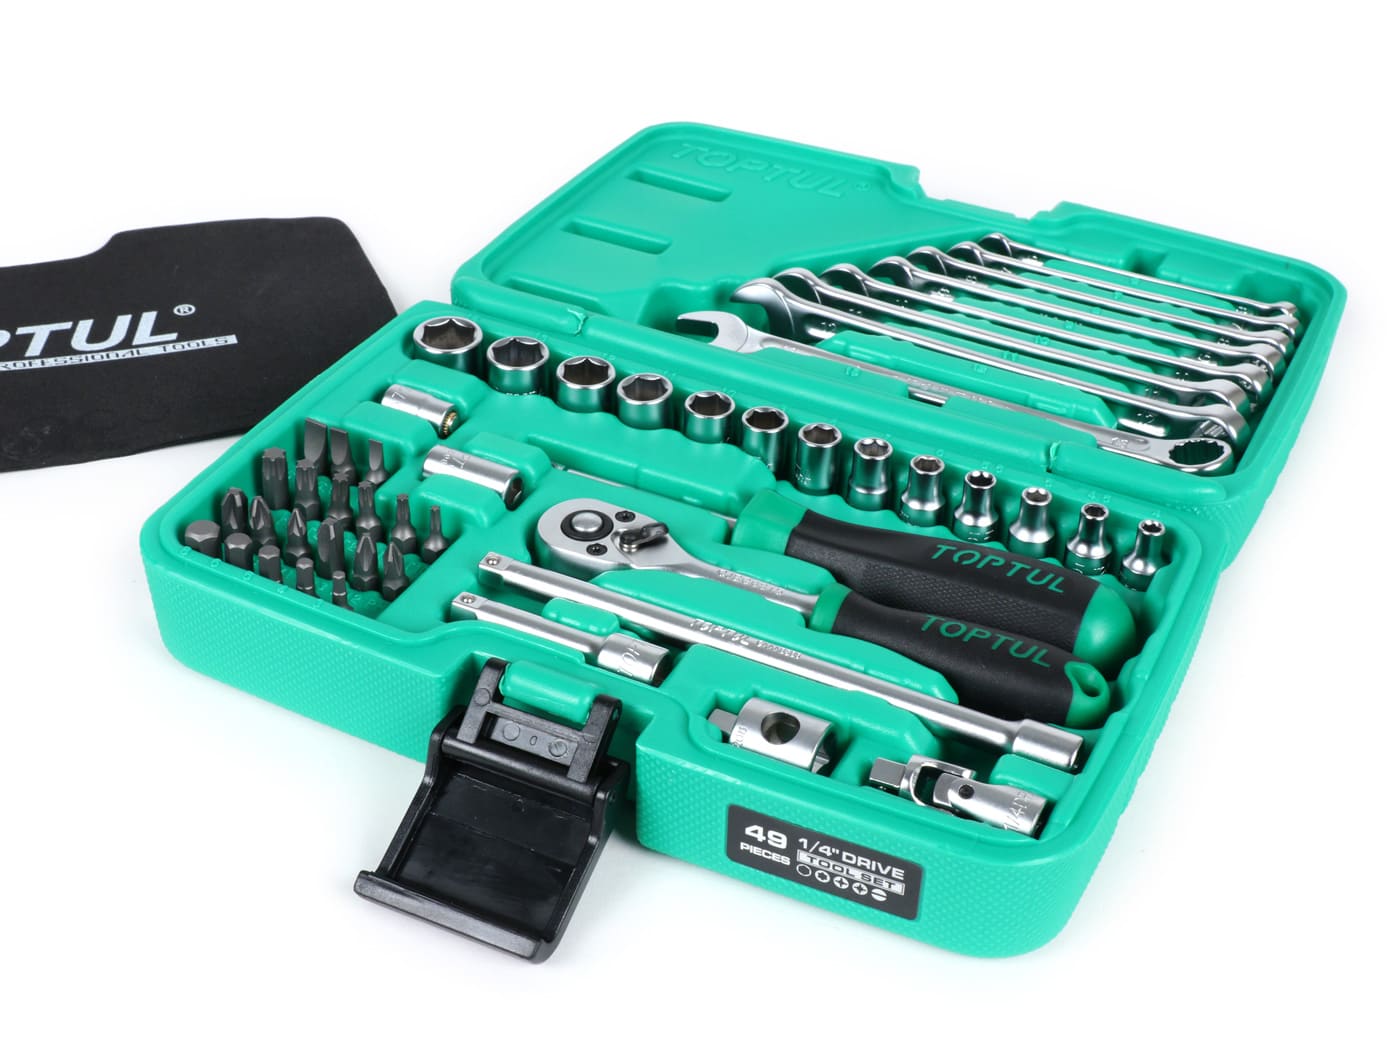
Hemos recibido una gran entrega, por lo que las populares Herramientas TOPTUL vuelven a estar available.

TOPTUL lleva más de 20 años fabricando herramientas de alta calidad y es absolutamente imbatible en una comparación de precio / rendimiento. Los productos TOPTUL se utilizan a diario desde hace años en Vespa, Lambretta & Co. y convencen una y otra vez.
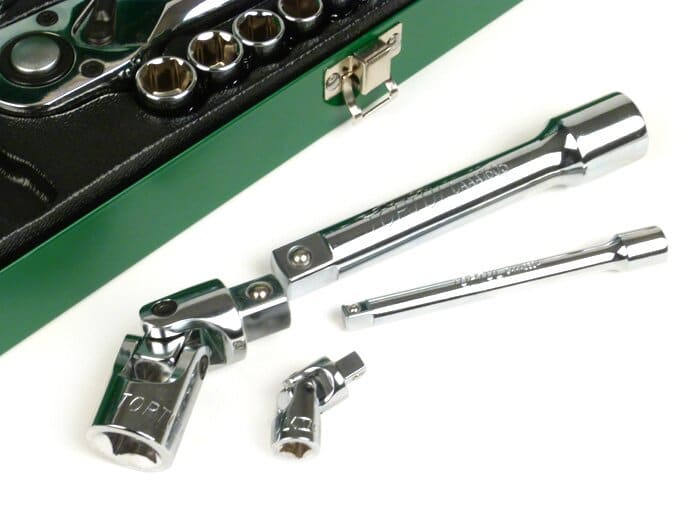
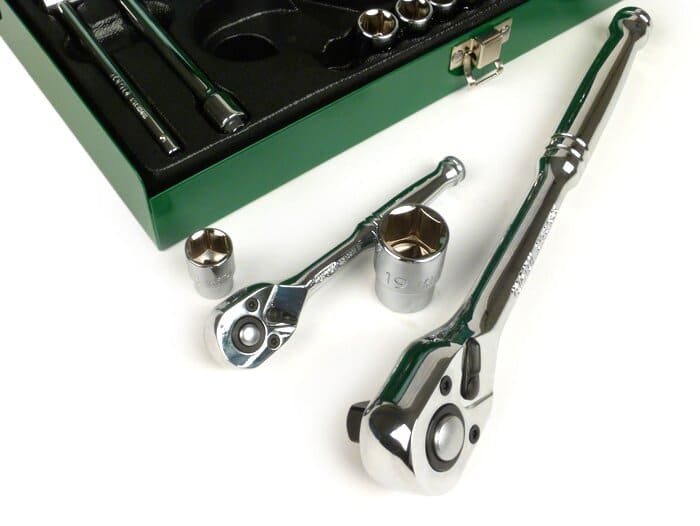
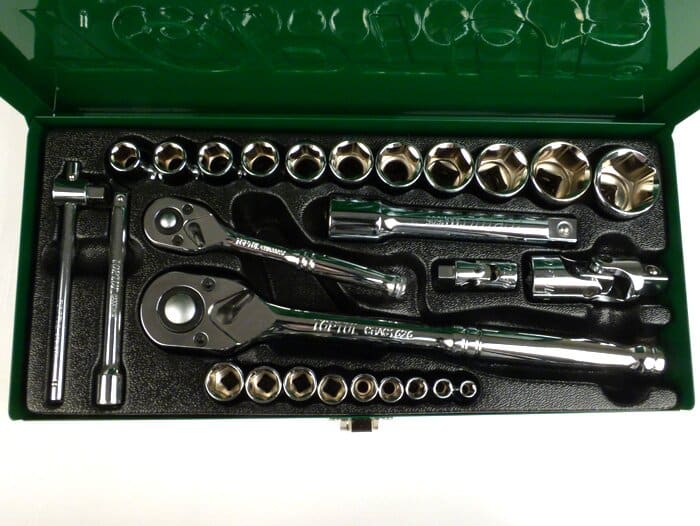
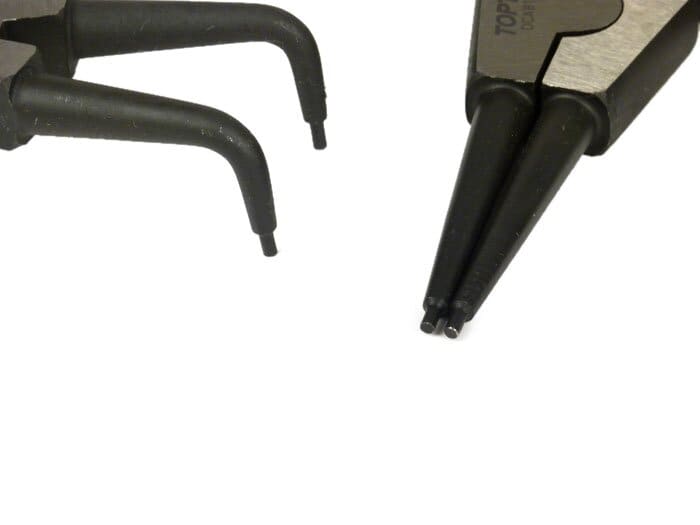
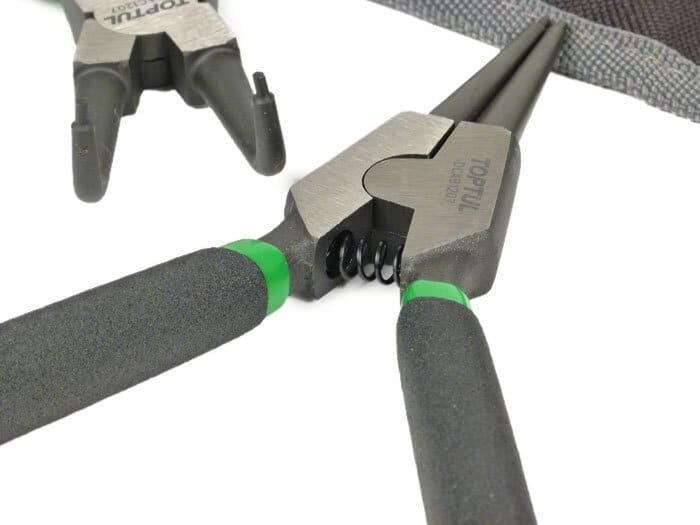
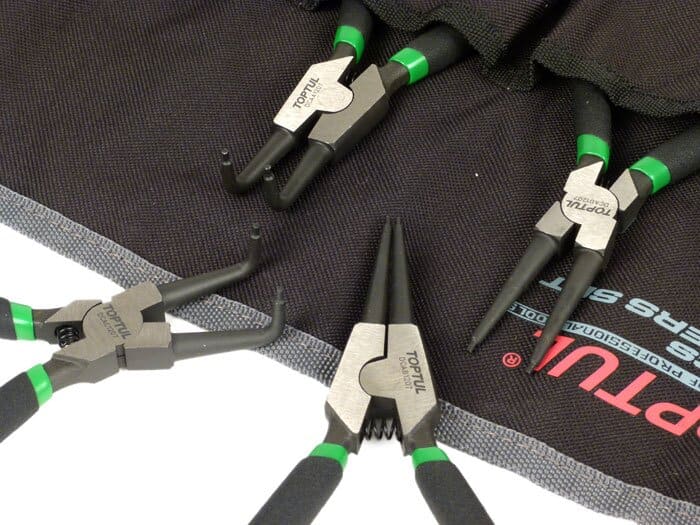
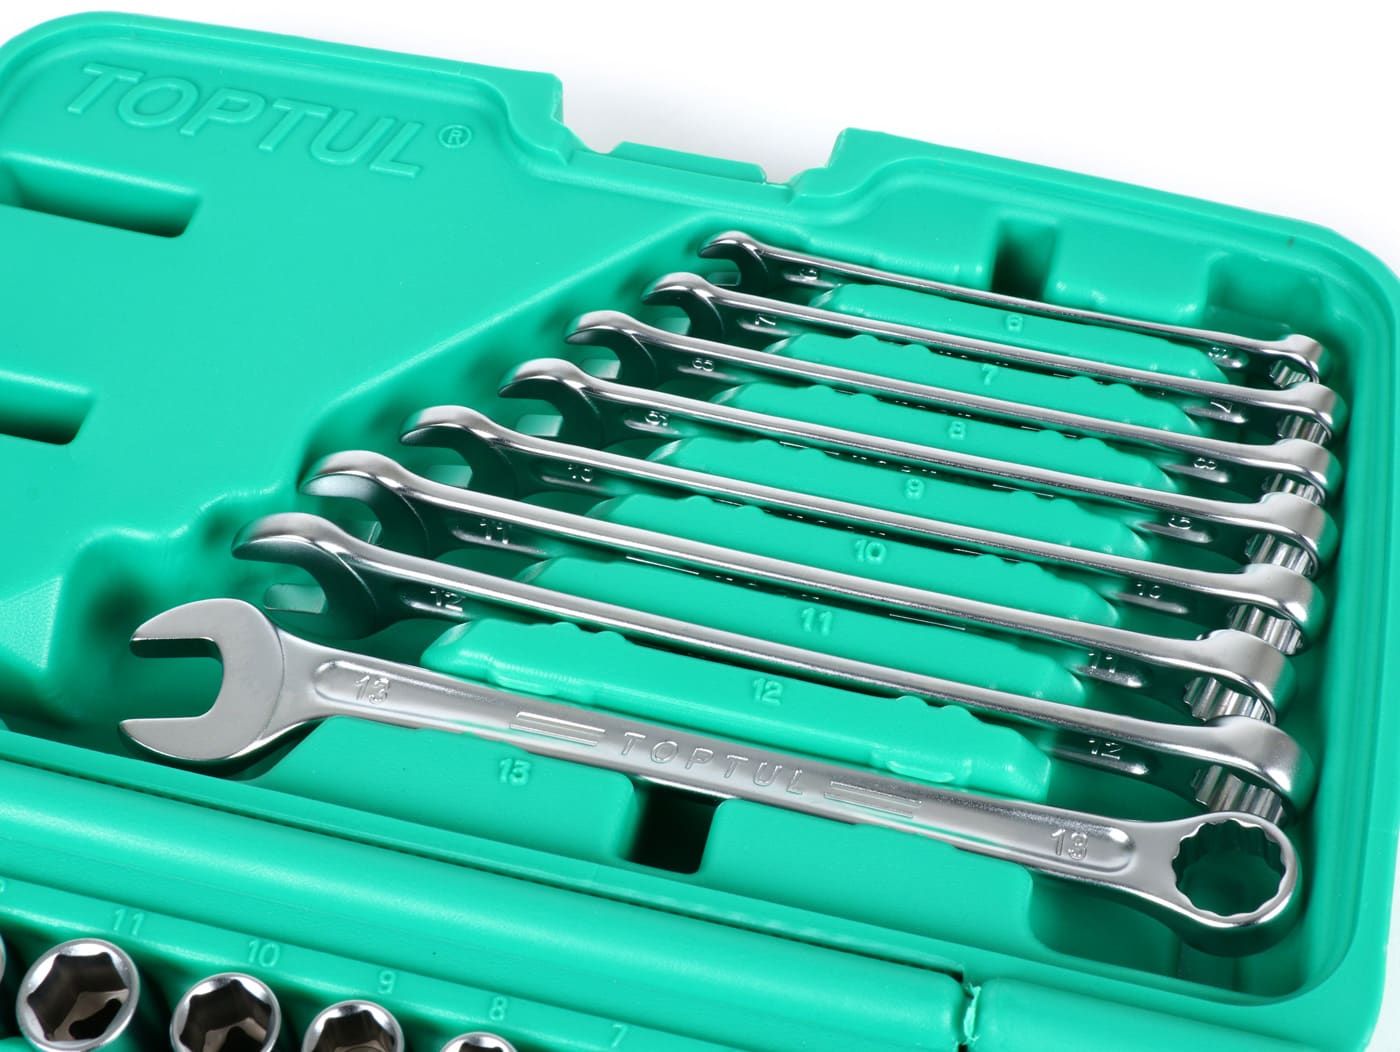
Como ejemplo, basta con ver los served finamente divididos de las carracas. El diseño macizo y robusto con 72 served consigue un cosido de sólo 5 grados (1/72 de vuelta). Esto permite trabajar con precisión y sin necesidad de cambiar de posición, incluso en lugares muy estrechos, con poco recorrido de trabajo para la carraca. Naturalmente, las herramientas TOPTUL cumplen o superan las normas comunes como DIN / ISO / ANSI. El control de calidad interno es muy estricto y se expresa, por ejemplo, en un protocolo de medición individual que se adjunta a cada llave dinamométrica en relación con la precisión de la medición y el comportamiento de liberación. For nuestra propia experiencia, podemos recomendar los productos TOPTUL a todos los “usuarios Intensos de llaves inglesas” con la conciencia tranquila.Y bonitos son todavía los conjuntos, como este:
TIP: Como uno tiene entonces en un columpio todo nuevo, uniforme y en una apariencia atractiva! También puedeFinder has more recommendations for TOPTUL aquí en nuestro Blog de Scooter Center: https://blog.scooter-center.com/tag/toptul/ These are the tools from Toptul for the conductors scooters You can find it in Nuestra TOPTUL - Tienda
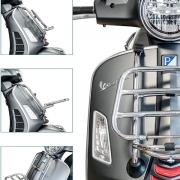
It's now new and innovative portaequipajes para los new models GTS. Este portaequipajes delantero MOTO NOSTRA Vespa GTS le ofrece dos grandes ventajas:
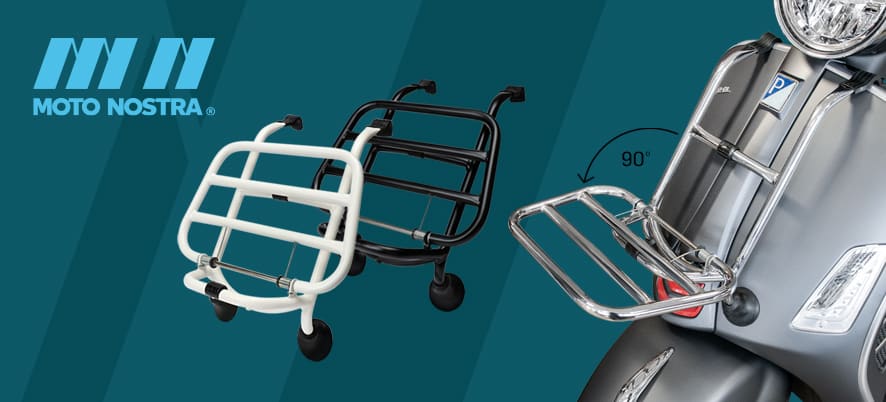
El portaequipajes se sujeta simplemente a la parte superior del escudo de piernas con los dos soportes y se fija al bastidor con la placa angular especial adjunta. Además, el portador se apoya en topes de goma en el bastidor y ofrece así un nivel de seguridad muy alto. Cuando se despliega, la plataforma de transporte tiene un ángulo agradablemente plano. De este modo, se puede transportar incluso un equipaje más grande sin tapar el faro. Hemos produced los portaequipajes MOTO NOSTRA in three versions:
El montaje es fácil y va rapido Nuestras instructions de montaje le ayudarán, son fáciles de entender y se incluyen con el producto. Por supuesto, también puede obtener las herramientas de nosotros: TOPTUL tool shop
MOTO NOSTRA it's a brand of Scooter Center!
A video from the present is now available for the MOTO NOSTRA for the model of Vespa GTS HPE.
Por supuesto, also puede descargarlo de nuestra tienda. O ahora mismo aqui:
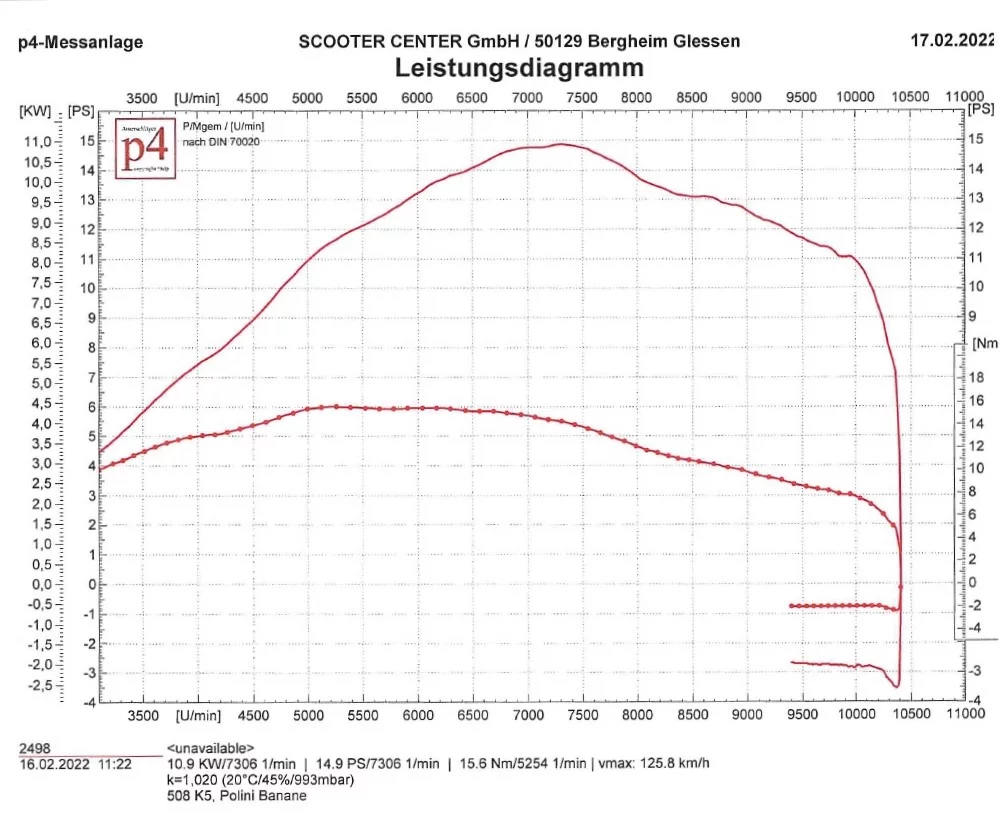
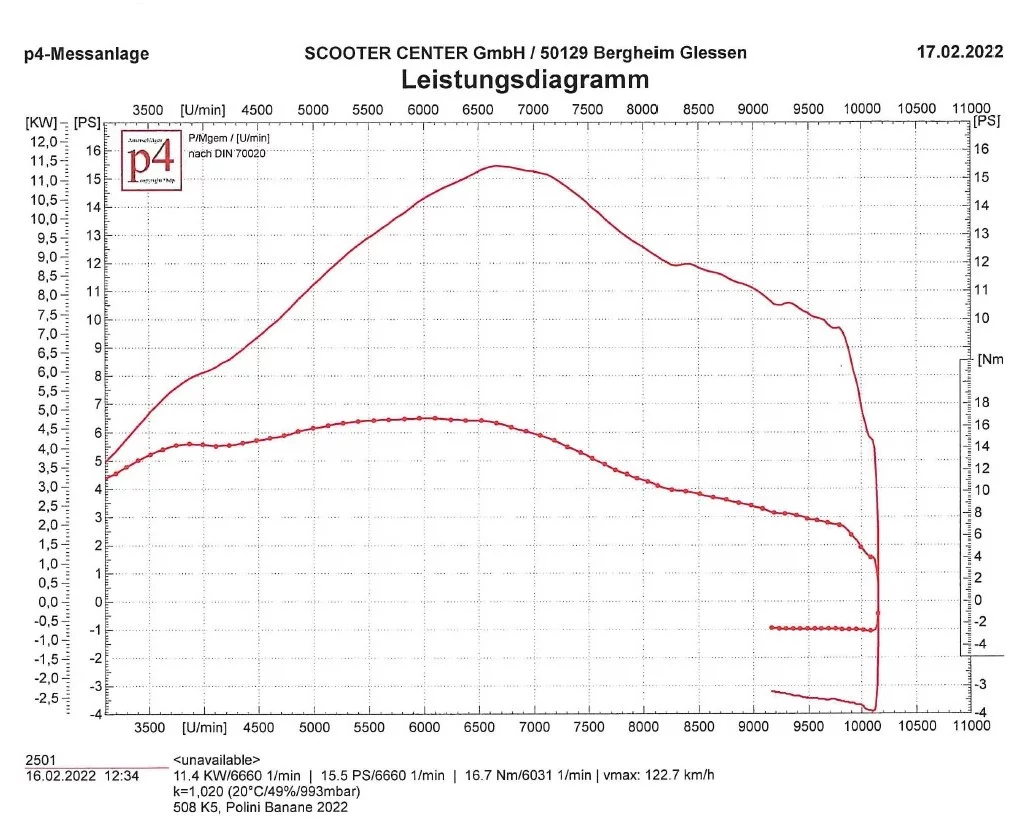
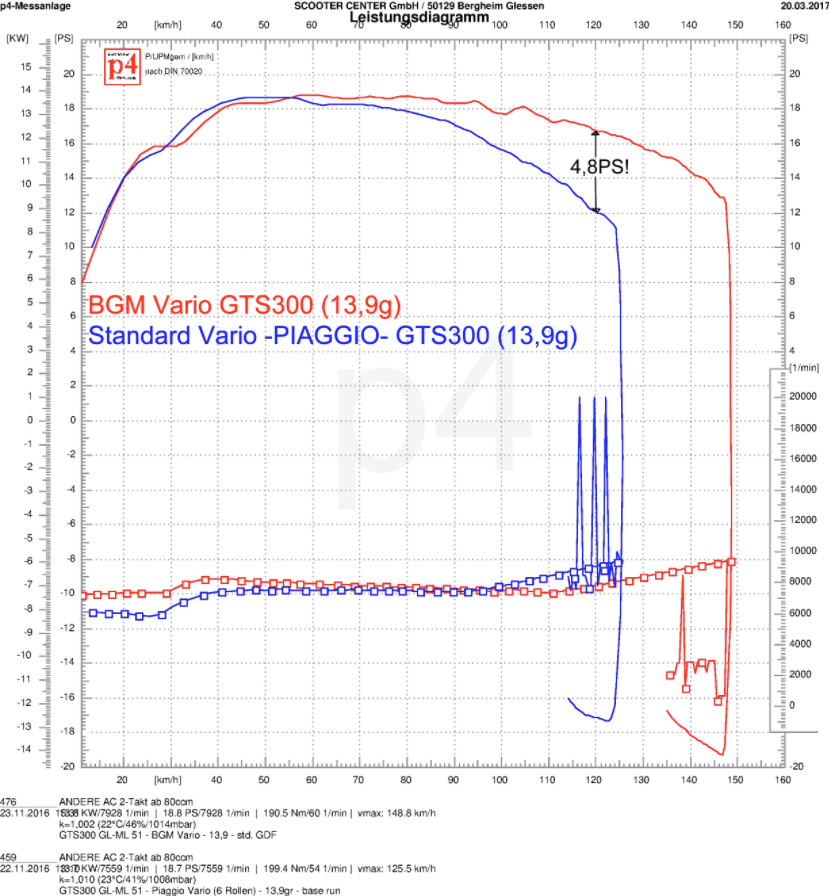
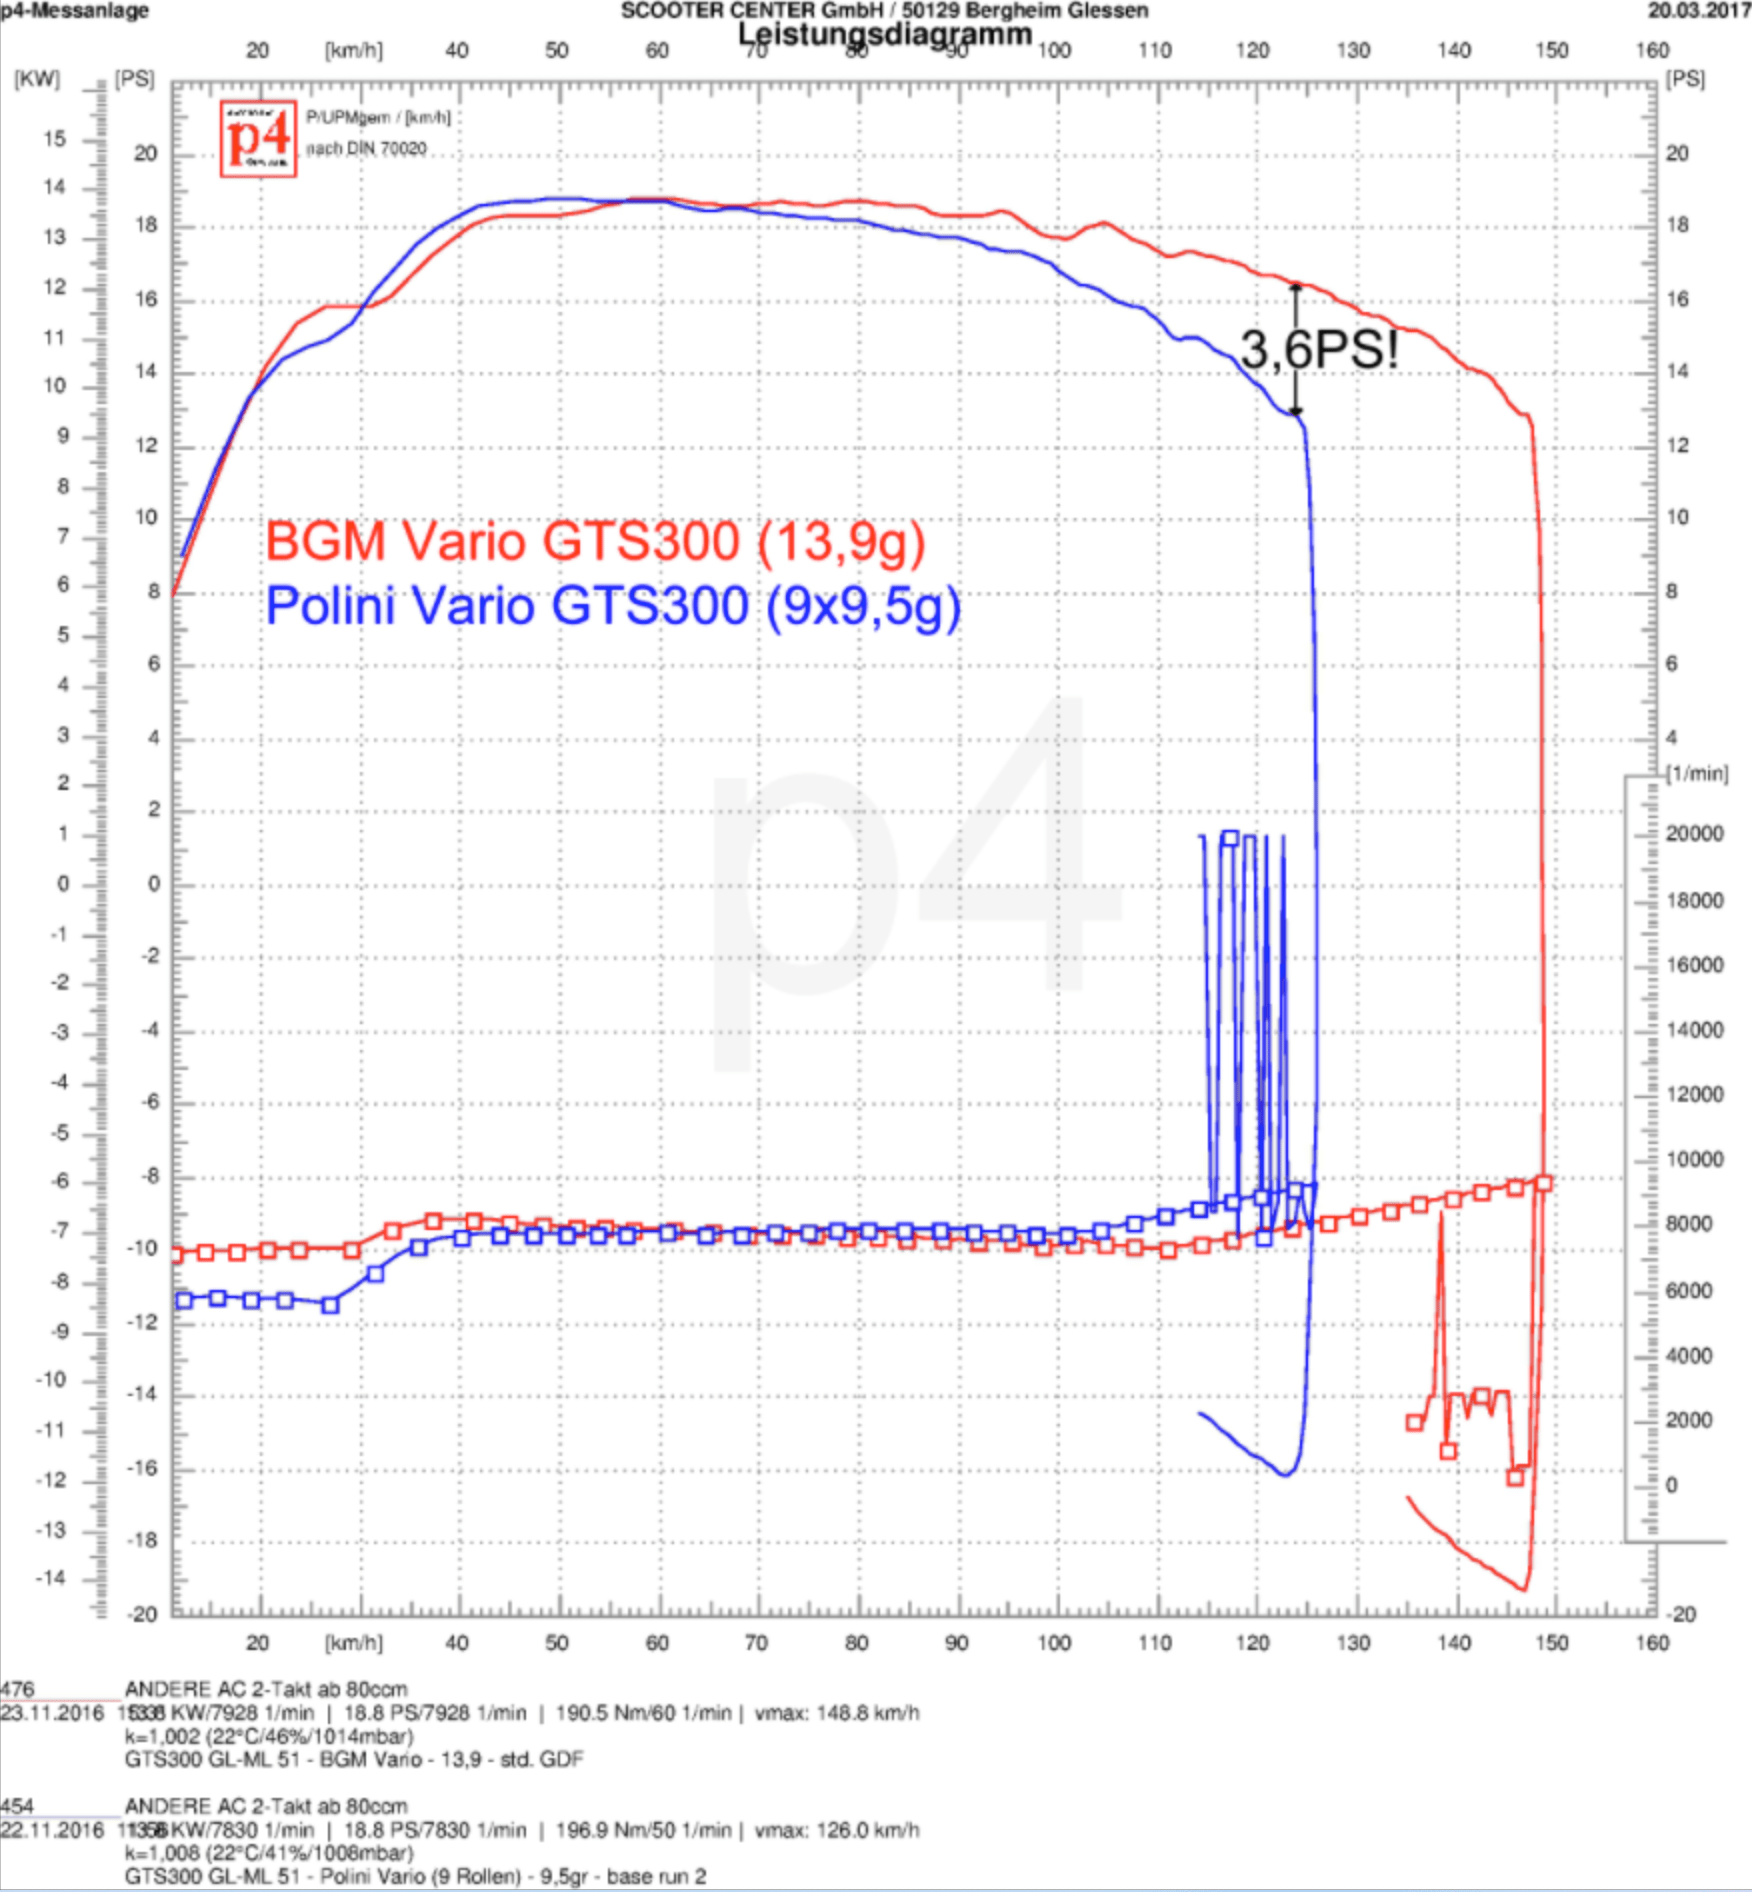
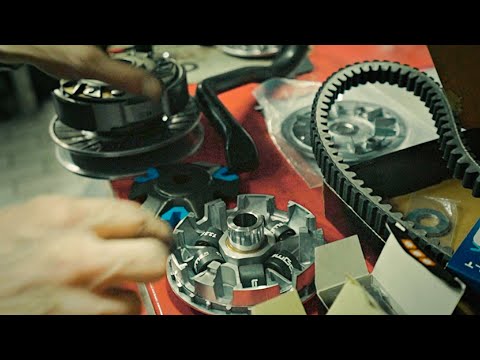
Nuestro bgm PRO Vario for the models Vespa GTS es very popular. En este bonito video Marc de Scooteria prueba el variador bgm PRO V2 and su Vespa GTS.
https://www.youtube.com/watch?v=wuVfCunEuWA 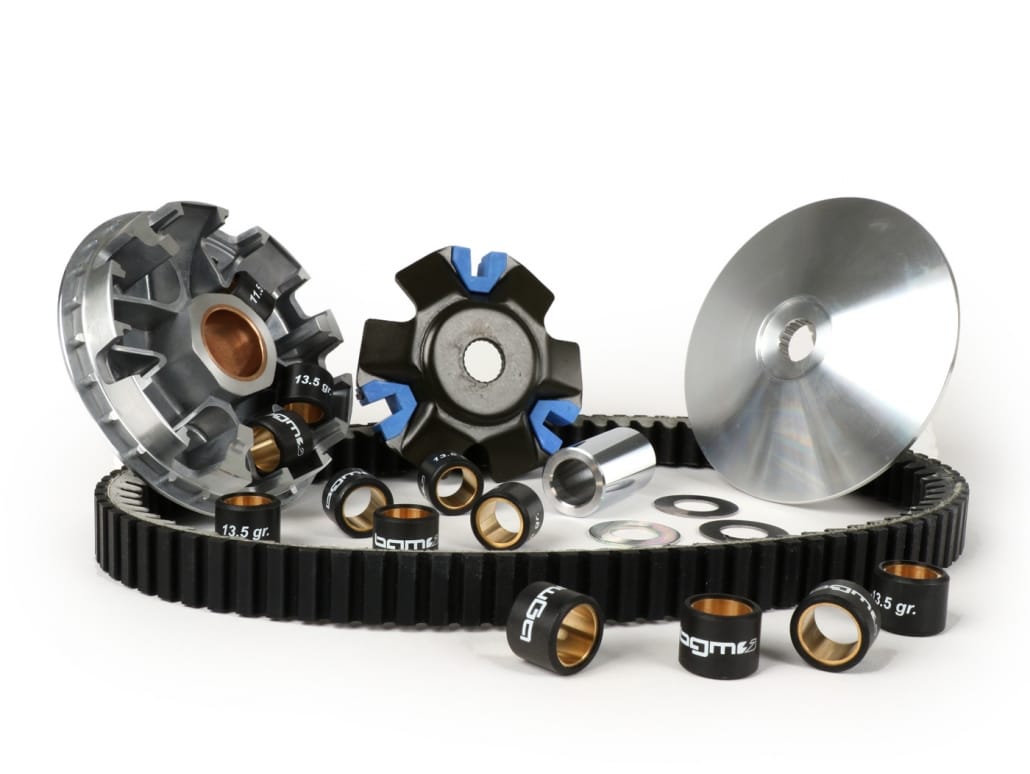
Installation of the variator bgm PRO V2 on the Vespa Gts 300 hpe Supertech. Marc de Scooteria está en Cafe Racer 69 y Micha del equipo de Cafe Racer 69 explica en 25 minutes muy simpático y detallado lo que hay que tener en cuenta al instalar un Vario. También hay consejos, como que puedes montar con el bgm Vario en tu nueva GTS el antiguo GTS vario cover, that a lot of things are better.
compare bgm PRO Vario kit aquí¿Aún no está seguro? En este video Marc prueba el variador en detalle y muestra el efecto del bgm PRO Sportvario durante una prueba de conducción.

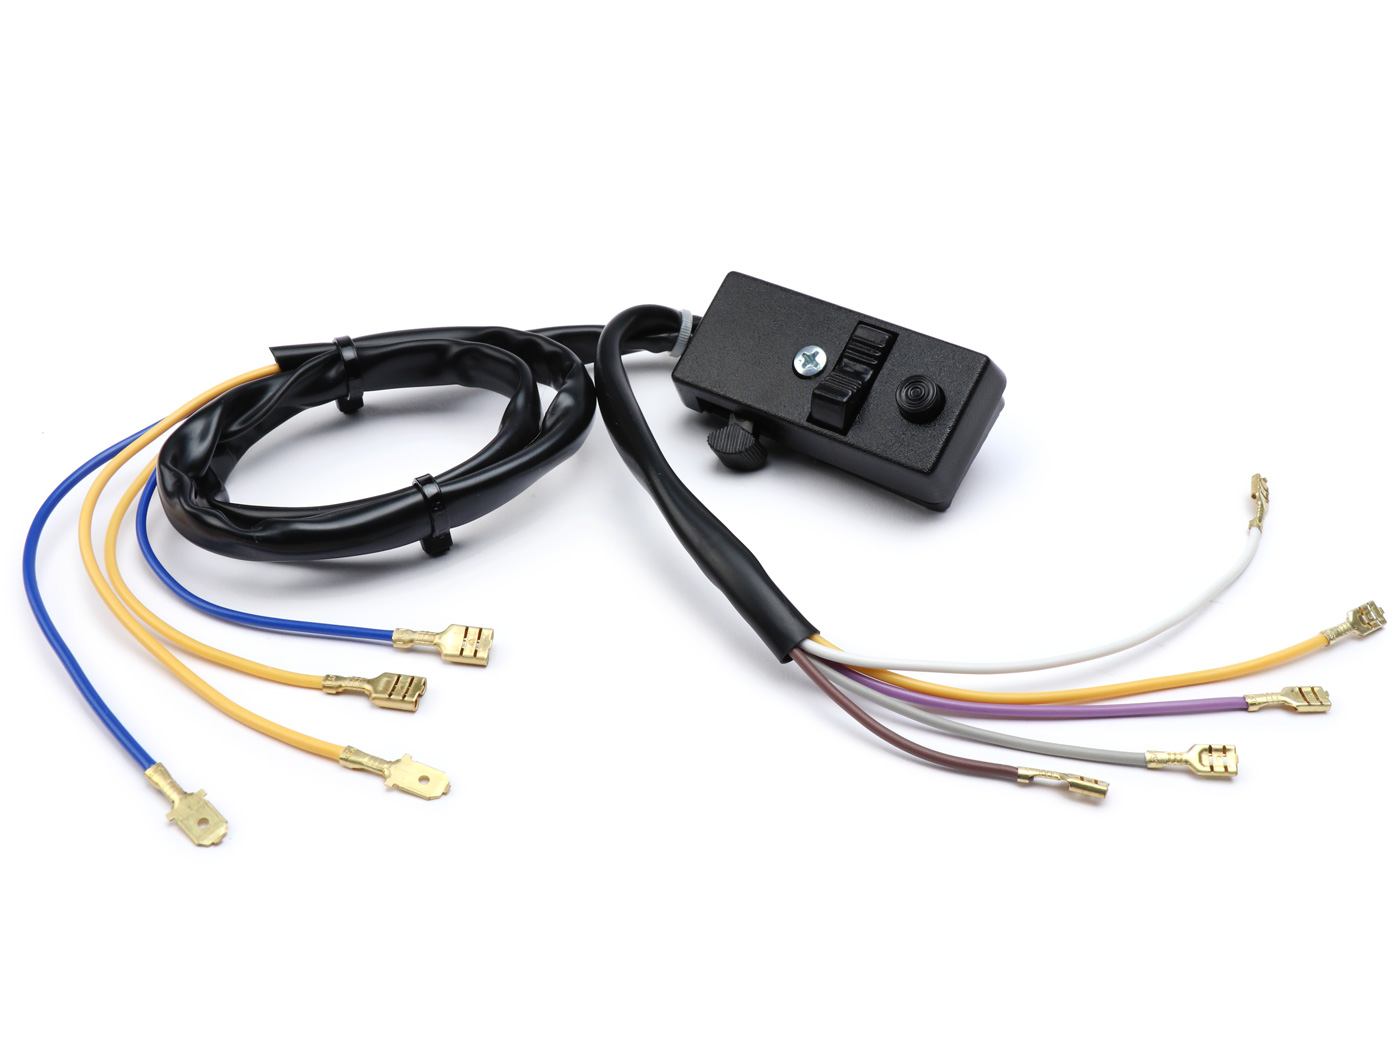
Un moderno sistema eléctrico sin batería en su scooter no destruye la apariencia, it una Ganancia invisible y economica en security y comfortBecause
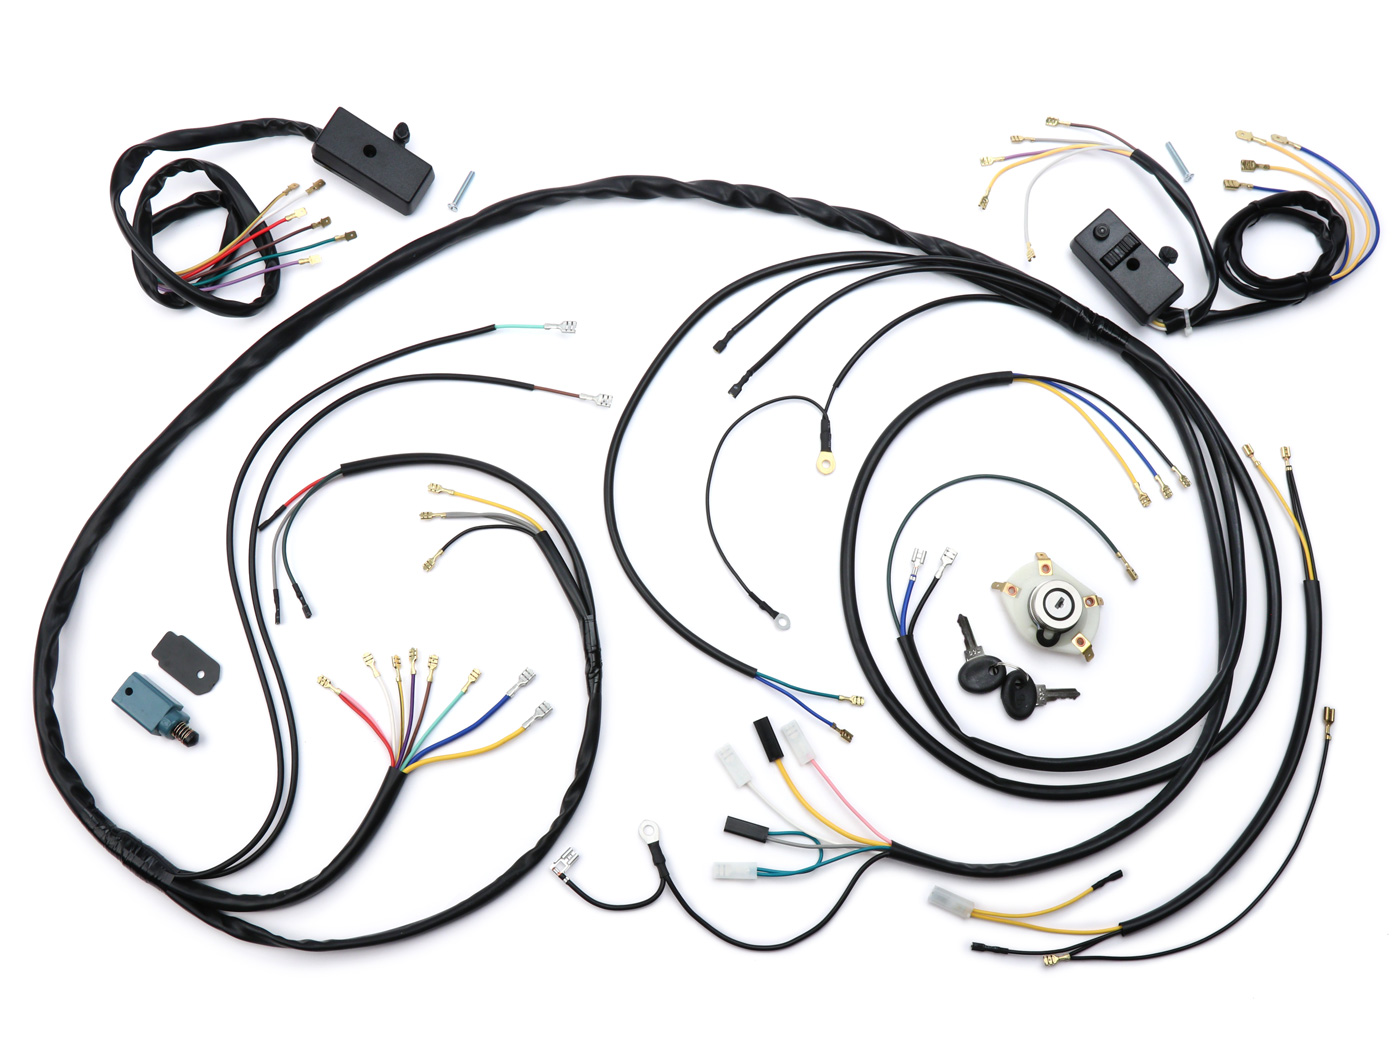
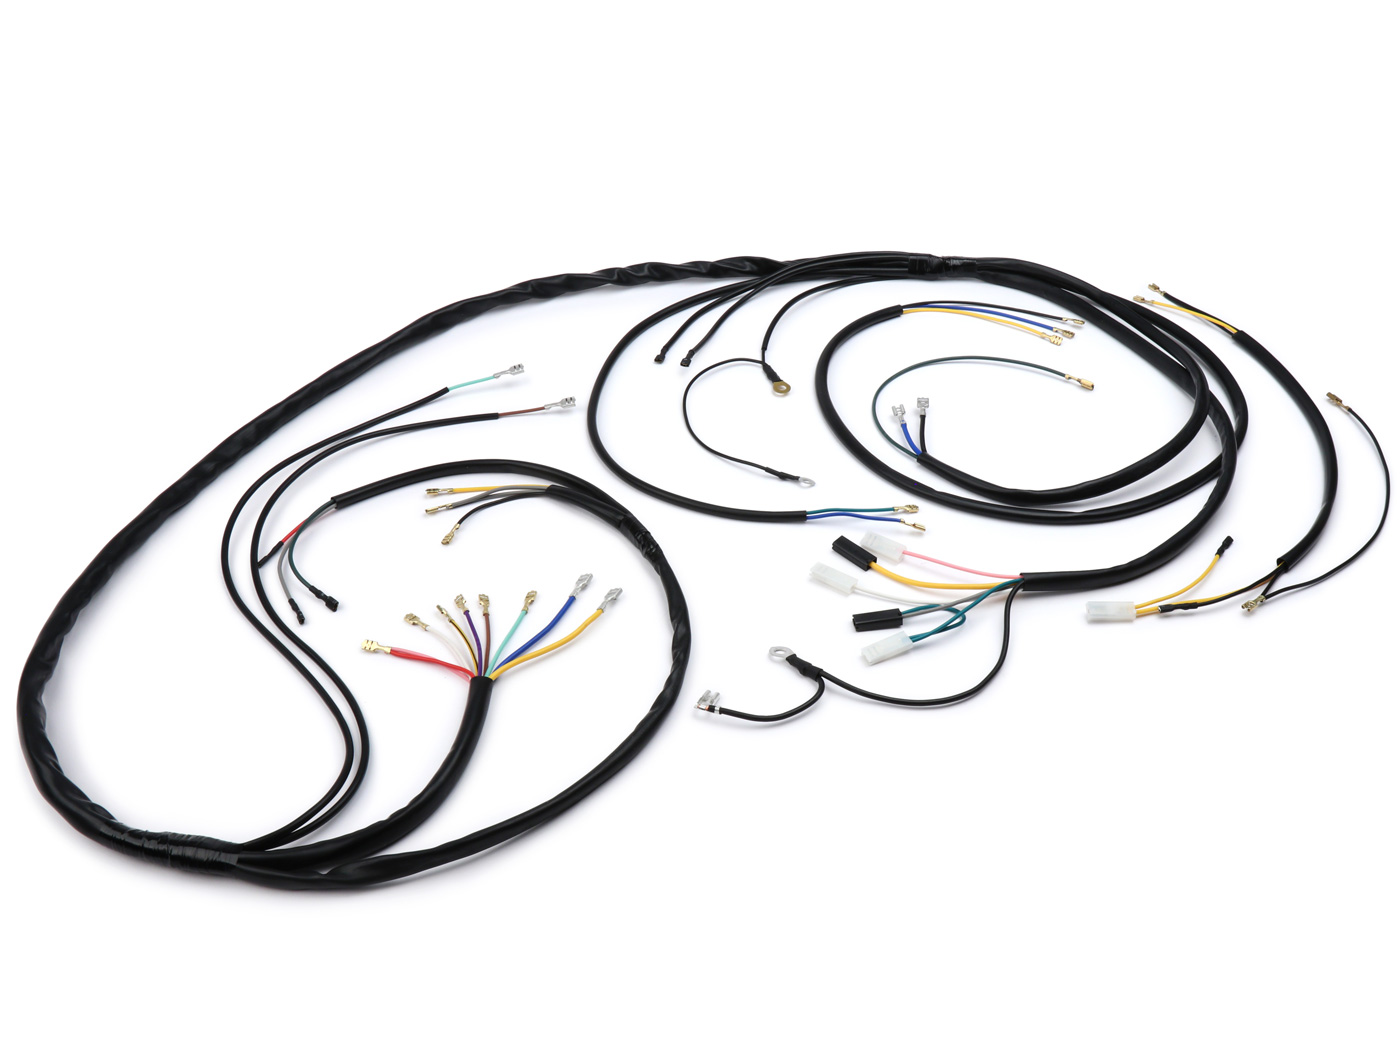
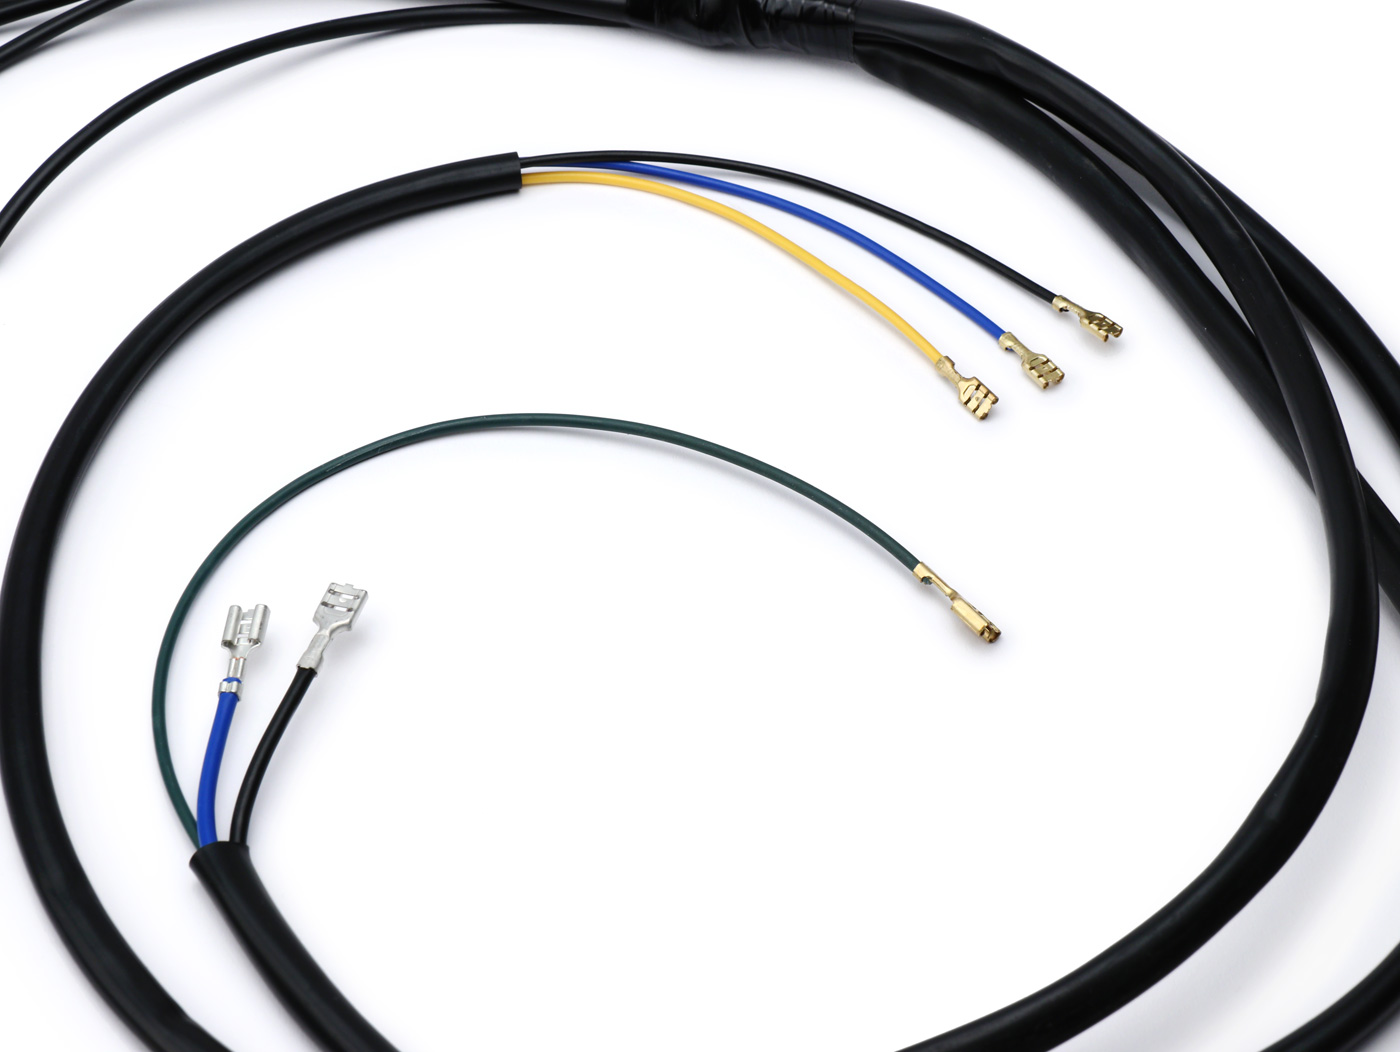
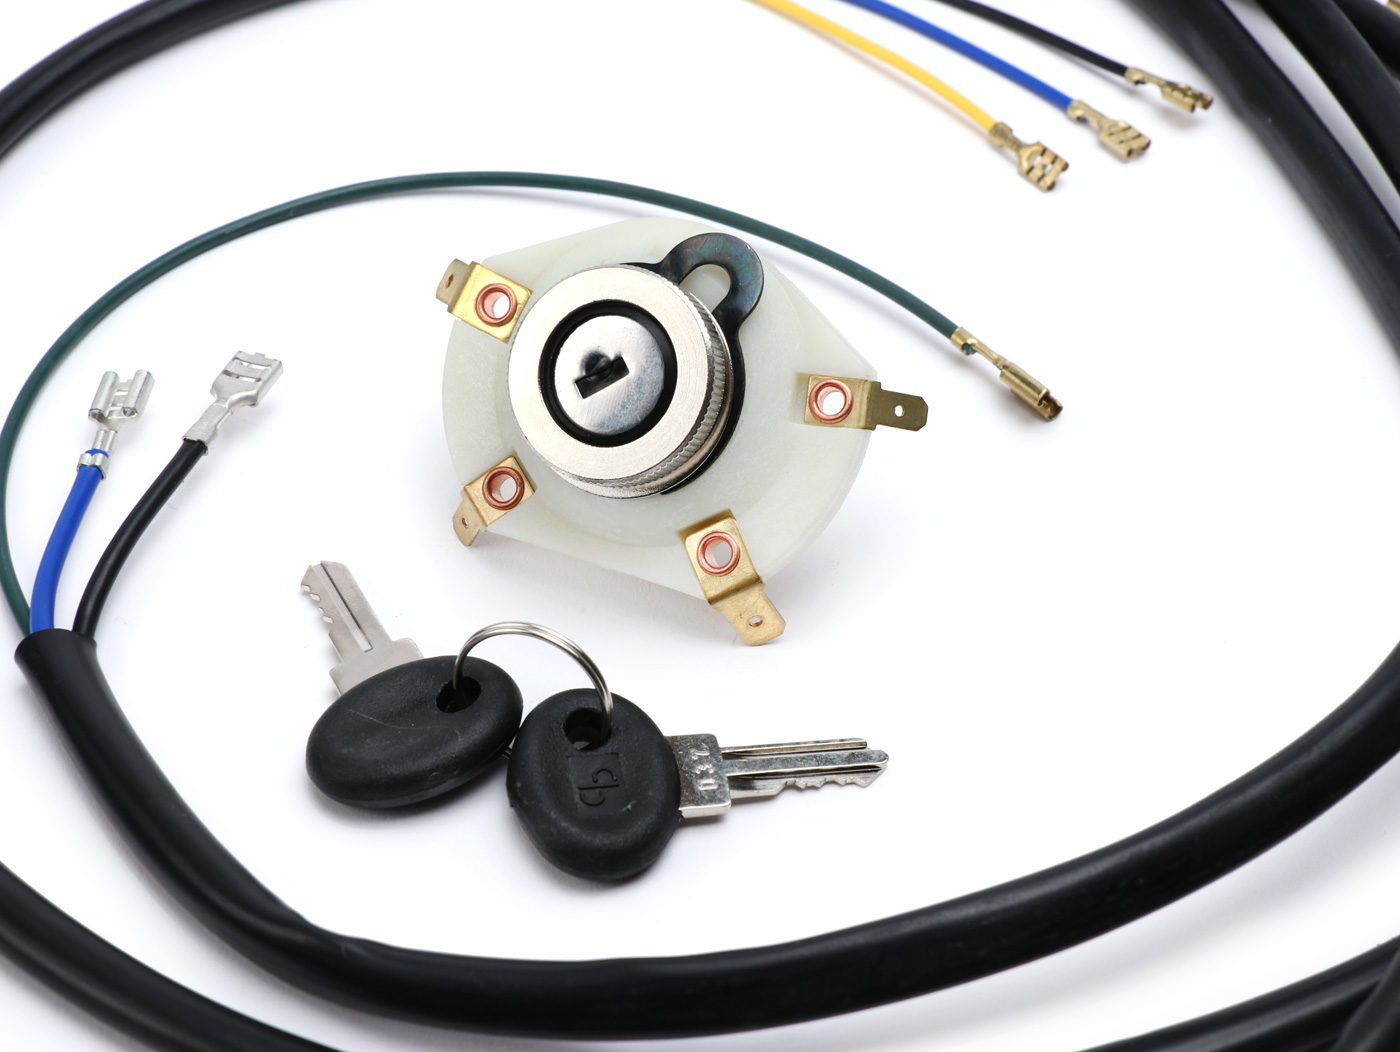
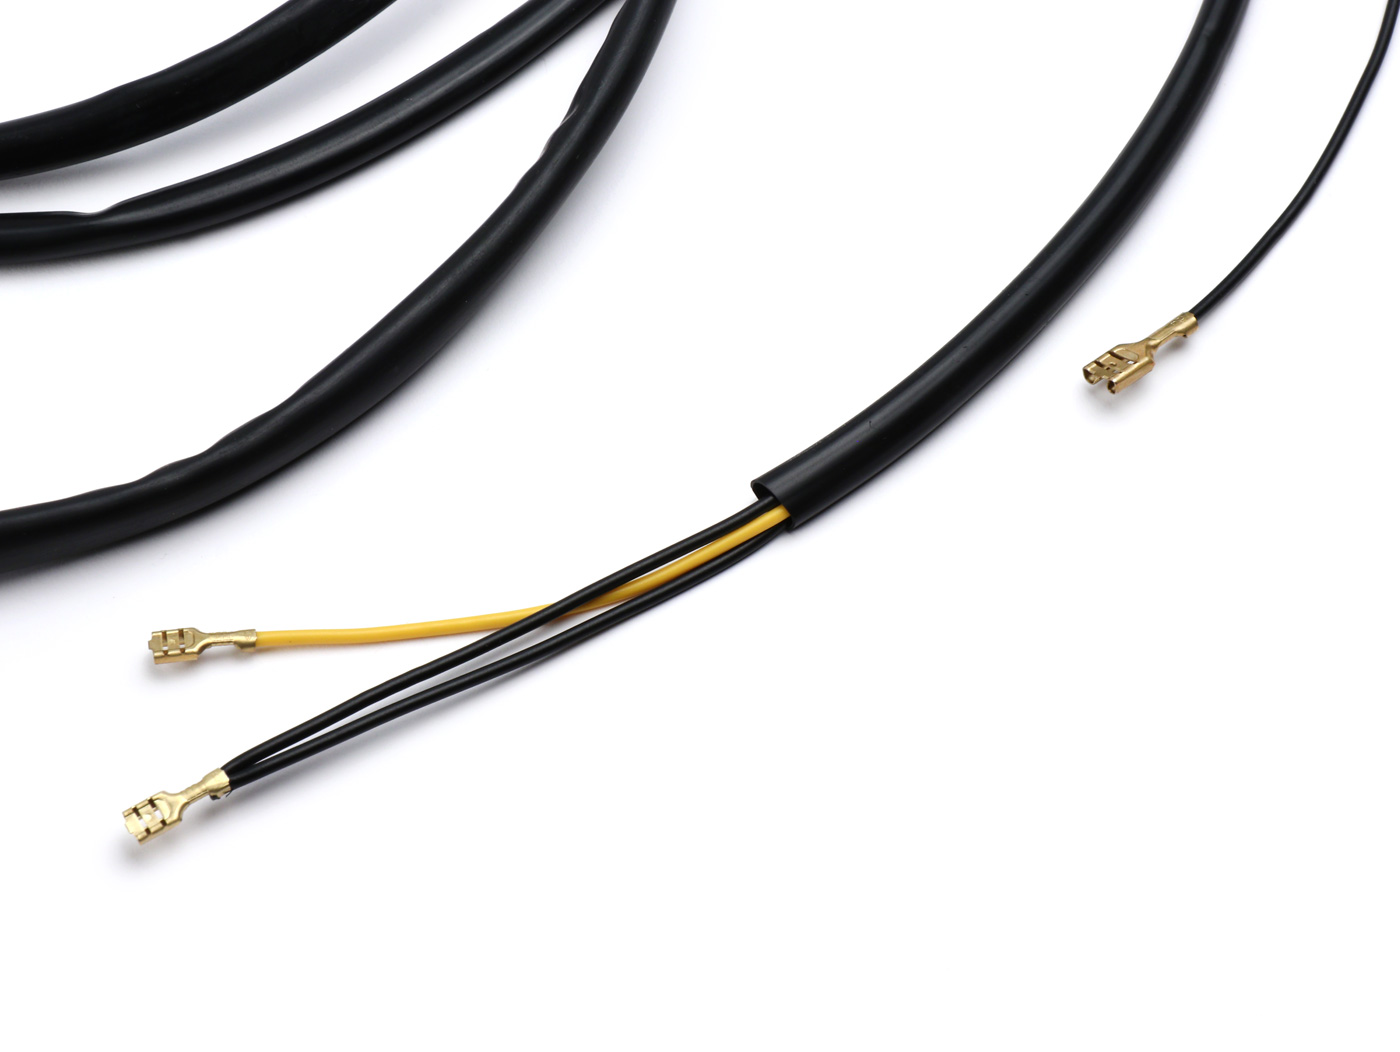
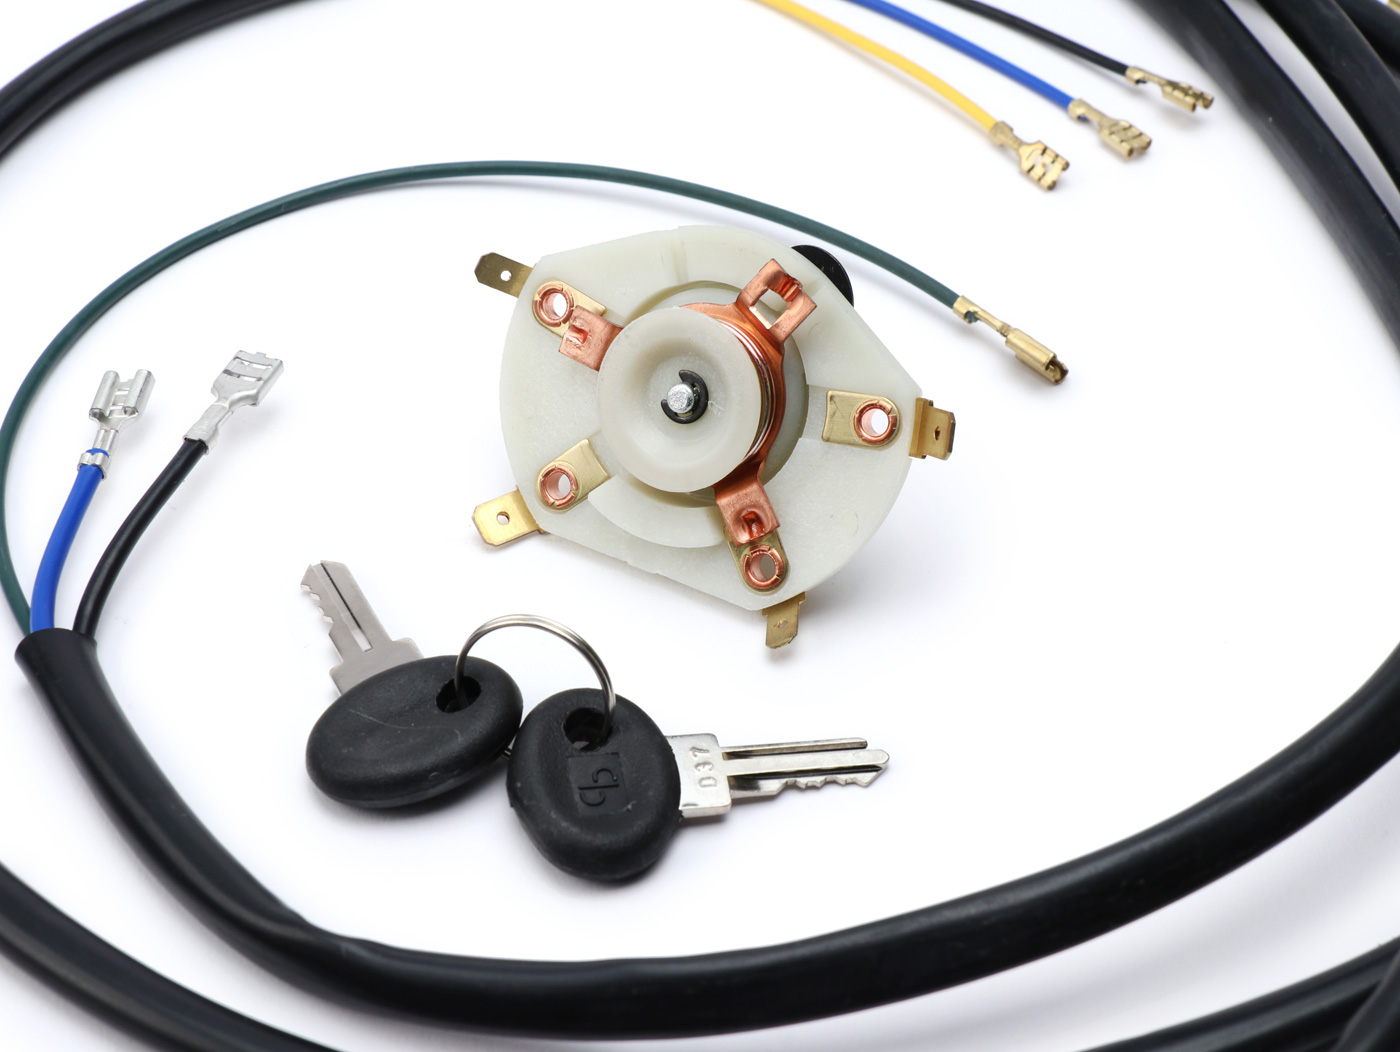
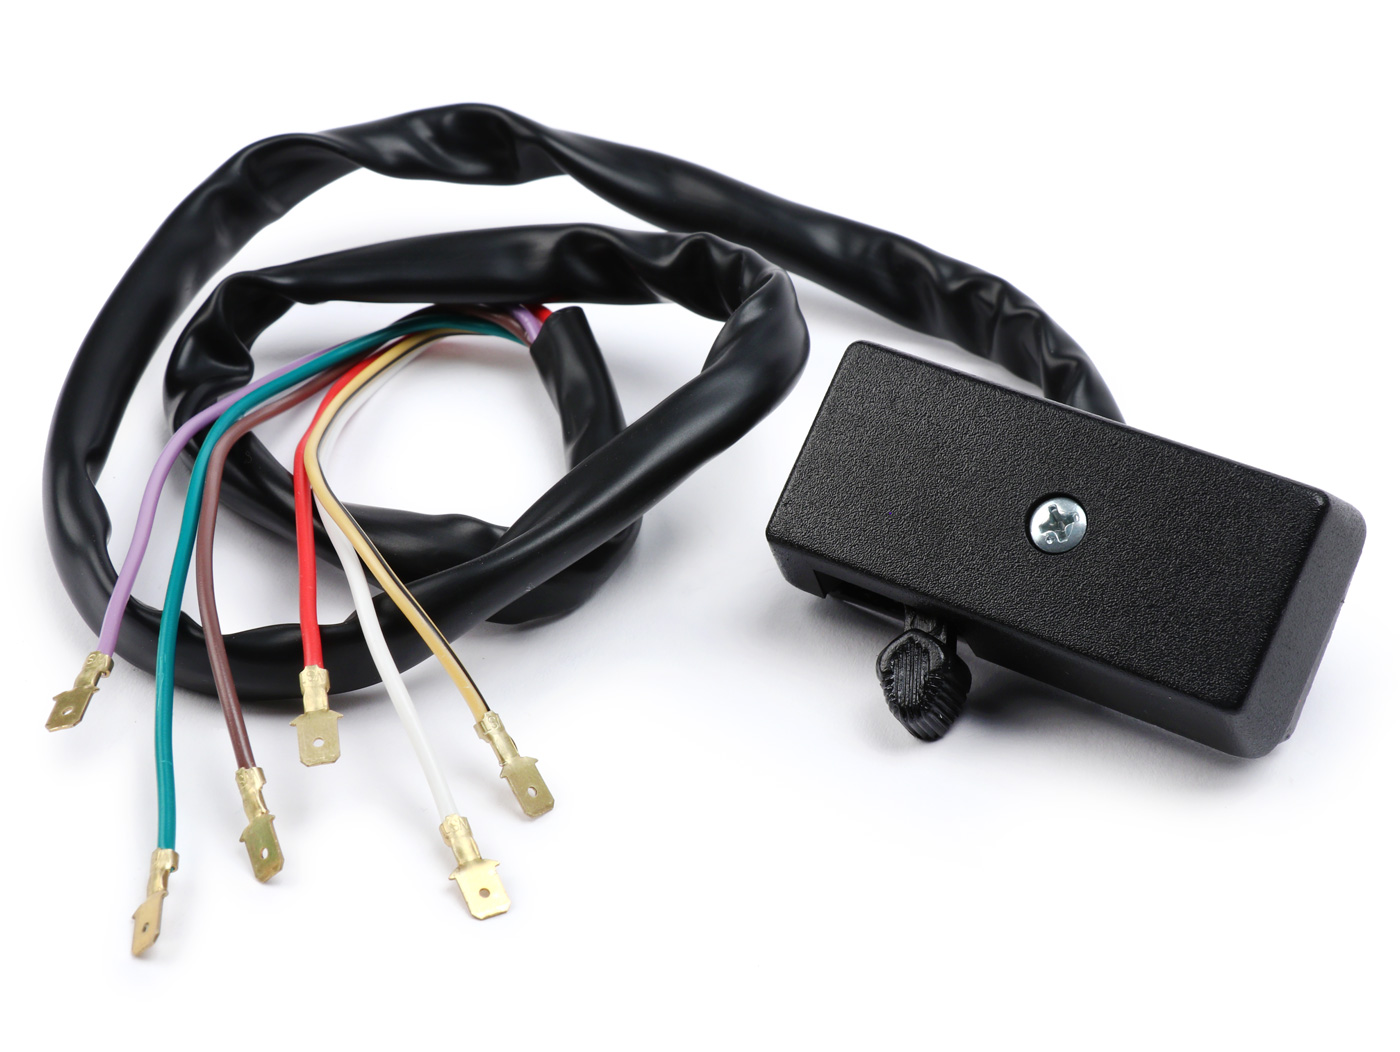
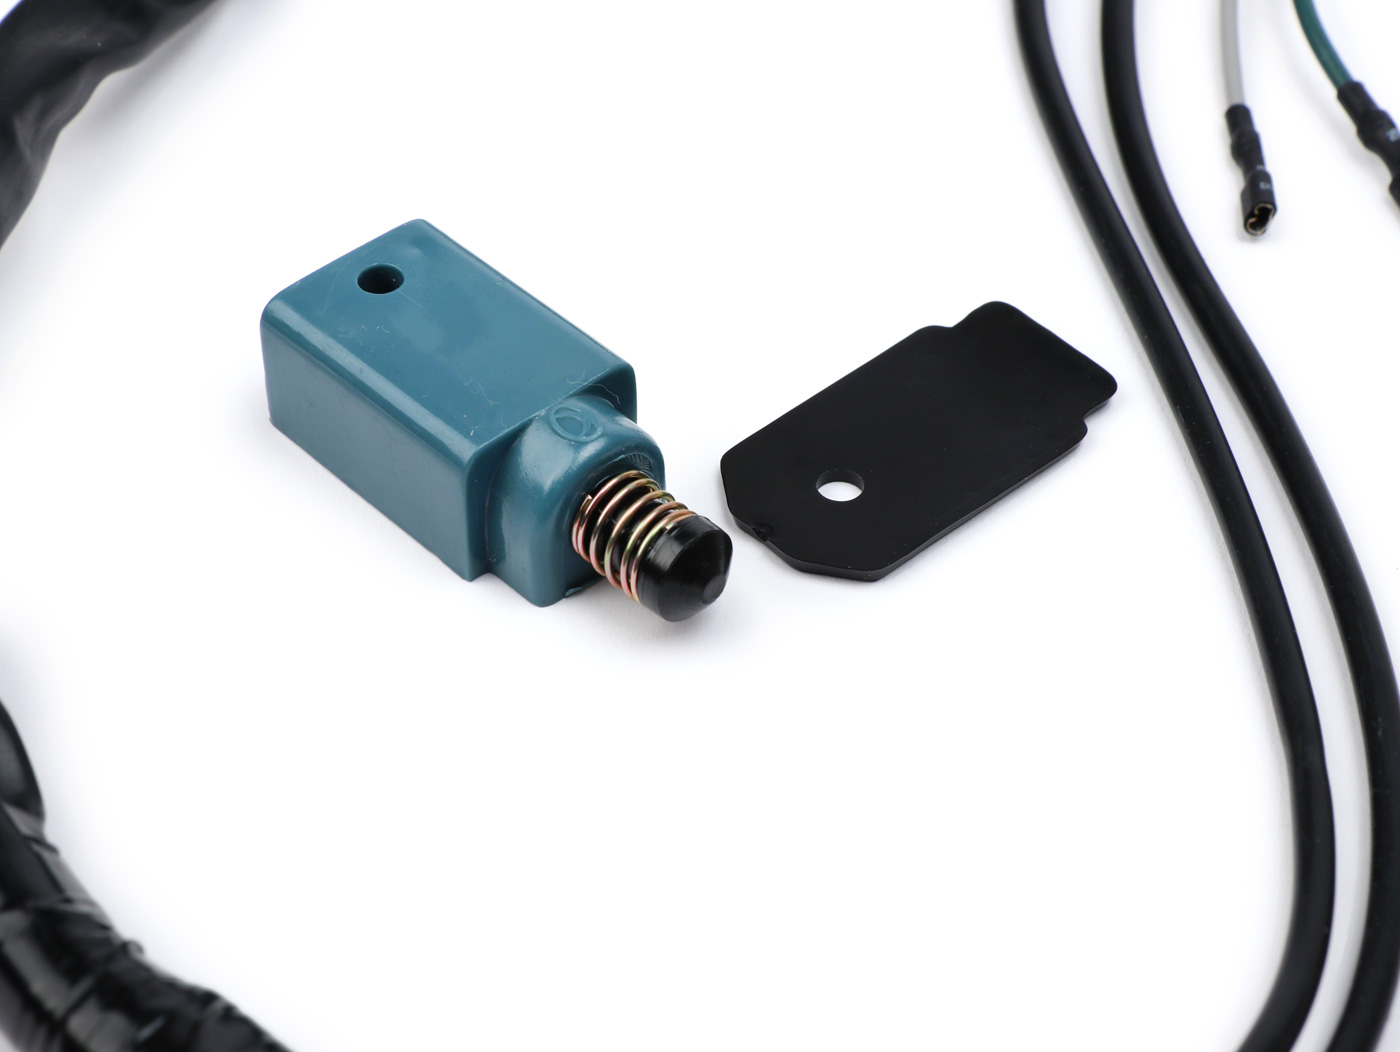
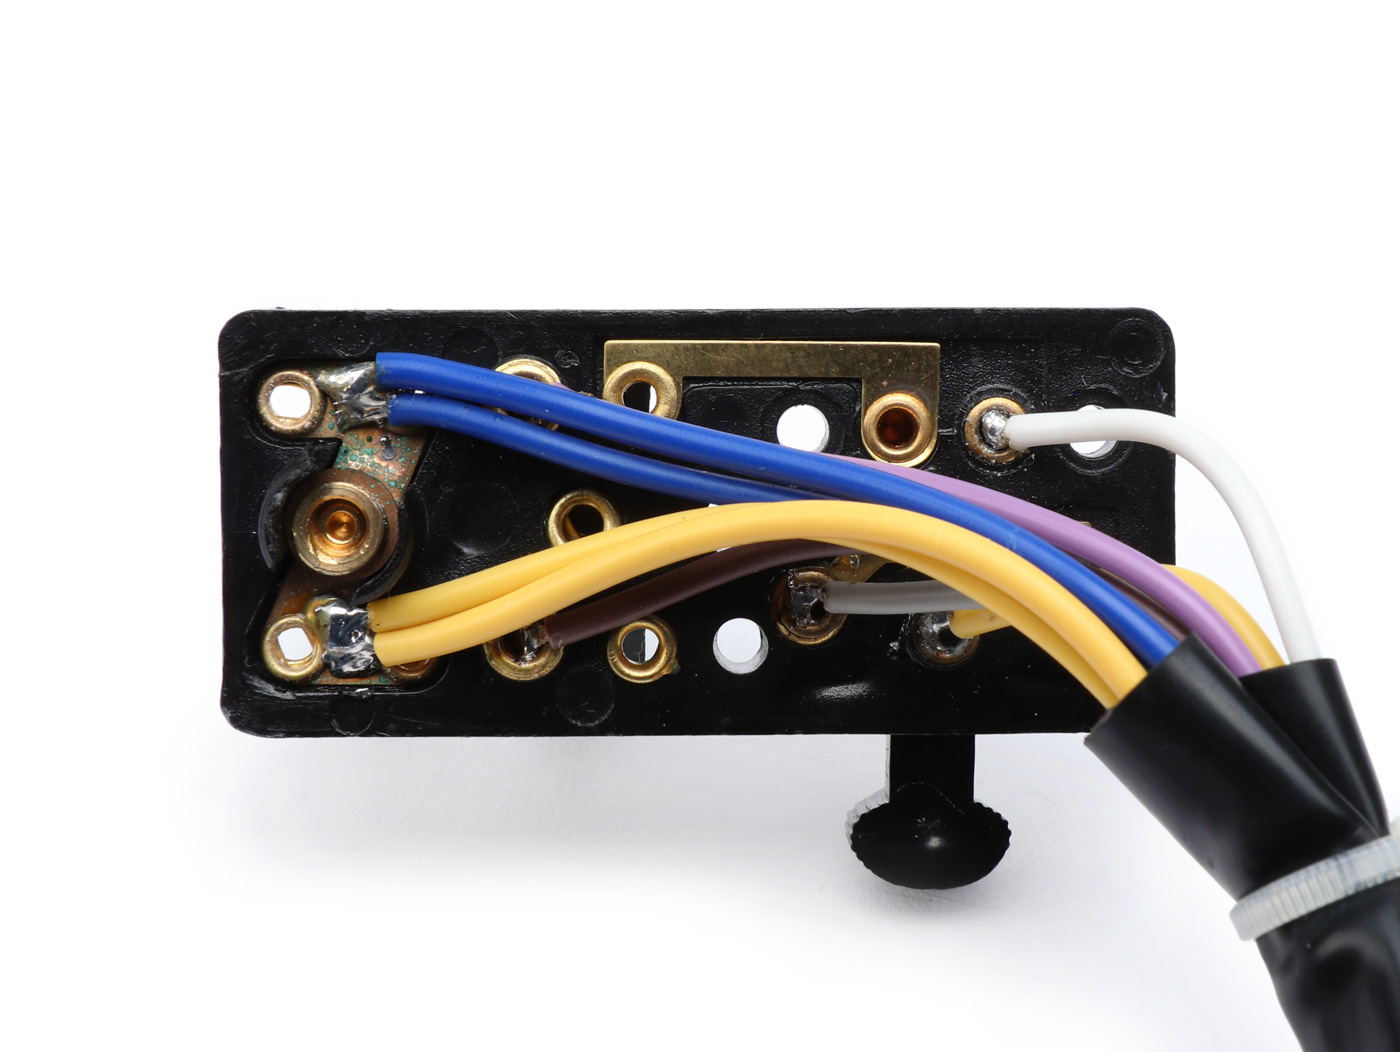
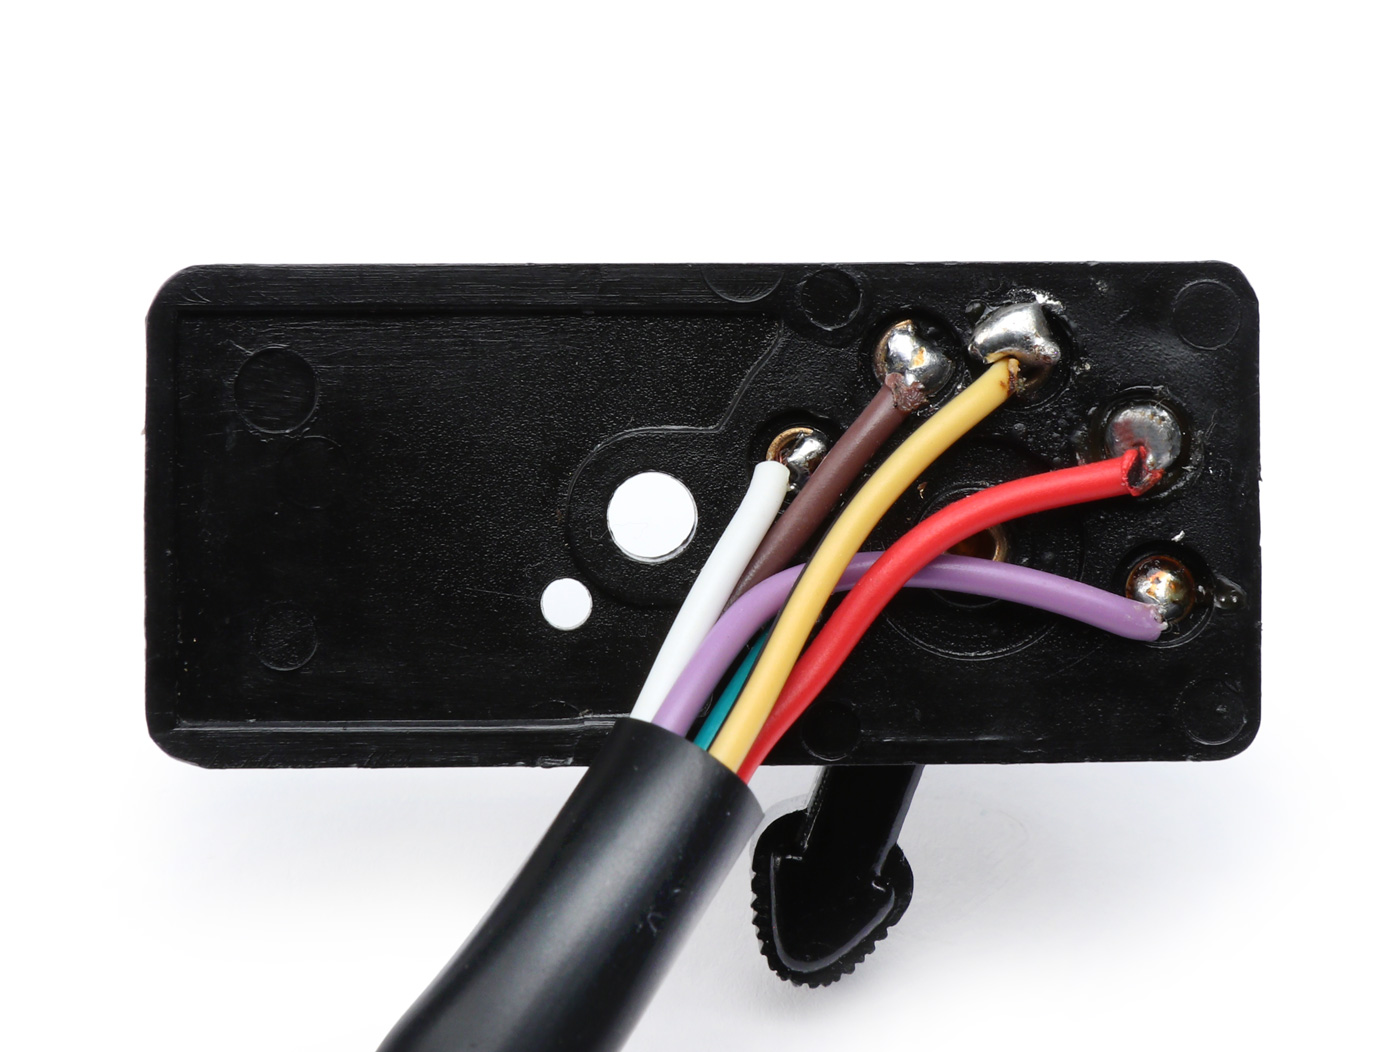
This type of cable is perfect convert Su Vespa PX, that has a batería de fábrica Piaggio, in a sistema eléctrico de a bordo moderno and sin mantenimiento, No battery. For this reason, we offer an economical and practical game with all the interruptors needed and the encendido lock(BGM6685KT).
Además, this is for a sustitución / restoration del mazo de cables PX en la version italiana for the modelos sin batería. Con esto los intermitentes, el claxon díe (llamado Schnarre) y todos los demás consumidores se alimentan directamente sobre la red de la placa de CA con corriente. A juego con esto está la placa base de encendido utilizada en estos vehículos con sólo 3 cables (modelos de encendido por contacto) or 5 cables (vehículos con encendido electrónico).
Para la conversion de su scooter al sistema eléctrico moderno, necesita las siguientes piezas y ahorrar en el futuro la battery, el invernaje y el cuidado / mantenimiento de la battery del vehículo
Para asegurarte de que todo funciona, deberías revisar esta lista y comprobar si tus antiguas piezas siguen estando bien. Si no es así, puede pedirlas directamente en nuestra tienda Vespa on través del enlace:
* 9512115? 9520072 + 9520074 / ** 9512027? 7675200 + 7675201
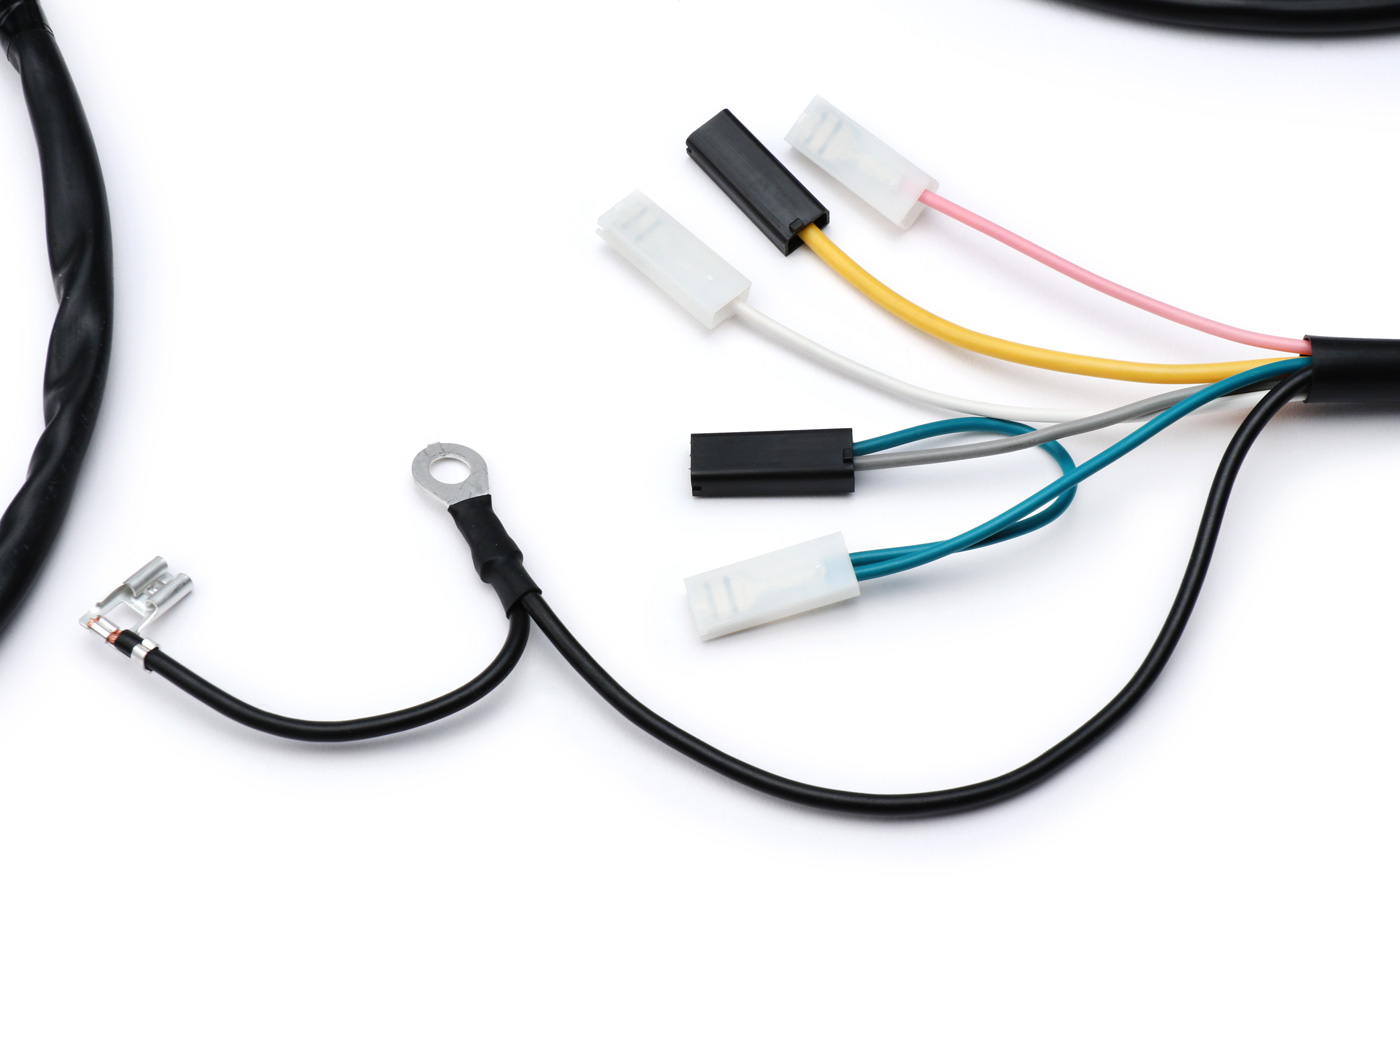
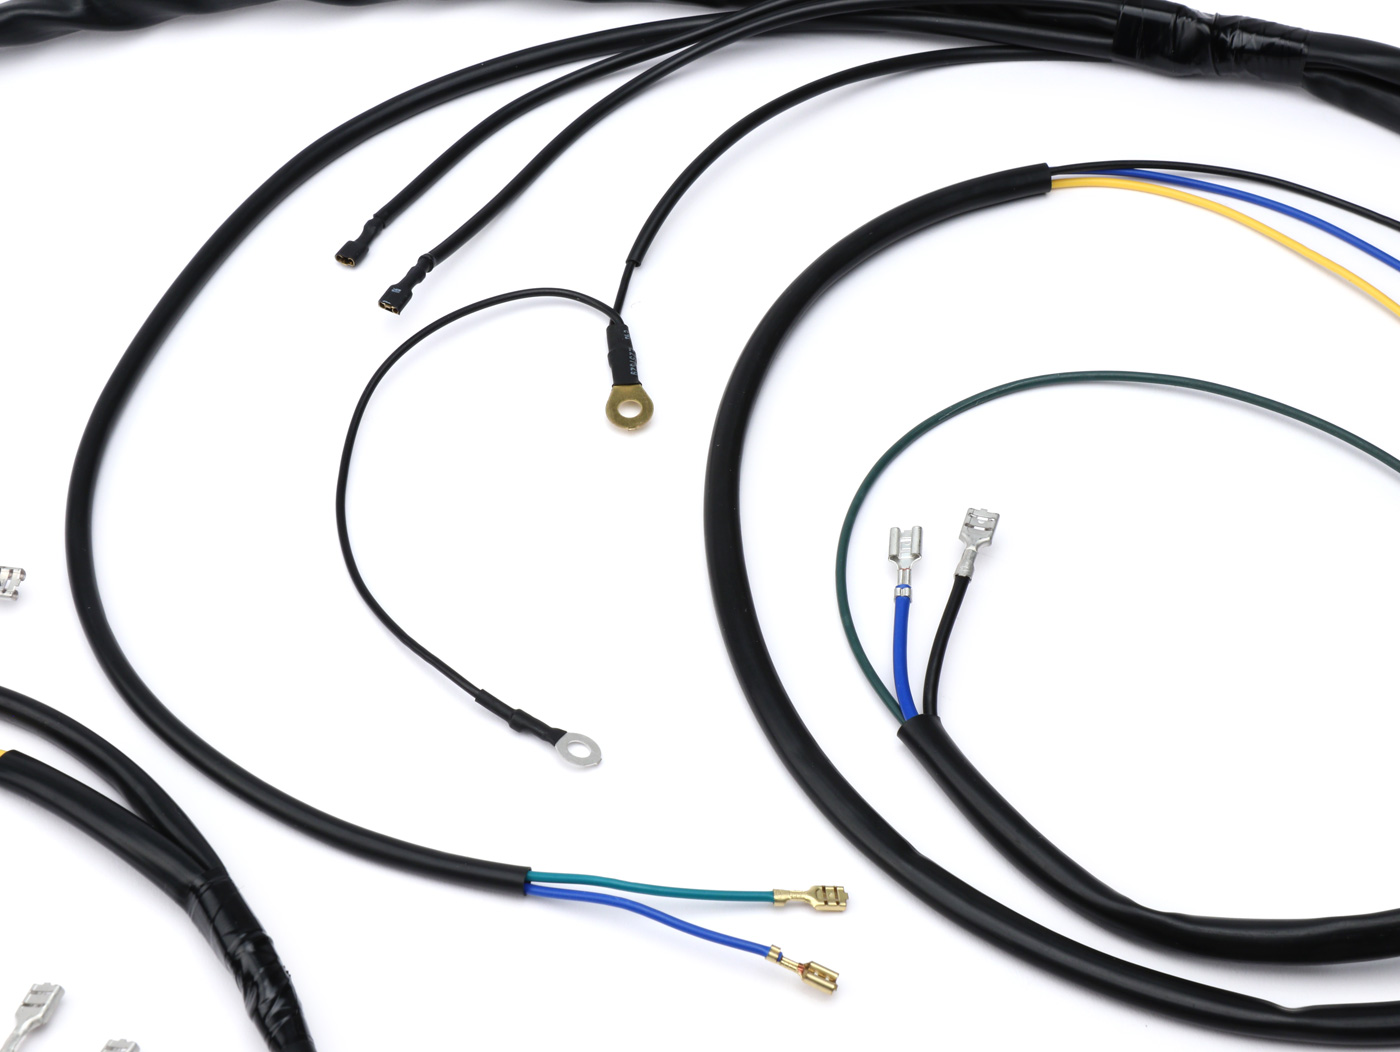
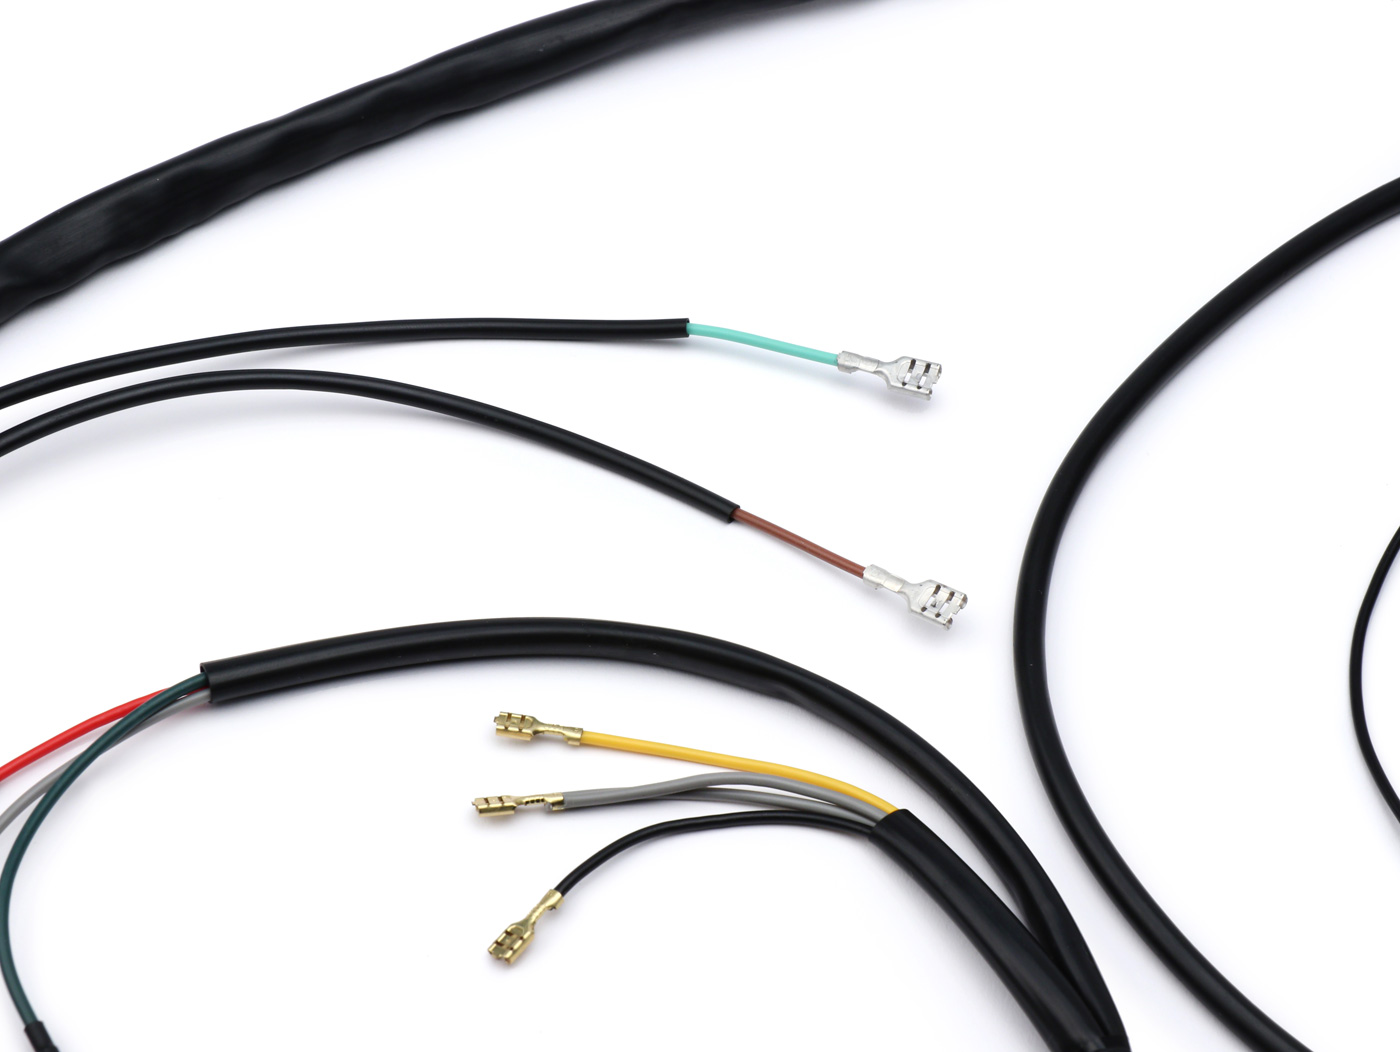
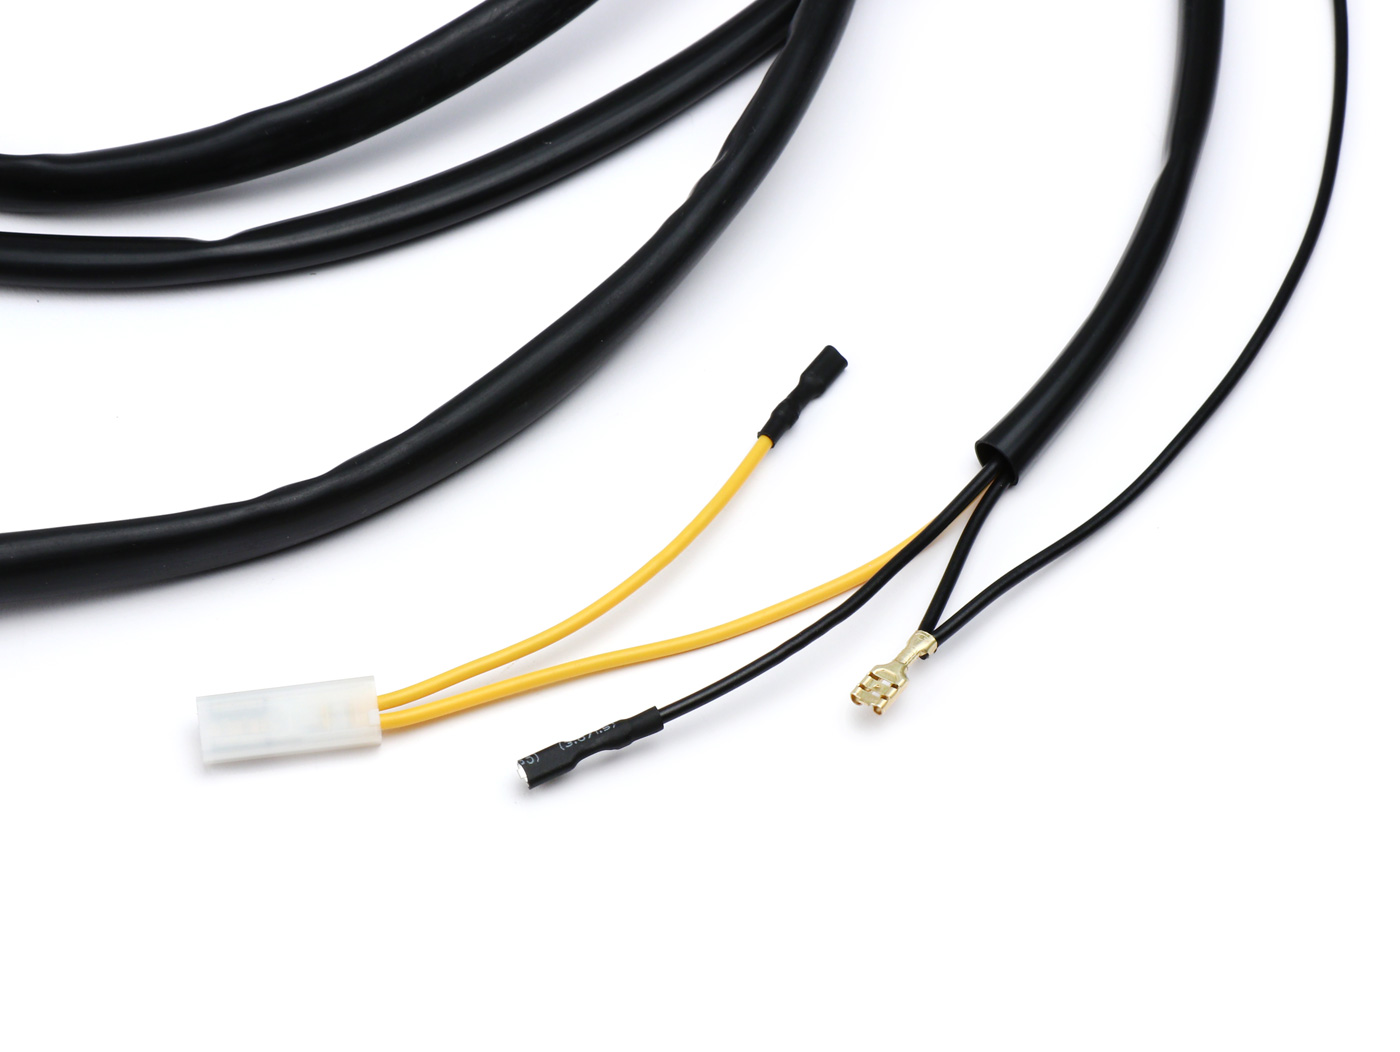
Este es un arnés de cableado PX-Lusso, tiene diferentes conectores, así que no se confunda allí. The principio basico de la instalación es el mismo y este video tutorial le ayudará a instalar y conectar el mazo de cables en la carrocería de su Vespa.
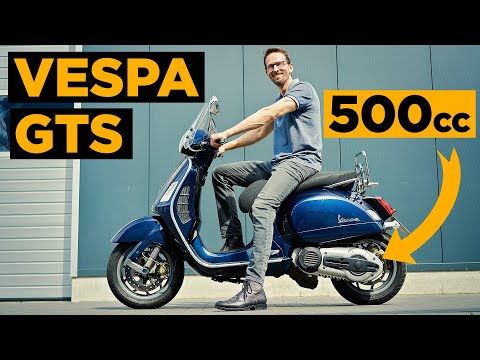
A Vespa GTS 500 is lo que muchos pilotos de GTS sueñan. Un ingeniero italiano ha reflexionado mucho y ha visualizado un modelo de 500cc del GTS, el video of Youtube has tenido mucho éxito. Todos los años se especula en la escena si Piaggio lo traerá este año. Ahora, Björn Dressler, de Berlin, se ha adelantado a Piaggio. Con su proyecto “La Mutata”, Björn lleva sus conversiones de hasta 44CV and 492ccm legalmente a la carretera. Antes de que saque la cartera: ¡esta conversión no se acaba de hacer! Tarda unos 4 meses y cuesta un poco más de lo que la mayoría de la gente lleva en la cartera: a partir de 15.000 euros. Marc de Scooteria te presenta el proyecto “La Mutata”, a Vespa GTS 500 transformada, see below
La conversion de una Vespa Gts a un engine Piaggio 500 con homologation alemana y Al menos 39 CV! En italiano significa “El Mutado” - permite un rendimiento de conducción con una Vespa GTS que this más allá de la de una 300. Todos los componentes instalados, como el chasis y los frenos, están adaptados al mayor par ya la potencia máxima significativamente mayor . Un acontecimiento absoluto para todos los aficionados al tuning of Vespa Pronto habrá una prueba de conducción con la Vespa Gts 500. Suscribete al Canal de Scooteria and do not miss anything!
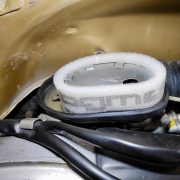
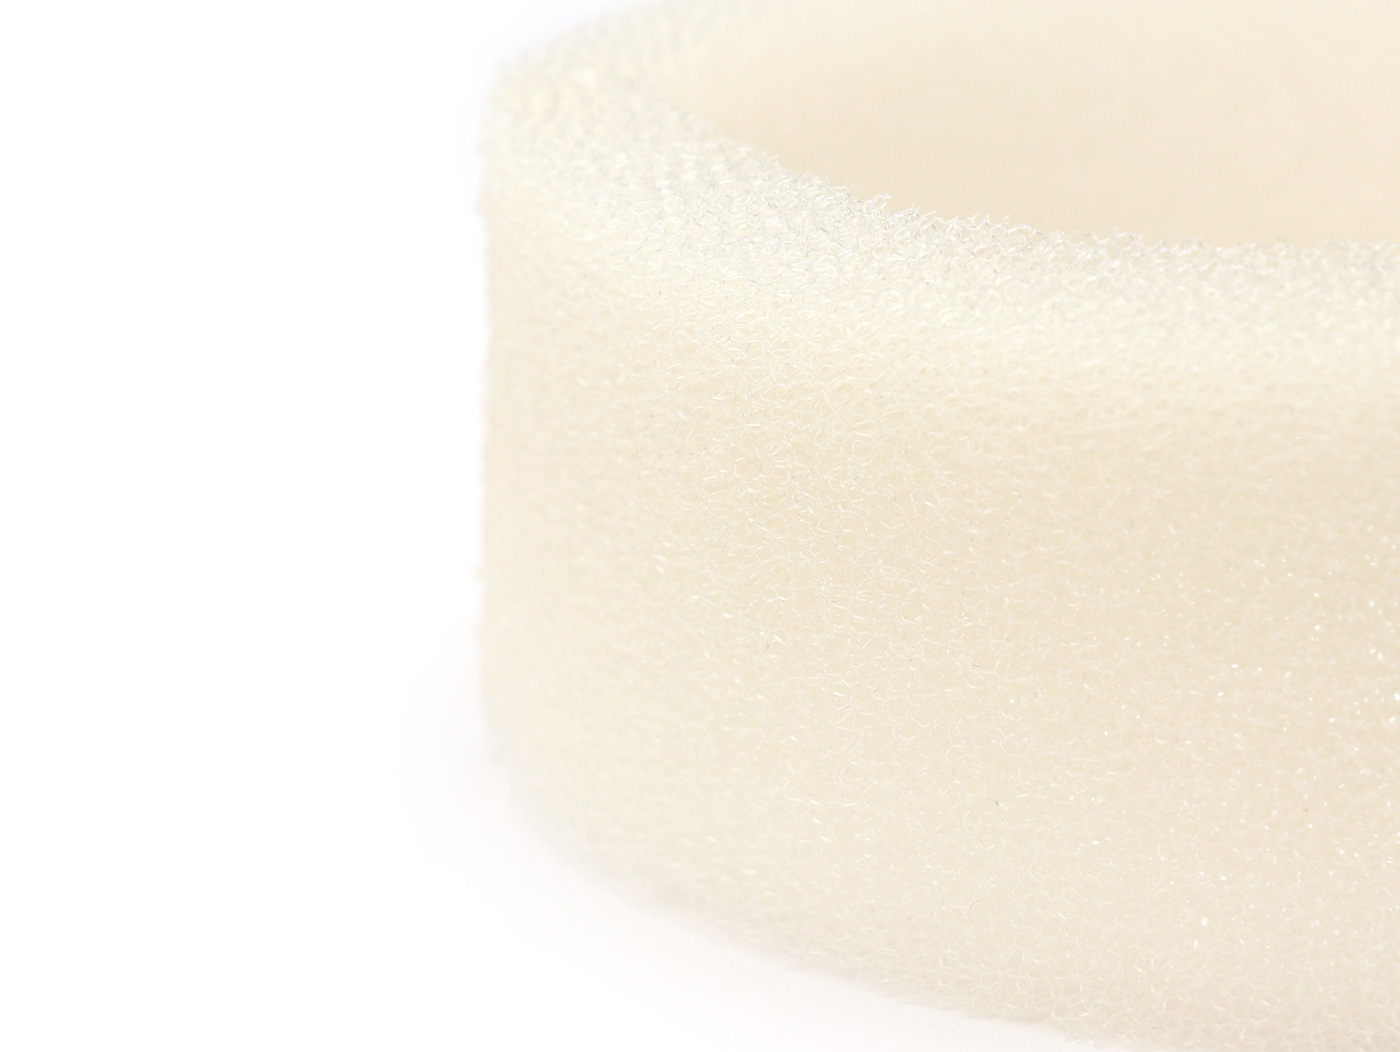
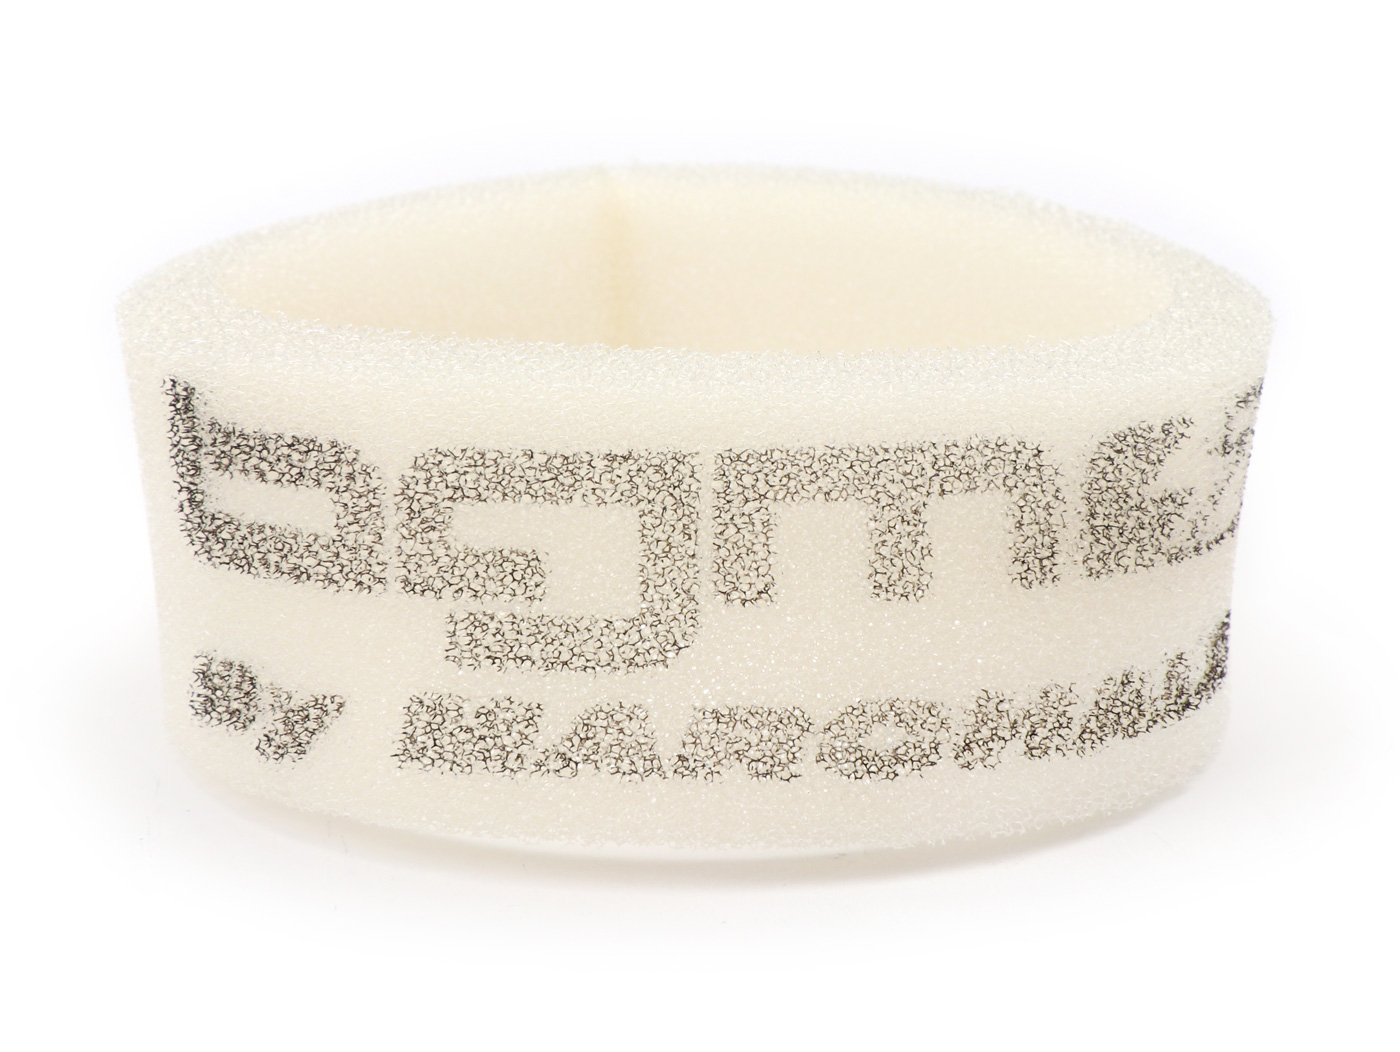
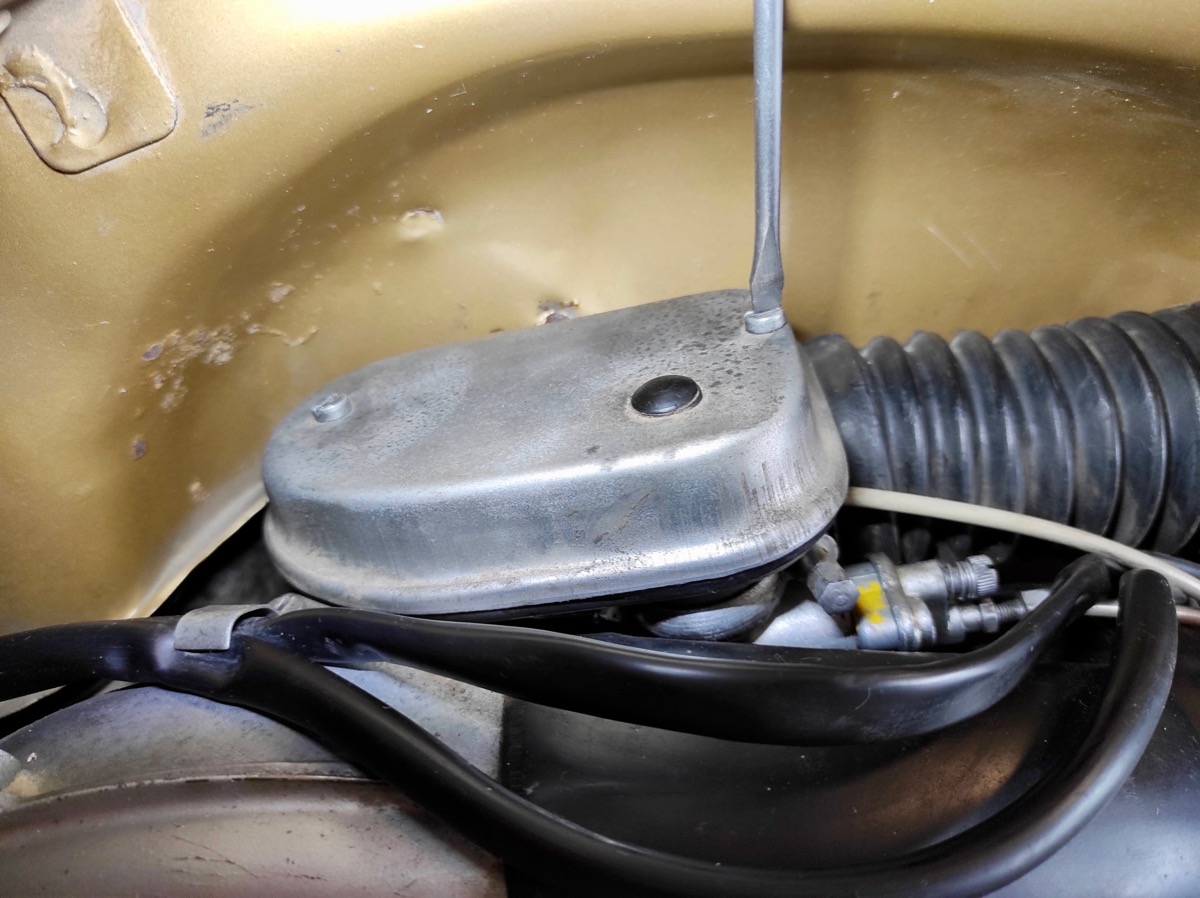
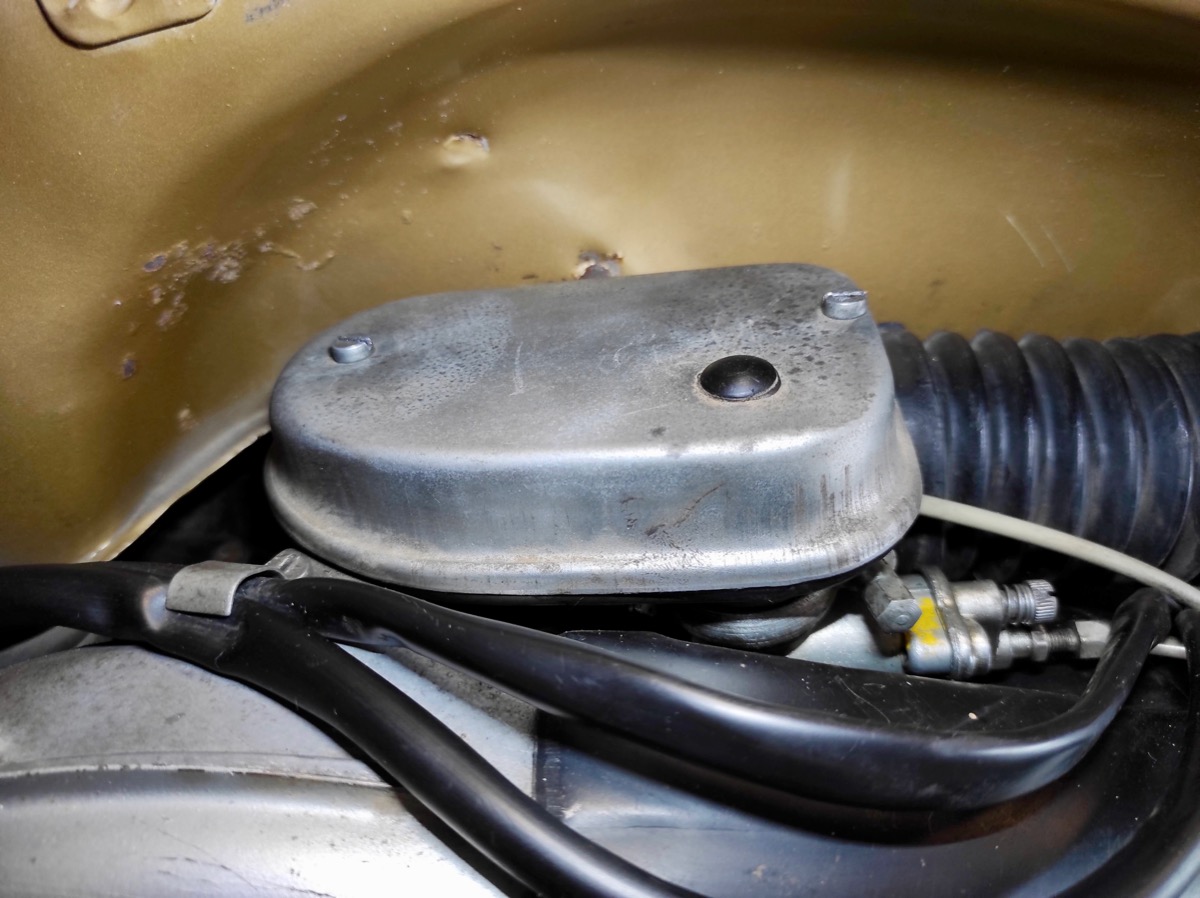
Many models of Motovespa Largeframe tien instalados los mismos filtros de aire. A menudo, this importante pieza para la protección del motor falta o this en un estado no utilizable. Por lo tanto, hemos fabricado un Insert the air filter of high quality for the modelos de Vespa Largeframe con licencia espanola.
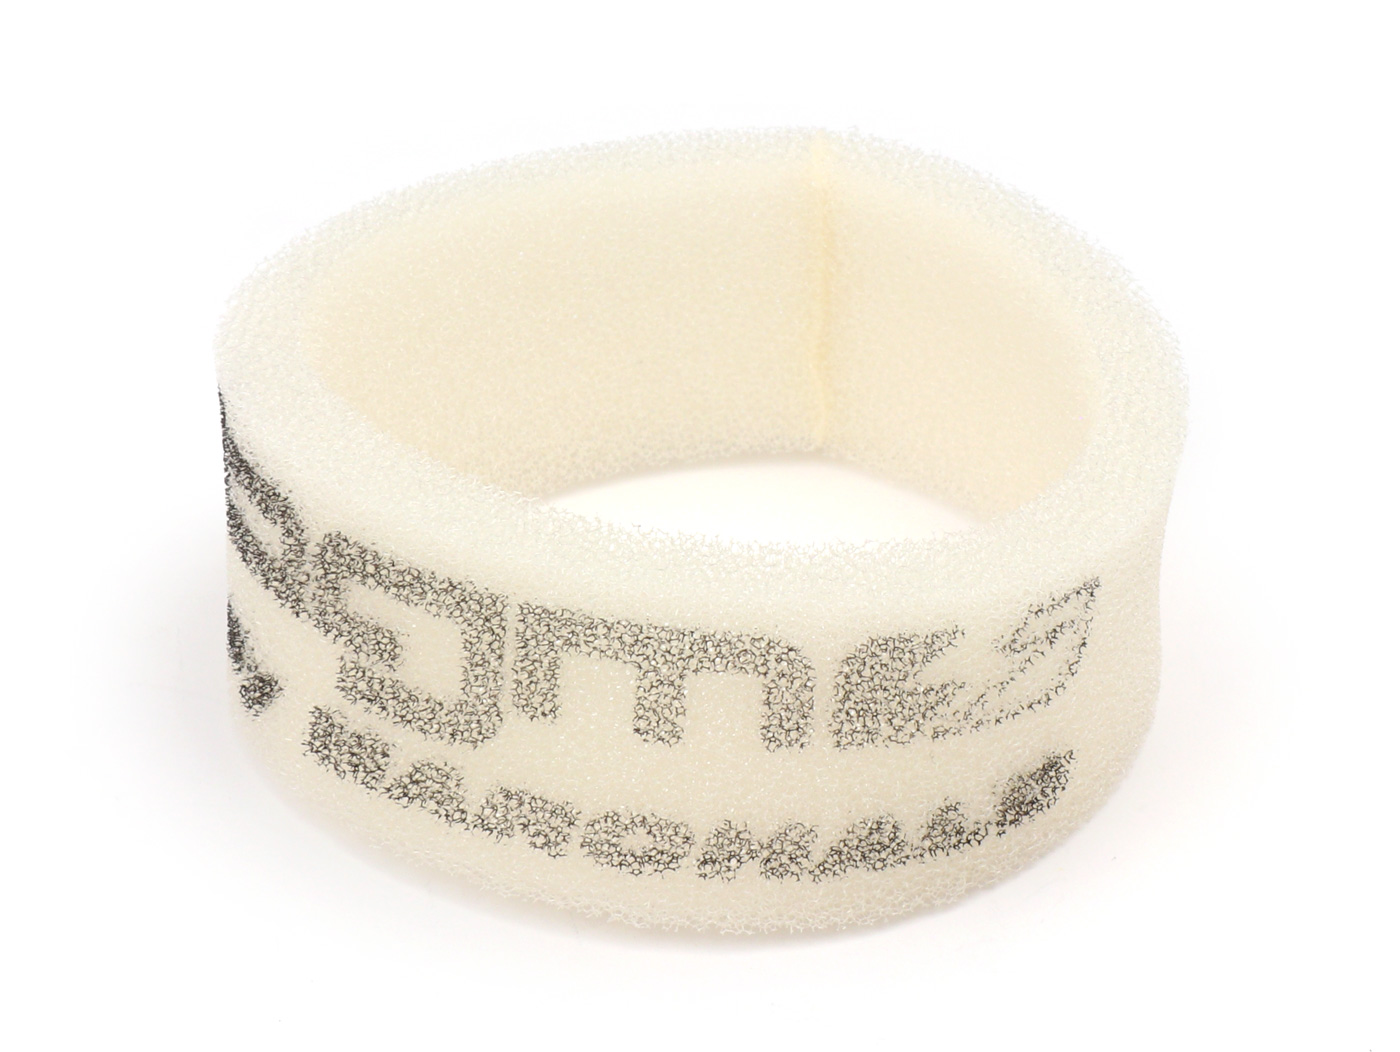
Vellón filtrante de alta calidad de Marchald (Italia), hecho para bgm PRO. Adecuado para los motores de administration directa (el carburador se asienta directamente en el cilindro) de los motores Largeframe Motovespa.
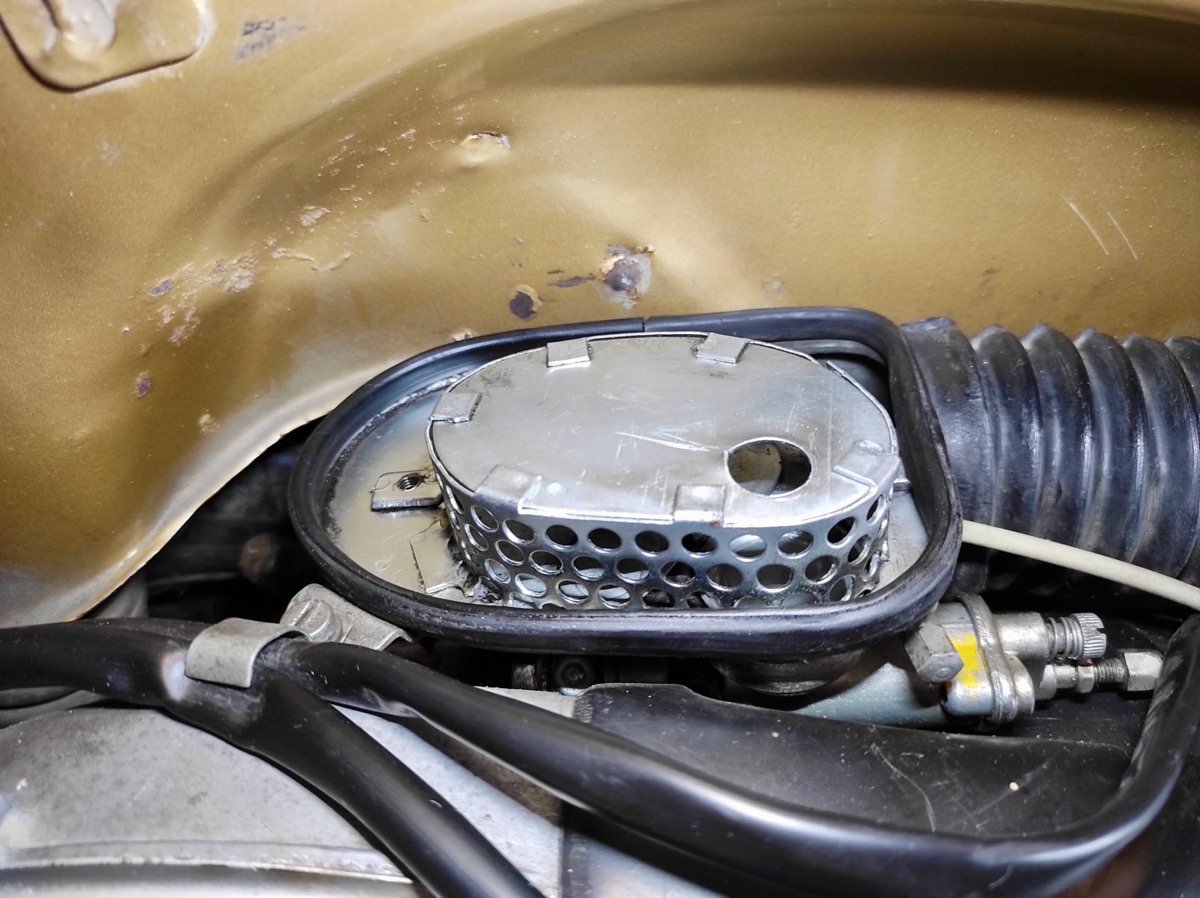
La sustitucion del elemento filtrante del aire es muy sencilla. Después de quitar el capó del lado derecho, se tiene immediateamente una vista de la caja del filtro de aire.

La tapa se fija con dos tornillos M5. He pueden aflojar con un destroyer de ranura de tamaño 5 a 6.
Después de retirar los dos tornillos, the tapa puede sacarse simplemente hacia arriba. Aquí, en nuestro ejemplo, el Insert the air filter original from the Motovespa ni siquiera esta presente!
The inserto del filtro de aire no tiene ninguna orientación de montaje y simplemente se puede deslizar en la carcasa del filtro desde arriba.
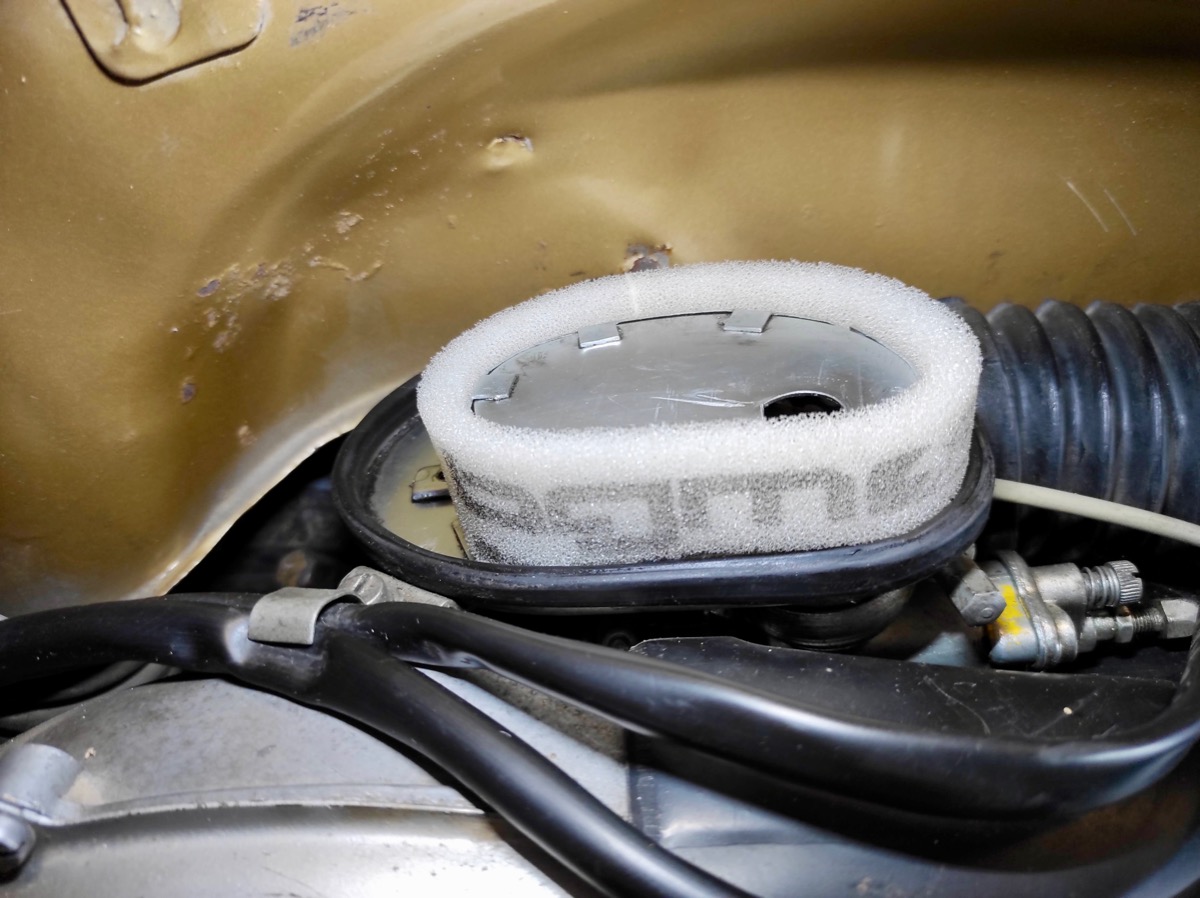
La protuberancia restante del inserto del filtro de aire se sella hacia la tapa de la caja del filtro de aire cuando se ensambla. Vuelva a colocar la tapa de la caja del filtro de aire con los dos tornillos, vuelva a colocar la tapa lateral y el cambio está completeto.
To record a return of the filter to the mayor, the insertion of the air filter can be used with oil for the air filter. Sin embargo, there is no absolutamente necesario debido al material filtrant de alta calidad del filter bgm PRO.

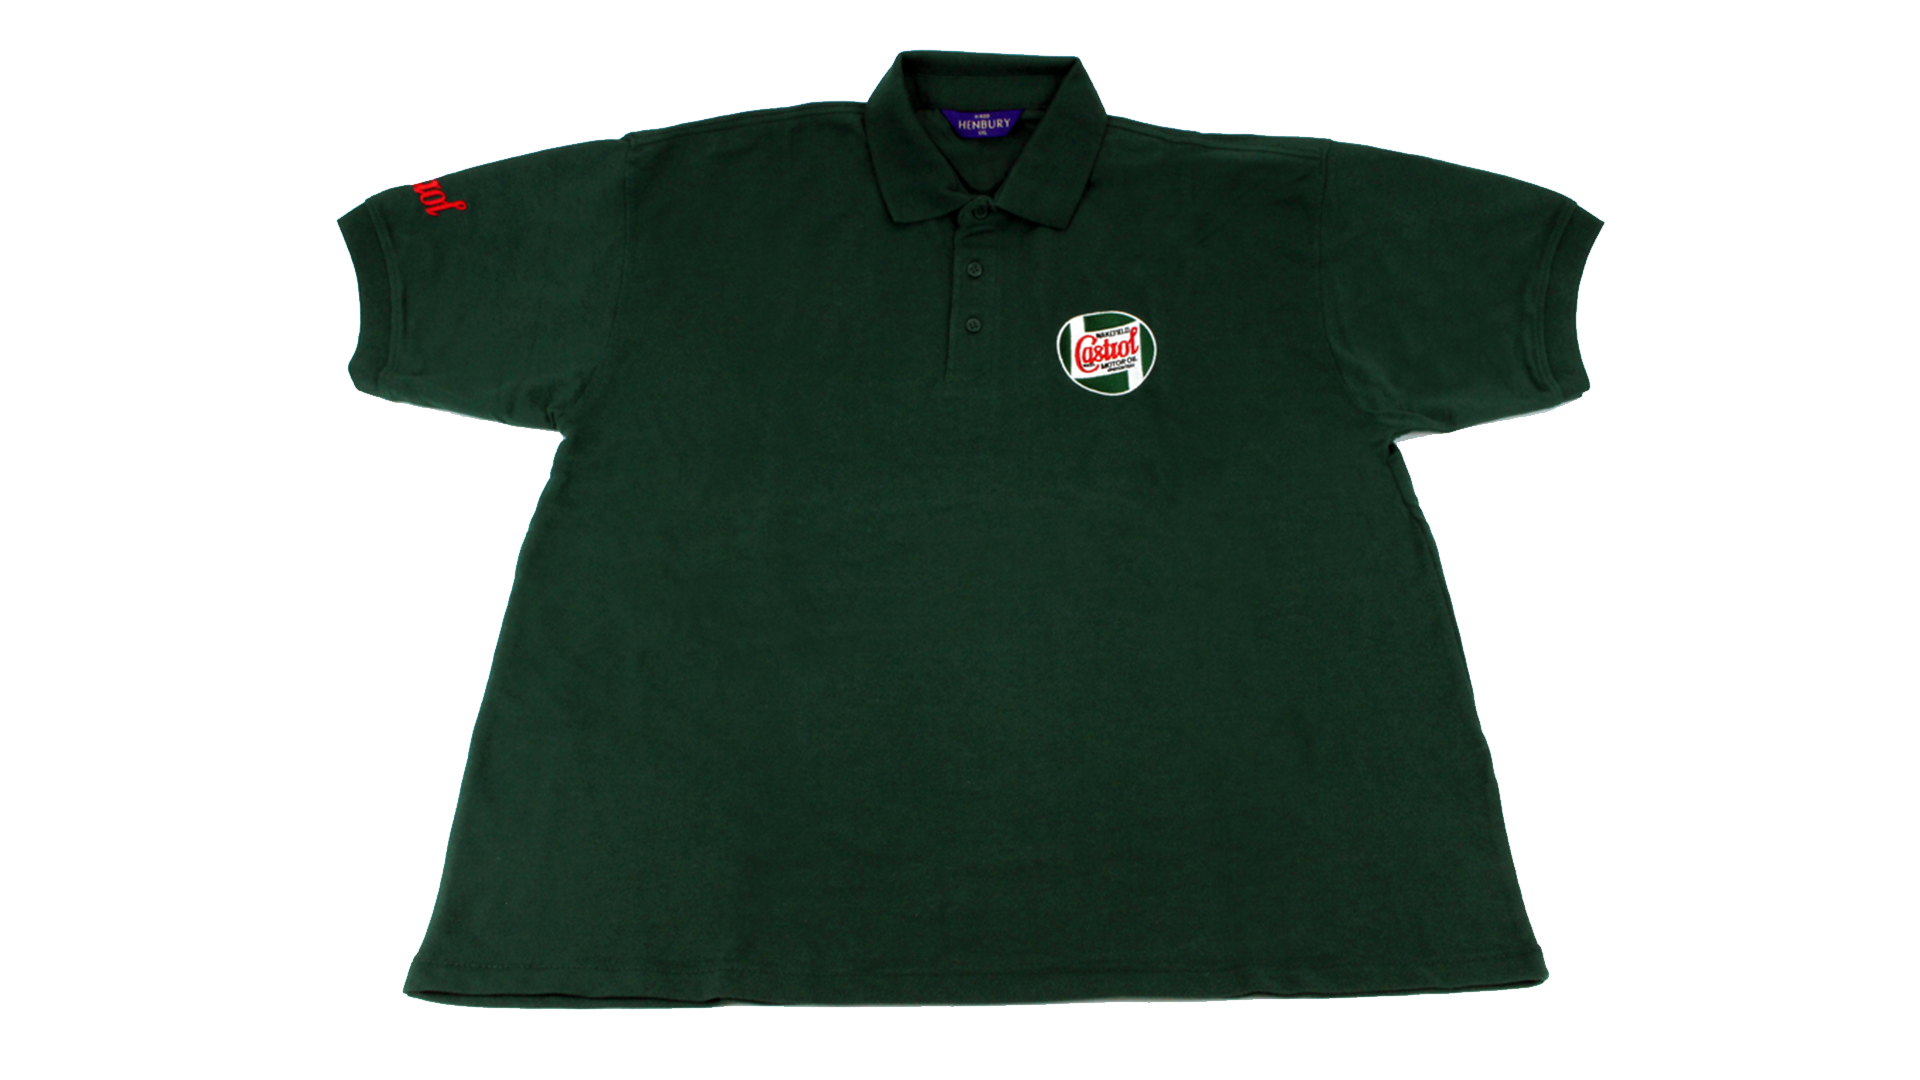
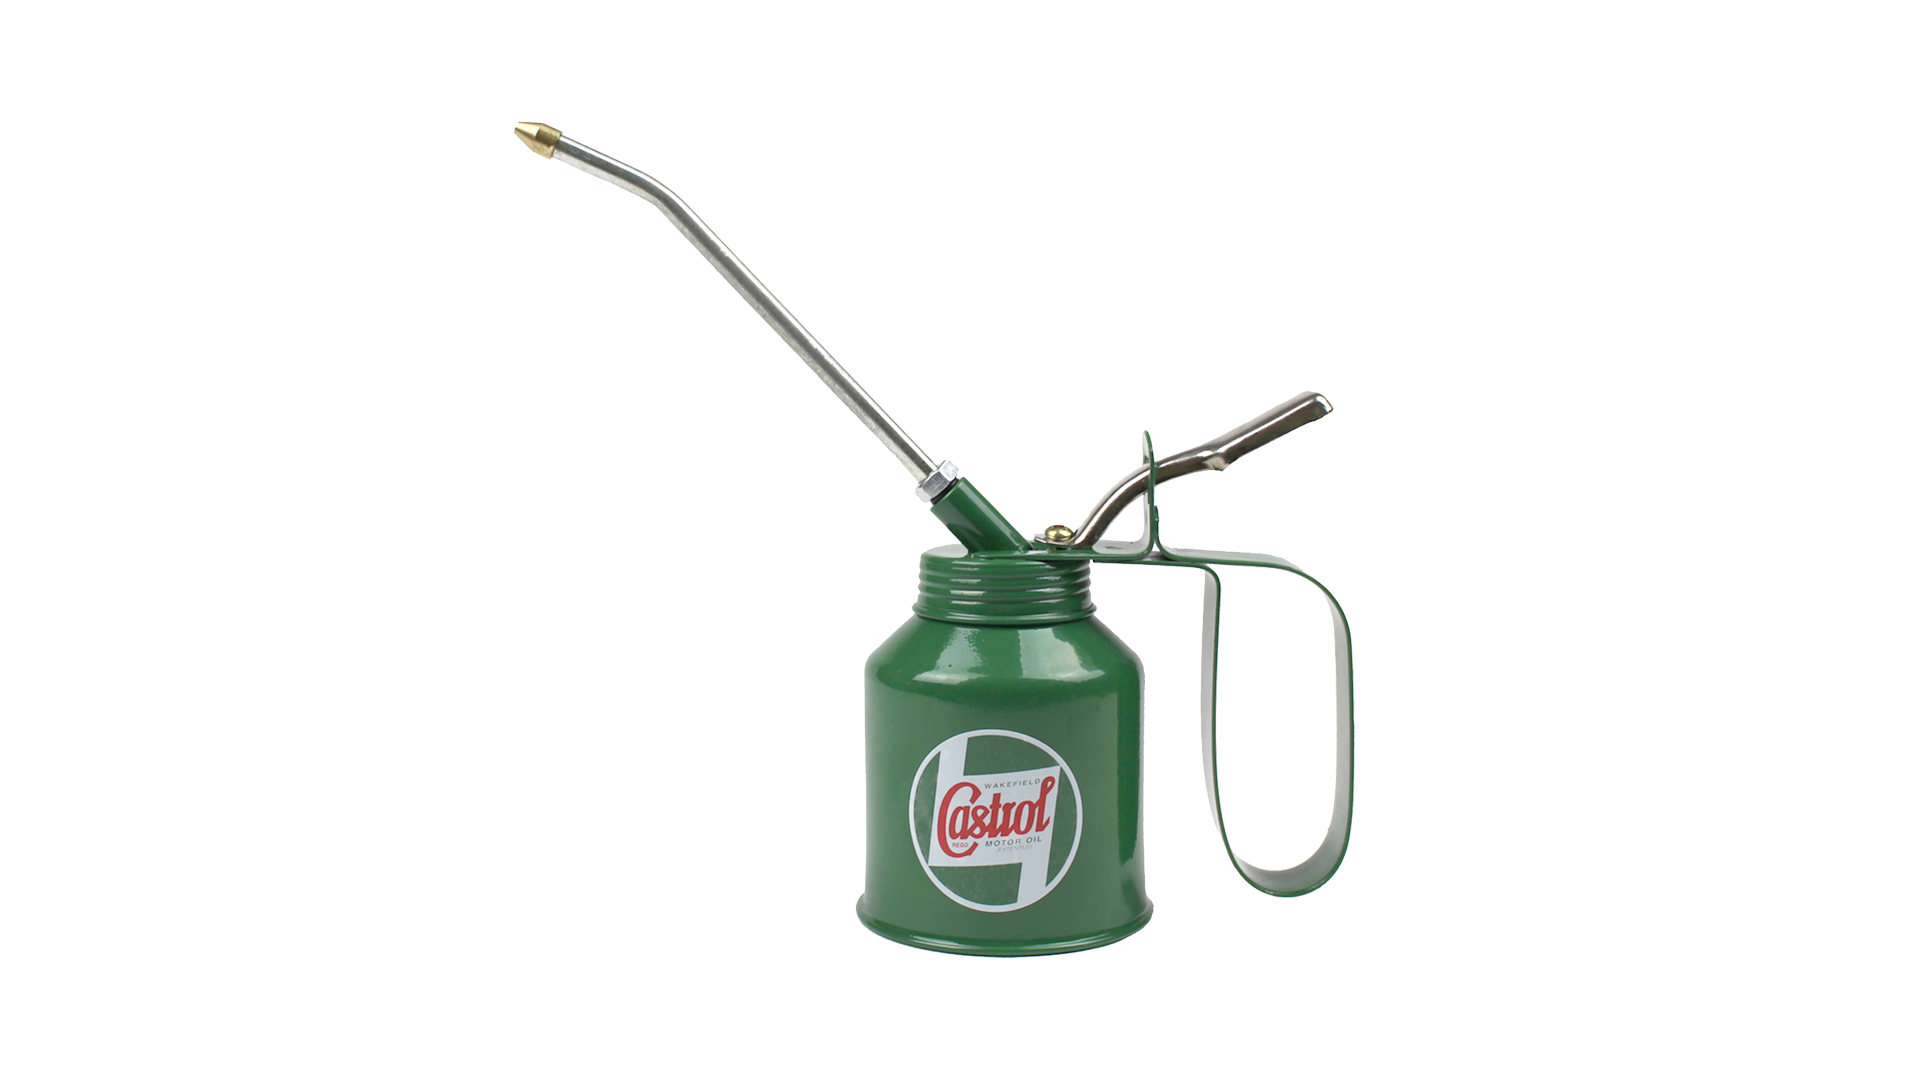
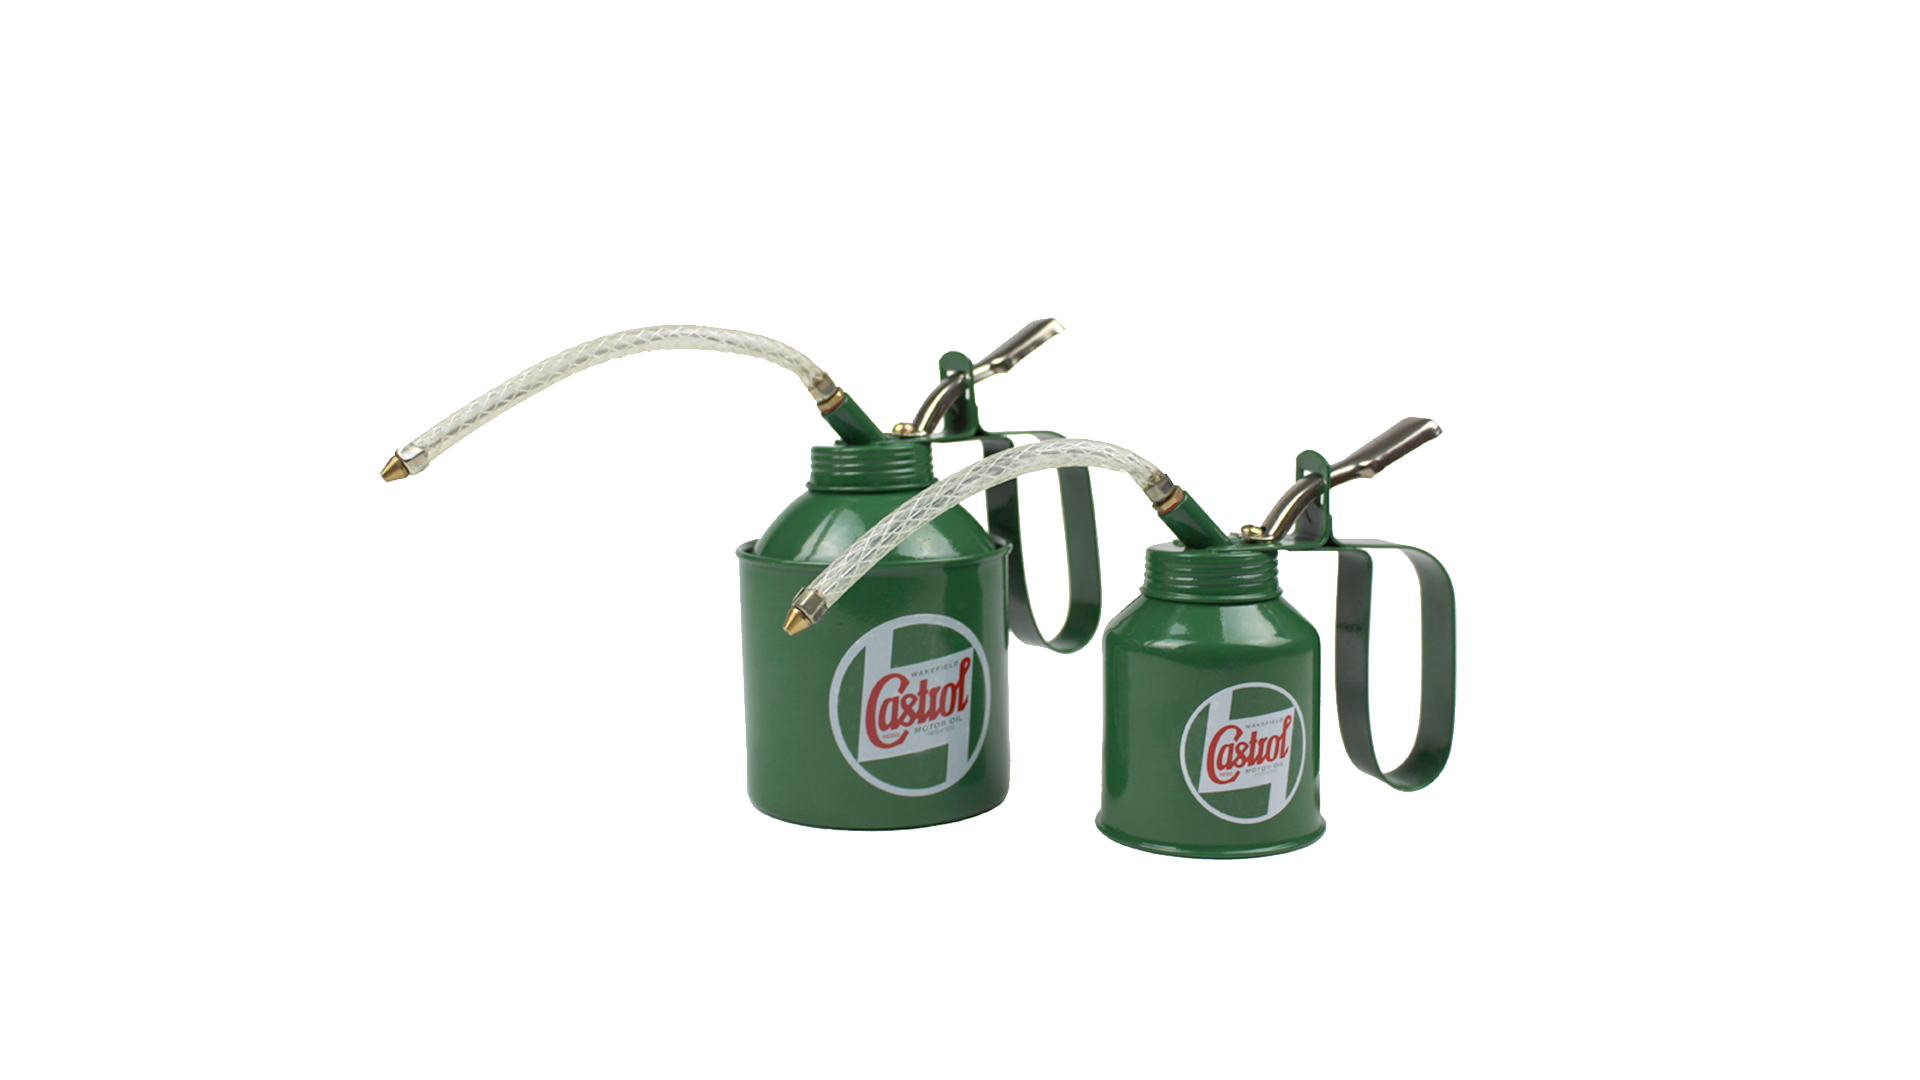
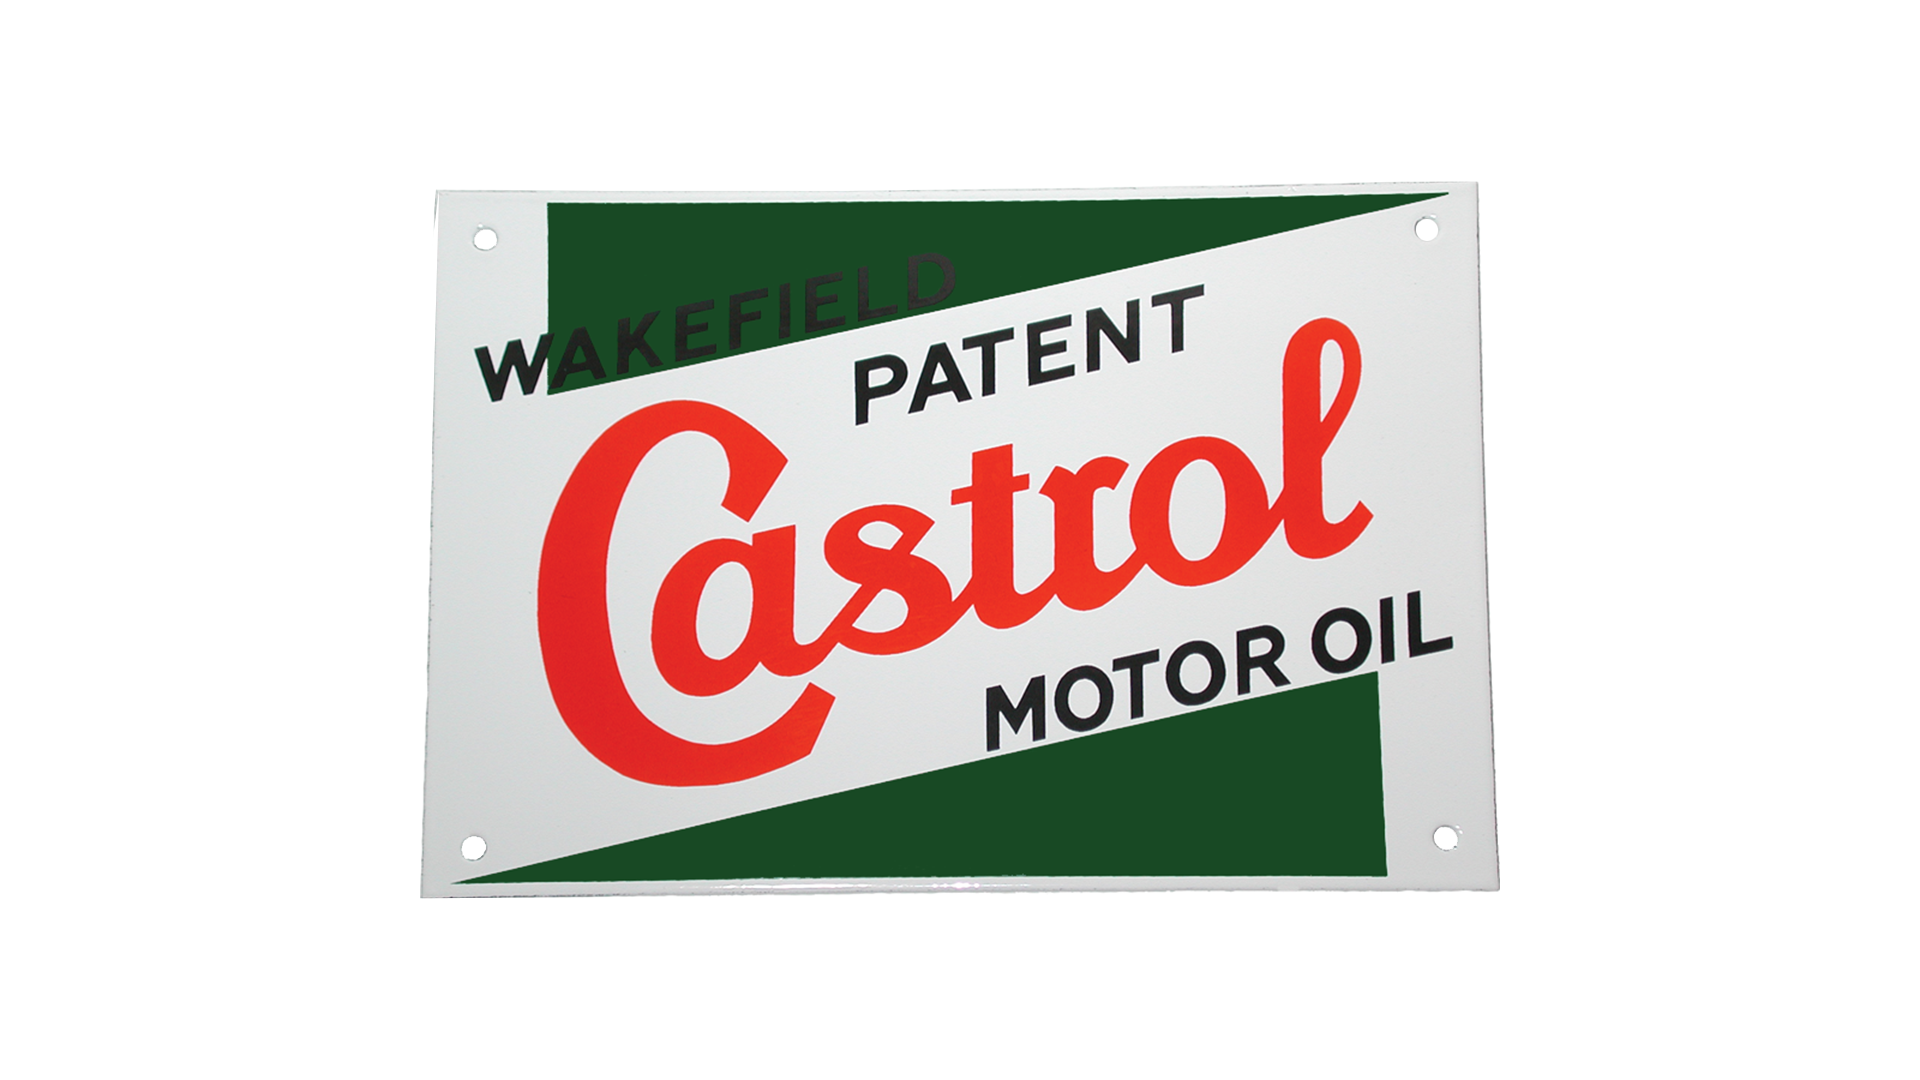
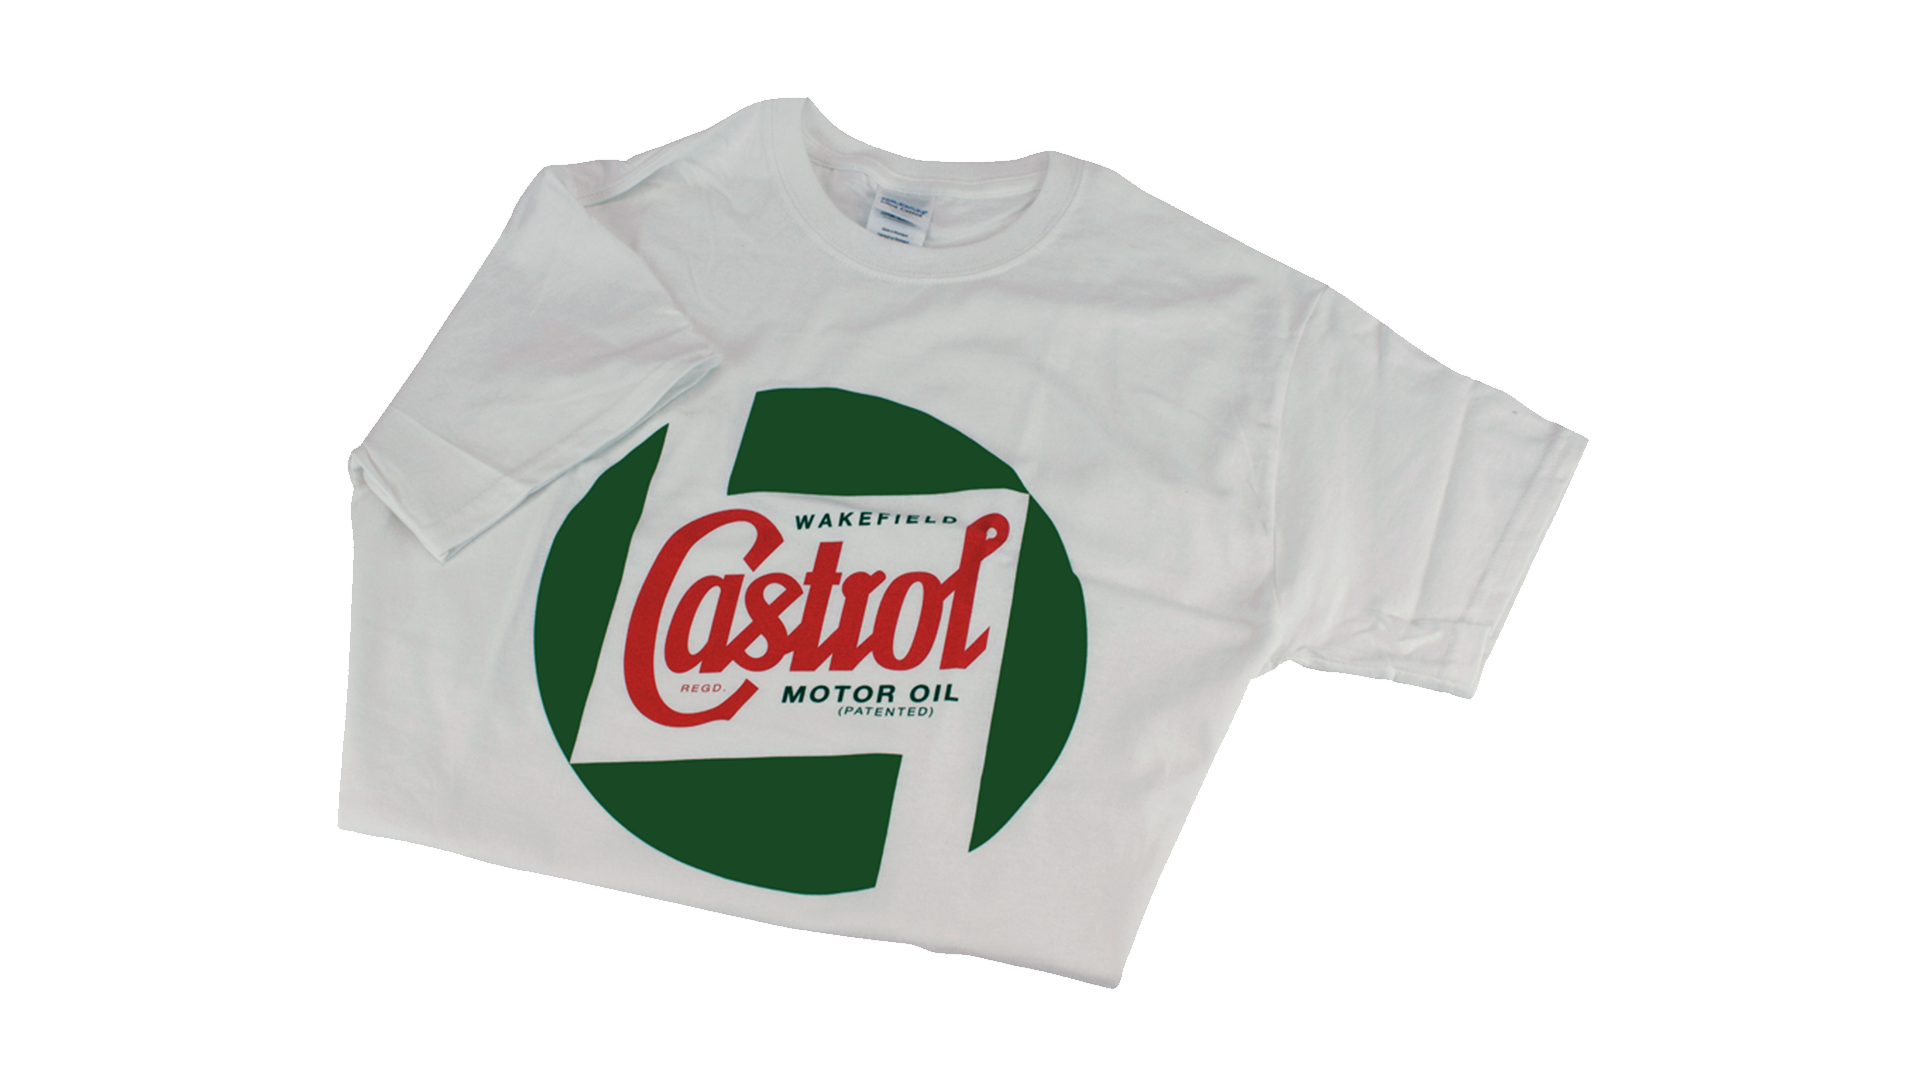
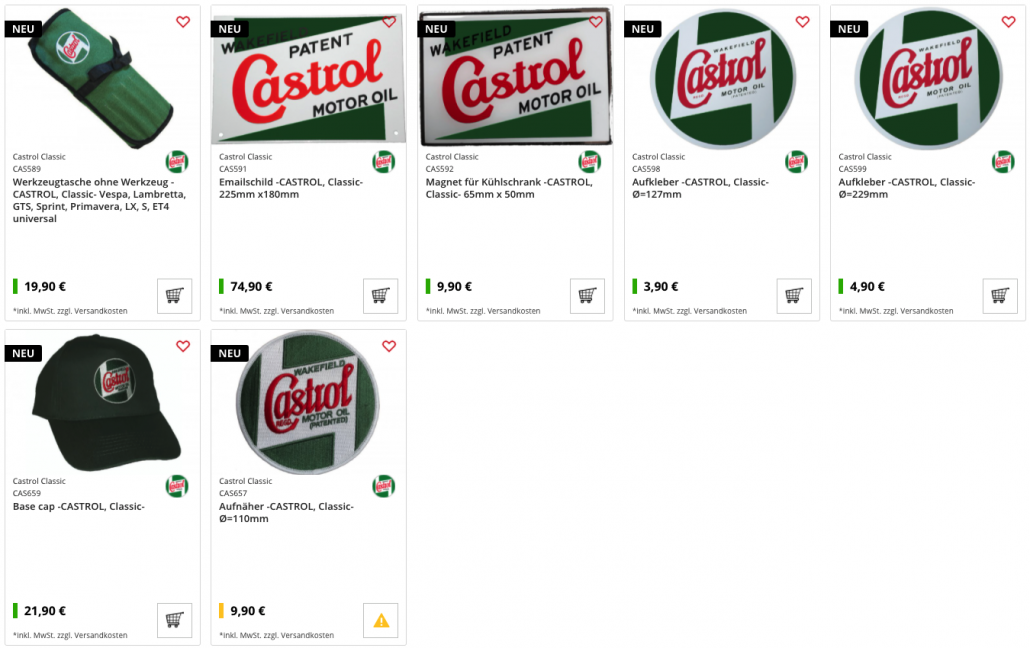
Ofrecemos una gama de artículos clásicos de high calidad, desde latas de aceite / jarras de aceite hasta imanes y carteles de pared, all with the iconic brand Castrol Classic de 1946. Ya sea en el taller o en casa, nuestra gama nostalgica combina tanto el estilo retro como la funcionalidad. With accesorios para el taller, ropa y mucho más, hay algo para cada propietario o entusiasta de los coches clásicos.
Ya sea un regalo para un ávido scooterista o un regalo para ti mismo, ¡findrarás el objeto perfecto en nuestra selección!
Castrol fue fundada por Charles “Cheers” Wakefield bajo el nombre de “CC Wakefield & Company”. En 1899, Wakefield dejó su trabajo en Vacuum Oil para iniciar su propio negocio de venta de lubricantes para ferrocarriles y maquinaria pesada. A principios del siglo XX, Charles se interesó por dos nuevos vehículos motorizados: el automóvil y el avión. Su empresa comenzó a desarrollar aceites para los nuevos motores. Estos aceites debían ser lo suficientemente finos para el arranque en frío y lo suficientemente gruesos para funcionar a altas temperaturas. Los investigadores de la empresa descubrieron que el problema podía solucionarse añadiendo Castor oil, aceite vegetal elaborado a partir de las semillas de ricino. Llamaron al nuevo producto"Castrol". En 1919, John Alcock y Arthur Brown utilizaron Aceite Castrol in the primer vuelo transatlántico sin escalas de la historia.
CC Wakefield no only inventory a new tipo de aceite de motor, sino también una nueva forma de other clientes potentiales a su producto: sponsorship. The name of Castrol appeared in pancartas and banderas In carreras areas, de coches y en intentos de récord de velocidad. Con el tiempo, la marca del aceite de motor se hizo mucho more conocida que la del fundador / empresa. Esta circunstancia hizo que en 1960 “CC Wakefield & Company” pasara a llamarse Castrol Ltd.
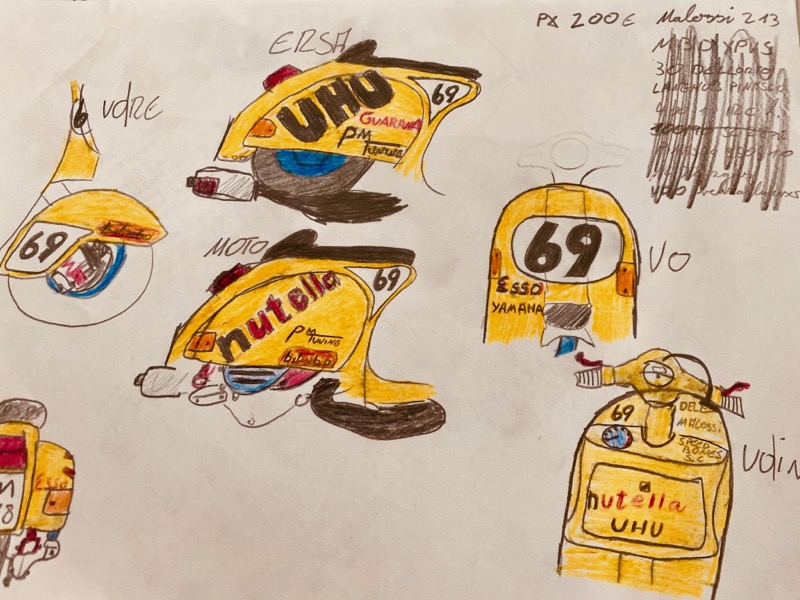
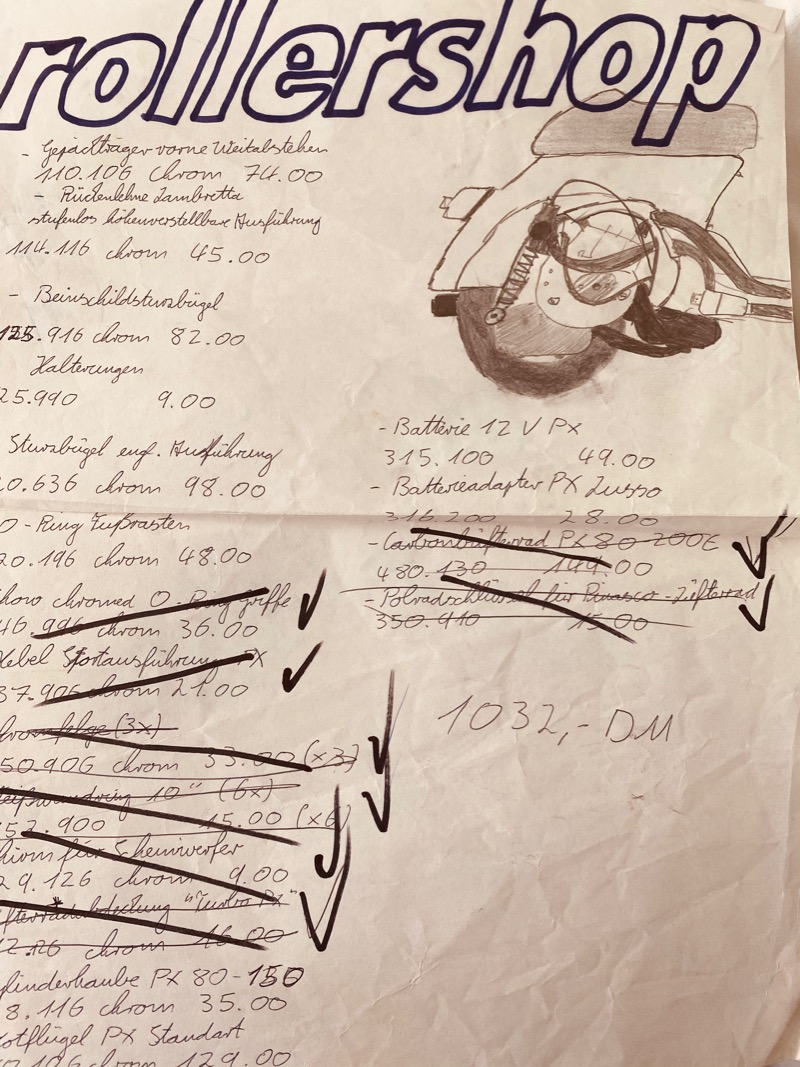
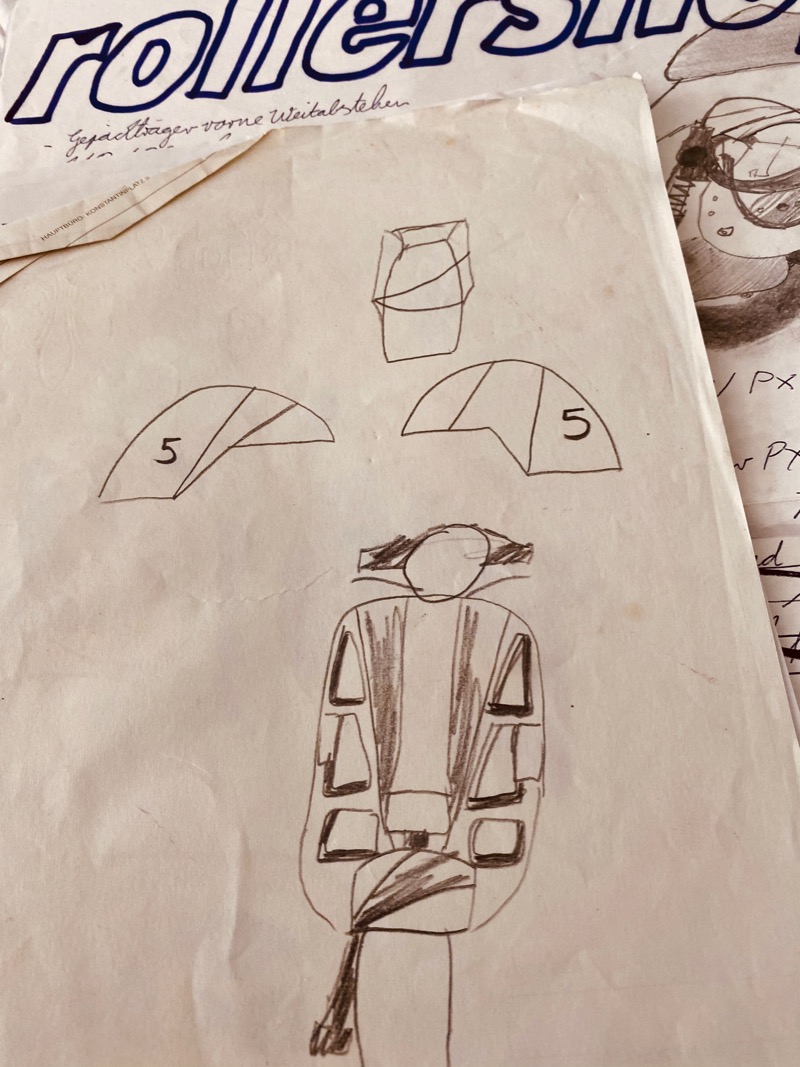
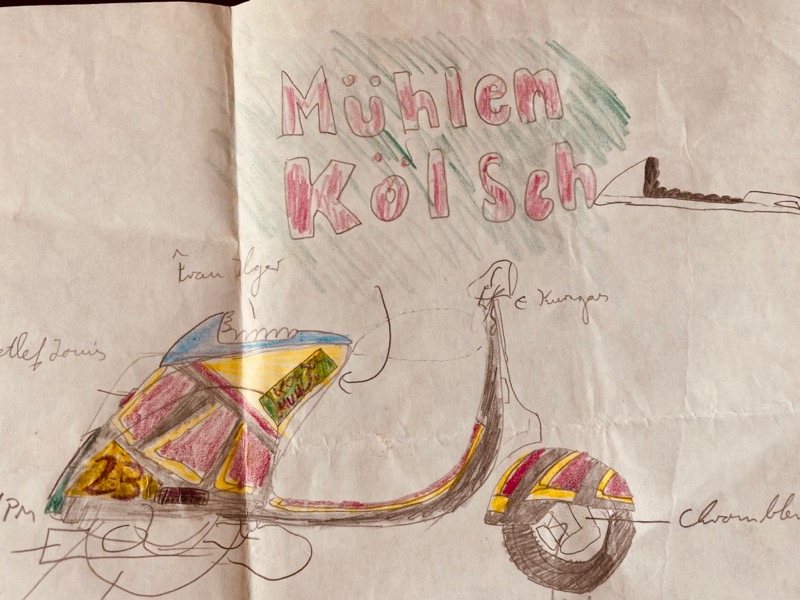
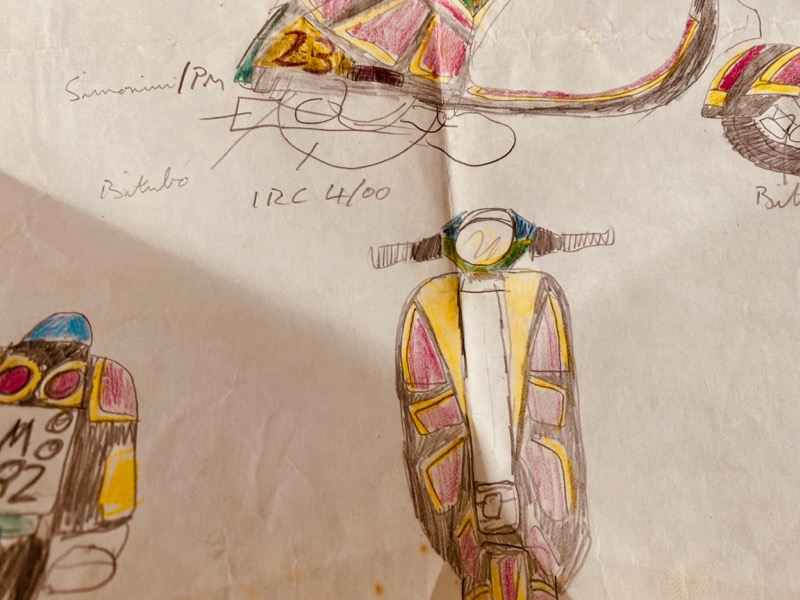
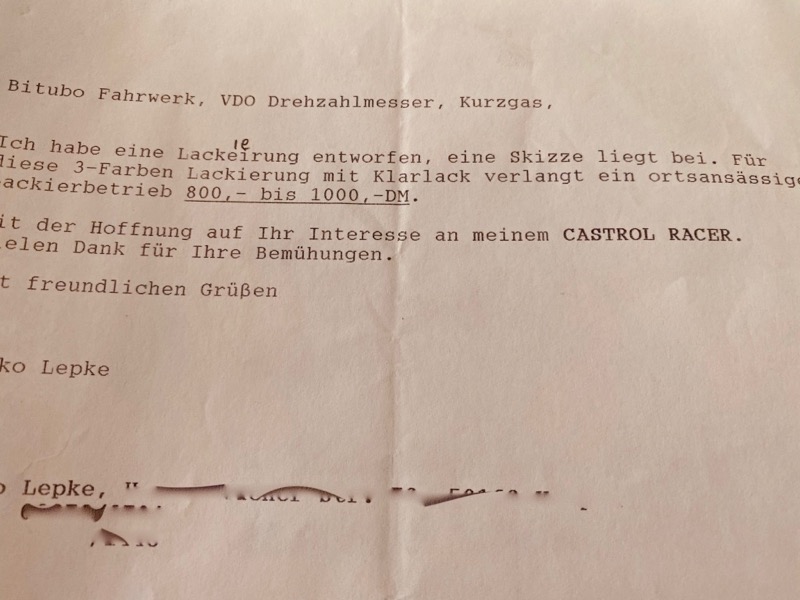
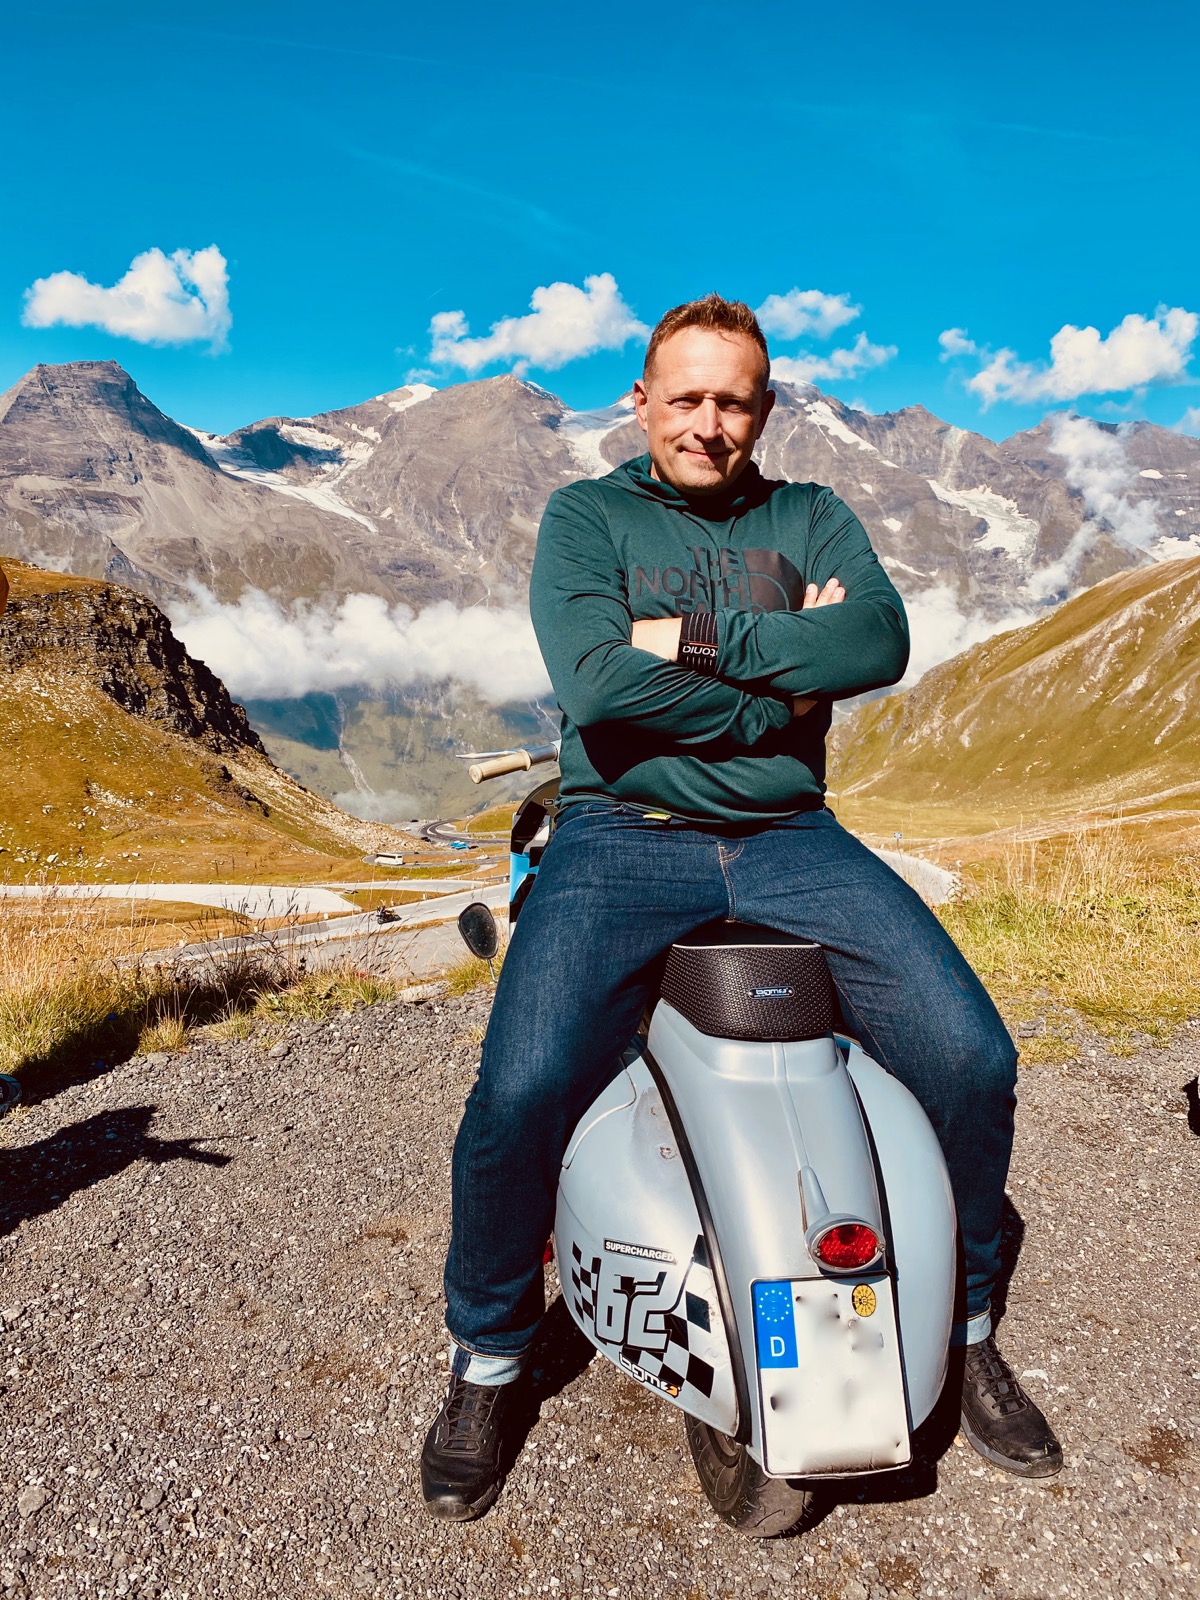
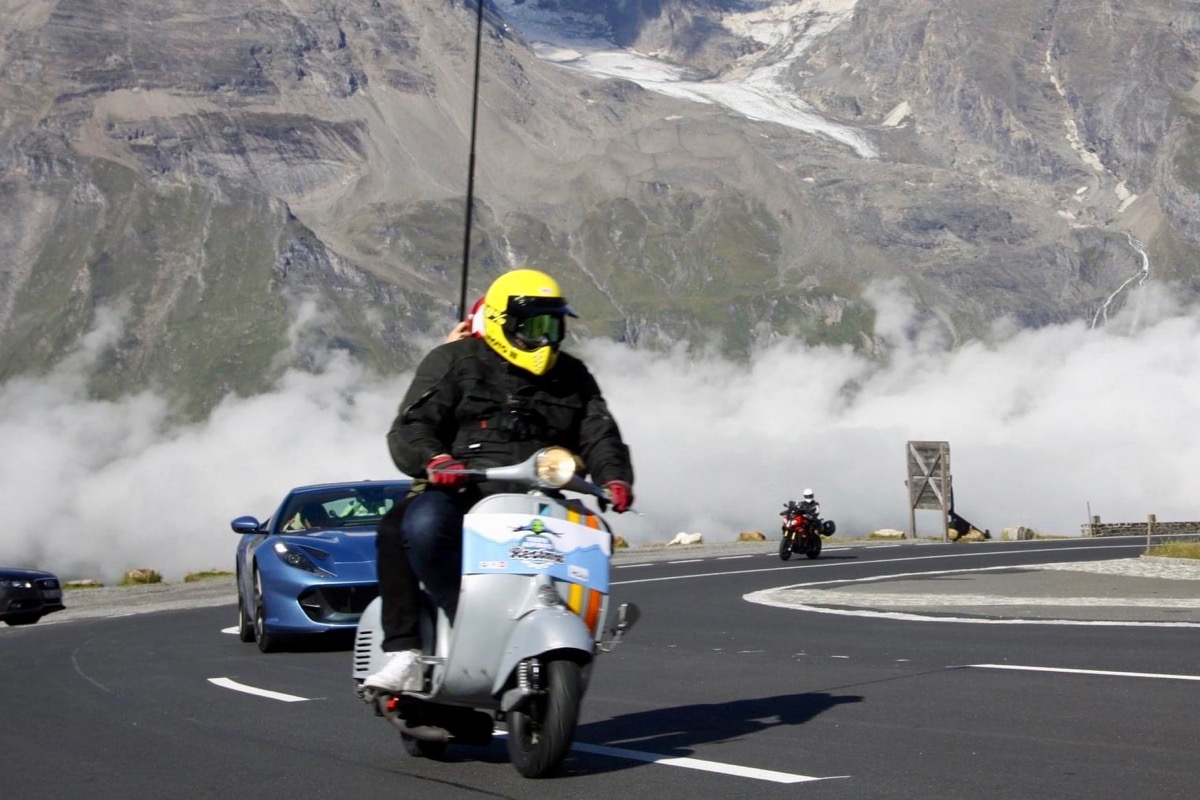
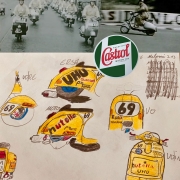
Llevo más de 32 years conduciendo Vespa y Lambretta. To do empezó con una Vespa PK50S roja que, comprada de segunda mano, ya estaba esperando en el garaje de my padres para sacarme el carné de conducir. Pero soon was too slow para mí. La primera medida de puesta a punto fue montar un costoso escape de 50 km / h. Pero no sirvió de mucho, los chicos de los ciclomotores seguían pasándome a diestro y siniestro. Asi que se vendió y mi interés fue un PX 80 Lusso negro, at the moment muy caro en el seguro. Durante la prueba de conducción las marchas siempre salían volando. Pero me alegré de que mi madre me permitiera comprarme este scooter…. además, mi padre estaba de viaje de negocios y no sabía nada de los nuevos “80”. Así que: ¡ahora o nunca! Asi que the scooter se compró con este “pequeño defecto oculto”.Todos sabemos lo que estaba mal en el motor: la razón del cambio descontrolado, era la cruz de cambio “redonda” desgastada. The next concesionario de Vespa quería 700 DM para el cambio, pero eso estaba fuera del presupuesto de mi hábil actualización de la scooter. Me puse en contacto con other conductores de scooters. Uno de ellos era patinador en monopatín y ahora, de repente, motorizado en una flamante Vespa PX 80 Lusso. Un mes más tarde volví a encontrarma con él, allí estaba sentado con traje y zapatos de cuero pulido en su, ahora con espejos y piezas cromadas enyesadas, Vespa. La siguiente vez que me lo encontré, le faltaba la mitad de su scooter y también la parte superior de la cabeza. En lugar de zapatos de cuero fino y un traje, ahora llevaba botas rojas hasta las rodillas, pantalones de camuflaje y una chaqueta de bombardero. En su cabeza, lo único que quedaba de su “melena popper” era un pequeño cuerno de pelo que revoloteaba desganado en su cara después de quitarse el casco. Algo irritado, le pregunté si había tenido un accidente con el patinete y por qué tenía un aspecto tan raro. Dijo que ahora era Scooterboy y que el scooter era un CutDown! Seguramente la había discovered antes, para mí era nueva en ese momento: la MOTORETTA, the Scootermag y todavía en blanco y negro. Y así el mal siguió su curso. Ahora también los 80 se volvieron de alguna manera rapidos demasiado lentos para mí, compañeros de escuela con DT, RD, MBX & Co e incluso algún Mofa, eran más rápidos que yo. Así que si cambio la palanca de cambios de todos modos y saco el motor y lo desmonto, también podría hacer la moto un poco más rápida ... Mientras tanto, también había discoveredo el catalog of the ROLLERSHOP and SCOOTERING. The painter's paintings were personalized and the brilliant revisions made me fascinated by my “guarderia” from the age of 80 and so with great painters’ painters and garabateé algunos de ellos en un papel. Sí, adelante, ríase, these sons of my objects recopiladas:
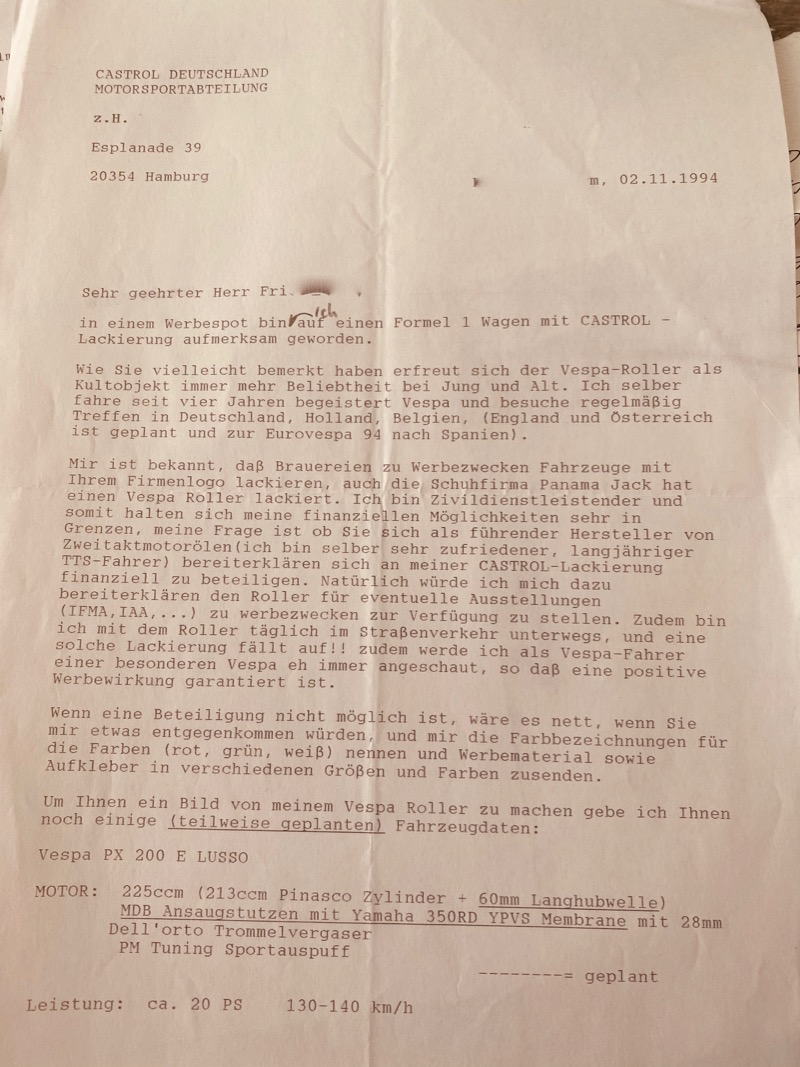
Así que, de alguna manera, mis sueños con respecto al trabajo de pintura personalizado no se hicieron realidad, así que más tarde tomé la iniciativa y pedí a Castrol un patrocinio. Sinceramente, ahora mismo me siento un poco incómodo con eso: estaba bastante seguro de haberlo hecho a los 16 años. Pero según la fecha de la carta a Castrol, that encounterré en mi “caja de la escena del scooter”, ya era un poco mayor y en ese momento ya estaba haciendo servicios comunitarios.
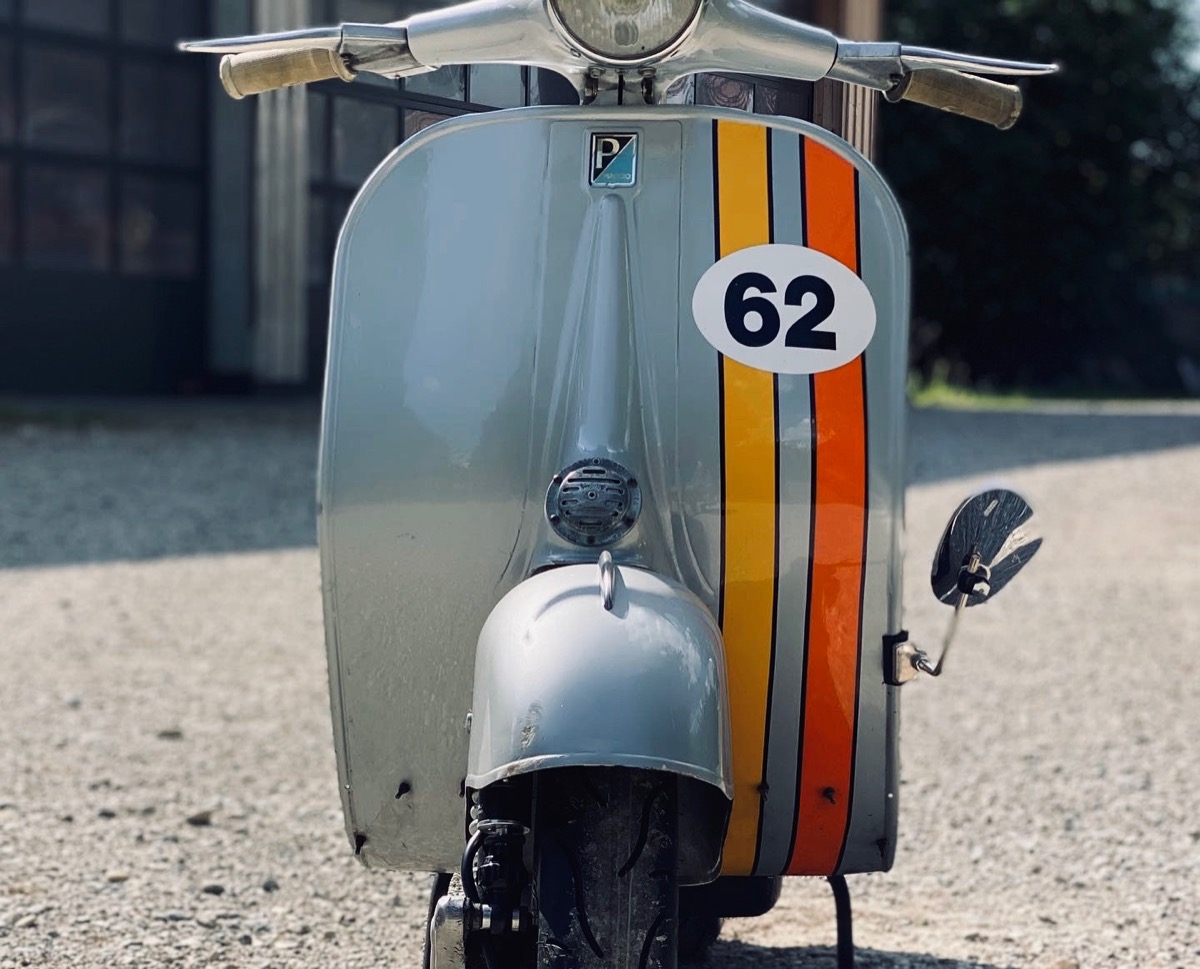
Desgraciadamente ya no tengo los bocetos de mi“Castro Racer”With 20 CV y objetivo de 130-140km / h. Supongo que había adjuntado los dibujos con la carta a Castrol, departamento de Motorsport. De la carta todavía Finderé this impresión de prueba con correcciones. Pero ciertamente no escribí a UHU y NUTELLA, MÜHLEN KÖLSCH? ¡Quizá! Ya no sé… Pero el señor de Castrol fue muy amable, me invitó a la IFMA de Colonia y, tras una breve conversación en el camión de Castrol, me puso en la mano unas pegatinas de Castrol. Si alguien de Castrol está leyendo esto: ¡mi oferta sigue en pie! Este es, por ejemplo, mi Augsburg Vespa T4:It is not necessary to write solicitudes de patrocinio para obtener nuestros products de Classic Castrol, ahora puede obtener los geniales productos retro de Castrol Racing a un gran prize en nuestra Tienda de Classic Castrol: 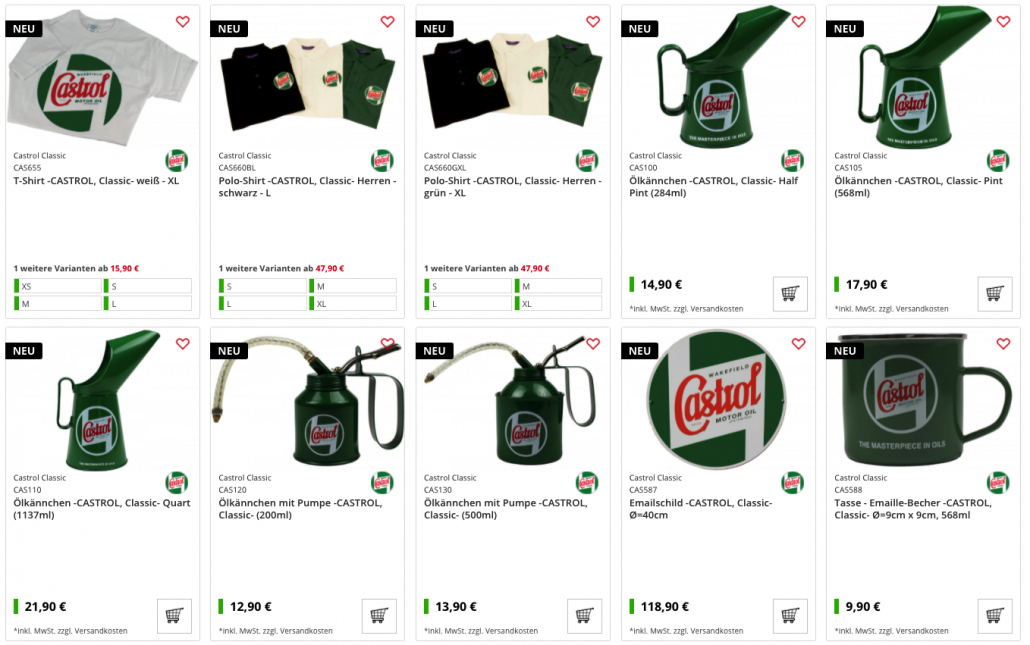
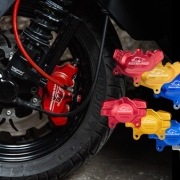
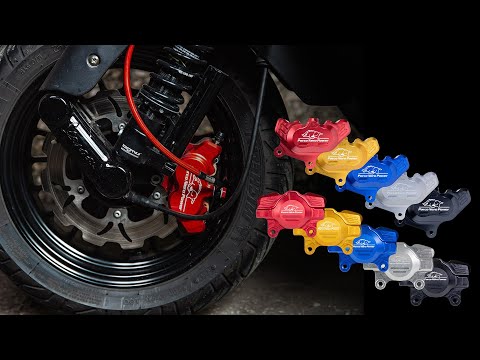
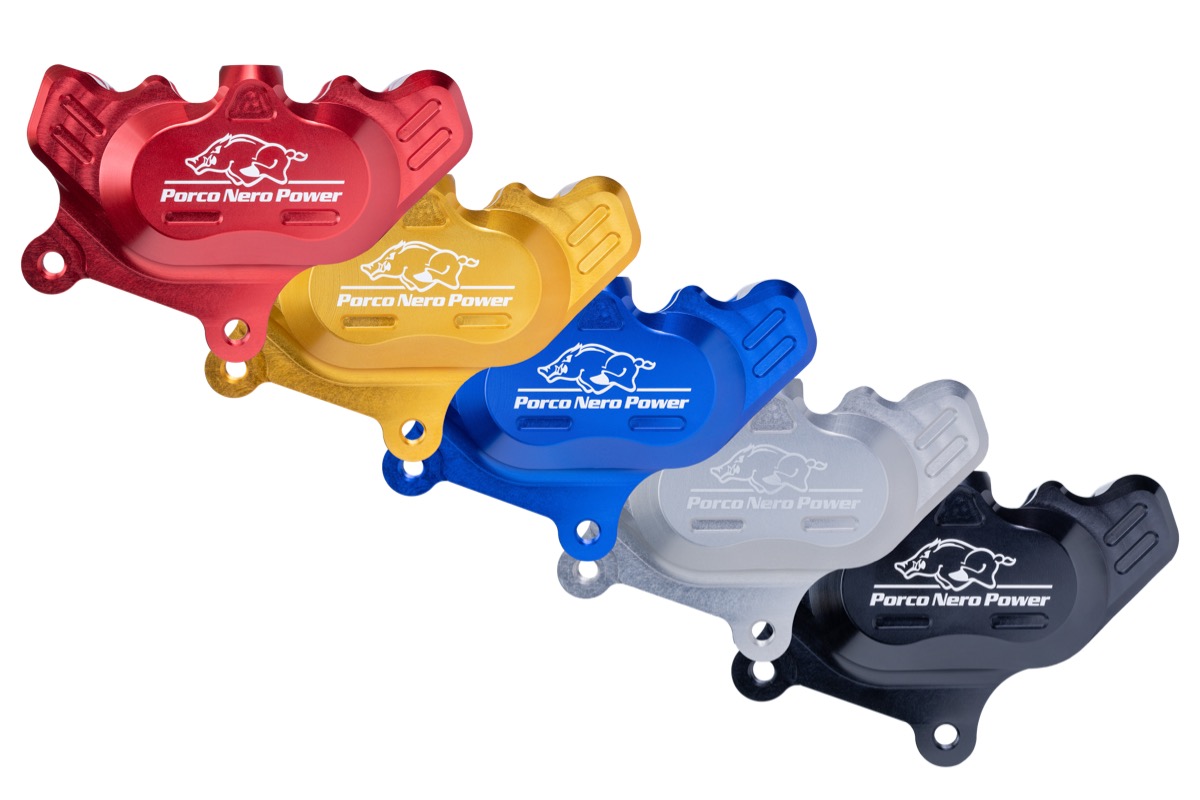
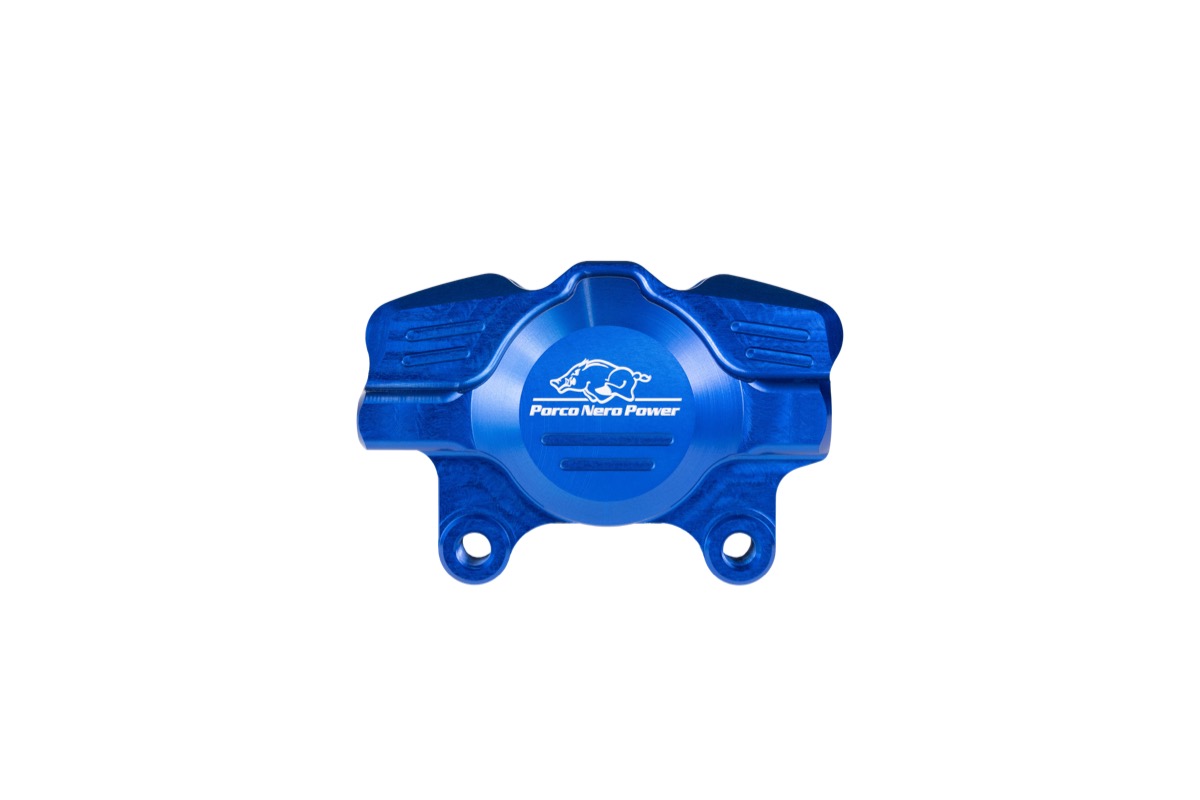
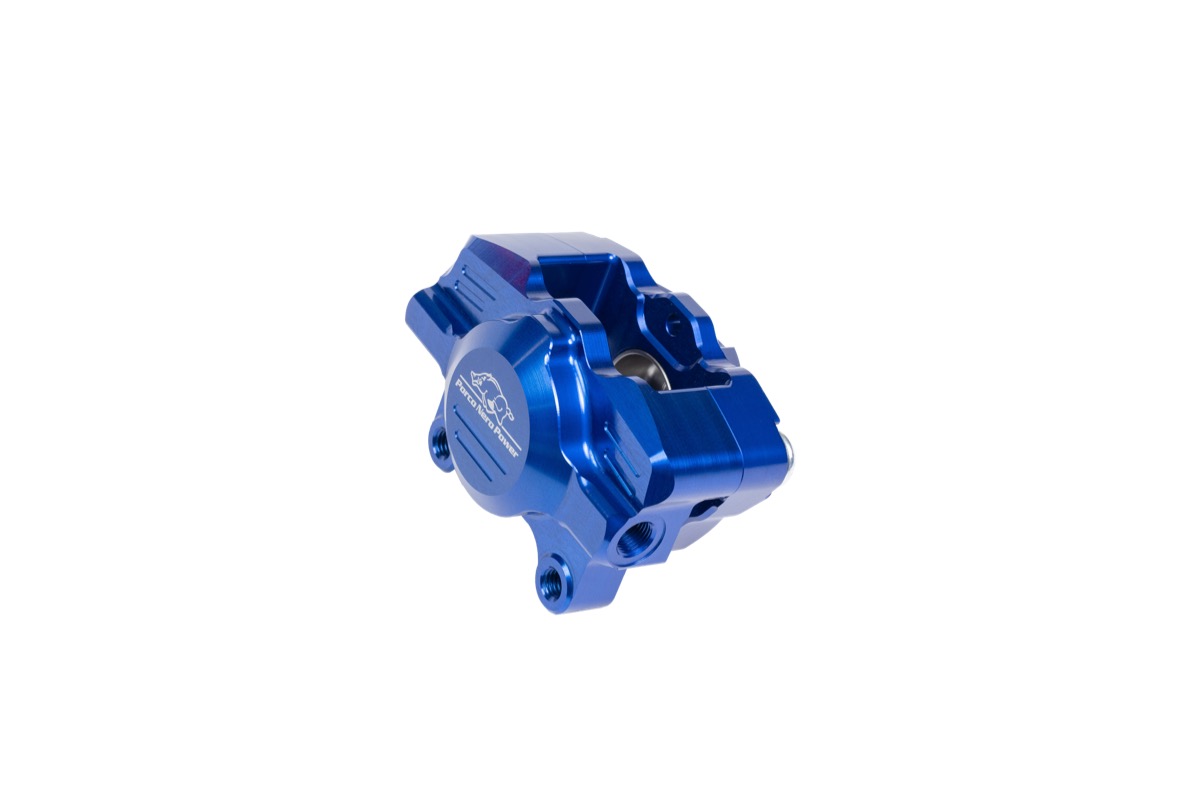
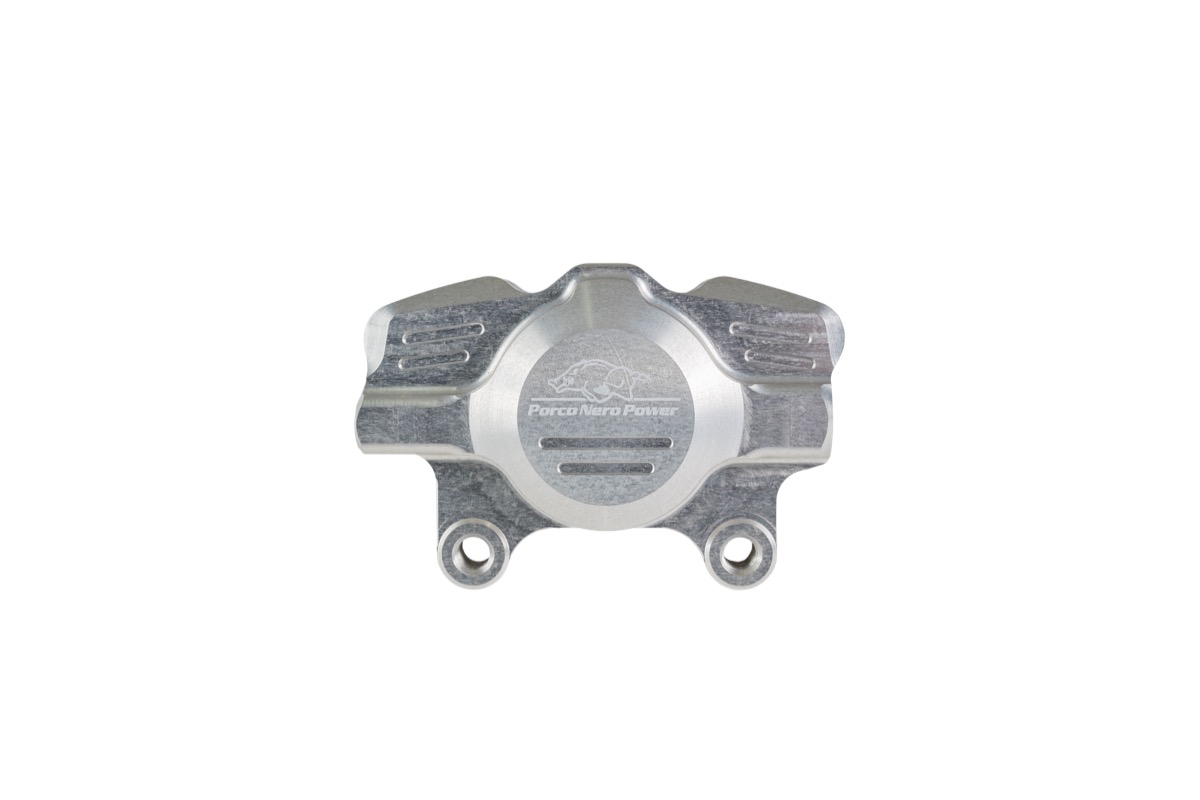
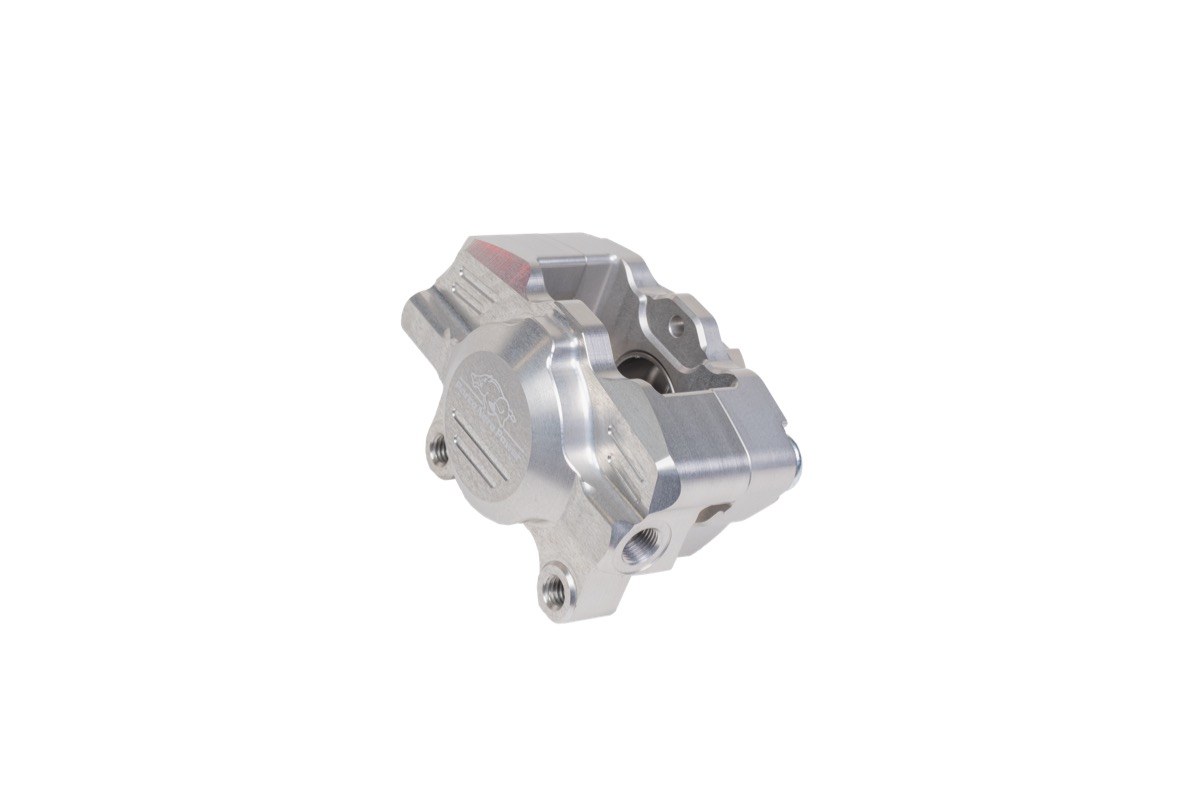
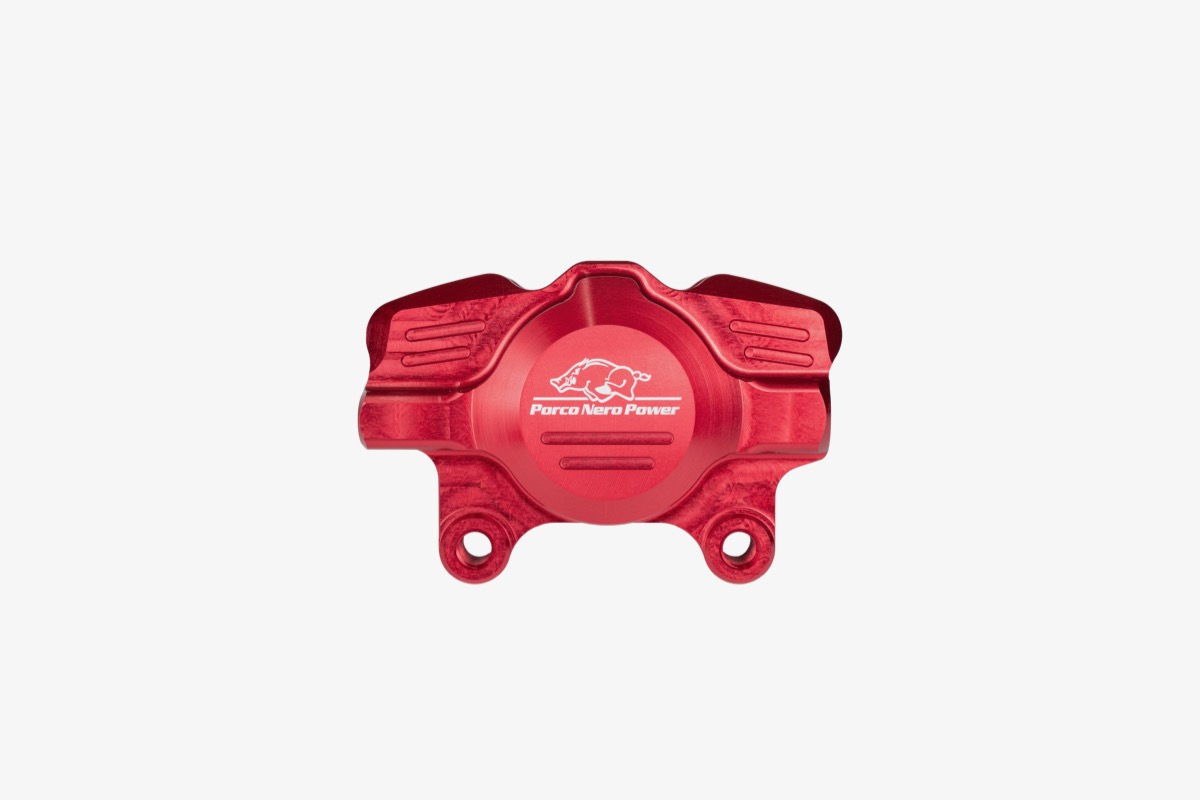
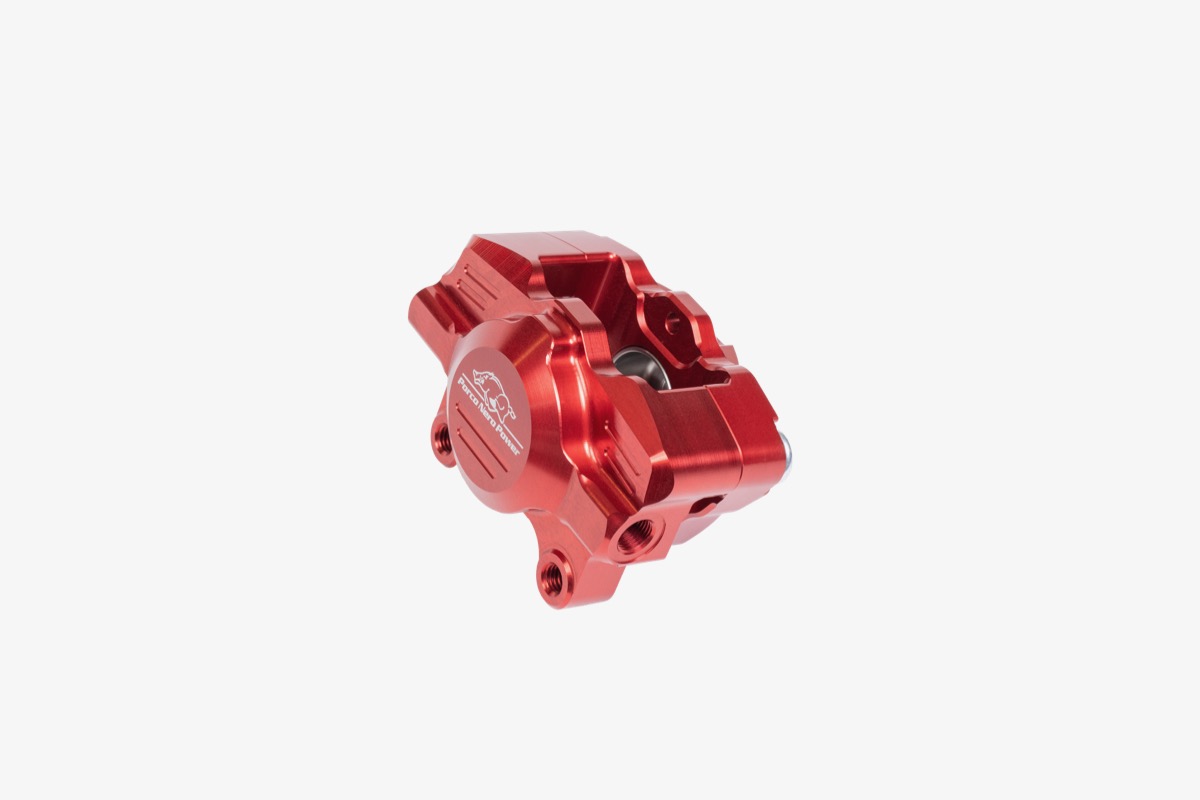
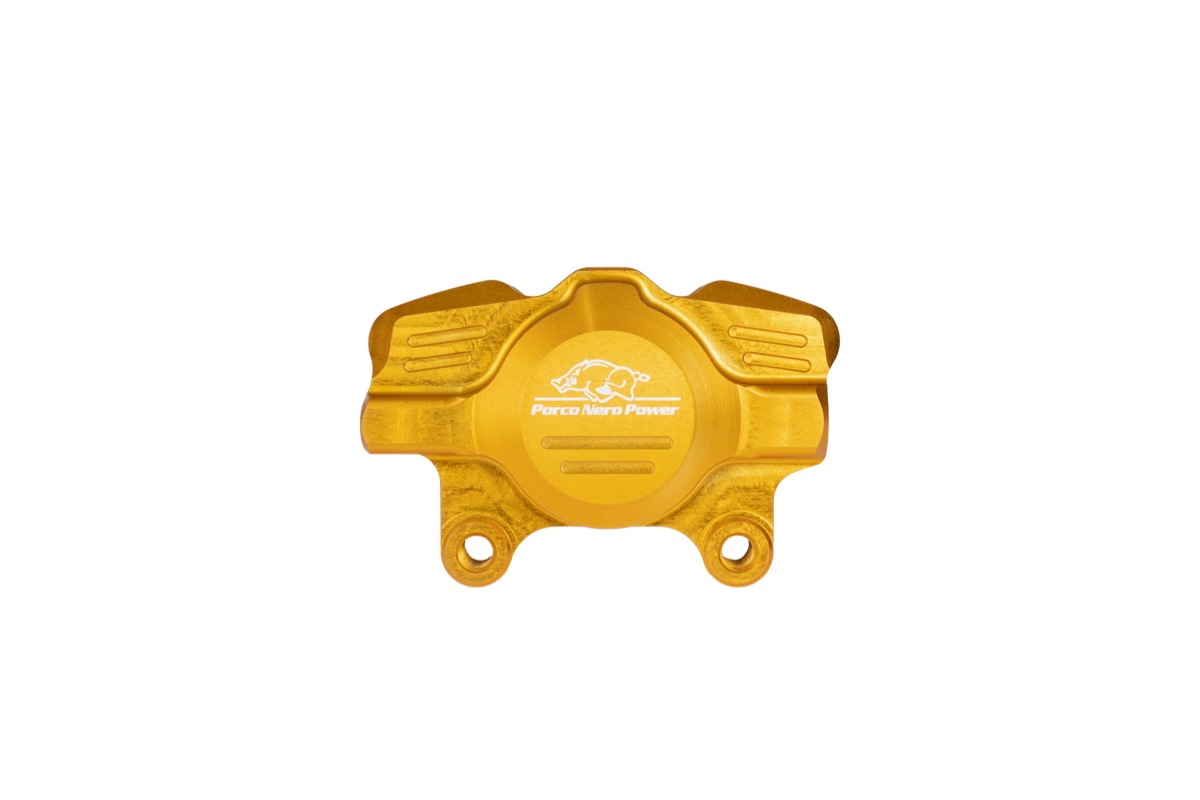
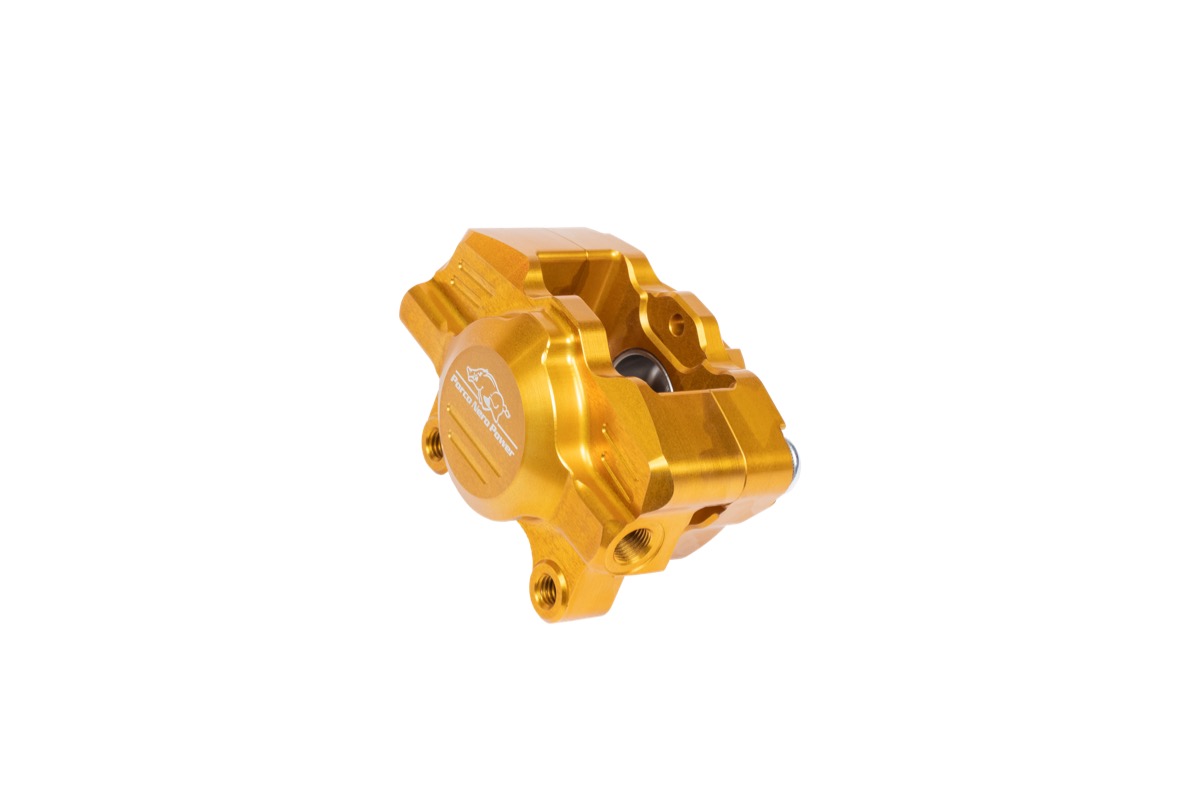
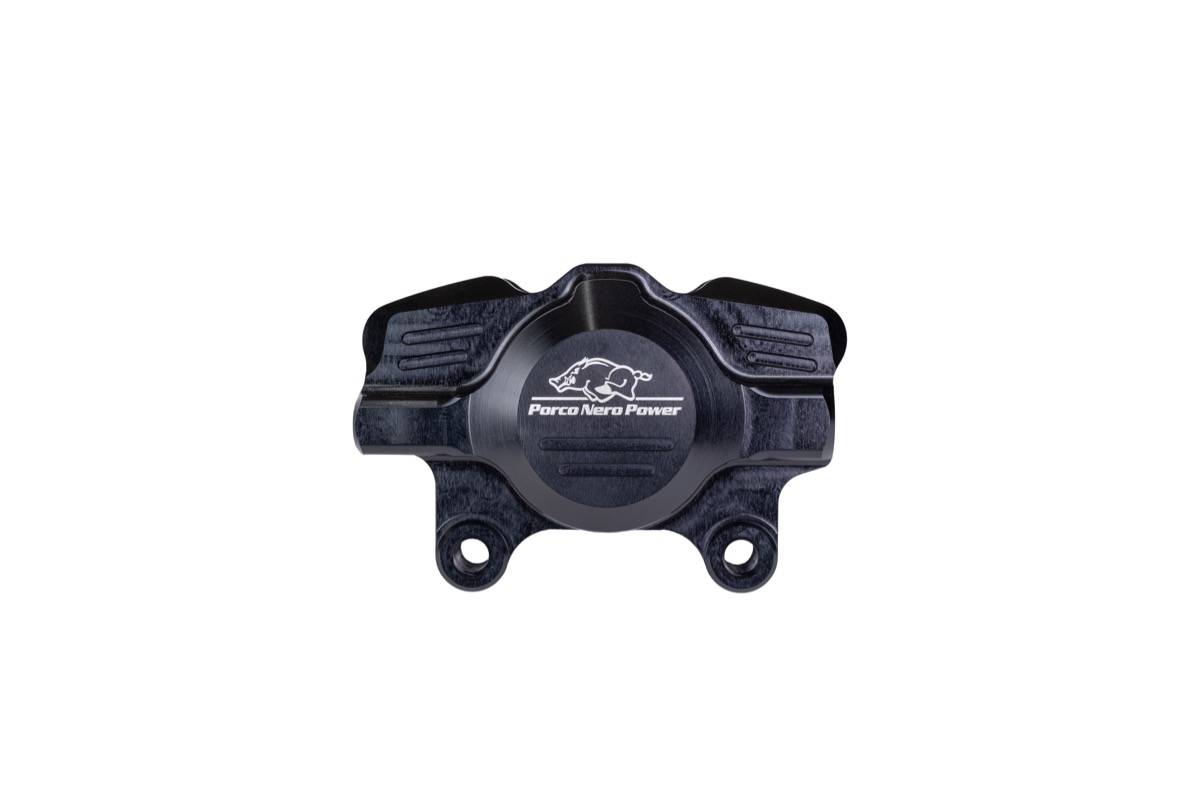
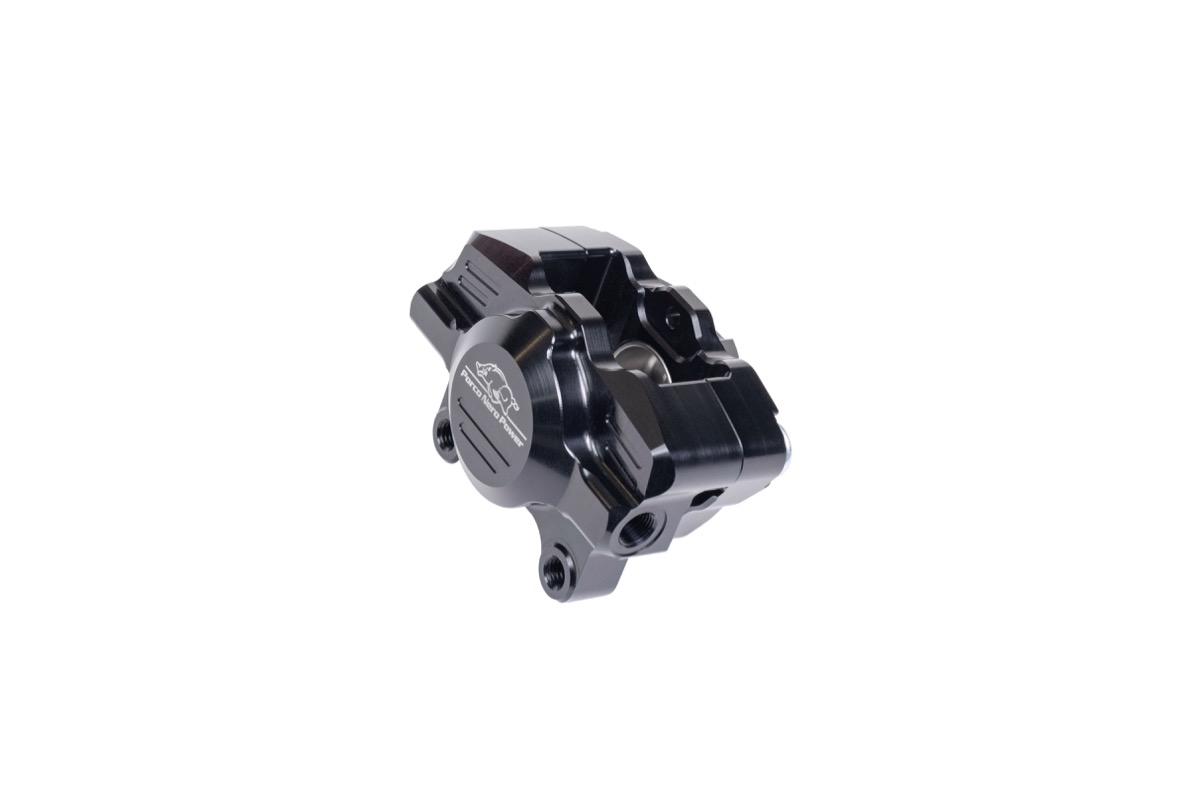
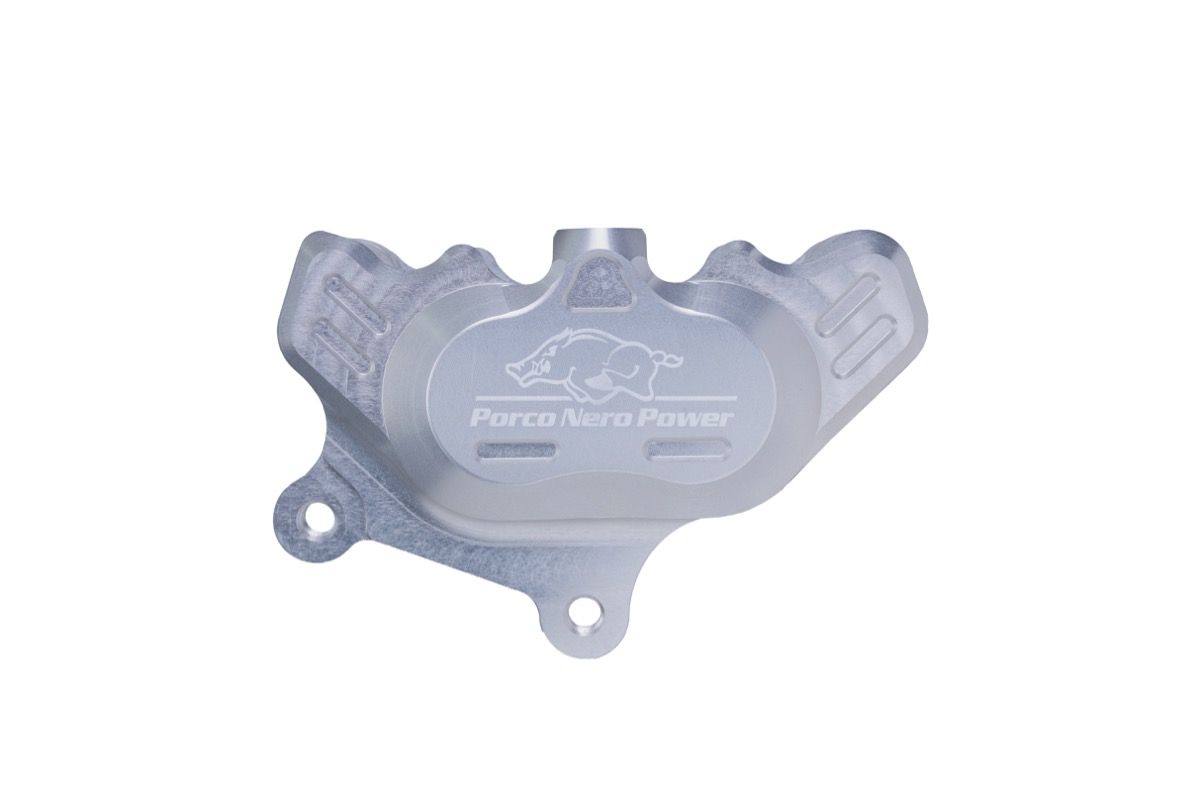
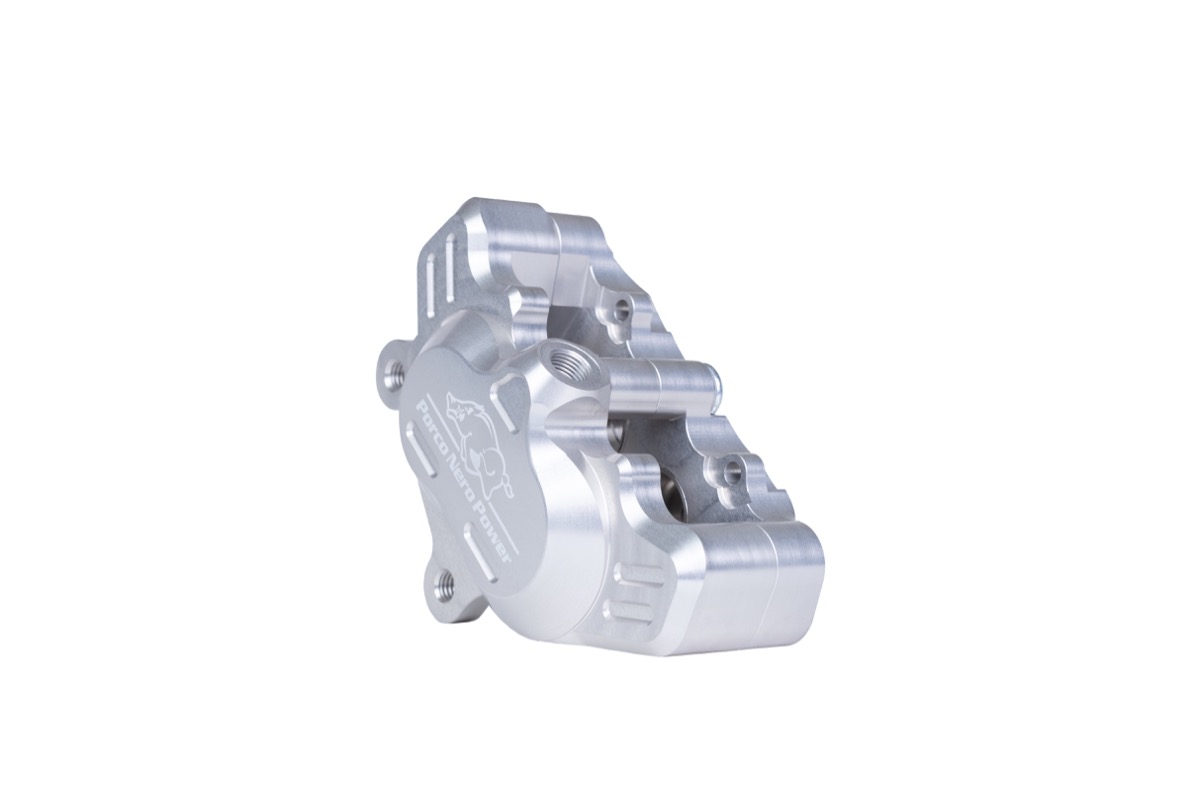
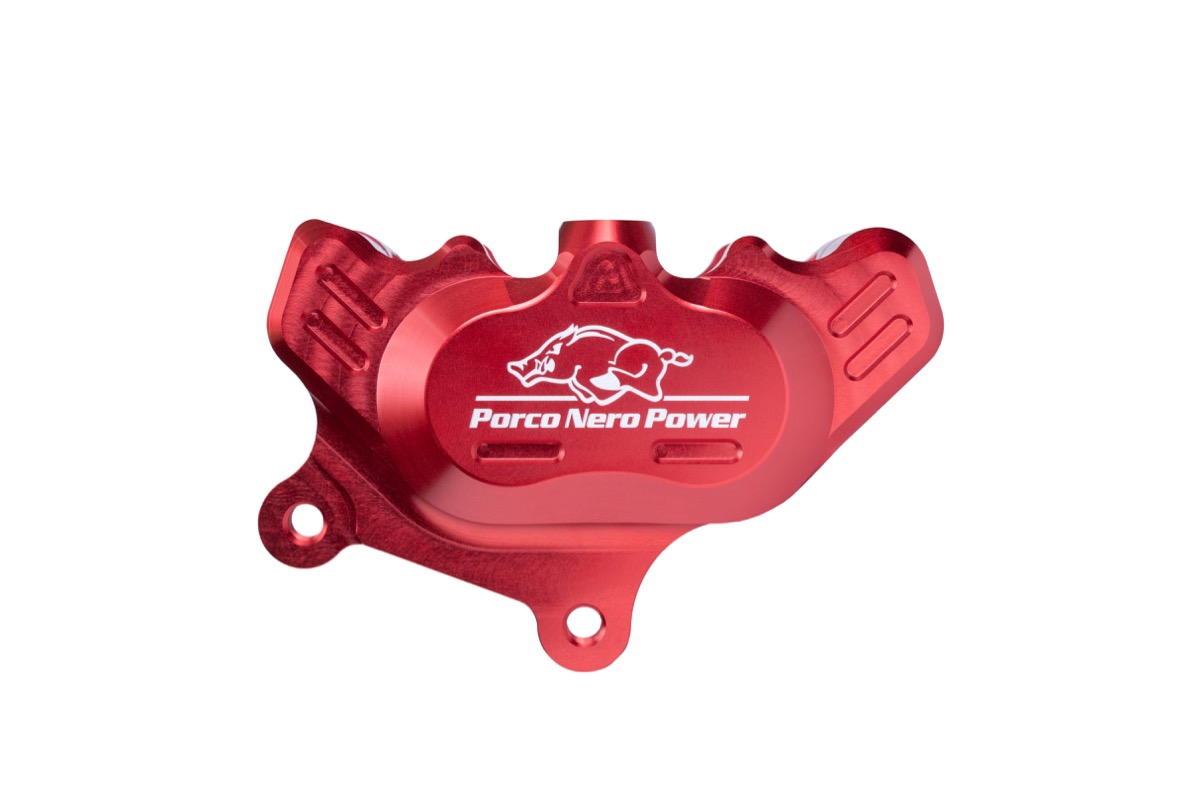
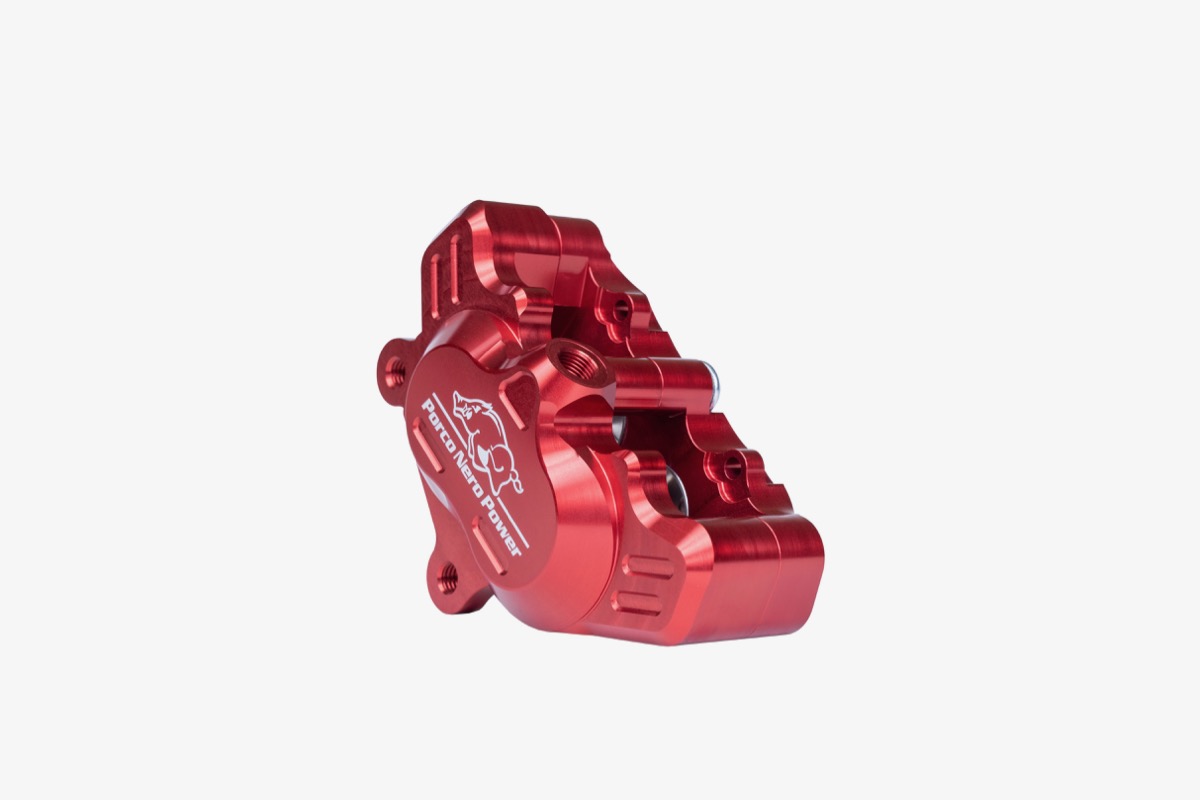
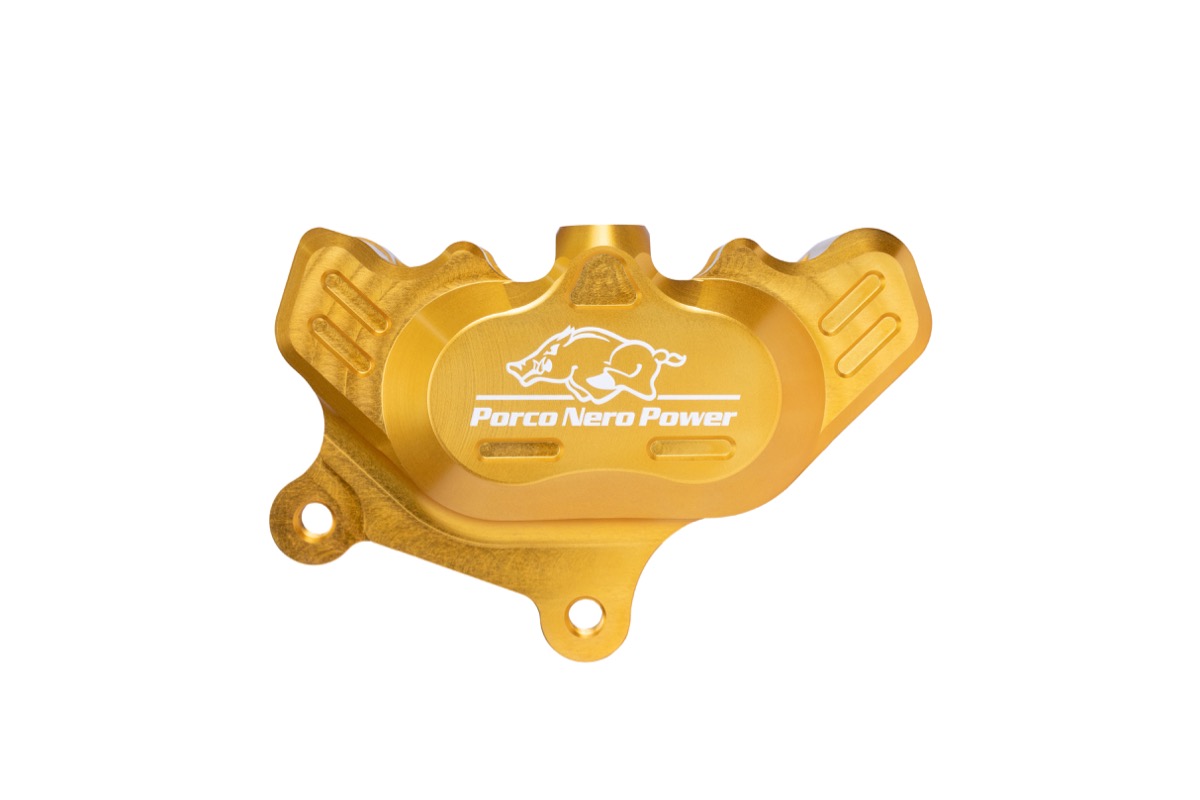
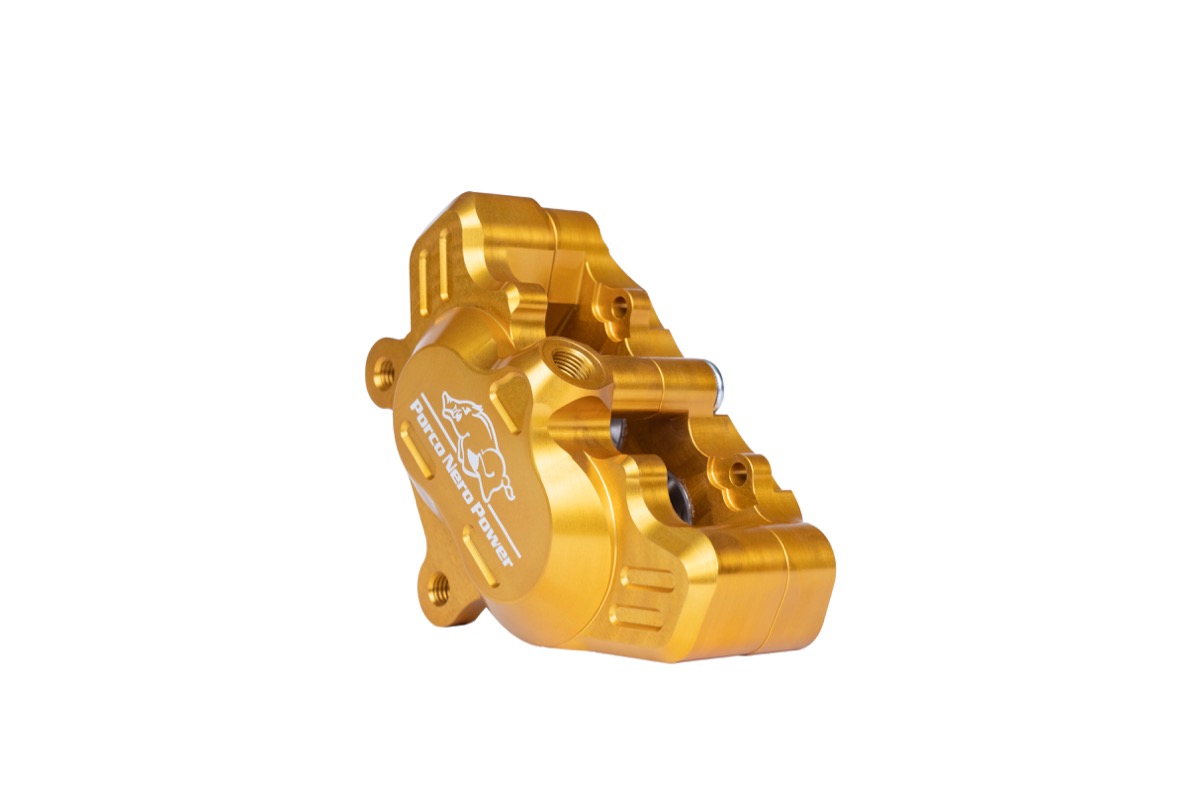
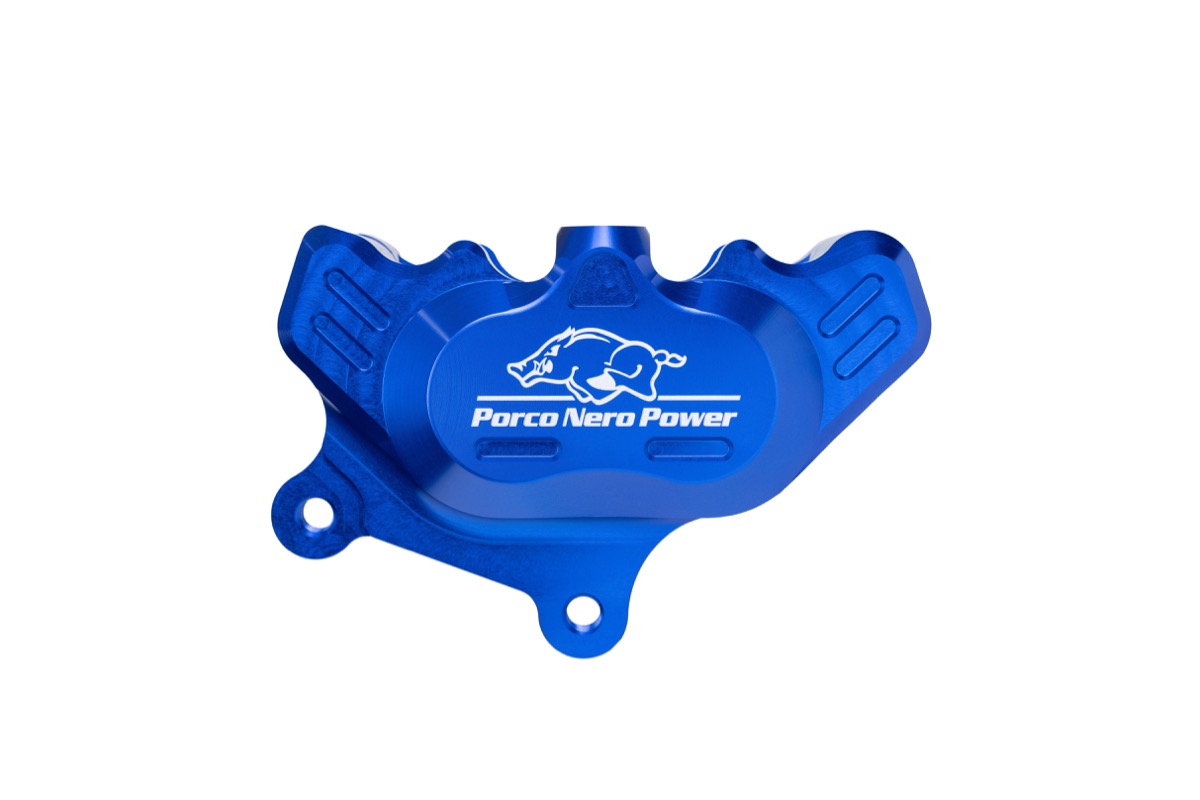
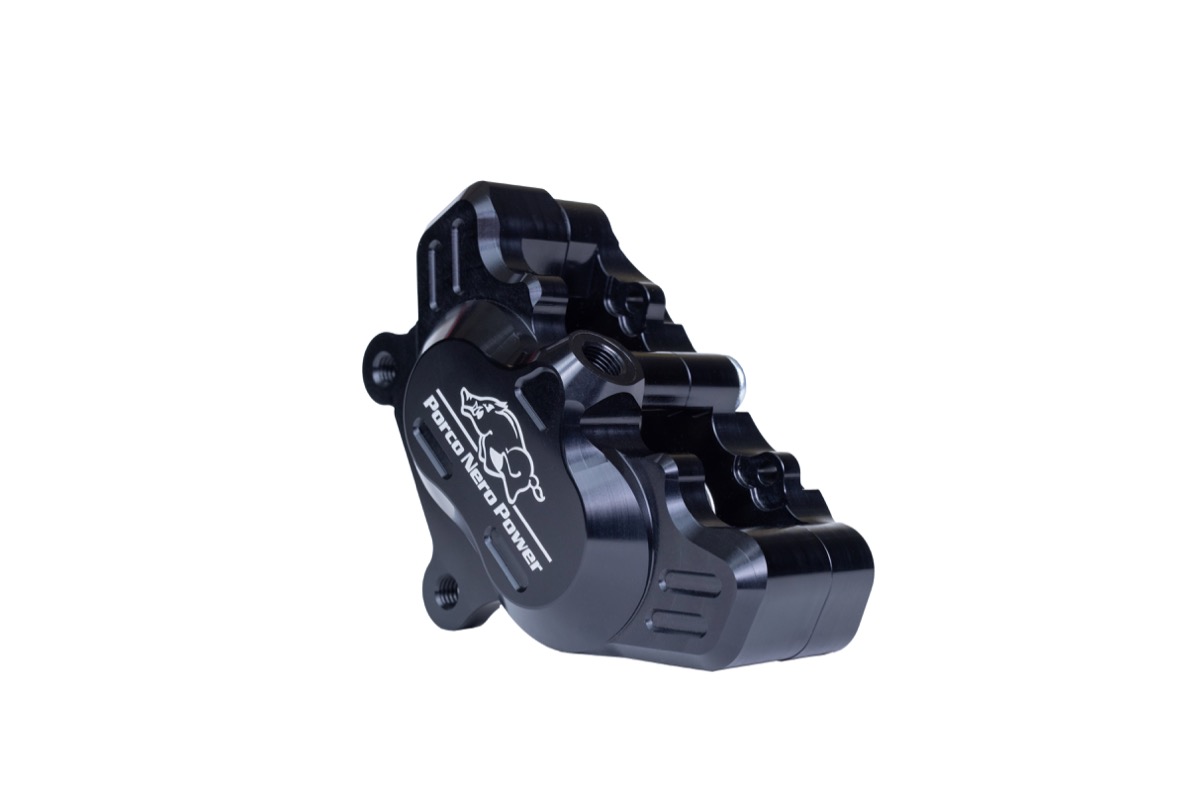
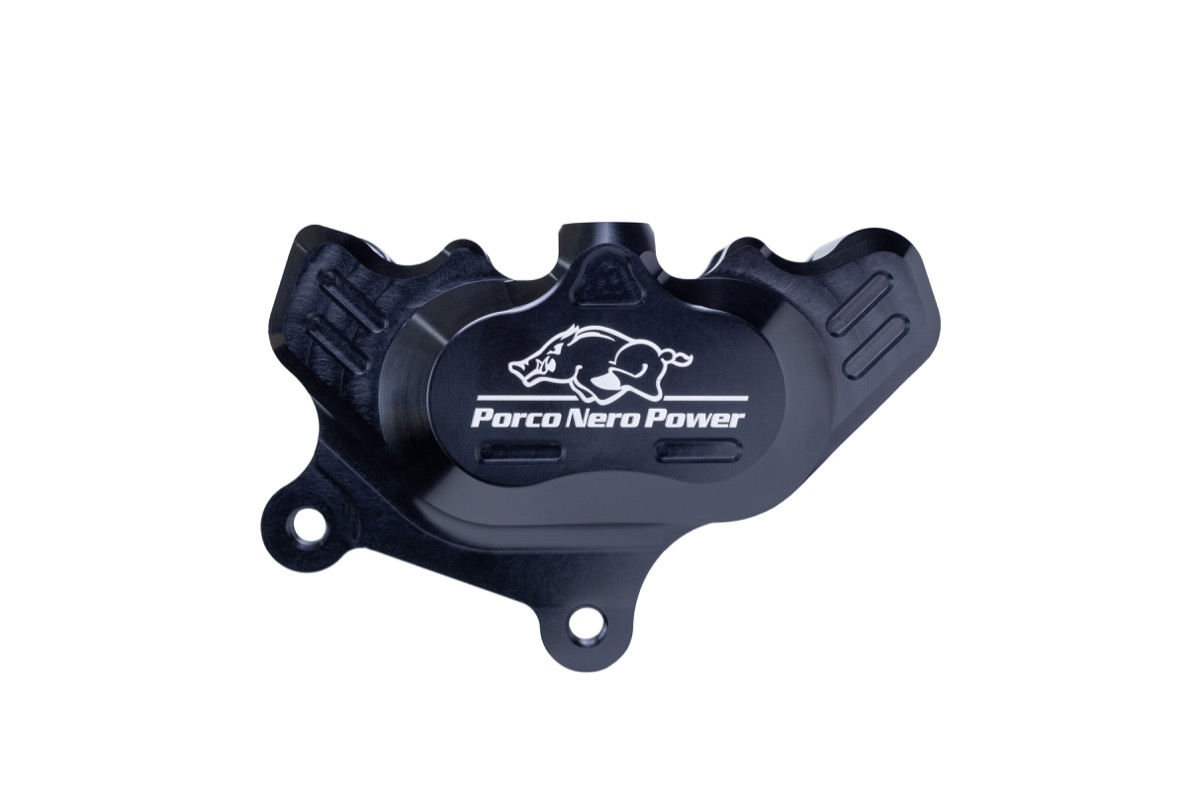
Si conduces rapido, tienes que ser capaz de desacelerar rapido. No hay problema, porque con nosotros obtendrá las Pinzas de freno de cuatro pistones Porco Nero Power de Spiegler. With him chasis bgm PRO for Vespa GTS con TÜV, it is frenos le officen una ventaja única de confort y seguridad para su Vespa GTS. La novedad son los dos colores plata y azul
| Article number | Color |
|---|---|
| PRN002BL2 | azul |
| PRN002GD2 | gold |
| PRN002RD2 | Red |
| PRN002BK2 | black |
| PRN002SL2 | plata |
| Article nº: | Color |
|---|---|
| PRN001BL2 | azul |
| PRN001GD2 | gold |
| PRN001RD2 | Red |
| PRN001BK2 | black |
| PRN001SL2 | plata |
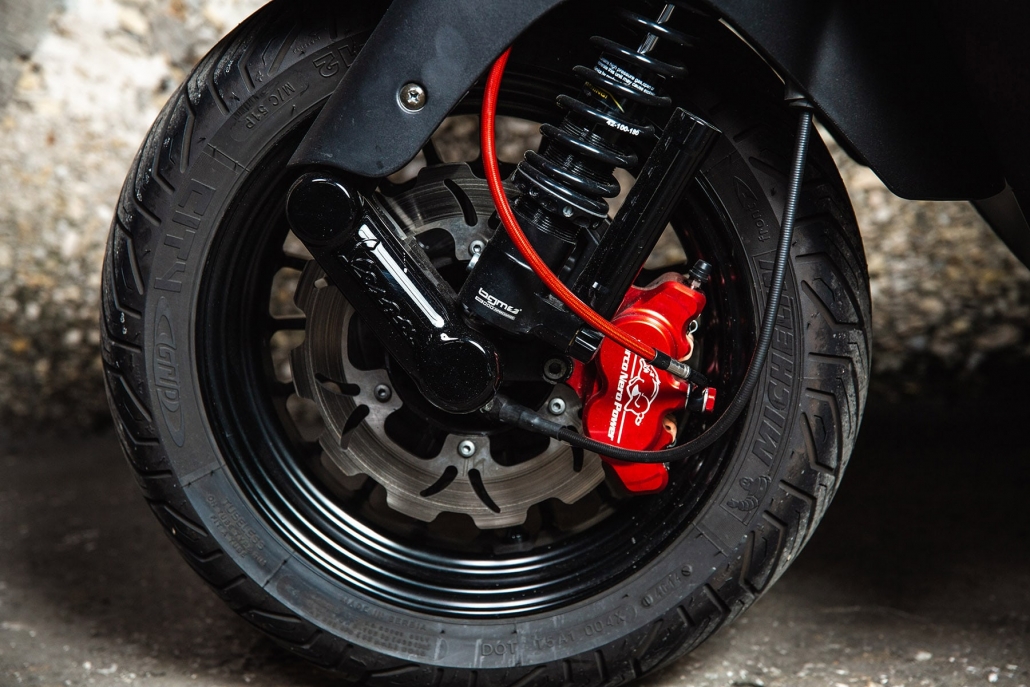
We have received TÜV certification for the Porco Nero Power / Spiegler brake for the description:
Note: Los frenos no encajan en los modelos GTV y GTS SeiGiorni con el faro en el guardabarros. Estos vehículos tienen un sistema ABS independiente que no es compatible with the pinza de freno Spiegler / Porco Nero Power desde un punto de vista puramente mecánico (problemas de espacio).