Posts

Tools not only please the heart of a screwdriver, with the right tool the work is also easier to do.

Contrary to the usual myth that you need tons of special tools for the Lambretta, only a few tools are really essential.

ESSENTIALS CATEGORY It doesn't work without them

Allen key bgm PRO 3.5mm

Unusual size and used for the clamping nipples on the gearshift and clutch. The bgm key comes with a practical ball head. This means that the rear shift cable can also be reached when the clutch cable is attached and without a special control block.


flywheel

Rotor puller M27x1,25

(A – D, LI, LIS, SX, TV, DL, GP, J, Lui) 
8099000

Rotor puller M30 x 1,5

(motor place ignition)
8099013

Flywheel holder 2+3 windows

LI, LIS, SX, TV, DL, GP, Lui, J50-125
8099008

Flywheel holder for flywheel bgm PRO

LI, LIS, SX, TV, GP, DL with 29cm
bgm2109T

Rotor holder Casatronic (IDM ignition) 

LI, LIS, SX, TV, DL, GP
3332382

Rotor holder Casatronic (Ducati ignition

LI, LIS, SX, TV, DL, GP
3332382D

Flywheel puller and suitable holders are the only way to remove the flywheel from the cone of the crankshaft. This is required for all work on the ignition system. But also if you want or need to penetrate deeper into the innards of the engine.

The flywheel holder 2+3 windows is intended for all original Innocenti and Indian flywheels with the corresponding recesses.

The bgm PRO pole wheel has an external hexagon on which the corresponding holder is attached. The holder is supported on the nut of the large silent blocks to hold it up.

There are two variants of the Casatronic ignition, one based on the IDM ignition and the current variant manufactured by Ducati Energia. The pole wheels are blocked with two or three pins on the pole wheel with the appropriate holder.

Clutch

Clutch compressor bgm PRO 

LI, LIS, SX, TV (Series 2-3), DL, GP, J, Lui 
bgm1220TL

Clutch compressor

LI, LIS, SX, TV (Series 2-3), DL, GP, J, Lui 
7671359

Coupling holder 

LI, LIS, SX, TV (Series 2-3), DL, GP 
8099003

Both of them are irreplaceable. The compressor is used to relieve the circlip on the Lambretta clutch. After removing the ring, the coupling can be removed.
The clutch nut is tightened with 66 - 74 Nm. For both loosening and tightening the nut, the clutch basket should be blocked with the appropriate tool/holder.

brake drum puller

OEM 

LI, LIS, SX, TV, DL, GP             
7676162

CASA LAMBRETTA 

LI, LIS, SX, TV, DL, GP
8099005

MBD 

LI, LIS, SX, TV, DL, GP
3333402

In the mid-1960s the design of the brake drum was changed. At this point, the Series 2 will have three M7 threads instead of the two M6 threads previously used. This goes hand in hand with the use of the retaining ring for the cap nut on the main shaft/brake drum. Our pullers come with both M6 and M7 screws to hold the puller in place. If it is attached to the brake drum, the brake drum is pressed by the main shaft via the large central screw.

The OEM quality of the puller works, but is not the best in terms of haptics.

Casa Lambretta offers the tool in a beautiful workshop quality and it corresponds to the original Innocenti tool.

MBD has optimized the original design and features knurling on the outer edge and a ball in the tip of the central screw. This fits into the recess on the mainshaft and is intended to prevent any damage.

Headset mounting wrench MBD

LI, LIS, SX, TV, DL, GP, J, Lui 

The MBD key for the headset bearing is perfectly adapted to the Lambretta. The holder for countering is separated according to the conditions of the Lambretta.

fork spring compressor

OEM 

LI, LIS, SX, TV, DL, GP             
6660212

CASA LAMBRETTA 

LI, LIS, SX, TV, DL, GP
CBL212

MBD 

LI, LIS, SX, TV, DL, GP
7670992

The compressor for the springs in the fork is used to overhaul the fork. Neither the fork links nor the springs and their spring guide rods can be removed from the fork without compressing the springs. 

Both the Casa Lambretta and the MB compressor are based on the original design of the tool. This is sometimes a bit difficult to handle and a third or even fourth helping hand is usually not bad.

The OEM design, on the other hand, is screwed to the fork and handling is very easy and time-efficient. So here: clear purchase recommendation for OEMs.

Silent block assembly tool bgm PRO

LI, LIS, SX, TV, DL, GP

The silent blocks can only be changed with the appropriate tool and with a sufficiently heated engine housing. The bgm tool for this is a solid turned construction.

HAVING IS BETTER THAN NEEDING

crankshaft pulling sleeve 

LI, LIS, SX, TV, DL, GP             
MRB0012

connecting rod locking tool

LI, LIS, SX, TV (Series 2-3), DL, GP, J50, J100, J125, Lui 50-75
7671543

Crankshaft removal tool -MBD

LI, LIS, SX, TV, DL, GP
7671543

Crankshaft pulling tool 

LI, LIS, SX, TV, DL, GP
CPX231B

It is best to pull the crankshaft into the bearing on the drive side. The original drive sleeve with the screw for the front sprocket can be used for this.

The pull-in sleeve is a length-optimized version of the original drive sleeve and offers comfort and speed when screwing. In both versions, the crankshaft must be fixed (e.g. with a connecting rod locking tool.

The Casa Performance version is a rather ingenious further development, in which the crankshaft does not have to be blocked and the shaft is drawn particularly gently into the bearing seat.

The MB tool is still the first choice for dismantling the crankshaft. It is screwed onto the motor housing and then the shaft can simply be pushed out of the bearing seat

Video CP tool

MB Developments

The MB Tools are still the first choice for crankshaft disassembly. It is screwed onto the motor housing and then the crank can simply be pushed out of the bearing seat.

Crankshaft drive sleeve puller

Exact copy of the original Innocenti tool. This allows tightly seated drive sleeves to be gently pushed off the crankshaft. The drive sleeve has two holes on the outer end for using the tool. The sleeve and tool are connected to each other with the two knurled screws on the side and then the sleeve is pressed off the crankshaft stump using the toggle.

LI, LIS, SX, TV (series2,3), DL, GP             
7671361MB

Main shaft assembly tool

Before installing the gear backlash, it is important that the countershaft is fully torqued into the rear hub bearing. This can be done with the rear brake hub fixed. An alternative to this is Mark Broadhurst's final drive sleeve tool. Once the layshaft is in place, insert the sleeve by locking the socket head cap screw into the layshaft grooves, fitting the special nut provided, holding the sleeve with a wrench and tightening the nut until the layshaft is pulled into place with the correct torque is.

LI, LIS, SX, TV (Series 2-3), DL, GP, J50, J100, J125, Lui 50-75
7671800

Determination of top dead center and ignition timing

The dial gauges and brackets, which are mounted in place of the cylinder head, are precision measuring tools for determining top dead center and ignition timing. A good choice if you already have an engine on the workbench or engine stand. If you need to do ignition timing with the engine installed, it may be easier to use the buzzwangle, beluga, or similar methods.

BUZZWANGLE from Sticky

The buzzwangle tool is a brilliant idea from the sticky. A digital degree disc can be clamped onto the threads for the flywheel puller using an adapter with four mounts. Thus, the digital angle dial gauge is immovably attached and both the ignition point and the control times can be determined and adjusted to an accuracy of 0,1°.

Fits all Lambretta Innocenti models and their derivatives. Just like on most Vespa and Piaggio models.

It's best if you just watch the video

CURIOS the video is also available with a German soundtrack

99,00€

degree disk bgm          
BGM8809

Ignition timing calipers

Series 1-3
CMDTB0010

Dial indicator holder MB

MRB0045

Dial indicator with holder bgm

8099009

dial gauge bgm

7670937

dial gauge holder bgm

7670938

Feeler gauge bgm          
BGM8809

Feeler gauge 

The feeler gauge is great for setting contact breaker or gear backlash.

Feeler gauge Toptul

ICAA0020

Spark plug wrench bgm PRO SW21mm/13mm

LI, LIS, SX, TV, DL, GP, Lui, Junior

The Li family's spark plug accessibility isn't the best. The original spark plug wrench fits, of course, but has the disadvantage that removing a hot spark plug can result in burnt fingers. With the bgm part, the candle can easily be completely unscrewed by hand after loosening. And not only that, an integrated magnet holds the candle securely in the key. There are guaranteed no burnt fingers here.

19,90 €

Assembly stand bgm PRO

Lambretta Series 1-3

Replaces the engine for assembly work. The assembly stand is screwed to the frame via the shock absorber attachment and the engine bolt. The scooter can then be maneuvered as if the engine were inside. Suitable both for keeping the scooter mobile and upright while the engine is on the operating table or for setting up the Lambretta after the preparation or painting when the engine is not yet ready.

109,00 €

Rivet hammer for lettering

Lambretta A, B, C, LC, D, LD, LI, SX, TV, DL, GP, J, Lui

All lettering with pins on the back for attachment can be professionally attached. The pins on the lettering should be shortened so that they protrude by only 2 mm. A top tip from Dean from the Sticky Manual is to drill out the pins of the lettering. For reference page 203 Sticky Manual.

8,90 €

Rivet hammer for rivet luggage compartment lock

LI, LIS, SX, TV, DL, GP

All lettering with pins on the back for attachment can be professionally attached. The pins on the lettering should be shortened so that they protrude by only 2 mm. A top tip from Dean from the Sticky Manual is to drill out the pins of the lettering. For reference page 203 Sticky Manual.

11,95 €

Mounting tool shifter claw bgm PRO 'ball crusher'

LI, LIS, SX, TV, DL, GP

The ball crusher is a cleverly designed tool. With it, the shift balls and spring can be easily and conveniently installed in the main shaft. Without this tool, installing the shift dog can be a real game of patience. Simultaneously get the balls in position on both sides and enough preload without being shot into the endless expanses of the workshop by the switching spring?

Threaded bushing MB

This thread insert is intended for repairing damaged threads on Lambretta engine cases. Easy and saves welding a case.

Threaded socket M10 x M6   
6661083

Threaded socket M10 x M7
6661082

Threaded socket M10 x M8

3331081

Stud mounting tool

Clever tool from BGM for installing stud bolts without damaging them.
Screw the BGM Pro tool onto the stud bolt and counter with the integrated hexagon socket screw. It is braced with the thread of the stud bolt. Now turn the outer wrench flat. The stud bolt is fixed and is loosened or screwed in. Make sure that the counter-locking is sufficiently strong so that the tool does not come loose.

Ideal for short bolts (such as Lambretta gearbox covers).
The required minimum length of grippable stud thread is:

  • M6 / /M7 = 6,5mm
  • M8 = 9mm

Available individually or as a set.
Also available for the rare thread size M7!

Required additional tool:

  • Combination wrench: SW19
  • Allen key: 6mm

NOTE: Please note that stud bolts glued in with screw adhesive/Loctite often have a very high breakaway torque. Here you should first try to heat the stud(s) or the housing around it in order to loosen the adhesive connection.

Stud assembly tool M6 x 1.00mm   
BGM72M6

Stud assembly tool M7 x 1.00mm 
BGM72M7

Stud assembly tool M8 x 1.25mm 

BGM72M8

tool bags

Tool bag without tools CASA LAMBRETTA    

8050083

Tool bag including on-board tools  CASA LAMBRETTA

8050083KT

Toolkit CASA LAMBRETTA

LI (Series1-3)

3331475

Tool bag without tools

CLA331

toolbox

Lui 50 C/CL, Lui 75 S/SL

7674676

Assembly support stand 

LAMBRETTA- LI, LIS, SX, TV (series 2-3), DL, GP, J50, J100, J125, Lui 50-75

Lambretta tool bag retaining clip    

The Innocenti icing on the cake of a beautiful restoration is the original on-board tool kit in the right bag with Lambretta Innocenti ribbons and then fixed with the correct retaining clip.

A nice reading recommendation on the subject of tools is the reprint of the Innocenti tool catalogue.

Oil measuring cup 

Another nice addition to any Lambretta tool box is the Innocenti oil can from Casa Lambretta. This is an exact copy of Innocenti's American market device. It comes complete with a snug fitting cap. It has the 'Lambretta' and 'Innocent' logos embossed on the sides.

Tool catalog -SCOOTERPRODUCTS

Tool catalog -SCOOTERPRODUCTS

Lambretta and Lambro (1960s models)     

And since the right tool is useless without knowing how to use it, here is the ultimate Lambretta reading tip! Since its release in 2004, the Sticky Manual has been the definitive repair manual for the Lambretta. The work steps are explained throughout with color illustrations. In addition to the pure repair instructions, the Sticky Manual is also an indispensable aid for identifying and distinguishing between parts.

Book -Complete Spanner's Manual Lambretta -Third Edition

by Sticky

Thanks to our friend Dean Orton, the Sticky Manual has also been available in Italian for over two years: 8100072IT

TOPTUL HIGHLIGHTS / SELECTED PARTS

Since 1994, Rptar Machinery Industrial Group has used its capabilities to manufacture top-of-the-line tools under the Toptul brand. The price/performance ratio is probably unsurpassed. Only the most reliable tool steel alloys are used, such as chrome-molybdenum steel or chrome-vanadium steel.
We have selected a few products to show the variety, but there is not enough space here for the entire range. 

Digital Torque Adapter

   TTDTA030N

Steckschlüsselsatz 

GCAI4901

Allen key 

GAAL0916

T-handle ratchet

TTCTRM1227


"I did not know the TOPTUL brand and I must say that it is excellent, very hard steel and TOP precision, it will be a reference brand for my next purchases in laboratory equipment, congratulations."

One of the ratings

in the SC shop

Digital degree disk -TSR Buzzwangle

Digital degree disc TSR Buzzwangle

Determine ignition timing and steering angle

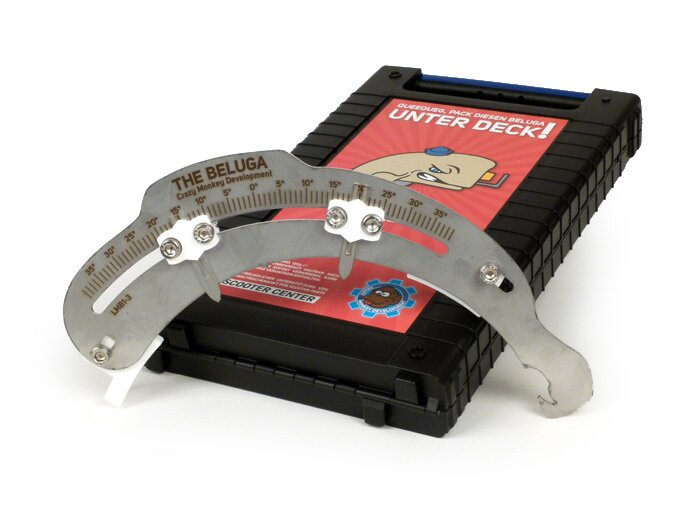
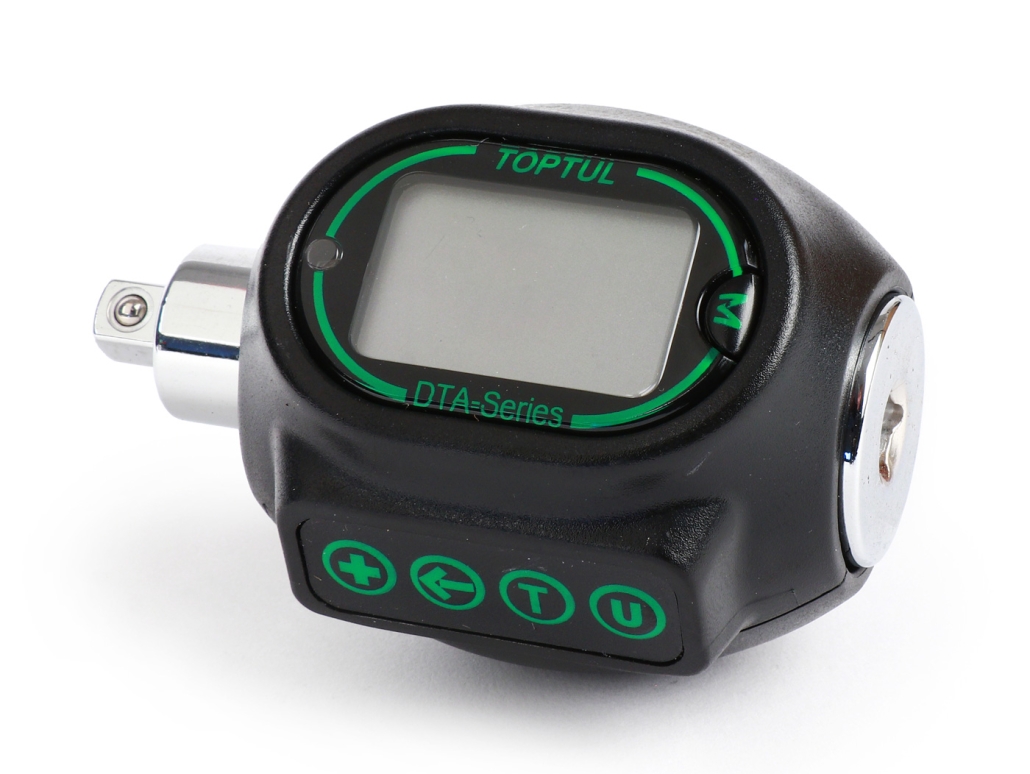
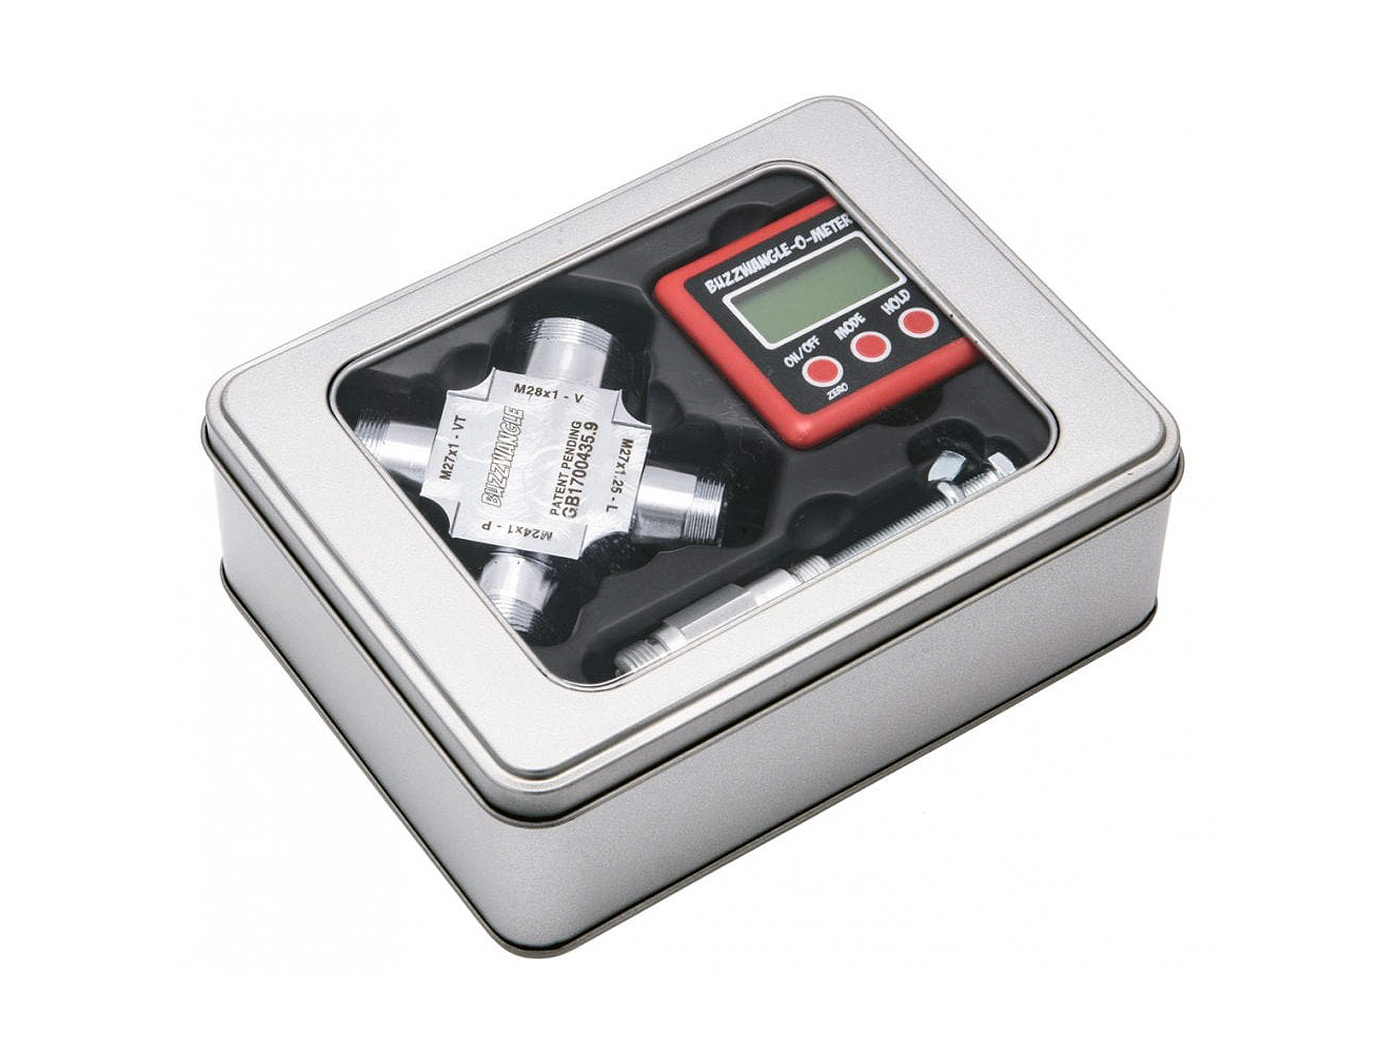
Set Vespa ignition / Set Lambretta ignition with the digital degree disk -TSR Buzzwangle Ignition and Port Timing Tool- used to digitally measure the ignition point and the control angle on 2-stroke engines (BZZKIT1)

TSR buzzer

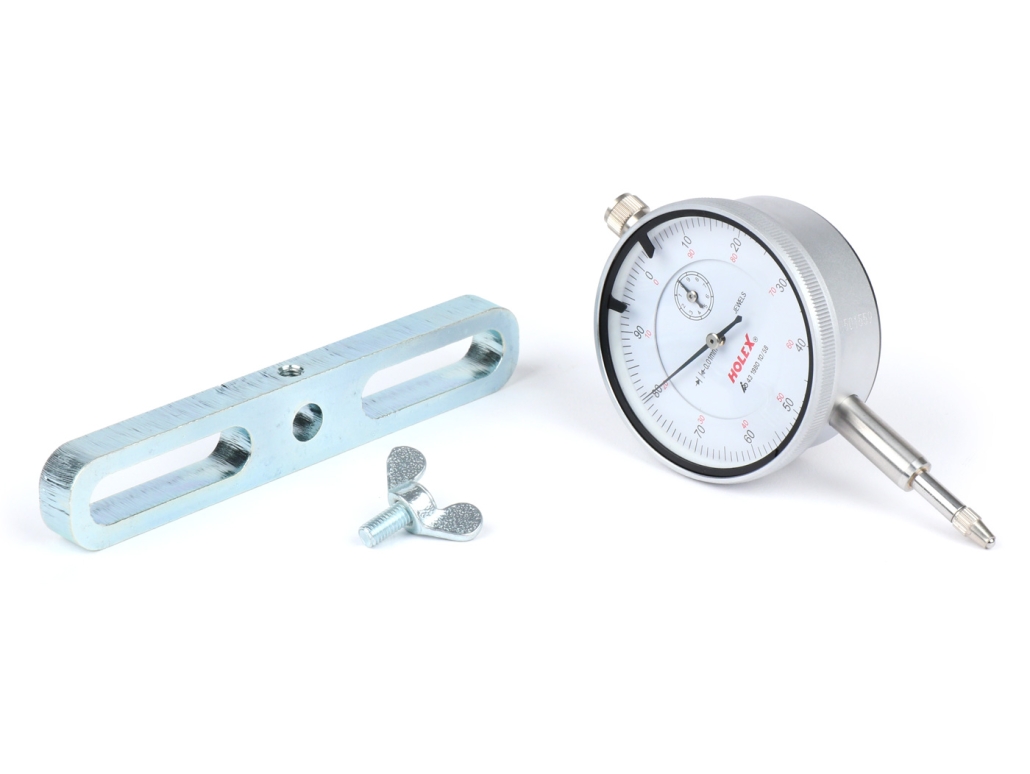
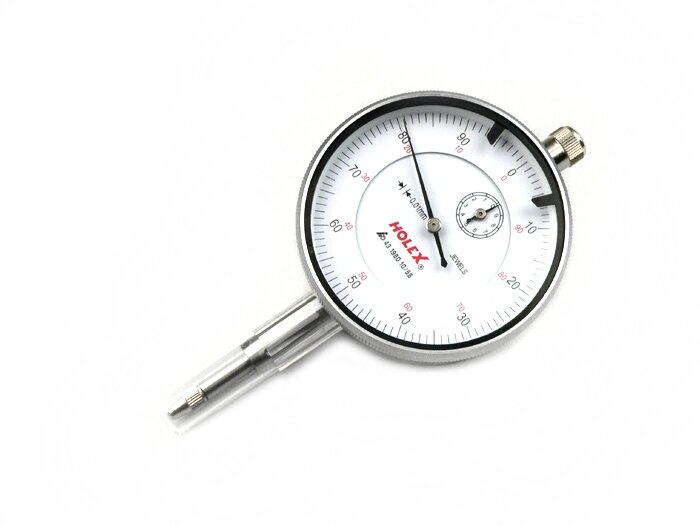
The BUZZWANGLE tool is designed to be able to determine both the ignition point and the control angle of a two-stroke engine (e.g. Vespa / Lambretta) in a very simple way. The device measures 360 ° with a resolution of 0,1 degrees. That is ten times more accurate than with a conventional degree disk!

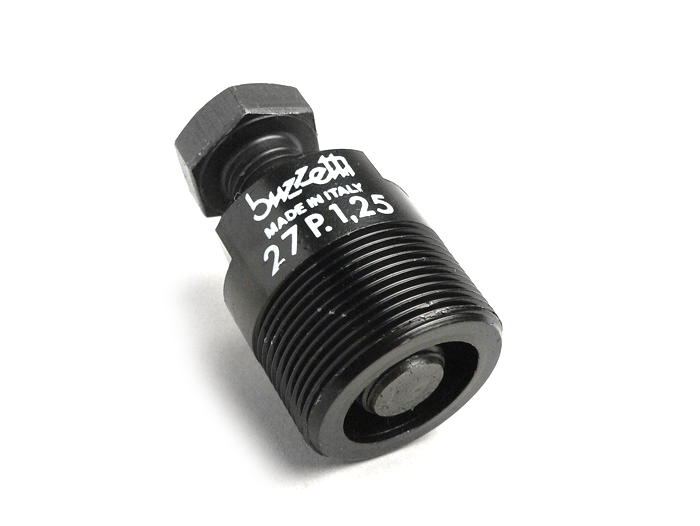
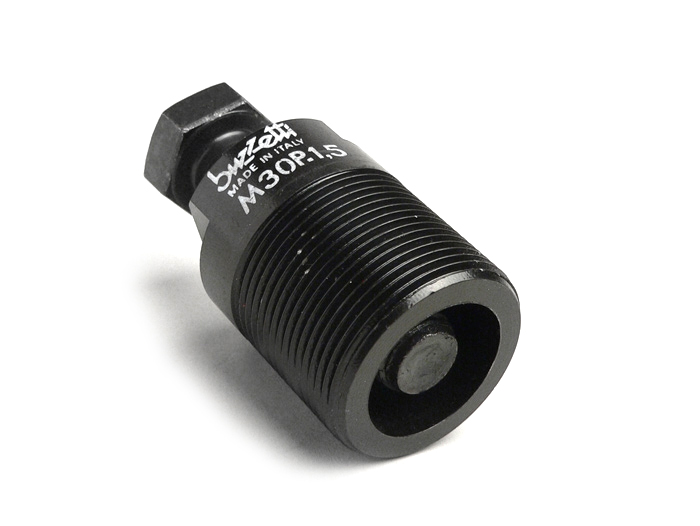
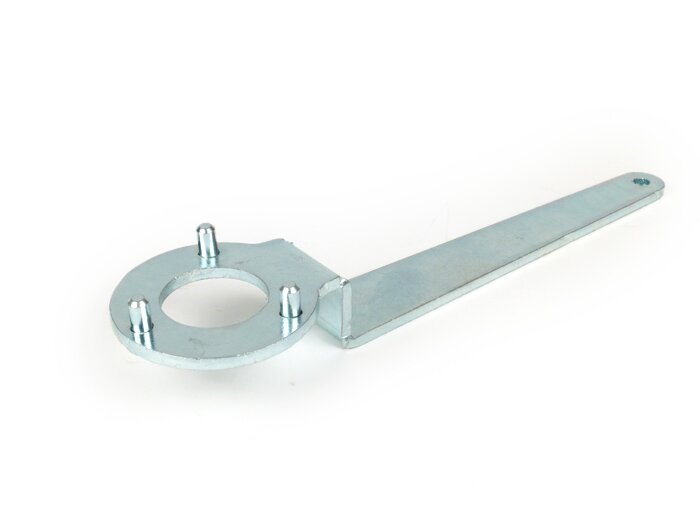
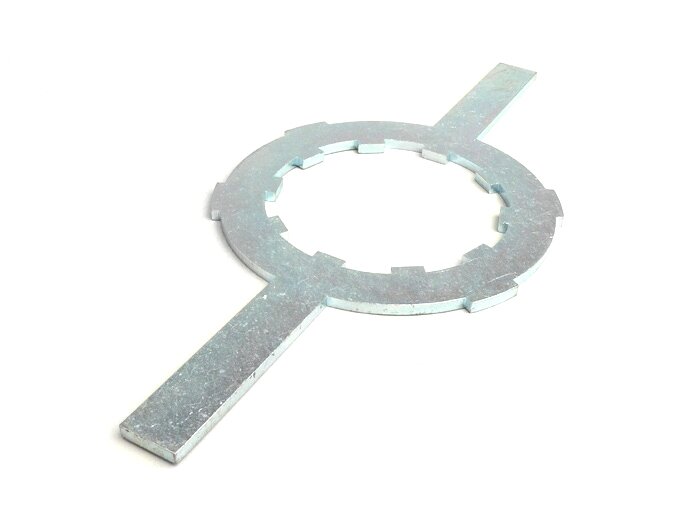
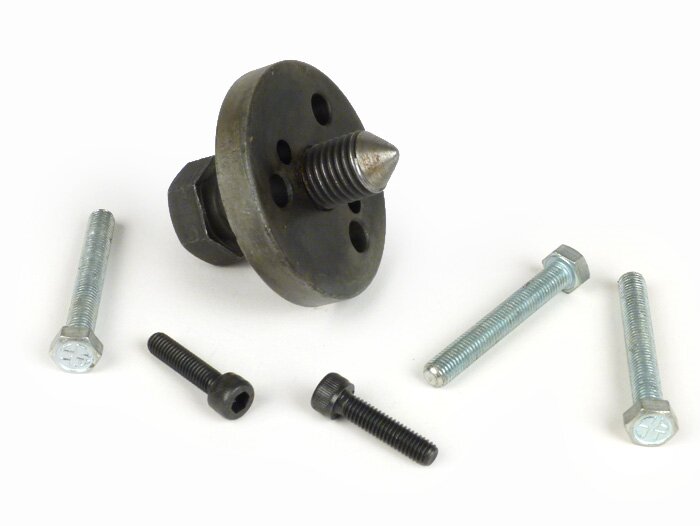
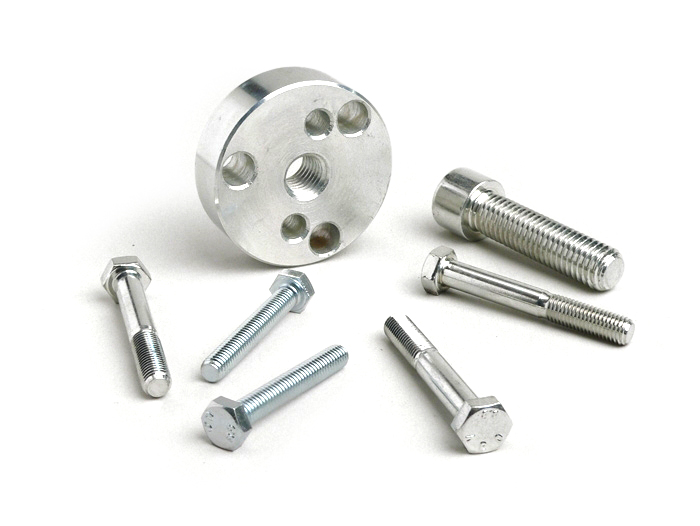
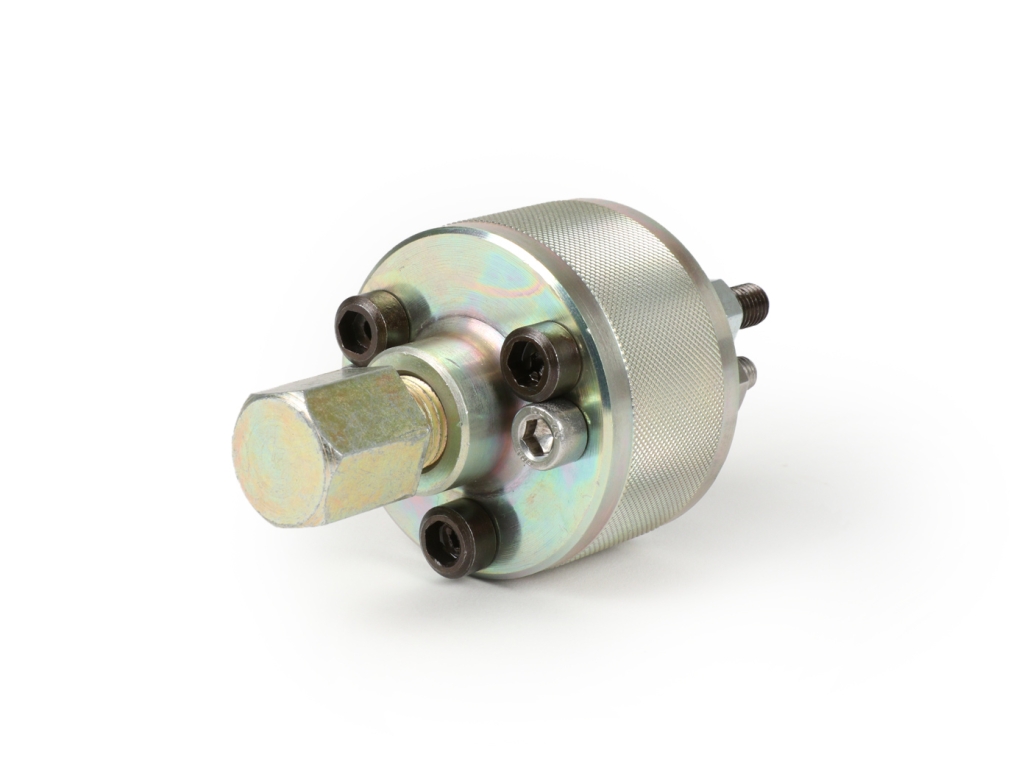
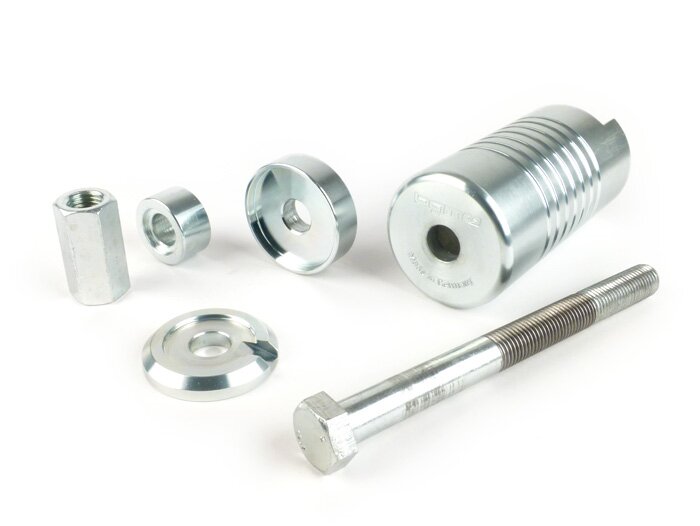
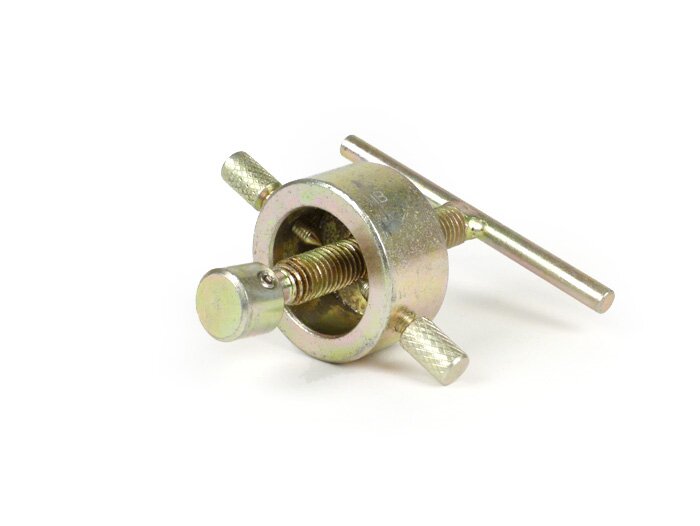
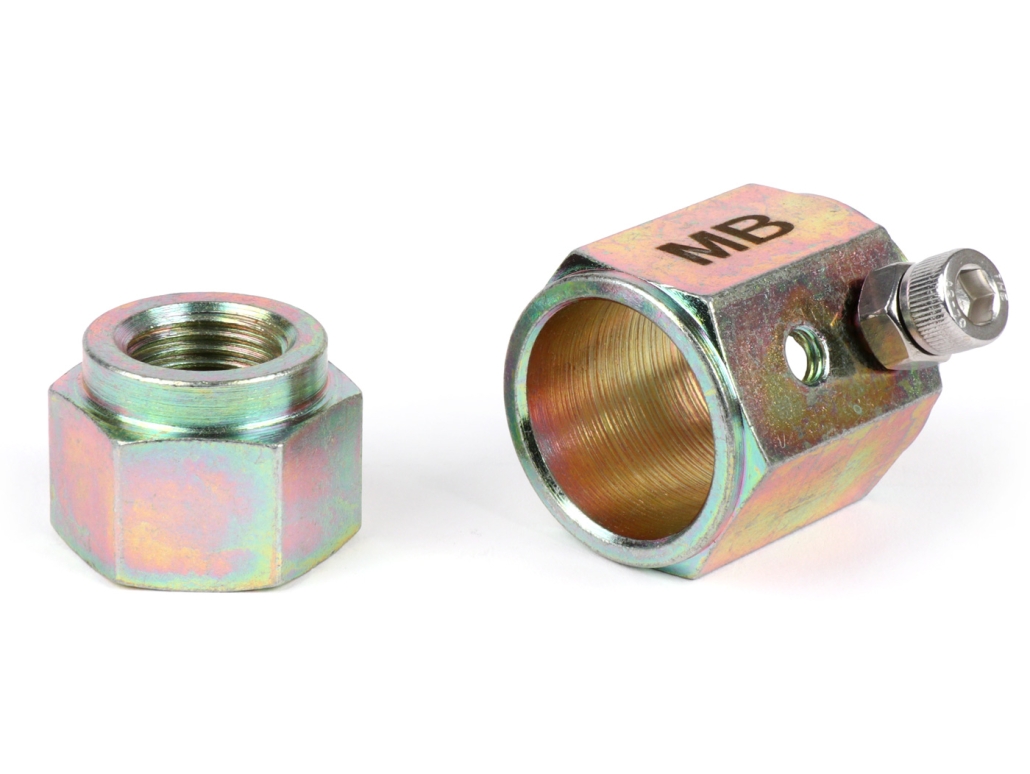
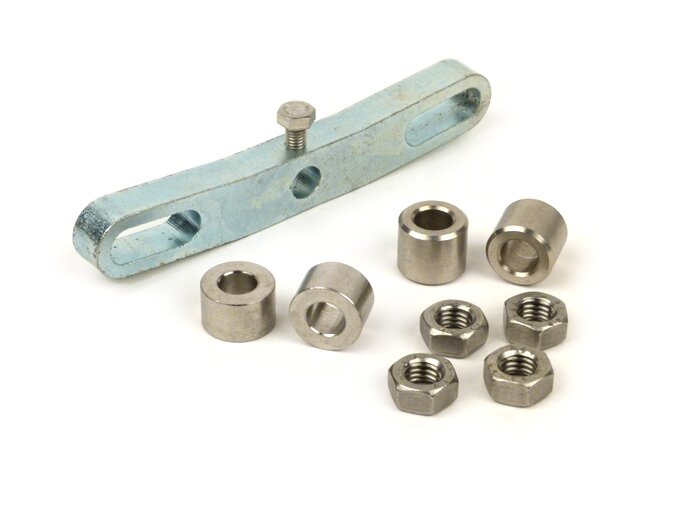
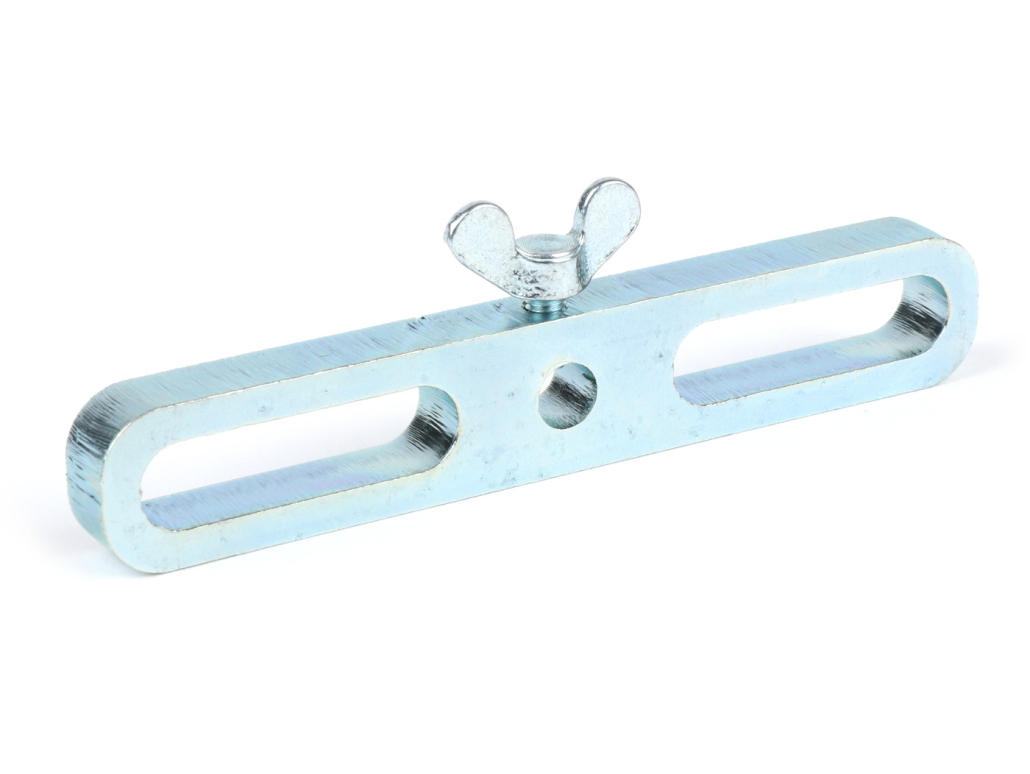
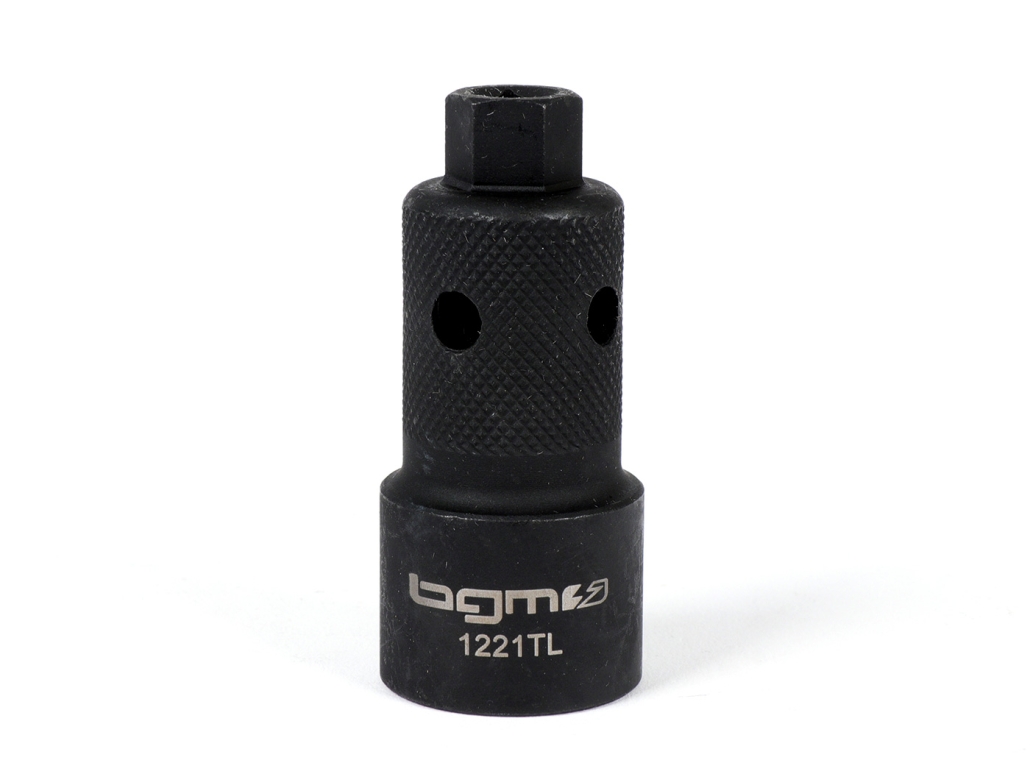
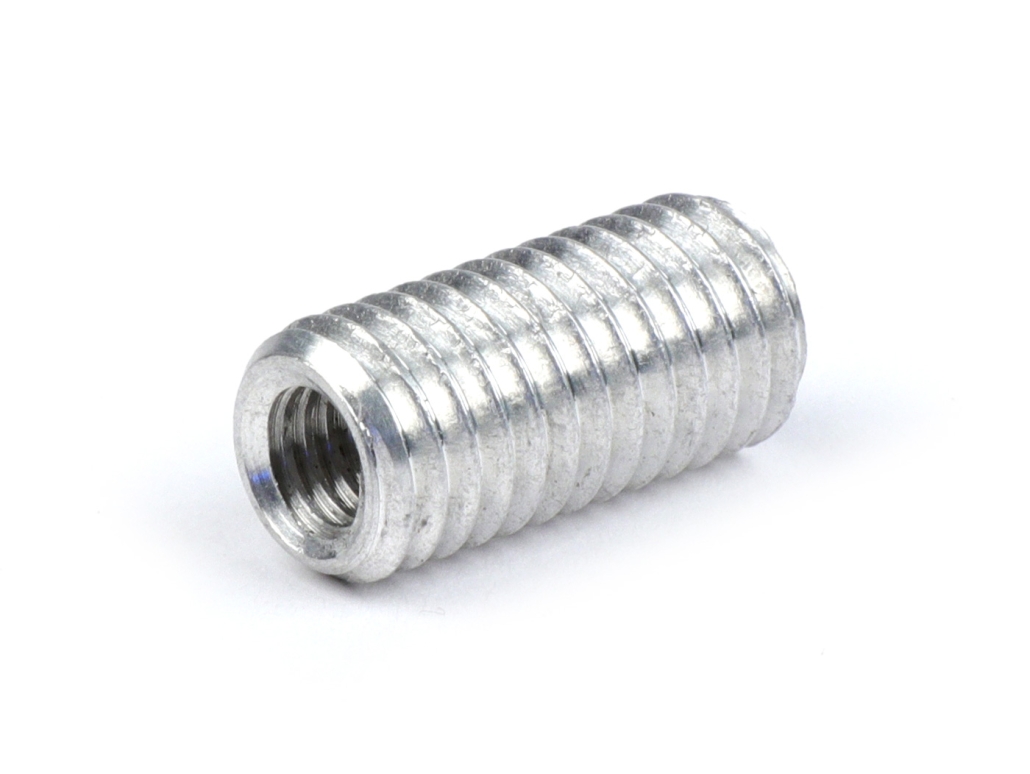
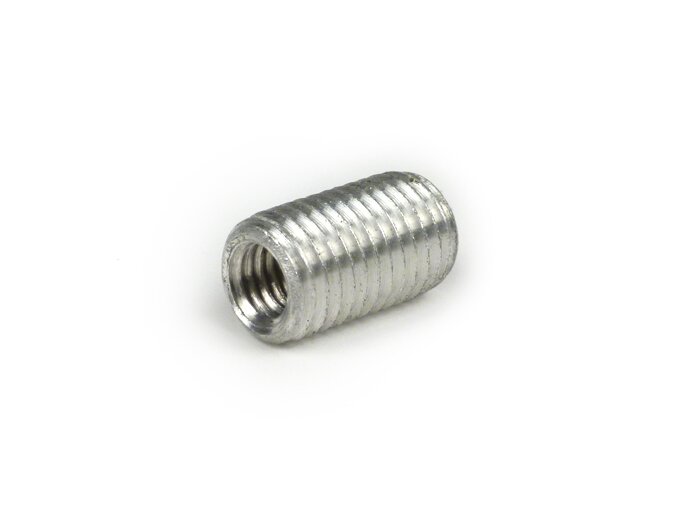
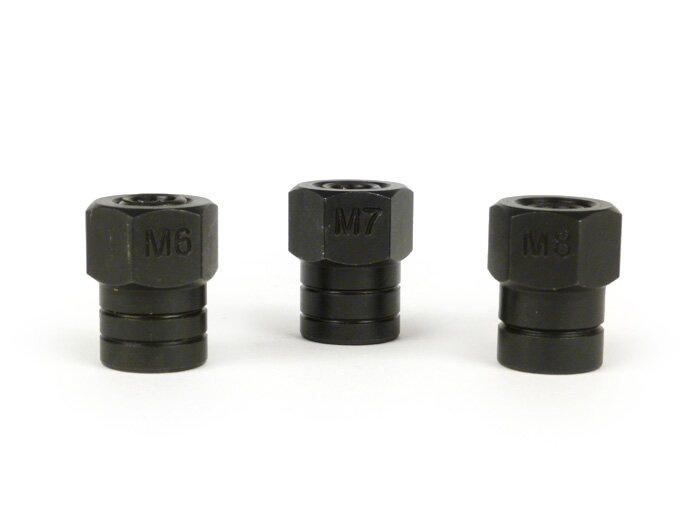
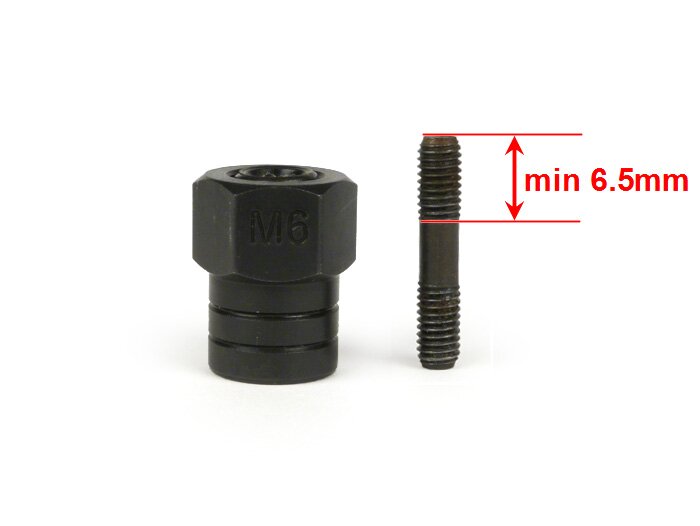
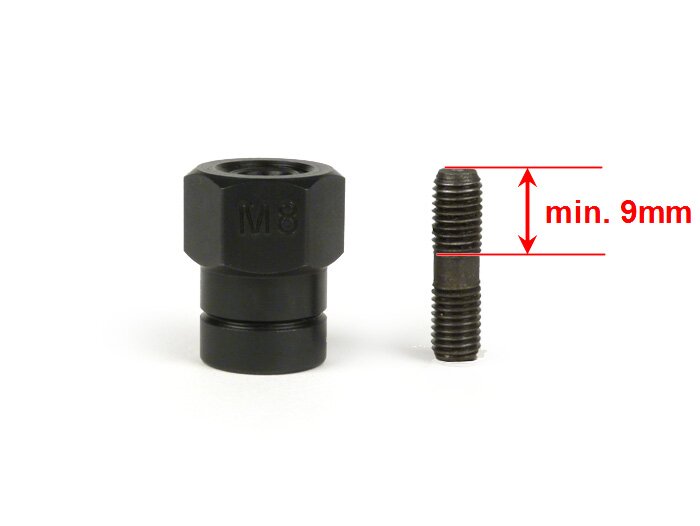
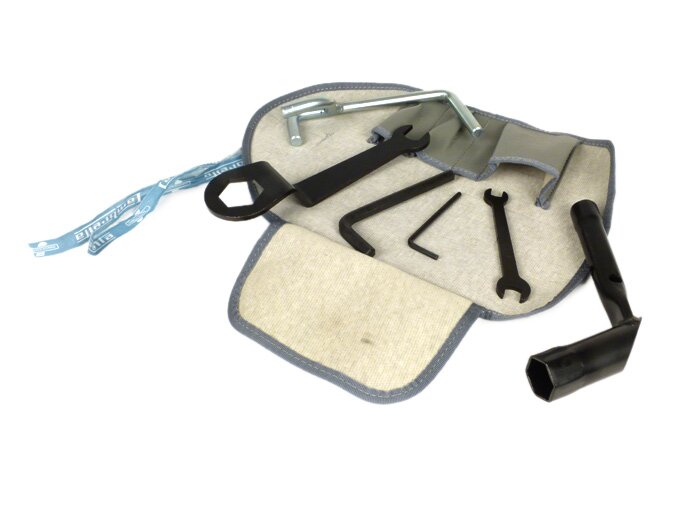
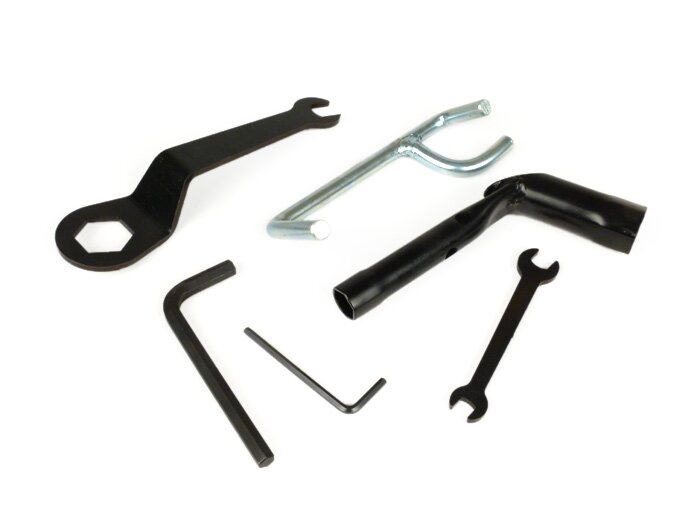
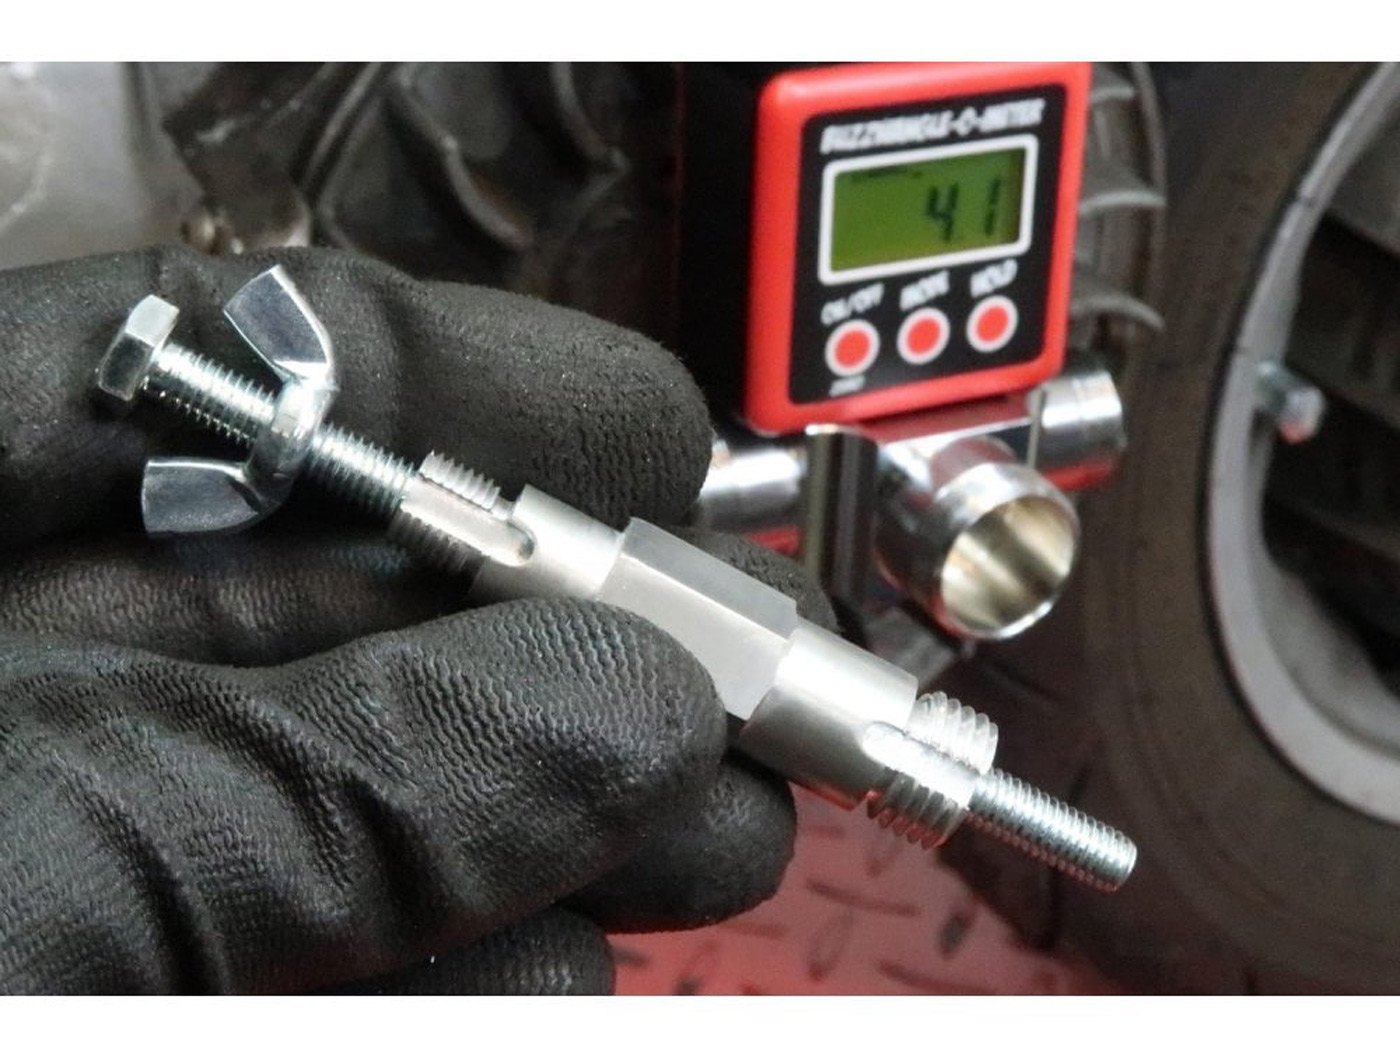
The kit consists of a screw adapter for the most common pole wheel threads. The magnetic buzzer tool is placed on this adapter.

The screw adapter fits the following models:

  • “L” M27x1.25 - suitable for LAMBRETTA Innocenti (models LI, LIS, SX, TV, DL, GP, J, Lui, A, B, C, LC, D and LD) and MZ vehicles
  • “V” M28x1.0 - suitable for almost all Vespa Largeframe and Smallframe Motors with pole wheel thread. Also for Piaggio / Gilera 125-180ccm Maximengines and SIP Vape ignitions.
  • “VT” M27x1.0 - suitable for Vespatronic retrofit ignitions. Can also be used for many classic 2-stroke motorcycles, e.g. Yamaha RZ350, RD350, RD250, RZ250, BANSHEE. Also suitable for GAS GAS motorcycles and Hondas that have a Kokusan ignition.
  • "P" M24x1.0 - suitable for Parmakit retrofit ignitions, also suitable for Aprilia RS125 and 50ccm engines from Kymco, MBK, Peugeot, Honda and Yamaha / MBK (Minarelli)


DETERMINE TOP DEAD POINT

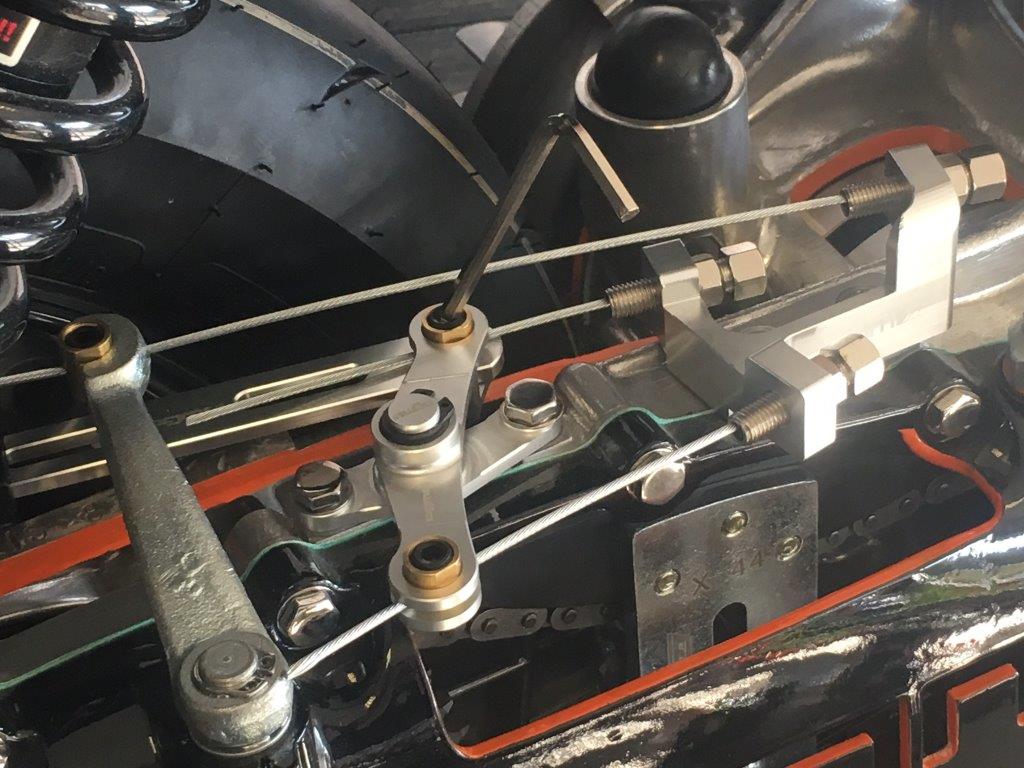
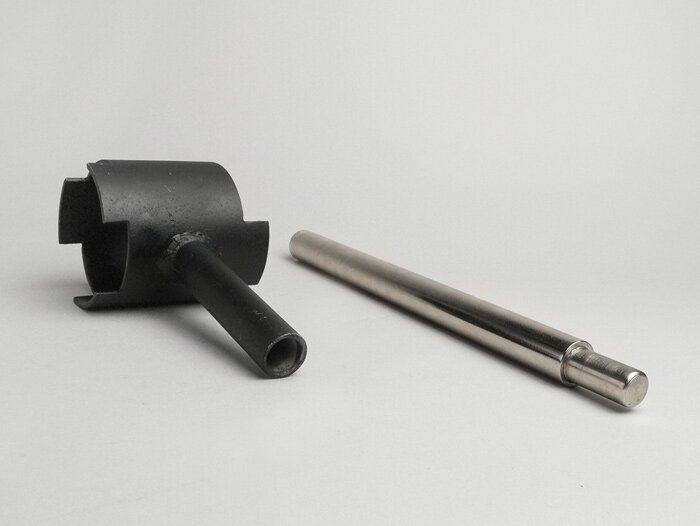
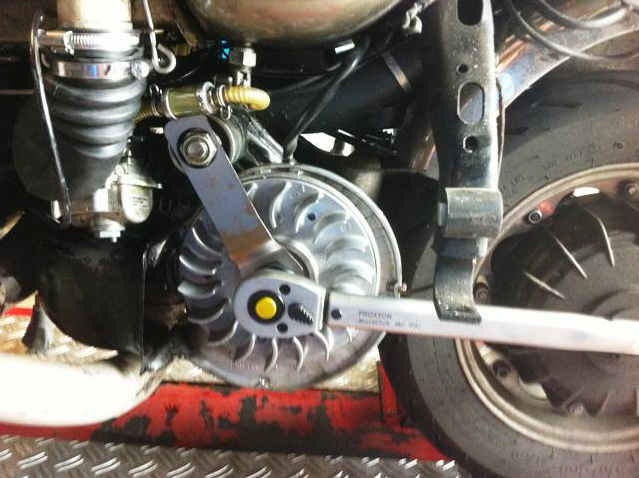
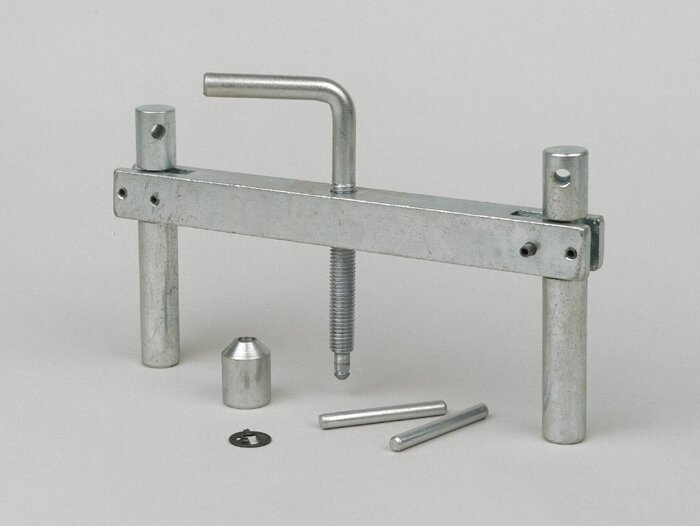
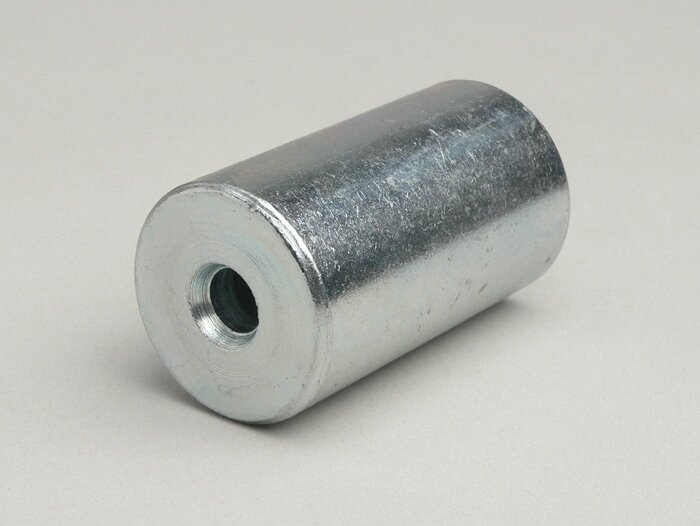
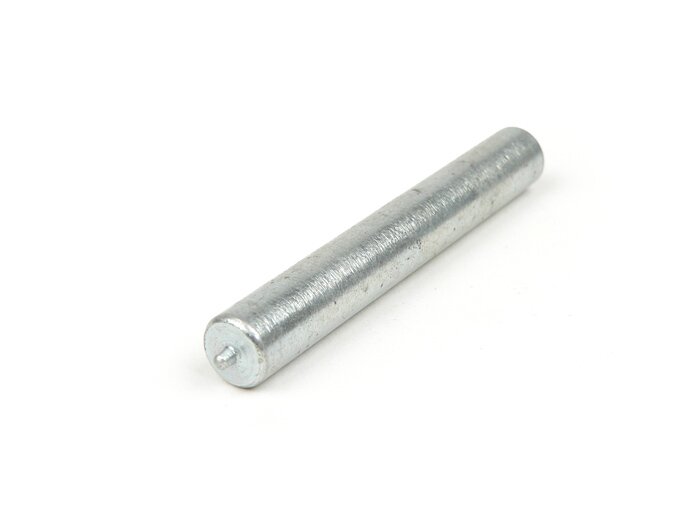
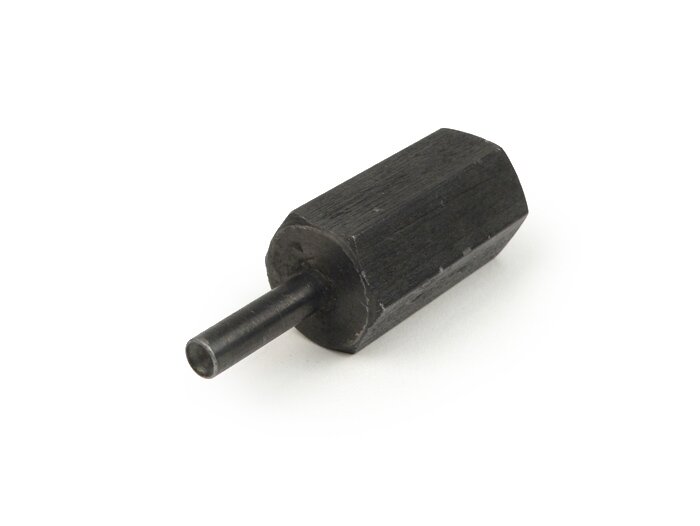
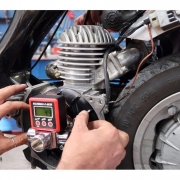
To do this, screw the piston stopper into the spark plug thread and turn the piston with the pole wheel against the stop. Now unscrew the adjusting screw of the piston stop until the piston just barely runs against a resistance. Now place the buzzer on the adapter screwed into the pole wheel thread and set it to ”0”. Now turn the pole wheel in the opposite direction until it runs against the stop of the piston stop again. Halve the value displayed by the device and turn the pole wheel again in the other direction until the halved value is reached. That's it: This is the exact top dead center!

How to use Buzzwangle Tool for ignition timing www.buzzwangle.com

SET IGNITION TIMING MARKERS

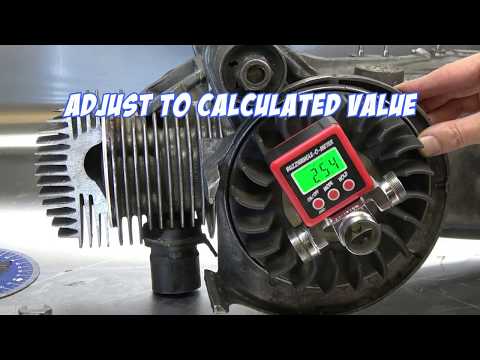
Once the top dead center has been determined, a corresponding mark is made on the pole wheel and the motor housing. The BUZZWANGLE is now set to ”0” and the number of degrees before top dead center is displayed by turning the pole wheel. Once the desired value has been reached, the final marking for flashing is applied to the motor housing. To do this, simply transfer the previously set marking of the top dead center from the pole wheel to the motor housing. Now this marking can be done with a running engine Strobe flash lamp be checked and, if necessary, the ignition setting corrected until the marking on the pole wheel and the motor housing match.

Buzzwangle - Ignition Timing and Strobing - the Fastest Way www.buzzwangle.com

DETERMINE CONTROL ANGLE

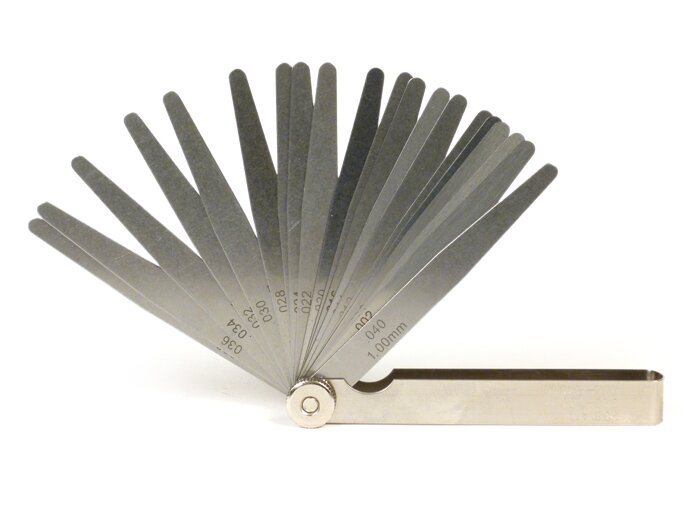
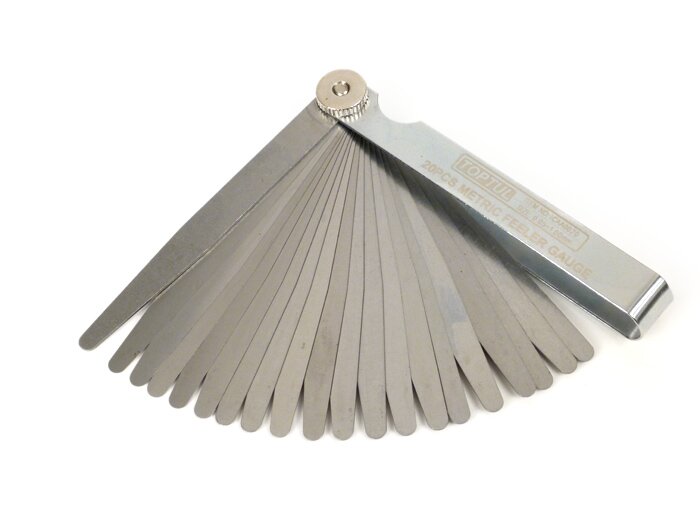
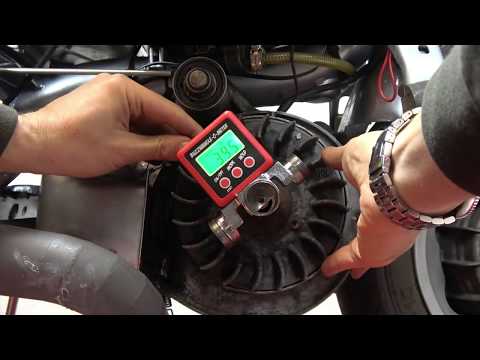
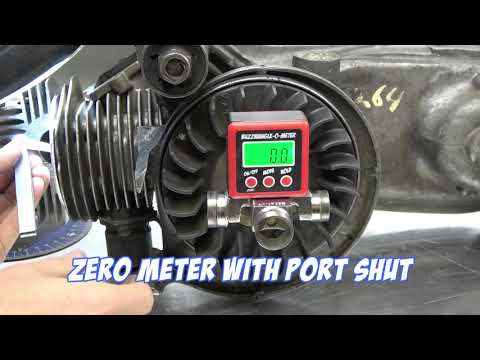
To do this, the BUZZWANGLE is placed on the adapter, the channel to be measured for the piston is blocked with a thin sheet of a feeler gauge and the tool is set to ”0”.
Now turn the crankshaft in the opposite direction until the piston hits the blade of the feeler gauge again. The tool now shows the exact control angle of the measured channel (minus the path blocked by the feeler gauge blade).

How to use Buzzwangle Tool to calculate 2 stroke port timing www.buzzwangle.com


Instructions via PDF: Buzzwangle digital degree disk

Digital degree disk -TSR Buzzwangle

Goniometro digital TSR buzzer clamp

Determinare la fasatura dell'accensione e l'angolo di apertura e chiusura

Impostare l'accensione della Vespa e della Lambretta con TSR Buzzwangle Ignition and Port Timing Tool, il disco graduato digital per la misurazione della fasatura dell'accensione e dell'angolo di fasatura (BZZKIT1).

TSR buzzer

Lo strumento BUZZWANGLE è concepito per poter determinare in modo molto semplice sia la fasatura dell'accensione che l'angolo di apertura e chiusura di un motore a due tempi (ad es. Vespa e Lambretta). L'apparecchio misura fino a 360 ° con la precisione di 0,1 degrees. Dieci volte più preciso del comune disco graduato!

The kit è composto da un adattatore avvitabile per i più comuni filetti del volano. Su questo adattatore viene fissato il Buzzwangle.

The adattatore avvitabile è compatibile with i seguenti models:

  • “L“ M27x1.25 - per LAMBRETTA Innocenti (models LI, LIS, SX, TV, DL, GP, J, Lui, A, B, C, LC, D y LD) e veicoli MZ
  • “V” M28x1.0 - compatible with quasi tutti i motori Vespa Largeframe e Smallframe con filetto per il volano. Also per i motori Piaggio / Gilera 125-180cc e le accensioni SIP Vape.
  • “VT” M27x1.0 - per accensioni per conversione Vespatronic. Utilizzabile anche per molti comuni motori a due tempi come ad esempio Yamaha RZ350, RD350, RD250, RZ250, BANSHEE. Compatibile also with the moto GAS GAS e Honda dotate di accensione Kokusan.
  • “P” M24.1.0 - compatibile con accensioni per conversione Parmakit, also per Aprilia RS125 e motori 50cc dei models Kymco, MBK, Peugeot, Honda e Yamaha / MBK (Minarelli)


DETERMINARE THE PUNTO MORTO SUPERIORE

Avvitare il bloccapistone nel filetto della candela e far ruotare il volano per far scivolare il pistone fino a toccare la parte filettata del bloccapistone. A questo punto regolare fino a quando il pistone continua a toccare il bloccapistone. Dopo aver avvitato l'adattatore al filetto del volano, posizionare su di esso il Buzzwangle e impostarlo a “0”. Far ruotare il volano dalla parte opposta fino a raggiungere il blocca pistone. Dividere per due il valore indicato dallo strumento e girare il volano verso l'altra direzione fino a raggiungere il valore dimezzato. Fatto! Questo è esattamente il valore del punto morto superiore!

How to use Buzzwangle Tool for ignition timing www.buzzwangle.com

MARCARE LA FASATURA DELL'ACCENSIONE

Un volta determinato il punto morto superiore, tale valore viene indicato sul volano e sul carter motore. The BUZZWANGLE viene impostato a ”0” e facendo ruotare il volano viene indicato il numero dei gradi prima del punto morto superiore. Se è stato raggiunto il valore desiderato, il valore contrassegnato finale viene indicato sul carter. Successivamente, riportare sul carter motore il valore del punto morto superiore marcato precedentemente sul volano. Su un motore acceso valore segnato può essere verificato per mezzo di una pistola stroboscopica ed eventualmente correggere le impostazioni dell'accensione fino a quando non coincideranno i valori marcati sul carter e sul volano.

Buzzwangle - Ignition Timing and Strobing - the Fastest Way www.buzzwangle.com

DETERMINARE L'ANGOLO DI APERTURA E CHIUSURA

Per determinare l'angolo di apertura e chiusura, il BUZZWANGLE viene posizionato sull'adattatore, il travaso che si desidera misurare viene bloccato con la lamina sottile di uno spessimetro e lo strumento viene impostato a ”0”. Far ruotare l'albero motore nell'altra direzione e finché il pistone non incontra nuovamente la lamina dello spessimetro. A questo punto l'apparecchio indica l'esatto grado di fasatura del travaso misurato (meno il tratto bloccato dalla lama dello spessimetro).

How to use Buzzwangle Tool to calculate 2 stroke port timing www.buzzwangle.com


Instructions (file PDF): Goniometro digital buzzer