Posts

Vespa PX LED headlight animation

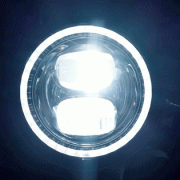
Vespa PX LED headlights

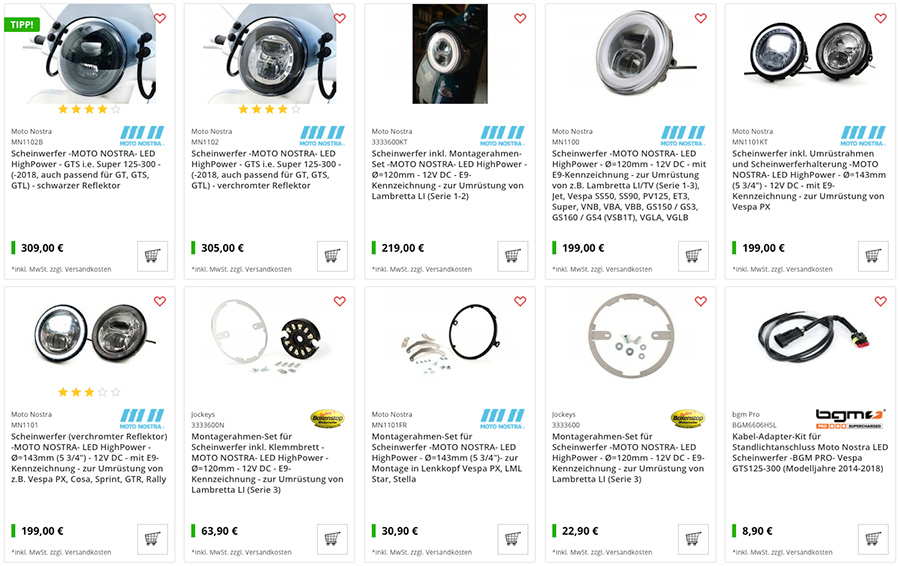
In this Vespa tutorial video we show you how our Vespa PX LED headlight is installed for the Vespa PX. the MOTO NOSTRA HighPower LED headlights can also be installed in other vehicles (Lambretta, Vespa GTS, Sprint, Rally), with the supplied, vehicle-specific frame, the installation of the Vespa headlight is as eg Vespa PX LED headlights easily.

CONTENT

  1. Assembly of Vespa PX headlights: 00:08
  2. Electrical part / connection Vespa LED headlights: 01:42
Vespa PX LED headlights tutorial MOTO NOSTRA LED headlights Vespa PX

DOWNLOAD PDF Assembly instructions for Print out as PDF

WHY AN LED HEADLIGHT ON THE VESPA? 

For most scooters, the limit with conventional Bilux light bulbs is a headlight bulb with 45/45 W. The ignitions, which are usually 80 W to a maximum of 120 W, do not provide any more. The luminosity is measured in lumens below 400. The LED headlight has a luminosity that is three times as high (1300 lumens). The power consumption is only 20 W. This corresponds to the light output of a conventional 100 watt spotlight. With a given alternator / power supply, a considerably better illumination can be achieved. In addition, there is more capacity for other consumers.

PARTS LIST / SHOP

Parts used in this video:

  • LED headlights incl. Vespa PX conversion frame and headlight bracket -MOTO NOSTRA- LED HighPower
    Item number: mn1101kt
  • Ignition switch -VESPA 4-wire- Vespa PX Lusso (from 1984)
    Item number: 9520133 
  • Light switch -GRABOR- Vespa PK125 XL / ETS, Vespa PX Elestart (1984-1998) - 10 cables (DC, models with battery, make contact)
    Item number: 9520145
  • Rubber flasher relay Vespa PX
    Item number: 3330940

MOTO NOSTA LED HEADLIGHT!

LED headlights with E9 marking (street legal) and bright high / low beam. An additional feature is a separately switchable position light. With a diameter of 143mm it also fits perfectly into the steering head of the PX and Cosa models as well as into the lamp ring of e.g. Vespa Sprint, GTR and Rally.


Vespa Moto Nostra LED High Power LED headlights

TECHNICAL SPECIFICATIONS

Luminosity 1300 lumens Voltage: 12 volts DC (direct current) Current consumption: 1,8A / 1,3A Power consumption: 21,5W / 15W / 1,9W Diameter: Ø143mm Body depth: 54mm (measured from the headlight ring without glass bulge) Overall depth: 79mm (measured from the headlight ring without glass bulge with cable feed)

NOTE

The LED headlight works exclusively with direct current, it therefore requires a battery or another equivalent power source with 12V DC. Operation with an alternating current voltage source leads to an immediate defect. 

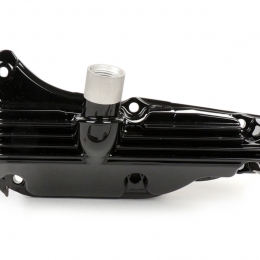
Oil pan Vespa GTS black

Install black oil pan Vespa GTS

Why convert a Vespa GTS oil pan?
In this post too Vespa GTS conversion we have some great examples of Custom and tuning for a Vespa GTS gezeigt.

Often it is the details that make a successful renovation with a coherent overall concept.

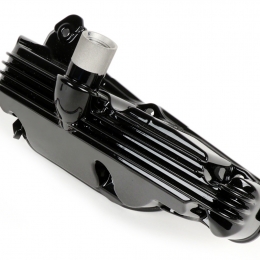
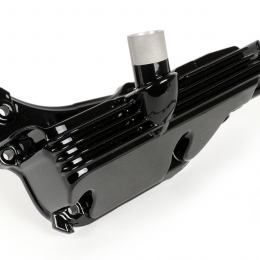
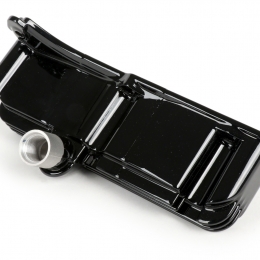
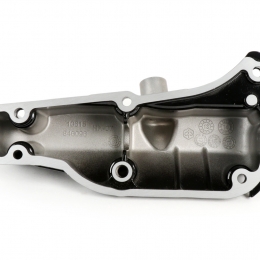
A nice detail on the modern Vespa scooters is, for example, a black oil pan. We offer you with our MOTO NOSTRA Oil pan one brand new original Piaggio oil pan which we have provided with a high-quality, high-gloss powder coating. The video below shows how the conversion can be done very easily.


This GTS oil pan is first prepared in a complex process for refinement and then professionally processed. The result is an extremely hard-wearing surface with a great look. The bathtub is of course delivered ready for installation, you have the choice:

Note: Please do not forget to install a new seal -> Oil pan seal
A great opportunity for something new Engine oil and use an oil filter:

Tip: We offer you cheap and practical sets! the Inspection kits are equipped with all parts that are required for an inspection, depending on the mileage and recommended overhaul work:

Vespa GTS inspection set

Conversion Vespa GTS oil pan

It is very easy to assemble, but there are a few things to keep in mind.
Here you can find a great video from Scooteria, who are also replacing the MOTO NOSTRA oil pan as part of their GTS 300 conversion. Helpful tips from the custom professionals at Cafe Racer 69 with tricks for installing the Vespa GTS oil pan:

Vespa Gts 300 hpe "British Classic" part 5 - black oil pan installation

The conversion works like this:

  1. Drain the oil
  2. Loosen the air filter box
  3. Unscrew the vario cover
  4. Unscrew the oil pan
  5. Clean the sealing surface (knife or fine sandpaper, degrease)
  6. apply a new seal (without additional sealant)
  7. now reassemble in reverse order

Note:

See video above. Use correct screws, reinsert the spring, observe the tightening torque: M6 screws oil pan: 10-14Nm.

Buy MOTO NOSTRA oil sump

The MOTO NOSTRA carrycot is available in:

The speed wheel is mounted and secured

KB-Racing Speedwheel for Vespa GTS 300 HPE

Here we had it for you speedwheel already presented. Today we take a closer look at the latest release from KP-Racing and show you in installation instructions how the Speedwheel is mounted on your Vespa.

With this little ingenious part the GTS speedometer is calibrated. A pleasant side effect: the GTS runs through it approx. 10 km / h faster. So if the speedometer shows 130 km / h, then the vehicle is actually running at 130 km / h. The speedometer's usual advance of 10 km / h is thus equalized.

The Speedwheel replaces the original ABS sound disc. By arranging the signal surfaces differently, the ABS receives the correct signals for detecting the speed. Since the HPE models are not limited by the speed but by the speed, the speed of the motor increases until the scooter runs into the soft limiter at 130 km / h.

Test on Scooter Center Dynamometer + 11km / h

We tried the KB Speedwheel on our dynamometer to find out whether the difference was really measurable.

After installing the Speedwheel, the ABS must be recalibrated. This small task can be completed in just a few minutes. Download instructions as PDF.

Unfortunately, according to the speedometer, the increase in speed cannot be determined on the road.
Of course, the speedometer still shows 130 km / h, so only a test on the road with a GPS comparison or the test bench can provide clarity.

And really: after installing the Speedwheel, our HPE 300 Tech is running a whopping 11 km / h faster than before switching to the KB Speedwheel!
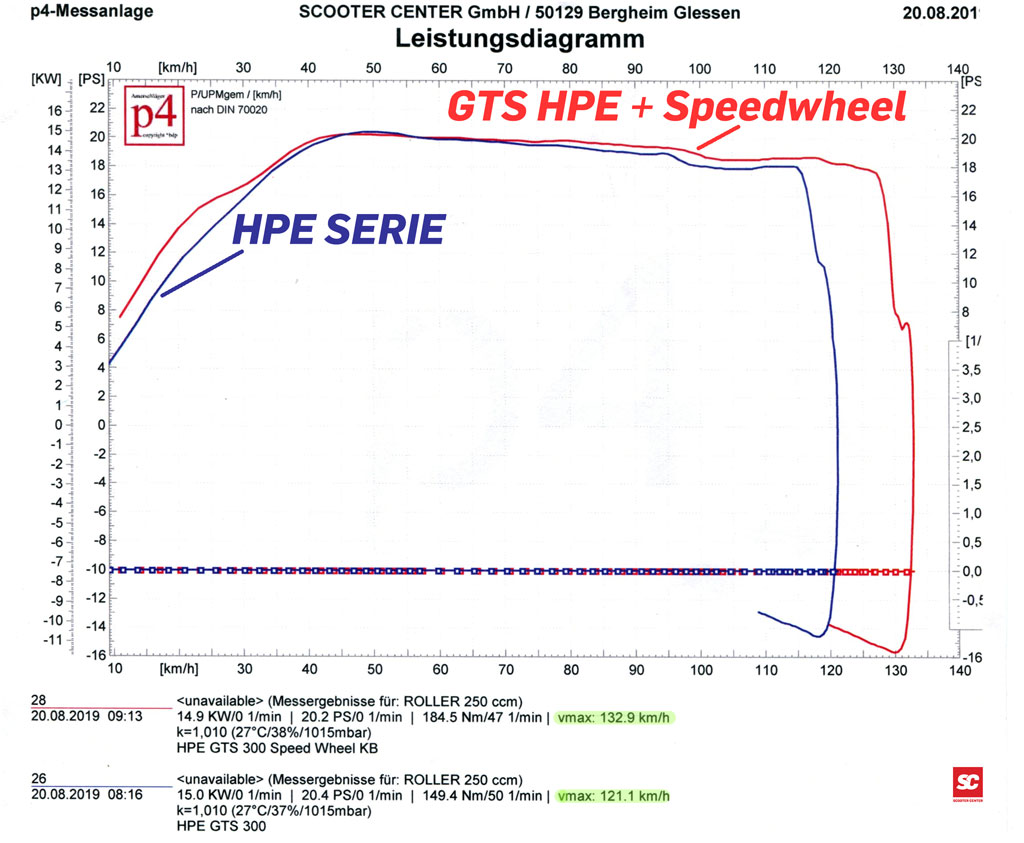
Performance diagram Speedwheel Vespa GTS

Order your Speedwheel here
Note: Even if the assembly of the Speedwheel is quite simple, we recommend having it installed by a specialist workshop.

Installation of the KB Speedwheel:

ATTENTION: Only work on a cold engine! To do this, place the vehicle on the main stand on solid ground!
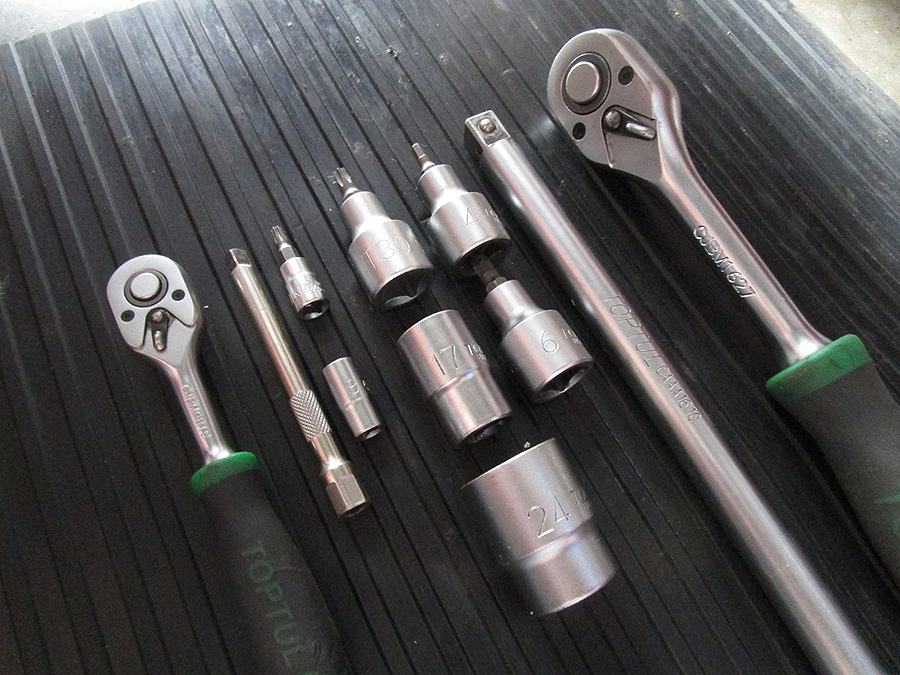
Tool assembly of the KB Speedwheel Vespa GTS

List of tools

- Ratchet 1/2 with SW17, SW24, IS4, IS6, TX40
- Ratchet 1/4 with SW8, TX20
- side cutters

material list

- 1 x KB Speedwheel (KBR10021)
- 1 x Split pin Ø 3,2 x 32 mm (4940034)
- 1 x High-strength screw locking (7676902)
- 5 x M6 x 20 screws, Tensile strength 10.9 (1667152 or 1271147 + 7676902)

1) Dismantle the exhaust

A ratchet with socket wrenches SW17 and TX40 is required.

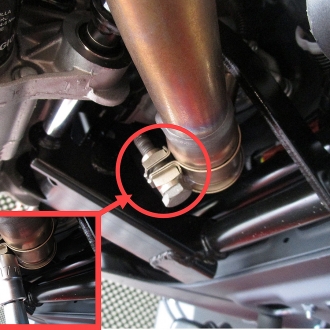
Loosen the screw of the clamp on the exhaust manifold with SW17.
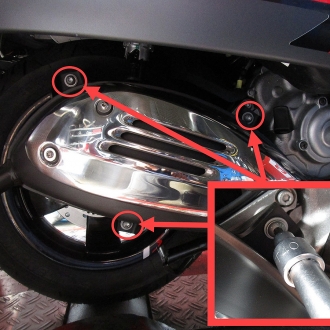
Loosen three screws of the exhaust body with TX40. Do not pull out the last screw at the top left until the exhaust is supported downwards with your hand. This prevents deformation of the manifold and damage to the manifold seal. For vehicles with higher mileage we recommend the exchange directly of Vespa GTS manifold gasket.

2) Dismantle the ABS sensor

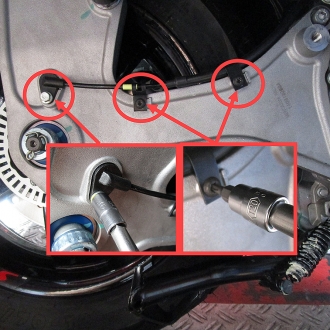
A 1/4 ratchet with TX20 and socket SW8 are required.
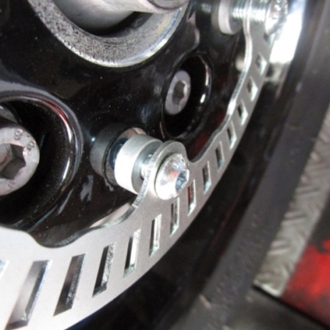
Since the ABS sensor is magnetic, there may be metallic abrasion from the brake system on the sensor surface. This abrasion can easily be removed with a cloth. The cable and the sensor are sensitive to mechanical influences. Therefore, when carrying out the following work, ensure that the sensor and the cable are not damaged.

3) Dismantle the swing arm

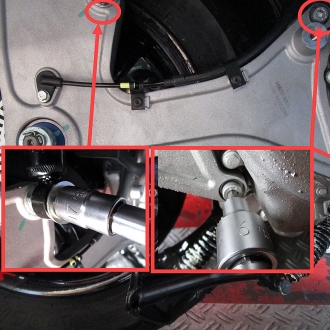
Loosen the nut of the shock absorber mount with SW17. Remove the nut, thrust washer and shock absorber from the mount. The vehicle frame will sag by a few millimeters. That is perfectly normal and not a cause for concern. Loosen the two front screws of the swing arm with IS6 and pull out. Note the order in which the lock washers and washers are installed.

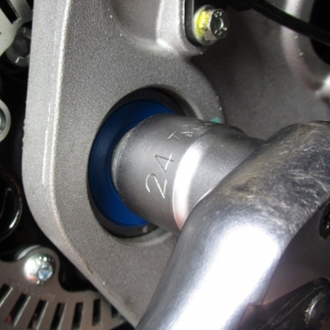
Cut off the head of the split pin of the main shaft nut with a suitable side cutter, pull the remaining ends out of the main shaft and pull off the safety cap. Loosen the nut of the main shaft with SW24. Remove the nut and the spacer underneath.

Pull the rocker off the main shaft.

4) Dismantle the tone wheel

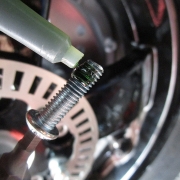
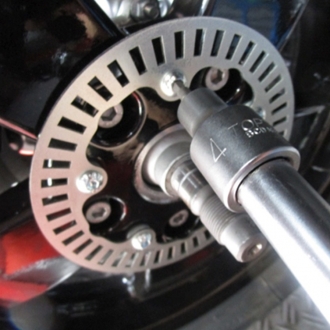
Loosen the original tone wheel with IS4. When removing the screw, pay attention to the location of the spacer rings.

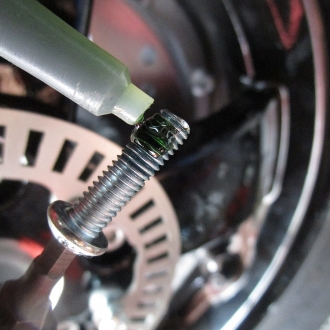
CAUTION! Depending on the construction status of the respective model, the screws of the tone wheel can be secured to different degrees. If the screws cannot be loosened straight away, the rim must be dismantled and heated from the inside in the area of ​​the screw connection of the tone wheel with a hot air blower in order to loosen the screw lock. Should new screws be needed, either article Screw 1667152 or Screw 1271147 zusammen mit Screw lock 7676902 use.

5) Mount the Speedwheel

Mount the Speedwheel together with the spacer rings on the rim. Should new screws be needed, either article Screw 1667152 or Screw 1271147 zusammen mit Screw lock 7676902 use.

The rest of the assembly is done in reverse order. The locking cage of the rear wheel nut must be secured with a new 3,5 x 32 mm split pin.

Assembly specifications and torques to be observed

  • Tonwheel / Speedwheel screws, IS4 = 10-12 Nm *
  • Rear wheel nut SW24 = 104-126 Nm
  • Screws swing arm on the motor housing IS6 = 20-25 Nm
    (ATTENTION! Only fasten the rear wheel nut after tightening)
  • Nut shock absorber mount SW17 = 40-45 Nm
  • Screws ABS sensor SW8 and TX20 = ​​4-5 Nm *
  • Screws of the exhaust body TX40 = 20-25 Nm
  • Screw of the clamp on the exhaust manifold with SW17 = 16-18 Nm

Information with *: there is no official information from Piaggio here. The values ​​are derived from the DIN table.


Any guarantee could expire during assembly.
The Speedwheel is not approved for use on public roads.
If the vehicle is used on public roads, the ABE is no longer valid.

Order your Speedwheel here


New Lambretta Bible

As announced at the beginning of the year click ->

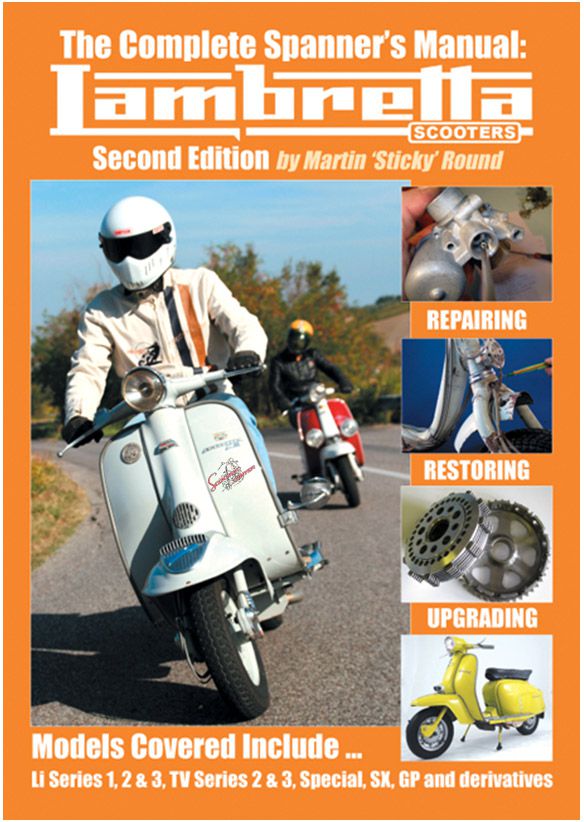
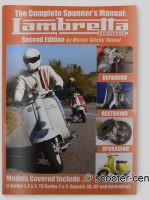
8100071 | Book -Complete Spanner's Manual Lambretta -Second Edition- by Sticky | 29,90 euros

The “best Lambretta manual” even better!
The first edition of the Sticky Manual was published in 2004. Series 3 was dealt with in detail with lots of pictures and practical tips. A total of around 15.000 copies were sold.

Instead of simply reprinting the book, Fingers in Pies Publications decided to revise the book substantially and to expand the content to series 1 and 2. Sticky 2 offers you:

read more

Book -Complete Spanner's Manual Lambretta -Second Edition- by Sticky Article no. 8100071

Lambretta manual

The Lambretta Handbook

That which is known and essential to all of us Lambretta scooter reference book is currently being completely redesigned by Martin 'Sticky' Round.

The Second Edition is also dedicated to the Lambrettas of series 1 (not TV 175 I) and the models of series 2. They will be completely integrated into the manual and the chapters will have the models logically integrated.

All chapters are massively revised, re-layouted and five years of technical updates and additional information are integrated.

The old edition is unfortunately completely out of stock and the reprint is not planned. So from now on only leaf through the sticky with clean fingers!


The “best Lambretta manual” even better!

The first issue of Sticky manual was published in 2004. Series 3 was dealt with in detail with lots of pictures and practical tips. A total of around 15.000 copies were sold.
Instead of simply reprinting the book, Fingers in Pies Publications decided to revise the book substantially and to expand the content to series 1 and 2. Sticky 2 offers you:

  • More than 200 new color photos. Over 1.050 images in total.
  • Additionally ten colored circuit diagrams.
  • Five other Italian models (TV175 S2, LI125 S1, LI125 S2, LI150 S1, LI150 S2).
  • The information about the new models has been carefully incorporated into the context. Not just clapped in!
  • Updates on the latest developments in the areas of tuning conversions, adjustable chassis, variable ignitions, tubeless rims and much more.
  • More anorack details and restoration tips (fork type identification, color code breakdown, locks and keys, speedometer and more).
  • Information on technical changes based on the original Innocenti dealer updates.
  • Improved index and easy-to-find chapters using color codes.
  • Completely redesigned layout.
  • 56 additional pages (292 in total).

About the Author Sticky: 

Sticky is a freelance writer and photographer who specializes in scooters. Sticky has been writing for the scooter press, motorcycle magazines and newspapers for 24 years. Sticky was also editor for Scootering and Twist & Go. His idea of ​​fun is to hide a motorcycle engine under a Lambretta and significantly expand the public's perception of the scooter.