
The brake pad wear of the front brake of the PX series up to 1998 and the PK-XL can be easily adjusted without tools using the well-known knurled screw on the brake cable.
On the Vespa PX125T5, this luxury can even be found on the rear brake.
With this model, Piaggio has already seen that the fiddly-to-use adjusting screw in hard-to-reach places is no longer state-of-the-art.
We leave the no longer available Piaggio original part of the T5 in excellent quality reproduce.
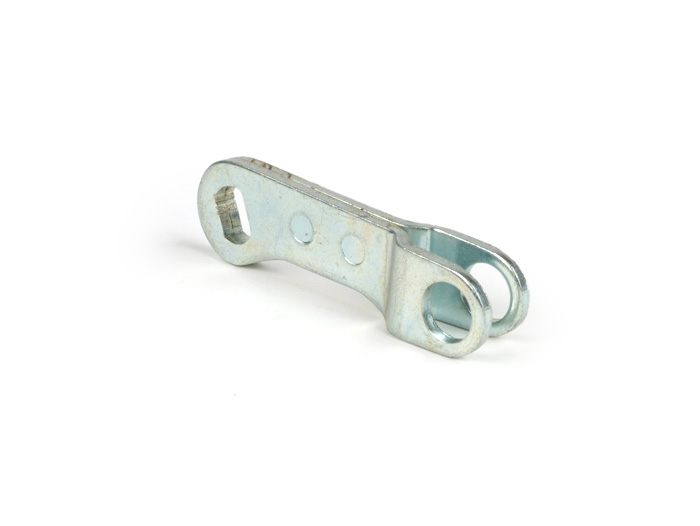
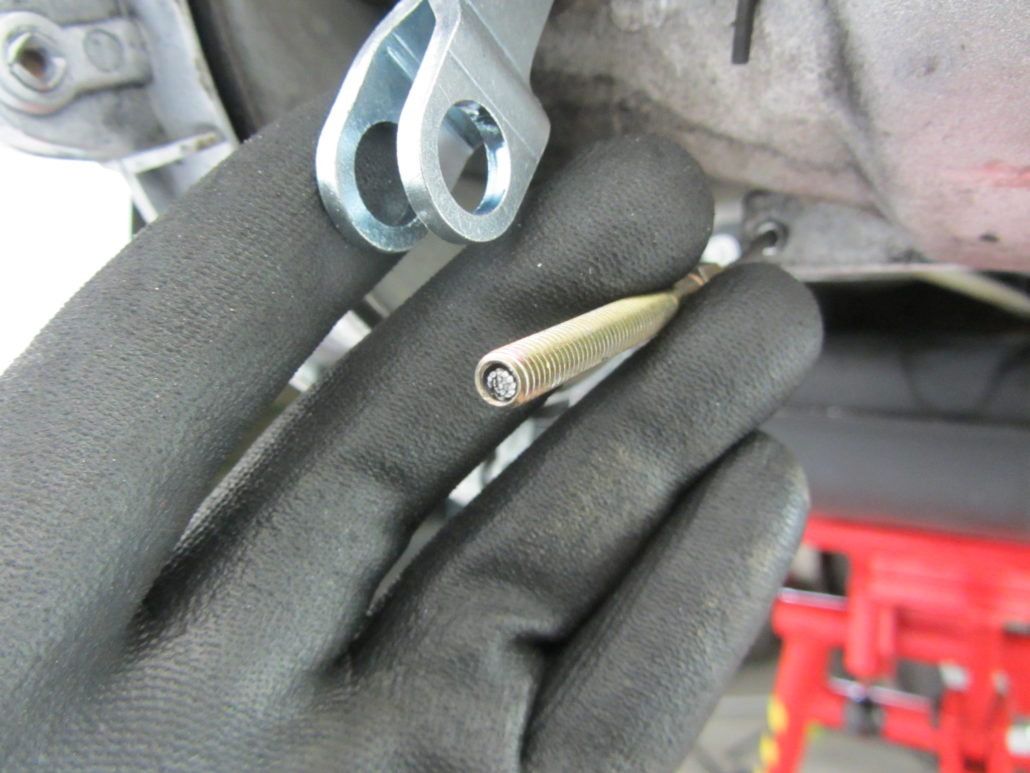
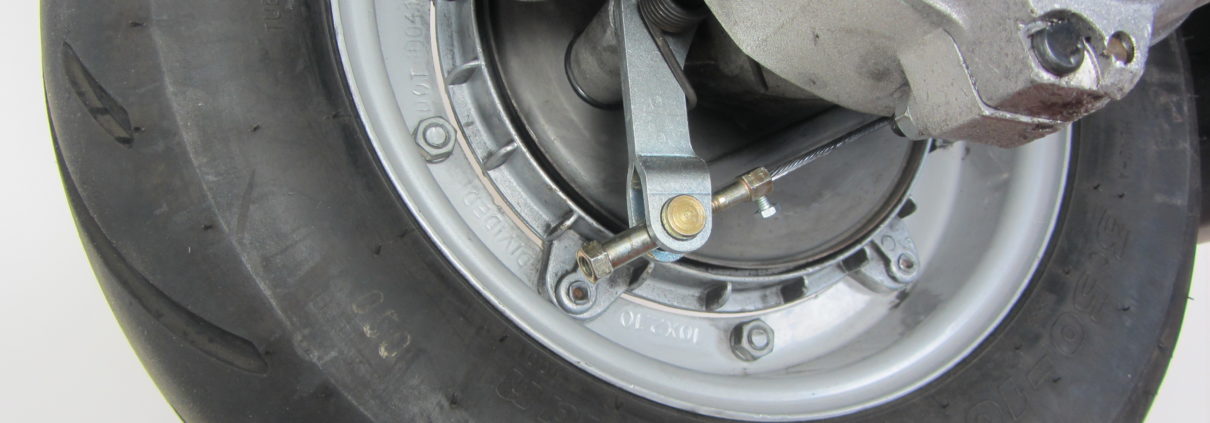
The brake arm fits almost all Vespa Largeframe Models and is one meaningful improvement especially for all PX before 1984, as well as rally, sprint and co, because the brake arm is longer and a greater braking force is generated with the same pedal force.
With the Set for retrofitting every PX can be brought up to the state-of-the-art.
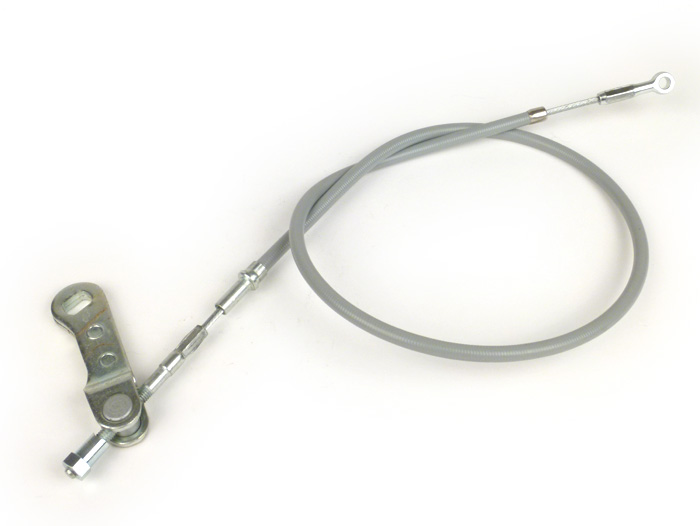
In order to carry out the conversion, a slot must be made in the cable guide of the brake pedal. The T5 brake cable has a cast nipple at each end and can therefore no longer be threaded through the bare hole in the cable guide on the pedal. In addition, the M8 set screw on the PX engine blocks must be removed and drilled to the size of the brake cable abutment.
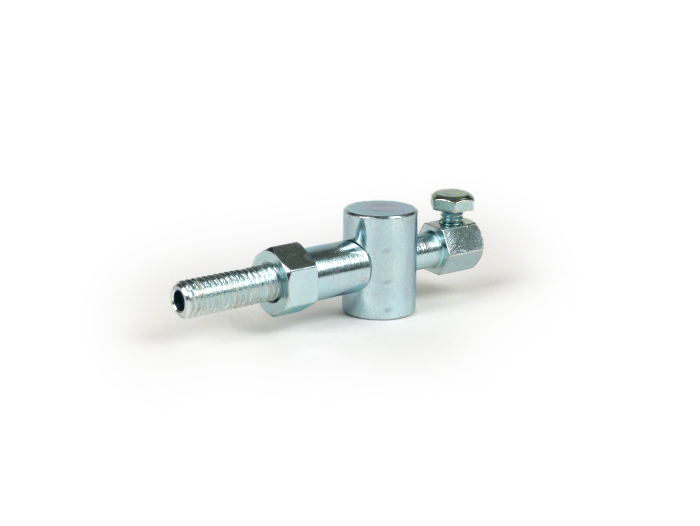
Those who shy away from the effort described above can easily fall back on the variant with our adapter for the pulling thread:
If the brake cable is not to be completely replaced, we also offer a fast one Adapter solution
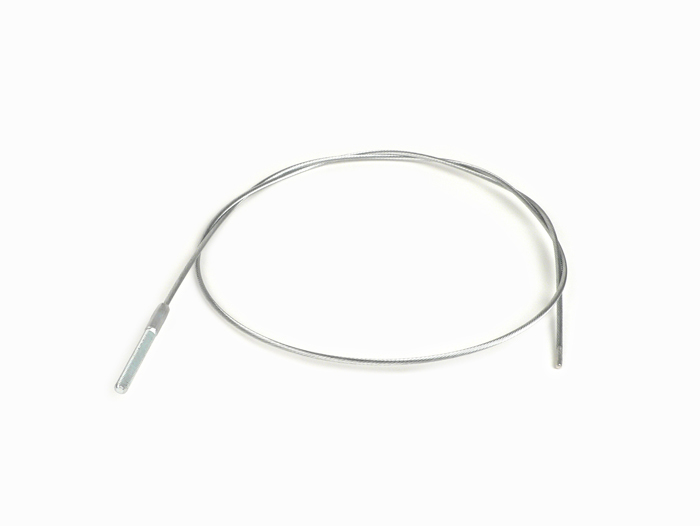
For the Vespa Largeframe Models with an external brake pedal, such as Vespa Rally, Sprint, VNA, VNB, etc., can also be converted either with the adapter or with one loose brake cablethat has one end with the matching thread.
Here we briefly present the conversion using the example of a Vespa PX.
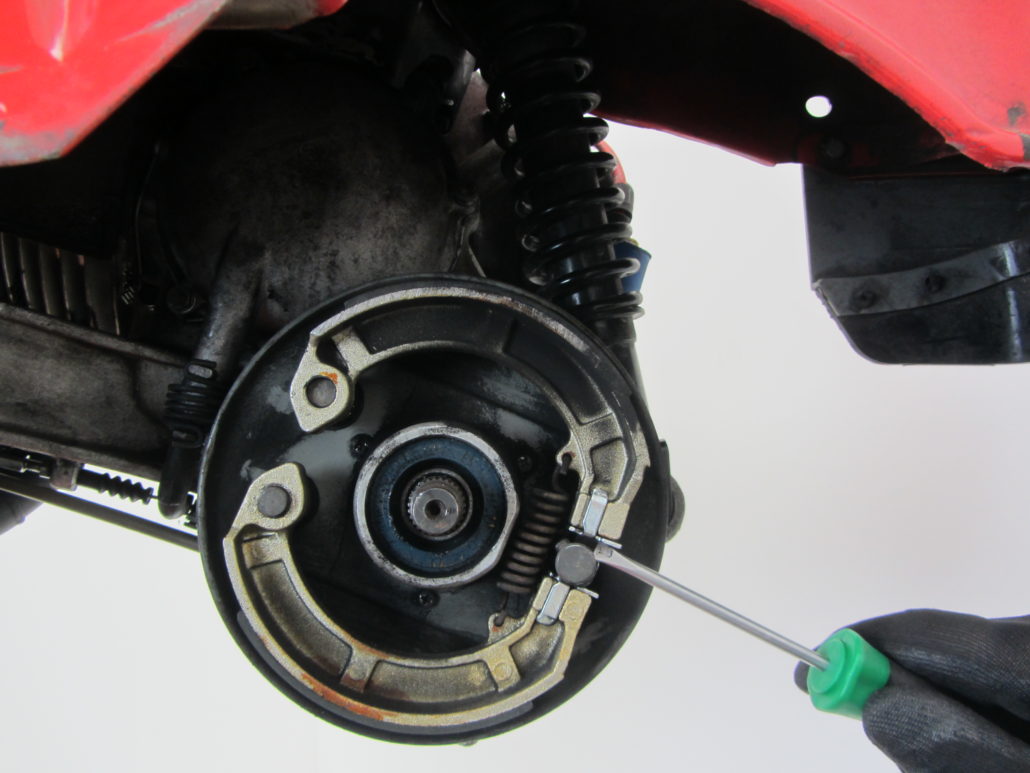
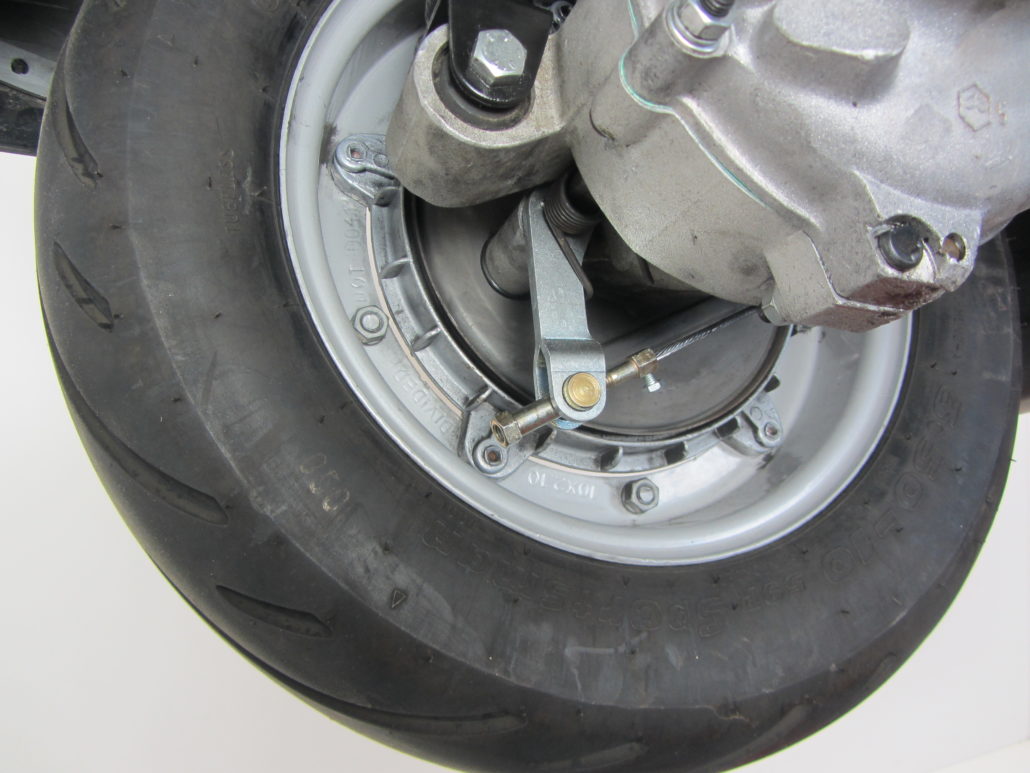
In order to be able to replace the brake arm, it is necessary to remove the brake cam.
In order to gain access to the cam, the rear wheel and the brake drum are dismantled.
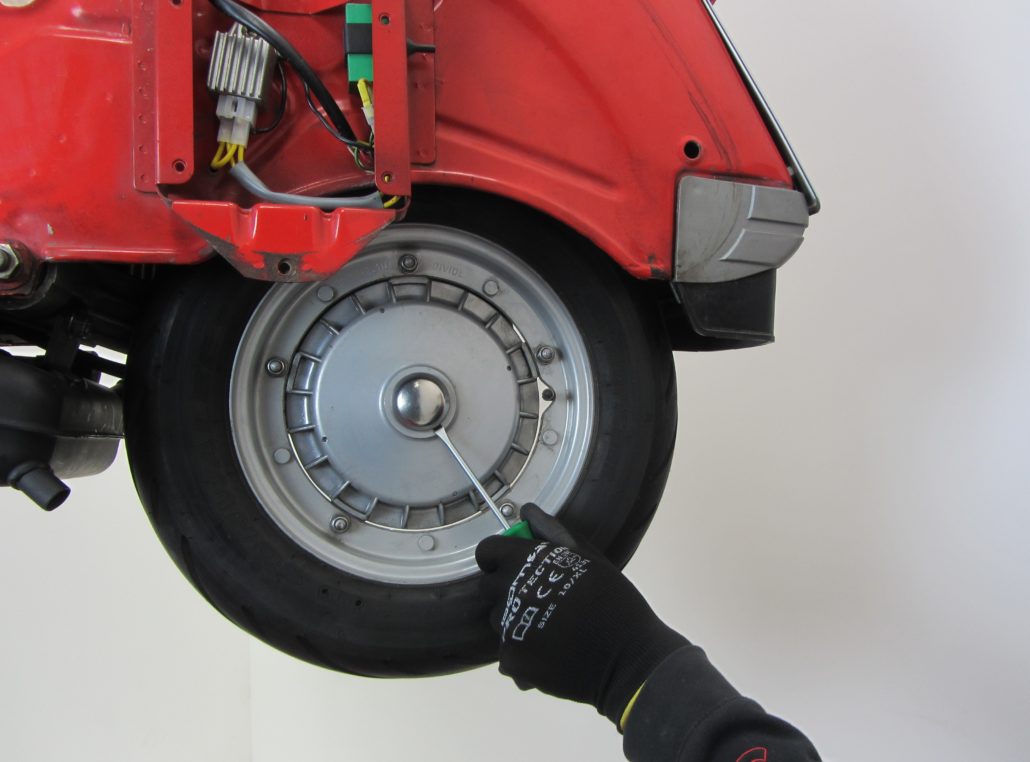
Dismantle the rear wheel
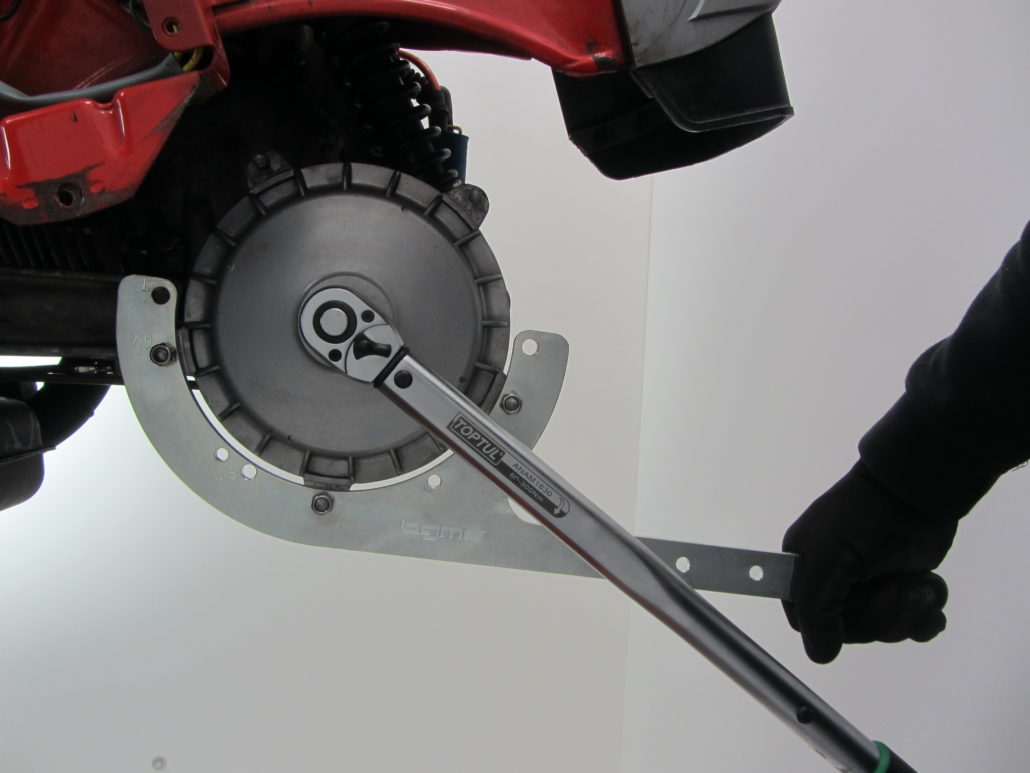
and then the brake drum remove.
ohne impact wrench is the Holding tool for Vespa and Lambretta brake drums a real help.
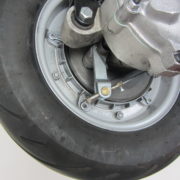
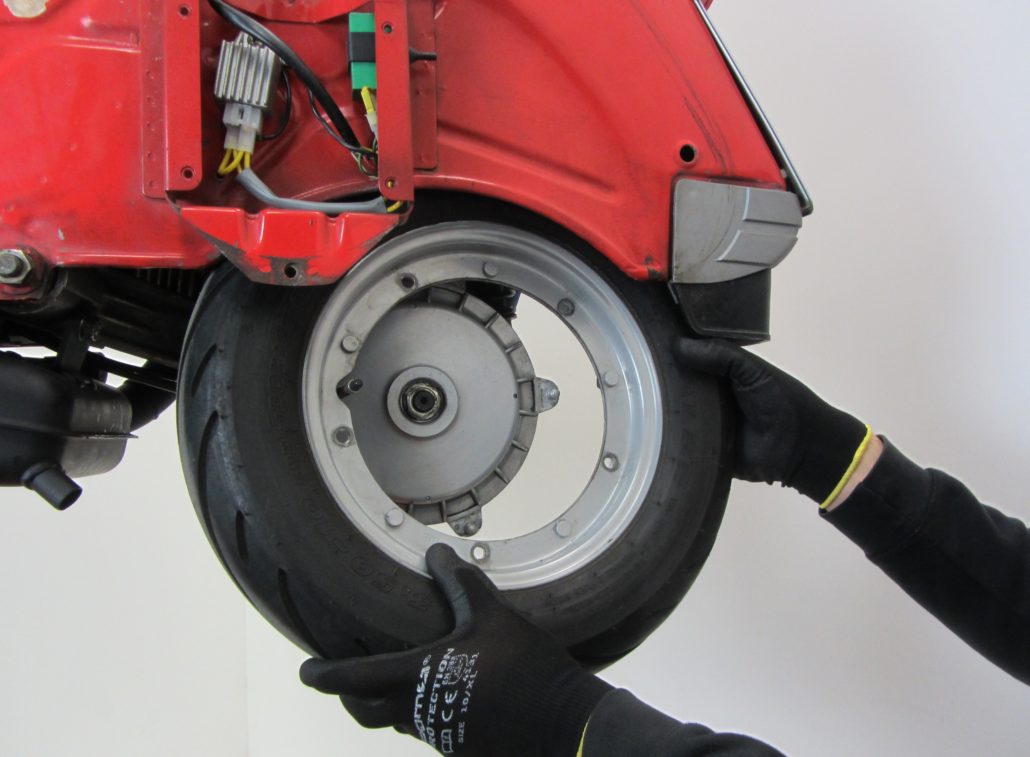
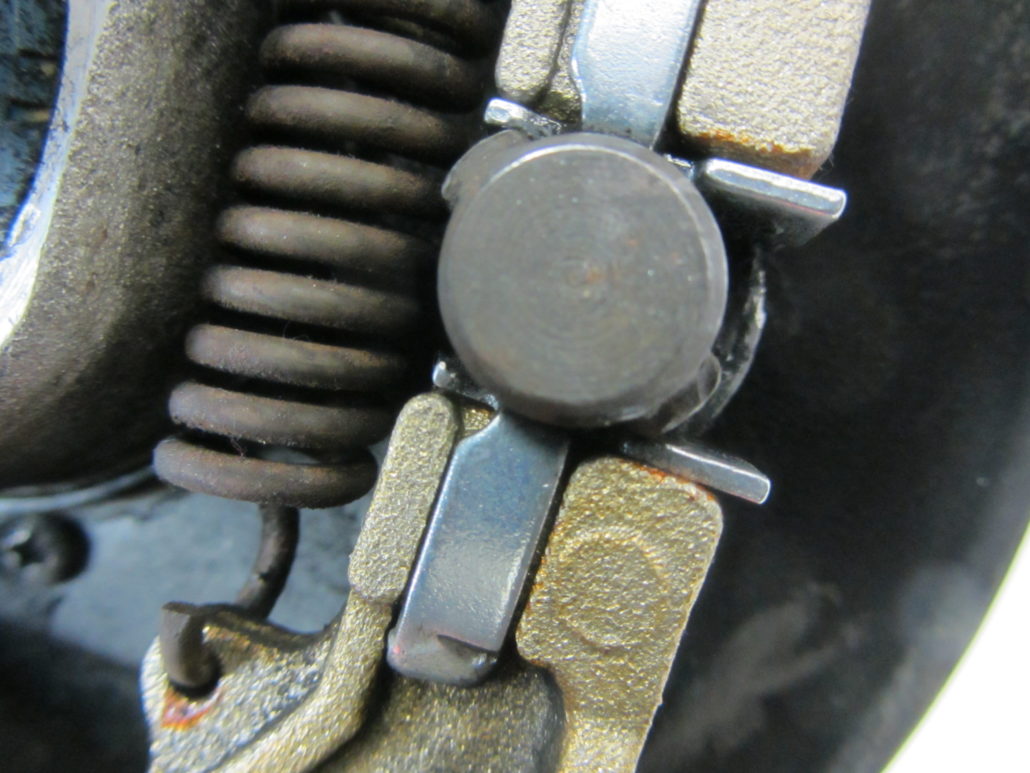
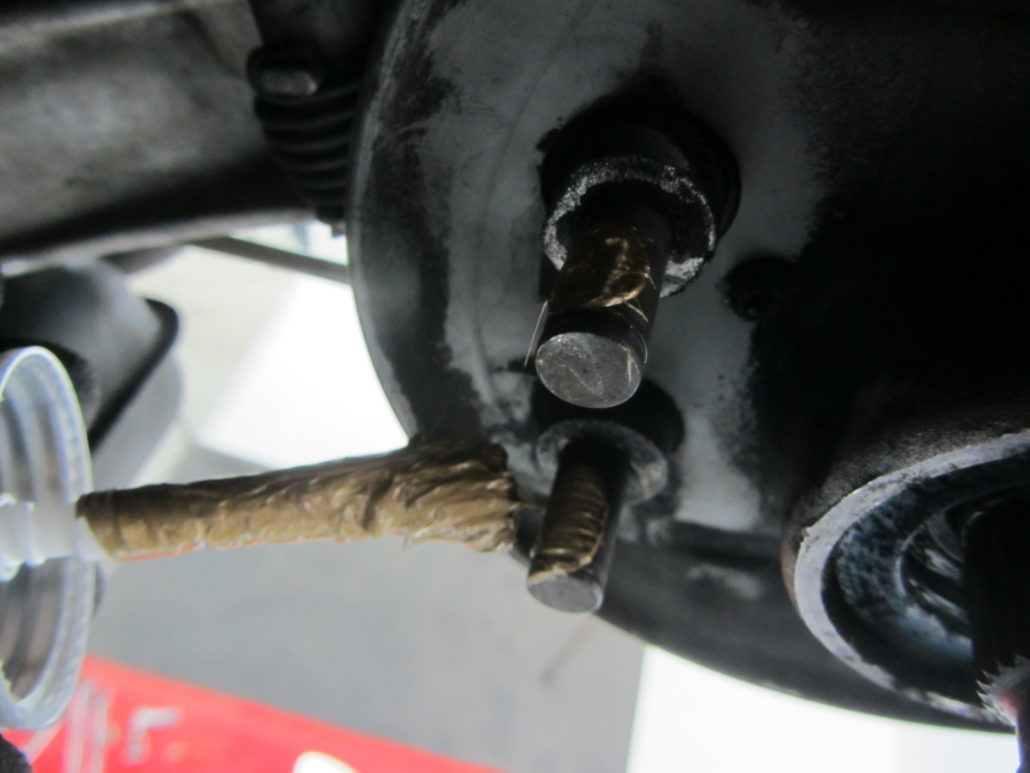
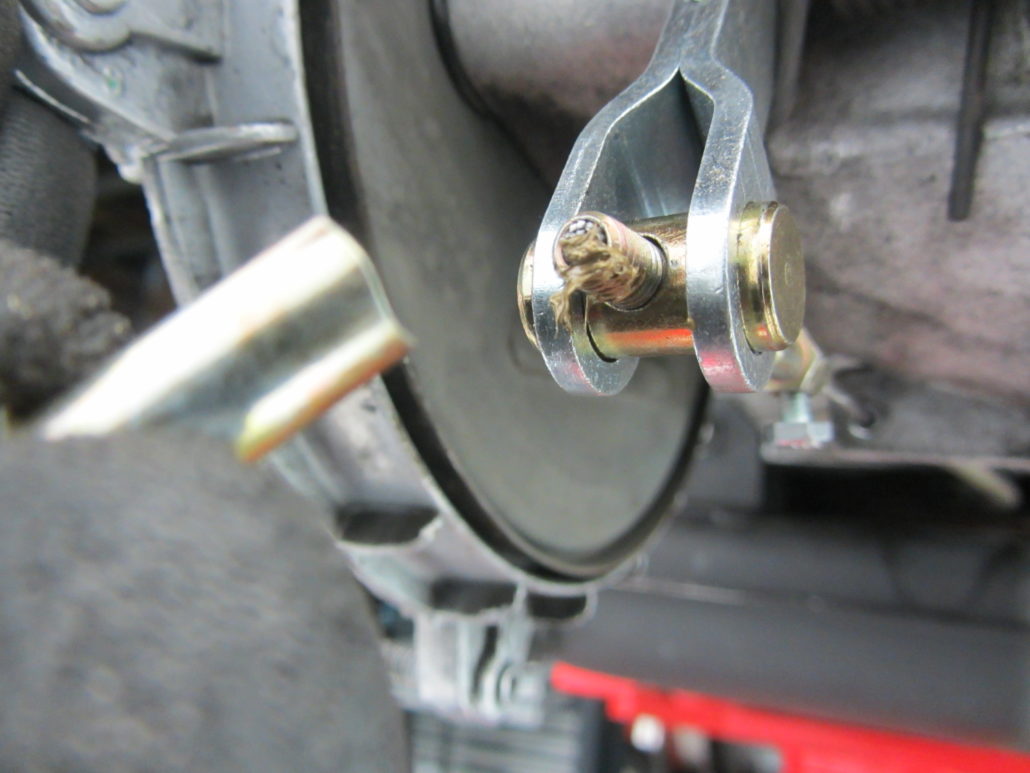
If the brake drum is removed, the brake shoes are freely accessible. Here it is worth taking a look at the position of the brake cam.
If the cam is almost 45 ° inclined to the brake shoes with the brake pedal unloaded, as shown here, this is an indication that the Brake shoes are soon worn out.
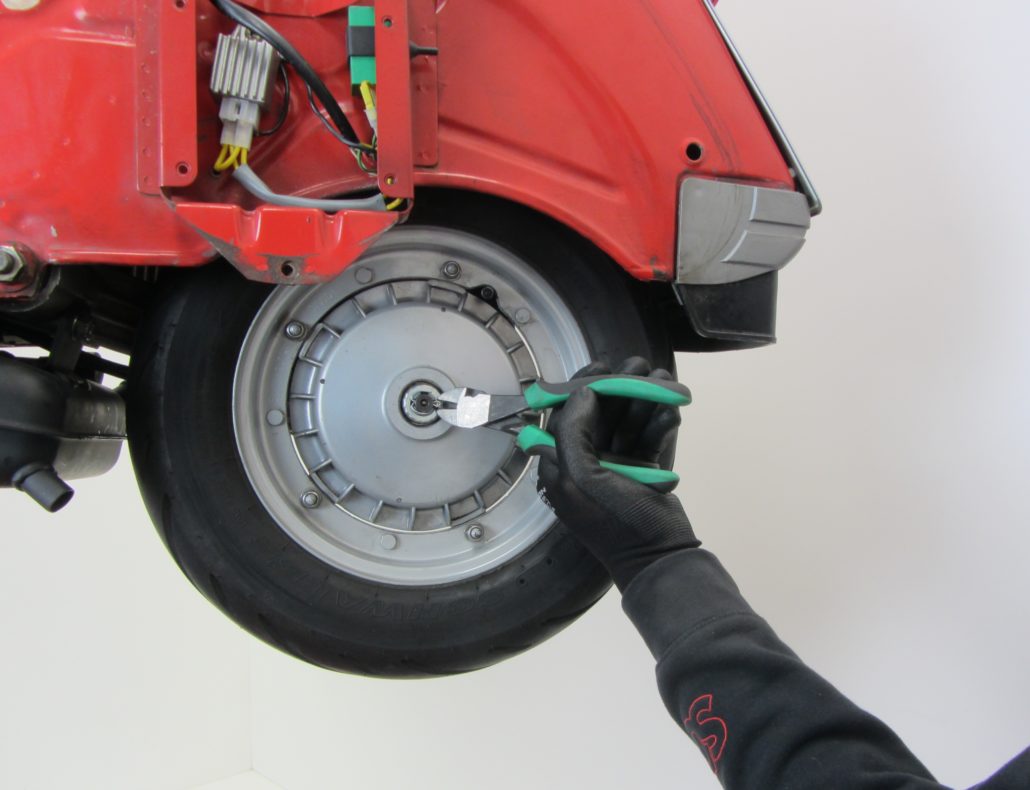
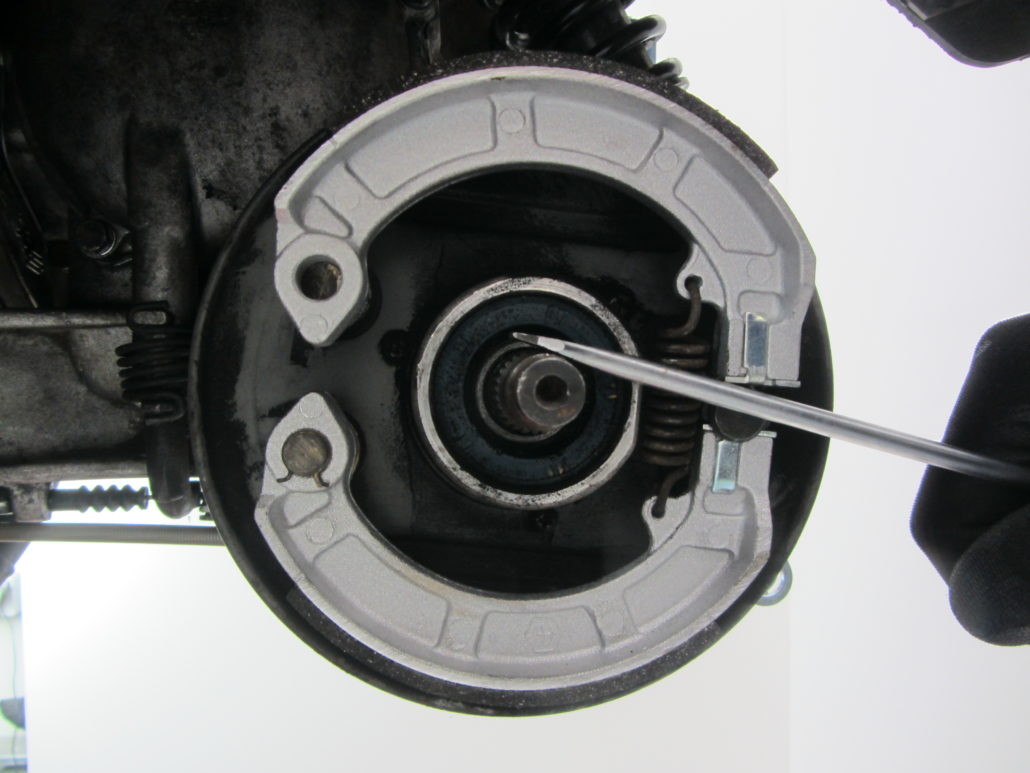
In order to be able to pull the brake cam a bit out of the guide, it is necessary to Brake shoes to remove. the Retaining rings can be removed quite easily.
However, care should be taken to secure the little nasty things against jumping away.
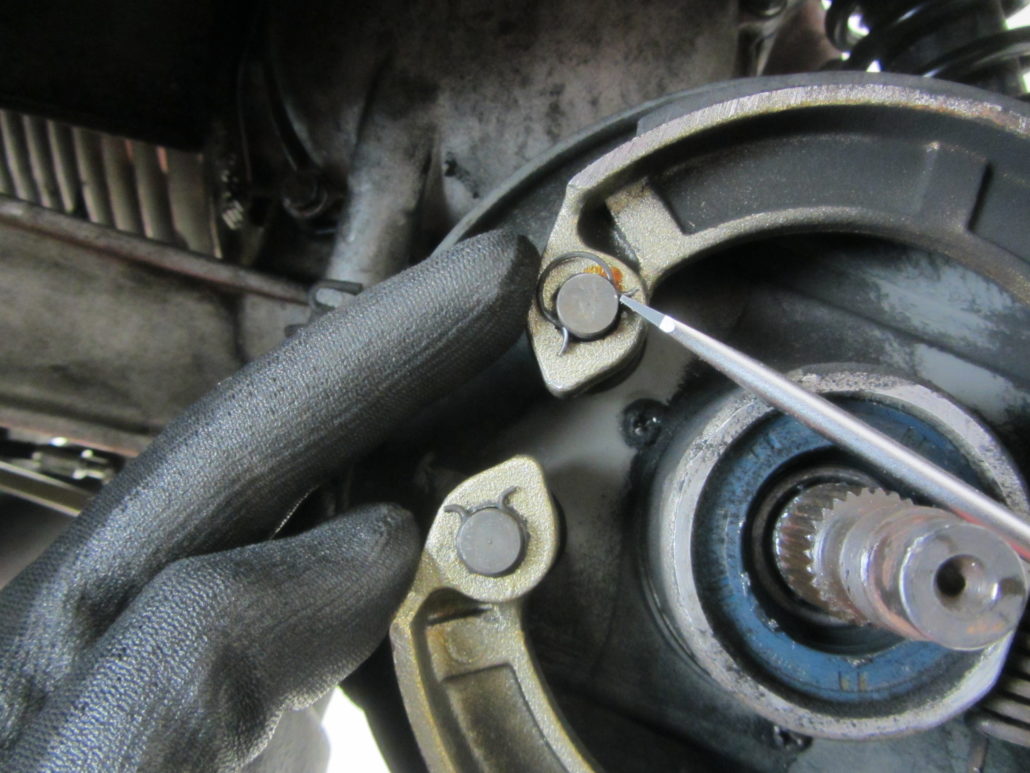
With a wider one screwdriver the jaws can be spread apart and removed one at a time. Shouldn't the brake shoes
are replaced, it makes sense to mark the installation position on one of the brake shoes. As can be seen in the picture above based on the abrasion,
the approaching brake shoe is subject to a different wear pattern than the decelerating brake shoe. Therefore, it makes sense to remove the brake shoes when reassembling
to put them back in their accustomed place.
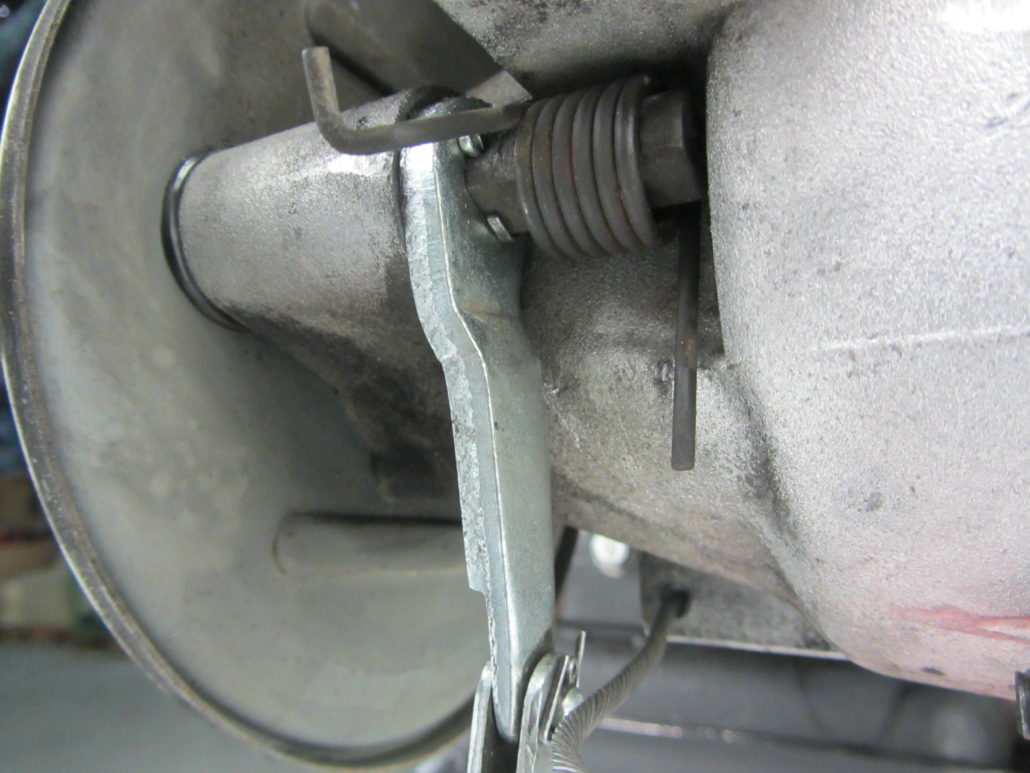
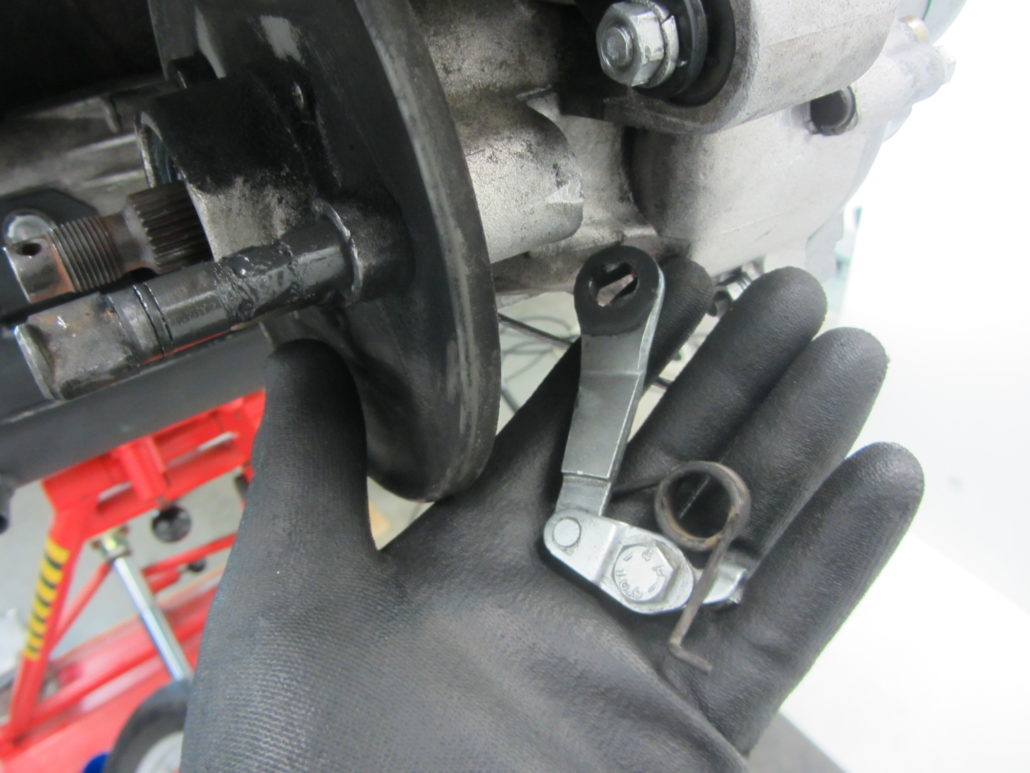
After unhooking the spring for the brake arm is the Safety split pin accessible. Once the split pin has been removed, the Brake cam pulled out
become and gives the Feder and the brake arm free.
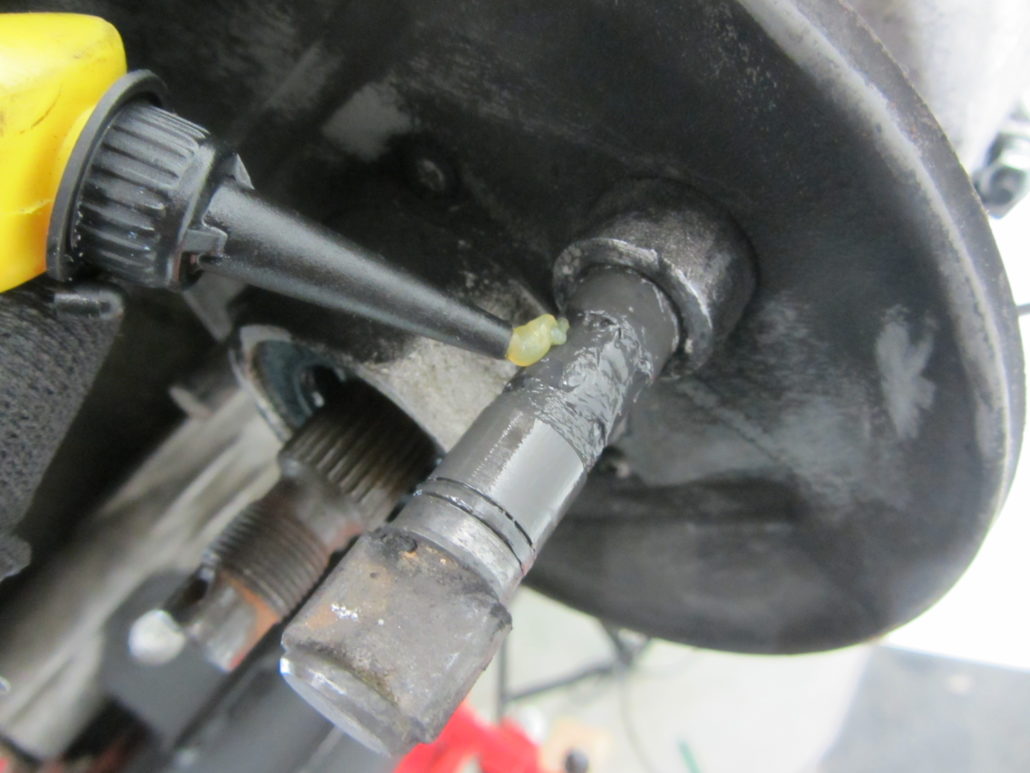
The brake cam is provided with a franking in which a Fat storage is introduced for long-term lubrication. Just fill up if necessary.
If the brake cam has the latest lubricant technology, the brake arm and the spring can be installed.
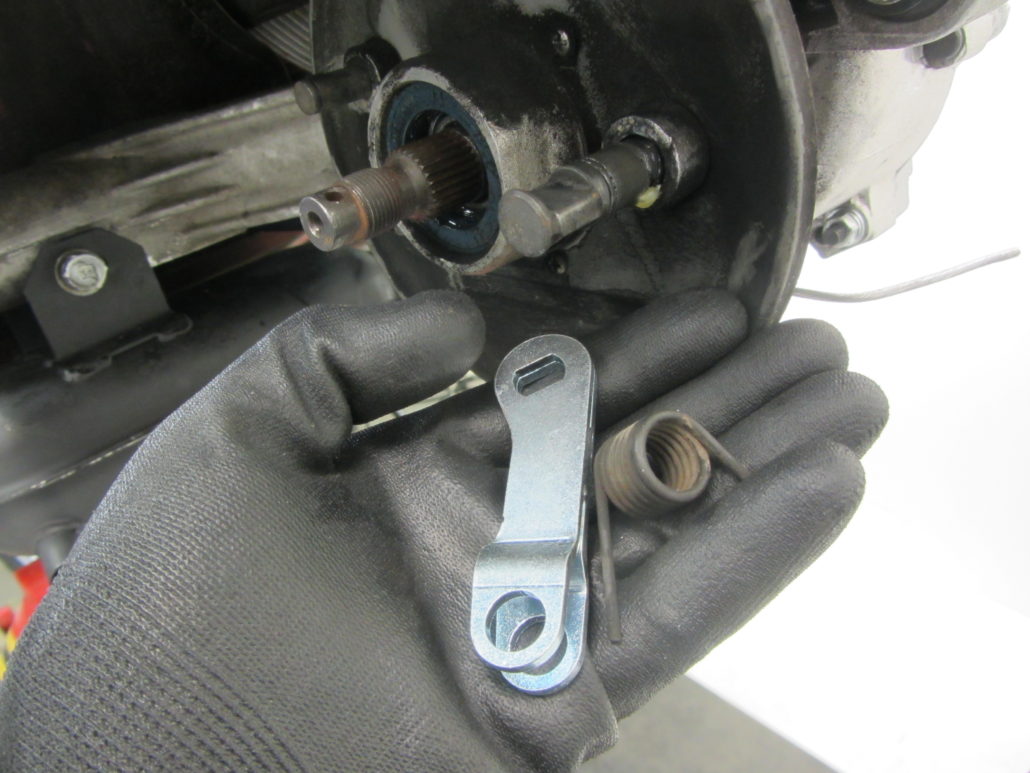
Do not forget the cotter pin before attaching the spring.
In this case, new brake shoes are used. To protect the guides from corrosion and to prevent the brake shoes from seizing up,
will be here copper paste applied.
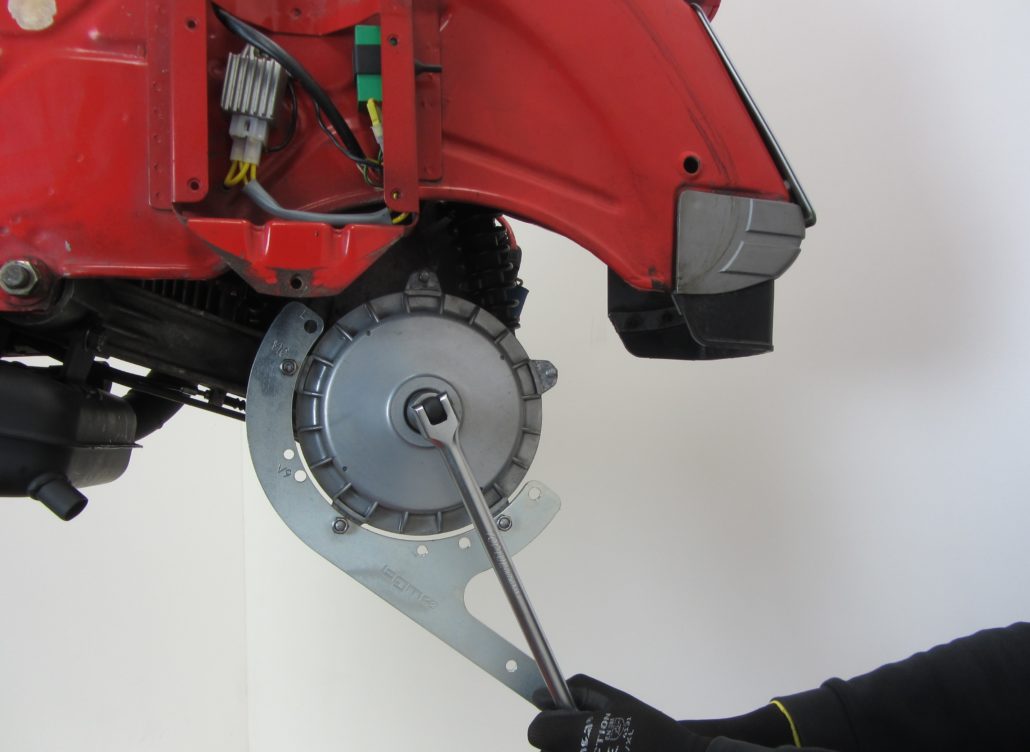
With the main shaft as support, the brake shoes are placed in the guides.
The Mother the Lusso main shaft with SW24, for example, is fitted with a torque fastened by 110Nm.
Before cutting the old inner cable to length, check whether the Adjusting screw is on “0”.
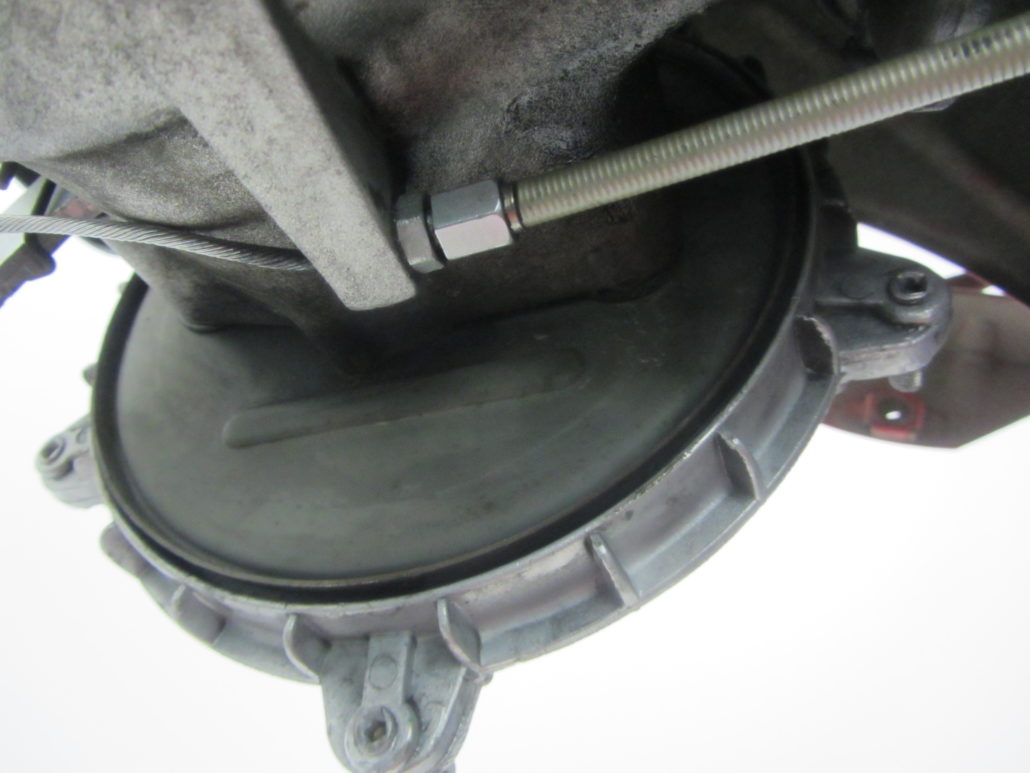
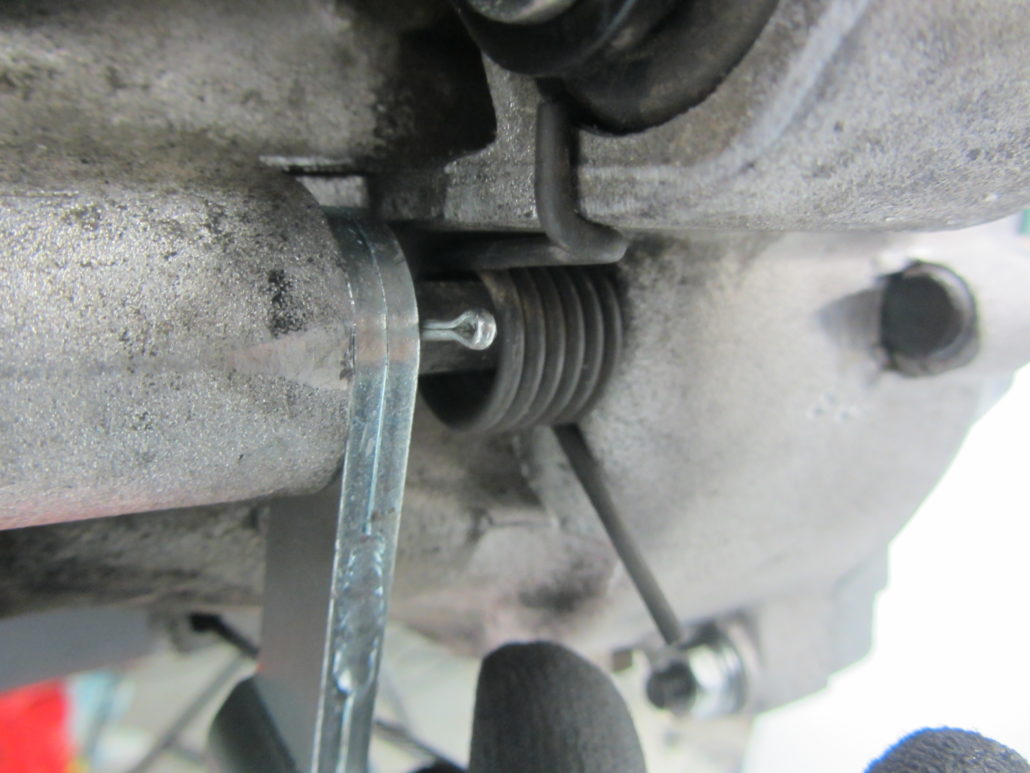
The required pull length for the adapter can be determined based on the position of the brake arm. The pull should be right right up to the end of the arm
are sufficient. the Cable shears ensures a clean and safe cut without the cable fraying.

Push the adapter up to the end of the inner cable and secure it with the clamping screw. After the first test braking, check whether the end of the train
is still in the same position. If not, the clamping screw must be checked and retightened.
So that the adjusting nut on the adapter is easy to move at all times and does not corrode, a little copper paste can also be used here.
Mount the rear wheel again and the wild ride can go on.

Just got us from Pinasco the news reaches us that the long-announced engine housings for the Vespa T5 should arrive next Thursday.
The engine housings of the rare Vespa PX125T5 have always been few and far between. We are all the more pleased that something is happening again with the products for the T5.
Pinasco now offers two alternatives. Like the PX motor housings also, it will for the T5
In terms of price, the T5 motor housings are slightly higher than the PX variant lie.
More technical details We can only give you this when we have received the first motor housings in the next few days. We keep you here in Scooter Center Blog up to date.
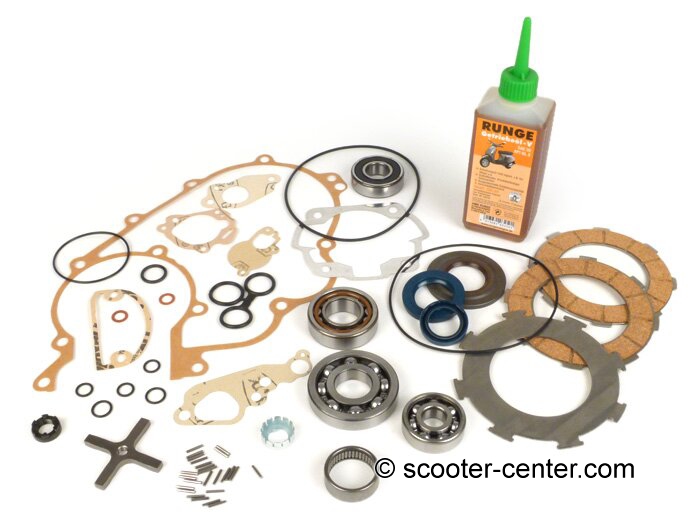
The easiest way to complete such an engine is to order the appropriate engine revision kit: Engine revision set Vespa 125T5
Information about a super suitable Exhaust you find here Vespa T5 exhaust
Here are some pictures that Pinasco made available to us.
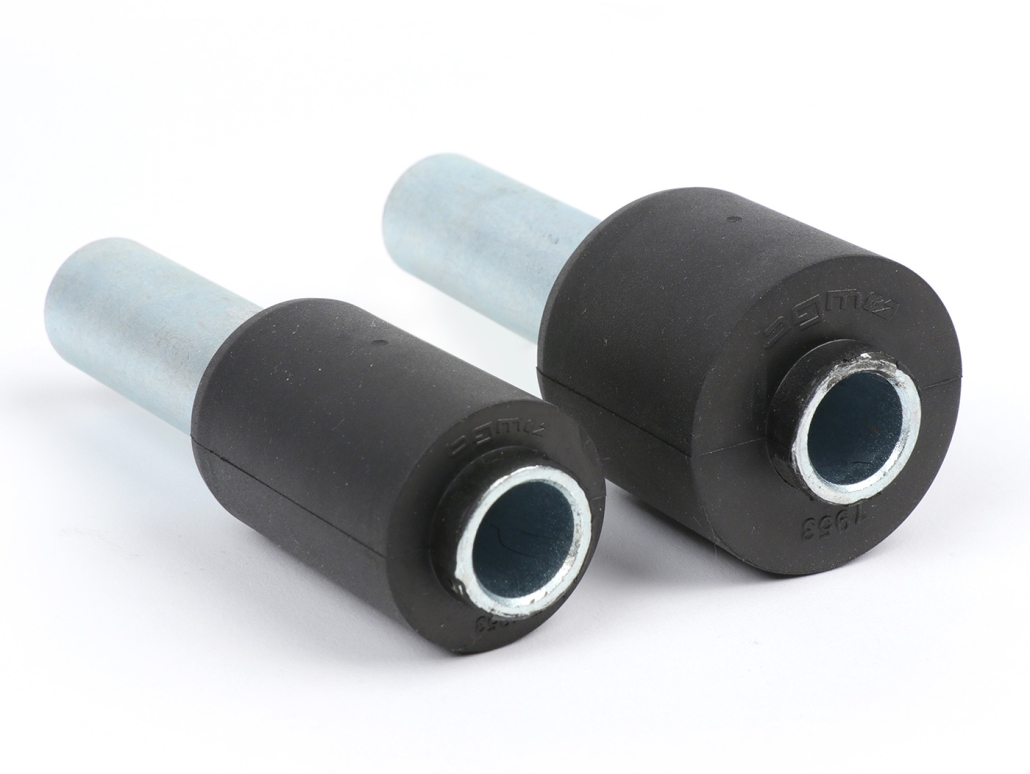
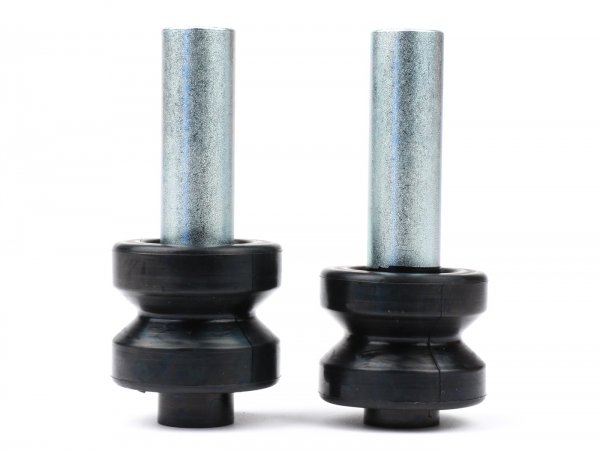
The motor housings are expected to be delivered with all fixed stud bolts and suitable silent rubbers for the motor cross-member and shock absorber mount.
The Pinasco motor housings are very high quality replacement motor housings made of the finest die-cast aluminum. In addition to the very precise processing, they also offer many special features that are particularly interesting for tuners.
In addition to the significantly larger sealing surfaces on the cylinder base and carburetor inlet, Pinasco also offers the housing as a version with a diaphragm inlet. This suction technology, which has long been standard in the automatic sector, also offers large carburettors a good passage to breathe deeply. Further reinforcements in the cast, a larger crankshaft bearing and the great scope of delivery round off the superb overall picture of the Pinasco engine housing perfectly.
The housings are manufactured in two variants:
MASTER = ROTARY VALVE INLET (LIKE FROM THE PIAGGIO FACTORY)
SLAVE = DIAPHRAGM CONTROLLED
The engine internals and ignition components of all 125-200ccm models from 1982 onwards can be taken over. The components built from 1984 onwards are preferable due to the improved and more stable gearbox and the more powerful alternator. The motor of the COSA models is also well suited as a donor motor. Their engine block is outwardly different, but uses the same innards as the PX models from 1992 onwards.
Both versions have the same useful improvements:
* Our tip: run the sealed bearing and external shaft seal with the appropriate brake drum.
SPECIAL FEATURES ROTARY VALVE VERSION
- Extra large sealing surface over both engine halves, suitable for all intake manifolds
- Can be used as a 1: 1 replacement for an original motor housing
SPECIAL FEATURES OF THE MEMBRANE VERSION
- Central, full-surface membrane inlet
- Incl. Membrane intake, incl. Membrane in RD350 format (hole 58x48mm)
- Suction rubber can be rotated 360 °, connection width carburetor = Ø34mm
- Rubber suitable for Keihin PWK28, Mikuni TMX27 / 30, Dell'Orto PHBH28 / 30, VHS24-30
- No cast-in axis for oil pump control
- No hole for oil pump drive
The enclosed fitting bush for the auxiliary shaft must be inserted by yourself
If transmission components other than those of the PX models from 125cc are to be used, please check the auxiliary shaft axis for compatibility beforehand and change it if necessary.
Please insert all stud bolts with high-strength screw adhesive. The cylinder studs are not oversized on one side, as is the case with the original Piaggio. Therefore, glue in the supplied Pinasco cylinder studs here as well. We recommend cutting all threads and cleaning them with compressed air.
ASSEMBLY NOTE:
The crankshaft bearing NU205 on the alternator side is not seated flush in the engine housing.
It protrudes approx. 1mm towards the crankshaft.
DELIVERY
· ROTARY VALVE
- All studs
- Silent rubbers + washers for silent rubbers
- Housing seals
- Bushing for auxiliary shaft axis
· MEMBRANE
- as above, additionally included:
- Intake manifold including membrane, suction rubber, seal and small parts
- NOTE: No screws included for attaching the intake manifold to the engine block (see: Accessories)
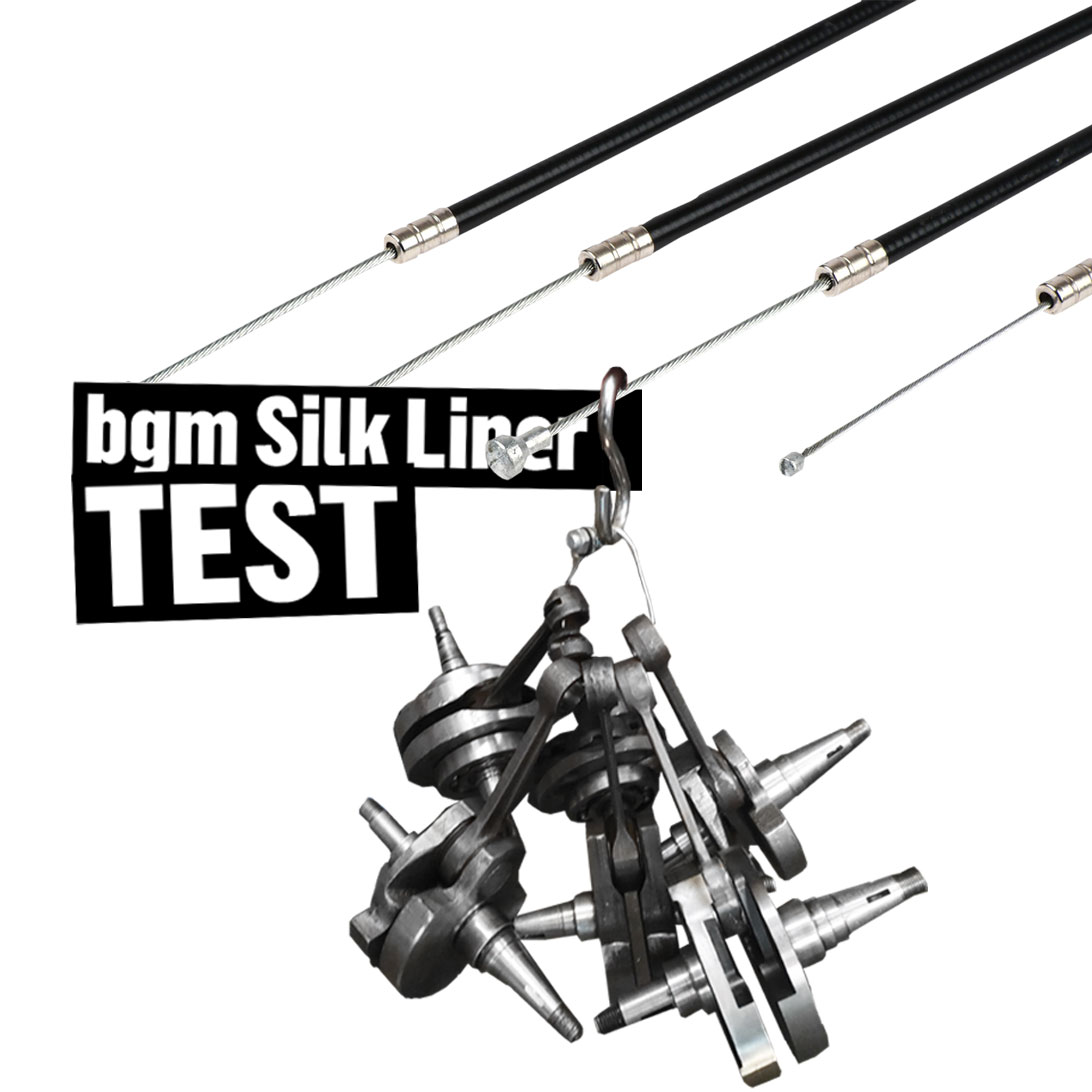
Our Racing exhaust for Vespa has been tested again. And again it is the test winner with the greatest performance. In that case it became ours BigBox for the Vespa T5 from UK online scooter magazine SLUK tested. Here is a video of the test:
The bgm BigBox Vespa T5 is designed as a replacement for the original sensationally good exhaust system of the Vespa PX special model T5. The T5 engine designed by Morini has some peculiarities due to the adapted powerful 125cc motorcycle cylinder.
The T5 engine reacts very strongly to the exchange of the exhaust system. The BGM BigBox for the T5 is based on the standard exhaust in order to keep the torque in the lower and middle speed range at a similarly high level as the standard exhaust. Depending on the setup, it can turn out a little further.
Nice to see at our customer Nino in Portugal, Original T5 with the bgm BigBox. Seems to be fun:
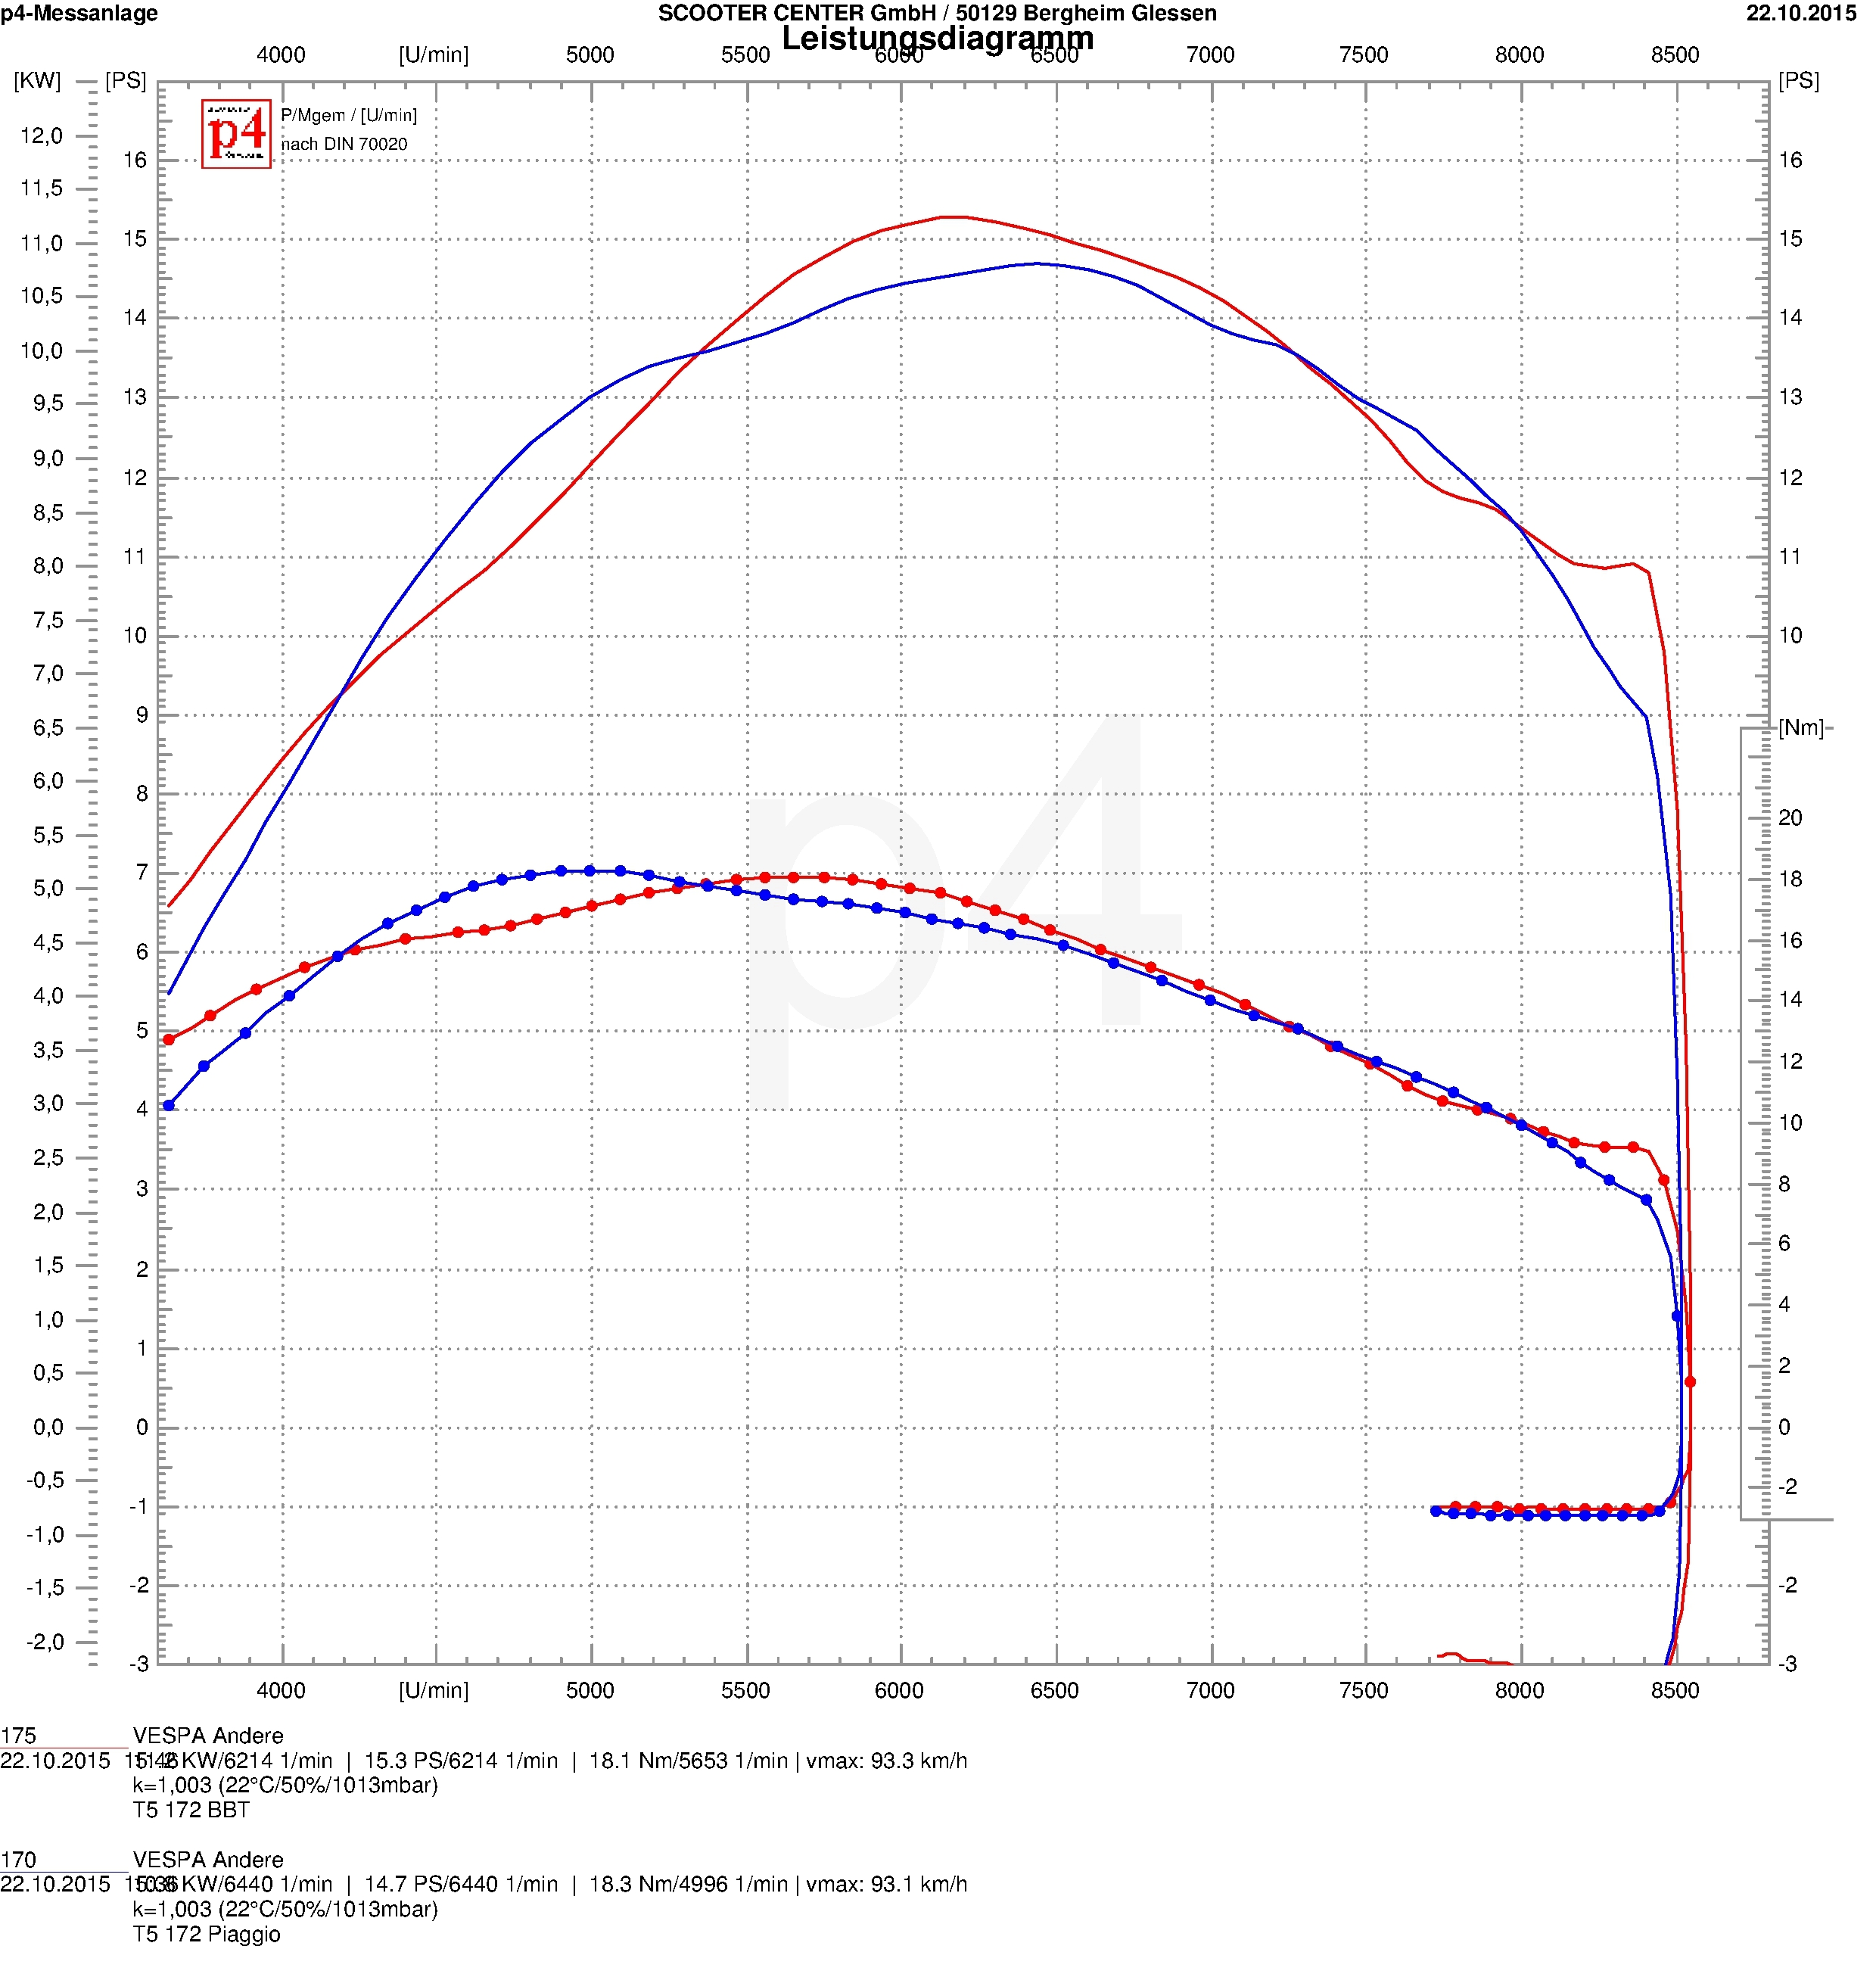

Nice to see in the diagrams: ours bgm BigBox harmonizes with the original engine as well as with Polini 152 or Malossi 172 tuning cylinders. On revised engines, the larger volume of the BigBox Touring results in a significantly better torque and power curve than with the original exhaust.
You can find the detailed test here: SLUK

The brake pad wear of the front brake of the PX series up to 1998 and the PK-XL can be easily adjusted without tools using the well-known knurled screw on the brake cable.
On the Vespa PX125T5, this luxury can even be found on the rear brake.
With this model, Piaggio has already seen that the fiddly-to-use adjusting screw in hard-to-reach places is no longer state-of-the-art.
We leave the no longer available Piaggio original part of the T5 in excellent quality reproduce.
The brake arm fits almost all Vespa Largeframe Models and is one meaningful improvement especially for all PX before 1984, as well as rally, sprint and co, because the brake arm is longer and a greater braking force is generated with the same pedal force.
With the Set for retrofitting every PX can be brought up to the state-of-the-art.
In order to carry out the conversion, a slot must be made in the cable guide of the brake pedal. The T5 brake cable has a cast nipple at each end and can therefore no longer be threaded through the bare hole in the cable guide on the pedal. In addition, the M8 set screw on the PX engine blocks must be removed and drilled to the size of the brake cable abutment.
Those who shy away from the effort described above can easily fall back on the variant with our adapter for the pulling thread:
If the brake cable is not to be completely replaced, we also offer a fast one Adapter solution
For the Vespa Largeframe Models with an external brake pedal, such as Vespa Rally, Sprint, VNA, VNB, etc., can also be converted either with the adapter or with one loose brake cablethat has one end with the matching thread.
Here we briefly present the conversion using the example of a Vespa PX.
In order to be able to replace the brake arm, it is necessary to remove the brake cam.
In order to gain access to the cam, the rear wheel and the brake drum are dismantled.
Dismantle the rear wheel
and then the brake drum remove.
ohne impact wrench is the Holding tool for Vespa and Lambretta brake drums a real help.
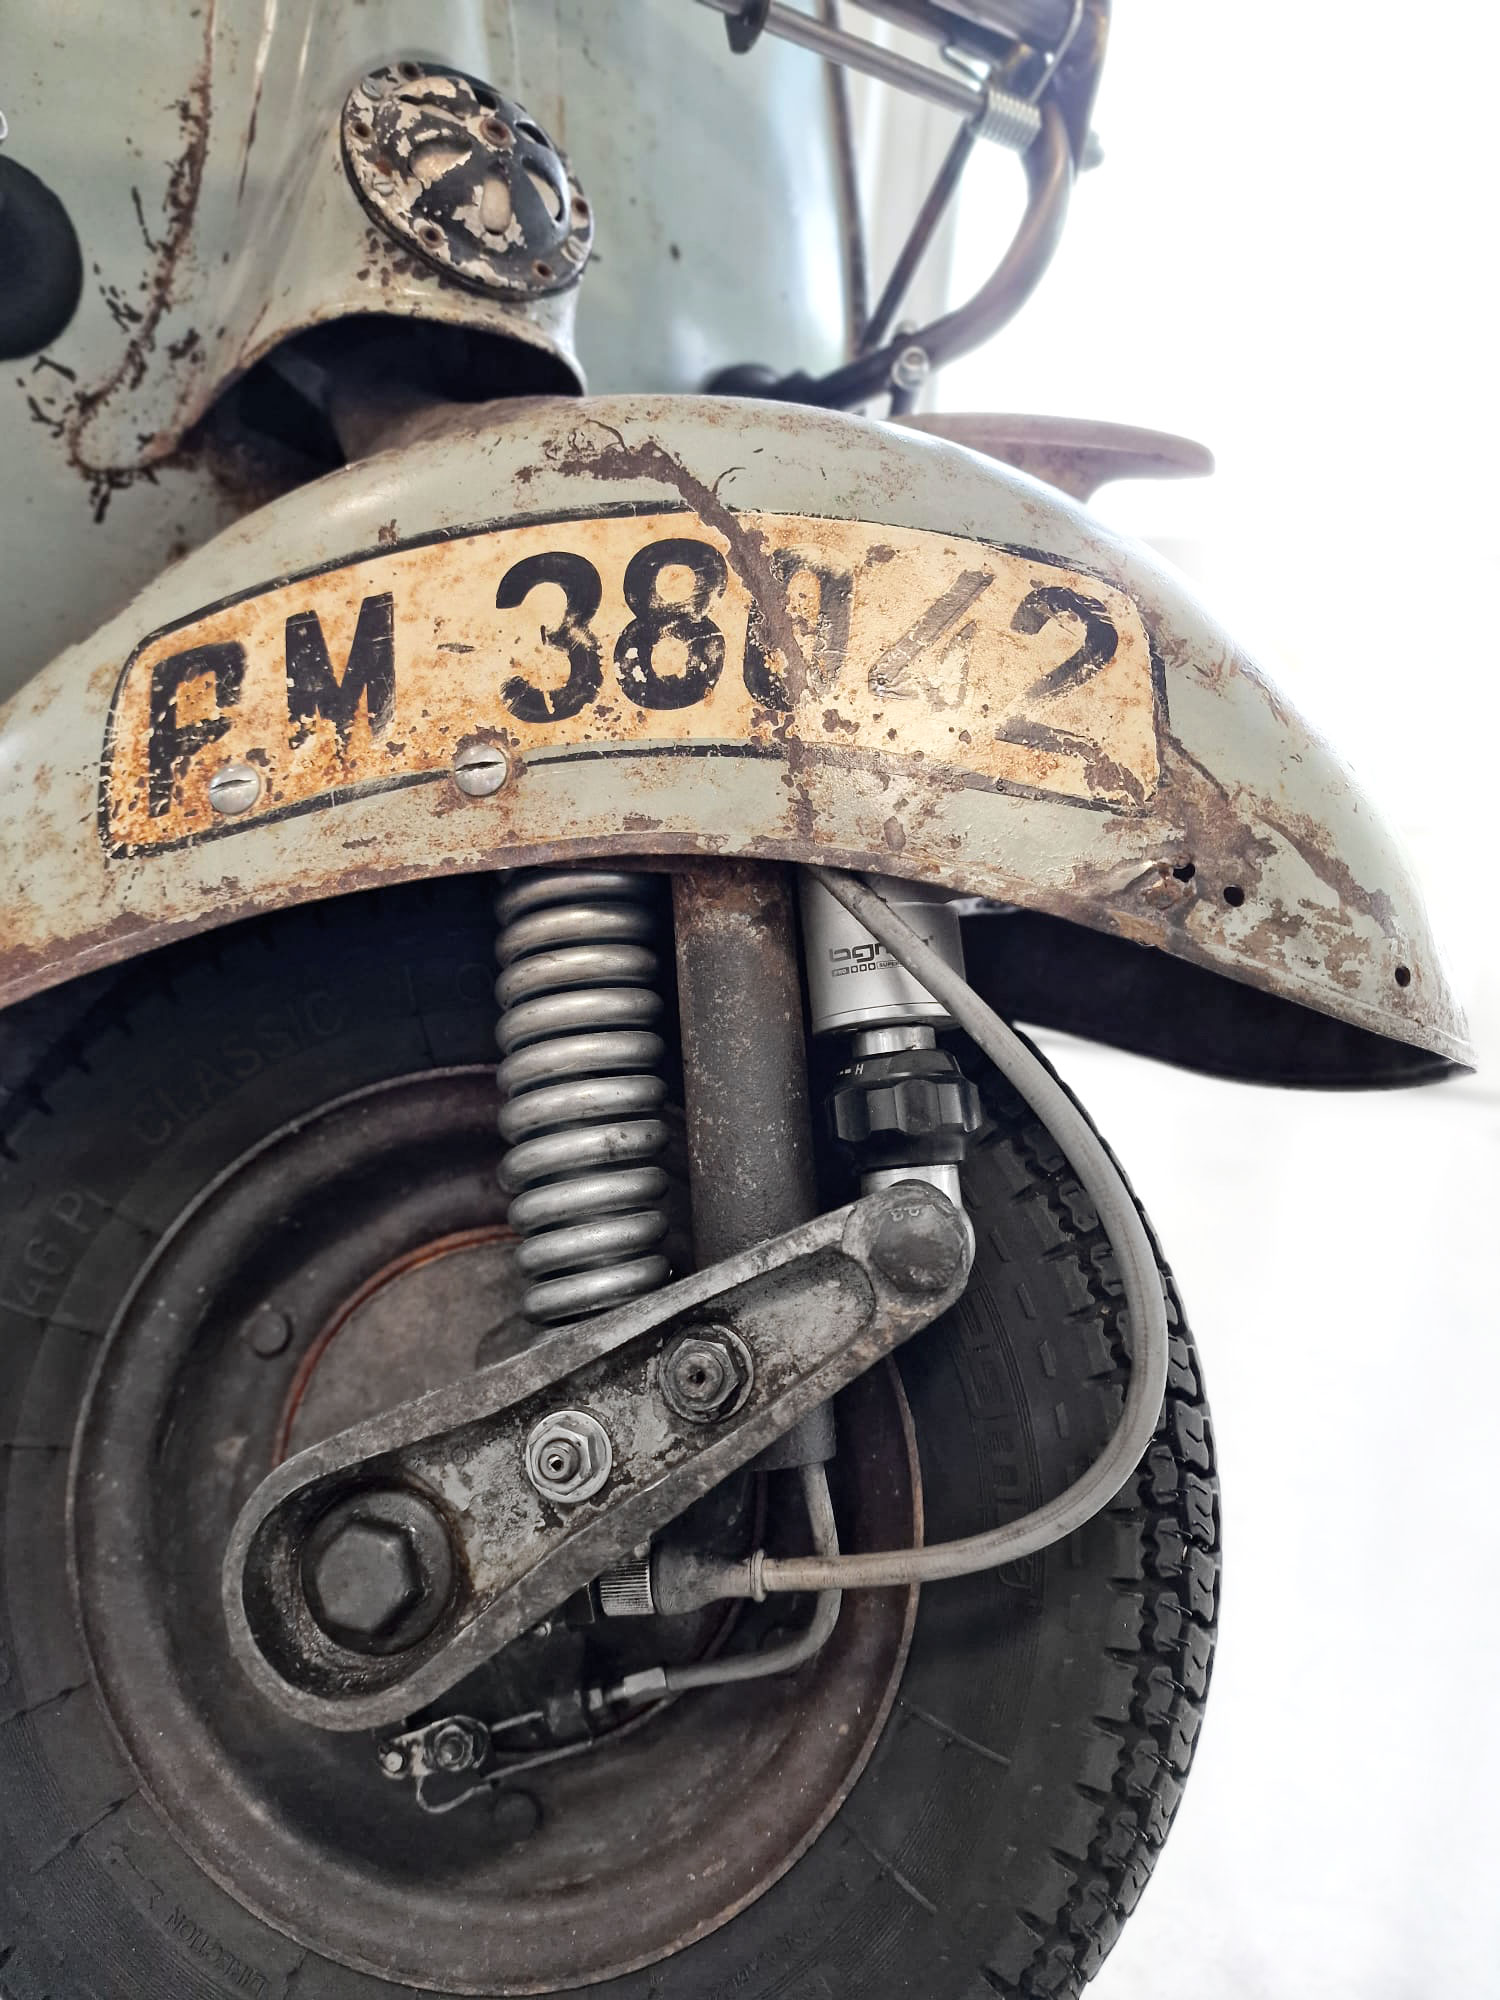
If the brake drum is removed, the brake shoes are freely accessible. Here it is worth taking a look at the position of the brake cam.
If the cam is almost 45 ° inclined to the brake shoes with the brake pedal unloaded, as shown here, this is an indication that the Brake shoes are soon worn out.
In order to be able to pull the brake cam a bit out of the guide, it is necessary to Brake shoes to remove. the Retaining rings can be removed quite easily.
However, care should be taken to secure the little nasty things against jumping away.
With a wider one screwdriver the jaws can be spread apart and removed one at a time. Shouldn't the brake shoes
are replaced, it makes sense to mark the installation position on one of the brake shoes. As can be seen in the picture above based on the abrasion,
the approaching brake shoe is subject to a different wear pattern than the decelerating brake shoe. Therefore, it makes sense to remove the brake shoes when reassembling
to put them back in their accustomed place.
After unhooking the spring for the brake arm is the Safety split pin accessible. Once the split pin has been removed, the Brake cam pulled out
become and gives the Feder and the brake arm free.
The brake cam is provided with a franking in which a Fat storage is introduced for long-term lubrication. Just fill up if necessary.
If the brake cam has the latest lubricant technology, the brake arm and the spring can be installed.
Do not forget the cotter pin before attaching the spring.
In this case, new brake shoes are used. To protect the guides from corrosion and to prevent the brake shoes from seizing up,
will be here copper paste applied.
With the main shaft as support, the brake shoes are placed in the guides.
The Mother the Lusso main shaft with SW24, for example, is fitted with a torque fastened by 110Nm.
Before cutting the old inner cable to length, check whether the Adjusting screw is on “0”.
The required pull length for the adapter can be determined based on the position of the brake arm. The pull should be right right up to the end of the arm
are sufficient. the Cable shears ensures a clean and safe cut without the cable fraying.
Push the adapter up to the end of the inner cable and secure it with the clamping screw. After the first test braking, check whether the end of the train
is still in the same position. If not, the clamping screw must be checked and retightened.
So that the adjusting nut on the adapter is easy to move at all times and does not corrode, a little copper paste can also be used here.
Mount the rear wheel again and the wild ride can go on.

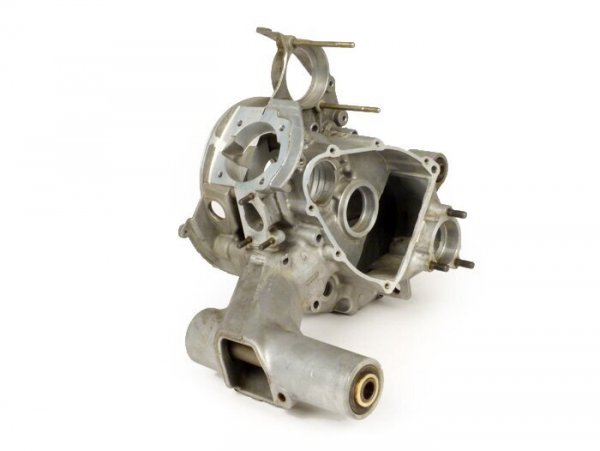
Just got us from Pinasco the news reaches us that the long-announced engine housings for the Vespa T5 should arrive next Thursday.
The engine housings of the rare Vespa PX125T5 have always been few and far between. We are all the more pleased that something is happening again with the products for the T5.
Pinasco now offers two alternatives. Like the PX motor housings also, it will for the T5
In terms of price, the T5 motor housings are slightly higher than the PX variant lie.
More technical details We can only give you this when we have received the first motor housings in the next few days. We keep you here in Scooter Center Blog up to date.
The easiest way to complete such an engine is to order the appropriate engine revision kit: Engine revision set Vespa 125T5
Information about a super suitable Exhaust you find here Vespa T5 exhaust
Here are some pictures that Pinasco made available to us.
The motor housings are expected to be delivered with all fixed stud bolts and suitable silent rubbers for the motor cross-member and shock absorber mount.
The Pinasco motor housings are very high quality replacement motor housings made of the finest die-cast aluminum. In addition to the very precise processing, they also offer many special features that are particularly interesting for tuners.
In addition to the significantly larger sealing surfaces on the cylinder base and carburetor inlet, Pinasco also offers the housing as a version with a diaphragm inlet. This suction technology, which has long been standard in the automatic sector, also offers large carburettors a good passage to breathe deeply. Further reinforcements in the cast, a larger crankshaft bearing and the great scope of delivery round off the superb overall picture of the Pinasco engine housing perfectly.
The housings are manufactured in two variants:
MASTER = ROTARY VALVE INLET (LIKE FROM THE PIAGGIO FACTORY)
SLAVE = DIAPHRAGM CONTROLLED
The engine internals and ignition components of all 125-200ccm models from 1982 onwards can be taken over. The components built from 1984 onwards are preferable due to the improved and more stable gearbox and the more powerful alternator. The motor of the COSA models is also well suited as a donor motor. Their engine block is outwardly different, but uses the same innards as the PX models from 1992 onwards.
Both versions have the same useful improvements:
* Our tip: run the sealed bearing and external shaft seal with the appropriate brake drum.
SPECIAL FEATURES ROTARY VALVE VERSION
- Extra large sealing surface over both engine halves, suitable for all intake manifolds
- Can be used as a 1: 1 replacement for an original motor housing
SPECIAL FEATURES OF THE MEMBRANE VERSION
- Central, full-surface membrane inlet
- Incl. Membrane intake, incl. Membrane in RD350 format (hole 58x48mm)
- Suction rubber can be rotated 360 °, connection width carburetor = Ø34mm
- Rubber suitable for Keihin PWK28, Mikuni TMX27 / 30, Dell'Orto PHBH28 / 30, VHS24-30
- No cast-in axis for oil pump control
- No hole for oil pump drive
The enclosed fitting bush for the auxiliary shaft must be inserted by yourself
If transmission components other than those of the PX models from 125cc are to be used, please check the auxiliary shaft axis for compatibility beforehand and change it if necessary.
Please insert all stud bolts with high-strength screw adhesive. The cylinder studs are not oversized on one side, as is the case with the original Piaggio. Therefore, glue in the supplied Pinasco cylinder studs here as well. We recommend cutting all threads and cleaning them with compressed air.
ASSEMBLY NOTE:
The crankshaft bearing NU205 on the alternator side is not seated flush in the engine housing.
It protrudes approx. 1mm towards the crankshaft.
DELIVERY
· ROTARY VALVE
- All studs
- Silent rubbers + washers for silent rubbers
- Housing seals
- Bushing for auxiliary shaft axis
· MEMBRANE
- as above, additionally included:
- Intake manifold including membrane, suction rubber, seal and small parts
- NOTE: No screws included for attaching the intake manifold to the engine block (see: Accessories)
The brake pad wear of the front brake of the PX series up to 1998 and the PK-XL can be easily adjusted without tools using the well-known knurled screw on the brake cable.
On the Vespa PX125T5, this luxury can even be found on the rear brake.
With this model, Piaggio has already seen that the fiddly-to-use adjusting screw in hard-to-reach places is no longer state-of-the-art.
We leave the no longer available Piaggio original part of the T5 in excellent quality reproduce.
The brake arm fits almost all Vespa Largeframe Models and is one meaningful improvement especially for all PX before 1984, as well as rally, sprint and co, because the brake arm is longer and a greater braking force is generated with the same pedal force.
With the Set for retrofitting every PX can be brought up to the state-of-the-art.
In order to carry out the conversion, a slot must be made in the cable guide of the brake pedal. The T5 brake cable has a cast nipple at each end and can therefore no longer be threaded through the bare hole in the cable guide on the pedal. In addition, the M8 set screw on the PX engine blocks must be removed and drilled to the size of the brake cable abutment.
Those who shy away from the effort described above can easily fall back on the variant with our adapter for the pulling thread:
If the brake cable is not to be completely replaced, we also offer a fast one Adapter solution
For the Vespa Largeframe Models with an external brake pedal, such as Vespa Rally, Sprint, VNA, VNB, etc., can also be converted either with the adapter or with one loose brake cablethat has one end with the matching thread.
Here we briefly present the conversion using the example of a Vespa PX.
In order to be able to replace the brake arm, it is necessary to remove the brake cam.
In order to gain access to the cam, the rear wheel and the brake drum are dismantled.
Dismantle the rear wheel
and then the brake drum remove.
ohne impact wrench is the Holding tool for Vespa and Lambretta brake drums a real help.
If the brake drum is removed, the brake shoes are freely accessible. Here it is worth taking a look at the position of the brake cam.
If the cam is almost 45 ° inclined to the brake shoes with the brake pedal unloaded, as shown here, this is an indication that the Brake shoes are soon worn out.
In order to be able to pull the brake cam a bit out of the guide, it is necessary to Brake shoes to remove. the Retaining rings can be removed quite easily.
However, care should be taken to secure the little nasty things against jumping away.
With a wider one screwdriver the jaws can be spread apart and removed one at a time. Shouldn't the brake shoes
are replaced, it makes sense to mark the installation position on one of the brake shoes. As can be seen in the picture above based on the abrasion,
the approaching brake shoe is subject to a different wear pattern than the decelerating brake shoe. Therefore, it makes sense to remove the brake shoes when reassembling
to put them back in their accustomed place.
After unhooking the spring for the brake arm is the Safety split pin accessible. Once the split pin has been removed, the Brake cam pulled out
become and gives the Feder and the brake arm free.
The brake cam is provided with a franking in which a Fat storage is introduced for long-term lubrication. Just fill up if necessary.
If the brake cam has the latest lubricant technology, the brake arm and the spring can be installed.
Do not forget the cotter pin before attaching the spring.
In this case, new brake shoes are used. To protect the guides from corrosion and to prevent the brake shoes from seizing up,
will be here copper paste applied.
With the main shaft as support, the brake shoes are placed in the guides.
The Mother the Lusso main shaft with SW24, for example, is fitted with a torque fastened by 110Nm.
Before cutting the old inner cable to length, check whether the Adjusting screw is on “0”.
The required pull length for the adapter can be determined based on the position of the brake arm. The pull should be right right up to the end of the arm
are sufficient. the Cable shears ensures a clean and safe cut without the cable fraying.
Push the adapter up to the end of the inner cable and secure it with the clamping screw. After the first test braking, check whether the end of the train
is still in the same position. If not, the clamping screw must be checked and retightened.
So that the adjusting nut on the adapter is easy to move at all times and does not corrode, a little copper paste can also be used here.
Mount the rear wheel again and the wild ride can go on.
Just got us from Pinasco the news reaches us that the long-announced engine housings for the Vespa T5 should arrive next Thursday.
The engine housings of the rare Vespa PX125T5 have always been few and far between. We are all the more pleased that something is happening again with the products for the T5.
Pinasco now offers two alternatives. Like the PX motor housings also, it will for the T5
In terms of price, the T5 motor housings are slightly higher than the PX variant lie.
More technical details We can only give you this when we have received the first motor housings in the next few days. We keep you here in Scooter Center Blog up to date.
The easiest way to complete such an engine is to order the appropriate engine revision kit: Engine revision set Vespa 125T5
Information about a super suitable Exhaust you find here Vespa T5 exhaust
Here are some pictures that Pinasco made available to us.
The motor housings are expected to be delivered with all fixed stud bolts and suitable silent rubbers for the motor cross-member and shock absorber mount.
The Pinasco motor housings are very high quality replacement motor housings made of the finest die-cast aluminum. In addition to the very precise processing, they also offer many special features that are particularly interesting for tuners.
In addition to the significantly larger sealing surfaces on the cylinder base and carburetor inlet, Pinasco also offers the housing as a version with a diaphragm inlet. This suction technology, which has long been standard in the automatic sector, also offers large carburettors a good passage to breathe deeply. Further reinforcements in the cast, a larger crankshaft bearing and the great scope of delivery round off the superb overall picture of the Pinasco engine housing perfectly.
The housings are manufactured in two variants:
MASTER = ROTARY VALVE INLET (LIKE FROM THE PIAGGIO FACTORY)
SLAVE = DIAPHRAGM CONTROLLED
The engine internals and ignition components of all 125-200ccm models from 1982 onwards can be taken over. The components built from 1984 onwards are preferable due to the improved and more stable gearbox and the more powerful alternator. The motor of the COSA models is also well suited as a donor motor. Their engine block is outwardly different, but uses the same innards as the PX models from 1992 onwards.
Both versions have the same useful improvements:
* Our tip: run the sealed bearing and external shaft seal with the appropriate brake drum.
SPECIAL FEATURES ROTARY VALVE VERSION
- Extra large sealing surface over both engine halves, suitable for all intake manifolds
- Can be used as a 1: 1 replacement for an original motor housing
SPECIAL FEATURES OF THE MEMBRANE VERSION
- Central, full-surface membrane inlet
- Incl. Membrane intake, incl. Membrane in RD350 format (hole 58x48mm)
- Suction rubber can be rotated 360 °, connection width carburetor = Ø34mm
- Rubber suitable for Keihin PWK28, Mikuni TMX27 / 30, Dell'Orto PHBH28 / 30, VHS24-30
- No cast-in axis for oil pump control
- No hole for oil pump drive
The enclosed fitting bush for the auxiliary shaft must be inserted by yourself
If transmission components other than those of the PX models from 125cc are to be used, please check the auxiliary shaft axis for compatibility beforehand and change it if necessary.
Please insert all stud bolts with high-strength screw adhesive. The cylinder studs are not oversized on one side, as is the case with the original Piaggio. Therefore, glue in the supplied Pinasco cylinder studs here as well. We recommend cutting all threads and cleaning them with compressed air.
ASSEMBLY NOTE:
The crankshaft bearing NU205 on the alternator side is not seated flush in the engine housing.
It protrudes approx. 1mm towards the crankshaft.
DELIVERY
· ROTARY VALVE
- All studs
- Silent rubbers + washers for silent rubbers
- Housing seals
- Bushing for auxiliary shaft axis
· MEMBRANE
- as above, additionally included:
- Intake manifold including membrane, suction rubber, seal and small parts
- NOTE: No screws included for attaching the intake manifold to the engine block (see: Accessories)
Our Racing exhaust for Vespa has been tested again. And again it is the test winner with the greatest performance. In that case it became ours BigBox for the Vespa T5 from UK online scooter magazine SLUK tested. Here is a video of the test:
The bgm BigBox Vespa T5 is designed as a replacement for the original sensationally good exhaust system of the Vespa PX special model T5. The T5 engine designed by Morini has some peculiarities due to the adapted powerful 125cc motorcycle cylinder.
The T5 engine reacts very strongly to the exchange of the exhaust system. The BGM BigBox for the T5 is based on the standard exhaust in order to keep the torque in the lower and middle speed range at a similarly high level as the standard exhaust. Depending on the setup, it can turn out a little further.
Nice to see at our customer Nino in Portugal, Original T5 with the bgm BigBox. Seems to be fun:
Nice to see in the diagrams: ours bgm BigBox harmonizes with the original engine as well as with Polini 152 or Malossi 172 tuning cylinders. On revised engines, the larger volume of the BigBox Touring results in a significantly better torque and power curve than with the original exhaust.
You can find the detailed test here: SLUK
The brake pad wear of the front brake of the PX series up to 1998 and the PK-XL can be easily adjusted without tools using the well-known knurled screw on the brake cable.
On the Vespa PX125T5, this luxury can even be found on the rear brake.
With this model, Piaggio has already seen that the fiddly-to-use adjusting screw in hard-to-reach places is no longer state-of-the-art.
We leave the no longer available Piaggio original part of the T5 in excellent quality reproduce.
The brake arm fits almost all Vespa Largeframe Models and is one meaningful improvement especially for all PX before 1984, as well as rally, sprint and co, because the brake arm is longer and a greater braking force is generated with the same pedal force.
With the Set for retrofitting every PX can be brought up to the state-of-the-art.
In order to carry out the conversion, a slot must be made in the cable guide of the brake pedal. The T5 brake cable has a cast nipple at each end and can therefore no longer be threaded through the bare hole in the cable guide on the pedal. In addition, the M8 set screw on the PX engine blocks must be removed and drilled to the size of the brake cable abutment.
Those who shy away from the effort described above can easily fall back on the variant with our adapter for the pulling thread:
If the brake cable is not to be completely replaced, we also offer a fast one Adapter solution
For the Vespa Largeframe Models with an external brake pedal, such as Vespa Rally, Sprint, VNA, VNB, etc., can also be converted either with the adapter or with one loose brake cablethat has one end with the matching thread.
Here we briefly present the conversion using the example of a Vespa PX.
In order to be able to replace the brake arm, it is necessary to remove the brake cam.
In order to gain access to the cam, the rear wheel and the brake drum are dismantled.
Dismantle the rear wheel
and then the brake drum remove.
ohne impact wrench is the Holding tool for Vespa and Lambretta brake drums a real help.
If the brake drum is removed, the brake shoes are freely accessible. Here it is worth taking a look at the position of the brake cam.
If the cam is almost 45 ° inclined to the brake shoes with the brake pedal unloaded, as shown here, this is an indication that the Brake shoes are soon worn out.
In order to be able to pull the brake cam a bit out of the guide, it is necessary to Brake shoes to remove. the Retaining rings can be removed quite easily.
However, care should be taken to secure the little nasty things against jumping away.
With a wider one screwdriver the jaws can be spread apart and removed one at a time. Shouldn't the brake shoes
are replaced, it makes sense to mark the installation position on one of the brake shoes. As can be seen in the picture above based on the abrasion,
the approaching brake shoe is subject to a different wear pattern than the decelerating brake shoe. Therefore, it makes sense to remove the brake shoes when reassembling
to put them back in their accustomed place.
After unhooking the spring for the brake arm is the Safety split pin accessible. Once the split pin has been removed, the Brake cam pulled out
become and gives the Feder and the brake arm free.
The brake cam is provided with a franking in which a Fat storage is introduced for long-term lubrication. Just fill up if necessary.
If the brake cam has the latest lubricant technology, the brake arm and the spring can be installed.
Do not forget the cotter pin before attaching the spring.
In this case, new brake shoes are used. To protect the guides from corrosion and to prevent the brake shoes from seizing up,
will be here copper paste applied.
With the main shaft as support, the brake shoes are placed in the guides.
The Mother the Lusso main shaft with SW24, for example, is fitted with a torque fastened by 110Nm.
Before cutting the old inner cable to length, check whether the Adjusting screw is on “0”.
The required pull length for the adapter can be determined based on the position of the brake arm. The pull should be right right up to the end of the arm
are sufficient. the Cable shears ensures a clean and safe cut without the cable fraying.
Push the adapter up to the end of the inner cable and secure it with the clamping screw. After the first test braking, check whether the end of the train
is still in the same position. If not, the clamping screw must be checked and retightened.
So that the adjusting nut on the adapter is easy to move at all times and does not corrode, a little copper paste can also be used here.
Mount the rear wheel again and the wild ride can go on.
Just got us from Pinasco the news reaches us that the long-announced engine housings for the Vespa T5 should arrive next Thursday.
The engine housings of the rare Vespa PX125T5 have always been few and far between. We are all the more pleased that something is happening again with the products for the T5.
Pinasco now offers two alternatives. Like the PX motor housings also, it will for the T5
In terms of price, the T5 motor housings are slightly higher than the PX variant lie.
More technical details We can only give you this when we have received the first motor housings in the next few days. We keep you here in Scooter Center Blog up to date.
The easiest way to complete such an engine is to order the appropriate engine revision kit: Engine revision set Vespa 125T5
Information about a super suitable Exhaust you find here Vespa T5 exhaust
Here are some pictures that Pinasco made available to us.
The motor housings are expected to be delivered with all fixed stud bolts and suitable silent rubbers for the motor cross-member and shock absorber mount.
The Pinasco motor housings are very high quality replacement motor housings made of the finest die-cast aluminum. In addition to the very precise processing, they also offer many special features that are particularly interesting for tuners.
In addition to the significantly larger sealing surfaces on the cylinder base and carburetor inlet, Pinasco also offers the housing as a version with a diaphragm inlet. This suction technology, which has long been standard in the automatic sector, also offers large carburettors a good passage to breathe deeply. Further reinforcements in the cast, a larger crankshaft bearing and the great scope of delivery round off the superb overall picture of the Pinasco engine housing perfectly.
The housings are manufactured in two variants:
MASTER = ROTARY VALVE INLET (LIKE FROM THE PIAGGIO FACTORY)
SLAVE = DIAPHRAGM CONTROLLED
The engine internals and ignition components of all 125-200ccm models from 1982 onwards can be taken over. The components built from 1984 onwards are preferable due to the improved and more stable gearbox and the more powerful alternator. The motor of the COSA models is also well suited as a donor motor. Their engine block is outwardly different, but uses the same innards as the PX models from 1992 onwards.
Both versions have the same useful improvements:
* Our tip: run the sealed bearing and external shaft seal with the appropriate brake drum.
SPECIAL FEATURES ROTARY VALVE VERSION
- Extra large sealing surface over both engine halves, suitable for all intake manifolds
- Can be used as a 1: 1 replacement for an original motor housing
SPECIAL FEATURES OF THE MEMBRANE VERSION
- Central, full-surface membrane inlet
- Incl. Membrane intake, incl. Membrane in RD350 format (hole 58x48mm)
- Suction rubber can be rotated 360 °, connection width carburetor = Ø34mm
- Rubber suitable for Keihin PWK28, Mikuni TMX27 / 30, Dell'Orto PHBH28 / 30, VHS24-30
- No cast-in axis for oil pump control
- No hole for oil pump drive
The enclosed fitting bush for the auxiliary shaft must be inserted by yourself
If transmission components other than those of the PX models from 125cc are to be used, please check the auxiliary shaft axis for compatibility beforehand and change it if necessary.
Please insert all stud bolts with high-strength screw adhesive. The cylinder studs are not oversized on one side, as is the case with the original Piaggio. Therefore, glue in the supplied Pinasco cylinder studs here as well. We recommend cutting all threads and cleaning them with compressed air.
ASSEMBLY NOTE:
The crankshaft bearing NU205 on the alternator side is not seated flush in the engine housing.
It protrudes approx. 1mm towards the crankshaft.
DELIVERY
· ROTARY VALVE
- All studs
- Silent rubbers + washers for silent rubbers
- Housing seals
- Bushing for auxiliary shaft axis
· MEMBRANE
- as above, additionally included:
- Intake manifold including membrane, suction rubber, seal and small parts
- NOTE: No screws included for attaching the intake manifold to the engine block (see: Accessories)
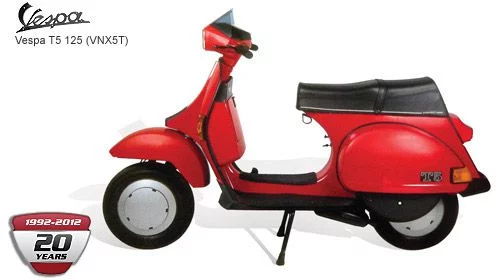
We have to celebrate this! But contrary to what you might expect, the big party is not taking place in Italy.
Our Friends team T5 France from France celebrate the Vespa T5 with a lavish party and you are invited. More information soon here:

We are happy to announce that we are Main sponsors are allowed to be there. So every visitor receives one Scooter Center / bgm Welcome bag with keyring etc.
This donates for the custom show and for the raffle Scooter Center one 23 teeth Vespa clutch bgm Superstrong and a set of bgm PRO SC shock absorber in elegant black, both of course perfectly match the Vespa T5!


You can find spare parts for the Vespa T5 here: Vespa T5 spare parts
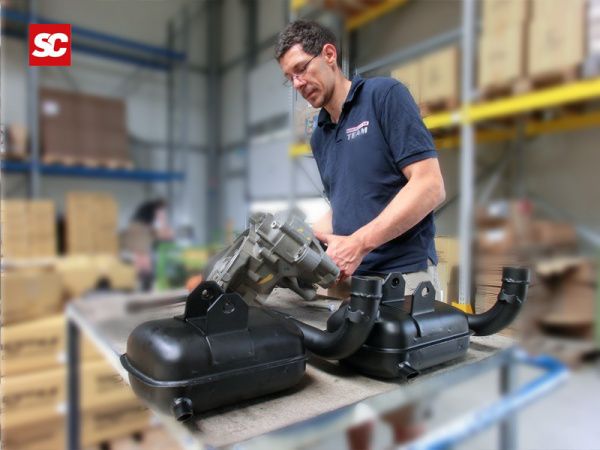

The exhaust systems eagerly awaited by Vespa fans bgm PRO BigBox are for the Vespa PX80, PX125, PX150 (BGM1010) and for the Vespa T5 (BGM1012) available again.

After a final quality check, THE tuning exhaust for the Vespa was neatly packed in bgm PRO boxes and prepared for worldwide shipping.
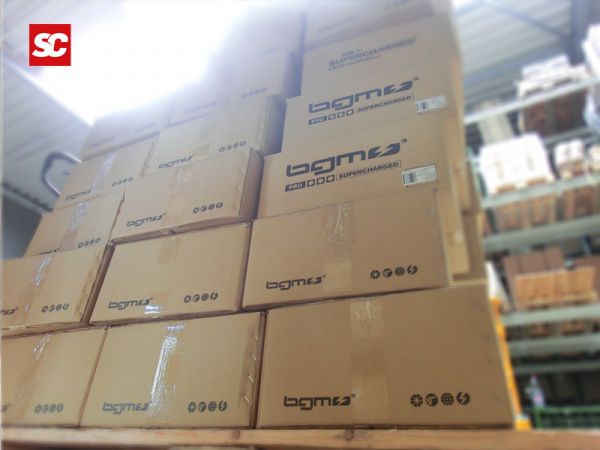
You can now order the Vespa exhaust systems here:
Exhaust bgm PRO BigBox Vespa PX80, PX125, PX150 Item number: BGM1010
Exhaust bgm PRO BigBox Vespa T5 125cc (VNX5T) Item number: BGM1012
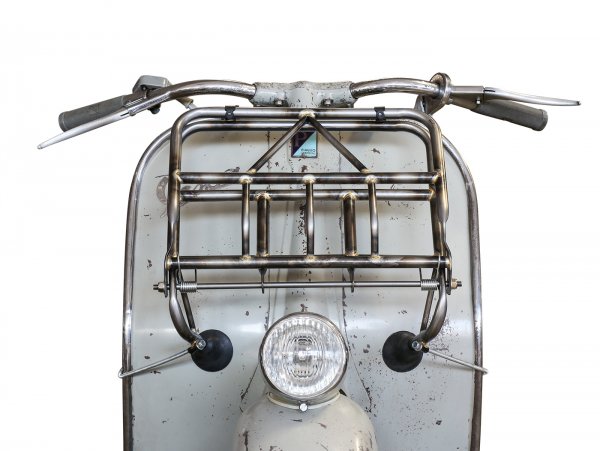
The Silver Fern needs a new brake system.
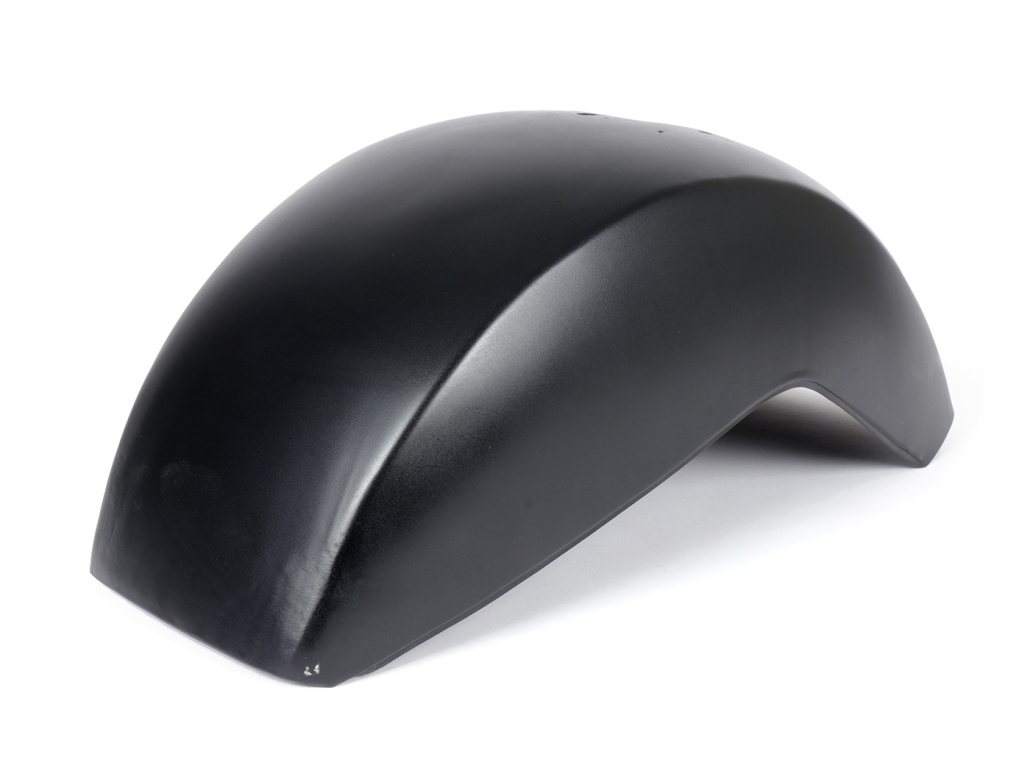
We use a complete LML disc brake for this. A T5 fender is to be mounted on the new steering tube. Since the T5 mud flap is a bit smaller, it is necessary to move the side holder.

The existing holder is therefore removed and the point at which it is to be welded on is prepared.

We bring the holder with the fender into the correct position.

After the holder is firmly connected to the steering tube again, we prepare the hole for the steel braided brake line.

The bore is widened to 9mm so that the connections of the brake line fit through.

We are still dipping the steering tube in fashionable matt black, we hope the new color scheme does not unbalance the sophisticated color concept of the Silver Fern too much.
While the paint dries, let's turn to the steering head bearings.
Special tools are required to remove the old shells.
With the plate ...

you get into the gap between the lower bearing shell and the seat.

The tool for the upper bearing shell ensures that the shell does not tilt in the head tube and widen the sensitive seat when it is removed.


When the old shells are removed, the new ones can be fitted with an insertion tool.

The steering tube is still drying. Therefore we only now turn to the handlebars.
The handlebars must be prepared accordingly for the brake pump holder.

We are taking this step-by-step.
Cut in first ...

... and then mill out to match.
We will replace the supplied Nissin brake pump with one of the current Vespa S / LX models.
The reason for this is the smaller piston diameter, the Nissen pump comes in the classic
1/2 inch format therefore, with a piston diameter of 12,7mm, while the pump of the Vespa S is equipped with an 11mm piston.

The smaller piston diameter enables higher braking power with less manual force.
The greater lever path due to the smaller hydraulic reduction leads to better controllability.
The adapter and the pump need to be adjusted slightly.

Fully assembled, it gives a very pleasing picture.

After the finished processing, the handlebar is also adapted to the new color concept and soon "shines" in matt black.
The steering tube is now dry. After the fender is mounted, the lower one
Open bearing shell and dust cover.

The steering tube is then inserted with plenty of grease for the bearings.

This one…

we replace with a set of new trains in Piaggio quality.
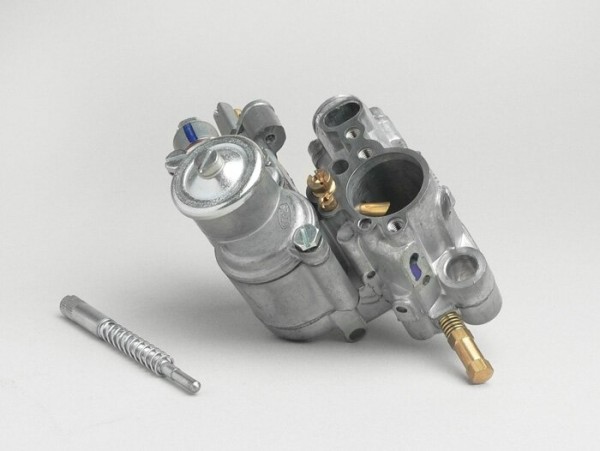
For the throttle cable, we use a universal throttle cable, the original Piaggio cable is unfortunately too short for the 28 Keihin.
After all the cables have been threaded in and the switch cables have been laid, the handlebars take their place on the new steering tube. We still have to come up with something on the subject of gas pipes. In order to open the 28er completely, the original gas reel would even be sufficient, but you would have to grasp at least once with the “tap open” movement.
This results in 2 solutions.
On the one hand, quick throttle grips are preferred, they give a sporty touch.
However, if you prefer a restrained look, you might be better off with a very inexpensive solution.
For some it is old hat, the pulley with stop.
There is no need to mount a suitable gas tube for quick throttle and the handlebars remain symmetrical.

Due to the conversion to a fully hydraulic brake system, there is no longer a brake cable running through the gas pipe, so we can freely choose the stop of the roller by positioning the screw.
However, if a brake cable continues to run through the gas pipe, then you are usually forced to drill new holes for the split pin attached to the pulley.

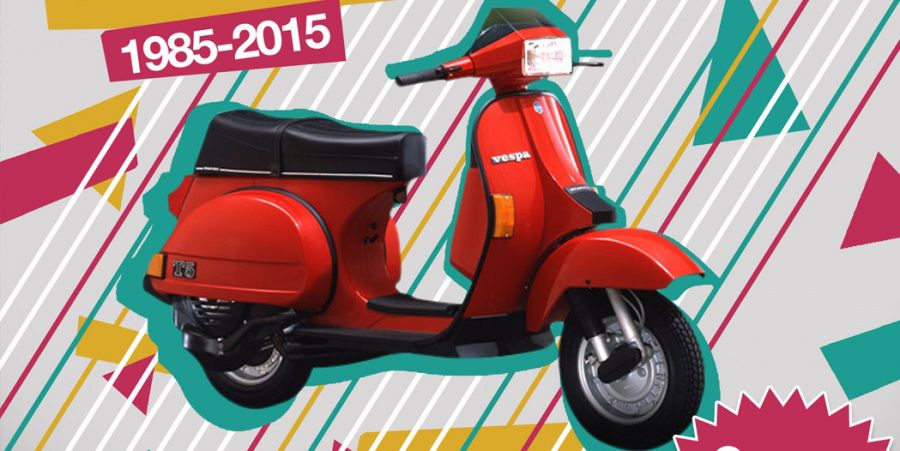
 Congratulations Vespa T5 for the 25th birthday!
- the motor with five overcurrents (Traversi5) like from the two-stroke picture book,
- comfortable seating position for driver and front passenger,
- a small disc that cleverly bypasses wind turbulence past the helmet,
- a tachometer that scientifically substantiates the engine orgies,
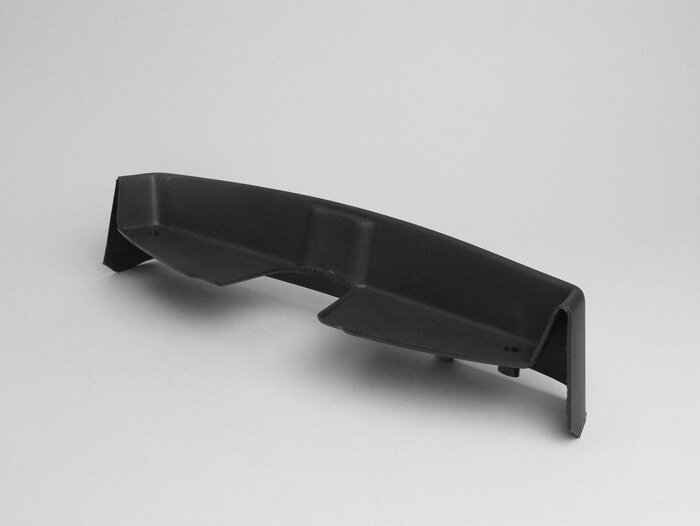
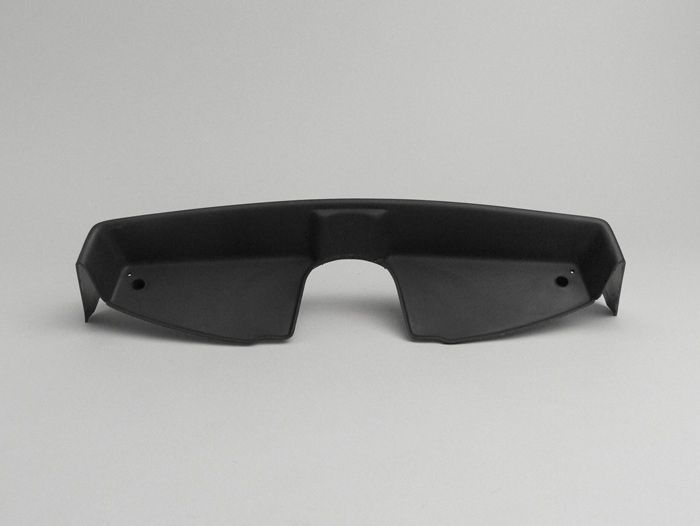
- black spoiler under the leg shield
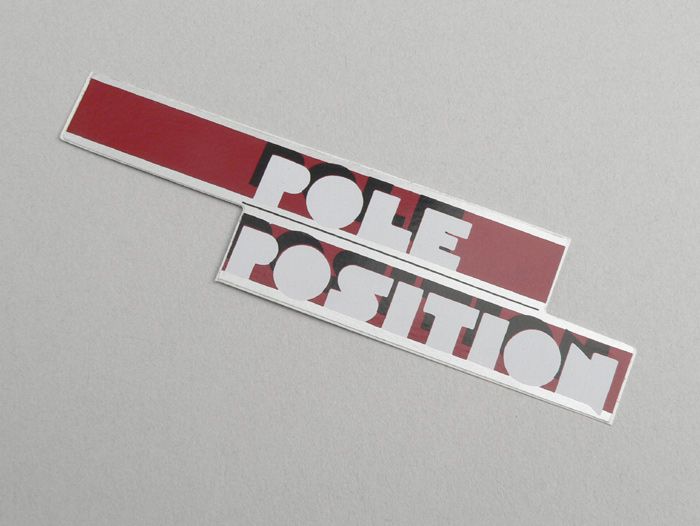
- and racing driver Nelson Piquet as pole position representative.
Nobody can say that in 1986 Piaggio did not go to great lengths to equip their newest racehorse in the stable.
Due to the unfortunate driving license requirements and the modern look, the reaction in Germany was rather restrained. The wild teenagers had their driving license limited to 80ccm and tormented their way through life with the brave but lame PX 80, and for the older guys the virile character and sporty look of the five were probably a bit too modern.
In Great Britain and Italy, due to other legal provisions, a real boom set in.
But the T5 has also made the leap to a classic here in Germany. Not least because of their great engine characteristics. 12HP from 125ccm made and let larger displacement Vesps quickly look old, and that with a unique driving experience, thanks to the turbine-like speed.
The T5 and its engine have become indispensable for trips out, club rallies, meetings, or hidden in strange clothes on the racetracks.
Due to many imports from Italy, Spain and Great Britain you can see more T5 scooters on our streets today than in the 80s. Should you stumble across a good specimen, don't hesitate and strike.
[youtube] uKp0FNMBwFQ [/ youtube]
We also say congratulations Vespa T5 and we have a lot of products in our program to preserve this classic. Be it the rare original exhaust systems, specific frames / add-on parts or tuning items such as the popular Malossi 172. Whether original or conversion, our heart beats for the T5.
A small selection from the one stop scooter shop for maintaining a great scooter.
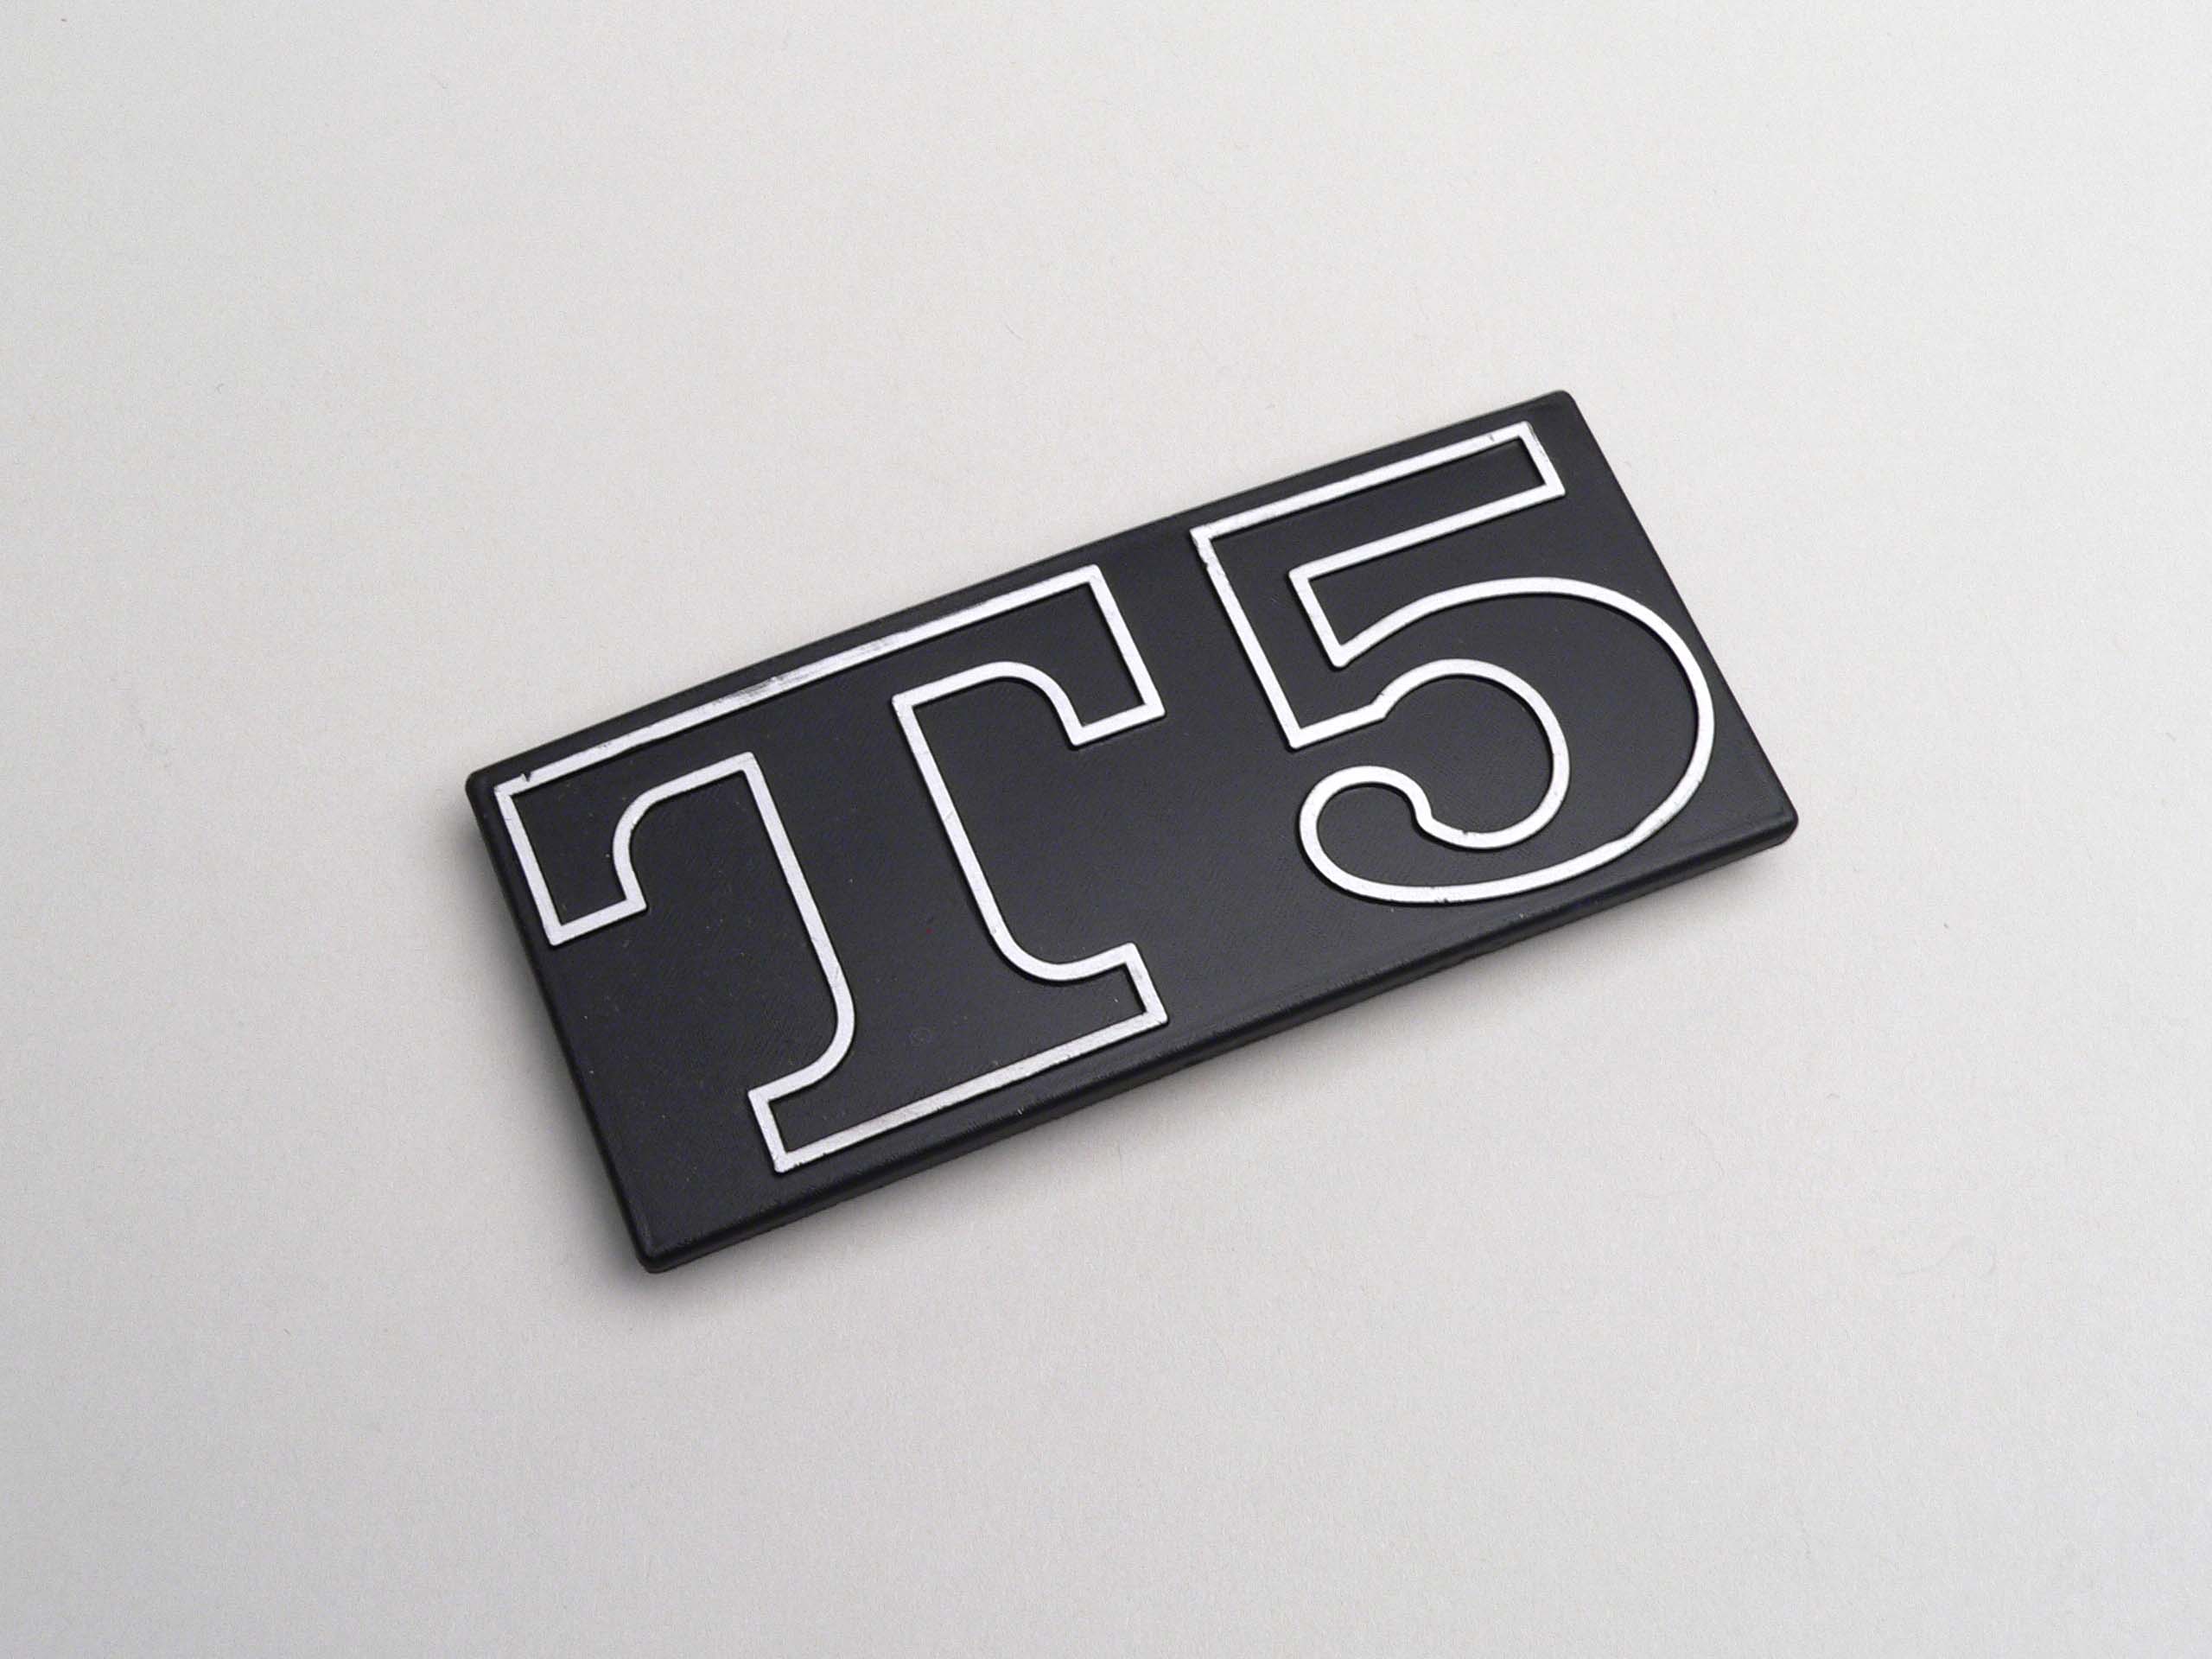
Lettering side panel -VESPA- T5- Vespa T5
1050020
http://www.scooter-center.com/scoweb/pages/productdetail.grid?product=288621642270928&target=productdetail&category1=C&category2=CAT
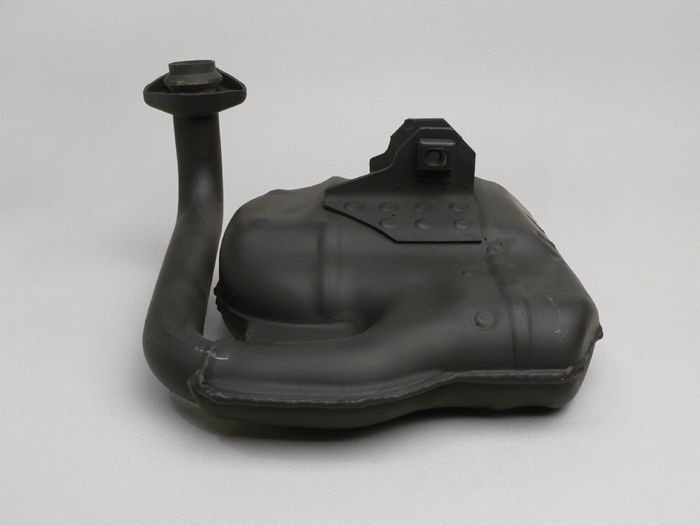
Exhaust -PIAGGIO ORIGINAL- Vespa T5
9021000
http://www.scooter-center.com/scoweb/pages/productdetail.grid?product=288621641324176&target=productdetail&category1=C&category2=CAT
Speedometer glass -PIAGGIO- Vespa T5
455001
http://www.scooter-center.com/scoweb/pages/productdetail.grid?product=288621642713888&target=productdetail&category1=C&category2=CAT
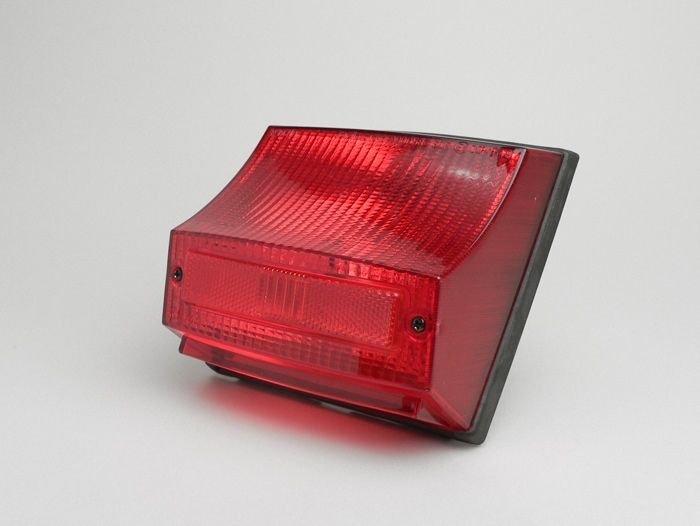
Rear light -VESPA- T5
4550017
http://www.scooter-center.com/scoweb/pages/productdetail.grid?product=288621641440048&target=productdetail&category1=C&category2=CAT
Lettering luggage compartment shelf -VESPA- Pole Position - Vespa T5
4550015
http://www.scooter-center.com/scoweb/pages/productdetail.grid?product=288621642271424&target=productdetail&category1=C&category2=CAT
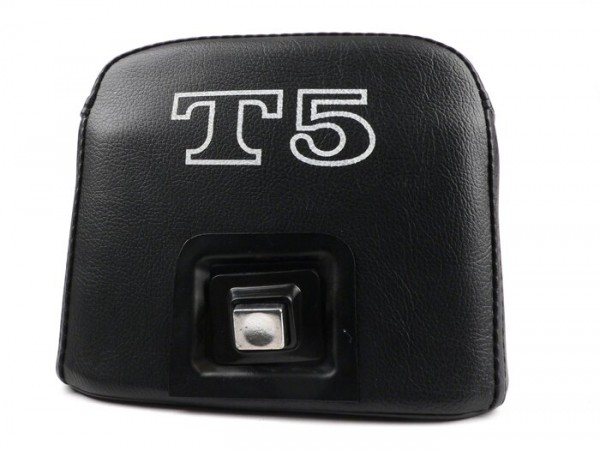
Storage on overhead bin -VESPA- T5
4550013
http://www.scooter-center.com/scoweb/pages/productdetail.grid?product=288621641678320&target=productdetail&category1=C&category2=CAT
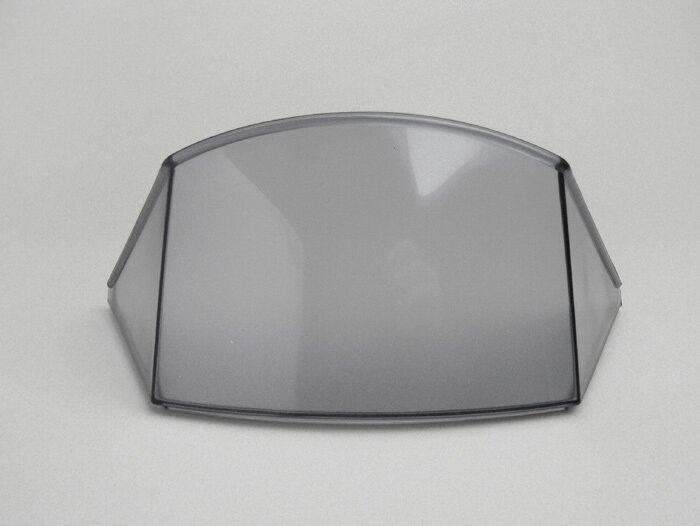
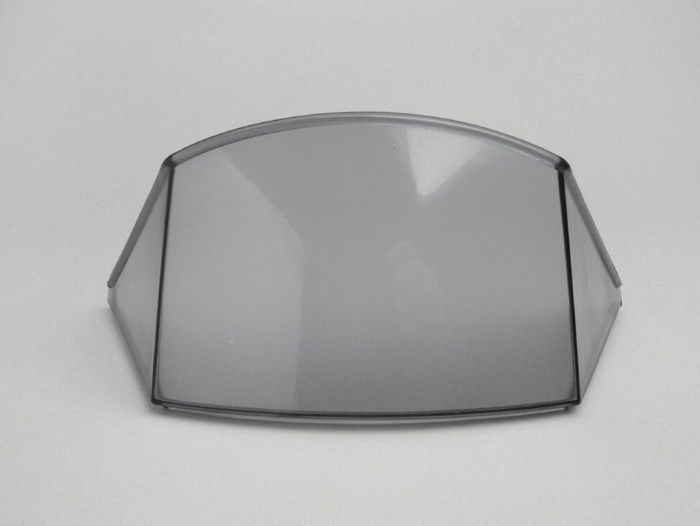
Cockpit window -VESPA- T5
4550001
http://www.scooter-center.com/scoweb/pages/productdetail.grid?product=288621641674336&target=productdetail&category1=C&category2=CAT
Headlight -VESPA rectangle- T5
4550016
http://www.scooter-center.com/scoweb/pages/productdetail.grid?product=288621641521376&target=productdetail&category1=C&category2=CAT
Speedometer border -VESPA- T5
4550002
http://www.scooter-center.com/scoweb/pages/productdetail.grid?product=288621641651936&target=productdetail&category1=C&category2=CAT
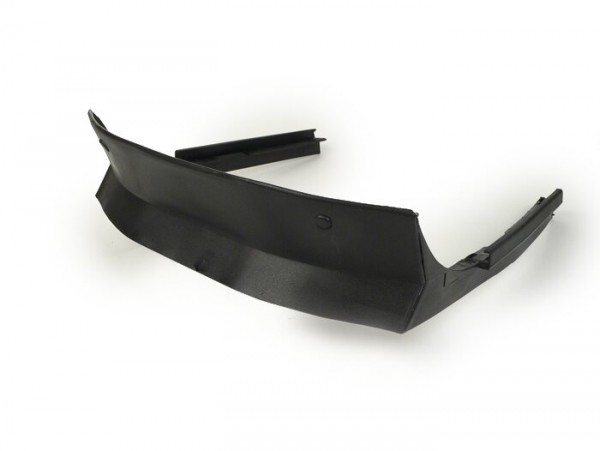
Cascade set -VESPA- T5 - unpainted
1050006
http://www.scooter-center.com/scoweb/pages/productdetail.grid?product=288621641679872&target=productdetail&category1=C&category2=CAT
Center stand -VESPA- PX, T5 - black
4350054
http://www.scooter-center.com/scoweb/pages/productdetail.grid?product=288666782429376&target=productdetail&category1=C&category2=CAT
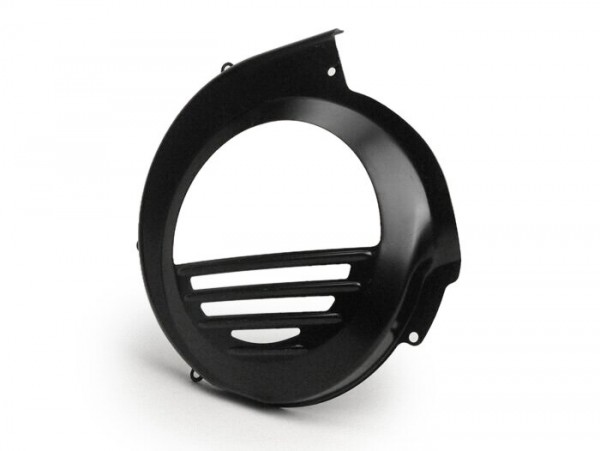
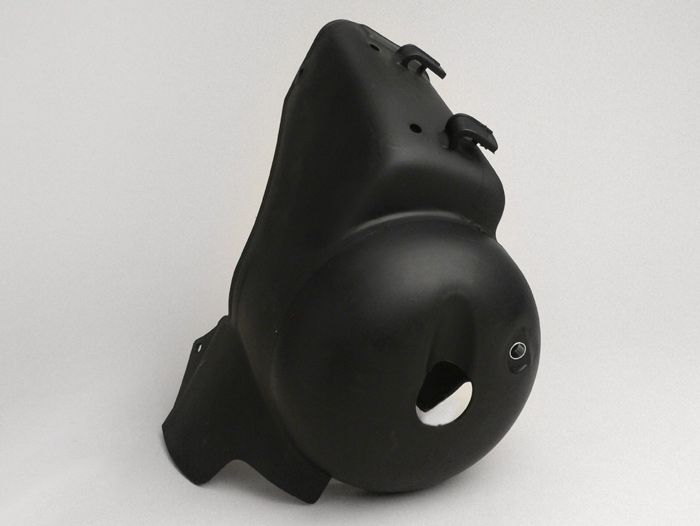
Cylinder cover -VESPA- T5
4350040
http://www.scooter-center.com/scoweb/pages/productdetail.grid?product=288621642743792&target=productdetail&category1=C&category2=CAT
Cylinder -MALOSSI 172ccm- Vespa T5
1120020
http://www.scooter-center.com/scoweb/pages/productdetail.grid?product=288621643578384&target=productdetail&category1=C&category2=CAT
Lock cylinder set -VESPA- Vespa PX Lusso (from 1983), PK S-XL, T5
4350066
http://www.scooter-center.com/scoweb/pages/productdetail.grid?product=288621638385664&target=productdetail&category1=C&category2=CAT
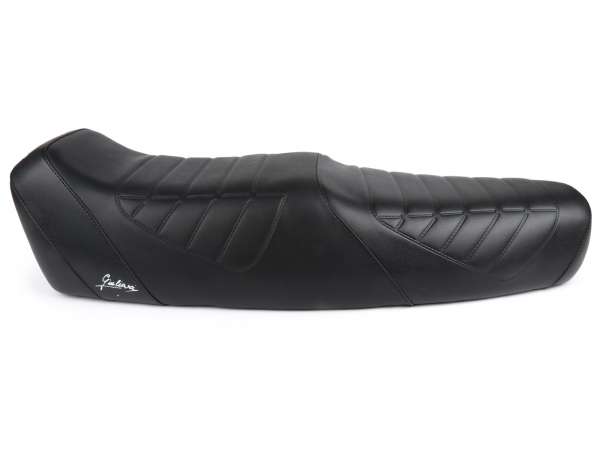
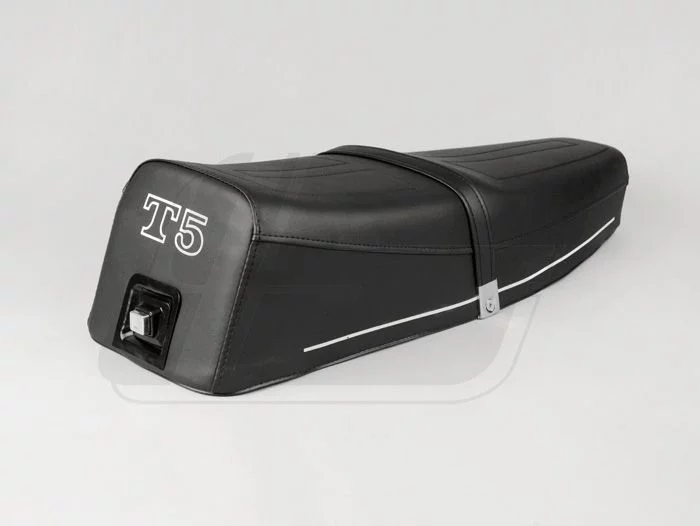
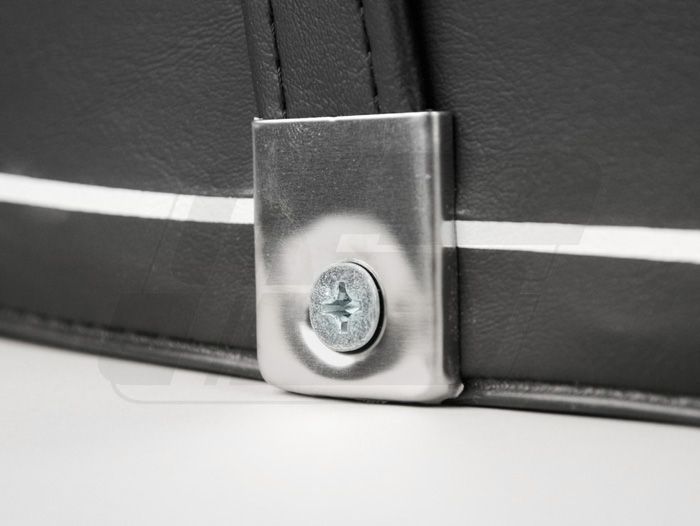
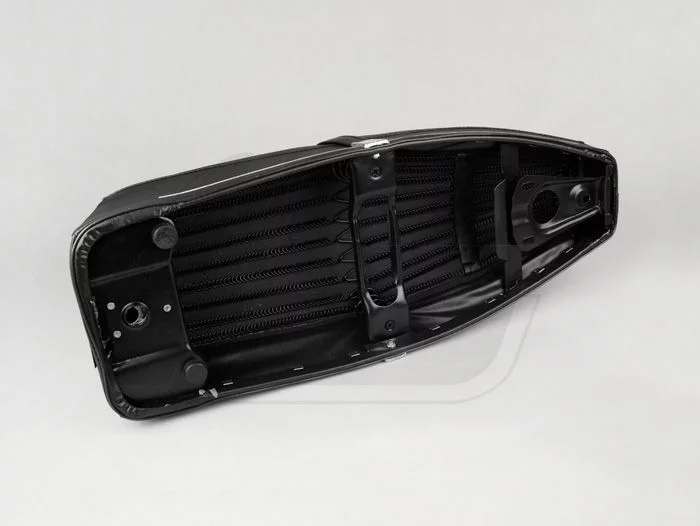
Bench -VESPA- T5
7900116
http://www.scooter-center.com/scoweb/pages/productdetail.grid?product=289442597034624&target=productdetail&category1=C&category2=CAT


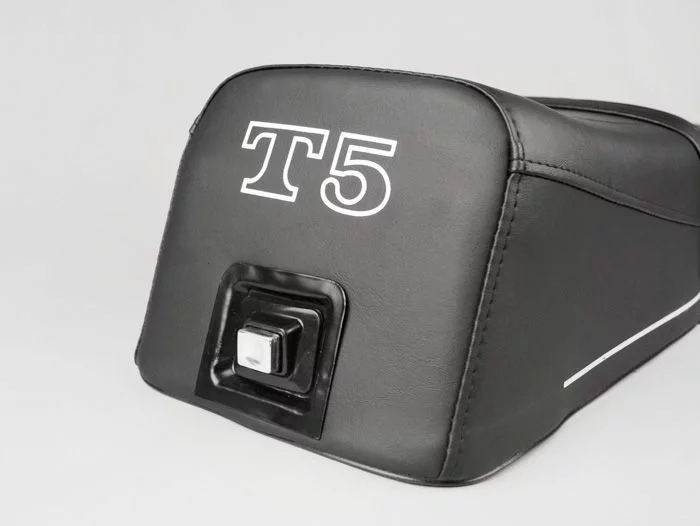
 black Vespa T5 - seat in 1a - original optics.
Very neatly processed, that's it best alternative to the original T5 seat from Piaggio that we have ever seen.
The original bench has not been available for years. In parts markets, even the most finished bench seats with torn bench covers are sold at the highest prices.
So a part that you like to put on the shelf just in case. Order here now


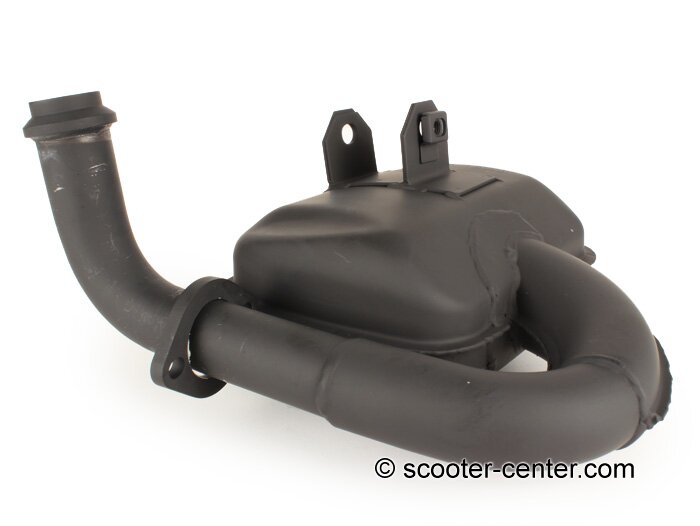
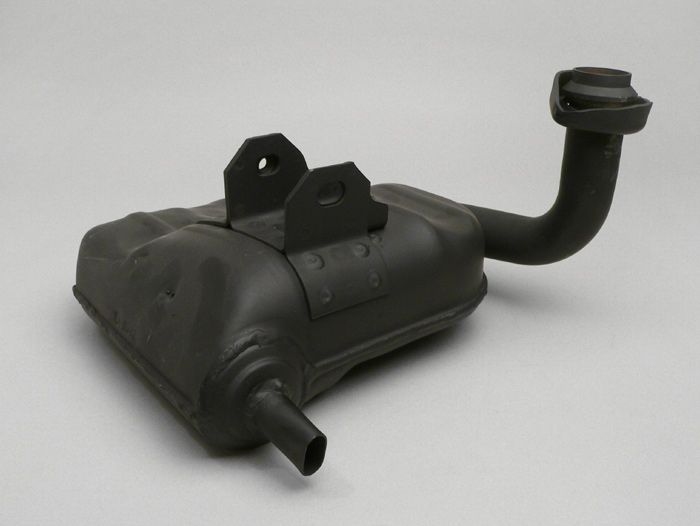
 The original T5 exhaust from Piaggio is back!
"The classic, not a bad choice for the tuning cylinder either."
The original exhaust of the PX / T5 models is unbeatable in terms of quality. Very thick sheet metal and neat workmanship justify the higher price compared to the replica systems.
It is also interesting how well the original exhaust performs in a direct comparison of performance. Compared to a hand-made resonance system, it lacks up to 4 kW of peak power, but it is in the Bandwidth absolute favorite. If you want to build a touring engine that will drive from here to Timbuktu, you will hardly be able to get past the original exhaust. In many cases, maximum ground clearance and very low consumption are factors that should not be underestimated.
Conclusion: The classic, not a bad choice for the tuning cylinder either.