Vespa Polini 210, BGM 60mm, Dellorto SI26 - Tuning test engine part 4
Now it starts with measuring the timing and the final steps before the first test bench runs.
With a 1mm Cylinder base gasket tells us that Degree disc an overflow angle of 125 ° and an outlet angle of 172 °.
Values with which you should definitely try a few times.
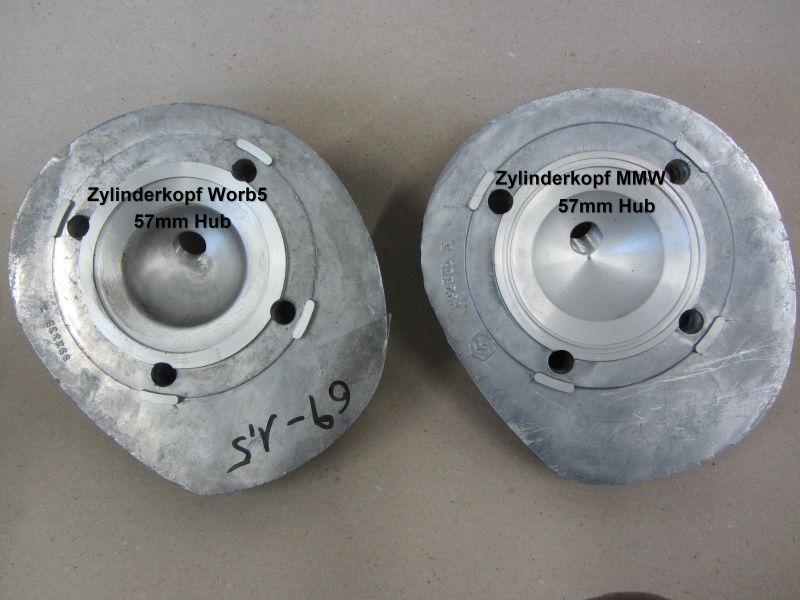
We also try out 3 different cylinder heads.
MMW for 57 mm and 60 mm Hub and one wrob 5 Cylinder head for 57mm stroke.
At first we only consider the squeeze dimension. The MMW head for 57mm stroke is, as expected, a bit tight at 1,0mm, a test with an additional cylinder head gasket from 0,5 mm or 0,8 mm is still possible. The head for 60mm stroke is practically designed as a head gasket variant and compensates for the stroke difference of 1,5mm through the combustion chamber, so the squeeze dimension here is, as expected, quite high at 2,7mm.
However, the MMW cylinder head for 60mm stroke also leaves the scope to lower the cylinder again. This shortens all steering angles, but this results in more foresight, which could perhaps have a positive effect on driving behavior.
The cylinder head from Worb5 was also made for a 57mm stroke, as is well known, the squeeze dimension on 57mm stroke with this head is quite large. In our case, this results in a quite usable squeeze dimension of 60mm with a 1,7mm stroke without an additional cylinder head gasket.
To what extent the different combustion chamber geometries then affect the power delivery, we will determine on our test bench.
The assembly of the carburetor is also part of completing the engine.
Obviously a fairly trivial topic, but you can skilfully screw it wrong here too.
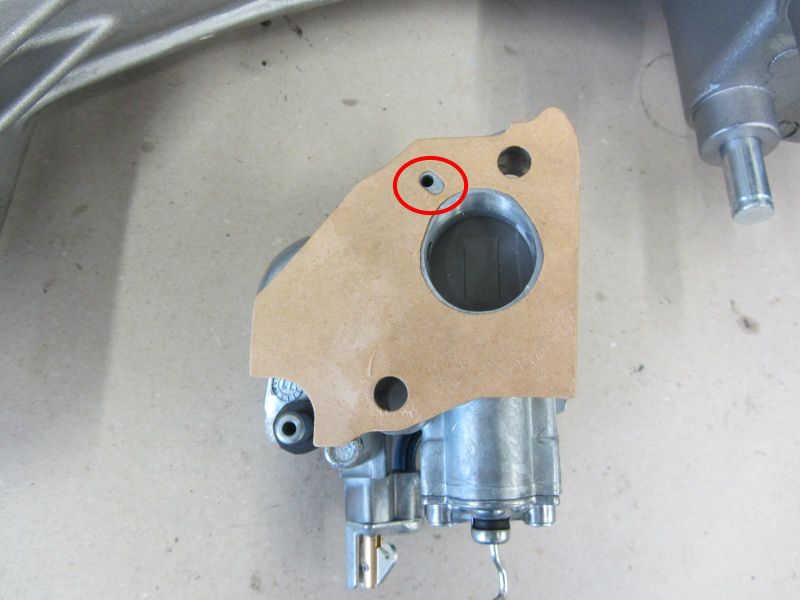
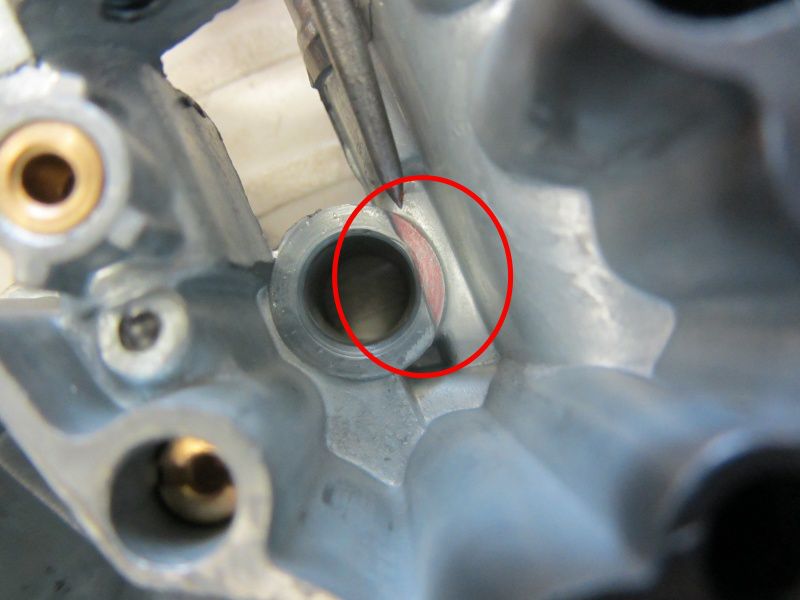
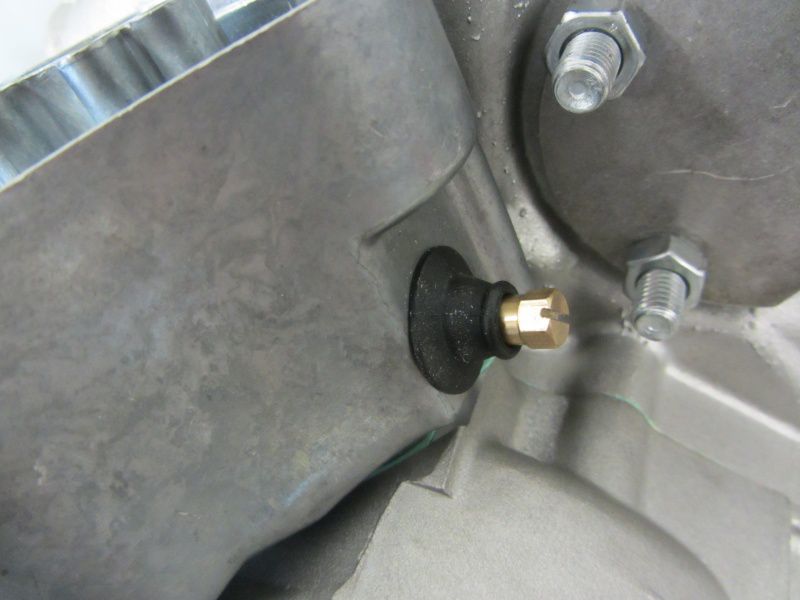
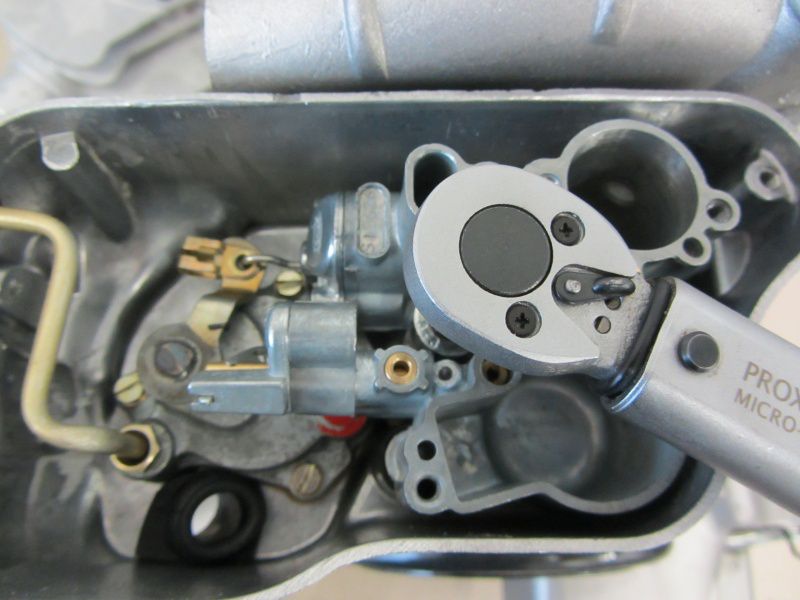
Friends of the generous use of sealant should exercise caution. The channel on the underside of the carburetor pan and the oil hole in the carburetor (marked in red here) must remain free on engines with separate lubrication. If the supply routes are closed, the crankshaft, alternator bearings and cylinders run without oil; and usually not for long '.
The frugal SI carburetor itself is very sensitive to incorrect attachment.
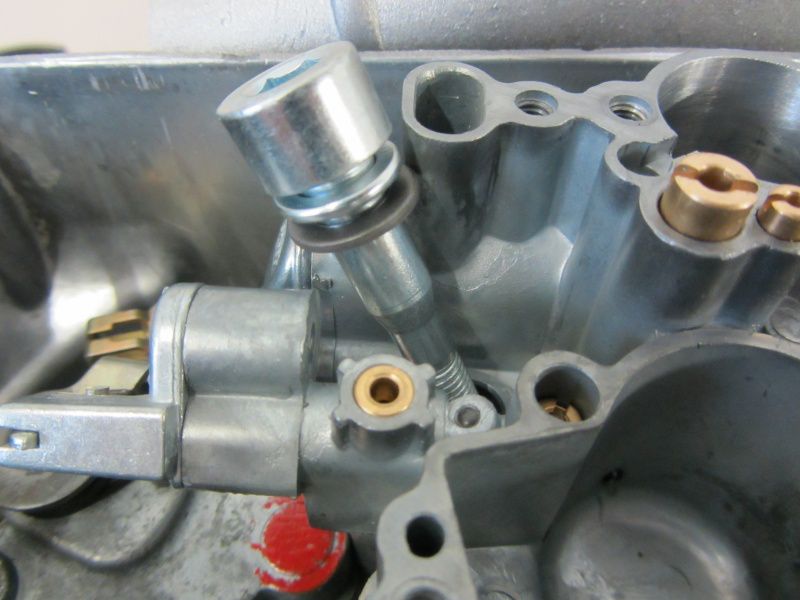
If you overdo it when tightening the screws, you could later struggle with a jammed slide. All newer SI carburettors have already been improved so that the screw head can no longer act directly on the slide guide.
To be recognized by a small undercut. This trick can also be applied to the older carburettors.
But even in spite of this preventive measure, you should stick to the torque of 16-18Nm when tightening the screws alternately.
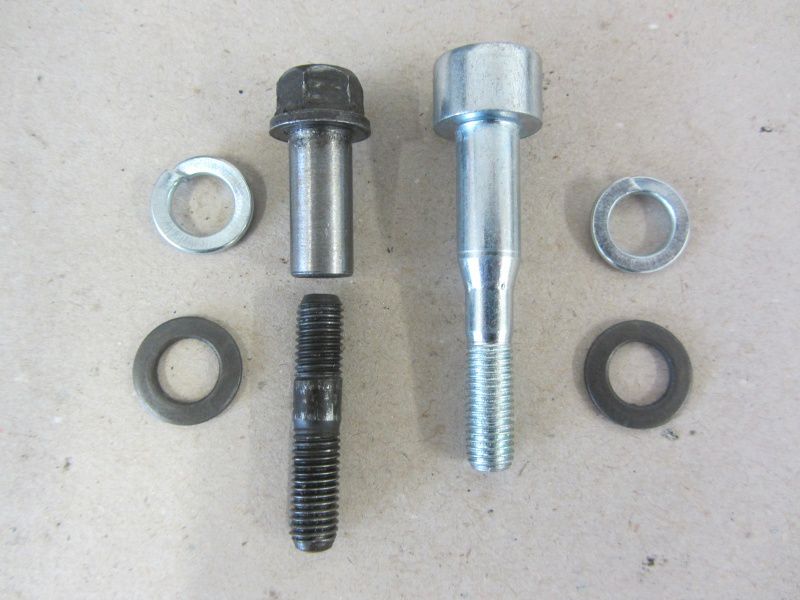
There are 2 variants of the carburetor attachment that can be used.
The “old” version with studs and sleeve nuts exists since Largeframes were equipped with SI carburetors there. The newer variant with a Set screw only came up with the Lusso or better the models with separate lubrication.
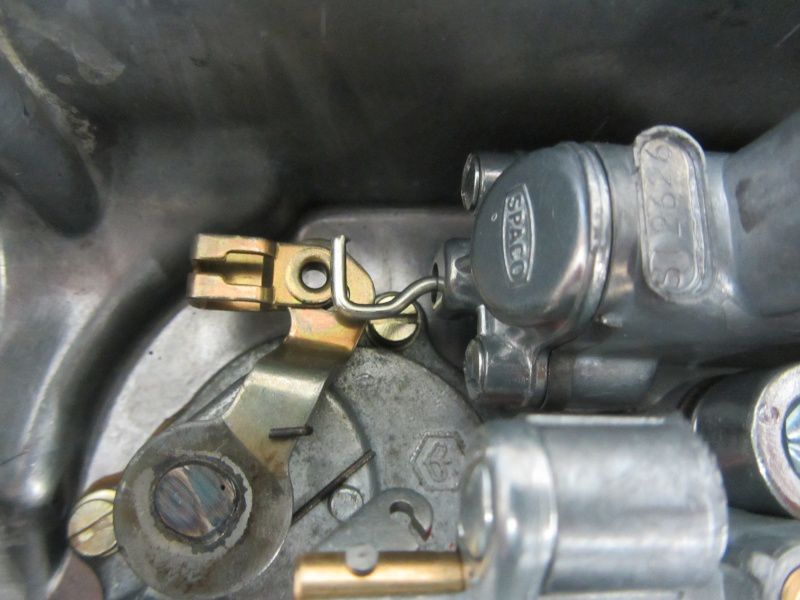
The reason for this is simply the ease of installation. Carburettors with separate lubrication are noticeably long due to better accessibility Mixture adjustment screw and an Push rod to hook in equipped. For use on engines with mixed lubrication, the pull bar can also be easily exchanged. Before the carburetor in his tub Taking a stand, we cut the mixture adjustment screw with a file. This will make it easier to set up later.
Shit, besides ...
That happens often and with pleasure.
When inserting the carburetor, make sure that the hook catches the tab of the oil pump.
If the carburettor is screwed tight as shown in the picture below, on the one hand the slide rod will be damaged and on the other hand, the carburetor would have been successfully disabled.
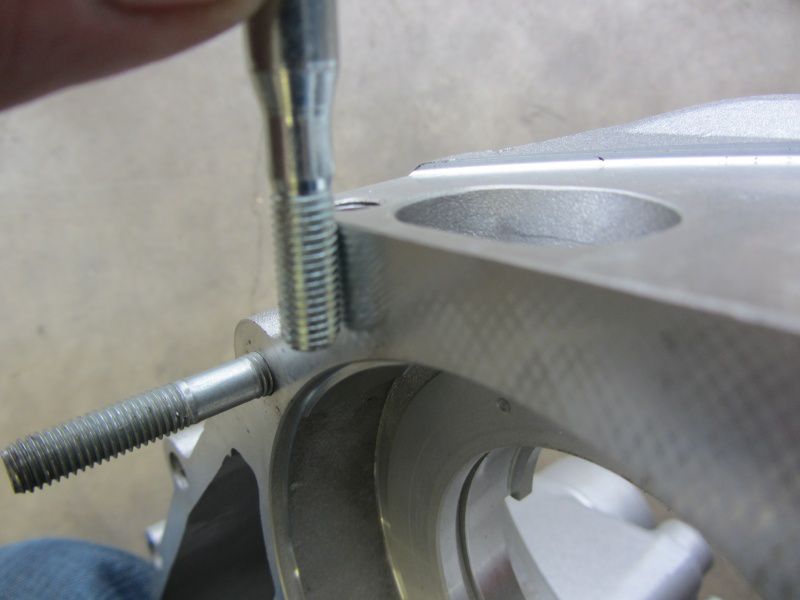
Stud bolts for attaching the carburettor would be a hindrance when inserting, so Piaggio came up with the idea of the set screws. Unfortunately, there is a small risk in simplifying it.
The screw at the rear in the direction of travel sits directly above the rotary valve surface.
At this point we forget the required one slices or Snap ring to use, the rotary valve will inevitably be damaged.
The carburetor is attached in steps of 8, 12, 16Nm.
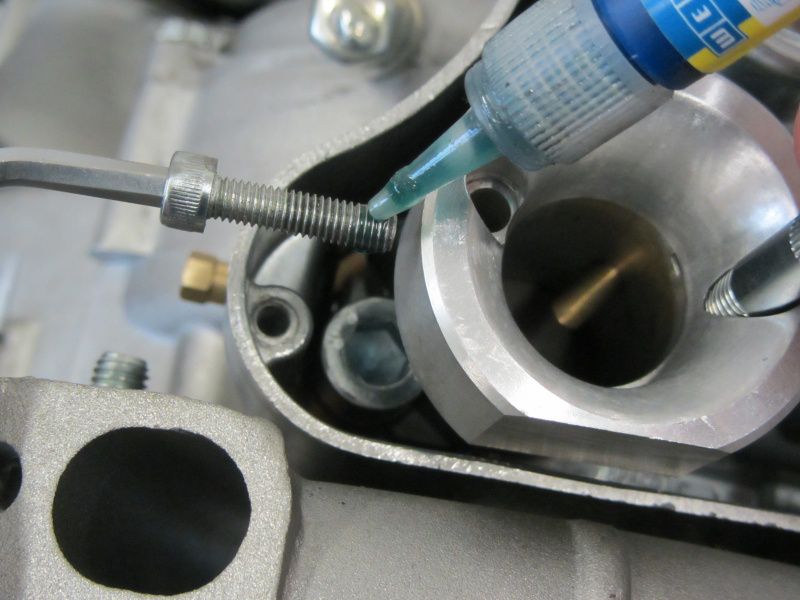
The Polini funnel is only fixed with a screw. the Idle speed screw is only used for installation orientation, as the funnel has a through-hole at this point.
For the test stand, we are content with simply attaching the single screw due to the expected nozzle change. However, as soon as a suitable carburetor setting has been found,
you should get the screw with threadlocking fix.
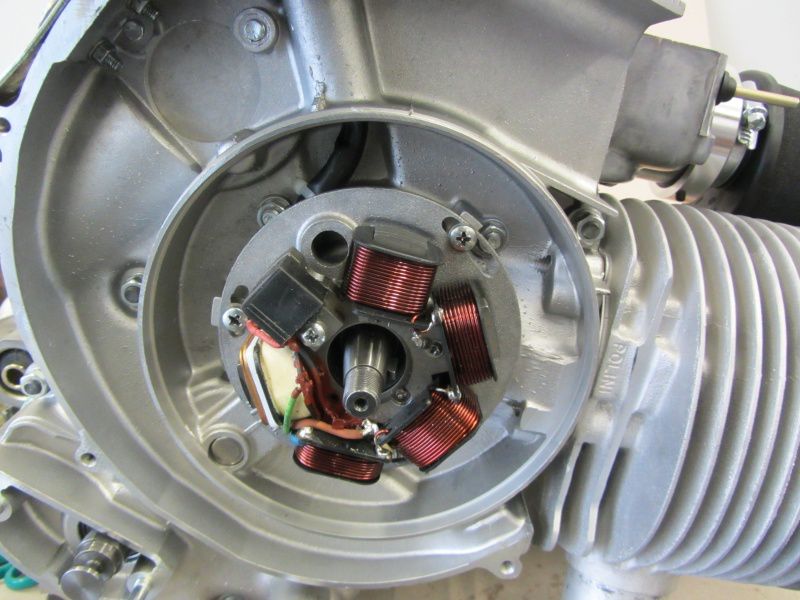
The Ignition stator For the first test runs we set it to the “IT” marking, i.e. an ignition point of 18 ° before the end of the day.



Such reports about the Vespa 200 project are great for every self-man screwdriver!
Description of the individual processing stages are detailed and easy to understand!
Thanks to the team.
H. Hormann