Posts

The perfect indicators for your Vespa GTS conversion

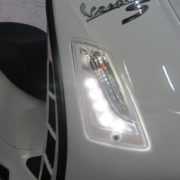
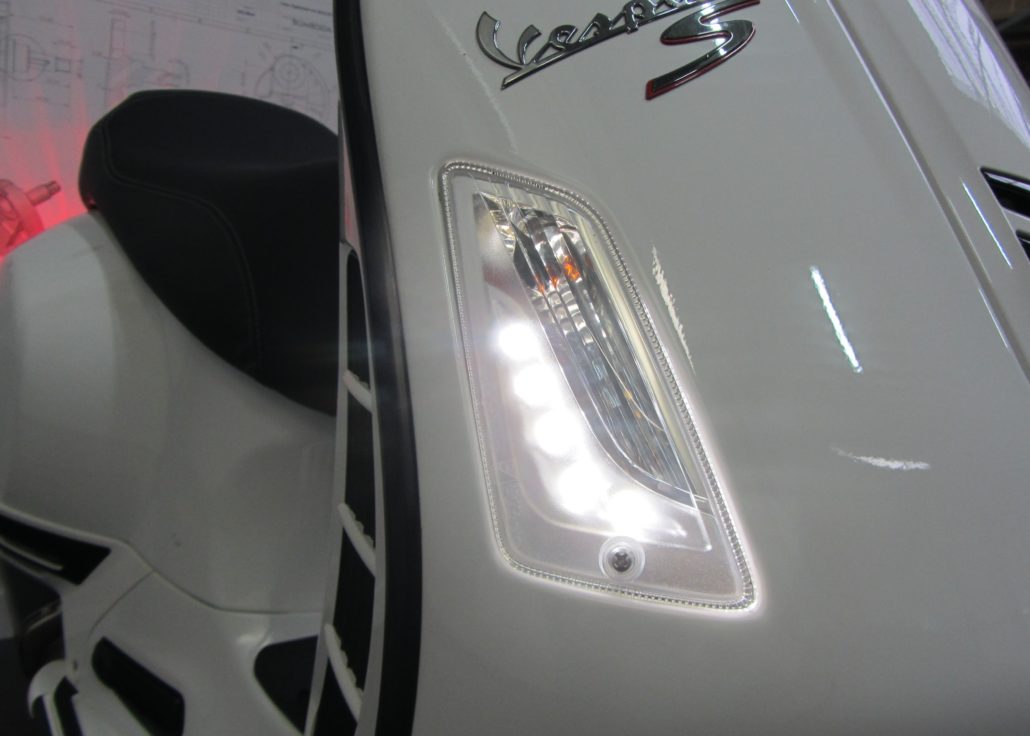
We have the popular LED indicators with dynamic running lights from MOTO NOSTRA already introduced to you here. Our partner Cafe Racer 69 also likes to install the turn signals on theirs Vespa GTS conversions. Not without reason, because the tinted indicators offer an exclusive and elegant look. They are in action GTS running light flashers spectacular, they also fit perfectly harmoniously into the design and lines of the Vespa GTS body: see also here in the video!
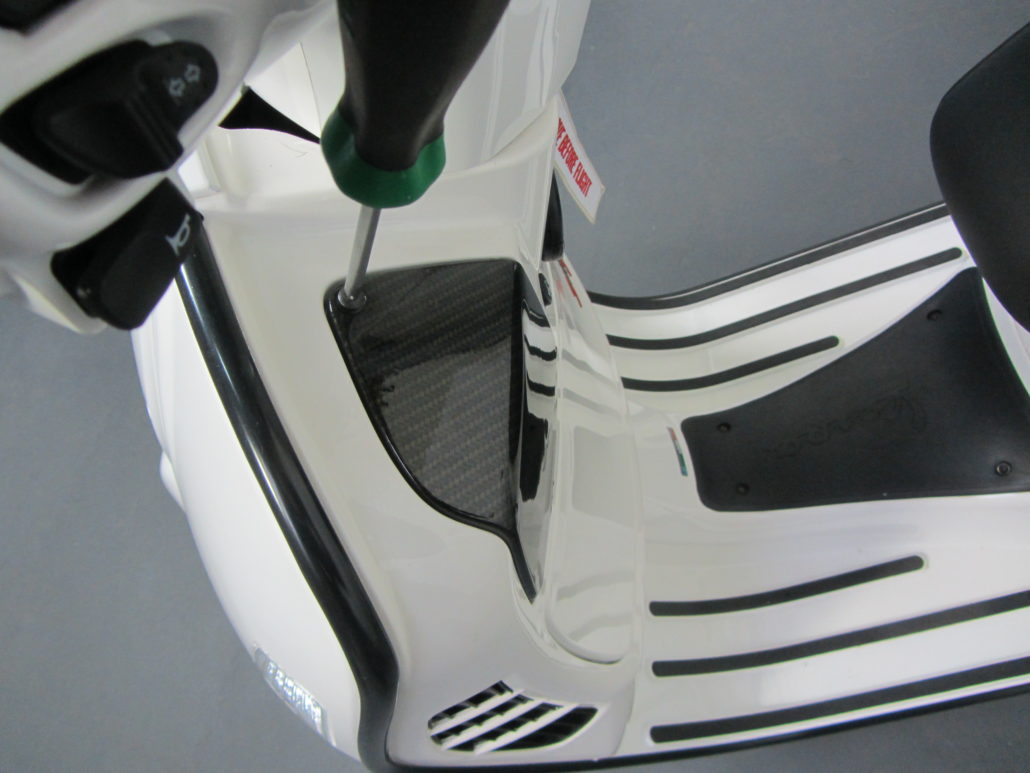
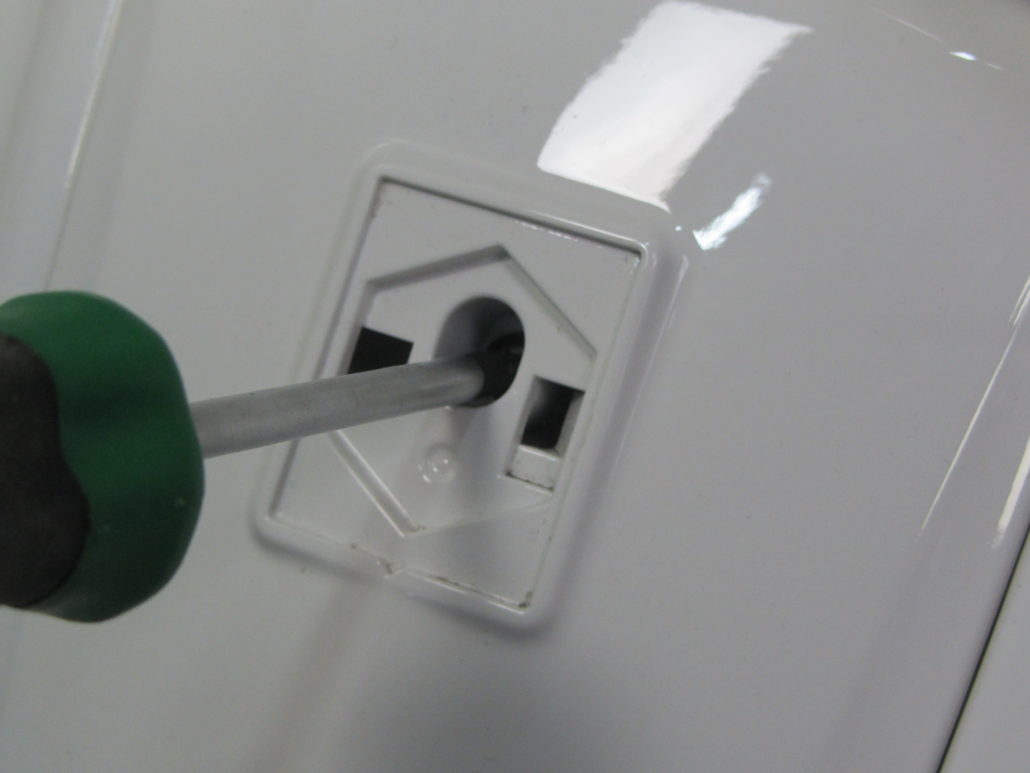
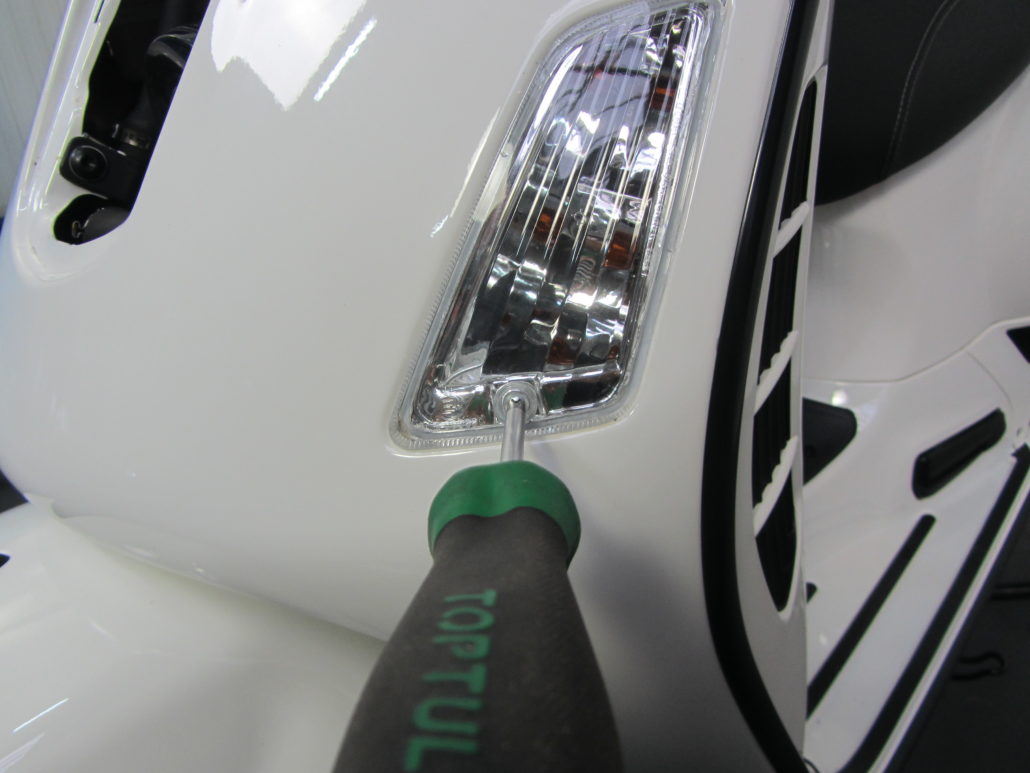
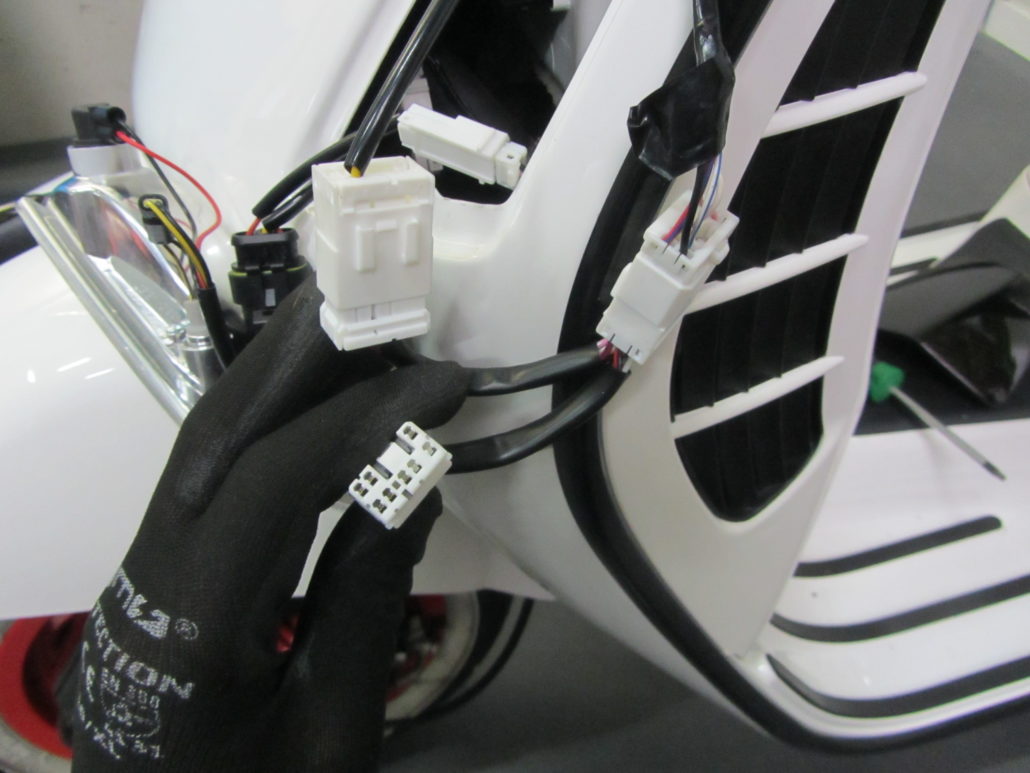
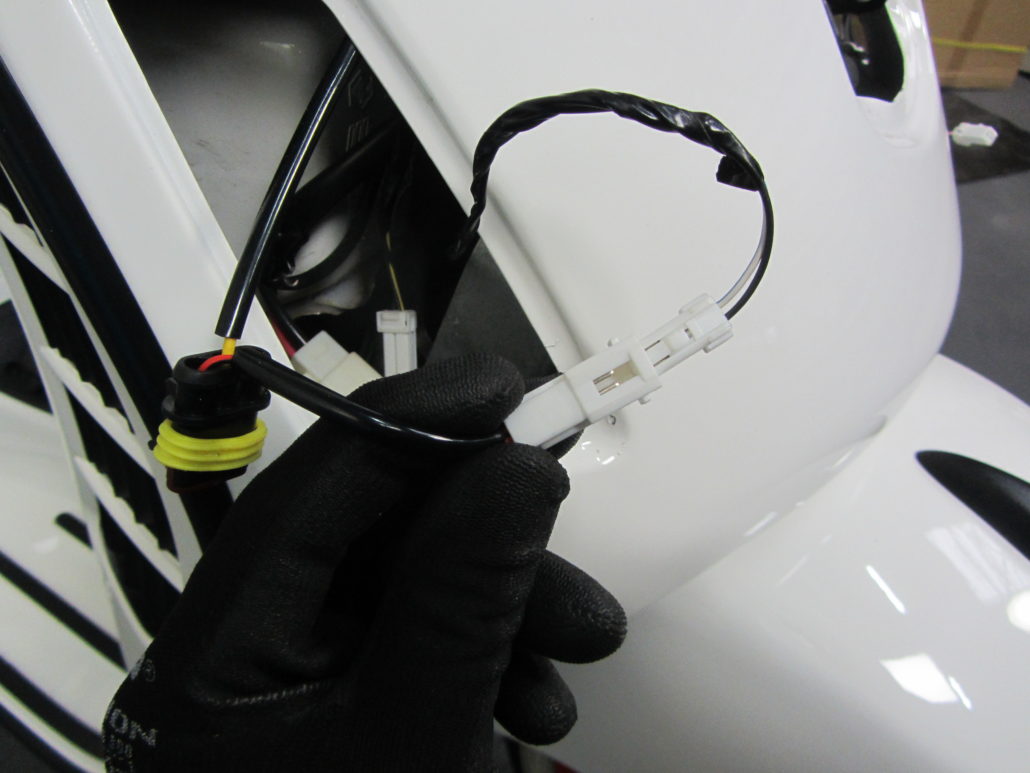
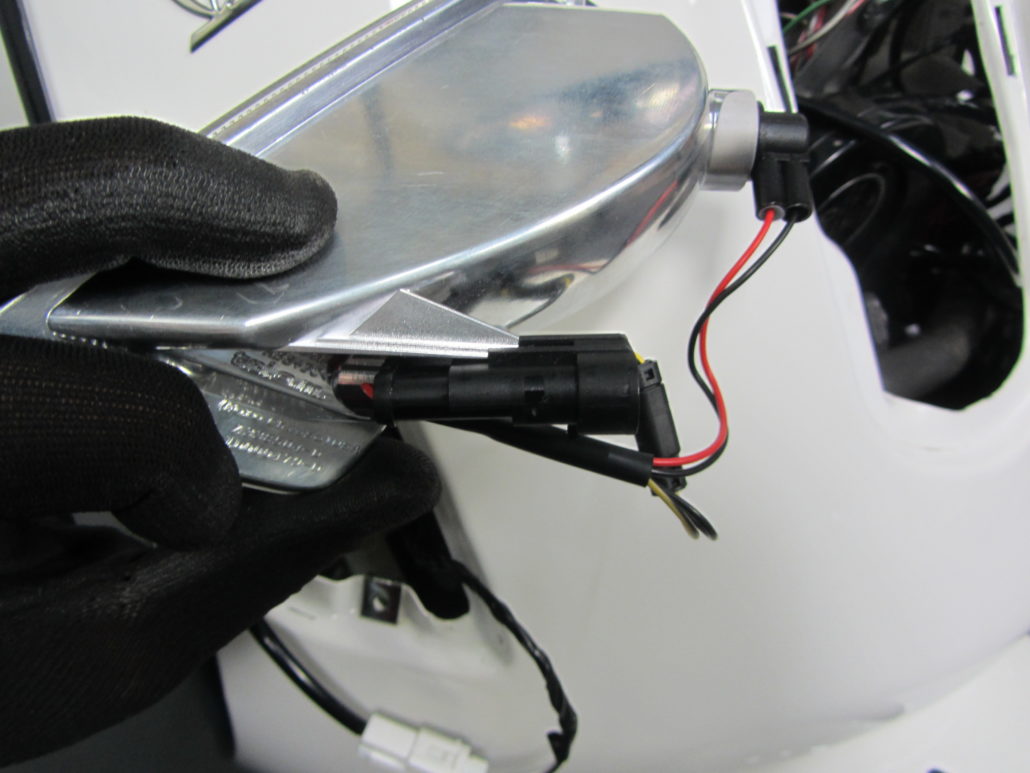
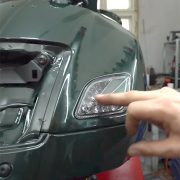
Easy installation

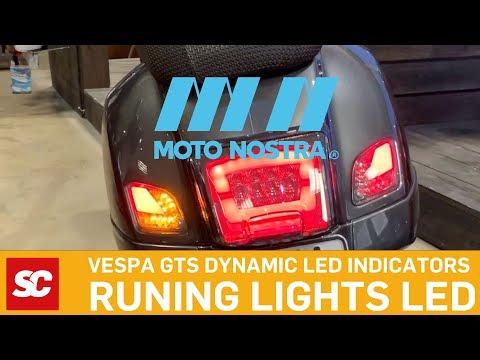
Now there is Youtube a video, which shows the simple installation of the LED indicators very nicely:

Vespa Gts 300 hpe "British Classic" Part 6 - Vespa LED indicators from Moto Nostra

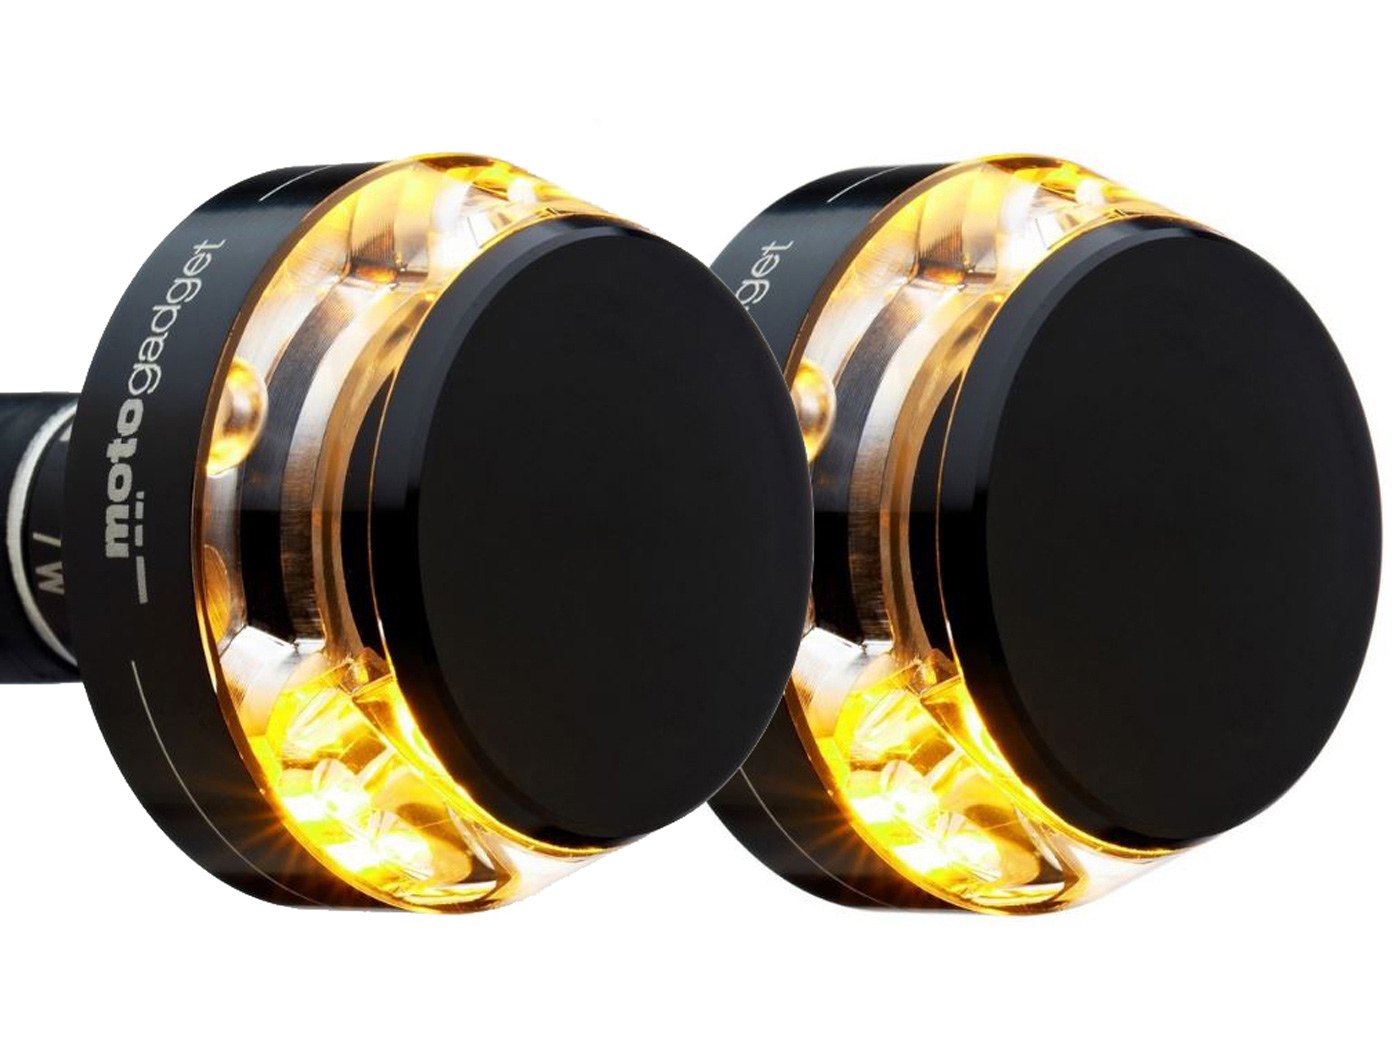
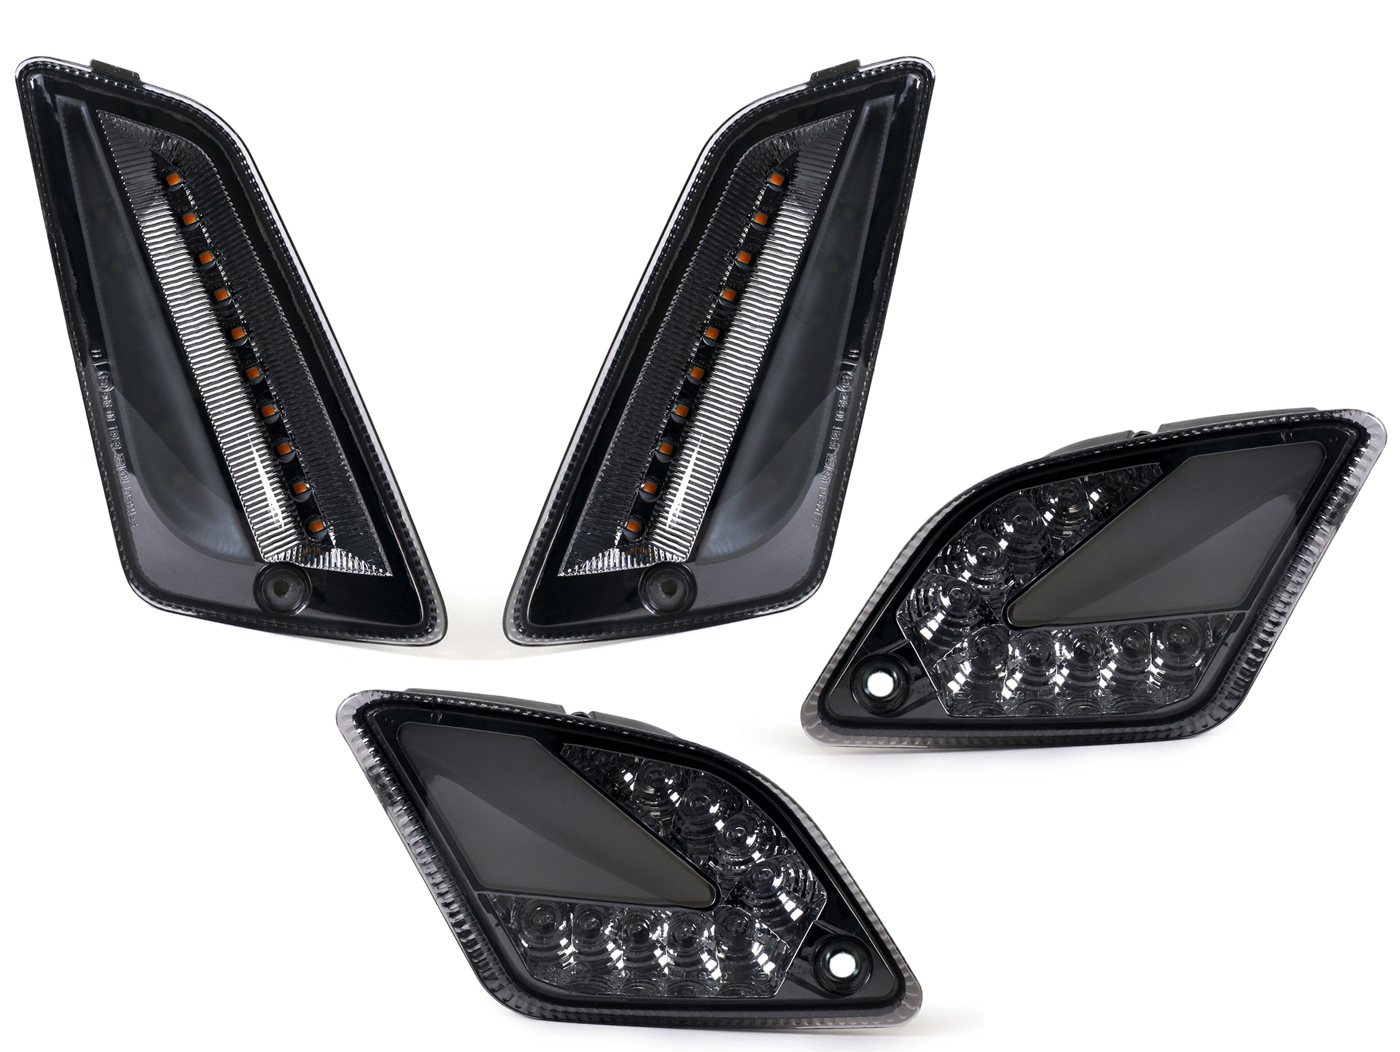
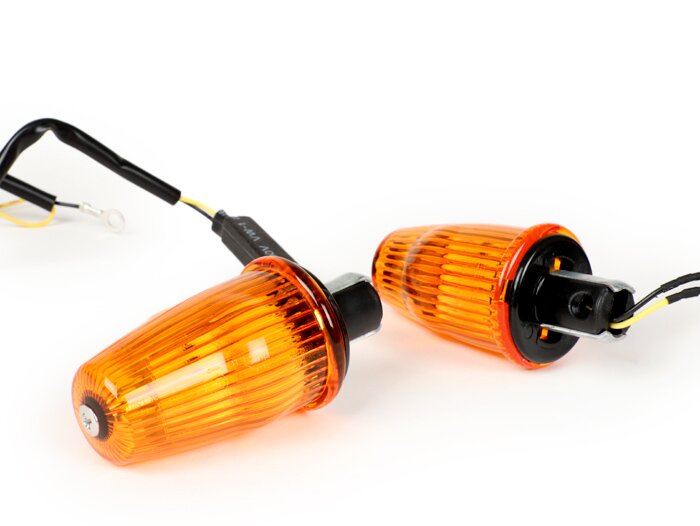
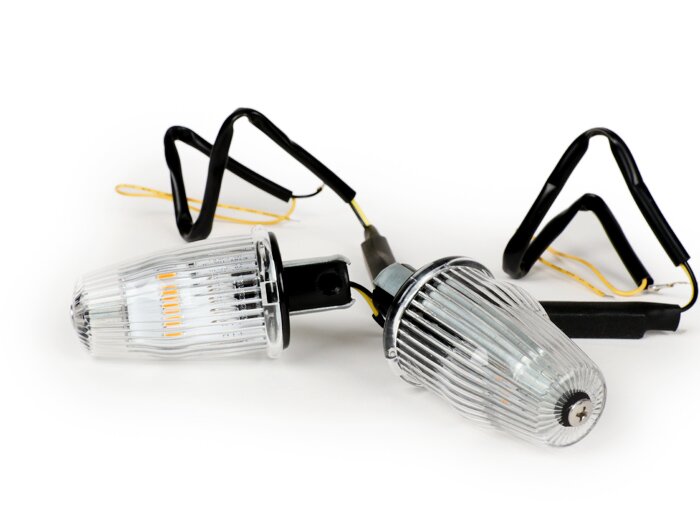
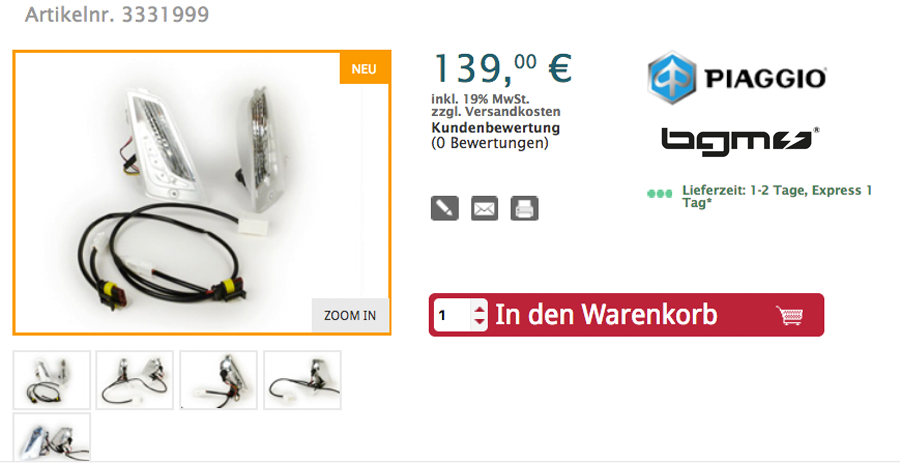
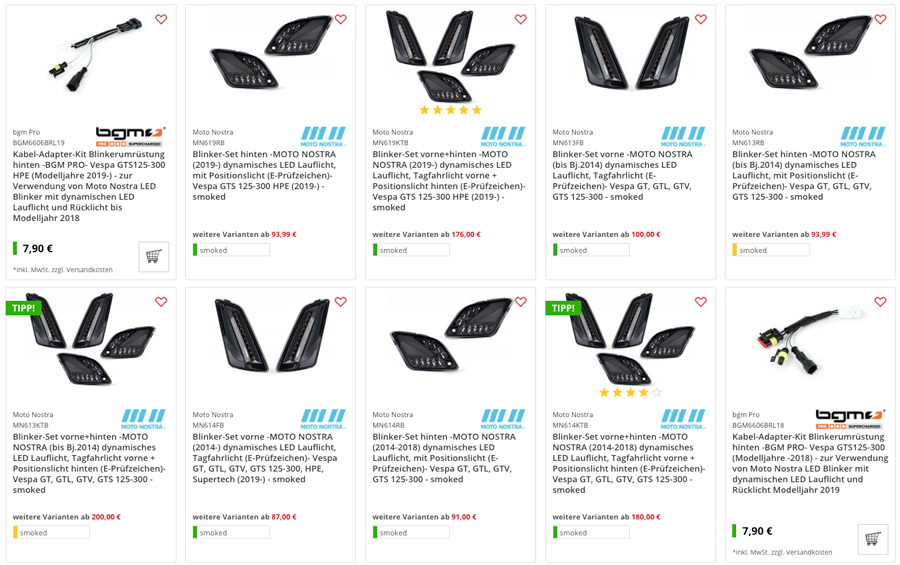
The Vespa GTS LED indicators with running light available in Clear glass or tinted black, individually for front or rear and in a cheap set:

Vespa GTS LED indicators with running light

Buy LED indicators for Vespa GTS

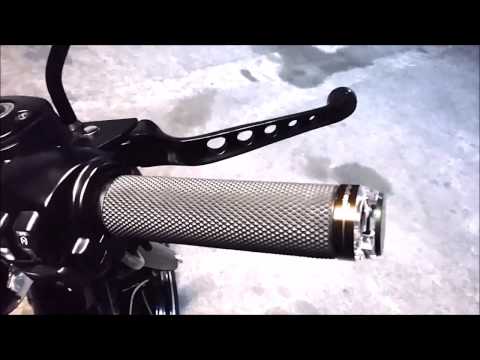
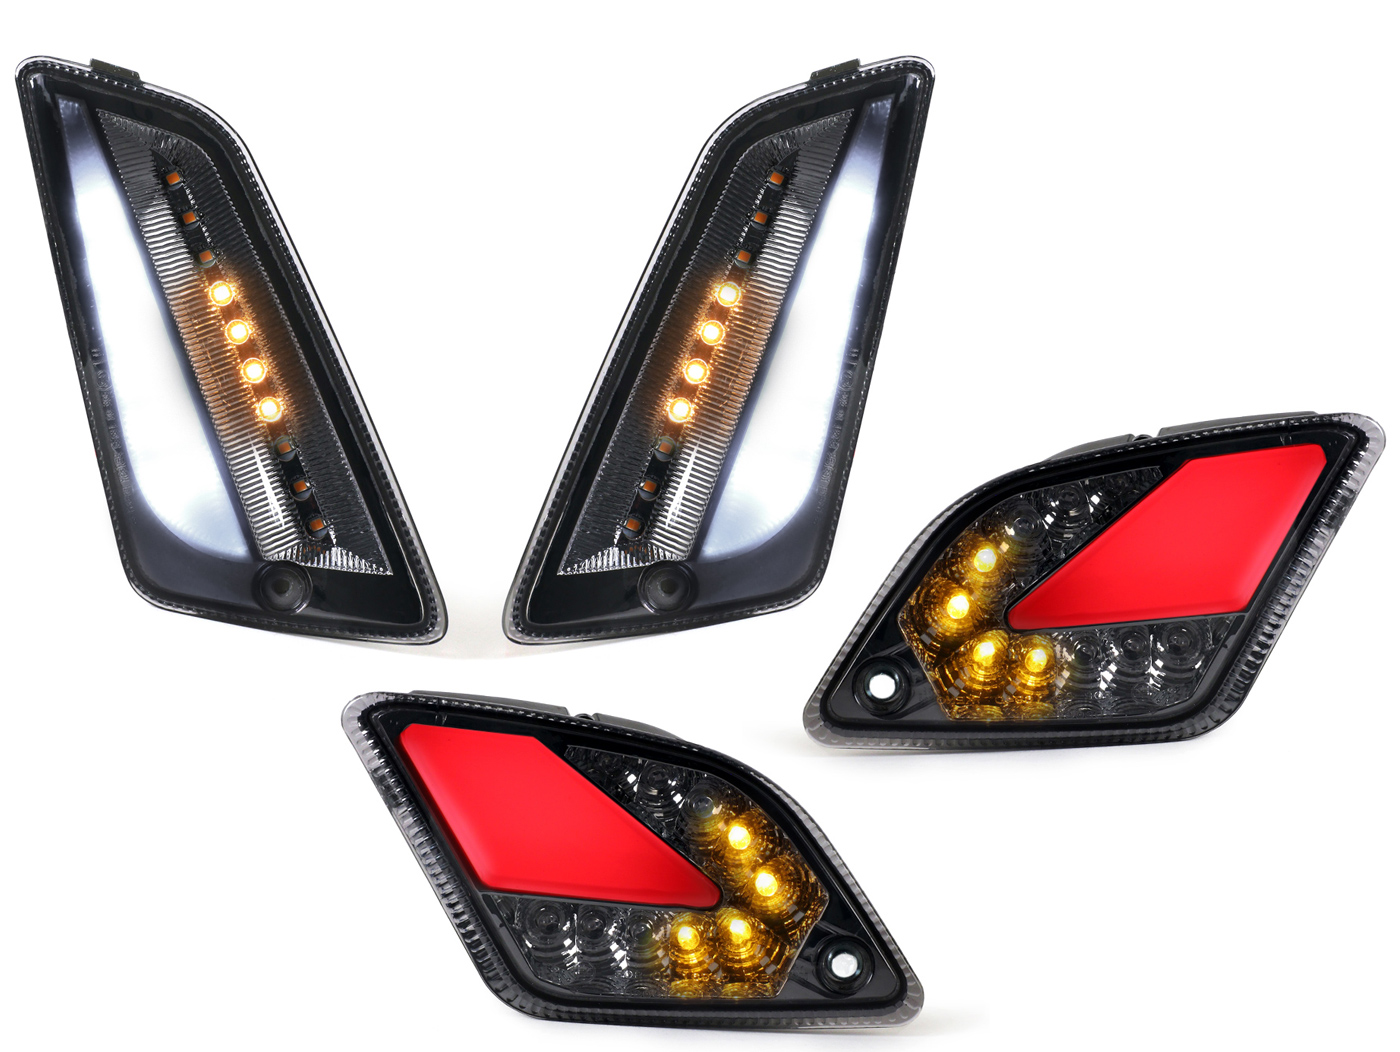
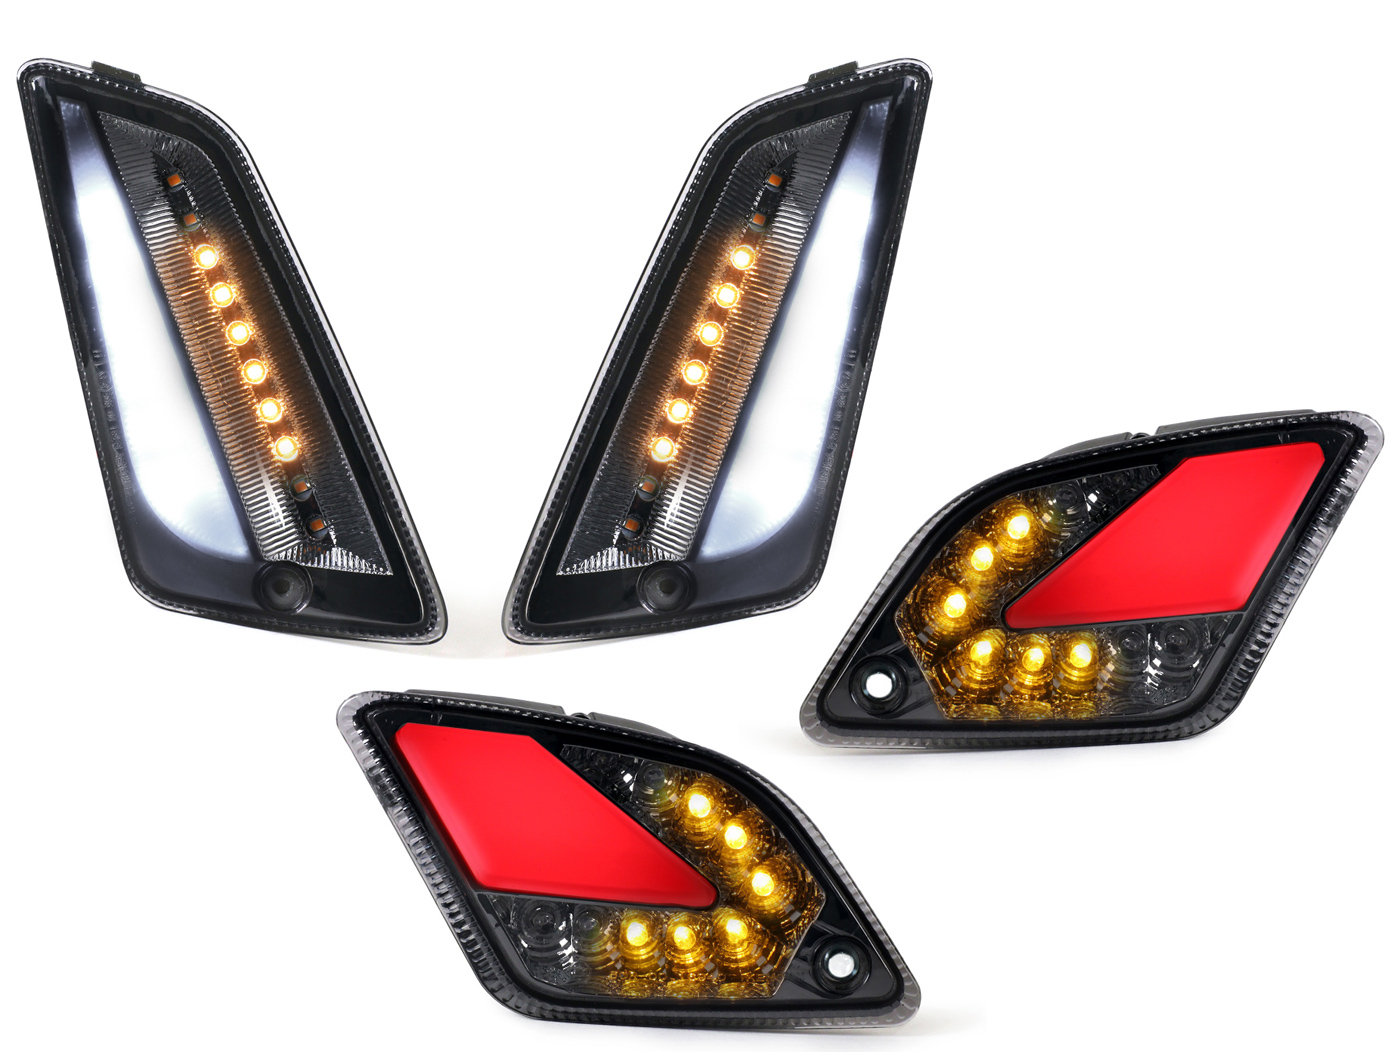
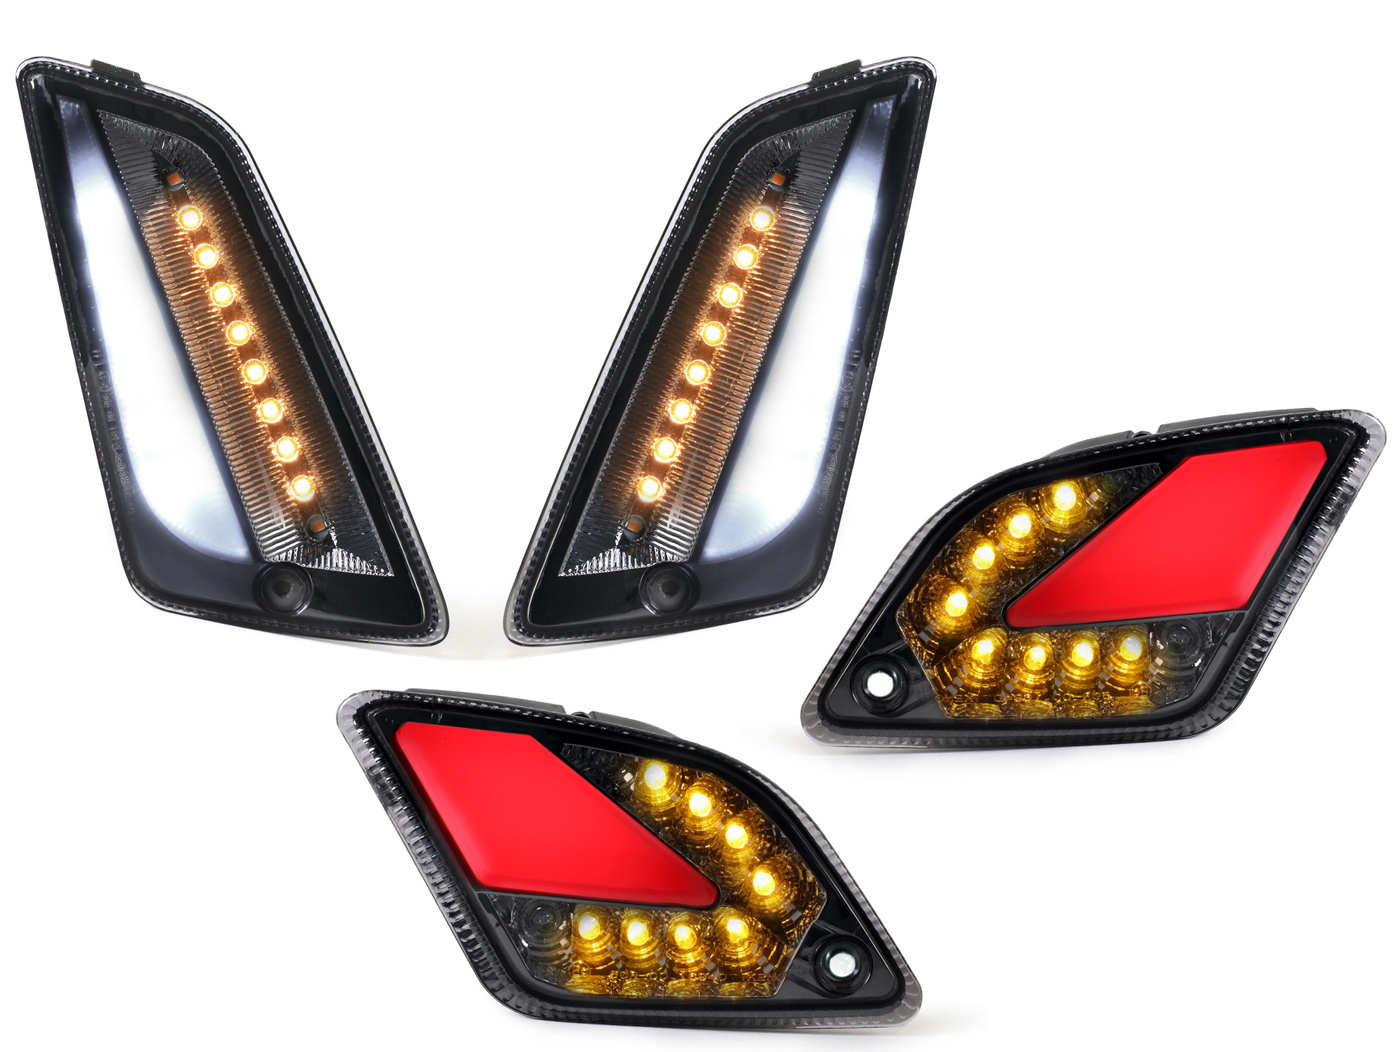
MOTO NOSTRA indicator with dynamic running light for Vespa GTS

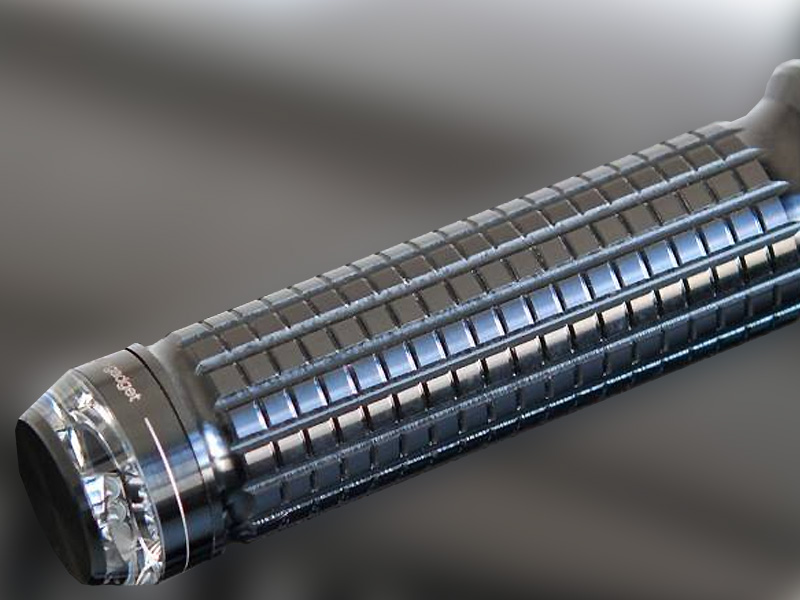
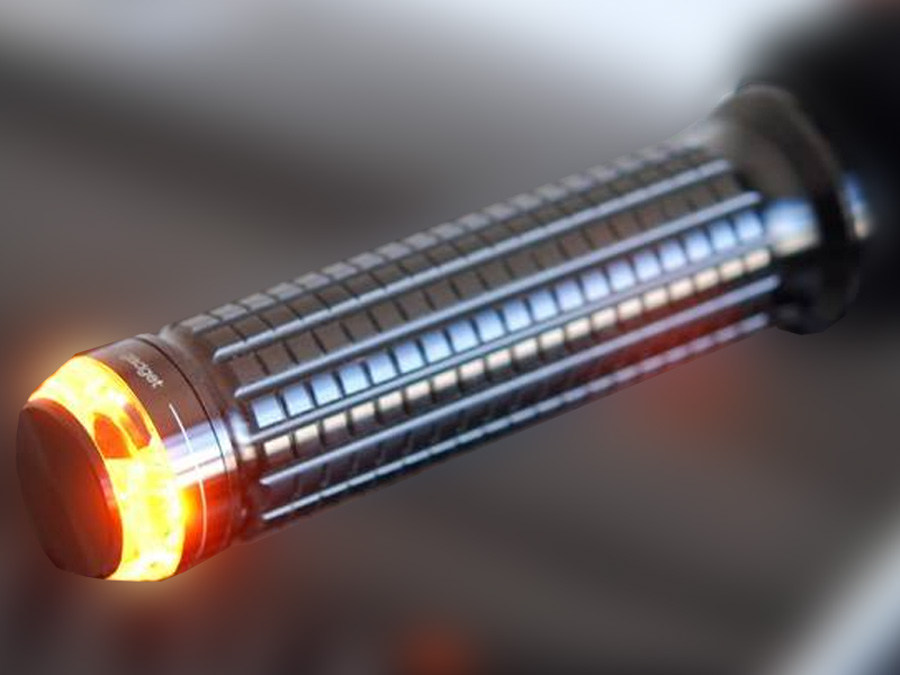
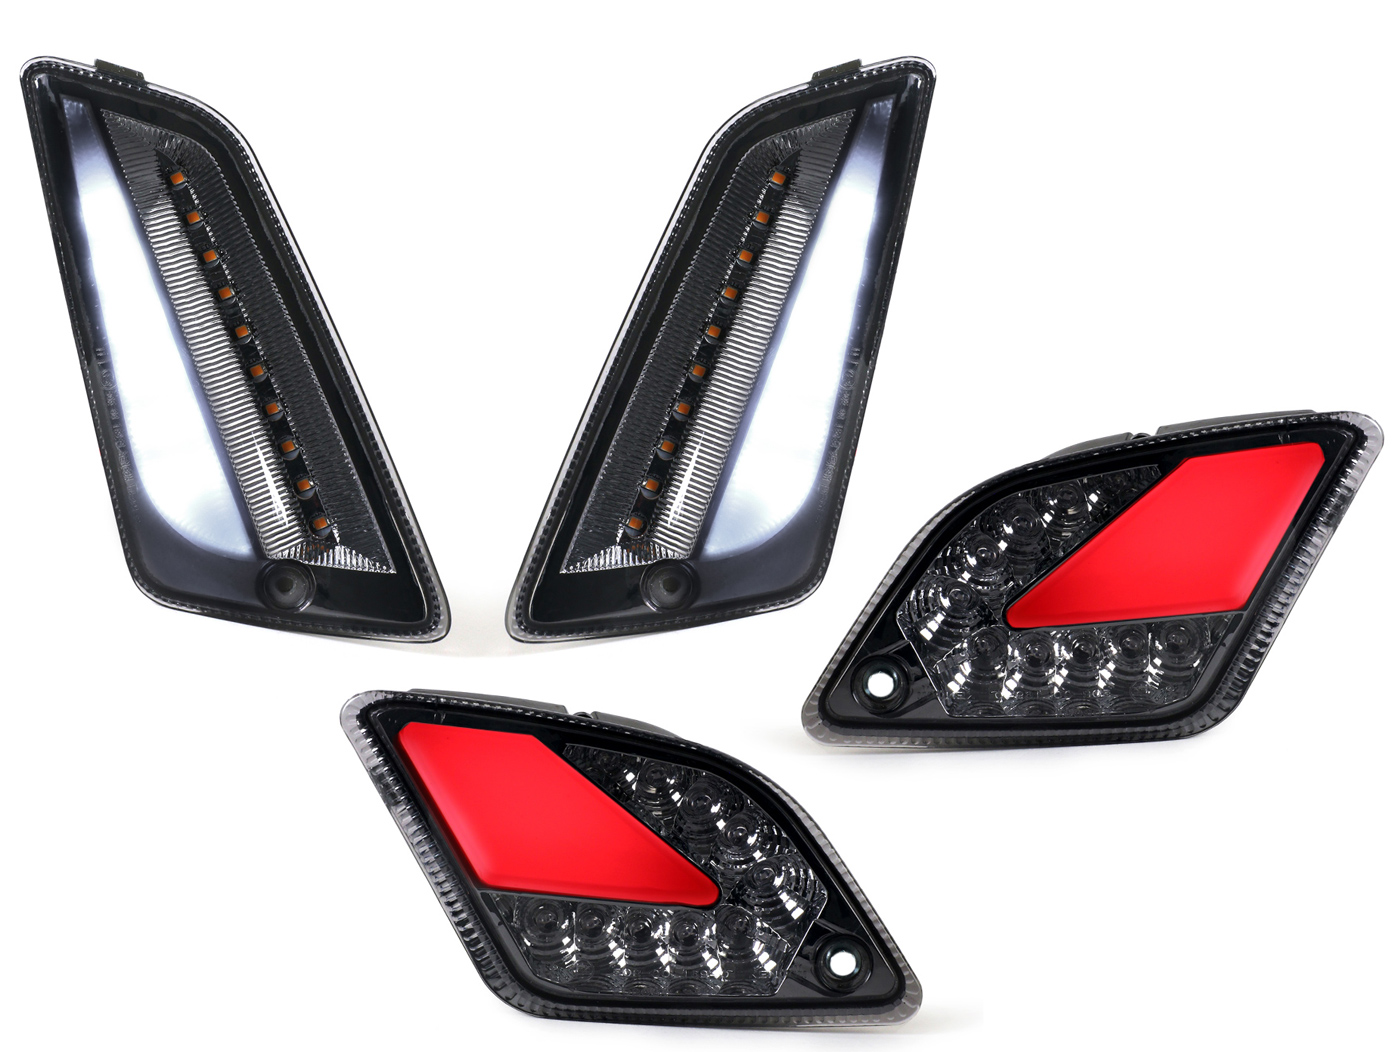
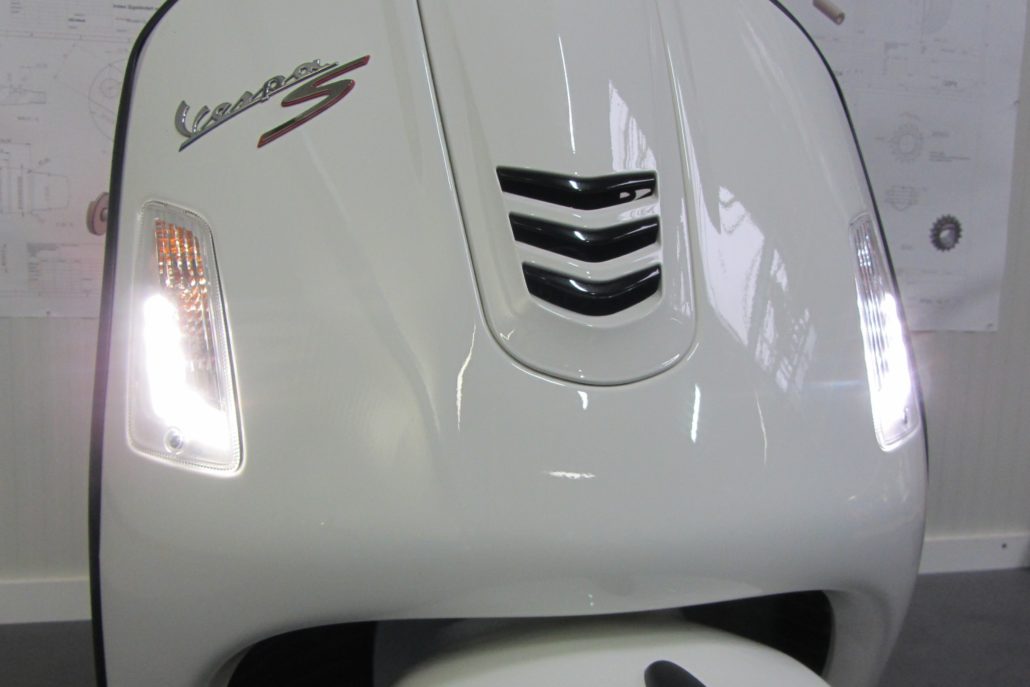
The MOTO NOSTRA turn signals have individually controlled LEDs and thus generate a fully dynamic running light, as we know it from vehicles of the luxury class (e.g. Audi A7). The light effect created is very pleasing and offers a pleasant change from conventional indicators. As an additional special feature, the front indicators have a bright white daytime running light strip in a plasma look. The same technology is used as the position light at the rear.

WHY LED? MORE SECURITY THROUGH TECHNOLOGY!

In addition to this wonderful optical upgrade of the scooter and the possibility to individualize your GTS and thus stand out from the crowd, there is another important point that speaks in favor of these great LED indicators:

This new technology increases the optical width of the rear end in the dark, making it easier to see in traffic. The bright LEDs of the turn signals are clearly visible from a long distance. The running light is also optically better captured than with a conventional turn signal.

QUALITY

A particular concern for us was the quality and fit. With the MOTO NOSTRA indicators, both are at a very high level and thus a high-quality alternative to the indicators from Power 1.
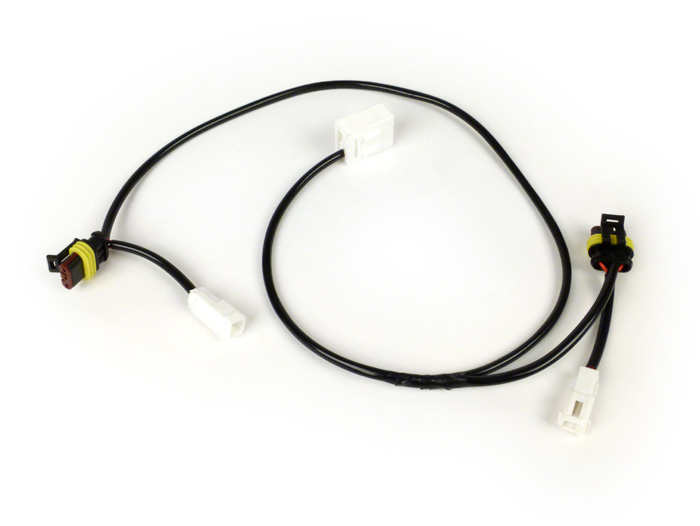
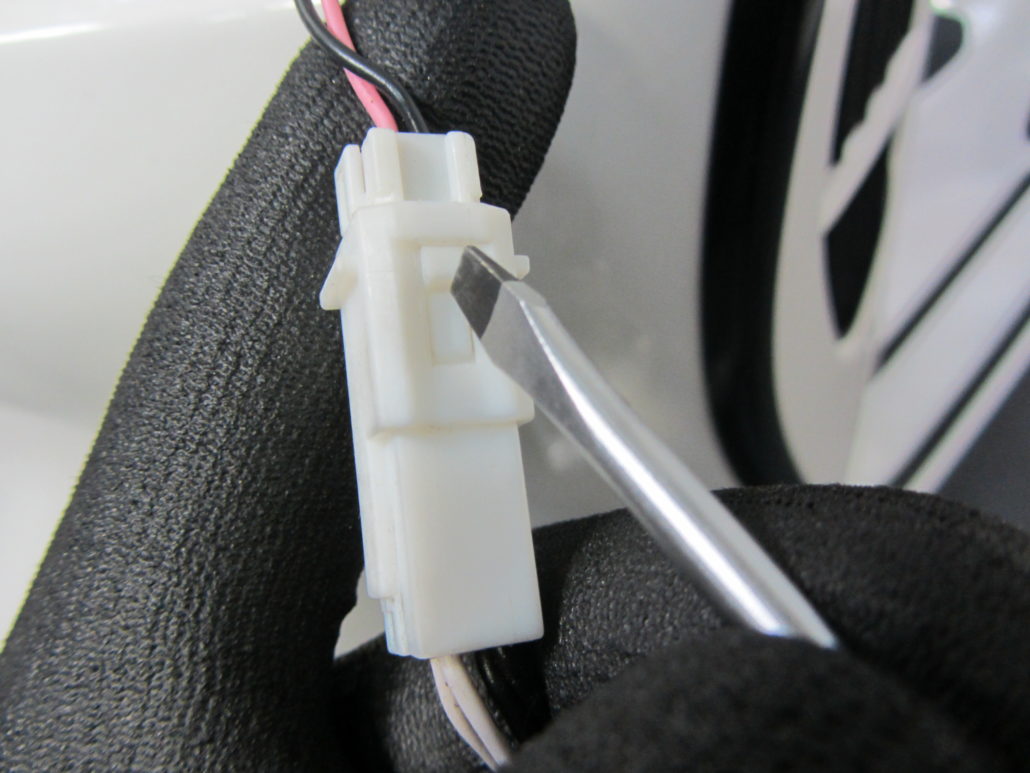
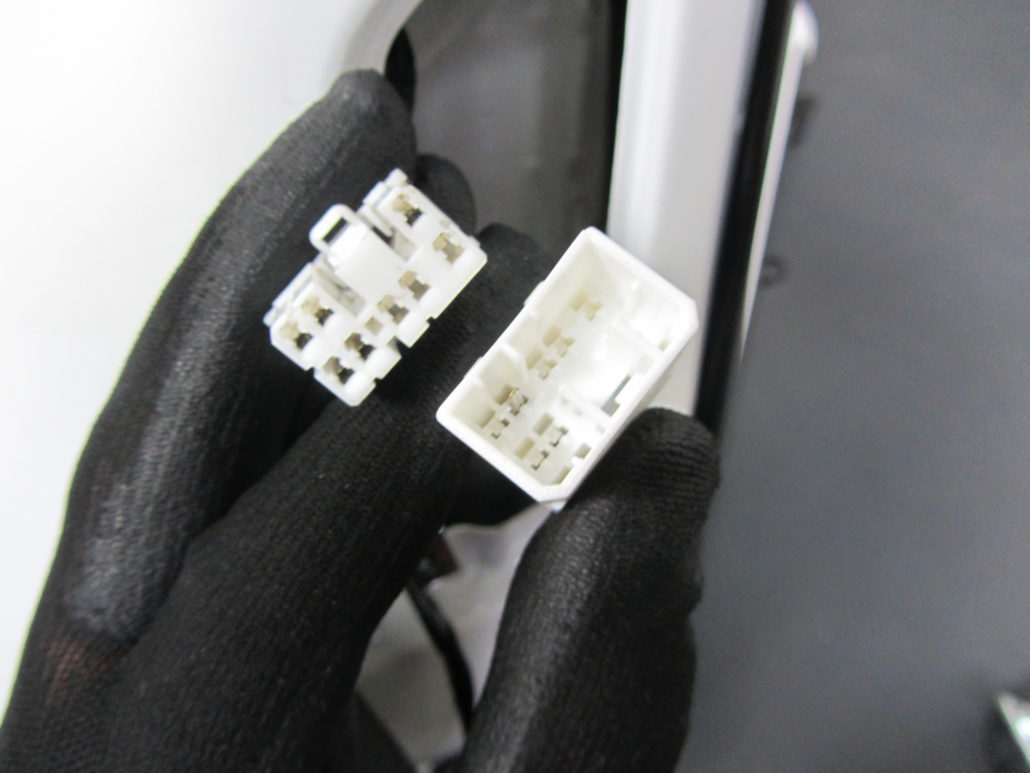
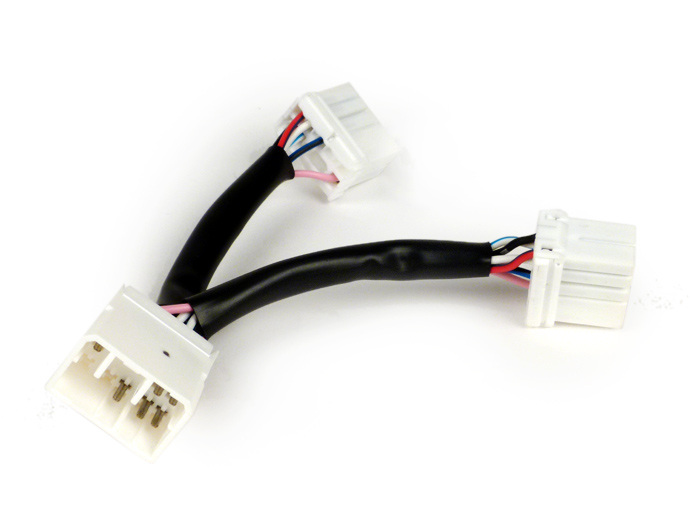
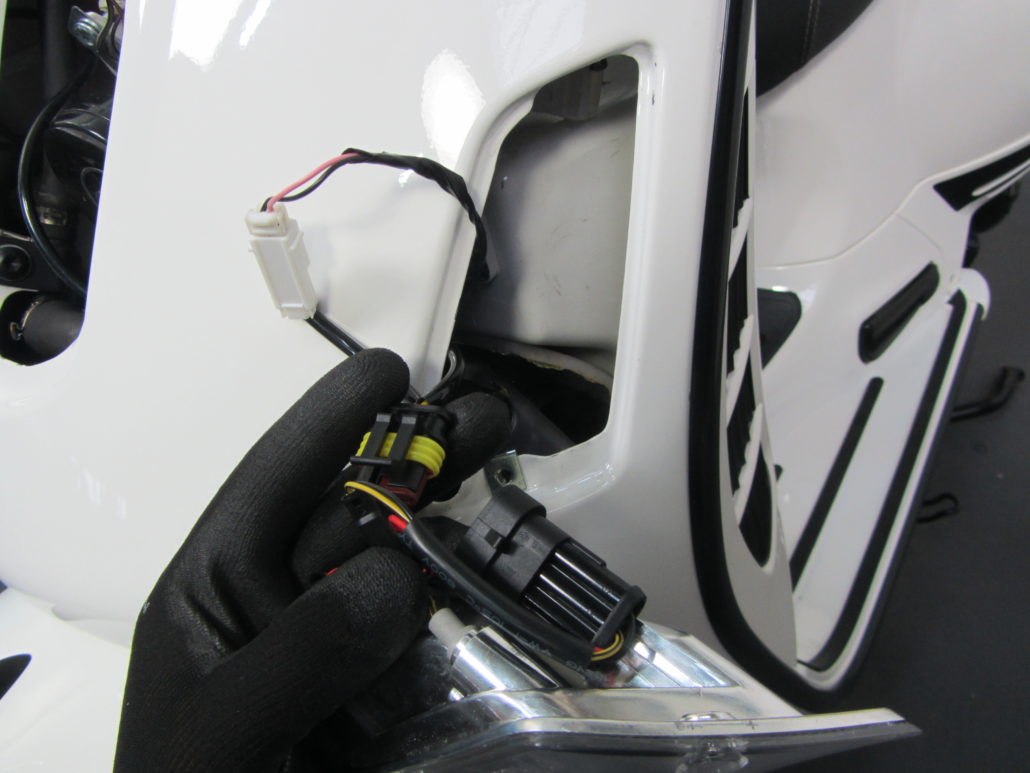
In addition, the Moto Nostra indicators are always delivered with connection adapters. There is therefore no need to change the wiring harness!


APPROVAL: NO PROBLEMS WITH THE TÜV

Of course, the indicators have a test mark and are approved for use on public roads (no TÜV approval required).


Handlebar indicator m-BLAZE disc indicator black E-approved

m.blaze disc LED handlebar turn signal black

These handlebar end indicators from MOTOGADGET - Made in Germany - are the first choice if the indicator is to be perfectly integrated into the vehicle concept. These super slim LED handlebar turn signals are very inconspicuous, if the viewer has it in view, he will surely call it optical highlight Perceiving your scooter. The workmanship and the materials used are of very high quality.

Installation is very easy if your Vespa is already equipped with handlebar end indicators. With our Harnesses with a little skill, these indicators can be retrofitted to any scooter - the indicators also fit e.g. on a Harley - see video.

In addition, the LED turn signals are by their brightness and the E-mark a real plus in terms of road safety.

Buy flat LED indicators here in a SET

If you prefer an original look for your Vespa, we recommend these LED indicators from Moto Nostra:

m.blaze disc from motogadget - a handlebar end indicator

The m.blaze disc is the latest generation turn signal light. The characteristic feature of the LED turn signal is the transparent light disc on a compact aluminum base, which fits harmoniously with the handle at the end of the handlebar.

Arlen Ness handles & Motogadget m-Blaze Disc on Harley Davidson - Breakout 2014

TranzLight turn signals

Blinker system that uses the new TranzLight technology (TLT, patent pending). This progressive development approach is not limited to the simple miniaturization of turn signal housings but creates the light directly via a crystal-like plastic body. Only precise optical CAD calculations and the most modern manufacturing processes enable this new design and its function.

The light flow required for the TranzLight principle is generated by the intensiLED® process developed by motogadget and consists of three important components:

  • Selected high-performance LEDs with maximum efficiency and a total output of 7W with a service life of more than 50.000 hours
  • An IC controlled constant current regulation clocked at 330kHz
  • A special collimator optic that couples the light from the LED precisely into the plastic body

The discreet aluminum housing is only used for stable attachment of the glass body and the integration of control electronics and high-end LEDs.

Of course, the housing is CNC-manufactured, schwarz eloxiert and finely inscribed by laser.

The handlebar end indicator is very flat and appears neutral and inconspicuous due to the transparent disc. Thus, it fits many styles and a wide variety of scooters and even on motorcycles, quads ...

The flasher can be operated like any common LED flasher with load resistors or with all of our load-independent flasher relays.

Benefits

  • Absolutely unique, independent design and functional principle
  • Hardly noticeable on the handlebars when switched off
  • Extremely bright light to the front, clearly visible light to the rear
  • State-of-the-art high-performance LED technology, IntensiLED
  • Electronic voltage conditioning and safe protection electronics
  • Flashing indicator light can be omitted
  • Closes the handlebar end very harmoniously - especially with m-Grip and other aluminum grips

What's in the box

  • The indicators are available individually or as a set
  • Single handlebar end indicator m.blaze disc left or right with clamp for steel and aluminum handlebars (22 mm and 1 inch handlebars) with an inner diameter of 14 mm to 21 mm
  • Connection cable with approx. 100 cm.
  • Installation instructions: see below / Motogadget-led-blinker-disc-installation-instructions_manual_
Buy flat LED indicators here in a SET

Specifications and Features

Diameter 35 mm
Total length over all 68 mm
Partial length outside the handlebar 20 mm
Partial length within the handlebar 48 mm
cable length about 100 cm
Weight about 40 g
Attachment Supplied with clamping rubbers for metric steel and aluminum handlebars (22 mm and 1 inch handlebars) with an inner diameter of 14 mm to 21 mm
input approx. 7 watts


Installation instructions for handlebar end indicators

The m-Blaze disc is suitable for mounting on handlebars with an inner diameter between 14 and 21mm. Use the following sketch to select the mounting elements required for your handlebars: Motogadget-led-blinker-disc-installation-instructions_manual_

The m-Blaze disc must be mounted horizontally, the angle of the handlebar inclination must be in a range from 0 ° to a maximum of 9 °. Before installing the indicator, clean the inside of the handlebars. Only a clean and grease-free surface enables the turn signal to be securely attached. For the cable exit, drill a 3mm diameter hole in the underside of the center of the handlebar. Alternatively, a hole can be drilled to the left and right of the switch fittings. The hole must be very carefully deburred inside and out. No tensile forces may act on the connection cables. This can tear the cable out of the turn signal housing or chafe the handlebar exit point. Make sure that the cable is long enough and pay attention to the steering angle. It is recommended to protect the cable at the exit point with shrink tubing.

DAMAGE TO THE CABLE INSULATION CAN CAUSE A SHORT CIRCUIT AND A CABLE FIRE, THAT IS RISK TO LIFE.

Use the blinker marked “L” for the left side of the handlebar and the blinker marked “R” for the right side of the handlebar. Guide the turn signal connection cable into the tube opening and from the inside through the 3mm hole to the outside. Use a stiff piece of wire for this. Tighten the M8 nut on the indicator lightly so that the rubber piece spreads open a little. The indicator is pushed into the tube, the rubber piece must be in contact with the tube wall. By turning the indicator clockwise by hand (do not use any tools!) The piece of rubber in the handlebars opens. Turn the turn signal until a considerable amount of force is required to release the turn signal; the motogadget logo must still be visible from above. If the rubber piece on the inside of the handlebar does not expand, the indicator is pulled out, the connection cable is brought back to its original position by turning the indicator housing counterclockwise, the rubber piece is more pretensioned by tightening the M8 screw and the assembly process is repeated.

THE CONNECTION CABLE MAY BE DAMAGED BY TURNING TOO FREQUENTLY IN ONE DIRECTION. DO NOT TURN MORE THAN 4 TURNS IN ONE DIRECTION IN ANY ASSEMBLY ATTEMPT. BREAK IF STOP THE TRIAL AND TENSION THE RUBBER TIGHTER. TURN THE CABLE BACK TO ITS STARTING POSITION IF YOU TRY TO REASSEMBLY.

Connect the red connection cable of the left turn signal with the positive lead of the left turn signal circuit and the red cable of the right turn signal with the positive lead of the right turn signal circuit. Connect the two black connection cables to vehicle ground. The supplied crimp connectors are used for this. Test the turn signals for their function. If the flashing frequency has changed, you need an electronic, load-independent flashing relay.

THE TURN SIGNALS ARE PROPERLY MOUNTED AND COMPLY WITH THE LEGAL REGULATIONS IF THE TURN SIGNALS WITH THE MARKING “L” FOR THE LEFT SIDE AND THE TURN SIGNAL WITH THE MARKING “R” FOR THE RIGHT SIDE HAS BEEN BUILT IN AND ON BOTH SIDES THE MOTOGADGET LOGO IS VISIBLE FROM ABOVE.

Buy flat LED indicators here in a SET
LED running light indicator Vespa GTS

Vespa GTS indicators Dynamic LED running light indicators with approval for Vespa

- Available now! -

The trend comes from the automotive industry and LED technology makes it possible. That Scooter Center is now the first manufacturer with its own brand “Moto Nostra” to produce and offer dynamic running lights for Vespa scooters as well.

Vespa GTS running light LED indicators | Running light LED indicators

Exclusively from Moto Nostra

LED running light indicators with a wipe effect are also known as "intermittent indicators". Running light, because the individual LEDs light up one after the other when they flash, creates an optical wipe effect.

Optics & security

- with E-marking / approval-

Visually, the indicators are of course the crowning glory. The new Scooter Center LED running light indicators from Moto Nostra for Vespa also score points in terms of safety. The LED indicators are bright and are even more noticeable due to the running LEDs. We scooter drivers depend on being clearly and well perceived in road traffic by the other, mostly larger and stronger road users. The front turn signals also have a daytime running lights - also for the models before 2014.
We offer these great Moto Nostra indicators in
  • white (transparent glasses) and in
  • smoked (tinted glasses).
The smoked version is in the same color as Moto Nostra LED taillights and thus forms a perfectly harmonizing overall picture.
Of course, the indicators have an E-license plate and can be used legally for public road traffic immediately after they have been installed without further entries.

Available for all Vespa GTS models

The new indicators are available as a set for the front or rear and also as a complete set: front and rear together.
In the version for the models before 2014, a suitable cable branch is included, which is to be connected plug & play. Your GTS before 2014 will then also get the current safety feature of the daytime running lights in the indicators.
For the models from 2014 and 2018/2019, the indicators are a little cheaper, as no additional cables are required and the original plugs can be used.

Moto Nostra LED Vespa handlebar end indicators in a set with E-mark

Our Moto Nostra Vespa handlebar end indicator LED combines the classic design of Hella handlebar end indicators with modern LED technology. The Vespa handlebar indicator has high power LEDs on a circuit board fitted on both sides. Compared to conventional light sources, these emit a clear and brilliant light with almost no switch-on delay.

We offer the Vespa LED indicators individually or as a complete set with gas and switching tube. The glasses are of course available individually as spare parts in all colors!

Buy Vespa handlebar end indicators LED here

Vespa LED handlebar end indicators orange yellow original

Vespa LED handlebar end indicators, tinted black Vespa LED handlebar end indicators clear white


DC AC

The handlebar indicators are suitable for all 6 volt or 12 volt power sources, regardless of whether direct current (DC) or alternating current (AC)! Clever integrated control electronics enable the optional operation on both types of voltage. Even at low voltage (e.g. when idling) they offer a constant flashing signal.

WITH E-MARK / TÜV

The indicators naturally have an E-mark / E-mark on the indicator glasses, which are available in different colors. The turn signals are E-marked Can be used immediately in traffic and no longer have to be approved by the TÜV!

Buy Vespa indicator LED with TÜV here

USE

The indicators fit on all vehicles on which handlebar end indicators have already been used at the factory. Many Vespa vehicles built before around 1980 can usually be retrofitted without any problems. We offer corresponding sets for this.

  • TYPE: handlebar end indicator Hella (originally used on Vespa V50, 90 Racer, ET3, Sprint, Rally)
  • LIGHT SOURCE: LED (permanently integrated)
  • VOLTAGE: 6V and 12V AC / DC available
  • WATT: 3,6Watt (+ series resistor)
  • TEST MARK: E-mark (E4)
  • AVAILABLE COLOURS:
    • original (orange),
    • tinted (black)
    • clear (white)

CONCLUSION VESPA HANDLEBAR END INDICATOR LED

  1. higher security
  2. Modern technology
  3. unchanged classic look
  4. optional modern look through black or white glasses
  5. Approval for public road traffic

The new handlebar end indicators are a useful update for every oldie. Robust LED technology, paired with a classic, original look result in a safety plus without this being recognizable from the outside!

Buy Vespa handlebar end indicators LED here

OUR TIP

The LED indicators use a series resistor to operate on the existing on-board network / indicator relay. This is necessary in order to adequately address conventional (mechanical) flasher relays and to achieve even timing. If you have optimized your on-board network or still want to, you can remove the series resistor (which is located outside the indicator housing in the supply line) when using an electronic flasher relay. The indicator glasses also fit conventional indicators, but the test mark is only valid when used with the Moto Nostra LED indicator.


Daytime LED conversion Vespa GTS with instructions

The newer Vespa GTS models from the year of construction 2014 have an additional daytime running light in the indicator lights. That looks great and offers additional security.

Update for daytime running indicators for Vespa GTS models built before 2014!

THE DESIRE

The Vespa GTS models from 2014 already have an LED daytime running light which is integrated in the indicators. These indicators also fit in all previous years of the GT / GTS / GTL series.

THE PROBLEM

However, the wiring is not very easy due to the different connector types used at the factory and would require irreversible intervention in the wiring harness.

THE SOLUTION

Our specially made adapter cable branch for your Vespa GTS before 2014 allows an absolute simple and comfortable Connection. This is suitable for all years of construction. Just plug it in and enjoy the great LED light:

THE perfect conversion set for your Vespa GTS LED indicators

So that this neat look and the daytime running light function can also be implanted in the GTS models built before 2014, you need our practical one Daytime retrofitting set for Vespa GTS consisting of the original Piaggio indicators and the bgm adapter cable:

Indicator set -PIAGGIO Triom, LED daytime running lights- Vespa GTS (2003-2013) - white - clear glass -

LED daytime running lights set Vespa GTS

You can of course also get the cable individually if you already have the indicators:

PV60CKT Cable adapter kit for indicator conversion -BGM PRO, LED daytime running lights- Vespa GTS

PV60CKT cable adapter kit for indicator conversion -BGM PRO, LED daytime running lights-

PV60CKT cable adapter kit for indicator conversion -BGM PRO, LED daytime running lights- Vespa GTS (2003-2013)

feature

It works very simply: The daytime running lights of the turn signals are supplied by the light. When the ignition is switched on, the daytime running lights are also switched on.

The modification

To assemble the indicators and to lay the cable branch are simply only

  1. the maintenance hatch on the left
  2. the cascade,
  3. of course dismantled the turn signals.
  4. Then reassemble. Finished

The following tool is required

Assembly work

To remove the maintenance flap, turn the handlebars to the right and remove the screw with a TX25 wrench.

You then have to look for something in the bowels of the electrical system through the maintenance hatch. The object of desire is a free harness with a
8-way multi-connector. If the vehicle has an alarm system, it is plugged in there.

On some vehicles, this free cable branch is fixed to the glove compartment with a clip - here's a look through the front turn signal opening.

The Kasakde is only secured with an internal serrated screw (TX) hidden behind the Piaggio emblem.

The emblem has a small gap on the left-hand side in the direction of travel and can be lifted from there with a narrow screwdriver.

The only screw of the cascade is hidden underneath. This is released and removed with a TXS25 key.


The cascade is removed upwards / towards the front.

Dismantle both indicators with a Phillips screwdriver PH2.

and disconnect the connector. The safety clip can be easily operated with a slotted screwdriver.

If both indicators are removed, the new cable branch is plugged into the 8-way plug.


Should the scooter come with a Piaggio alarm system be equipped, a so-called cable switch or Y-piece is required.

PV60CKTA cable switch -BGM PRO, LED daytime running light / alarm system- Vespa GTS (2003-2013)

The cable switch is simply plugged between the cable harness from the vehicle and the alarm system. The function of the alarm system is still guaranteed without restriction.

The longer end of the new turn signal cable branch is led behind the cascade to the right-hand side and there connected to the original connector and the new LED turn signal.

For the turn signal on the right side, the black multi-connector must be pushed out of the guide on the turn signal housing, otherwise the turn signal will not fit into the cutout of the frame.

On the left-hand side in the direction of travel, the black multi-connector remains in the position on the indicator housing.

Once all the plug contacts have been connected, the indicators, maintenance flap and cascade are reattached.

Finished.