News on Lambretta topics

Scooter leg shield clamp mirror for Vespa and Lambretta

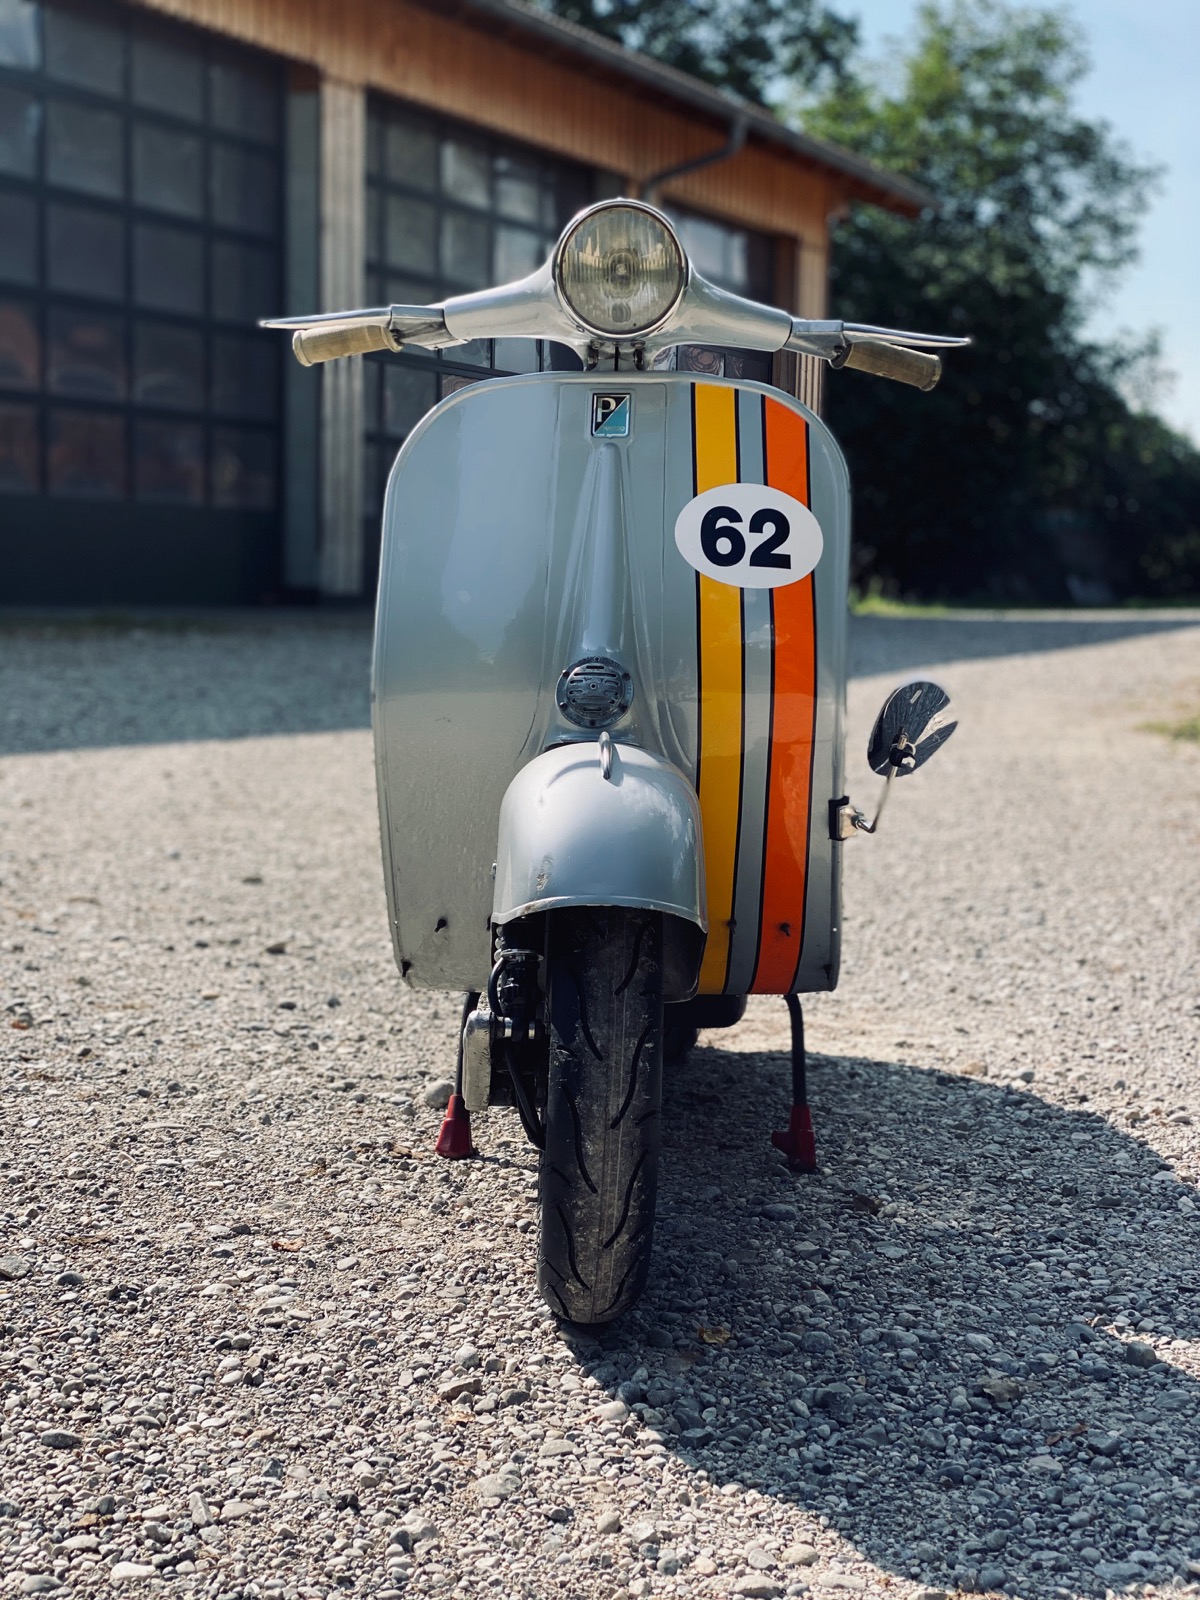
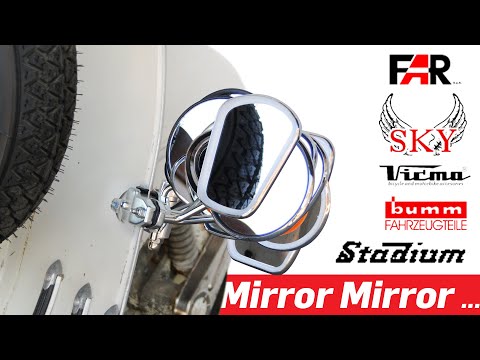
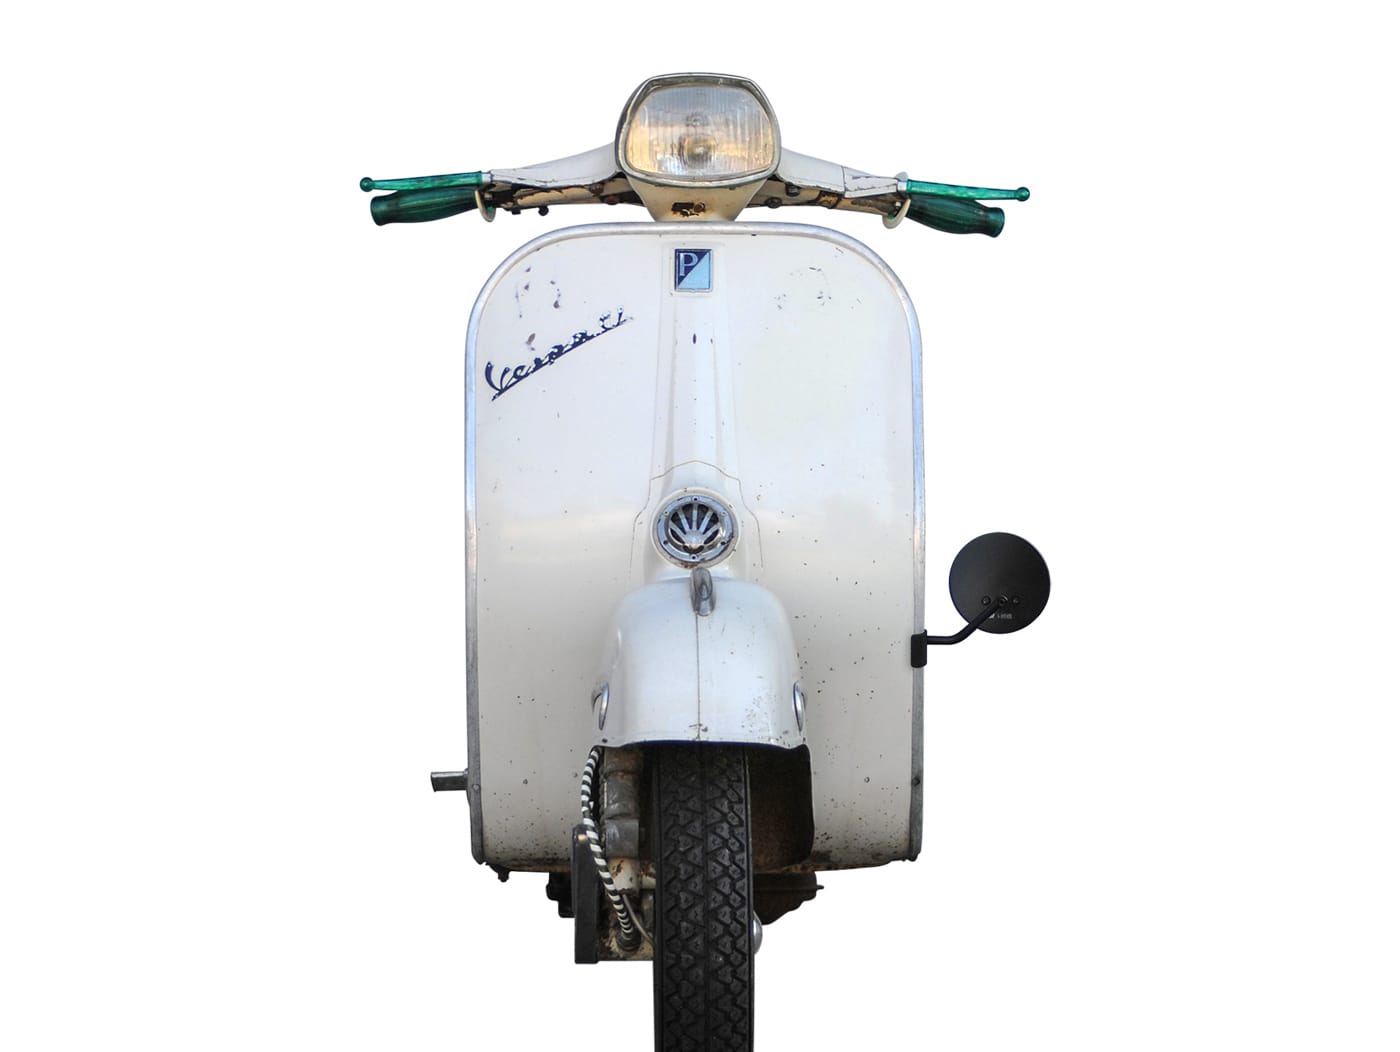
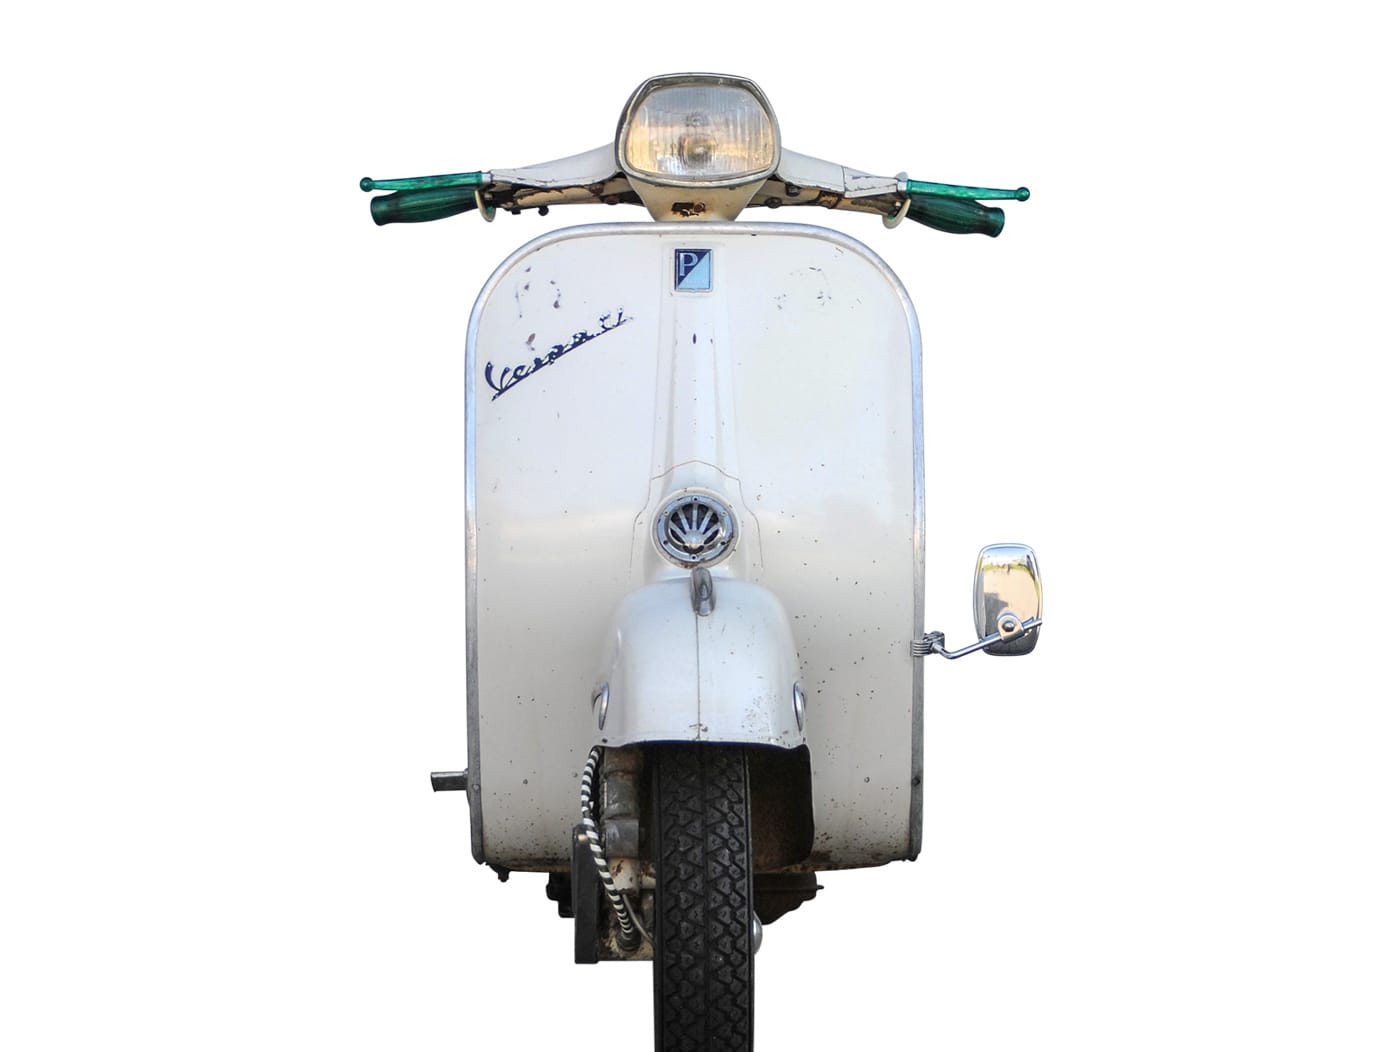
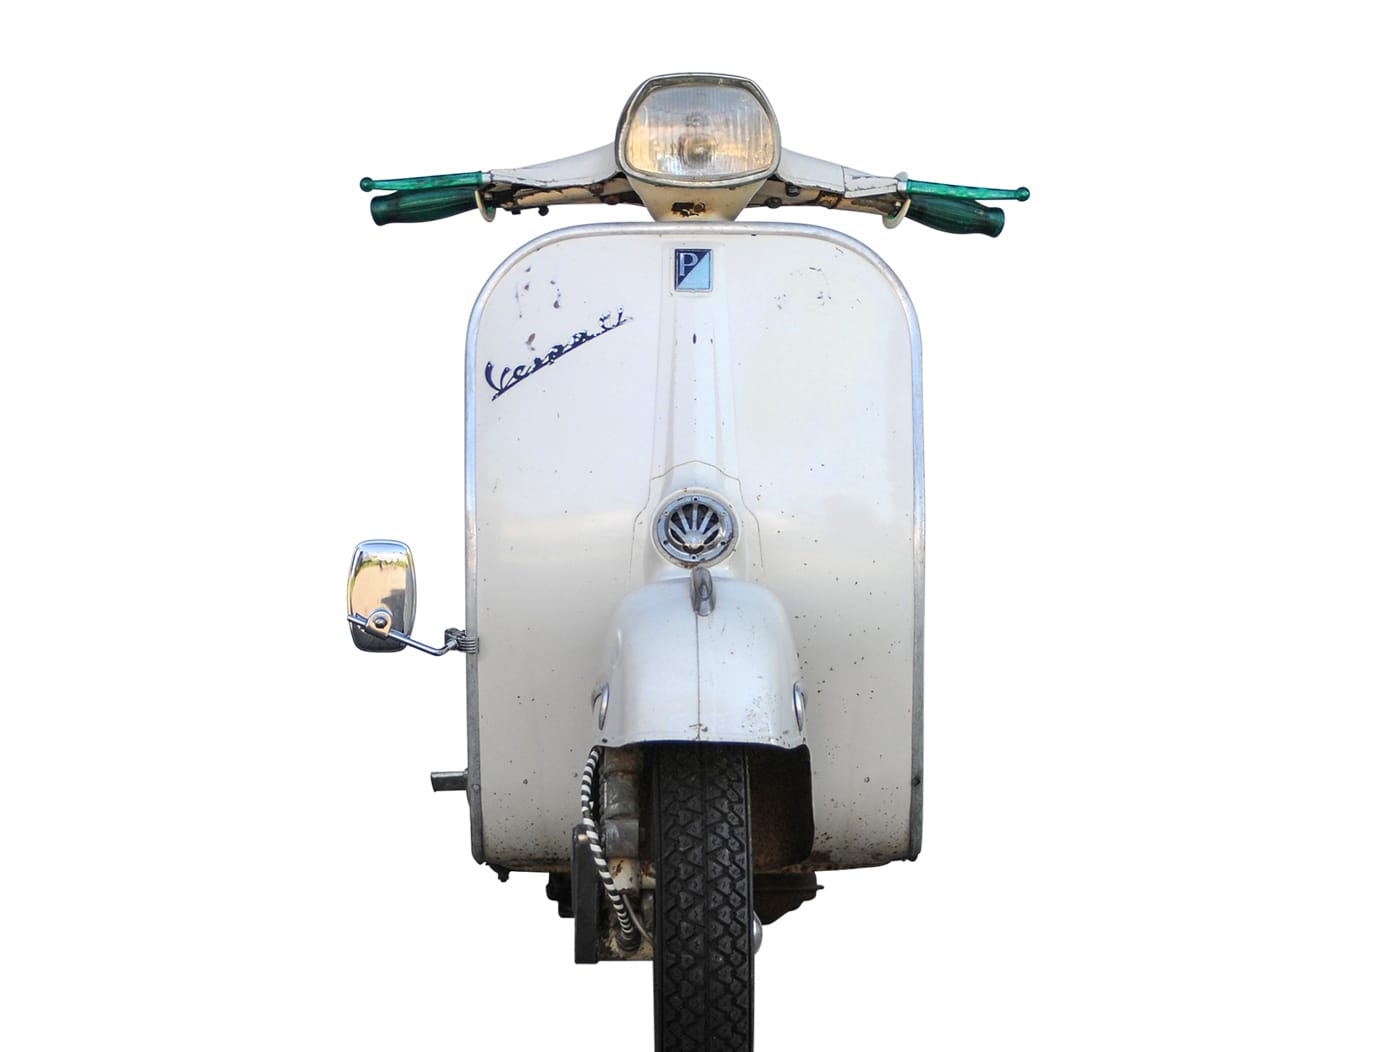
the last chance to get the classic retro mirror for left side mounting

In your Scooter Center Shop you will find a large selection Spiegel and Auch Clamp mirror for the leg shield!

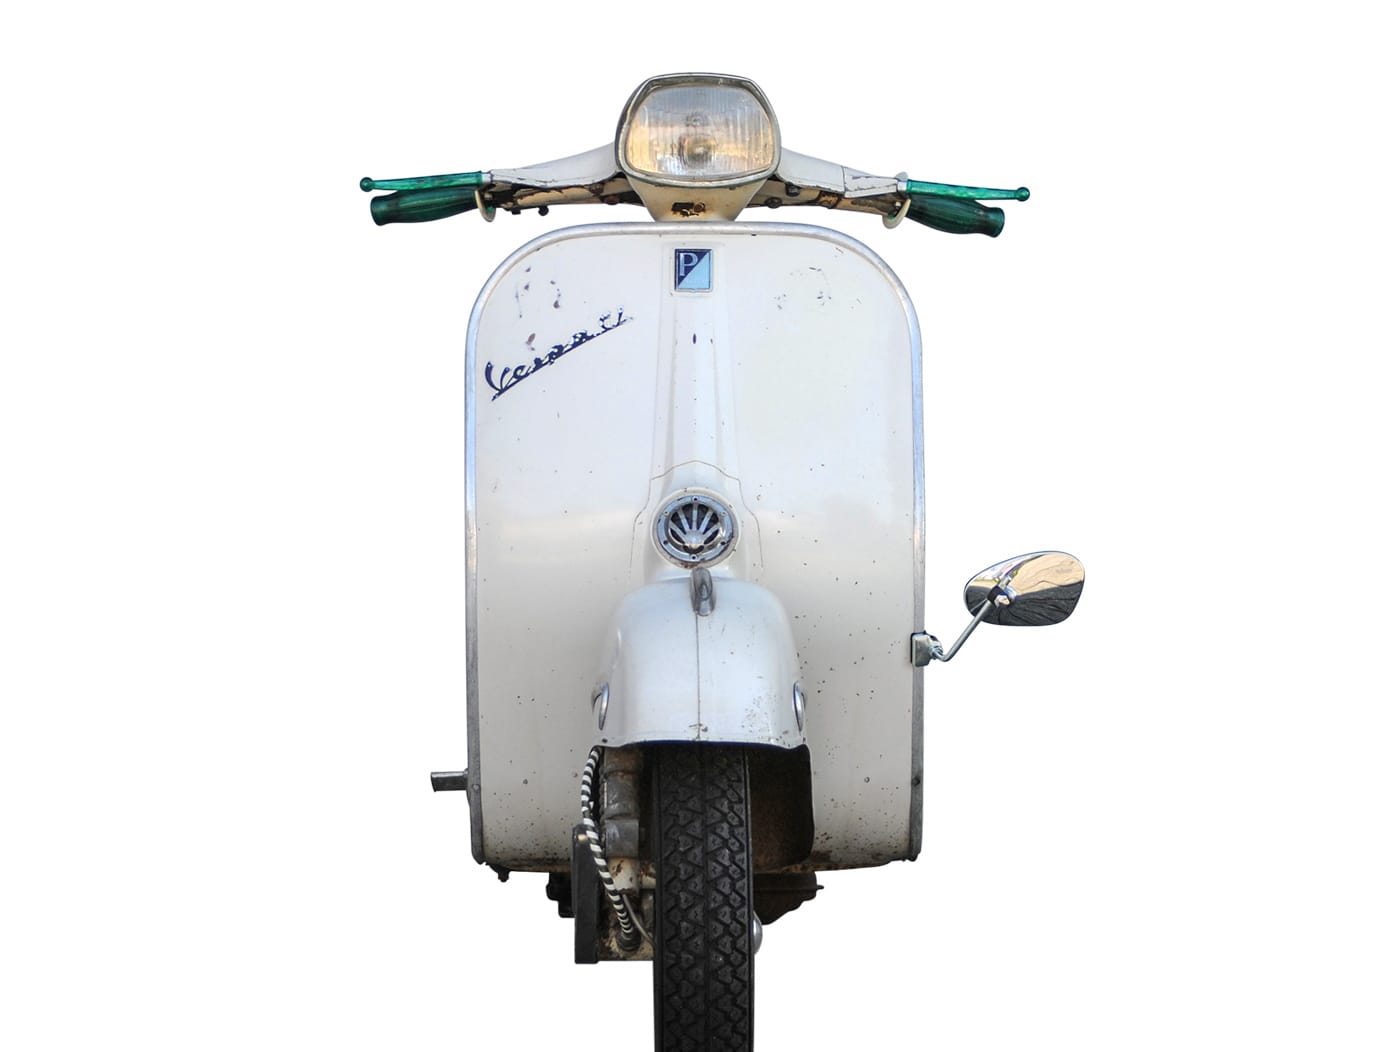
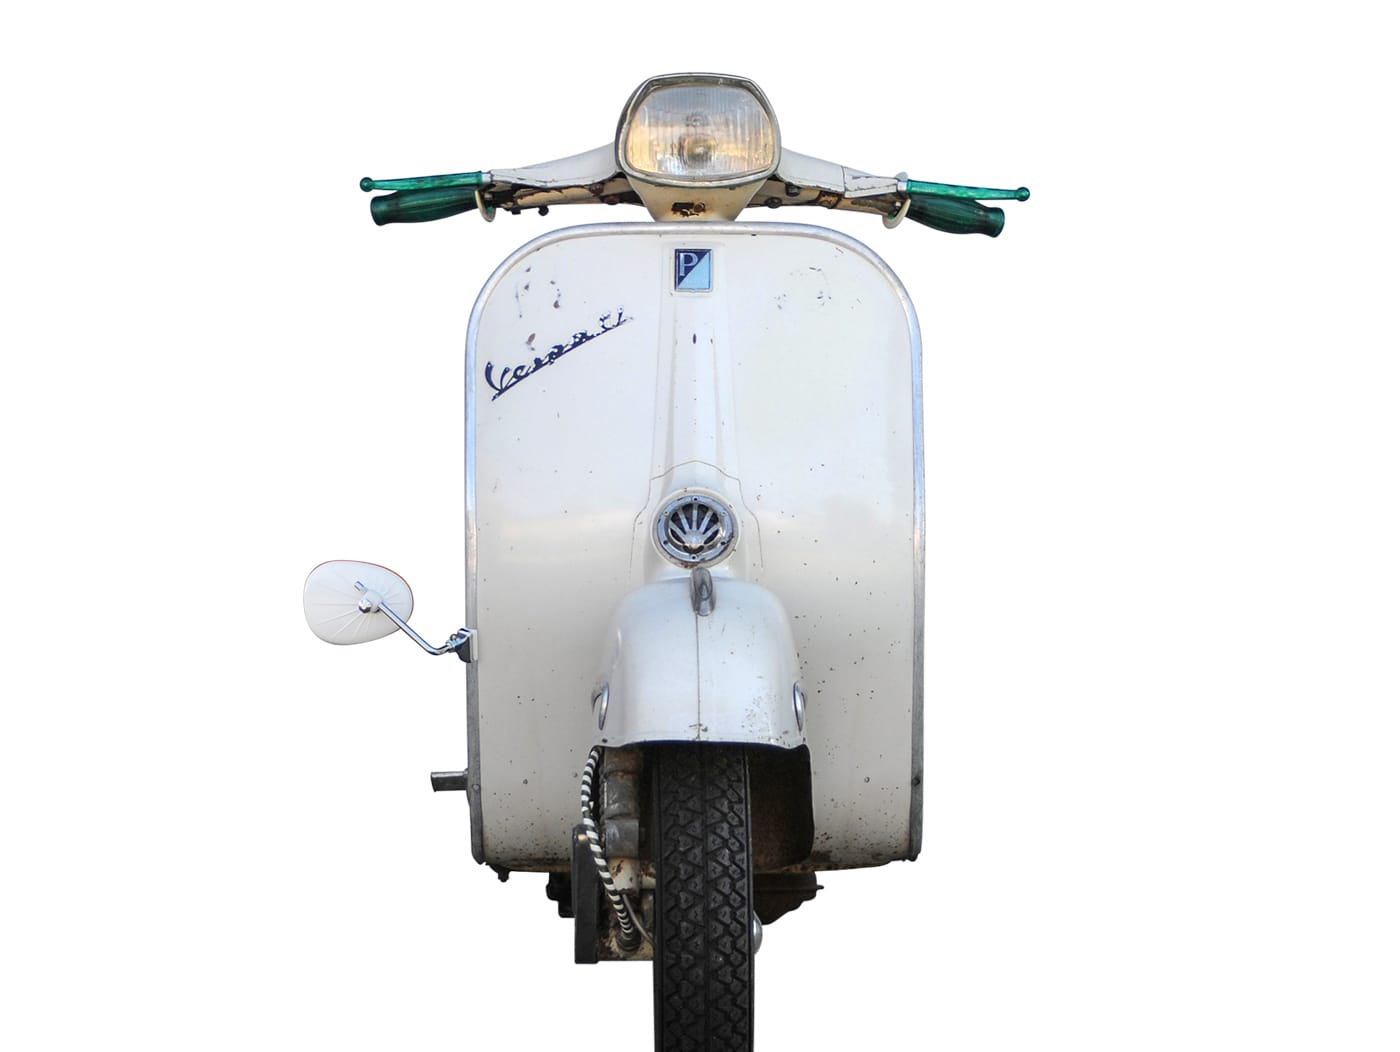
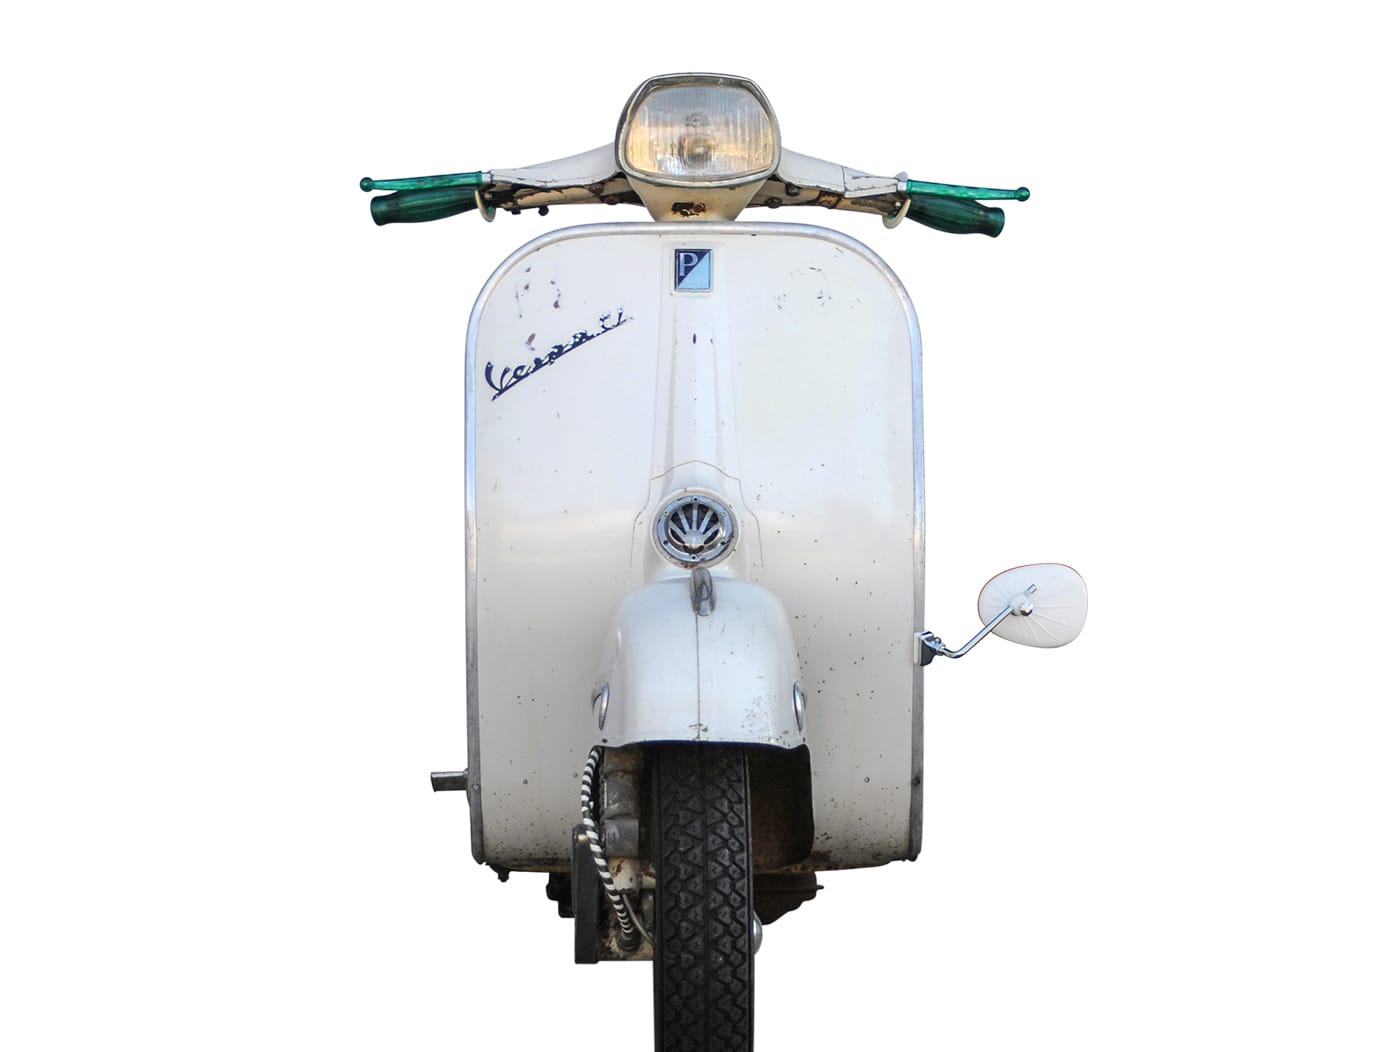
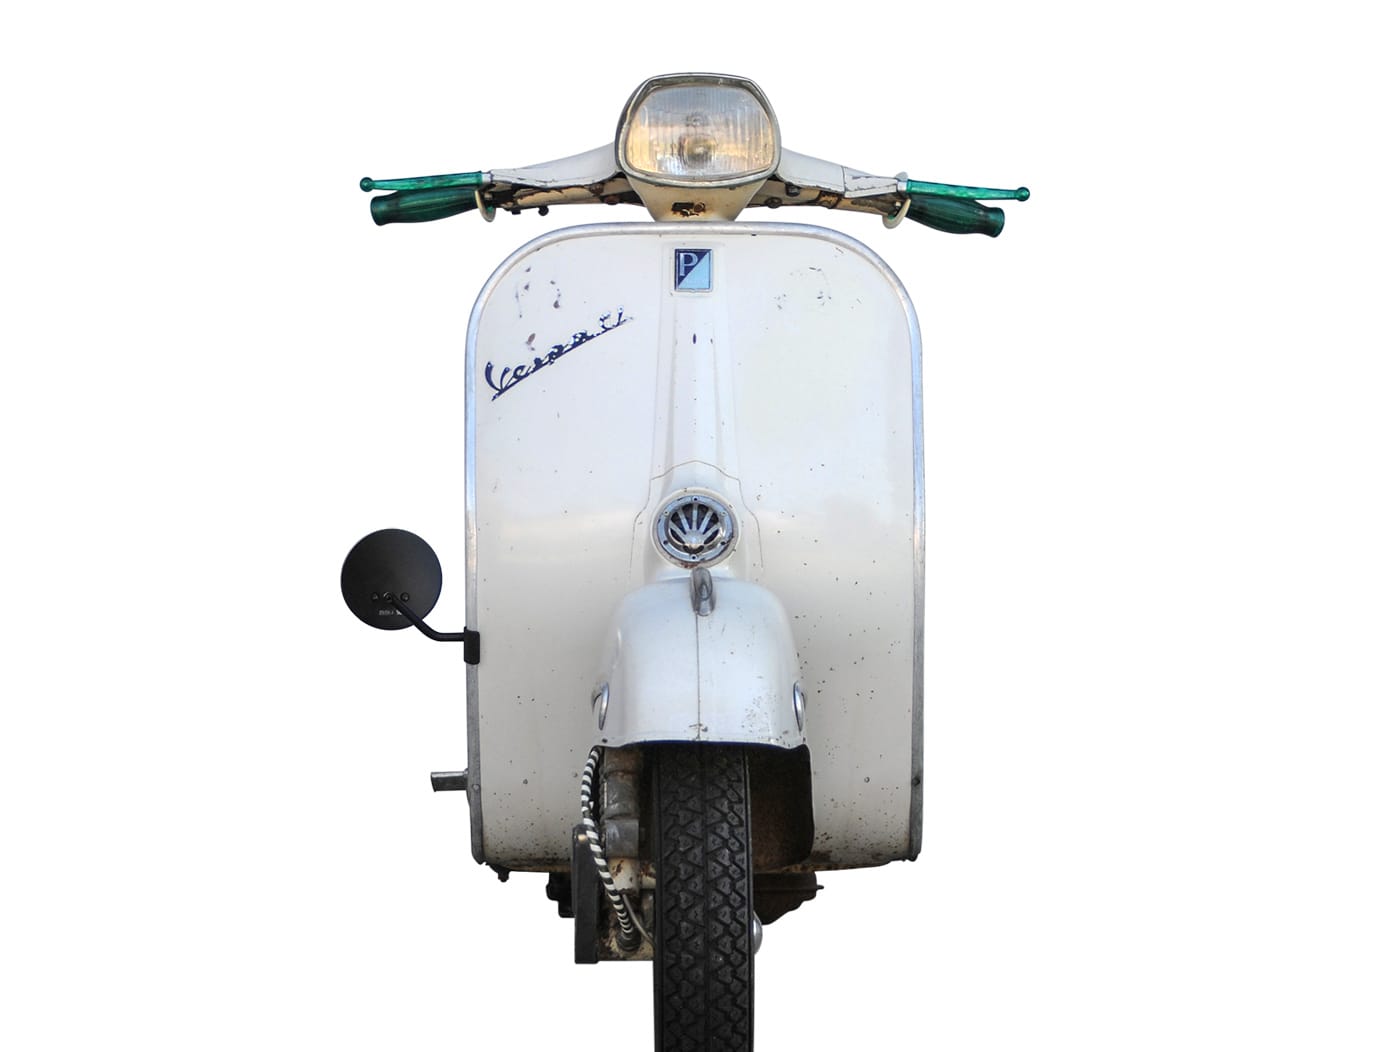
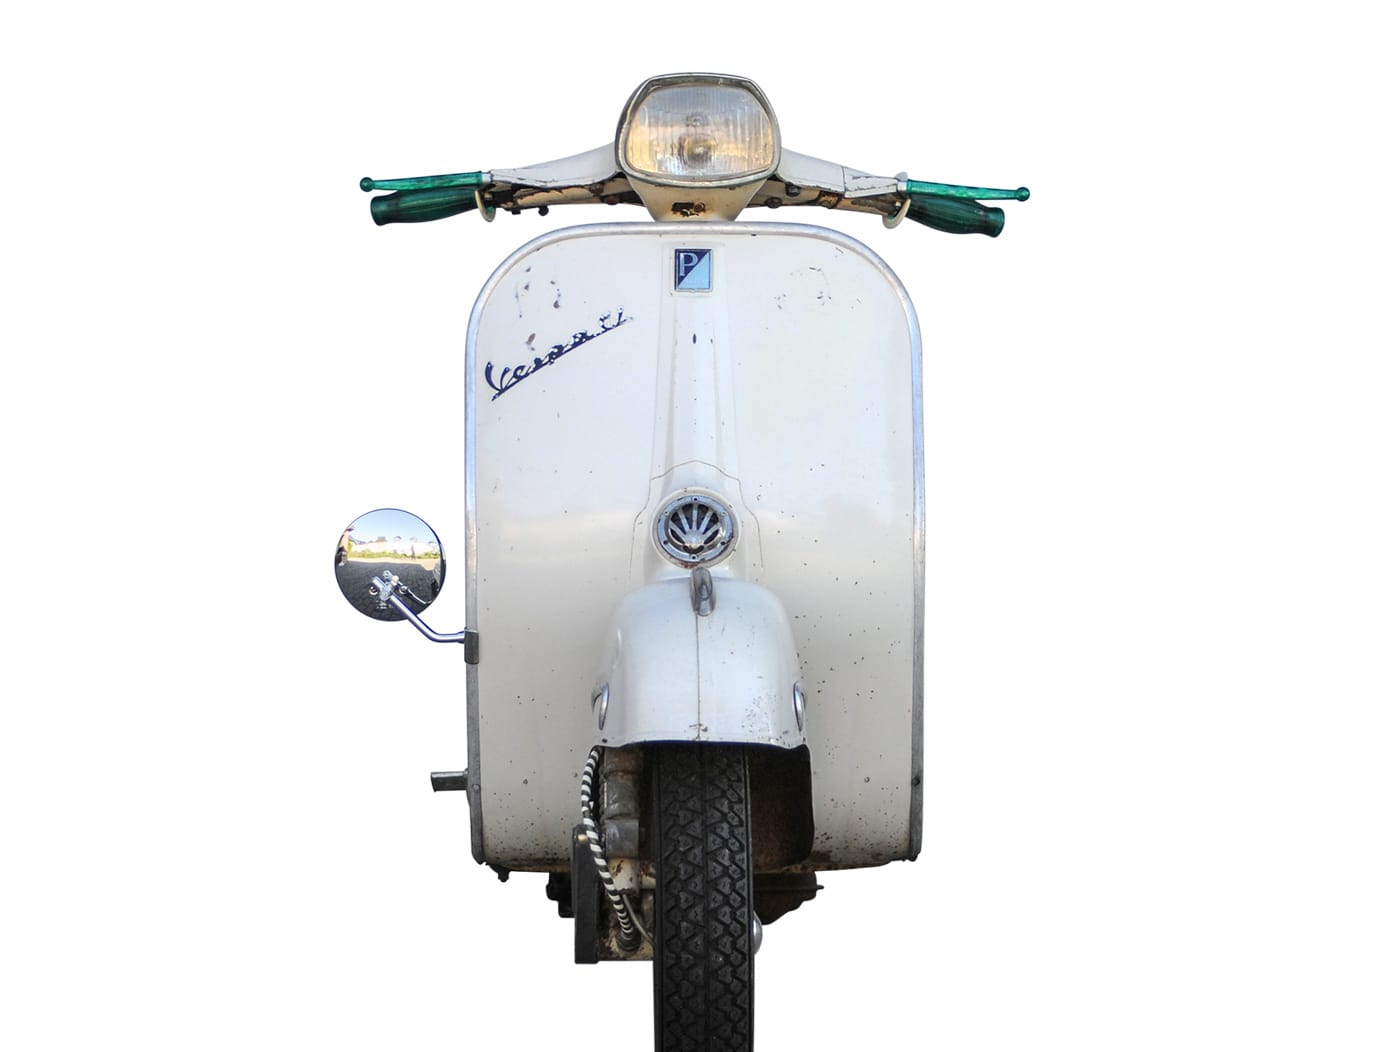
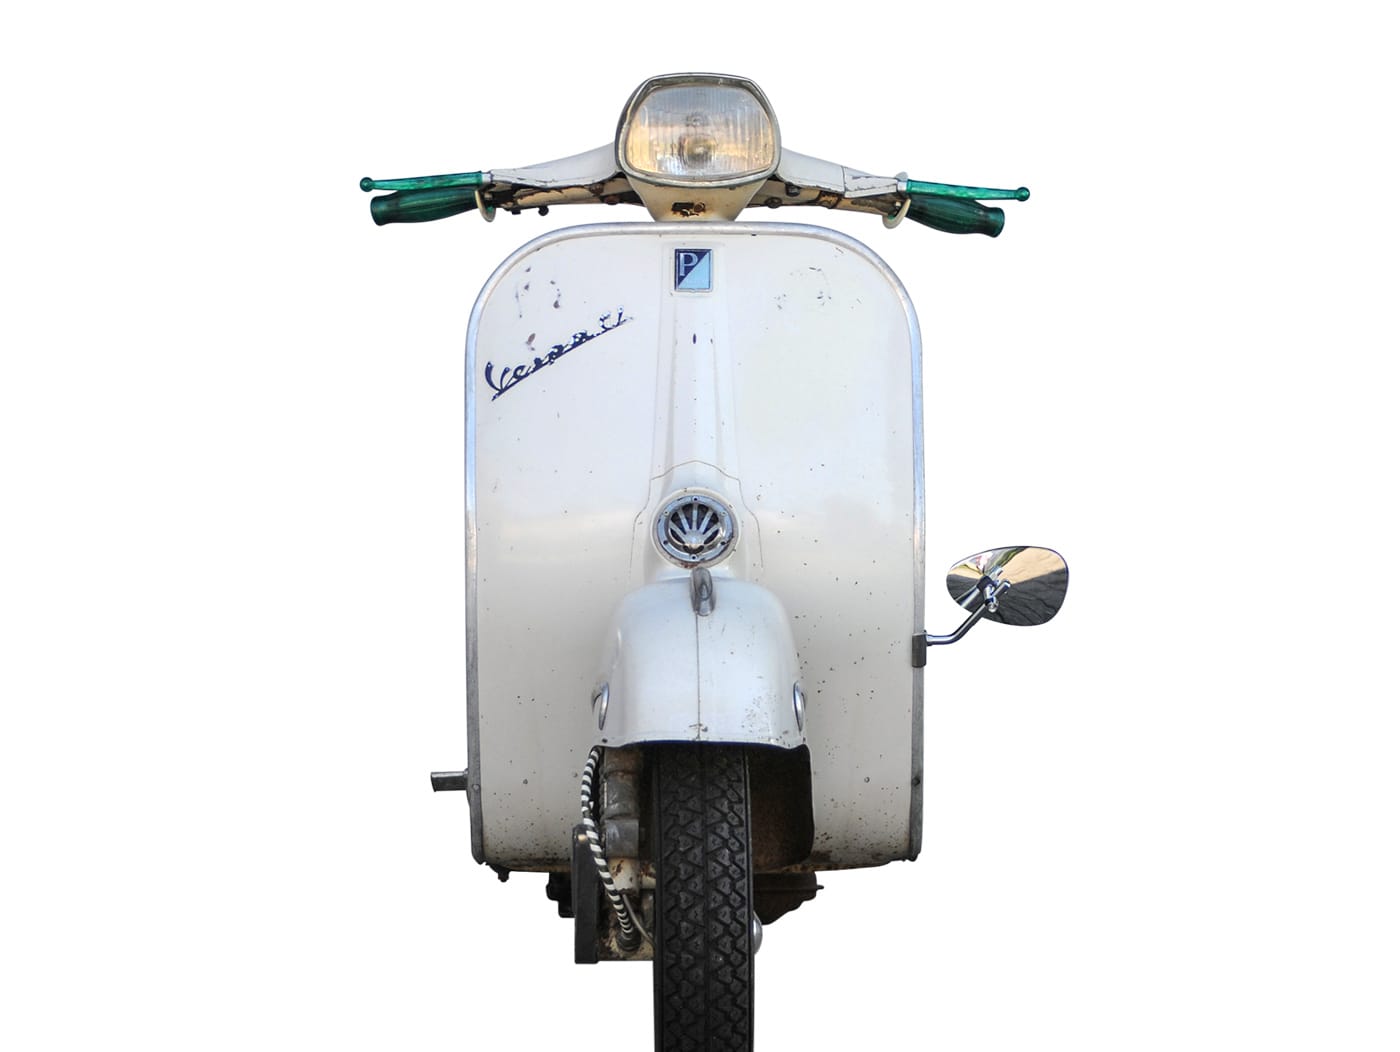
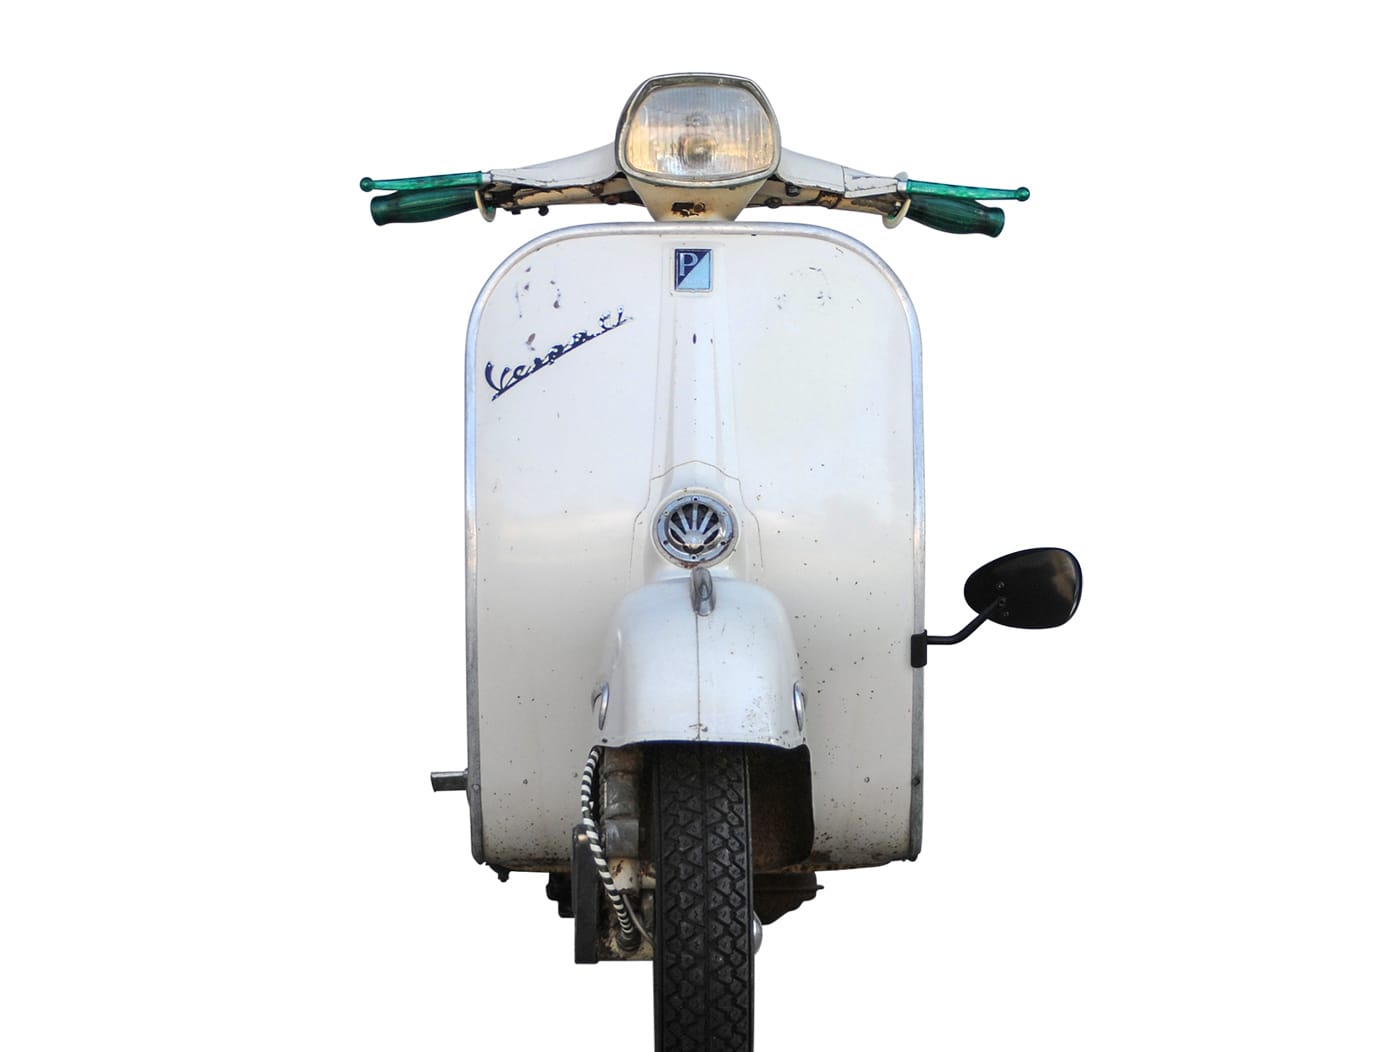
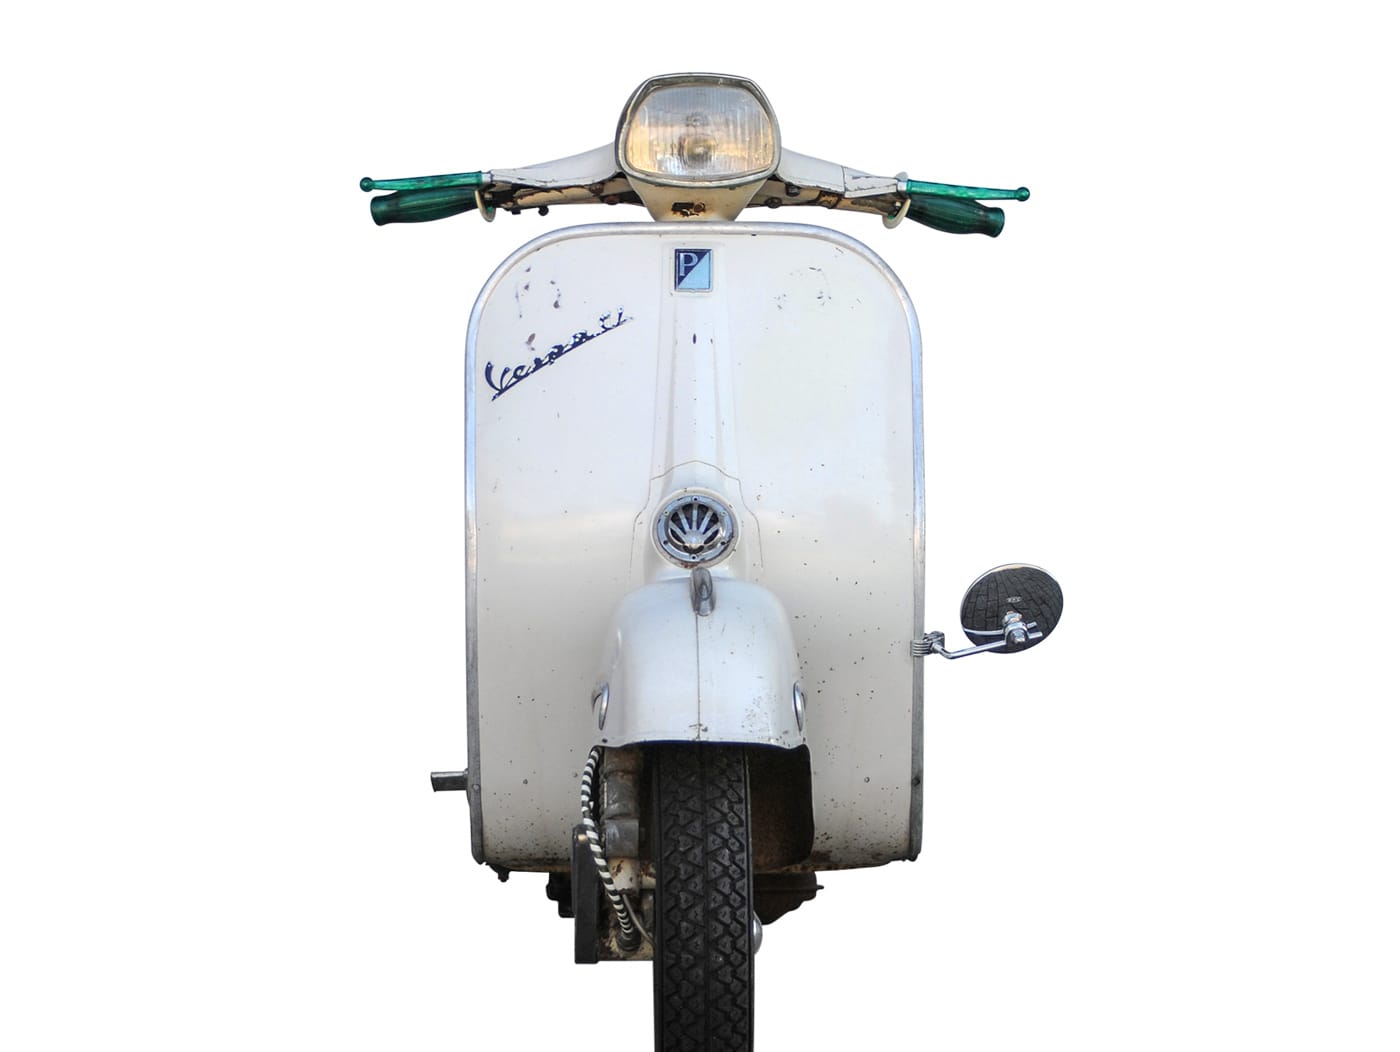
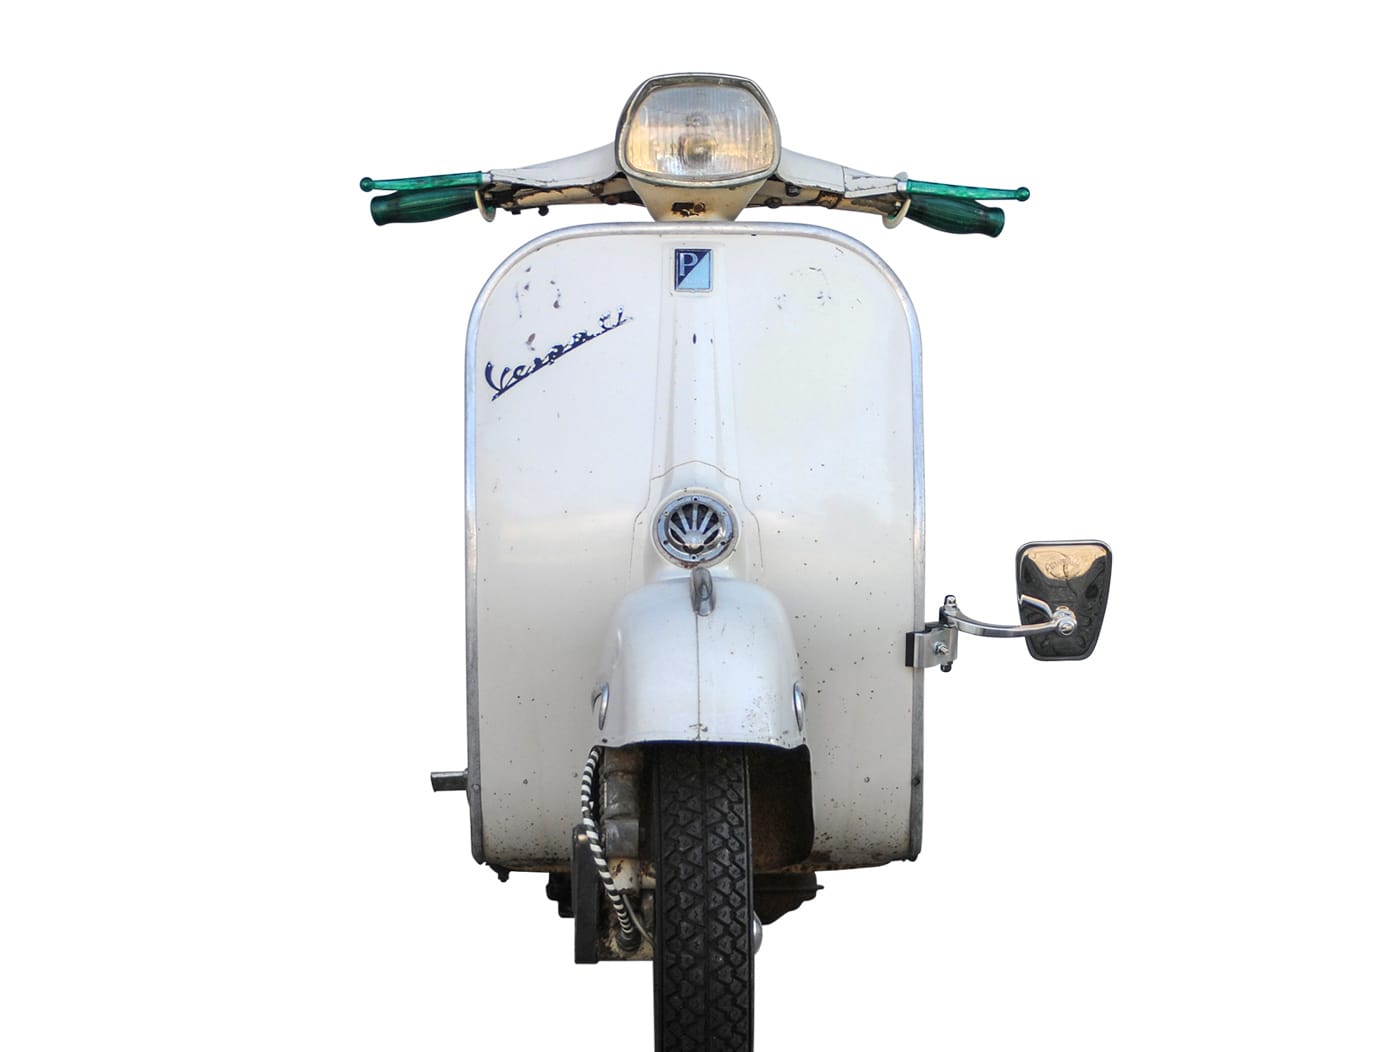
But do the mirrors fit your scooter? What is the size how does the color fit? What shape do the clamp mirrors have and what are the proportions in relation to the leg shield?

We have now installed all clip-on mirrors, also photographed from different perspectives! Now find your leg shield clamp mirror from a large one Selection in our shop.

Legshield clamp mirror Vespa & Lambretta

All legshield clamp mirrors at a glance


Legshield clamp mirror for Vespa and Lambretta

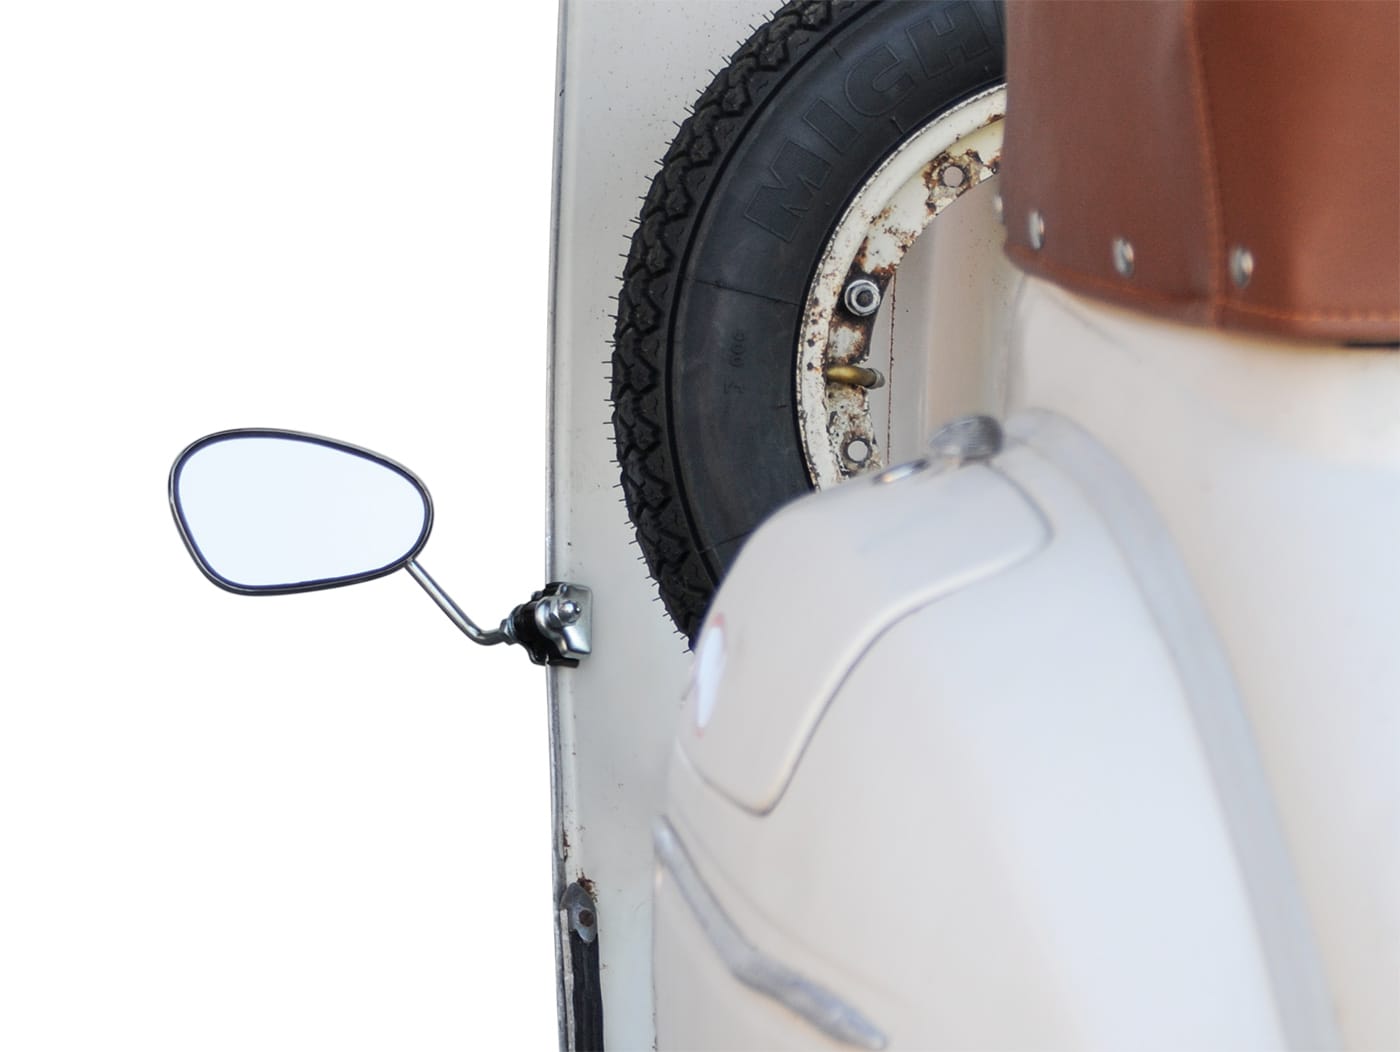
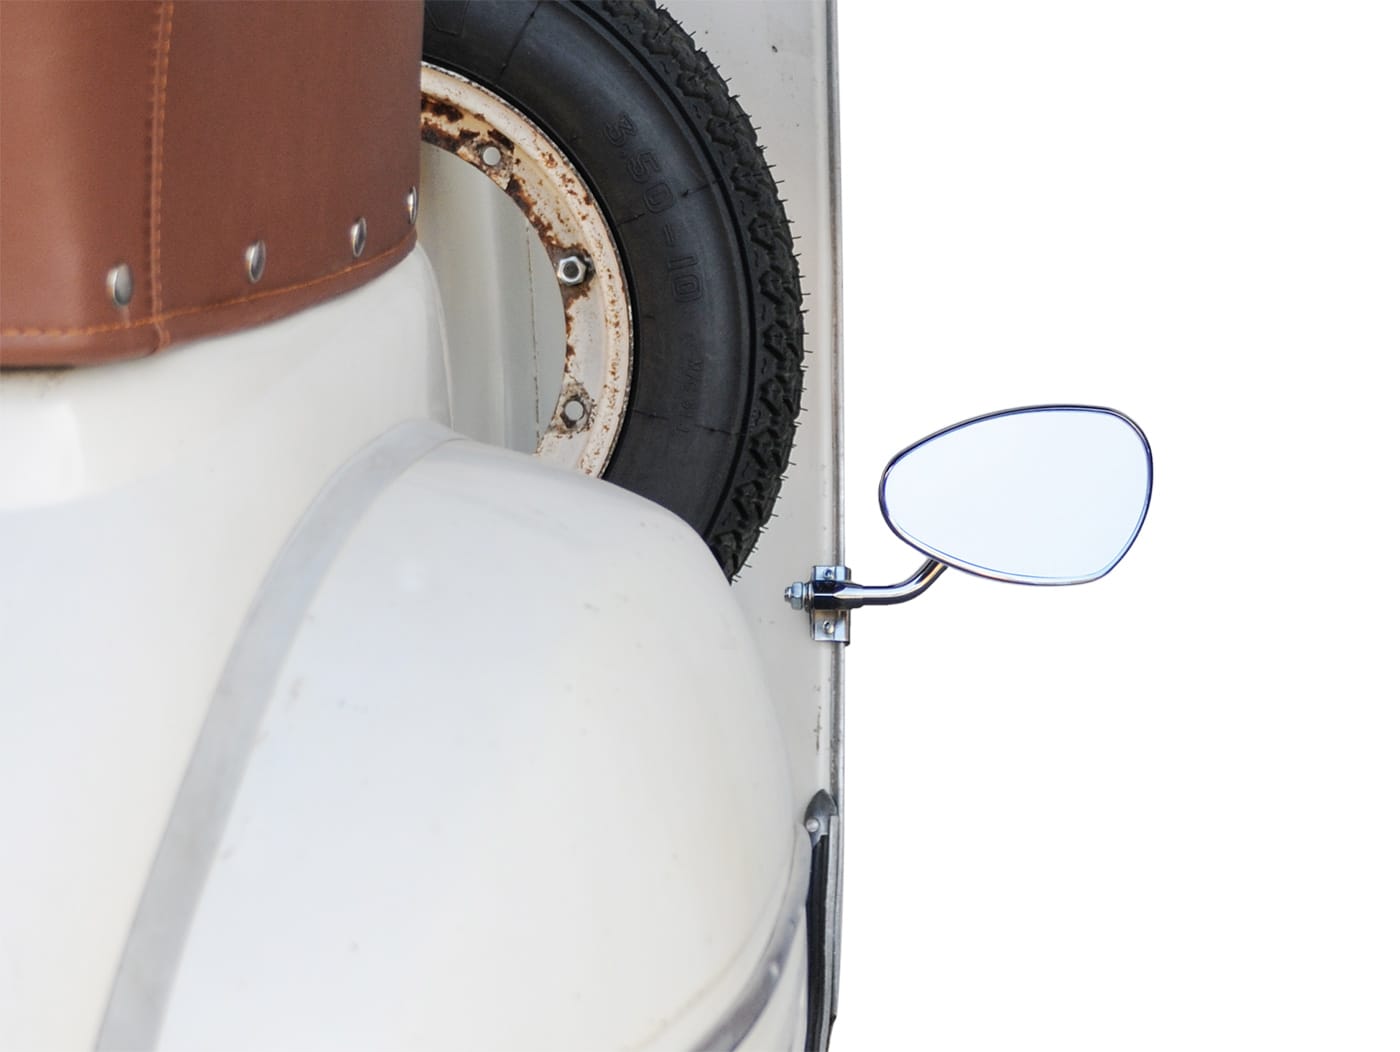
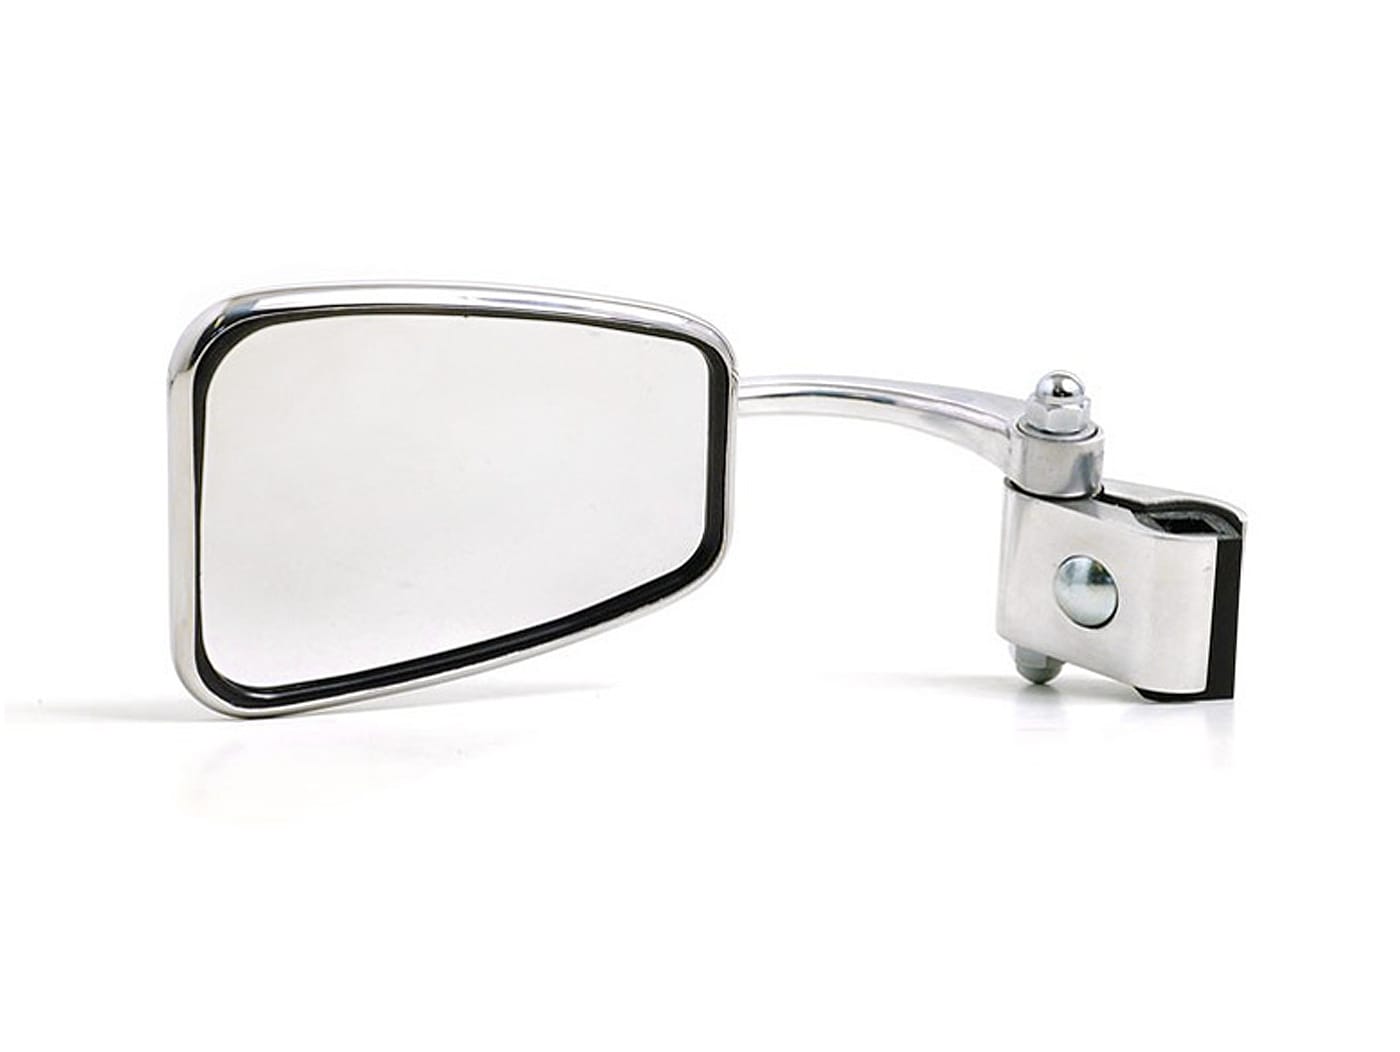
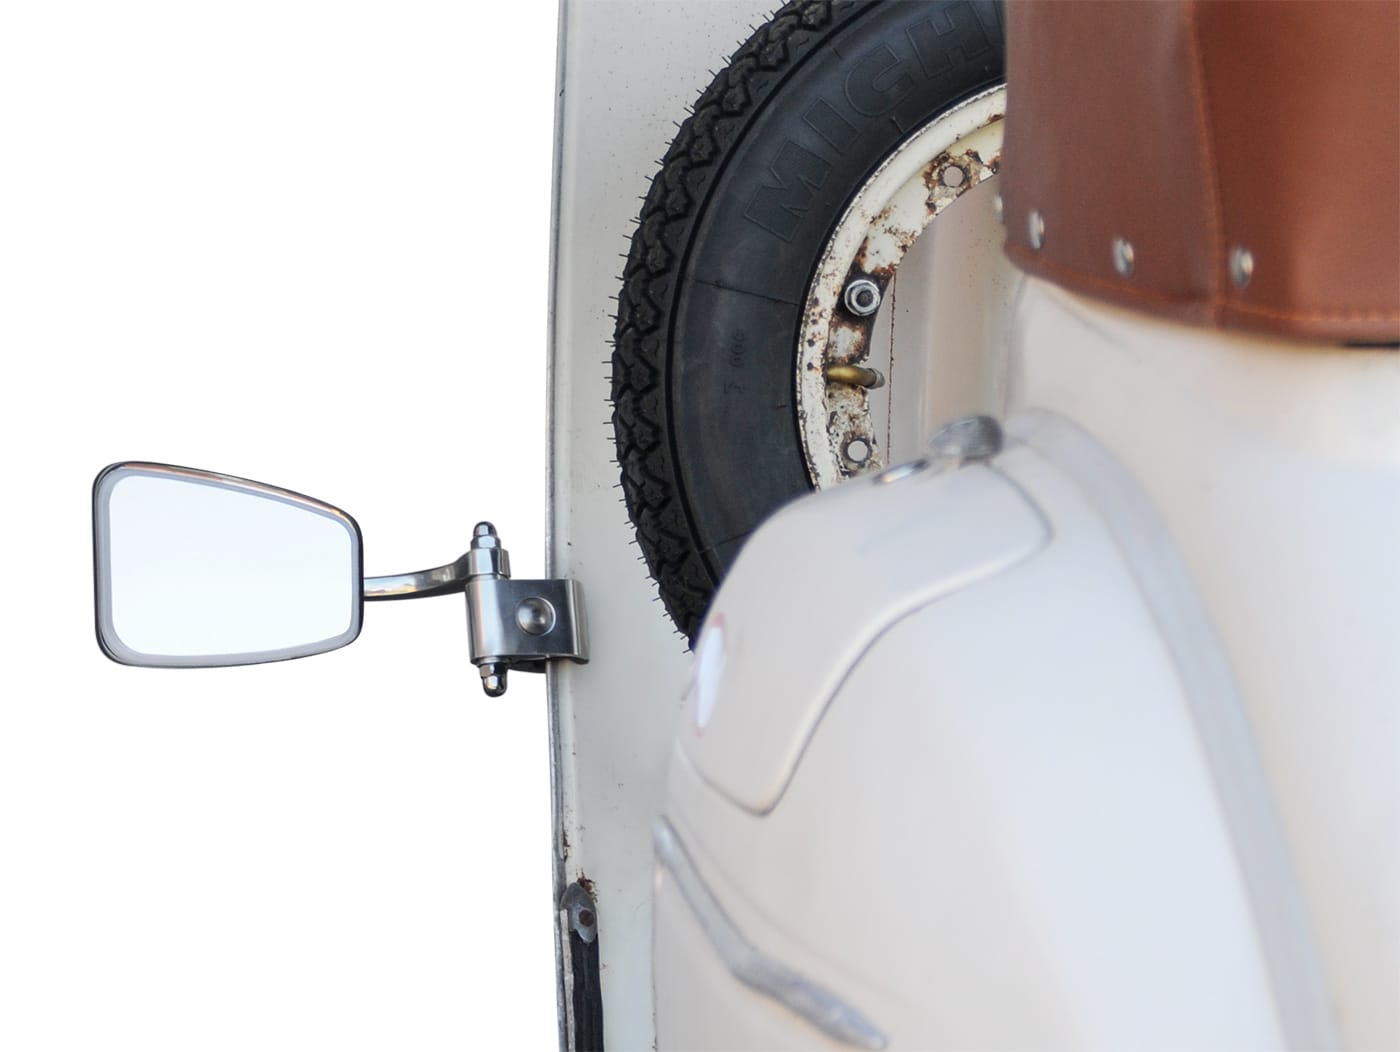
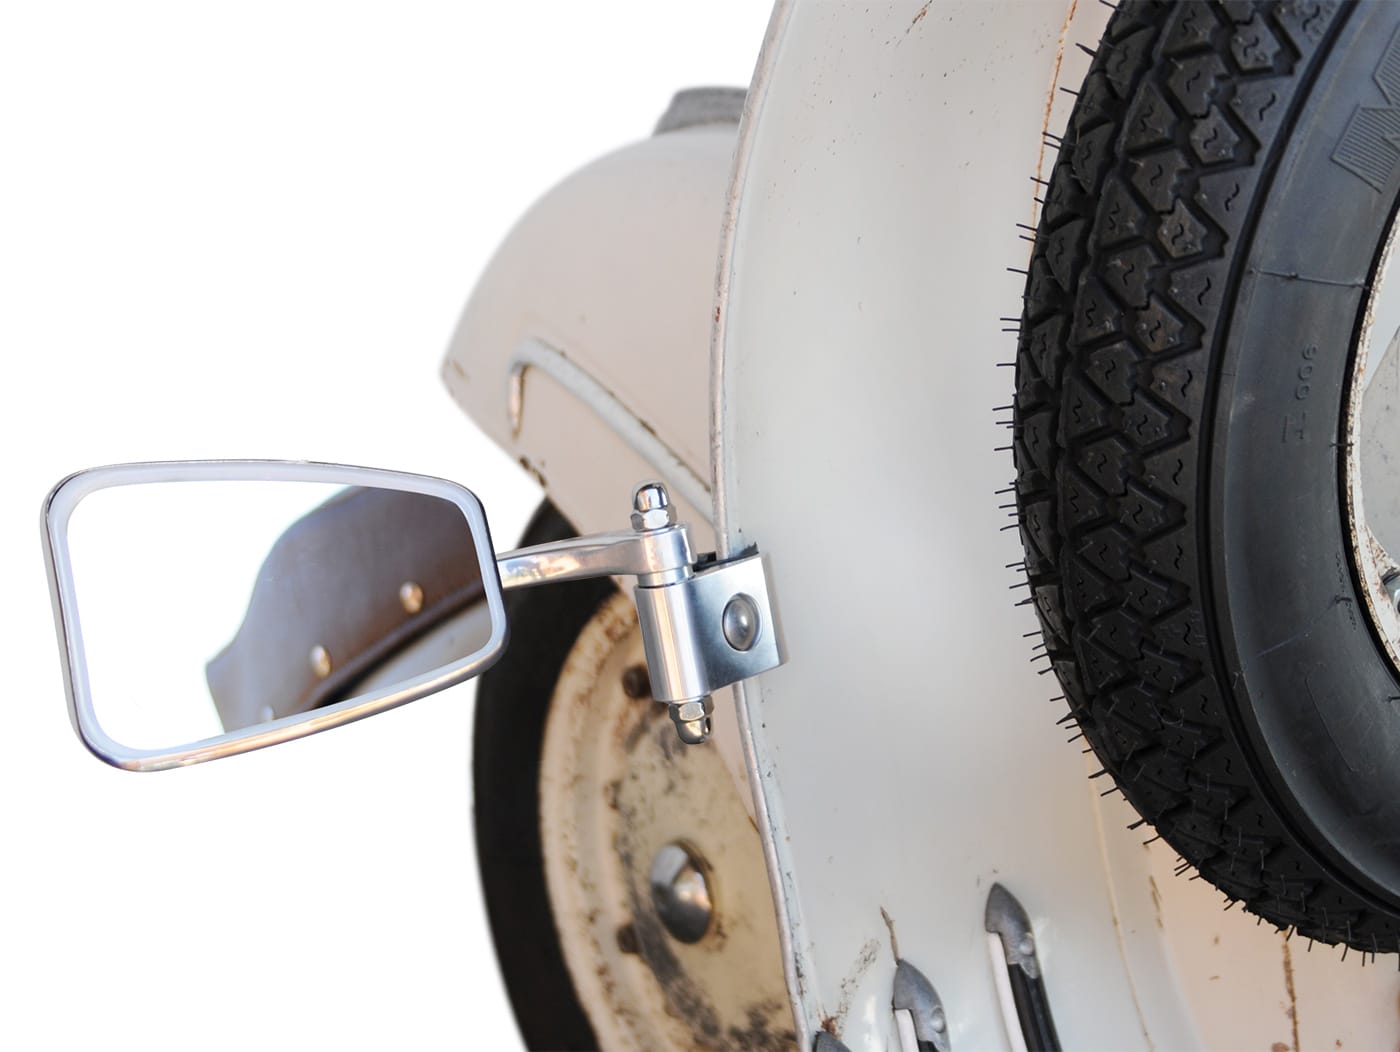
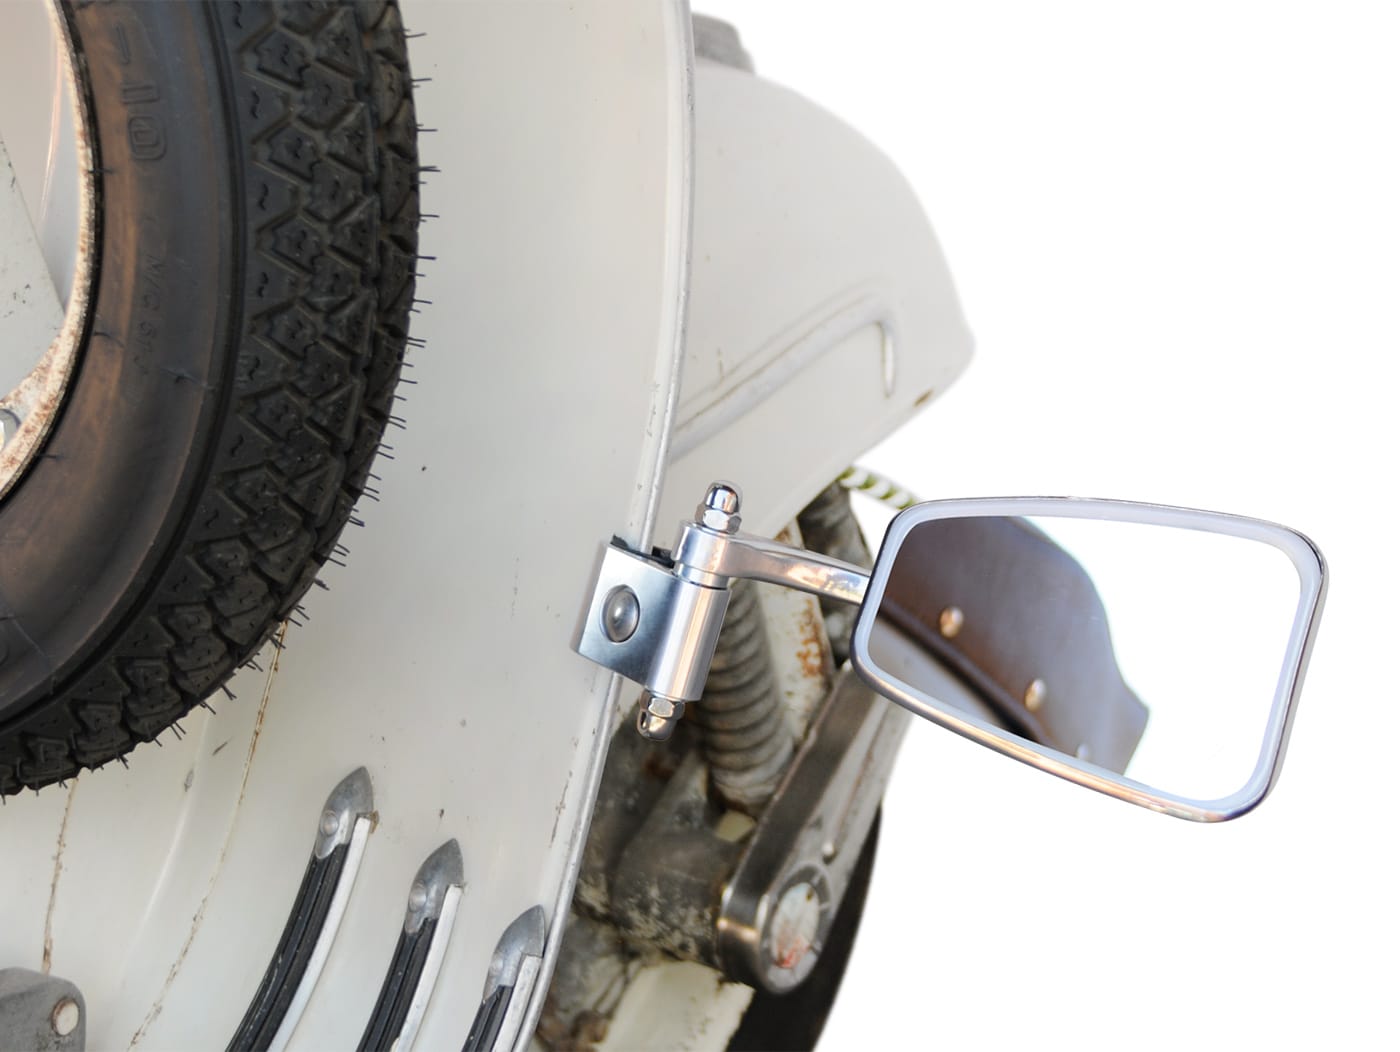
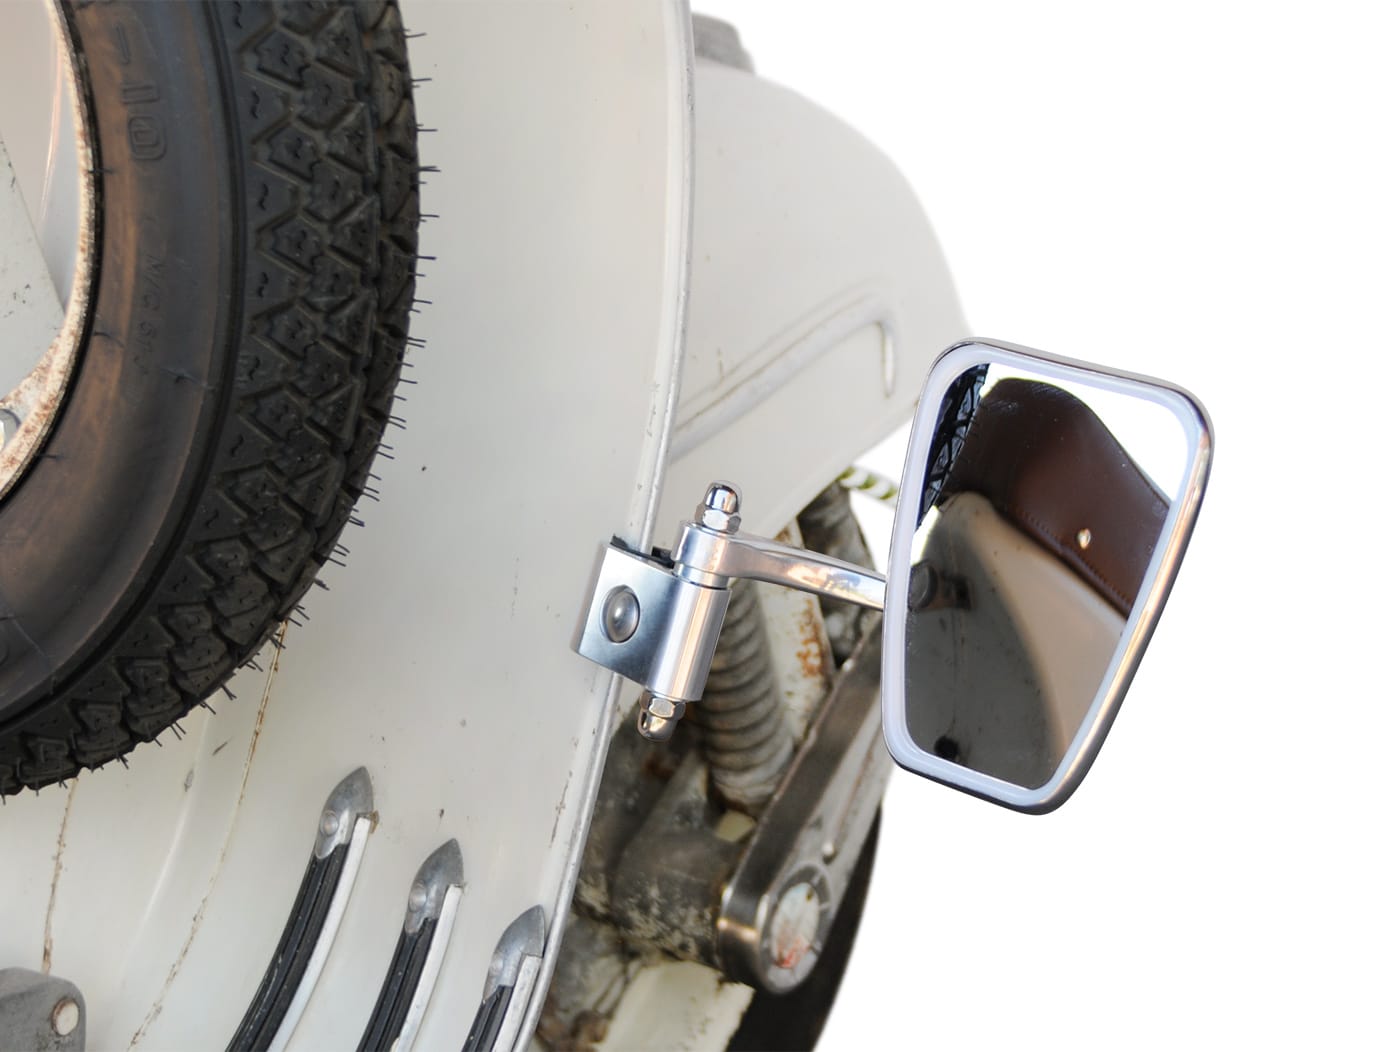
Mirror BUMM chrome, stainless steel, leg shield clamp mirror small

The classic clip-on mirror in kidney shape from BUMM for Vespa and Lambretta with a small mirror glass.
Trapezoidal shape. Visually very discreet and easy to adjust thanks to the universal mounting option on the leg shield.

This classic is available for:

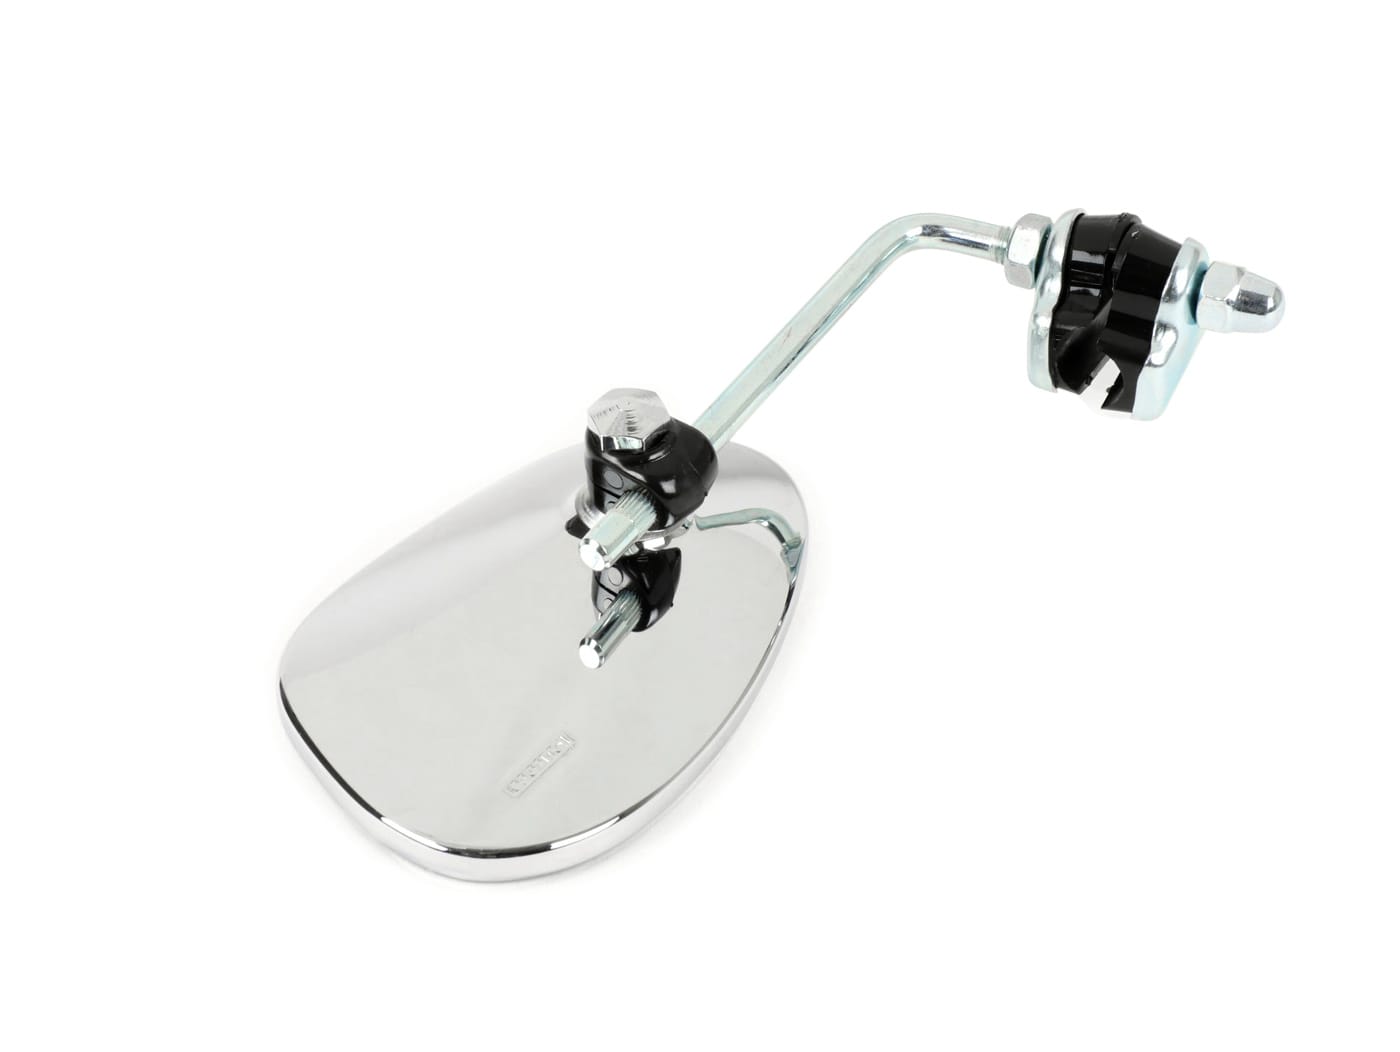
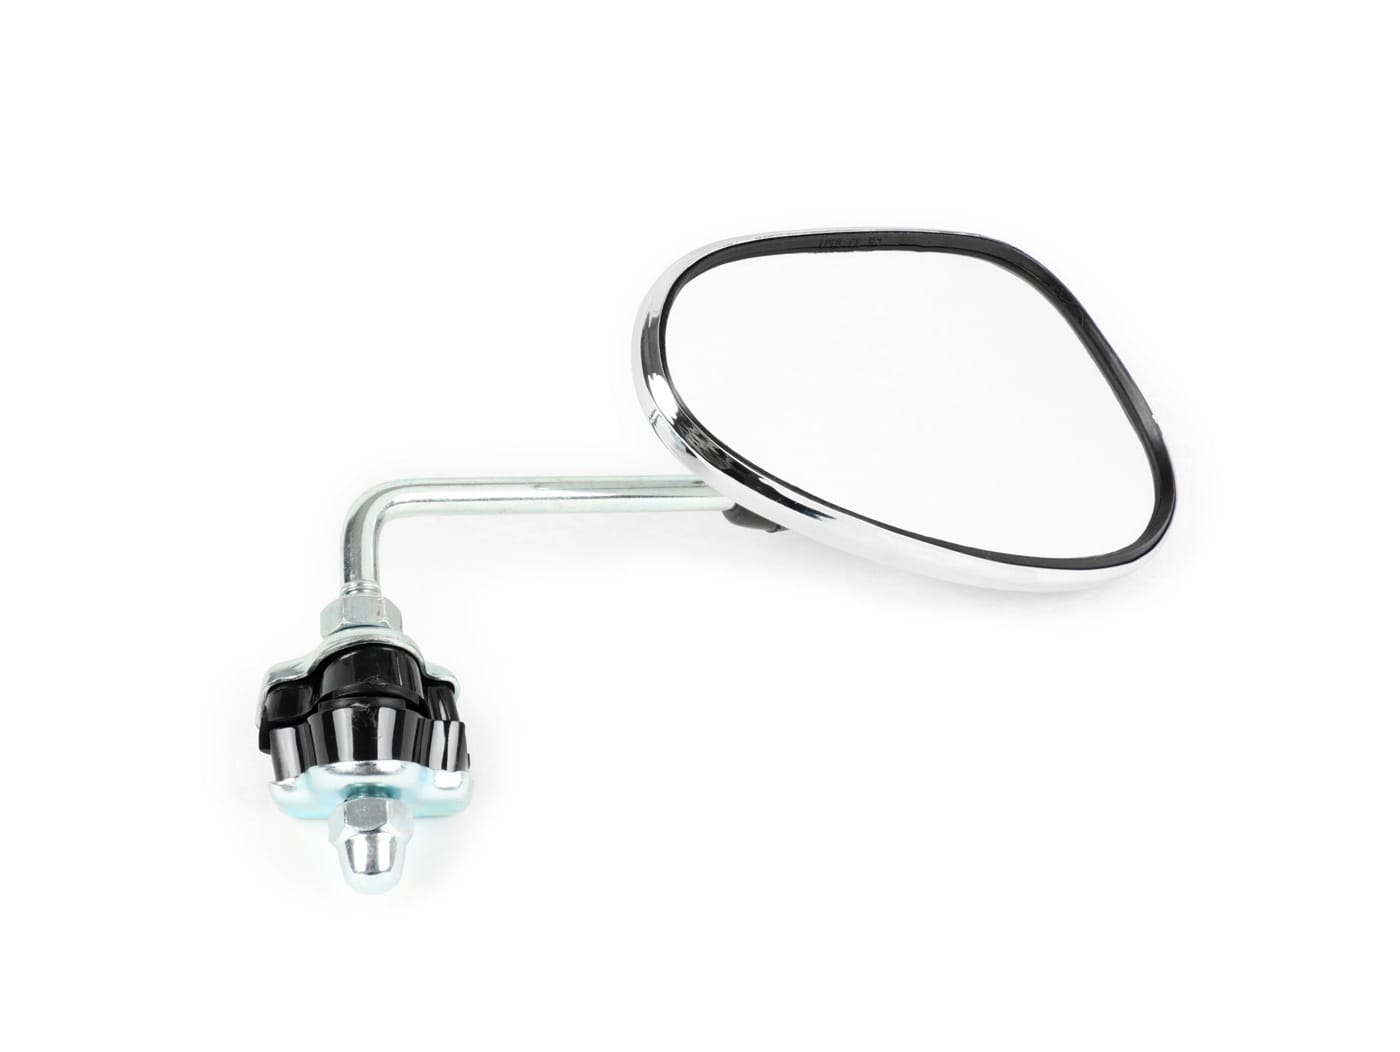
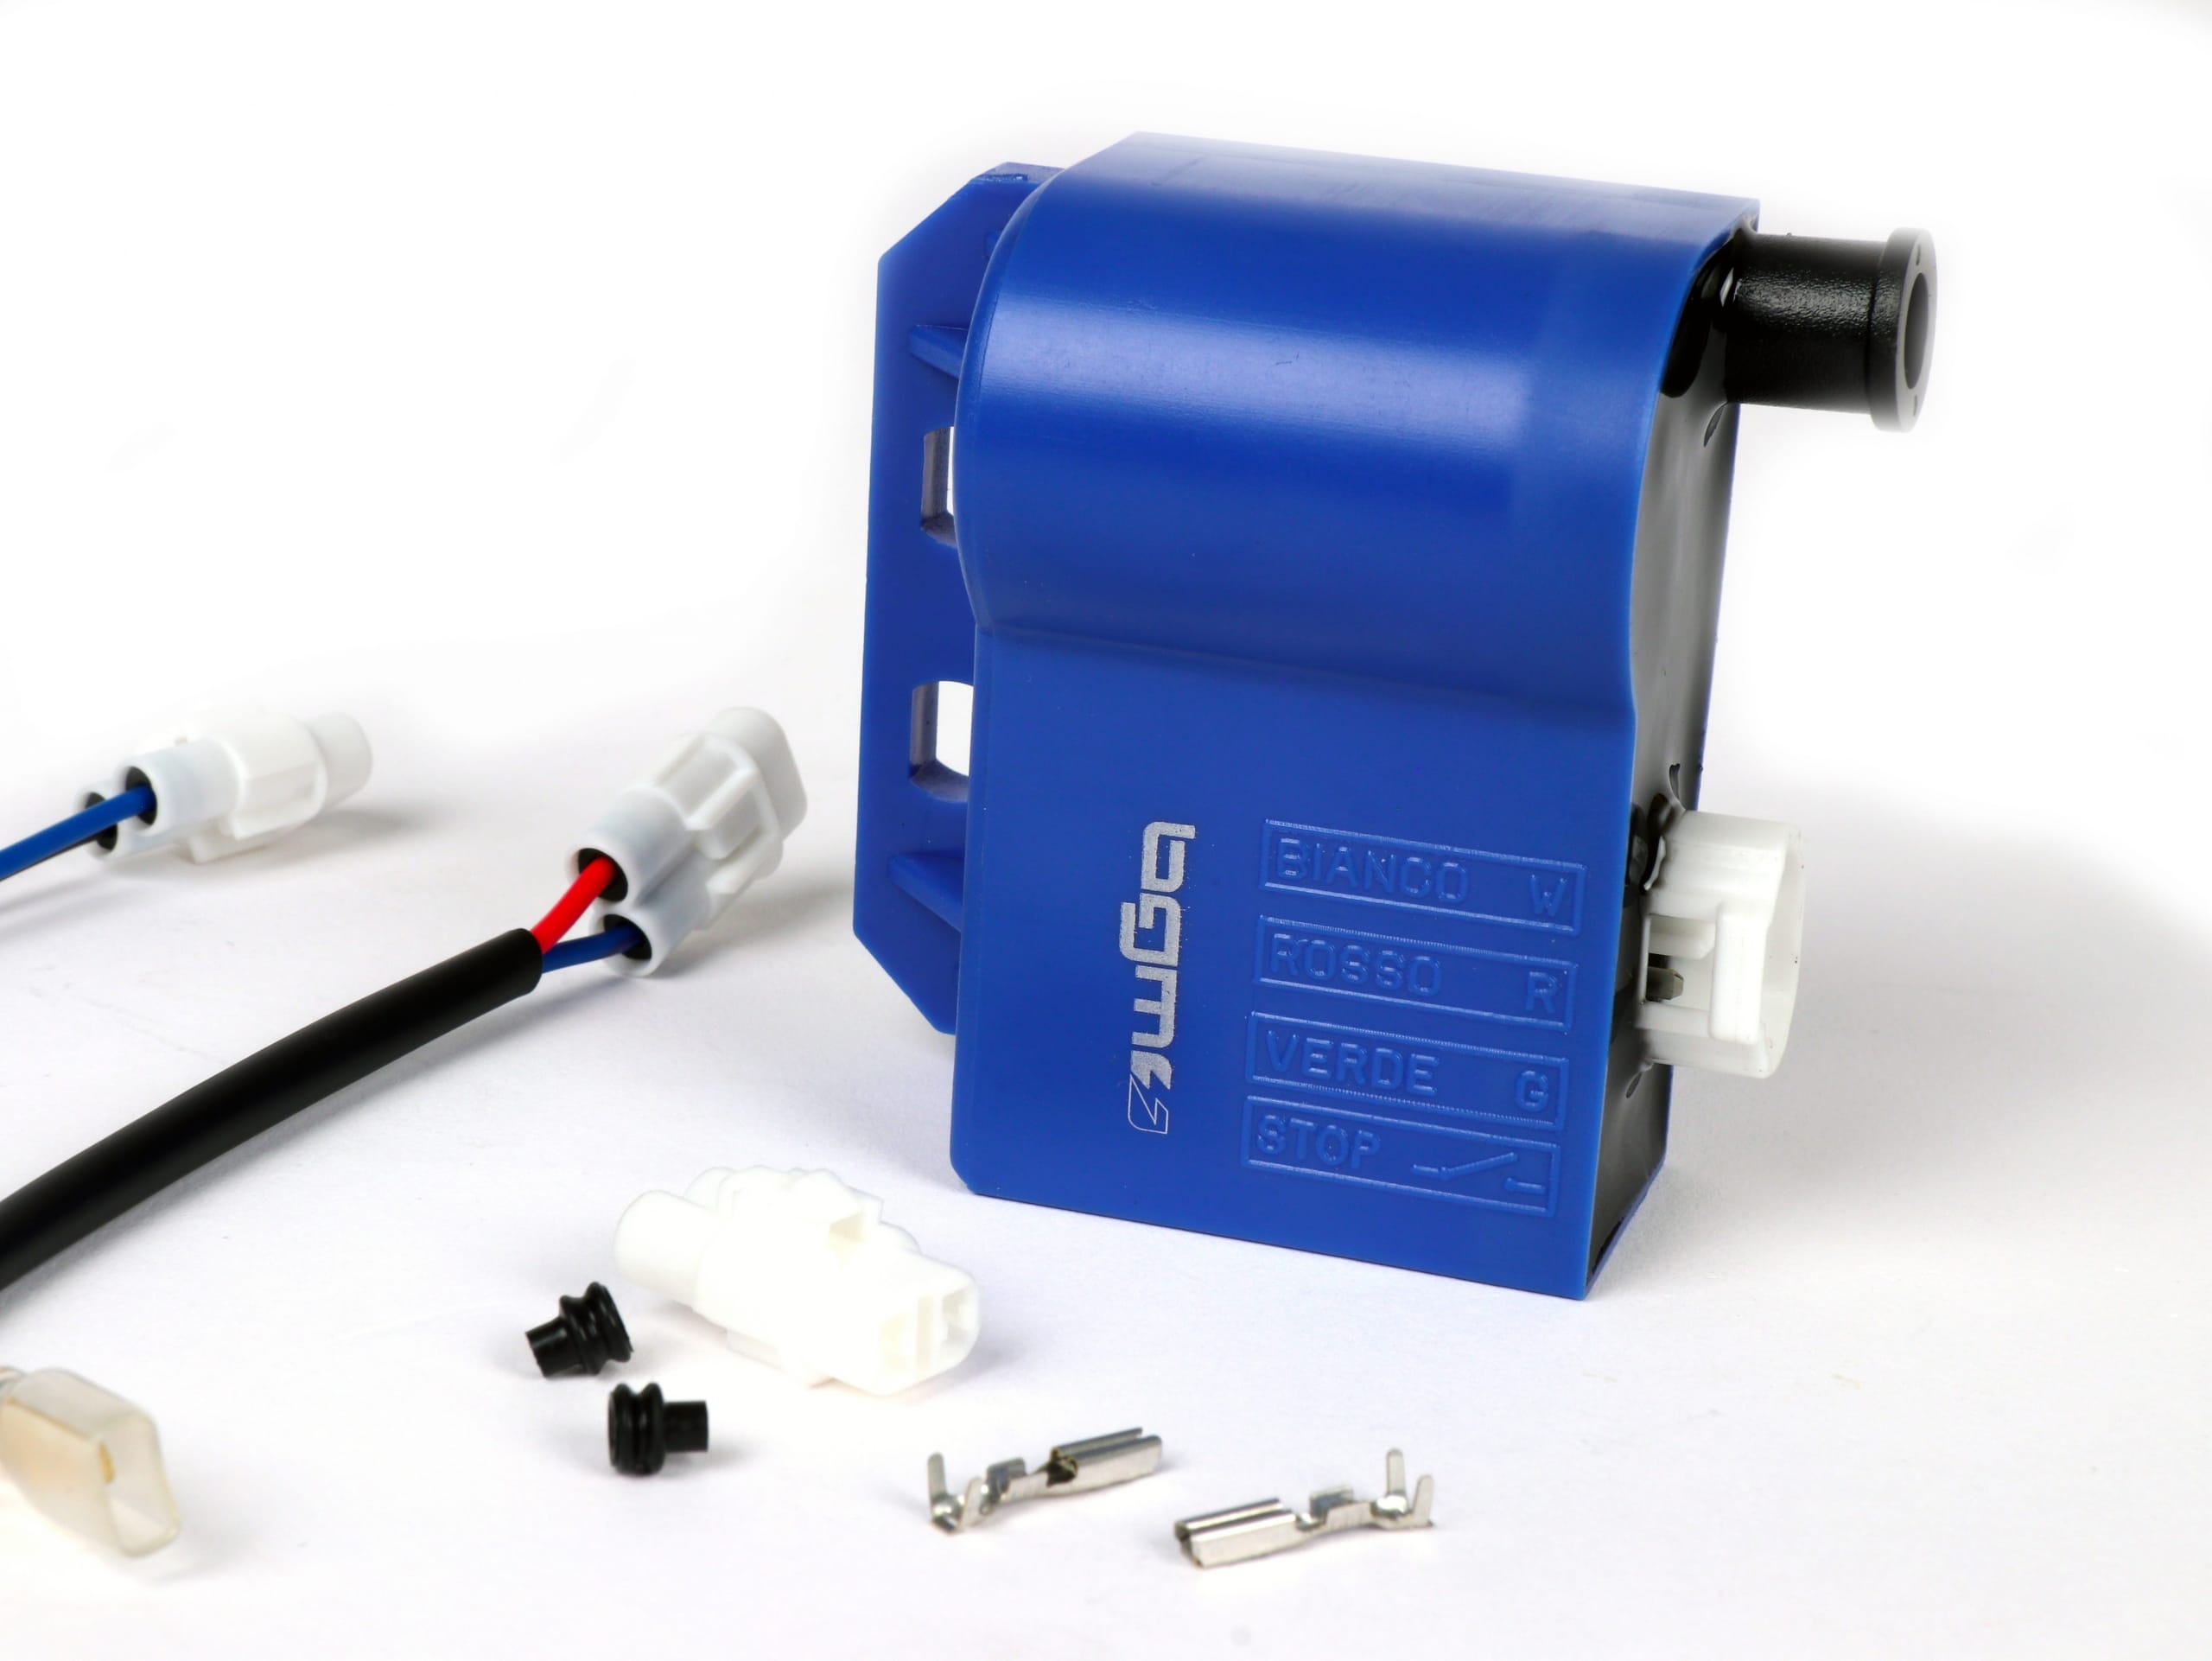
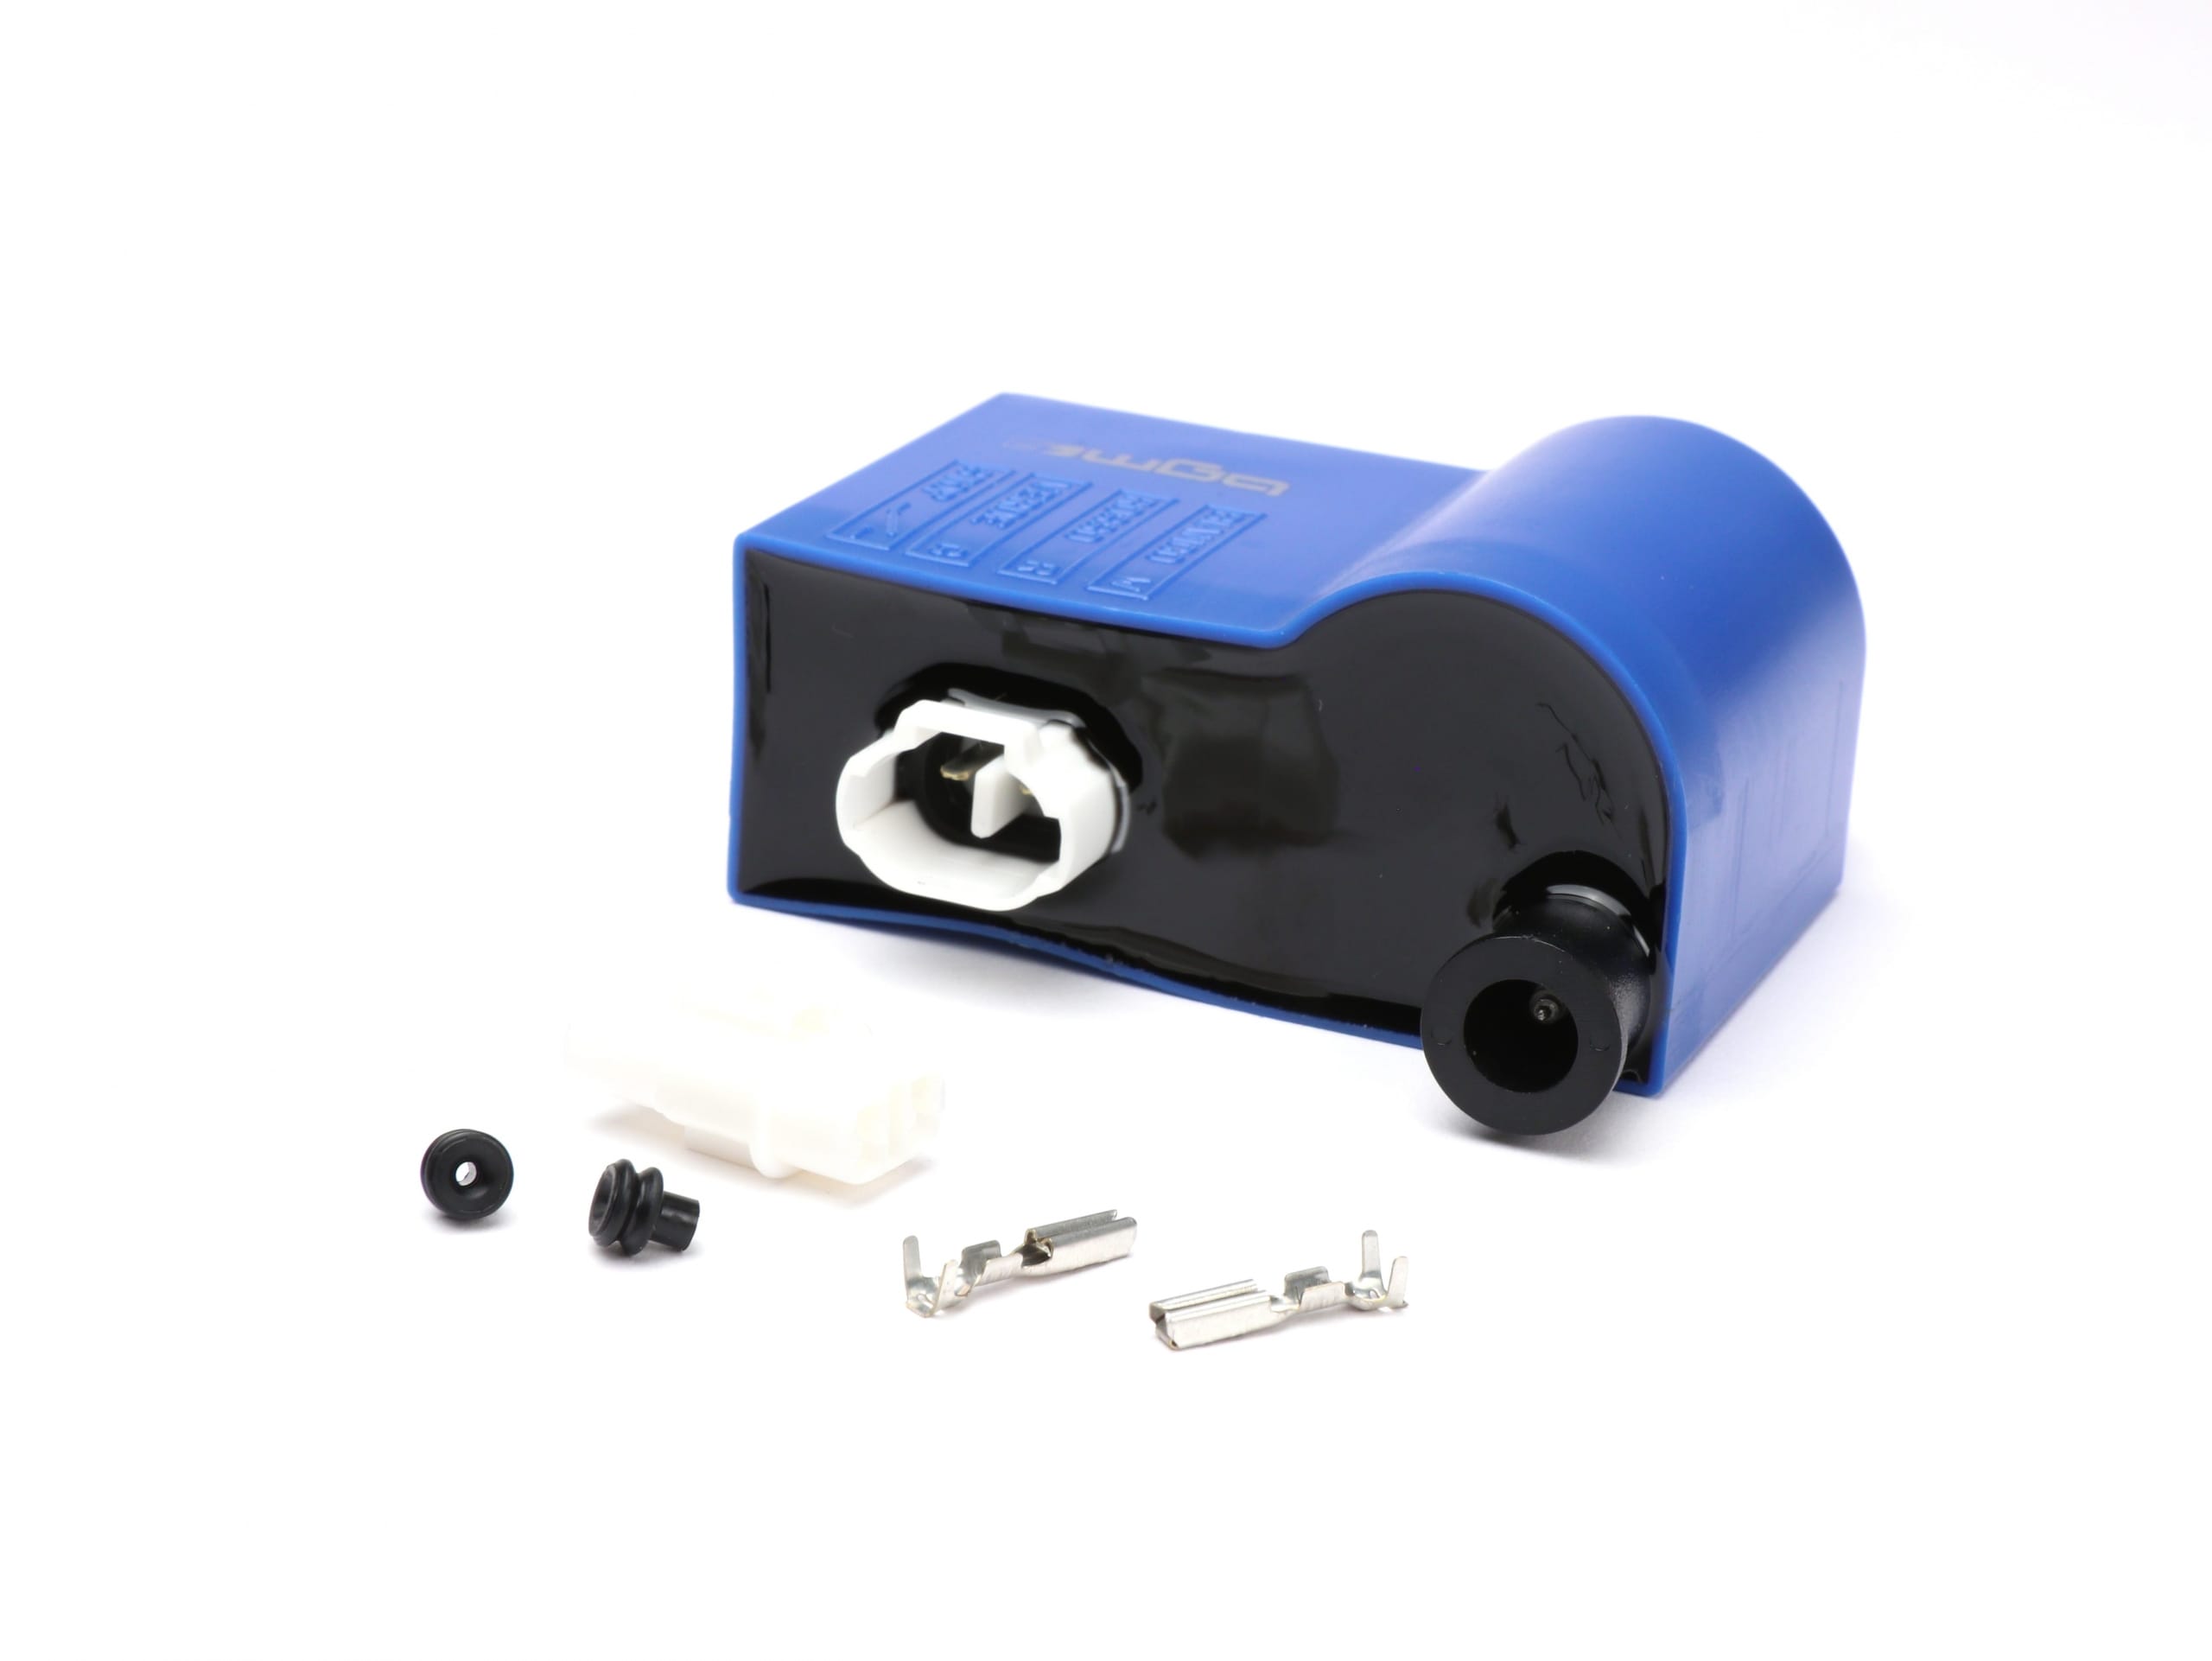
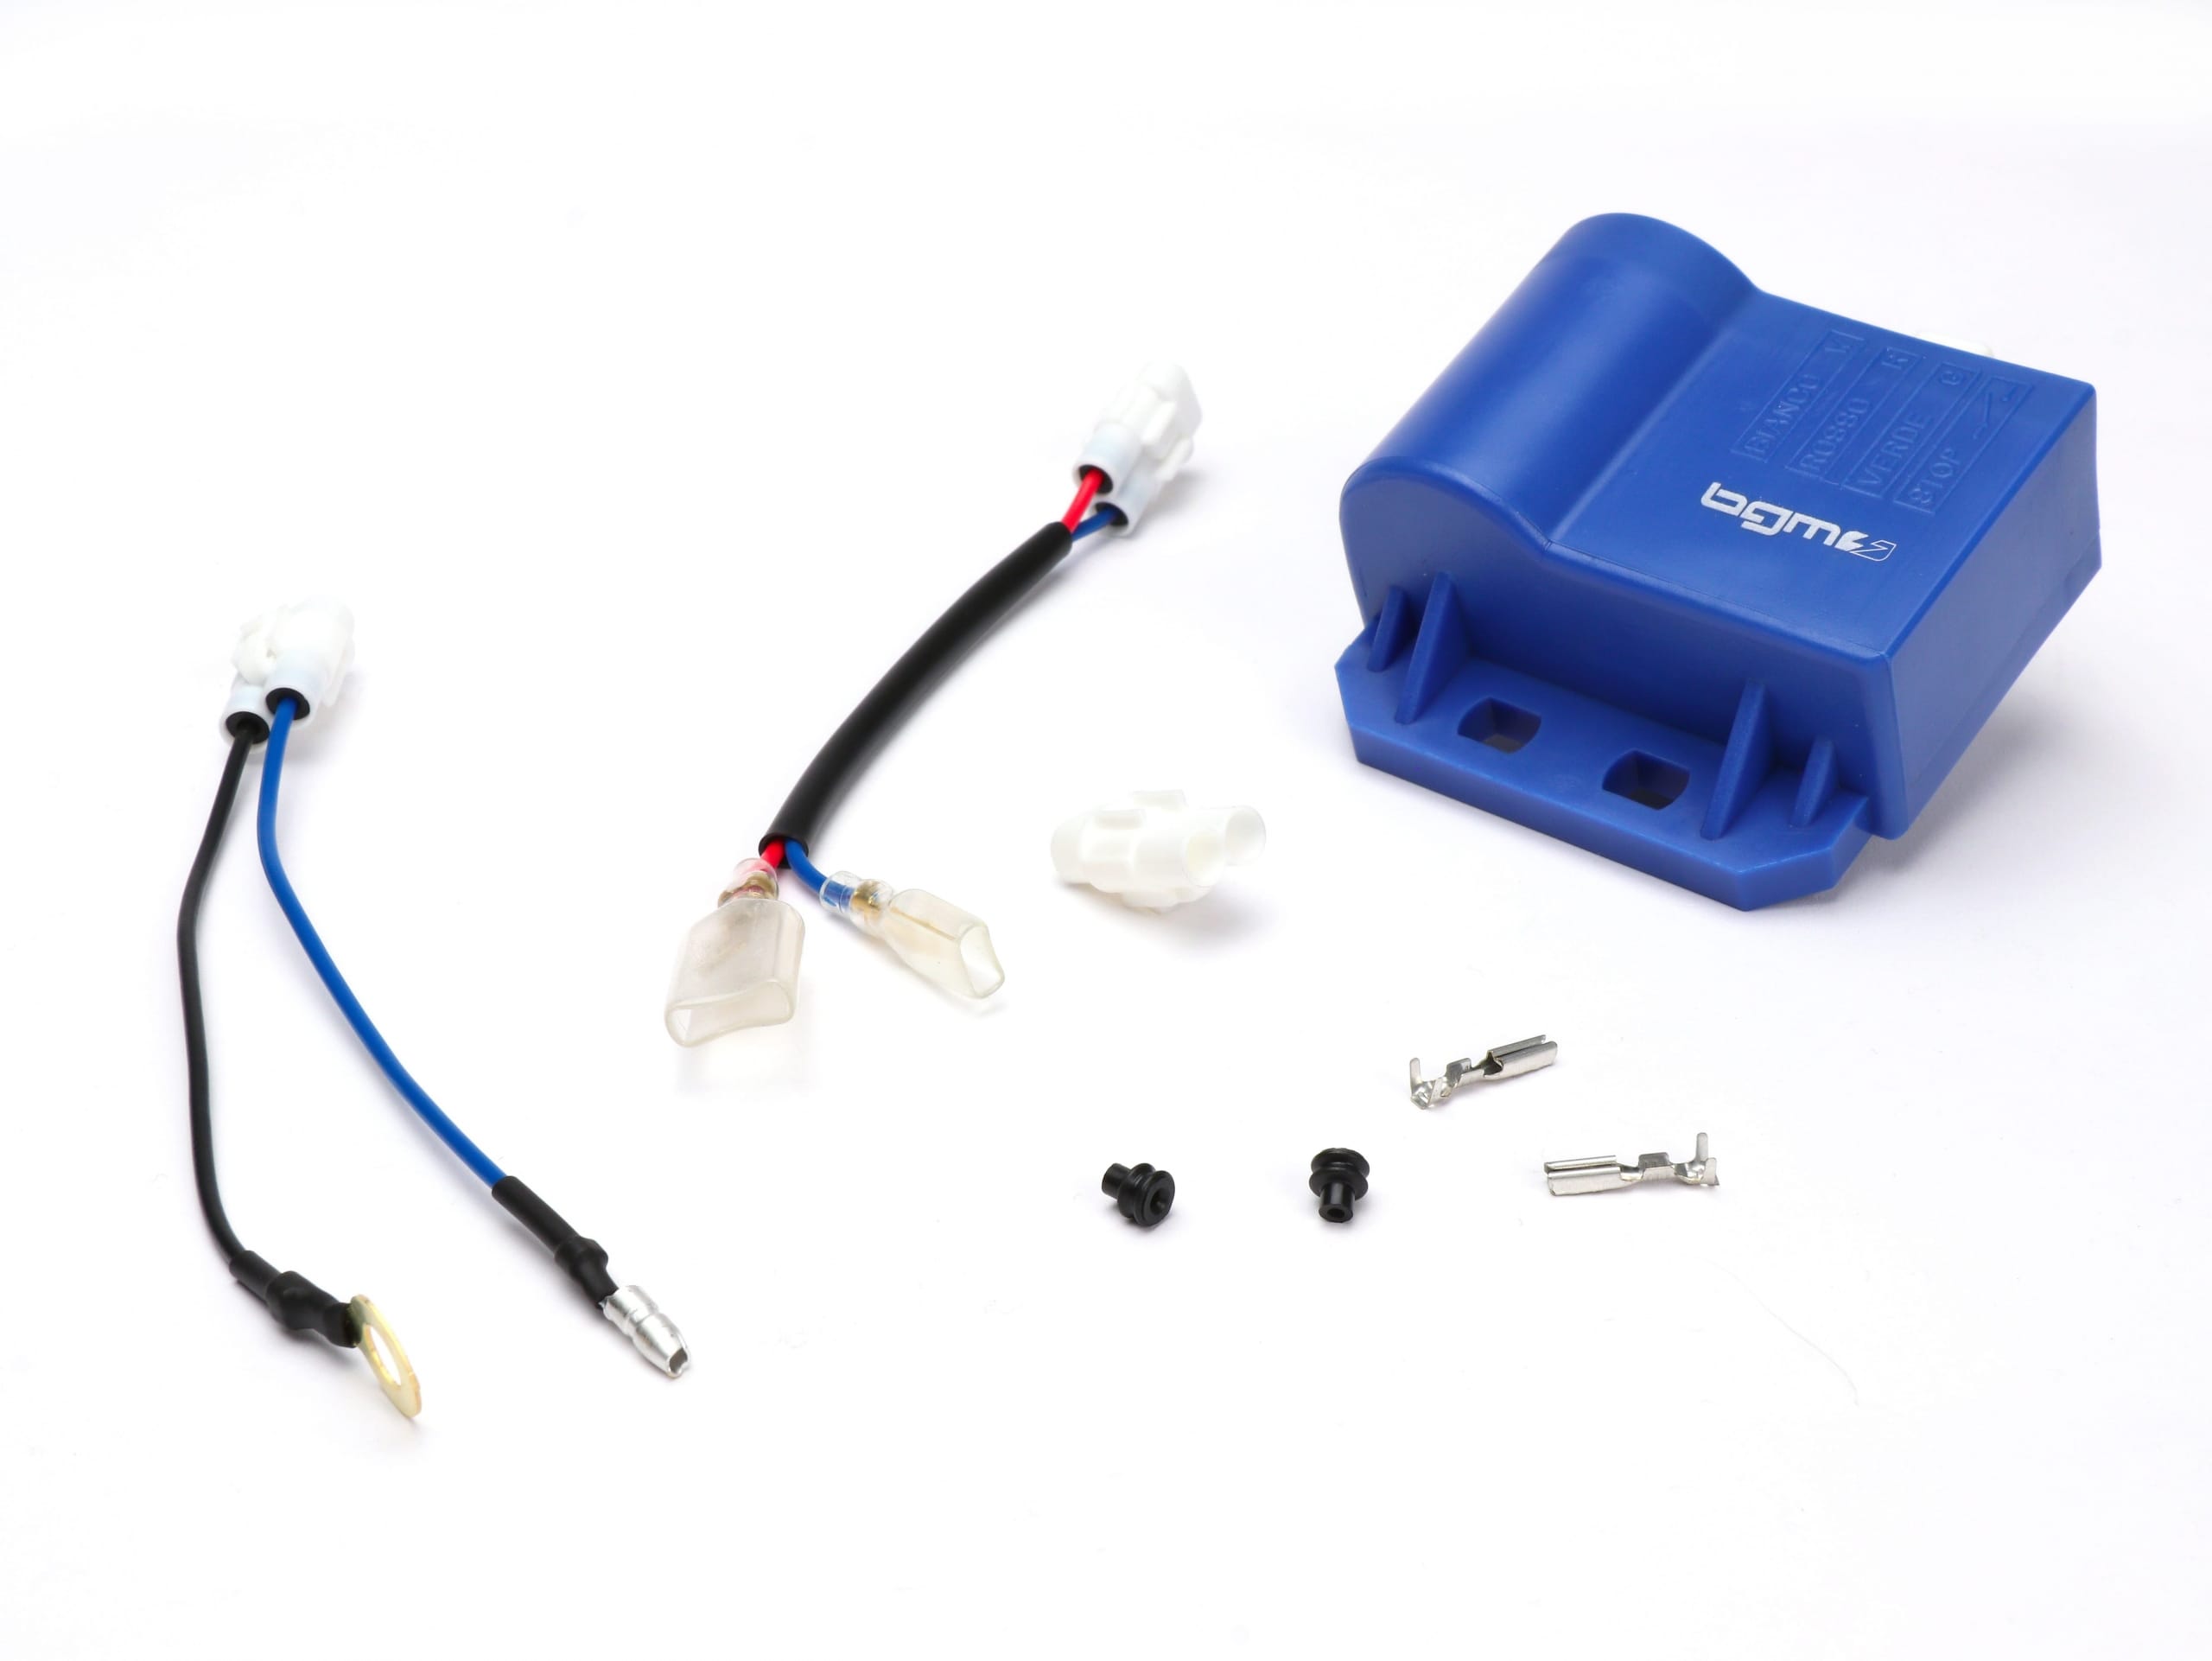
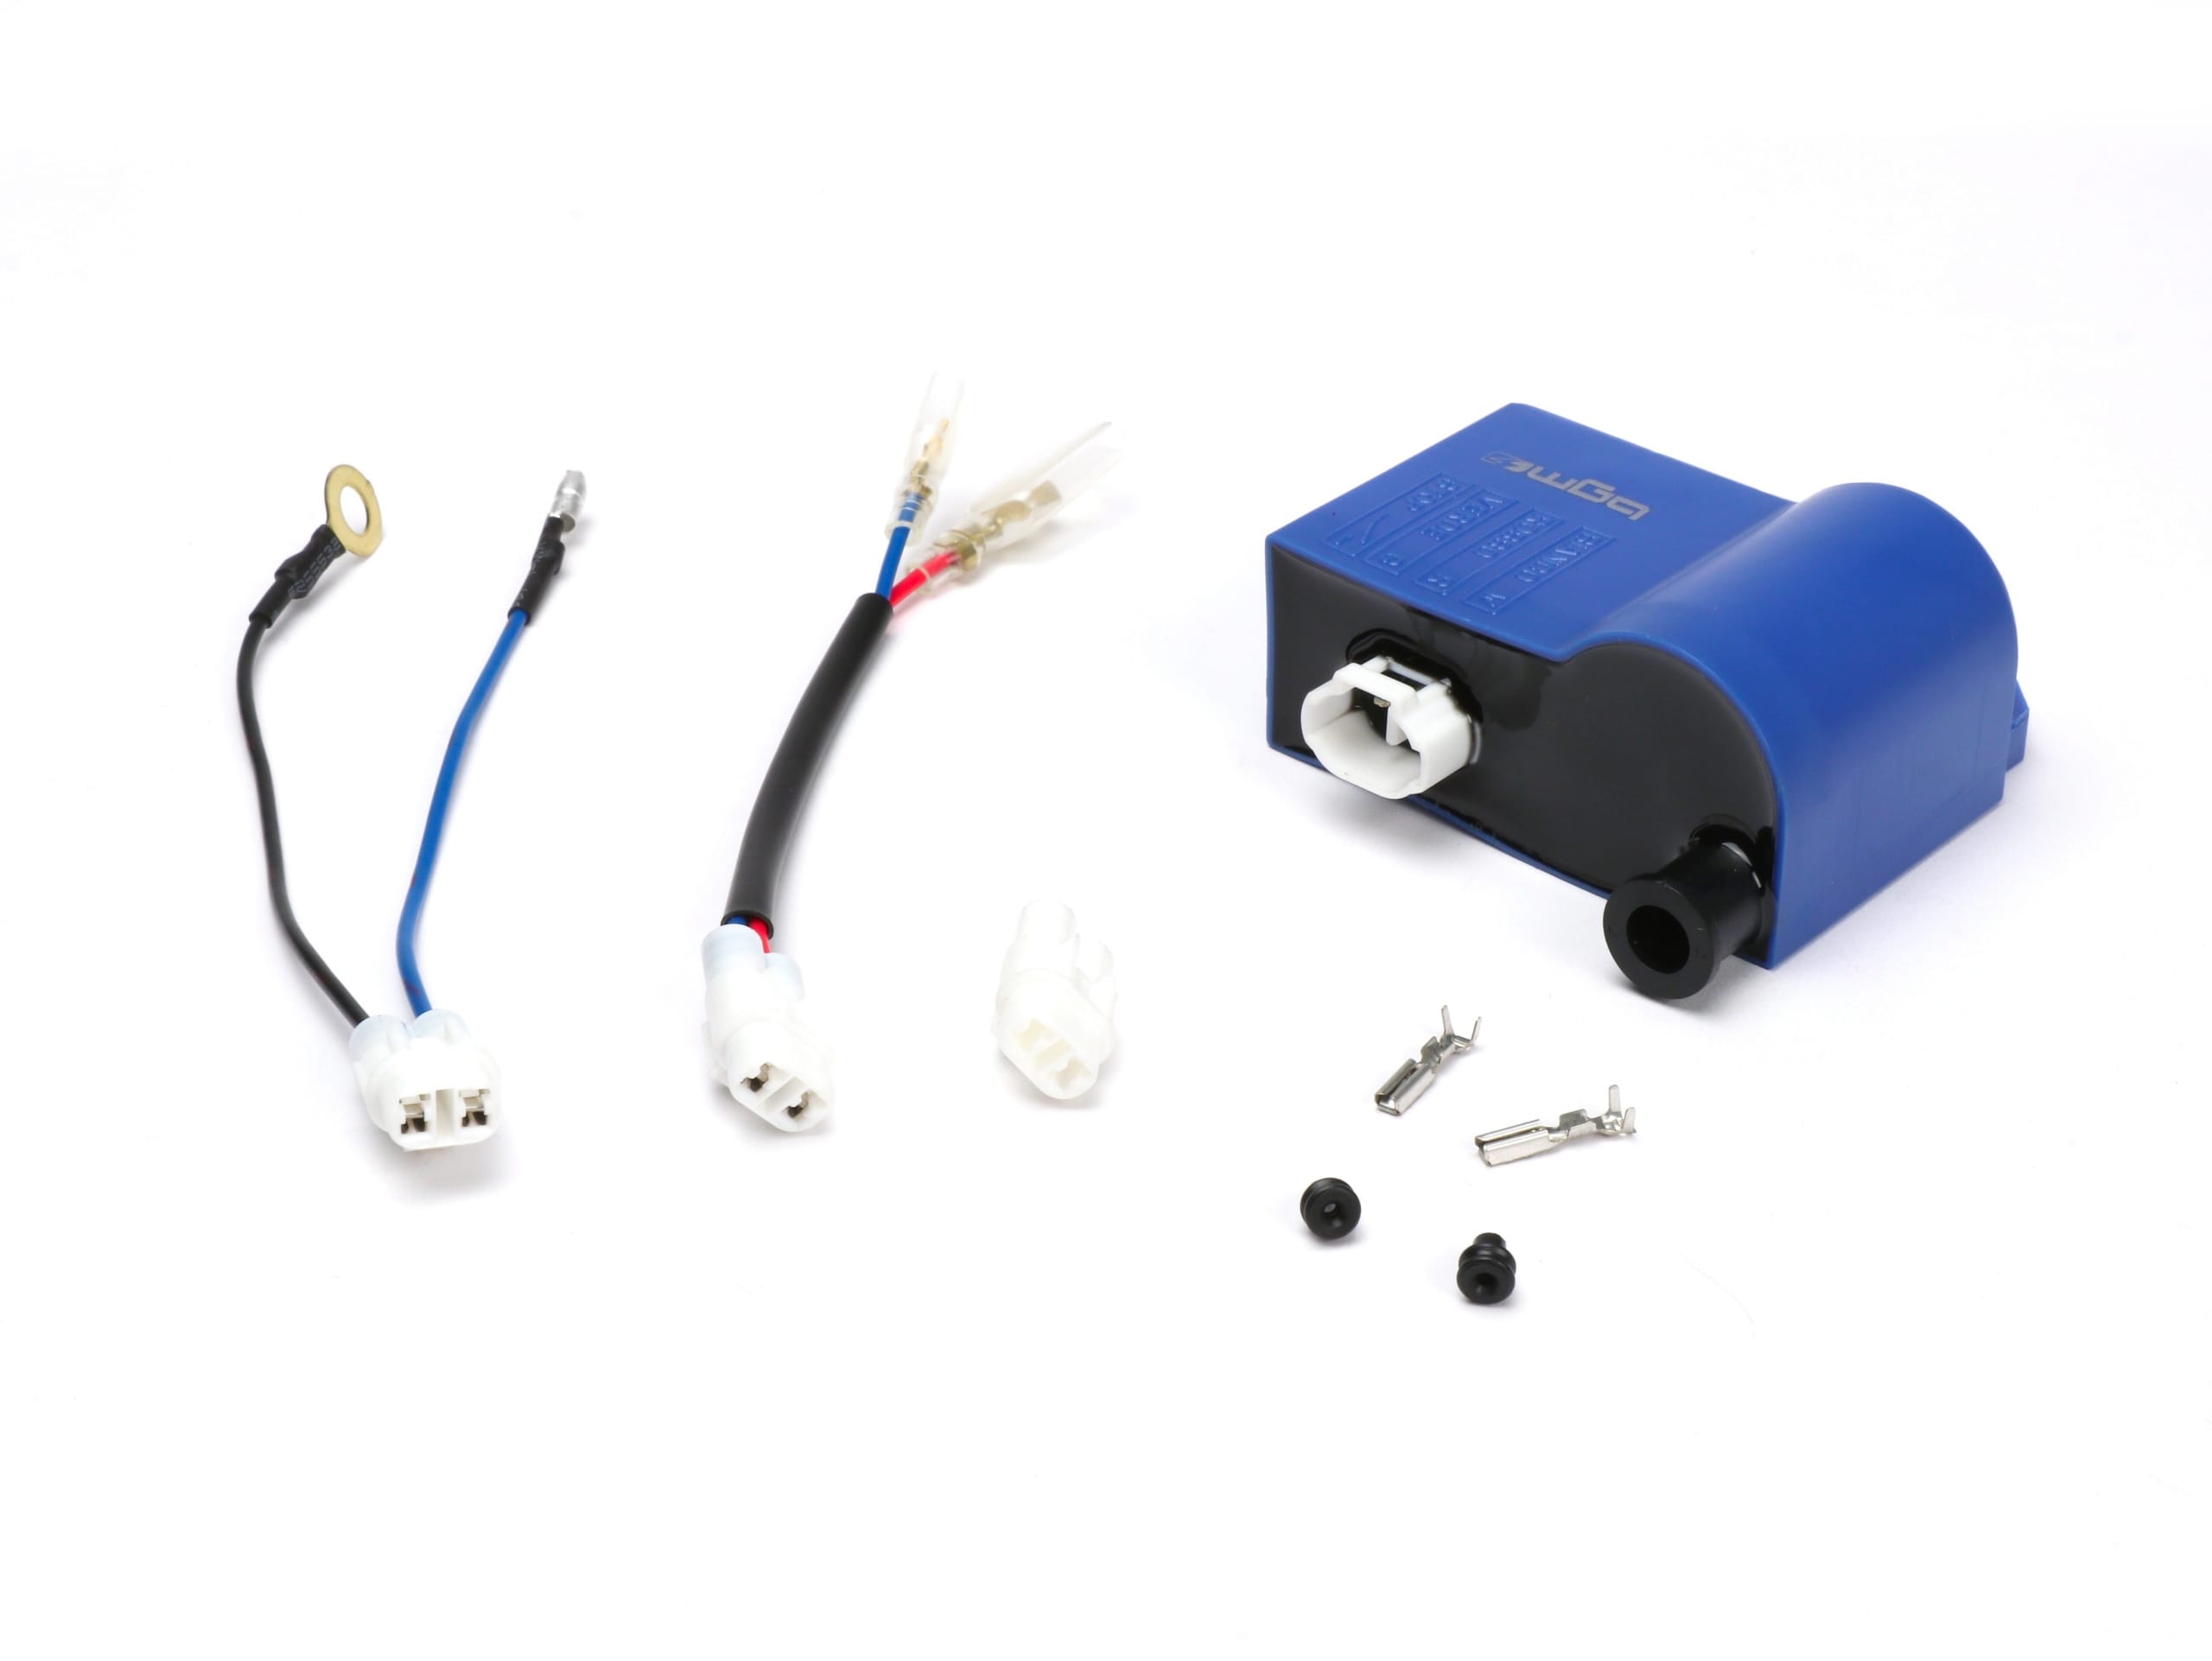
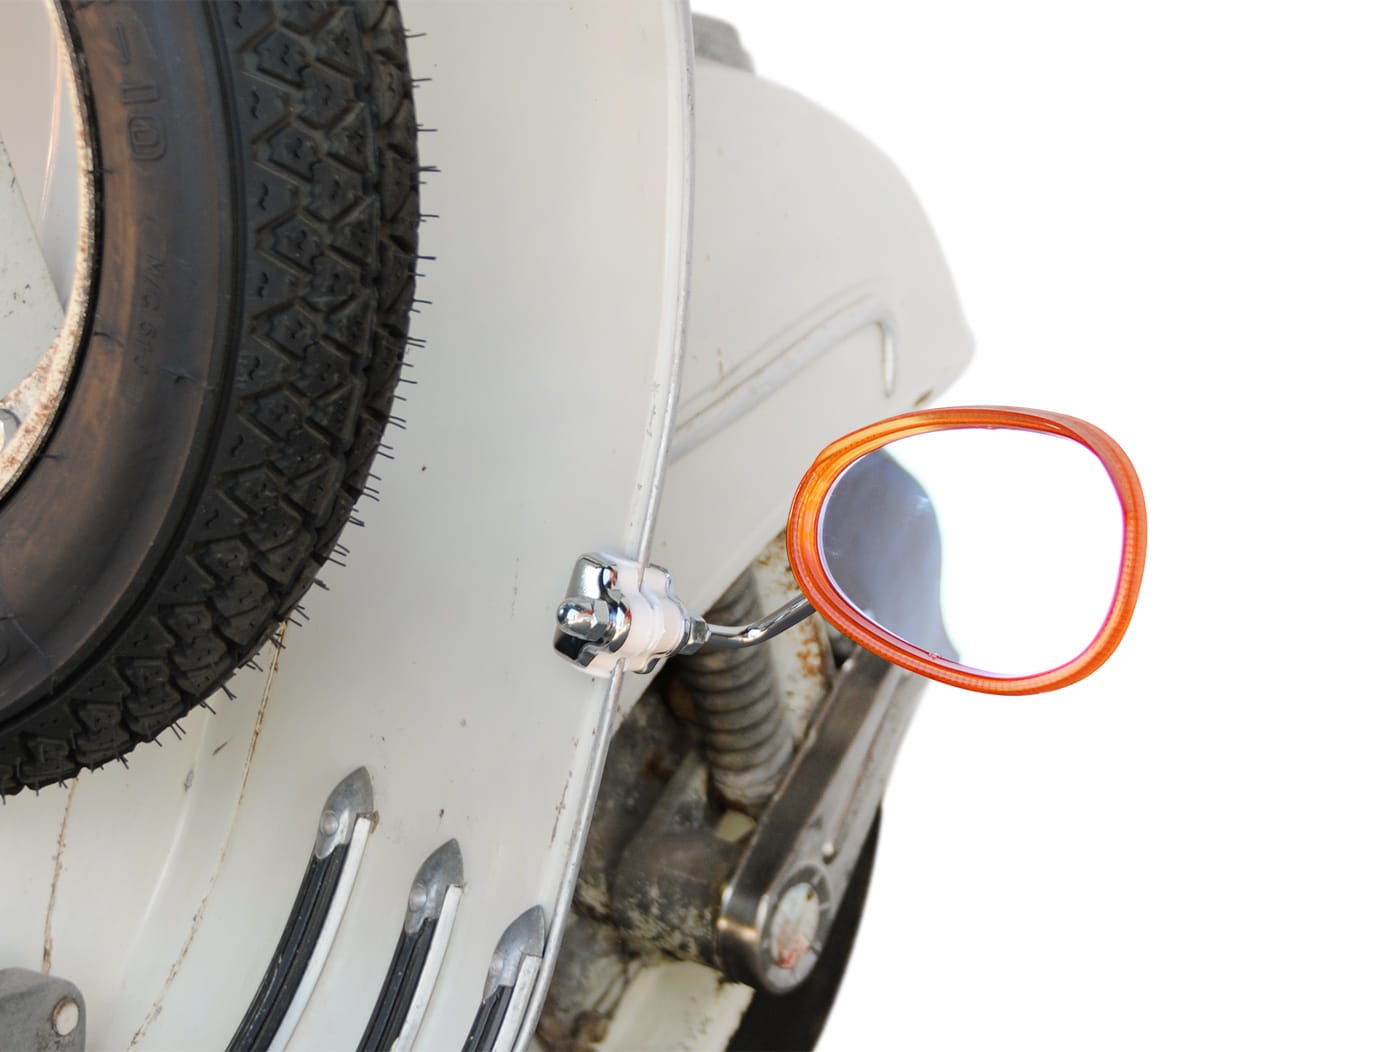
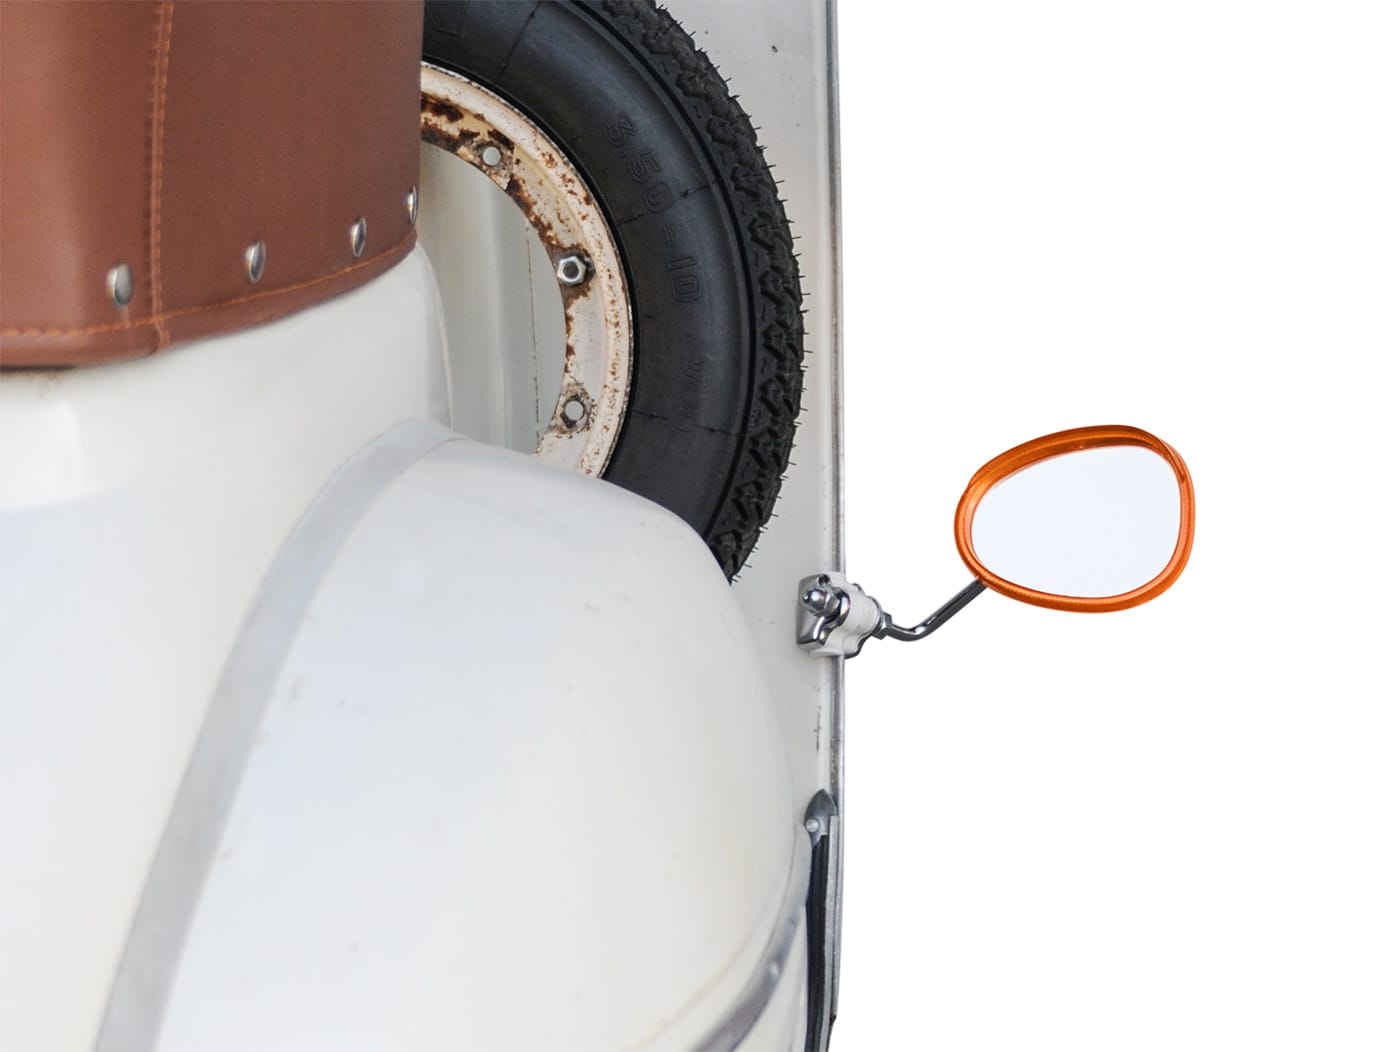
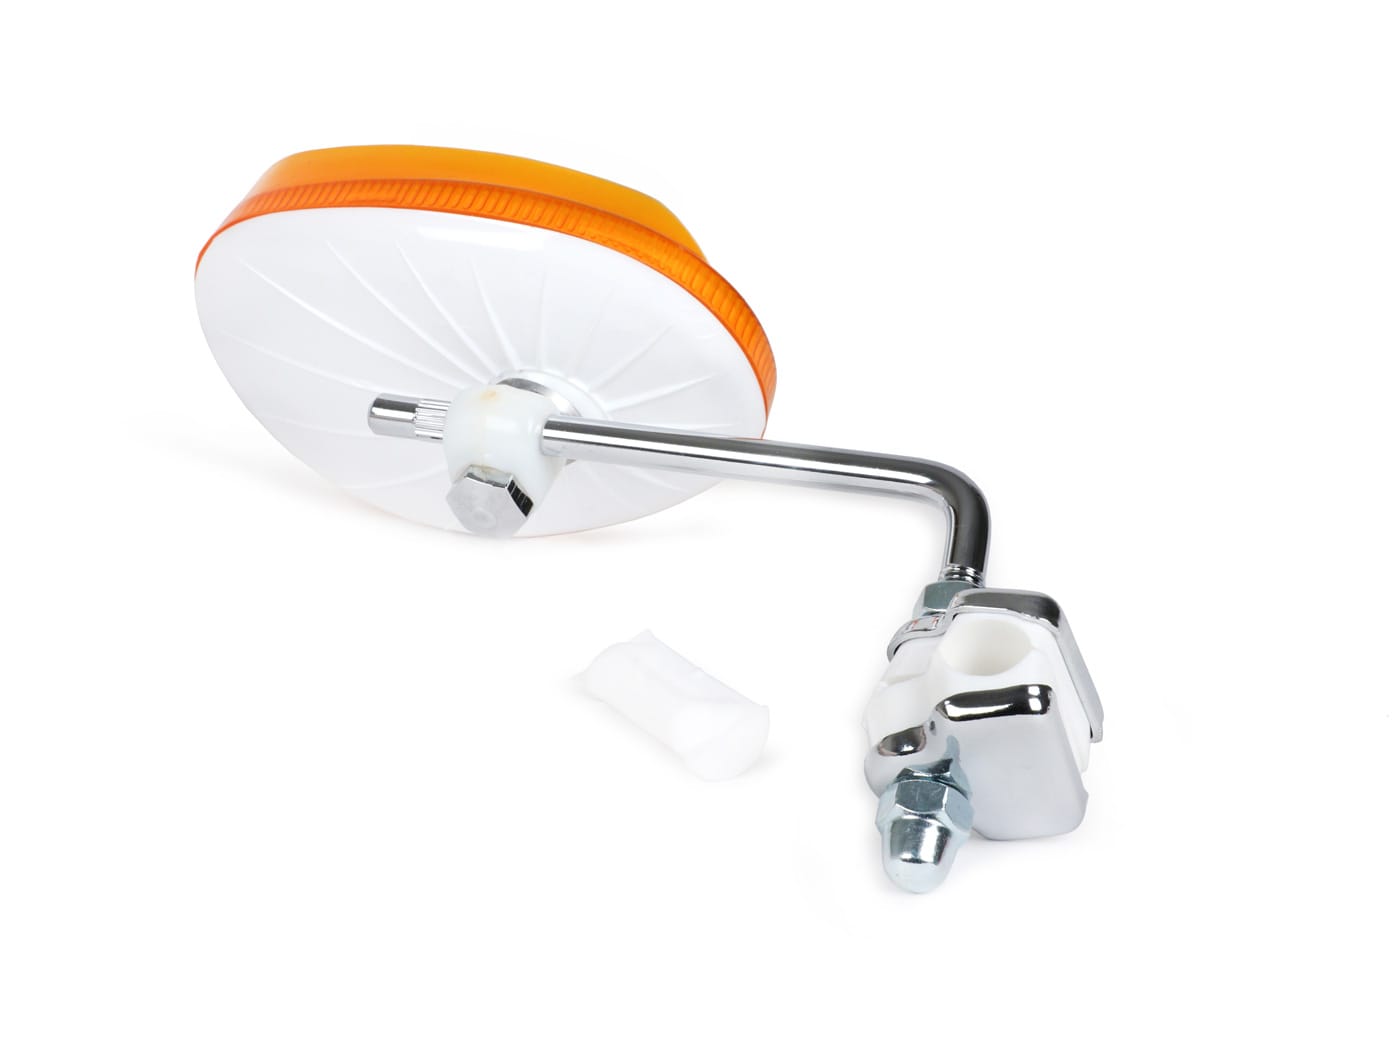
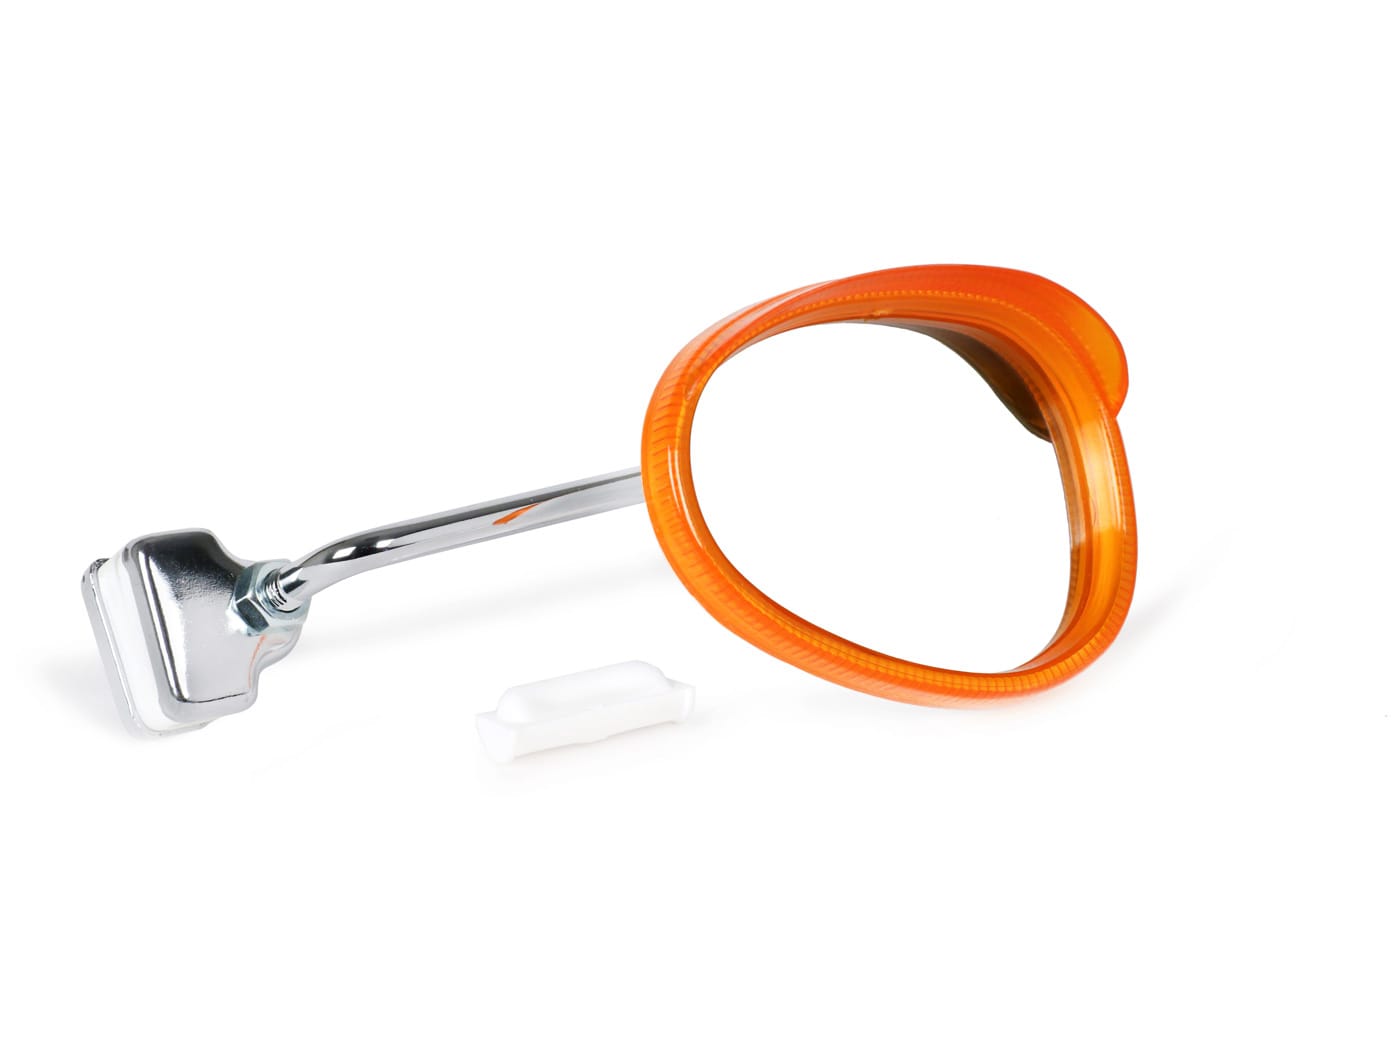
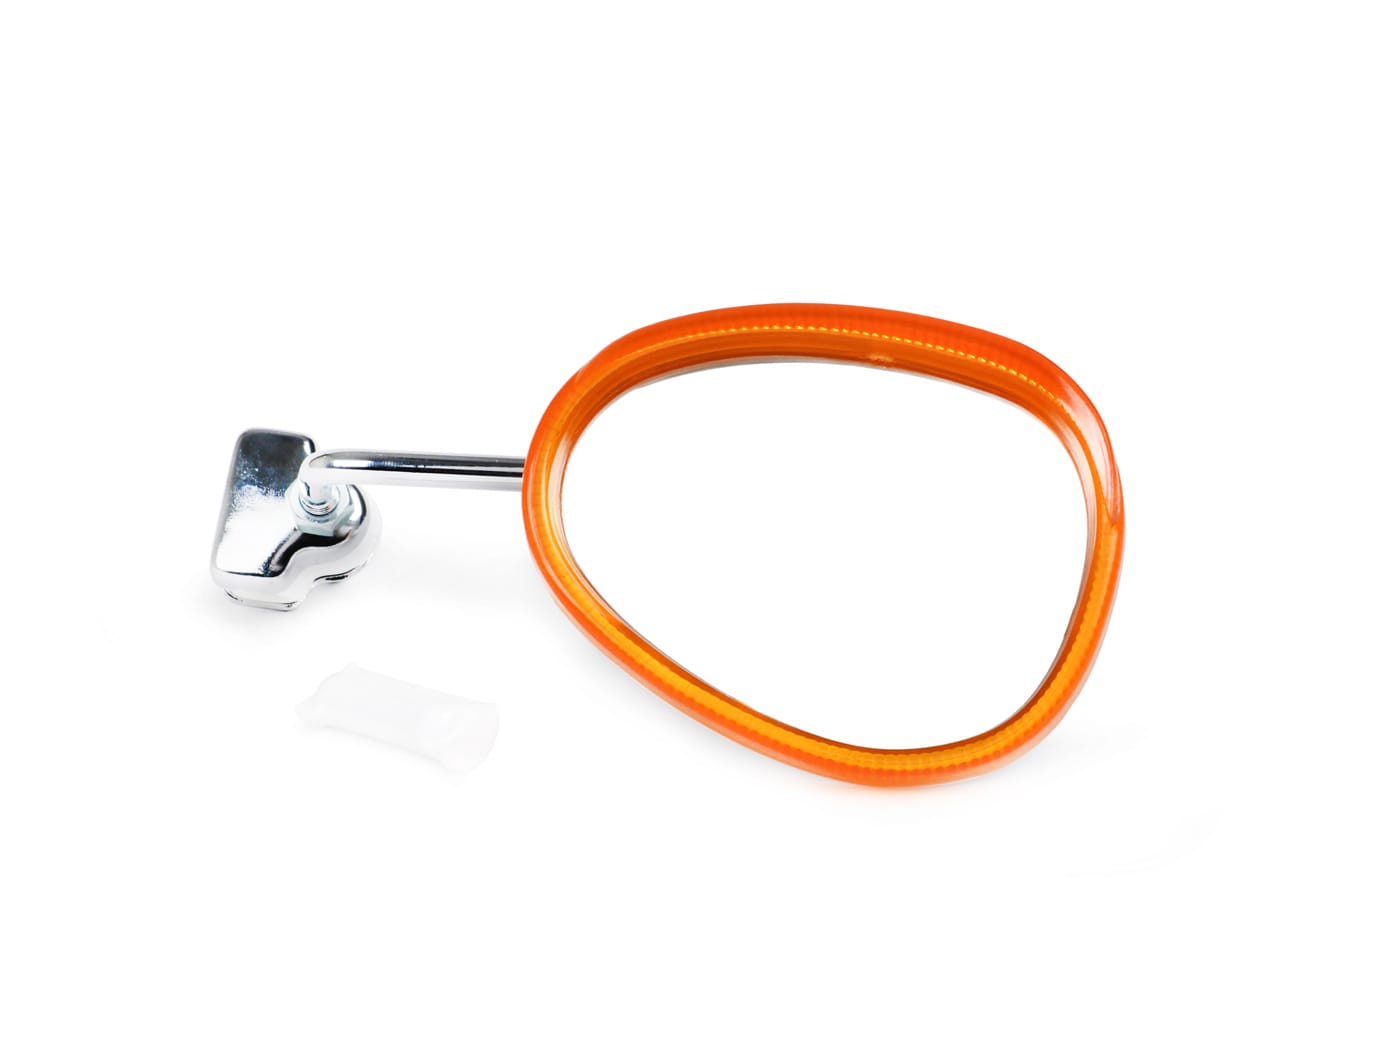
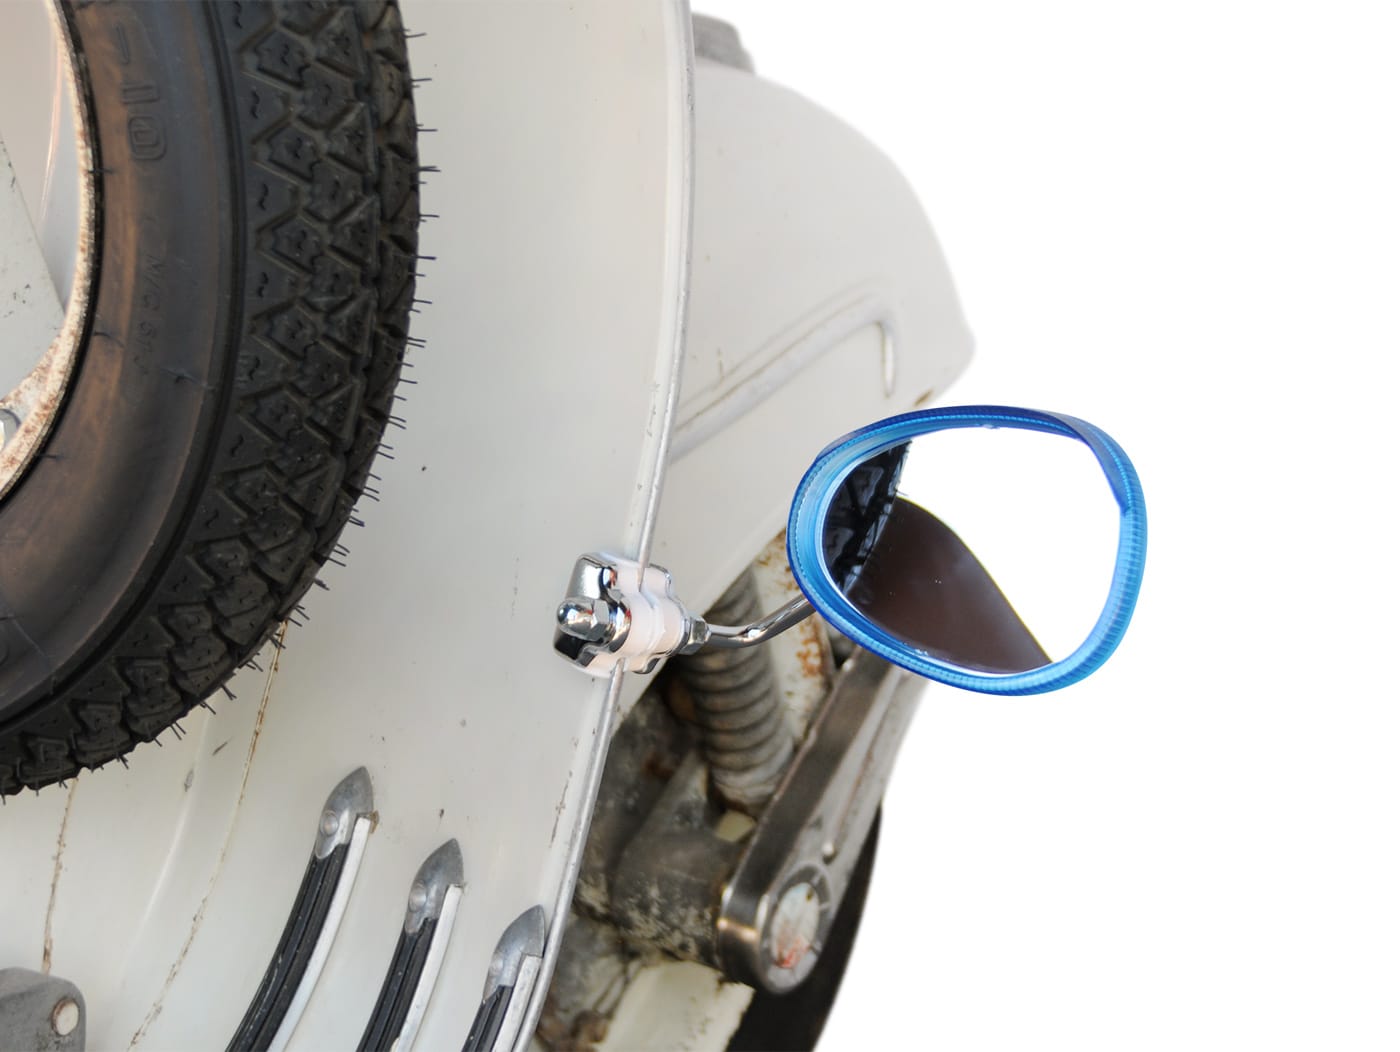
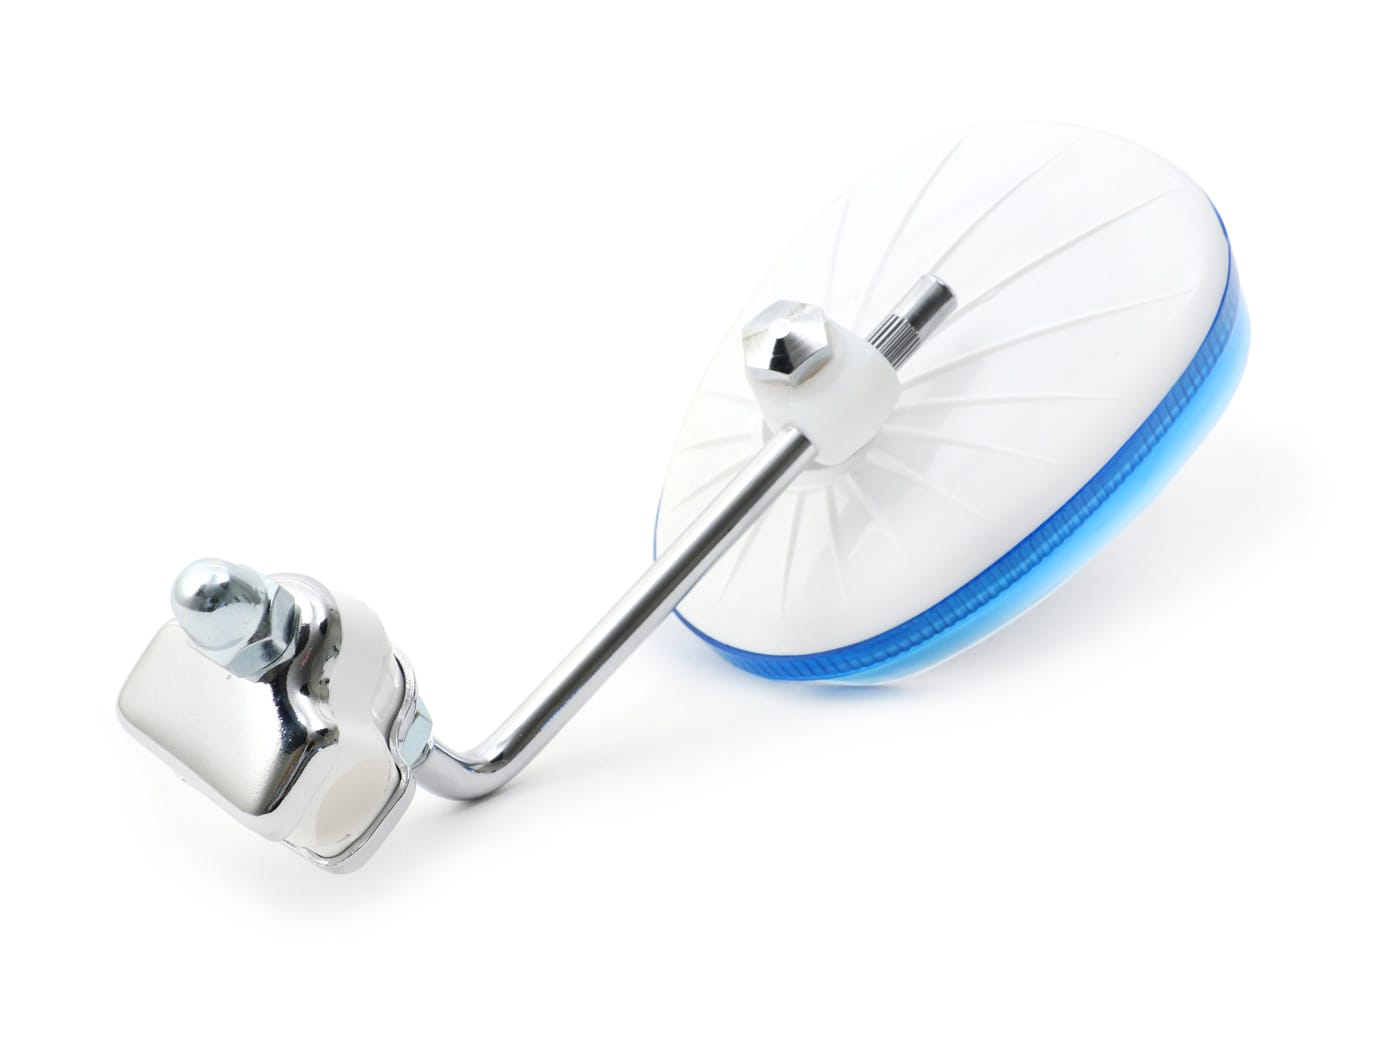
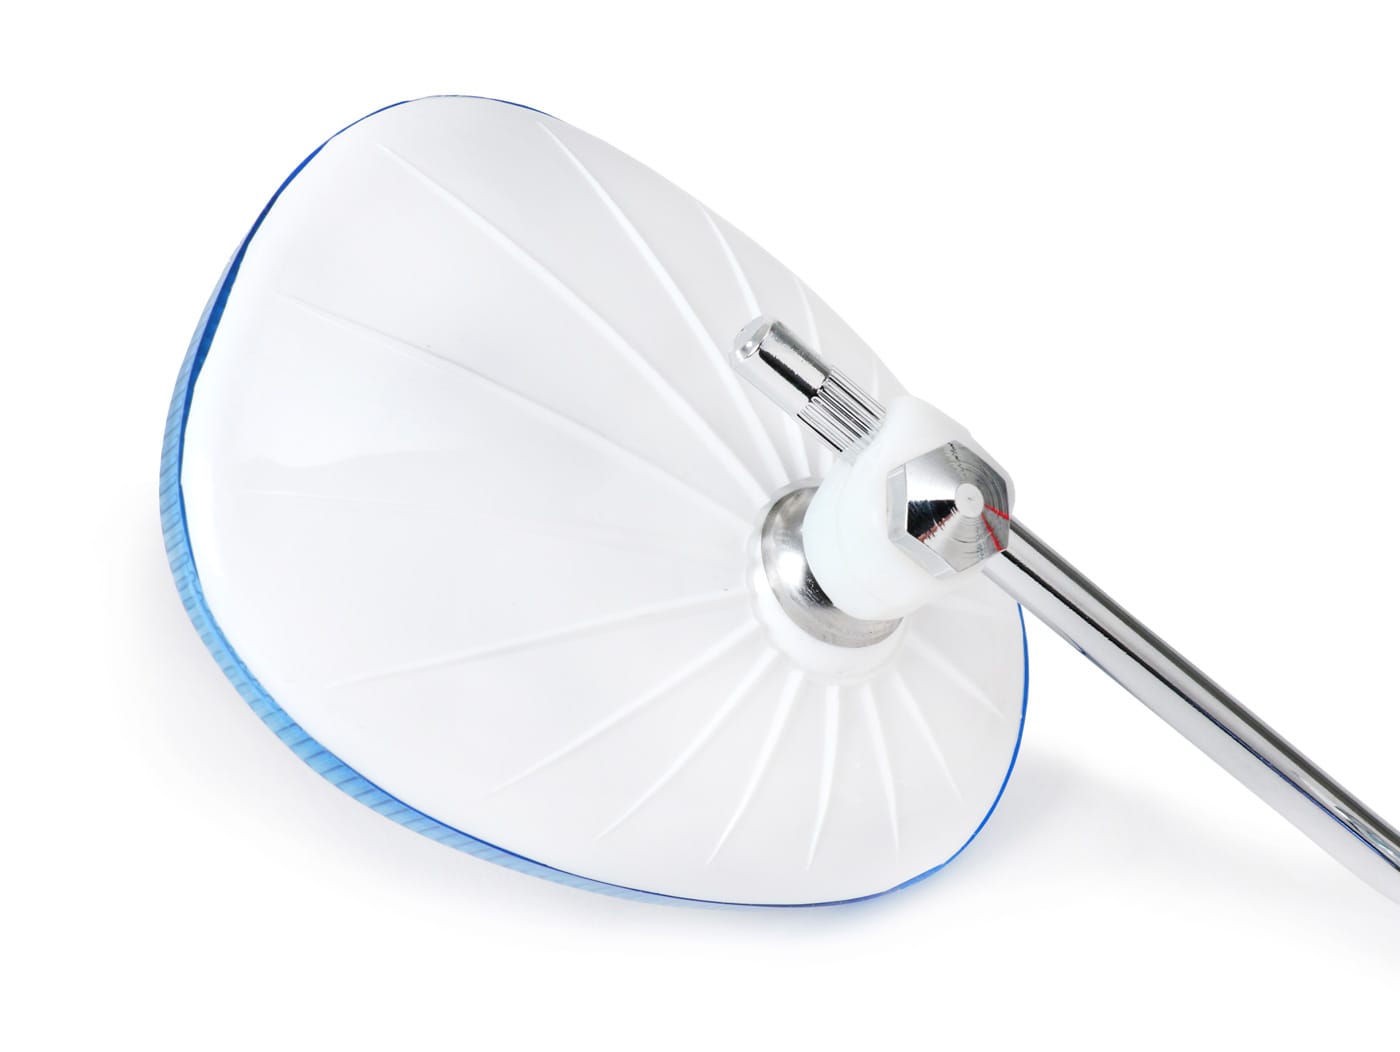
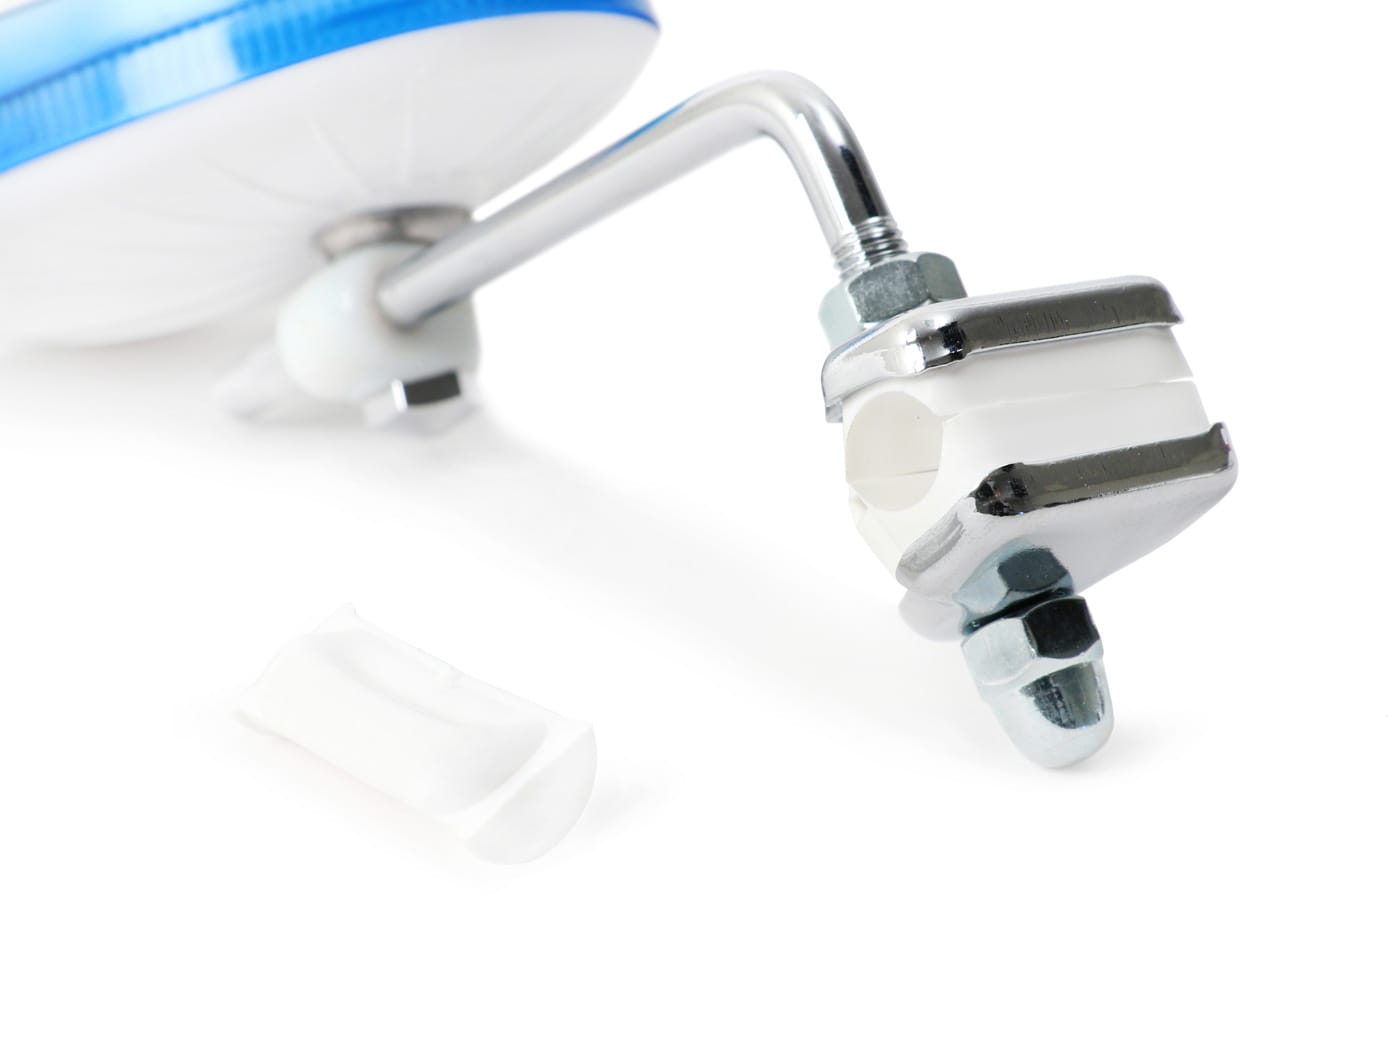
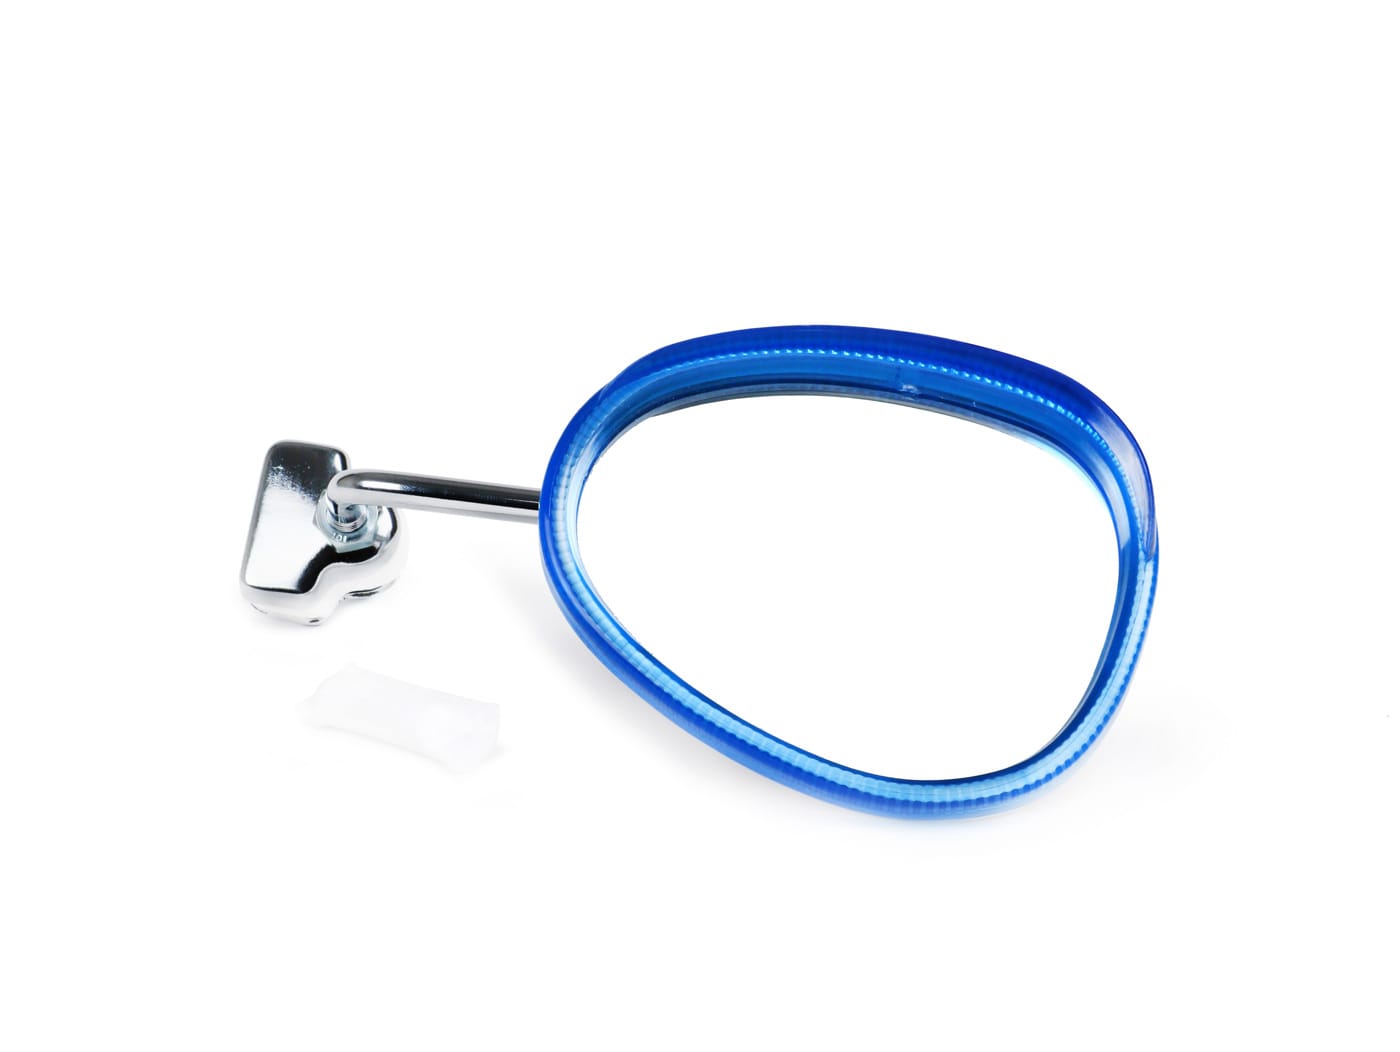
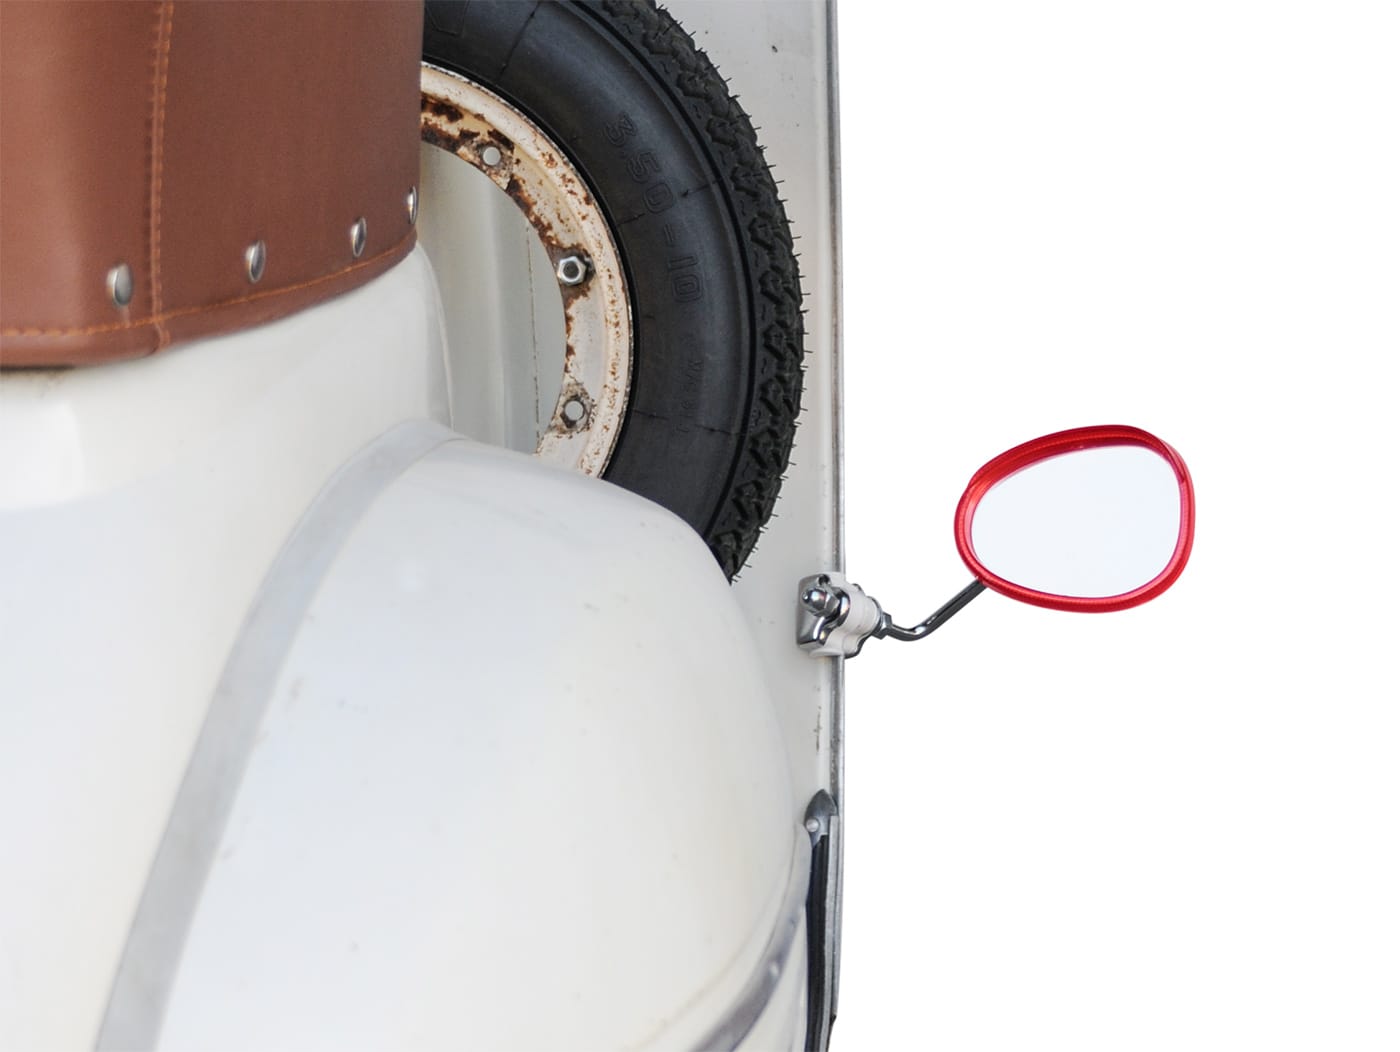
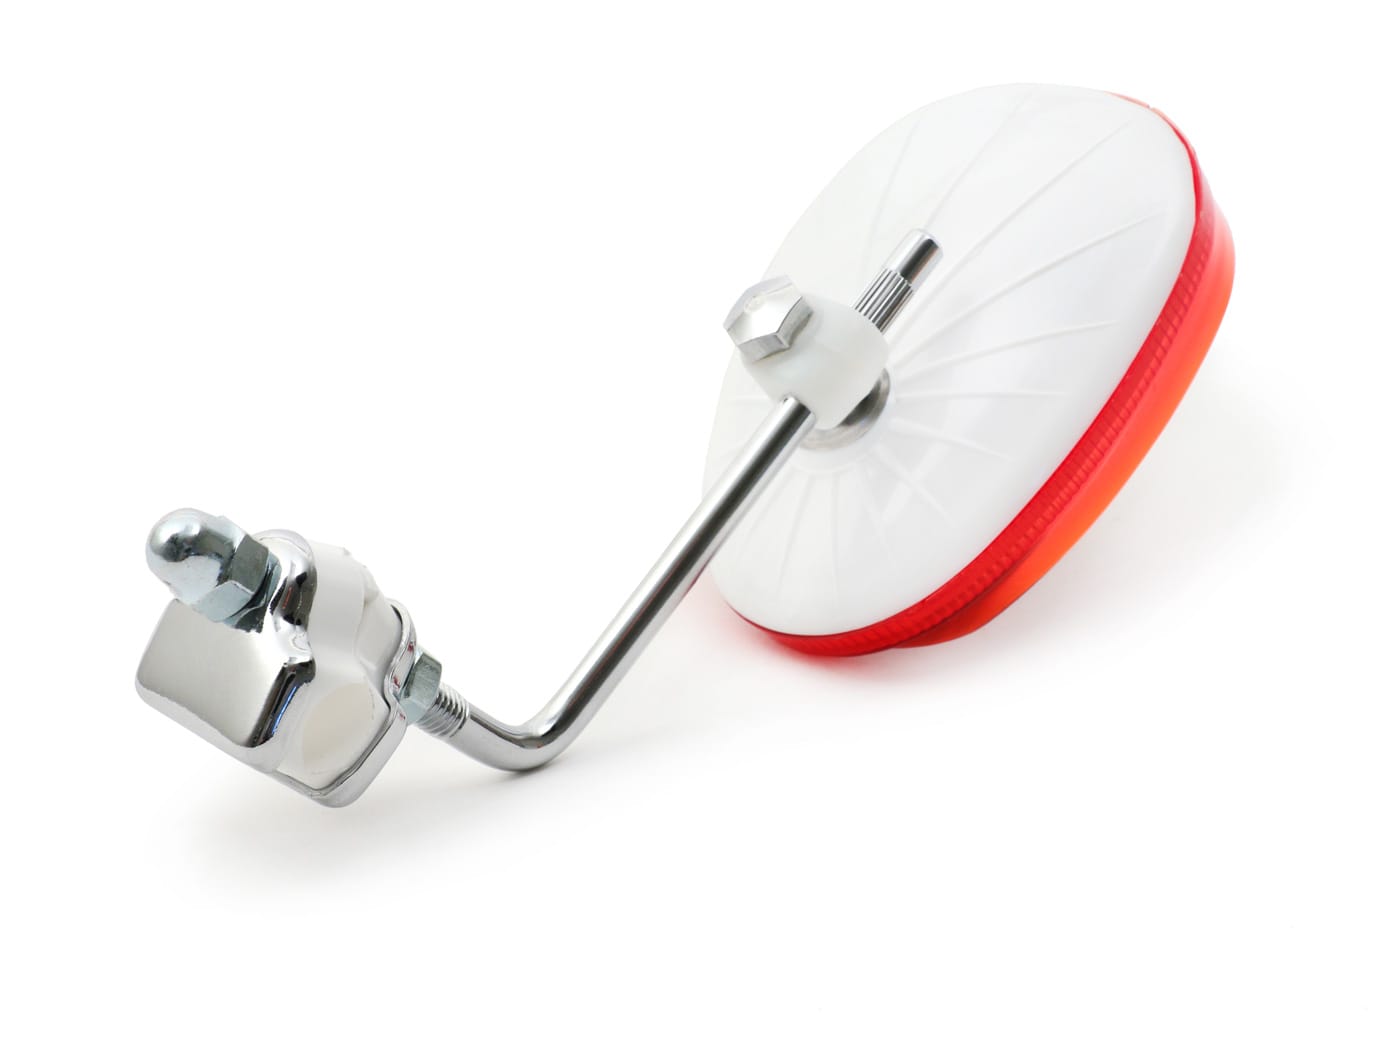
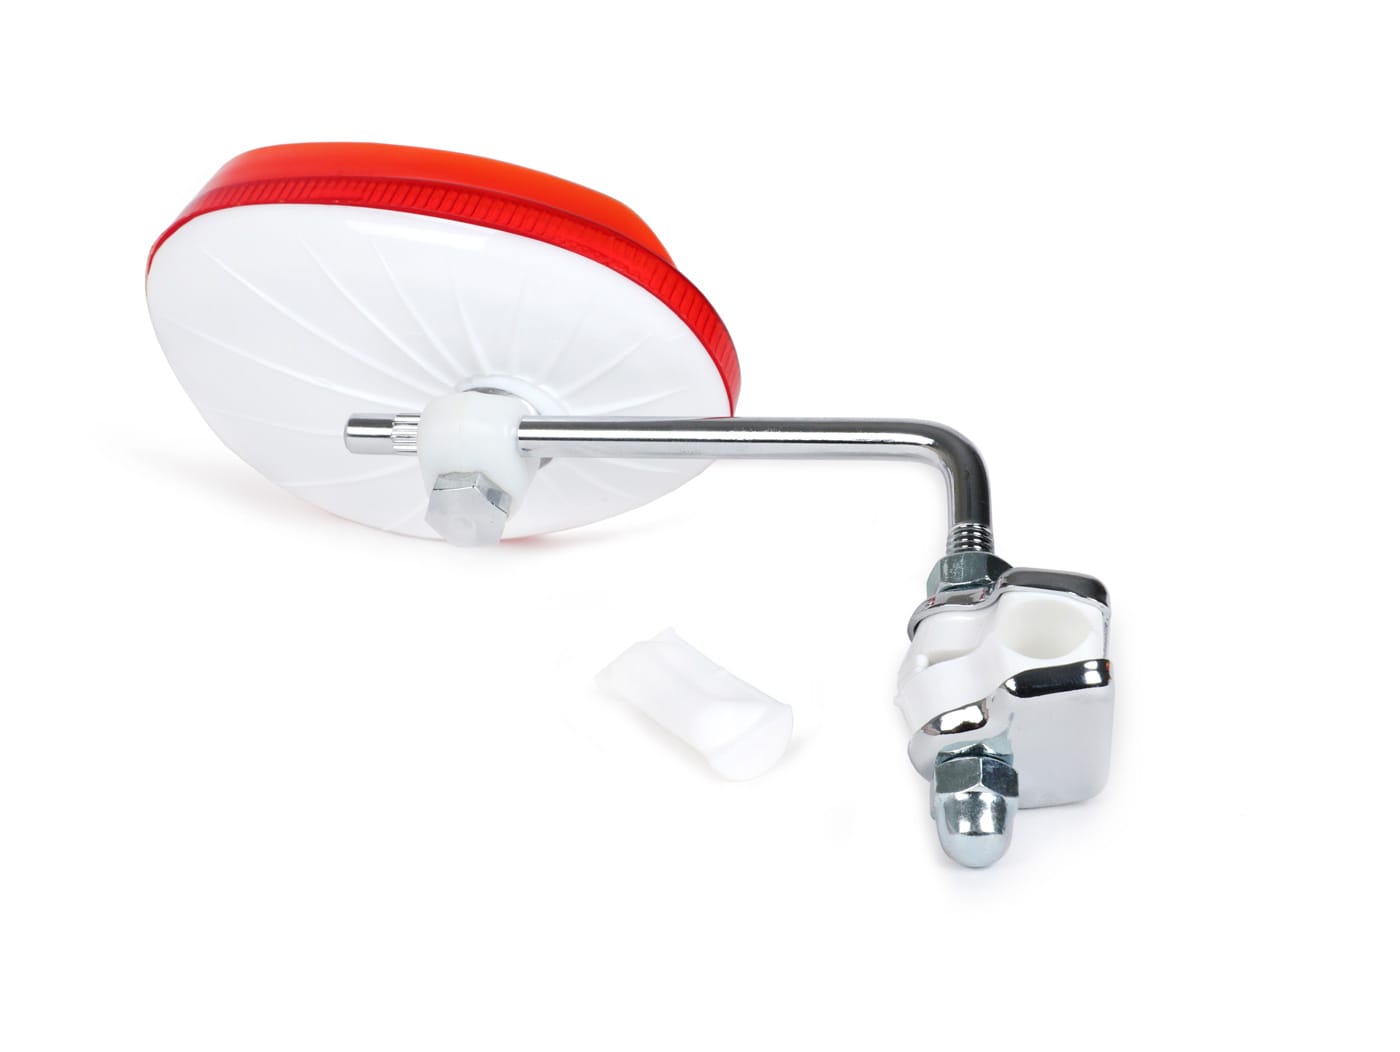
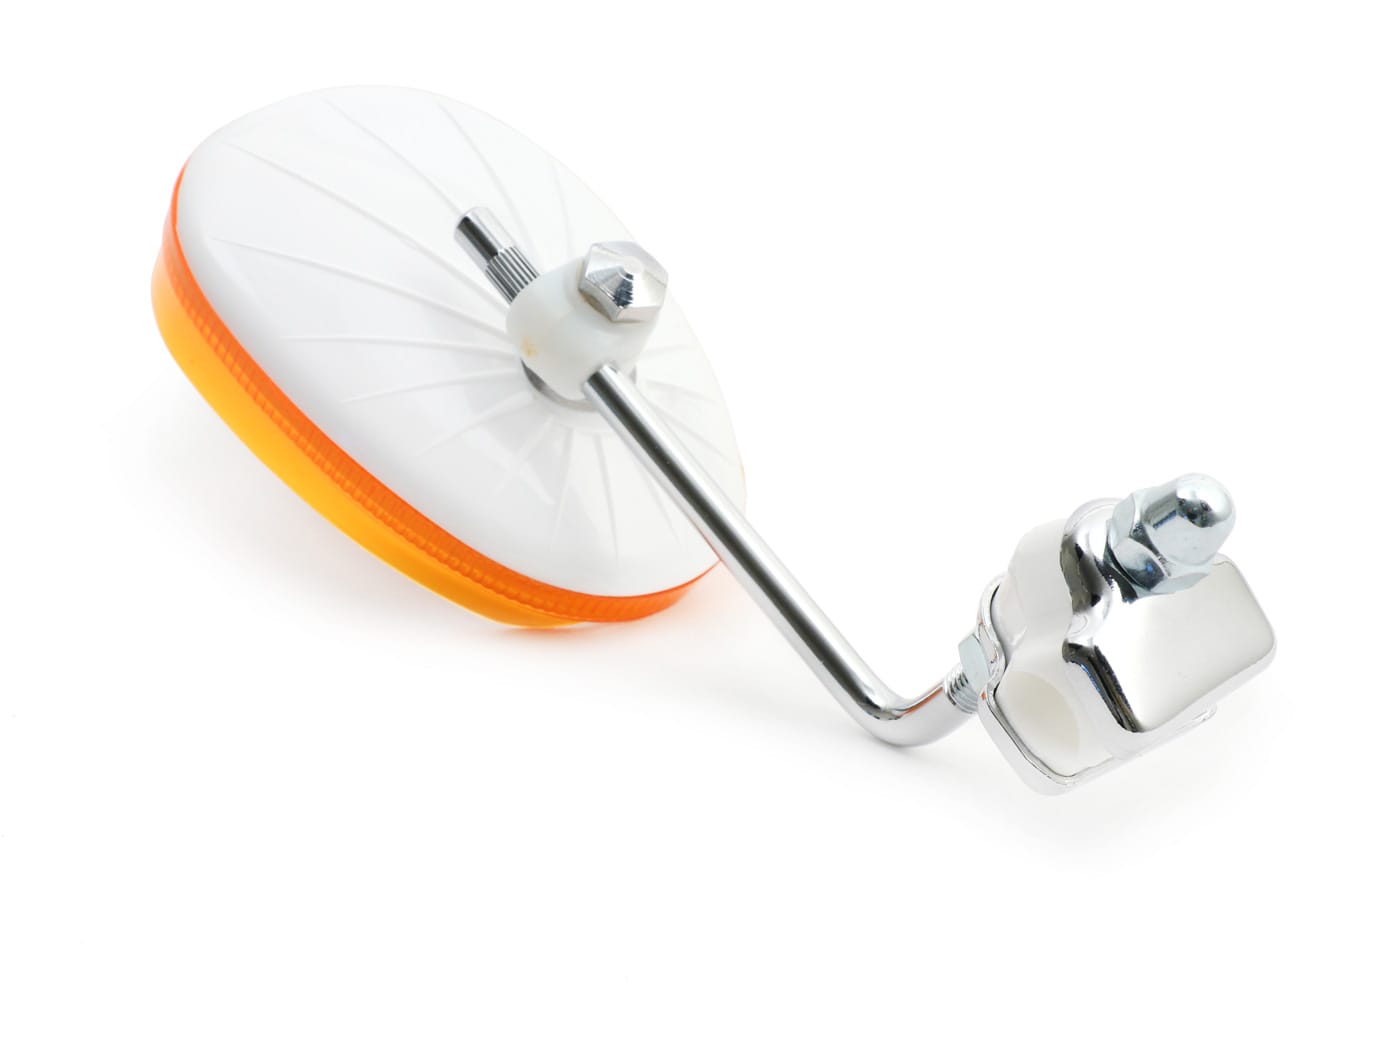
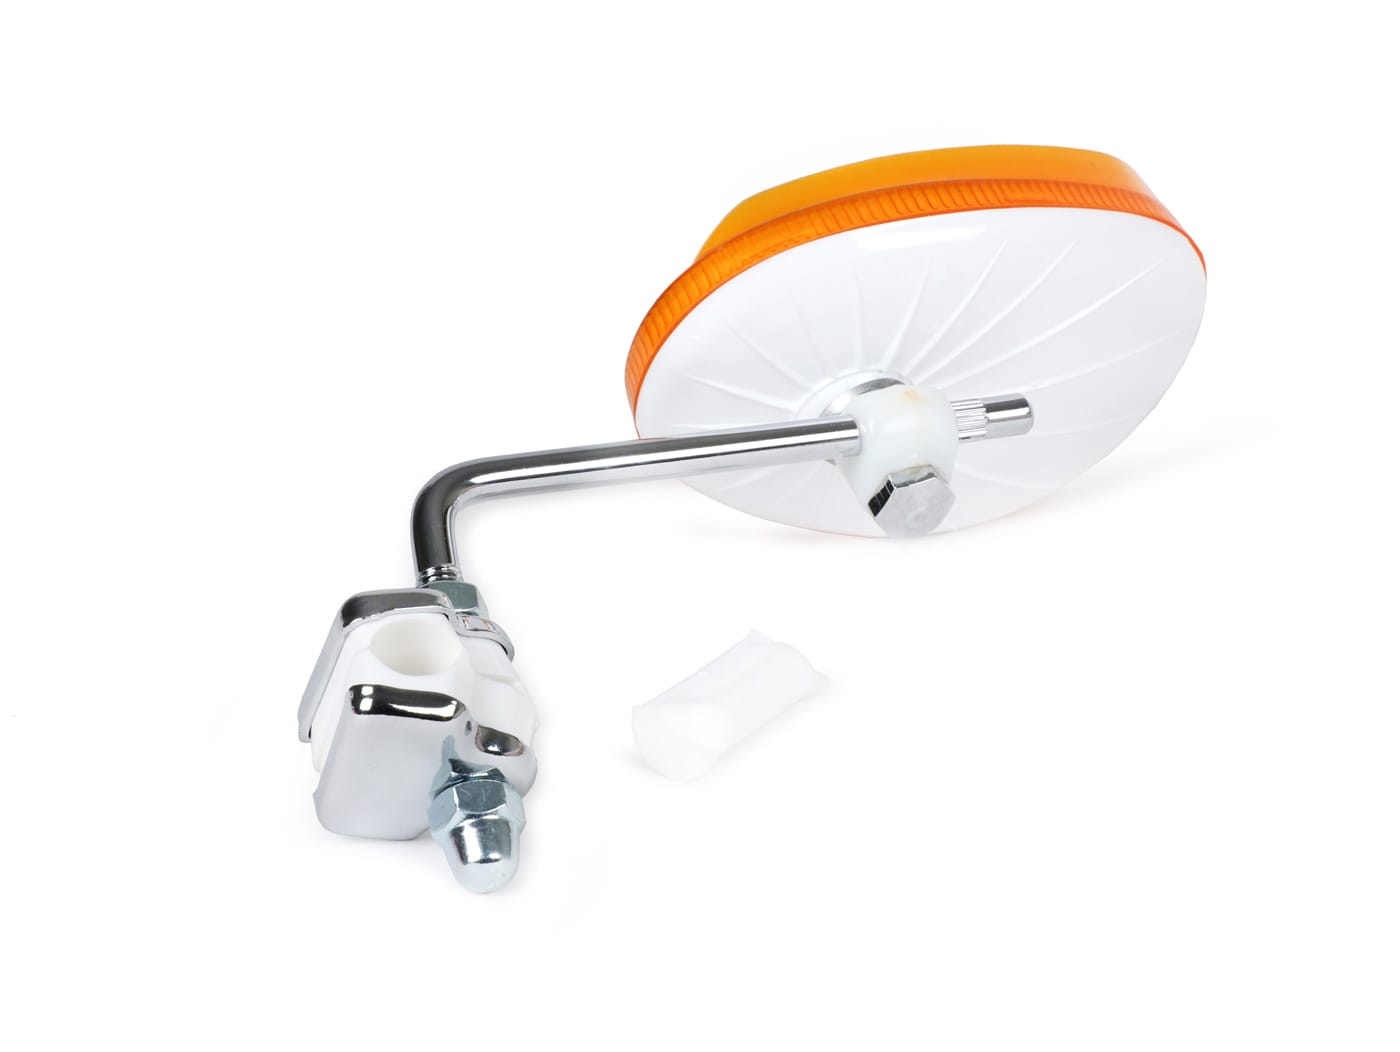
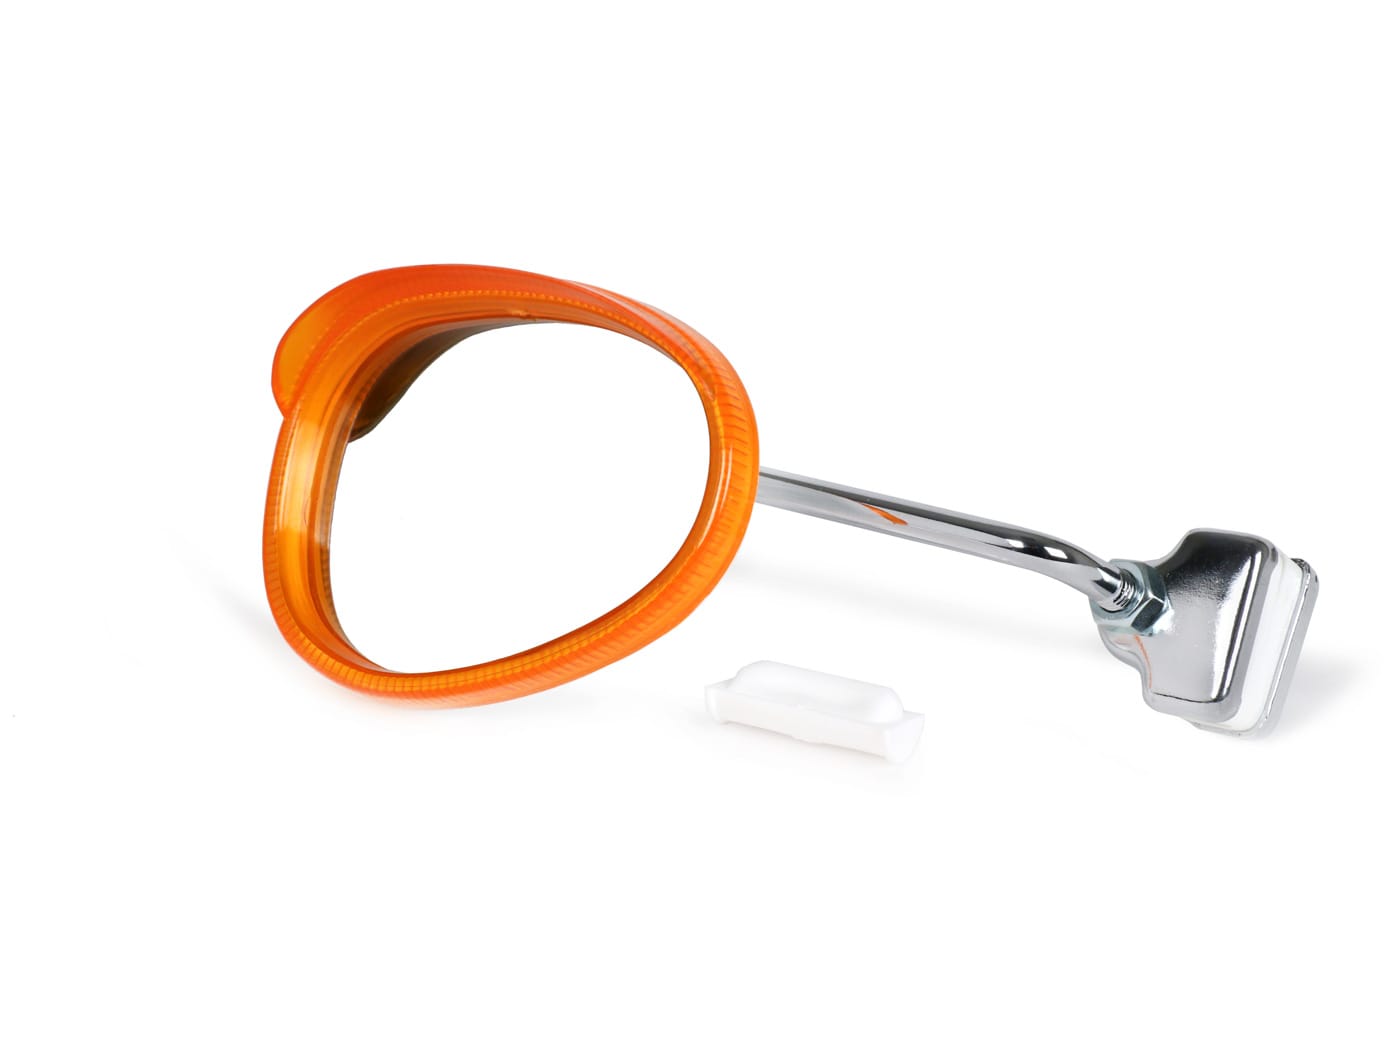
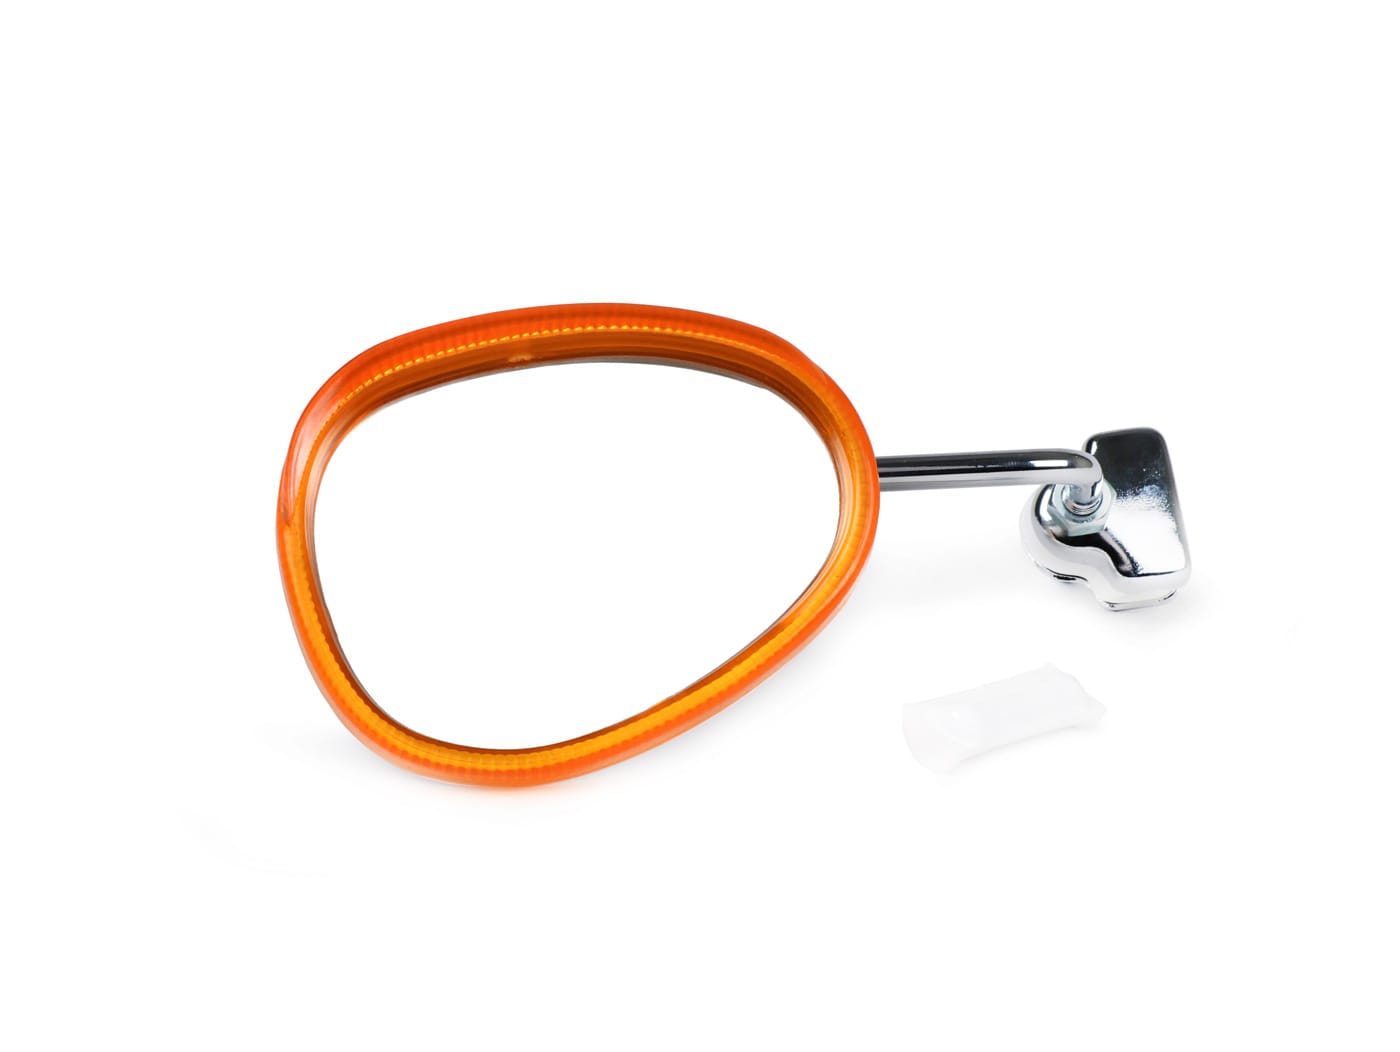
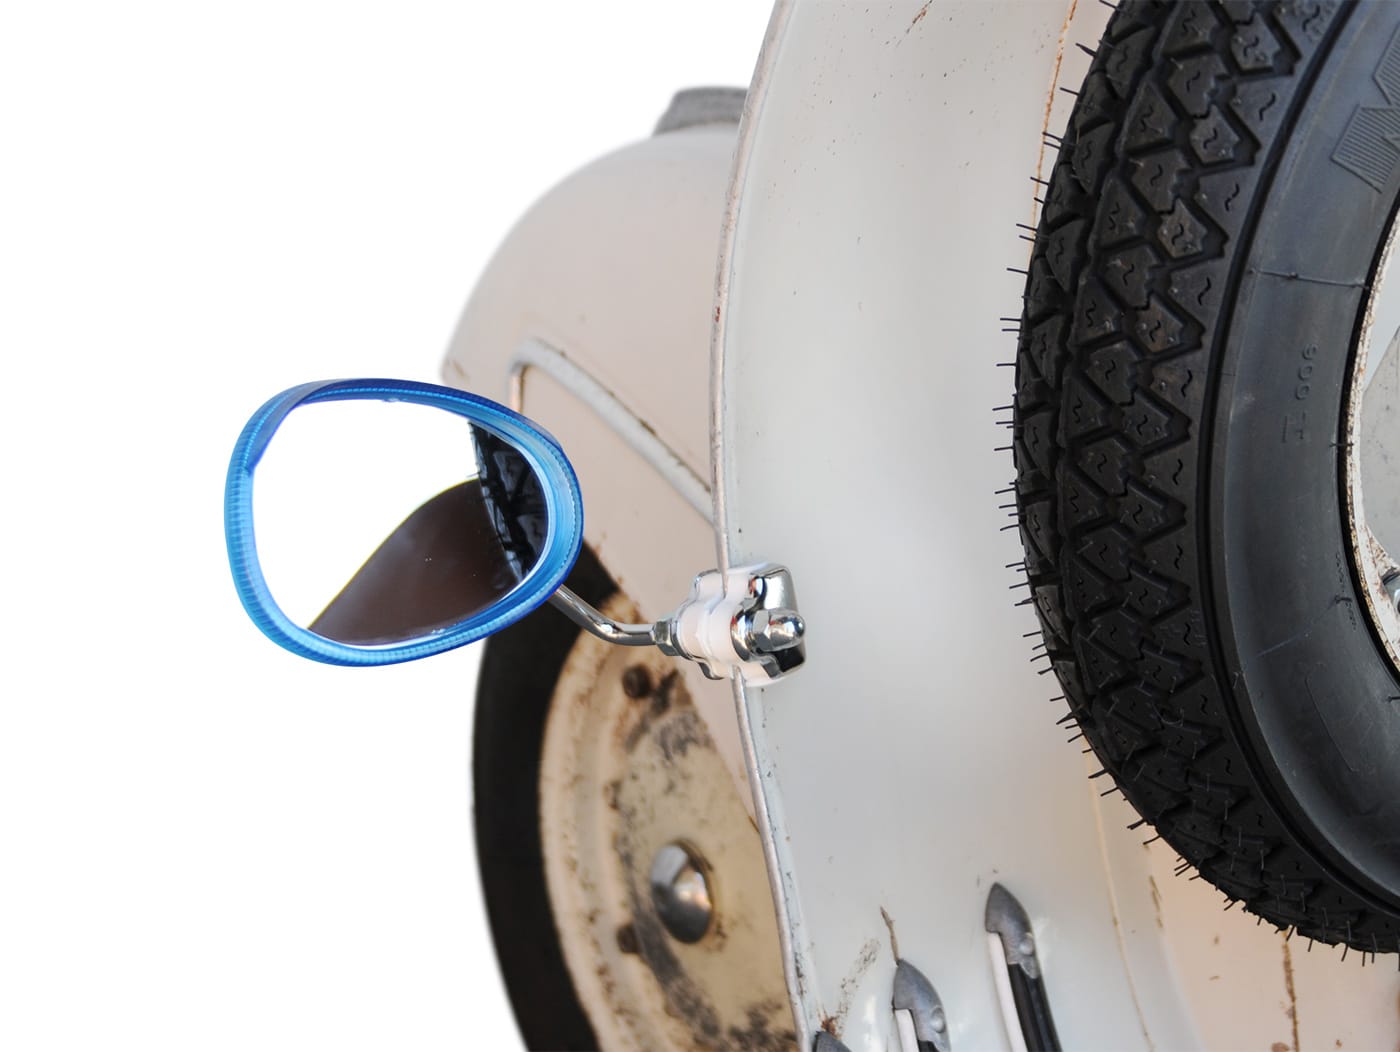
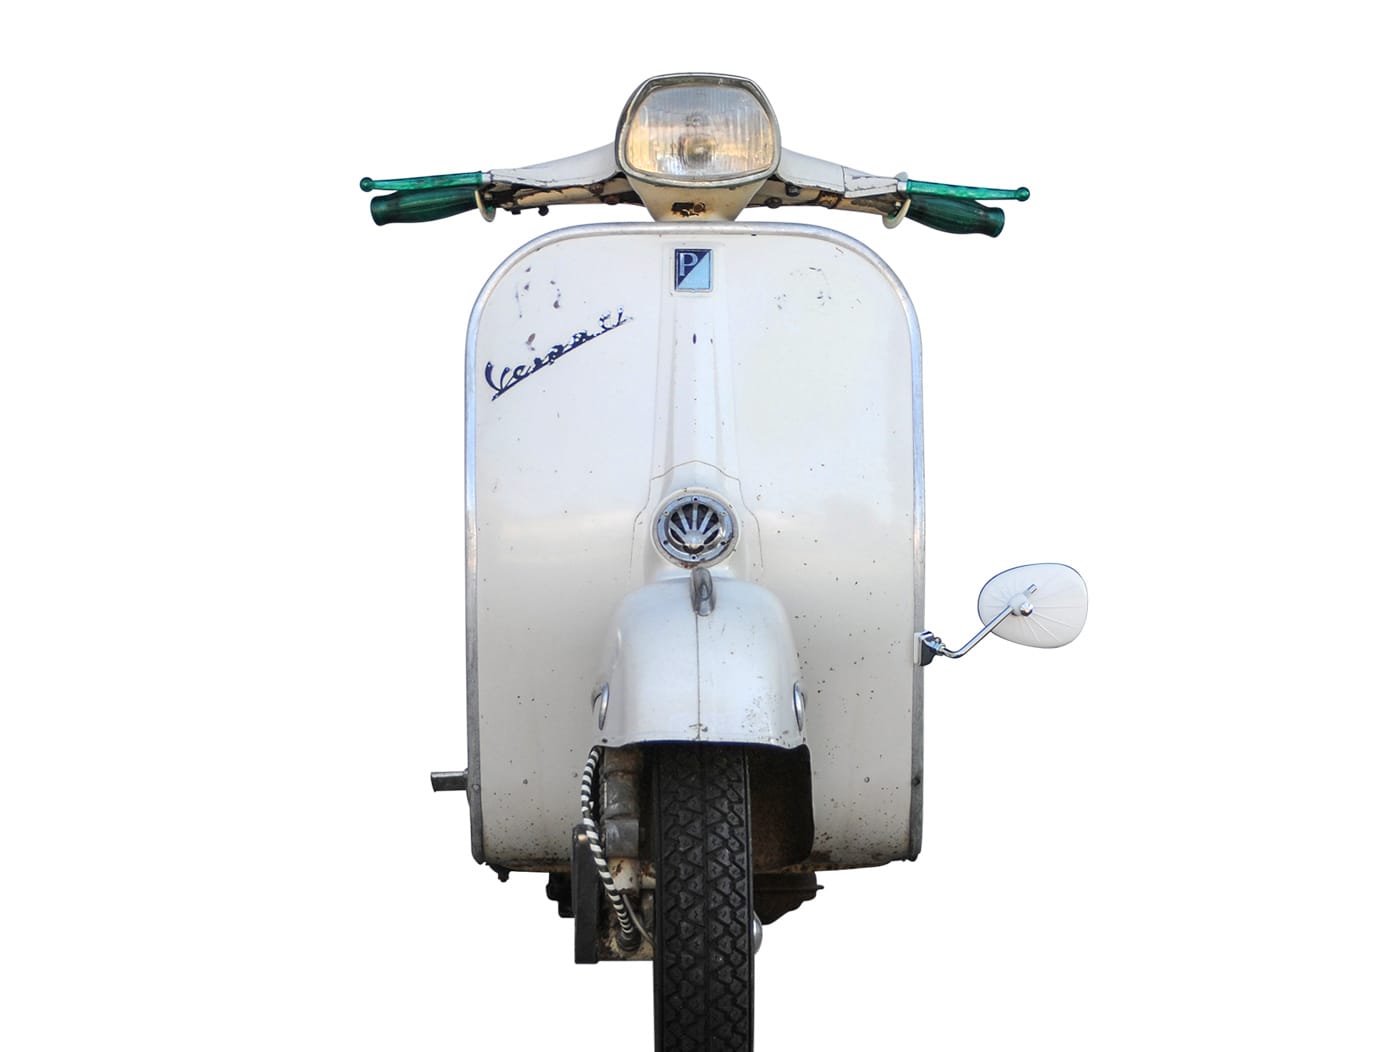
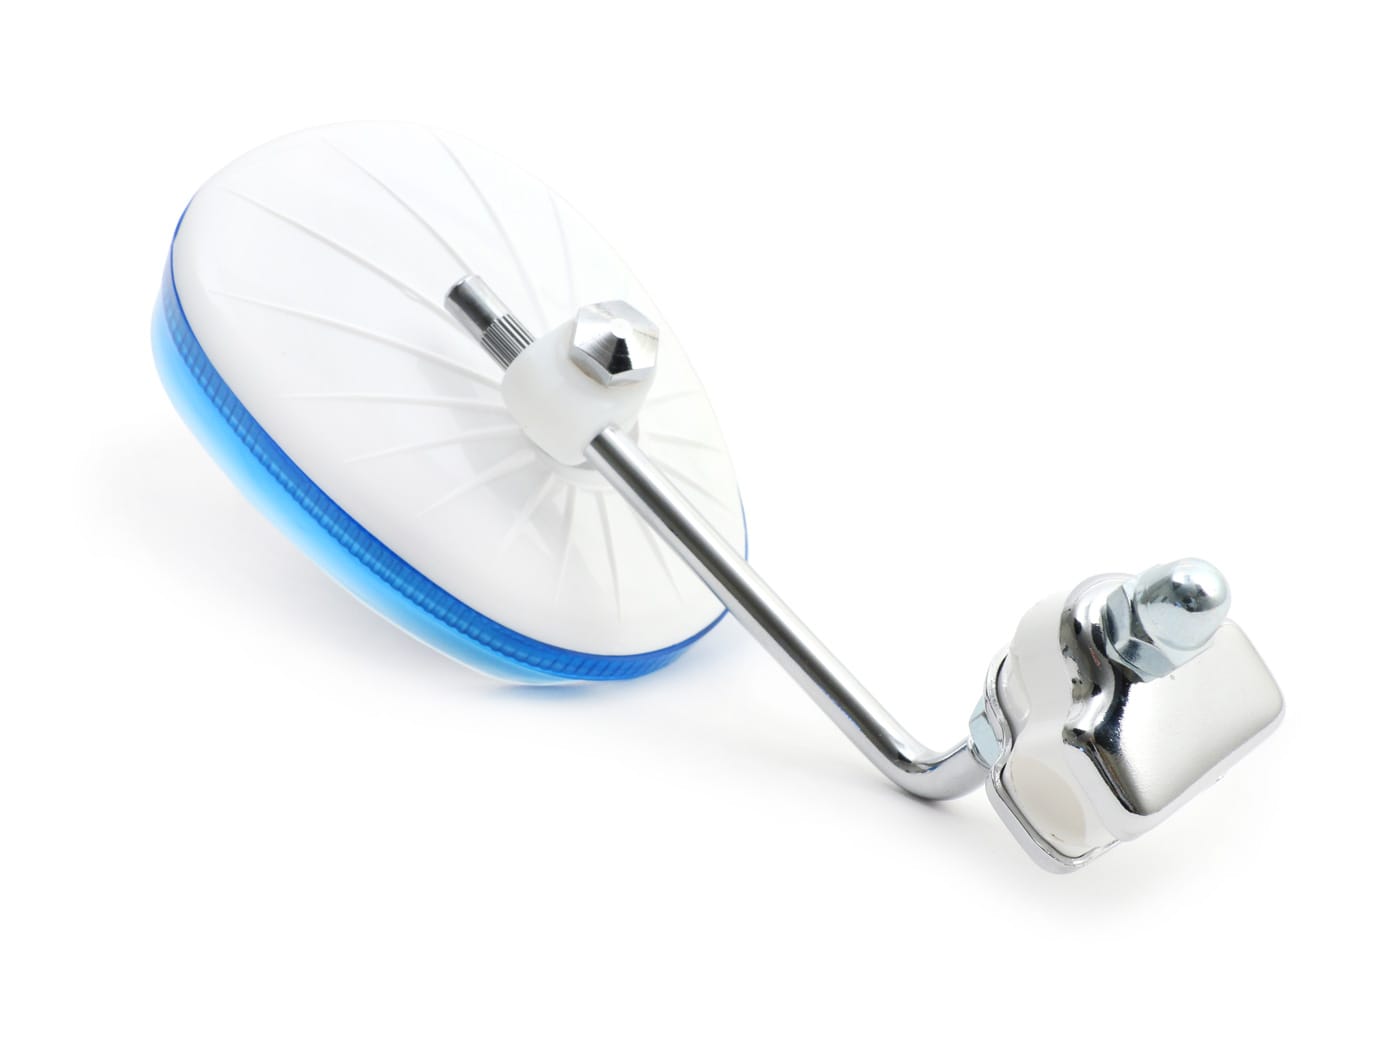
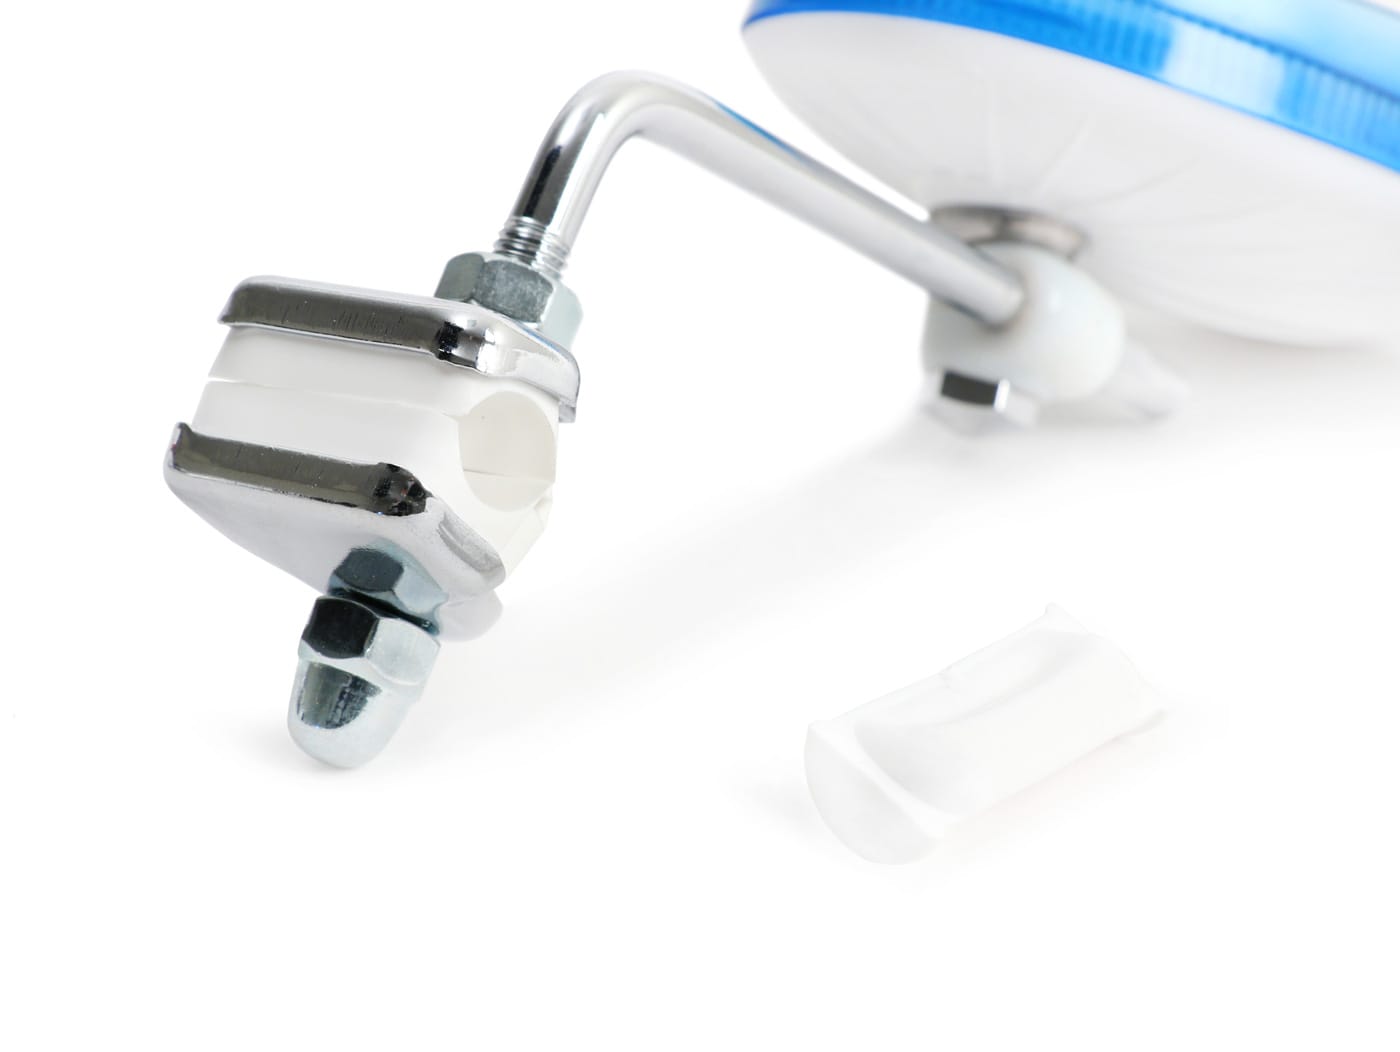
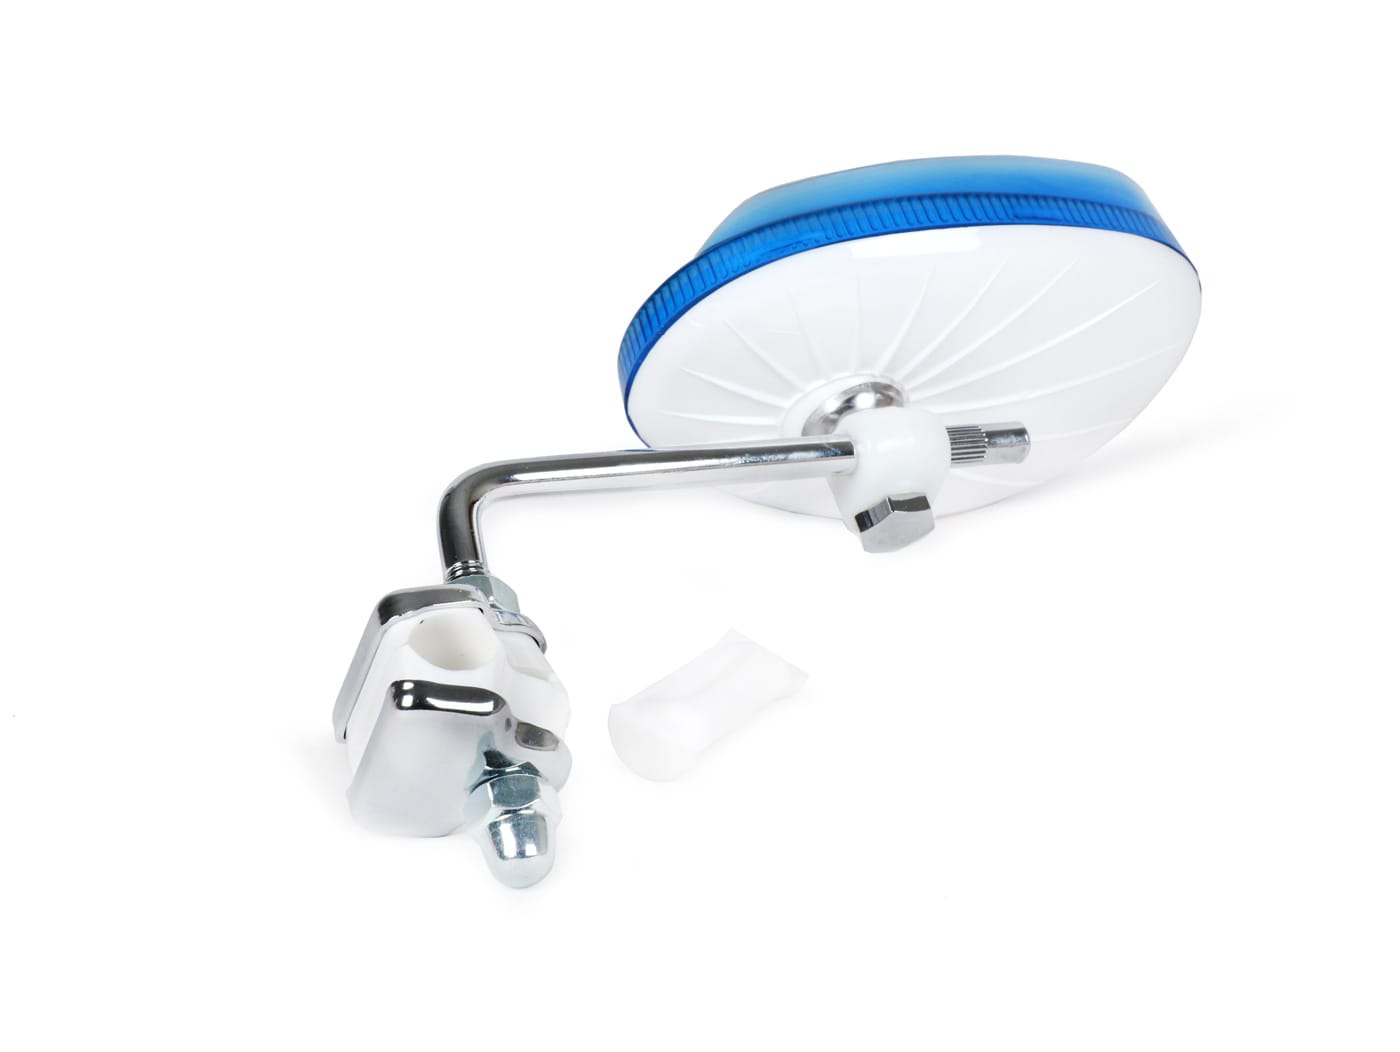
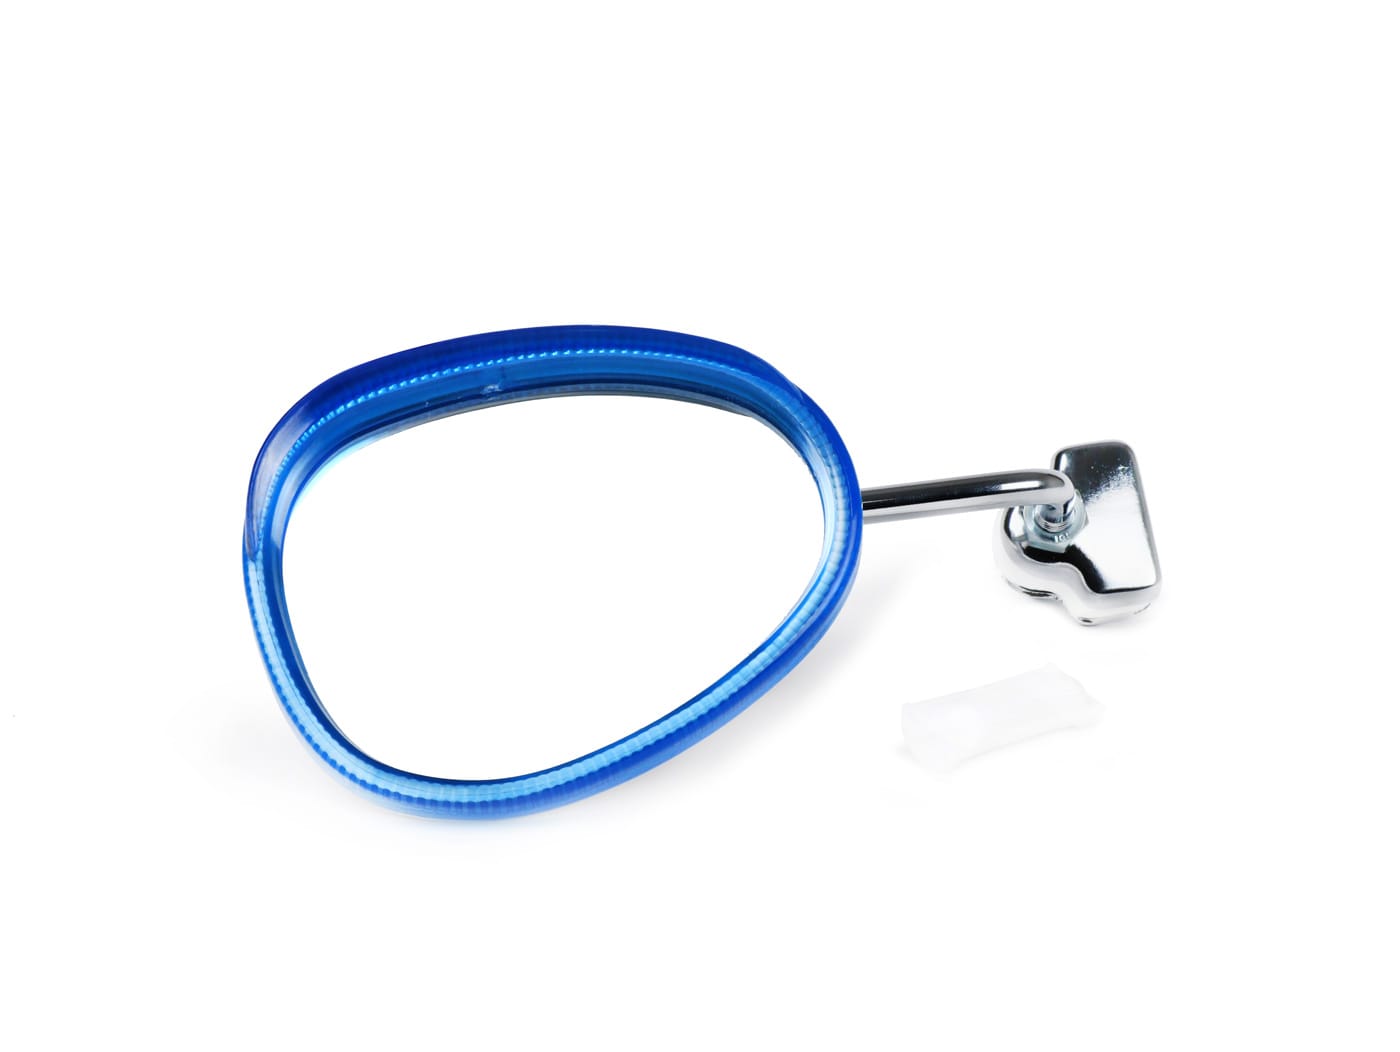
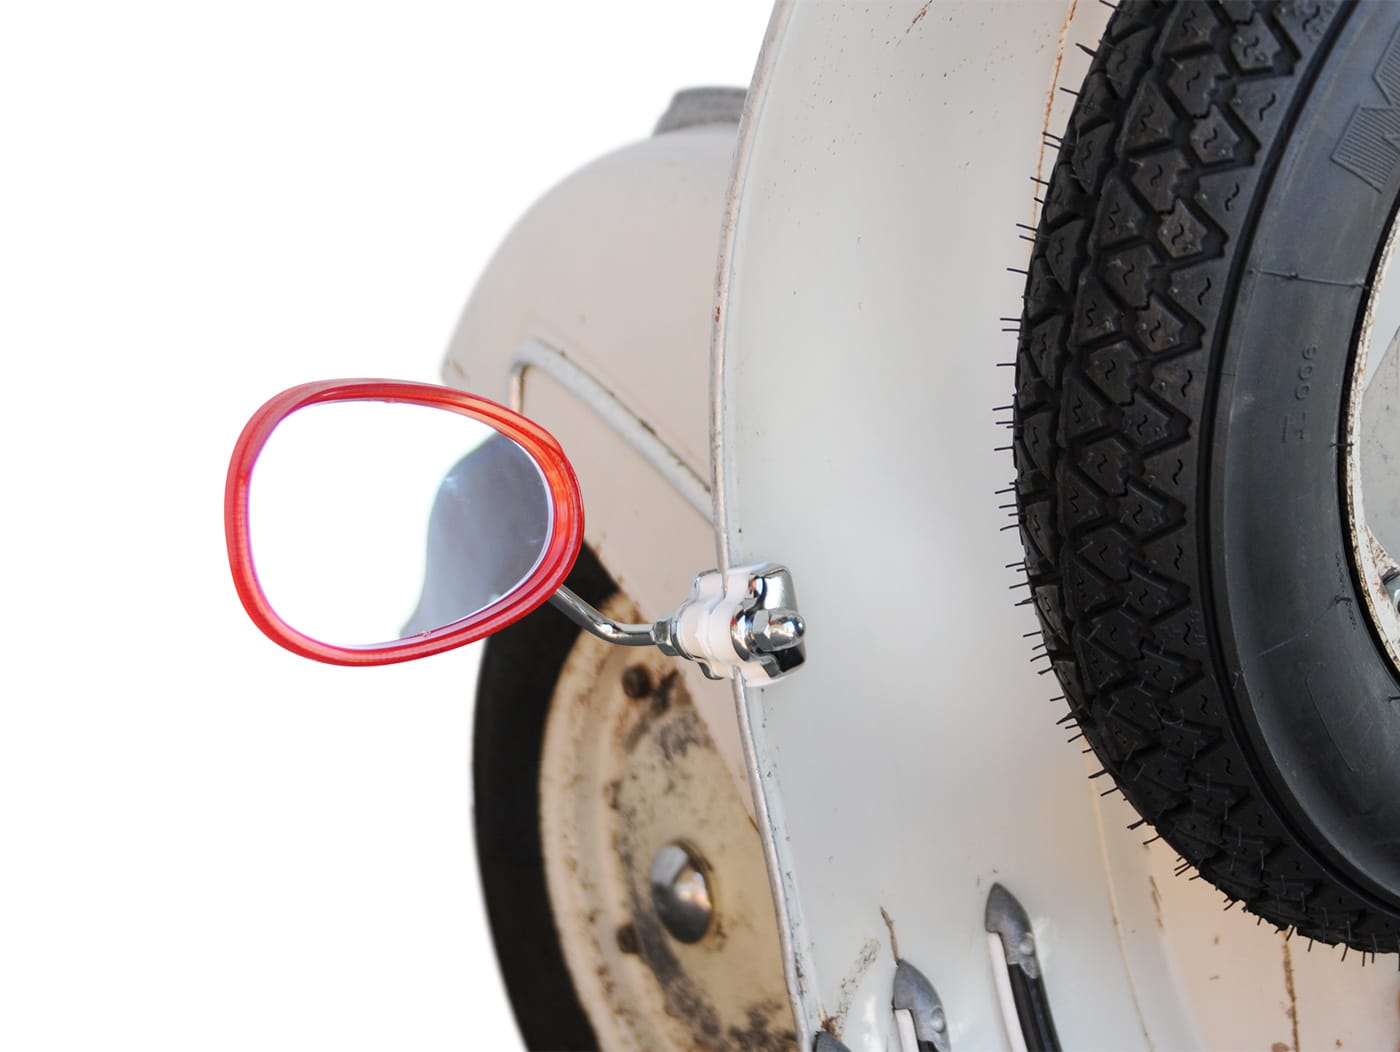
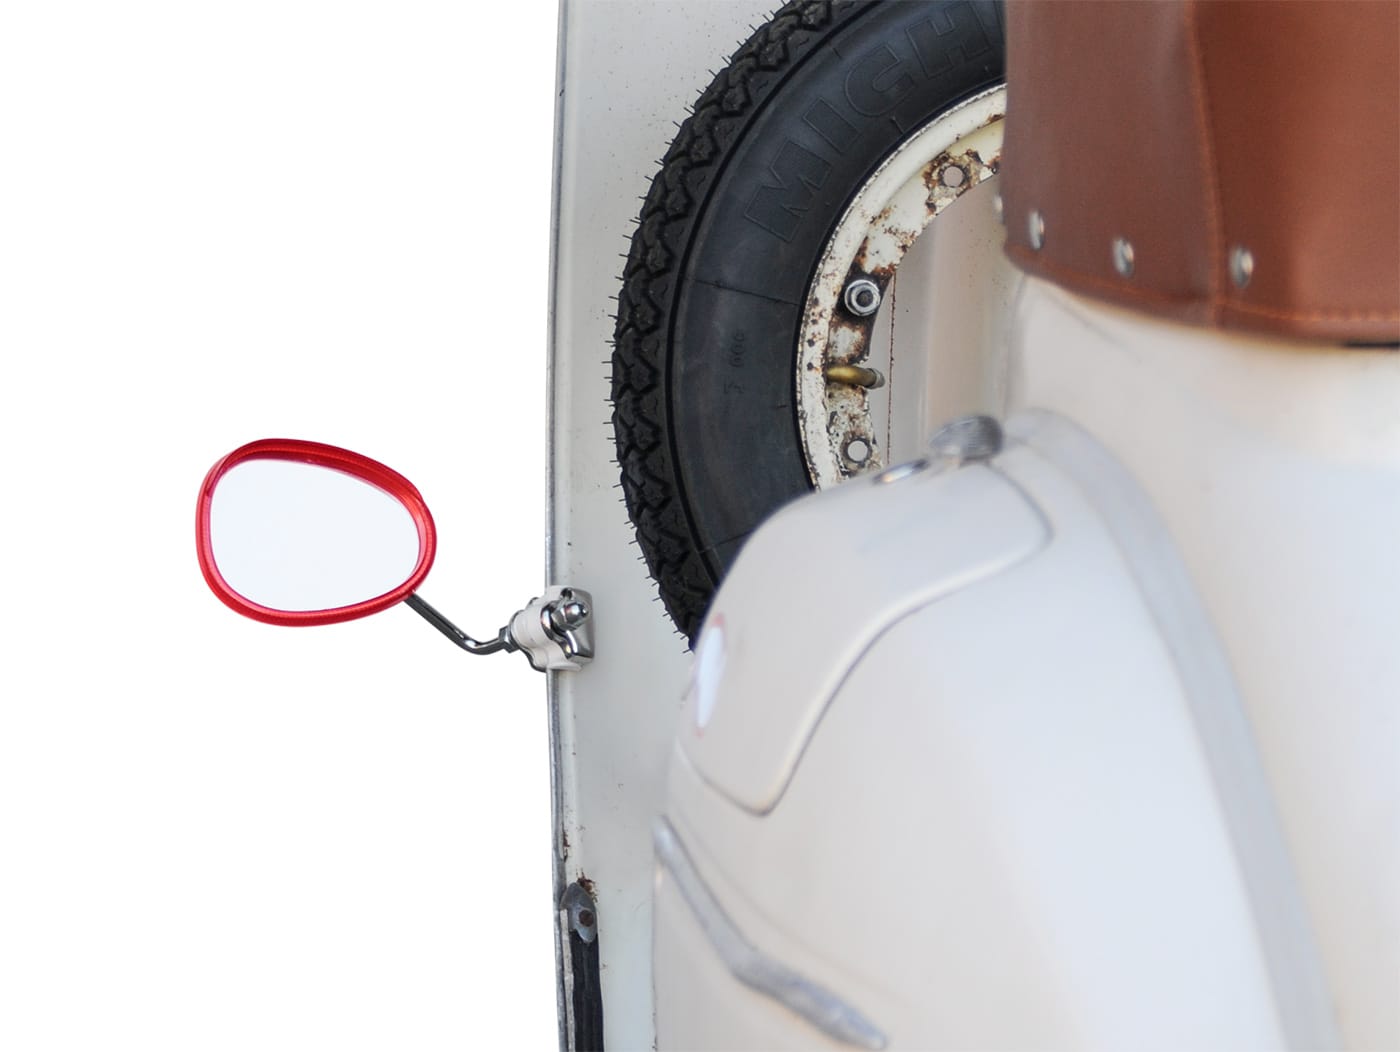
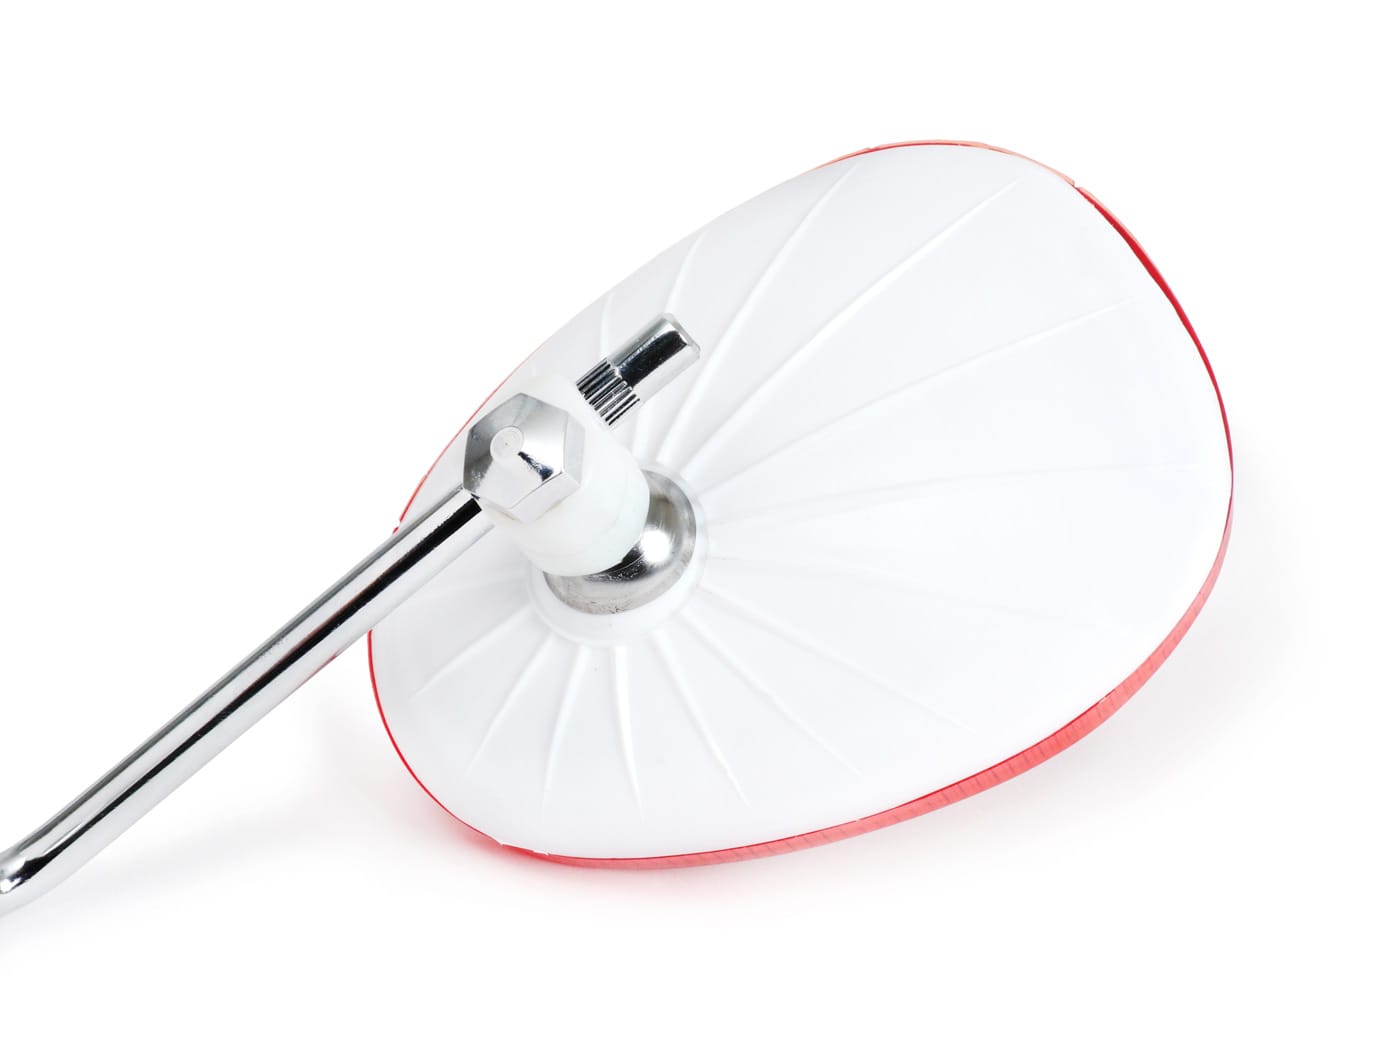
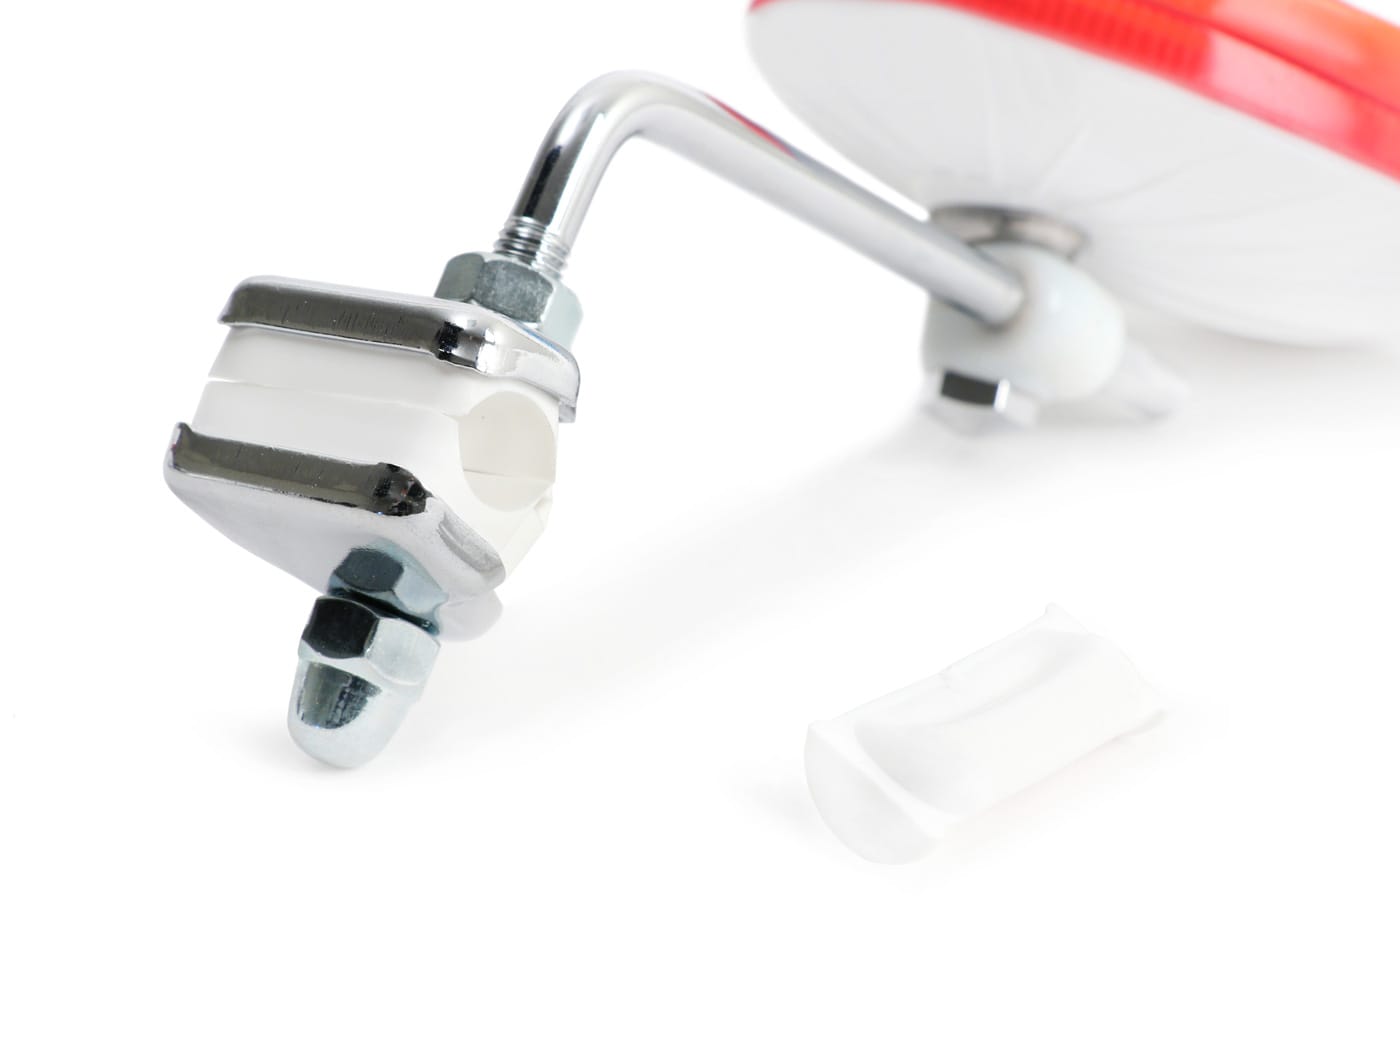
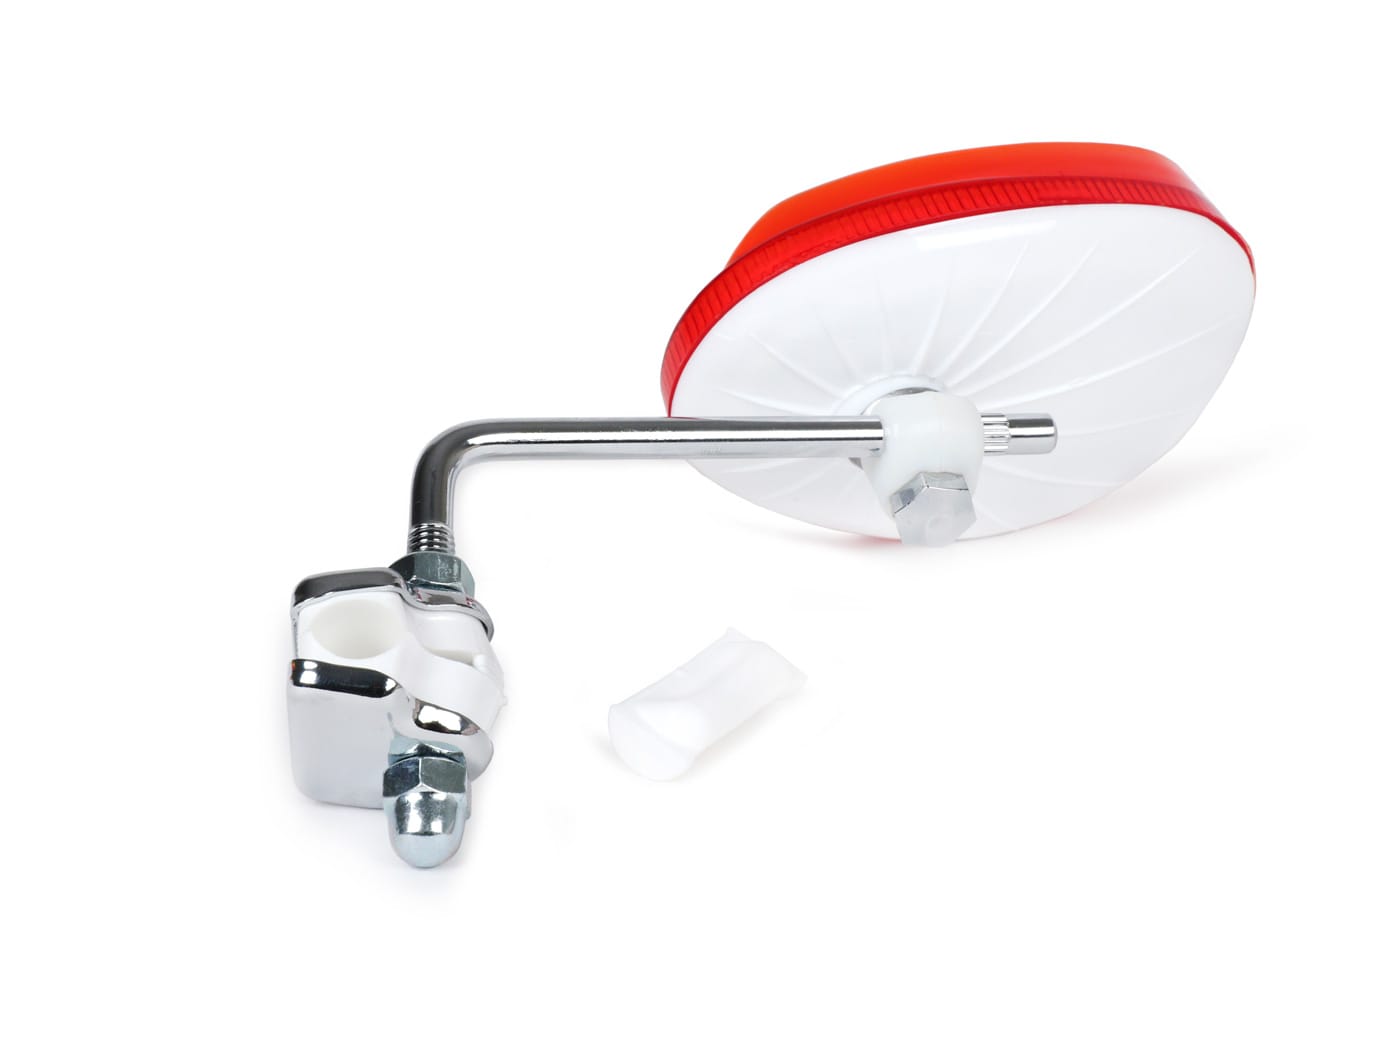
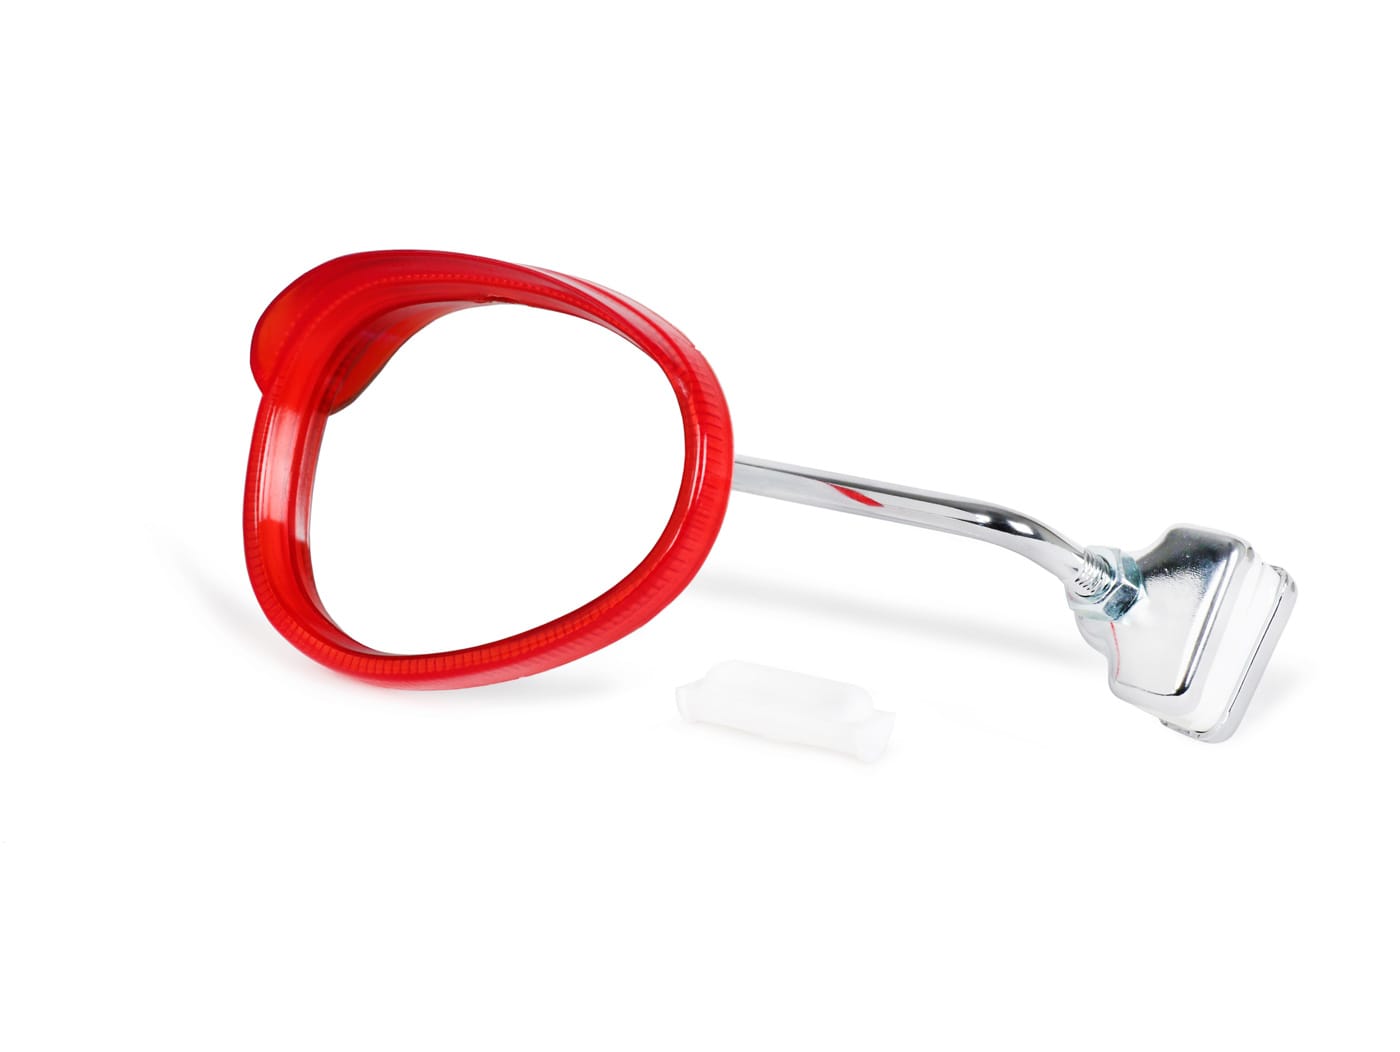
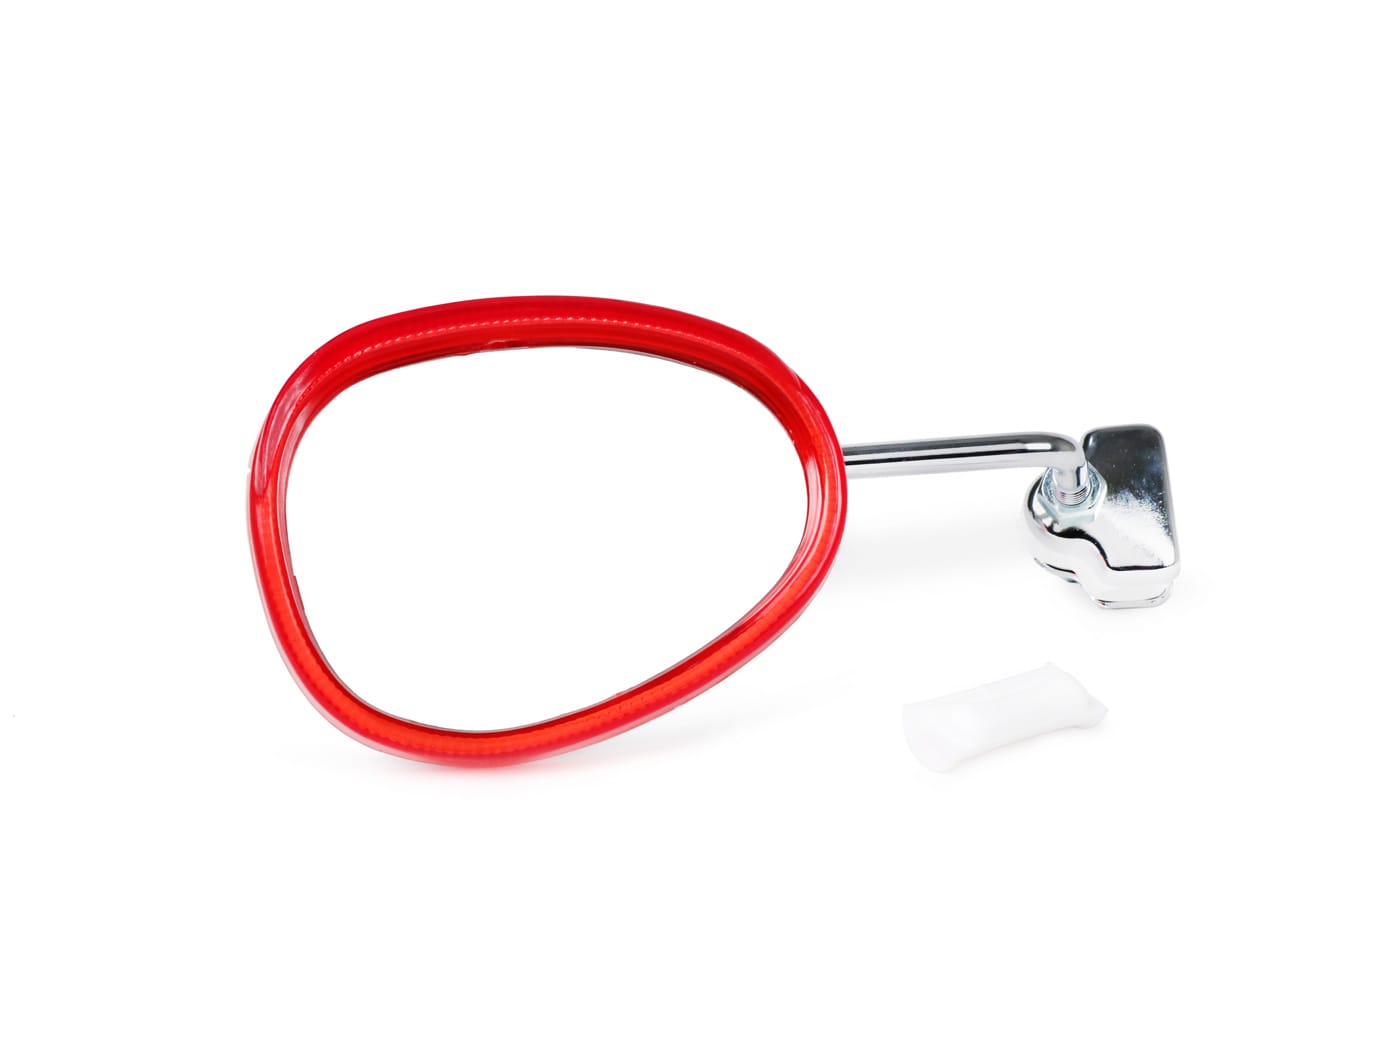
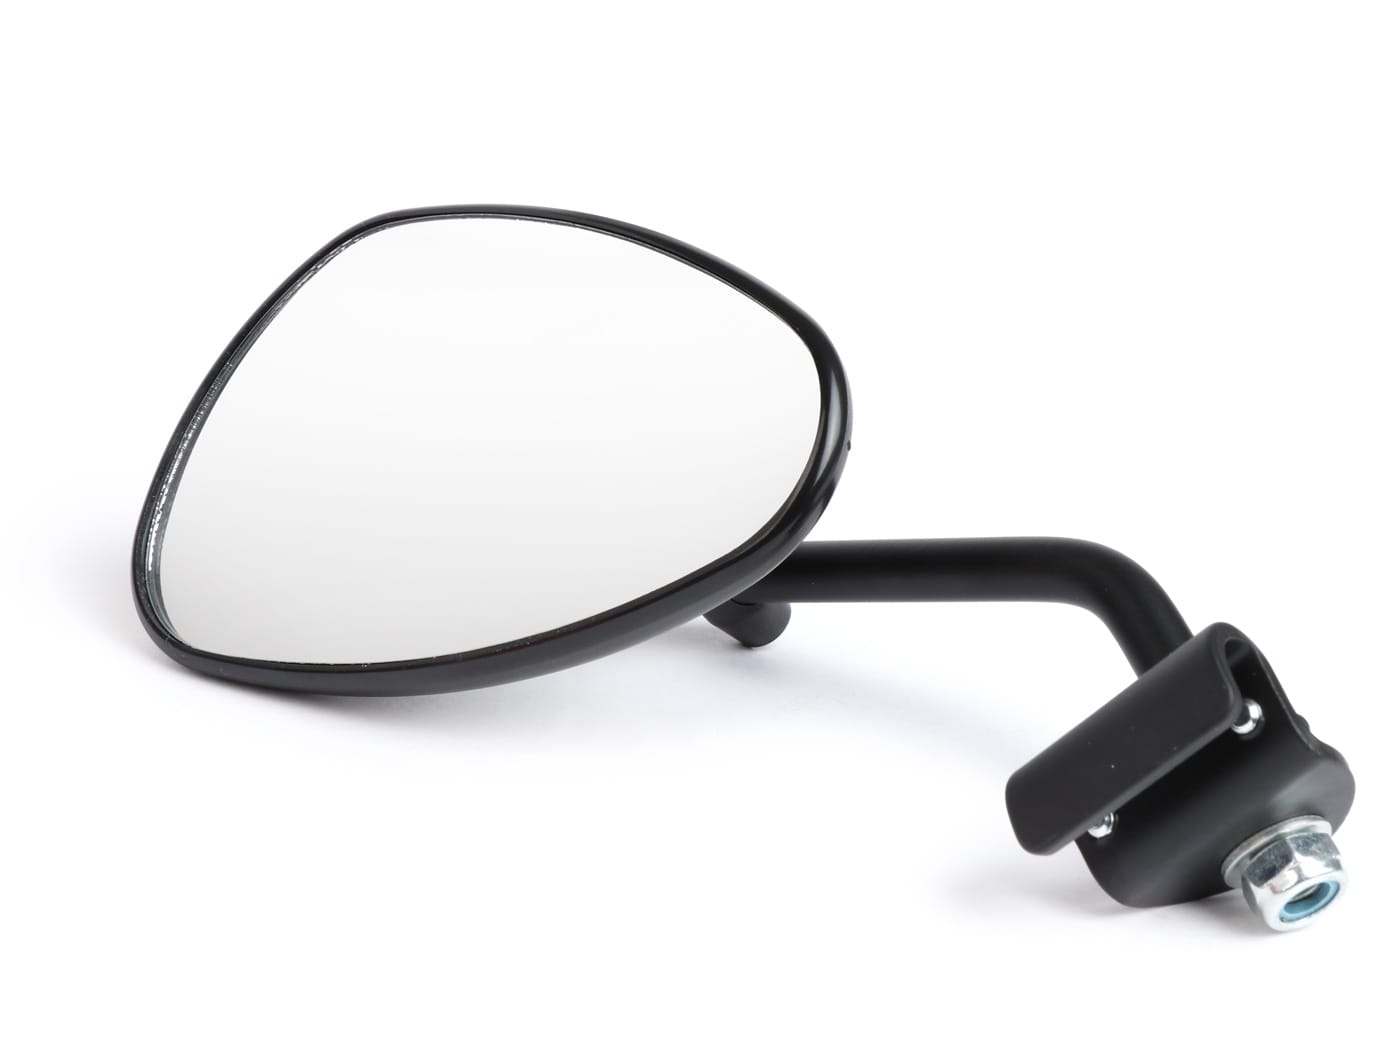
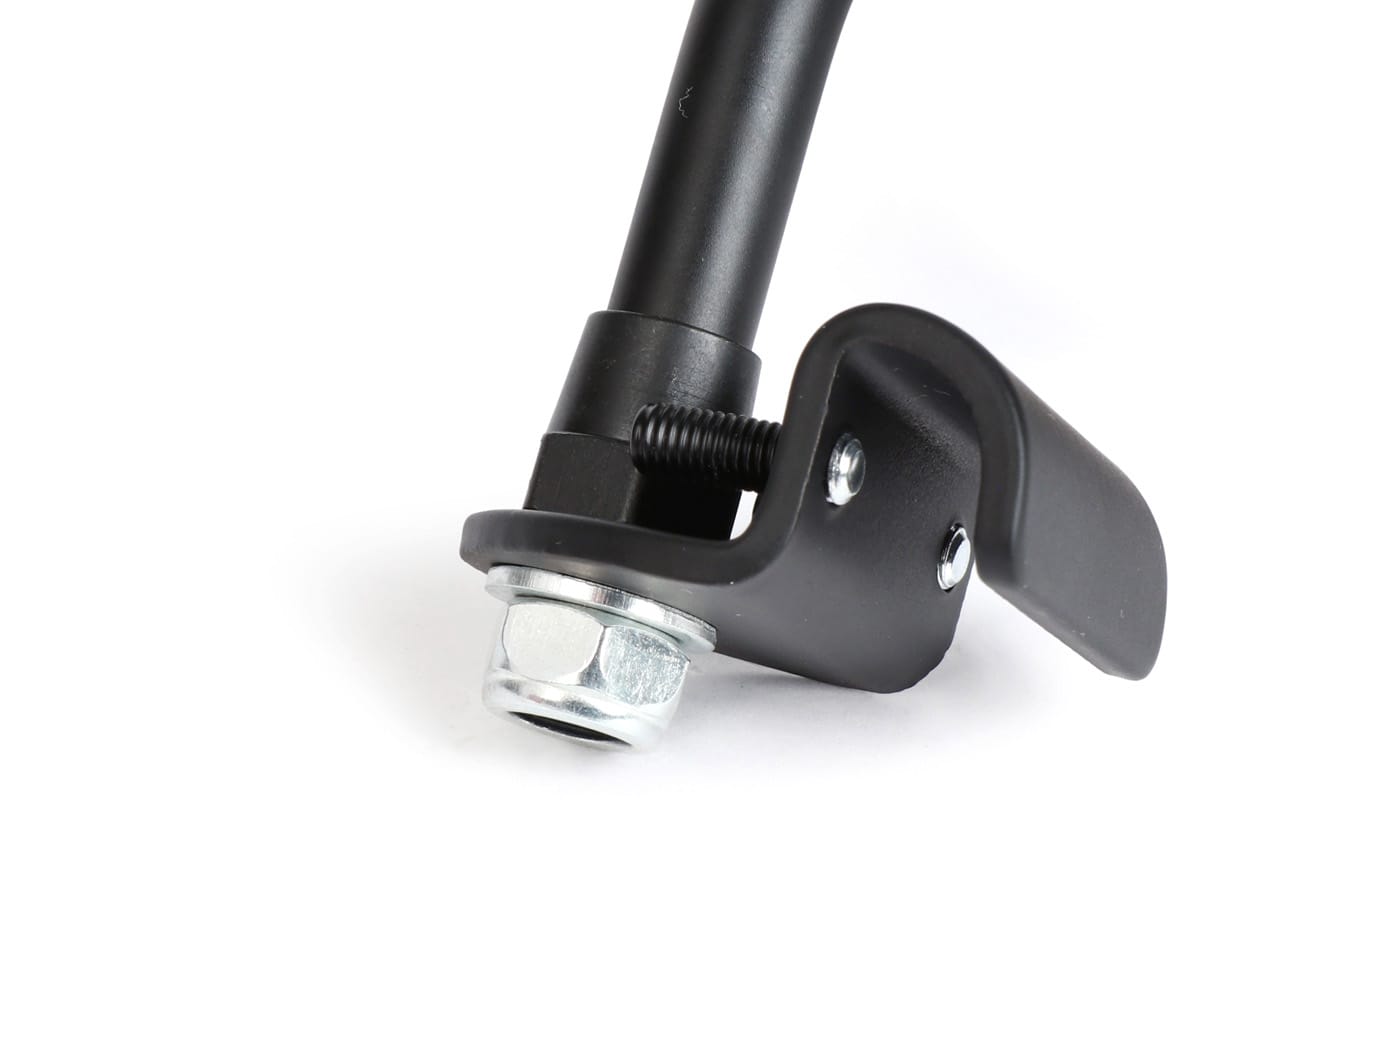
Mirror BUMM retro leg shield clip-on mirror, colored plastic housing

Universal fitting retro clip-on mirror for classic scooters, mopeds, mopeds. The kidney mirror is Made in Germany by BUMM. Neatly processed mirror in trapezoidal shape with white plastic housing and colored, transparent edge.
Has a plastic housing with a ball head. The clamp is suitable for both round slotted tubes and bead profiles (standard on Vespa).

Article no.: Design
1050138 White, blue, left
1050141 White, blue, right
1050139 White, orange, left
1050142 White, orange, right
1050137 White, red, left
1050140 White, red, right

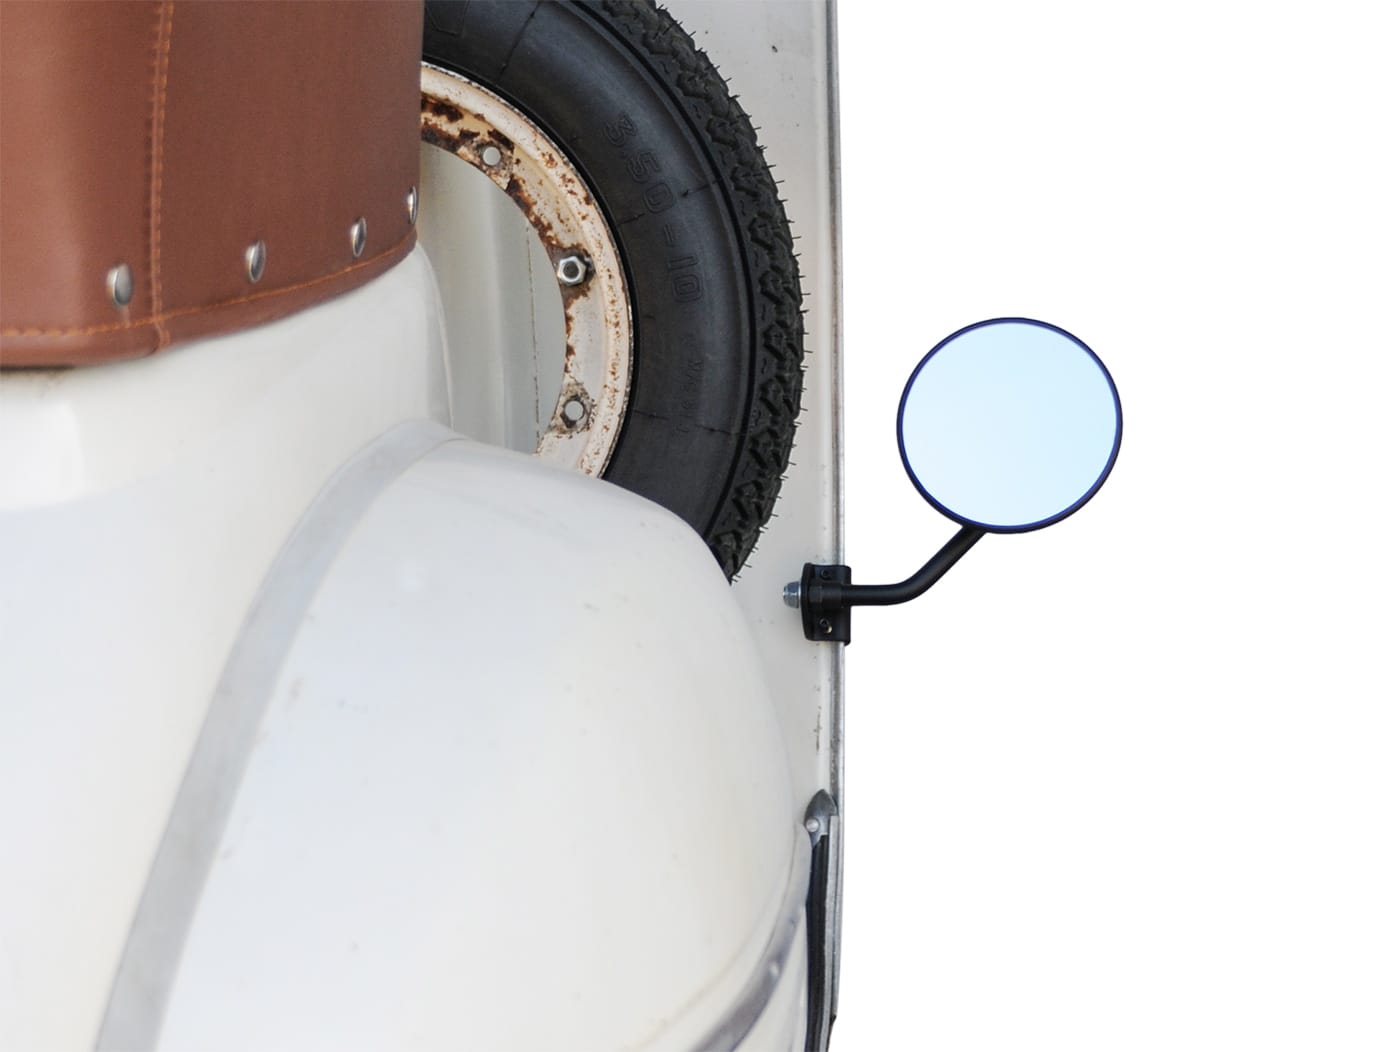
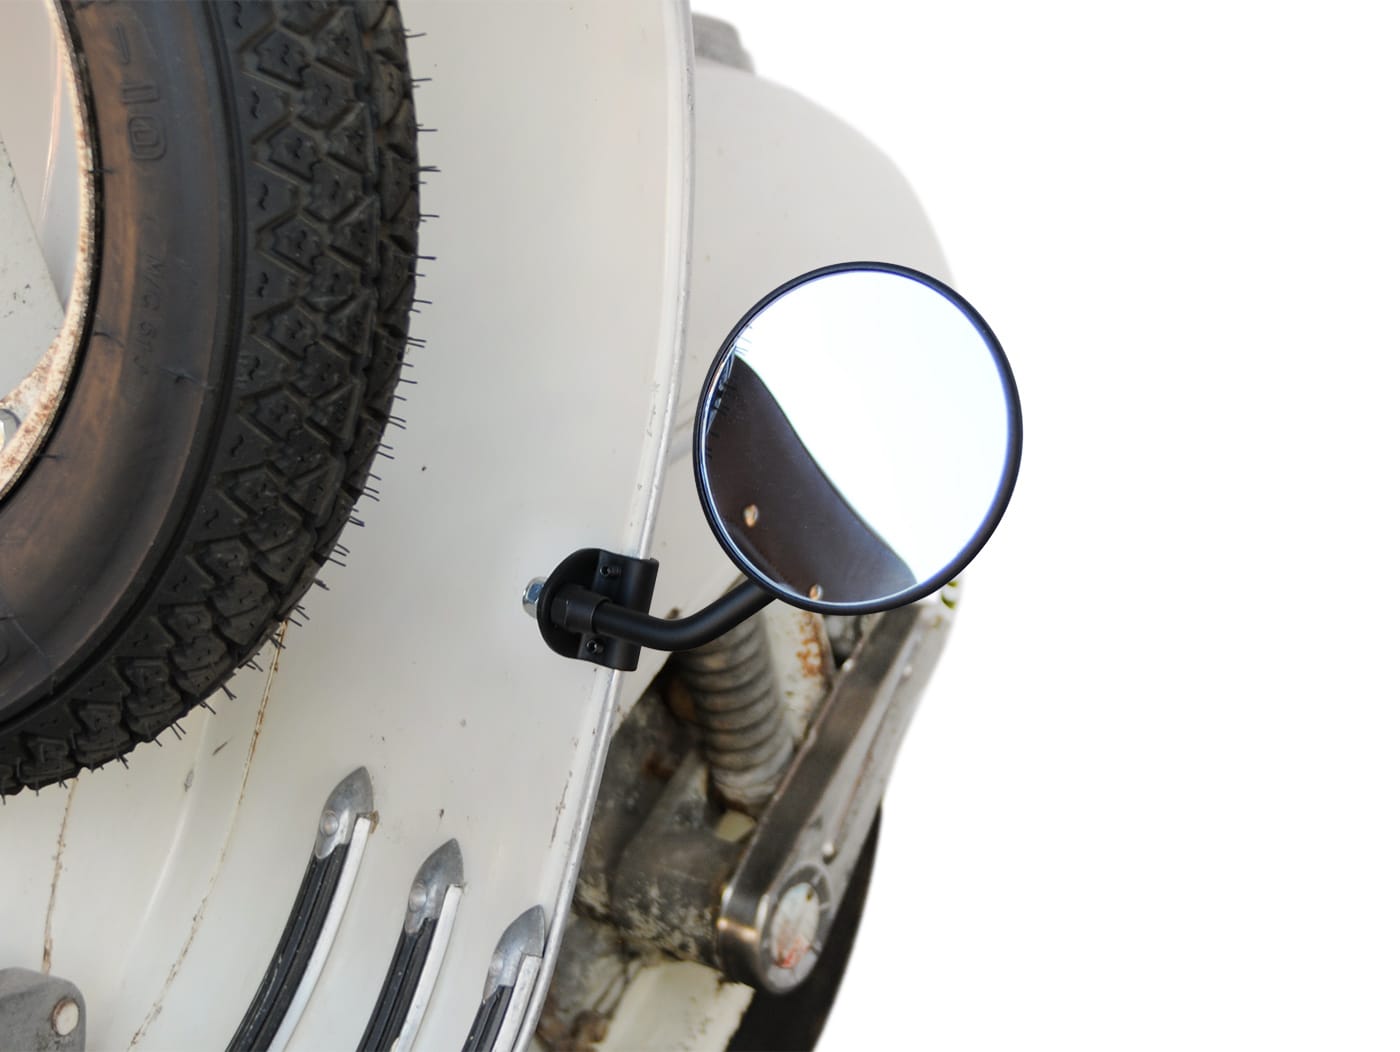
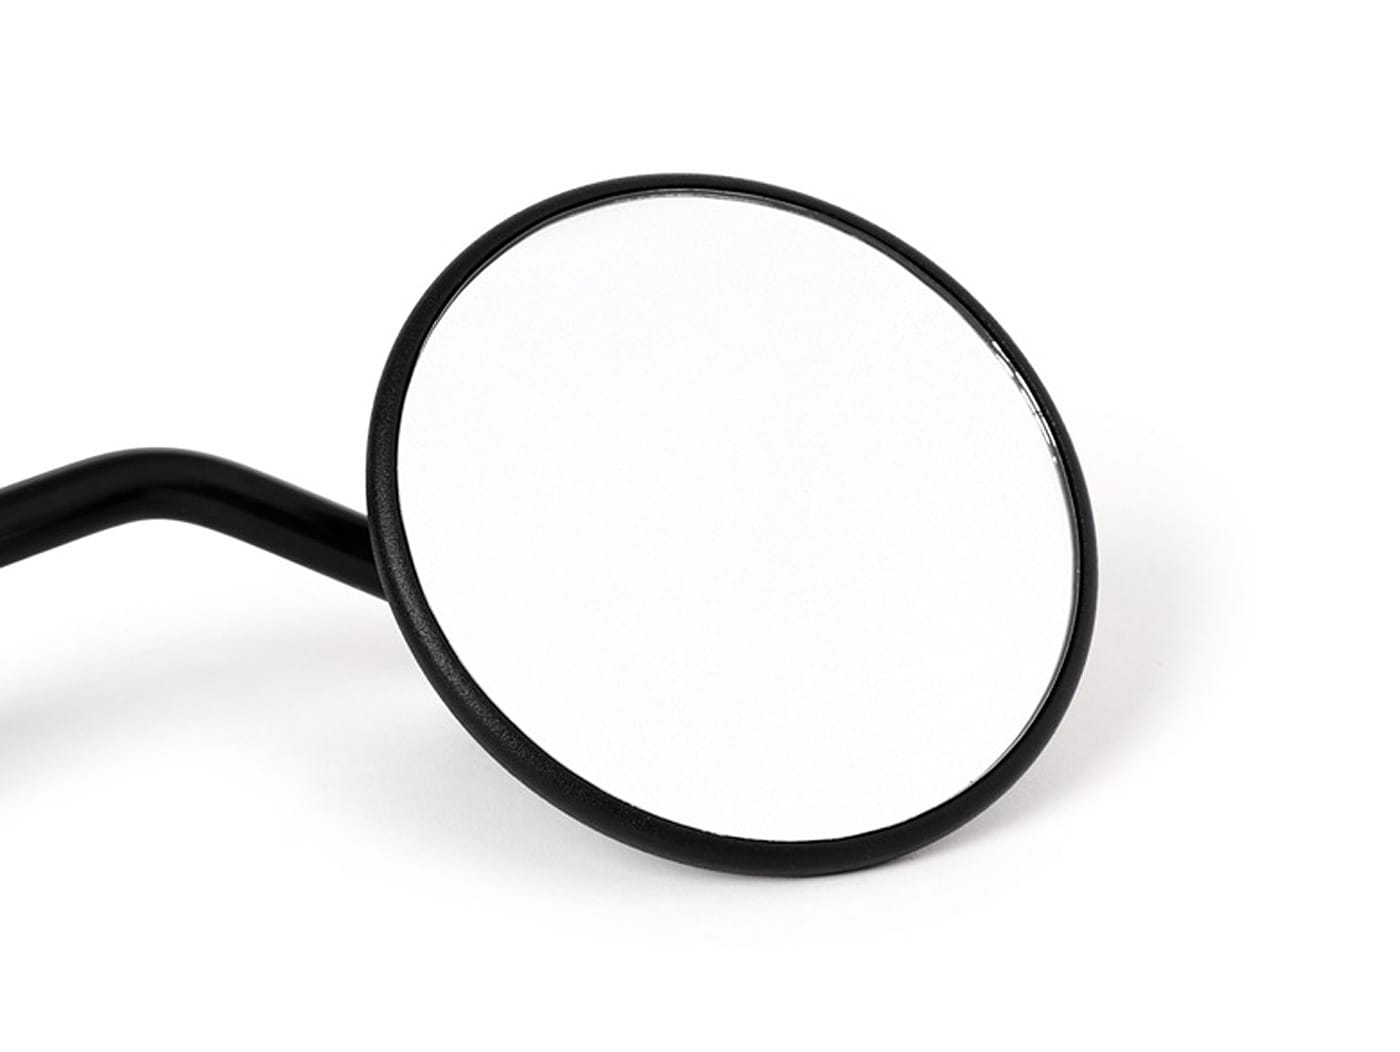
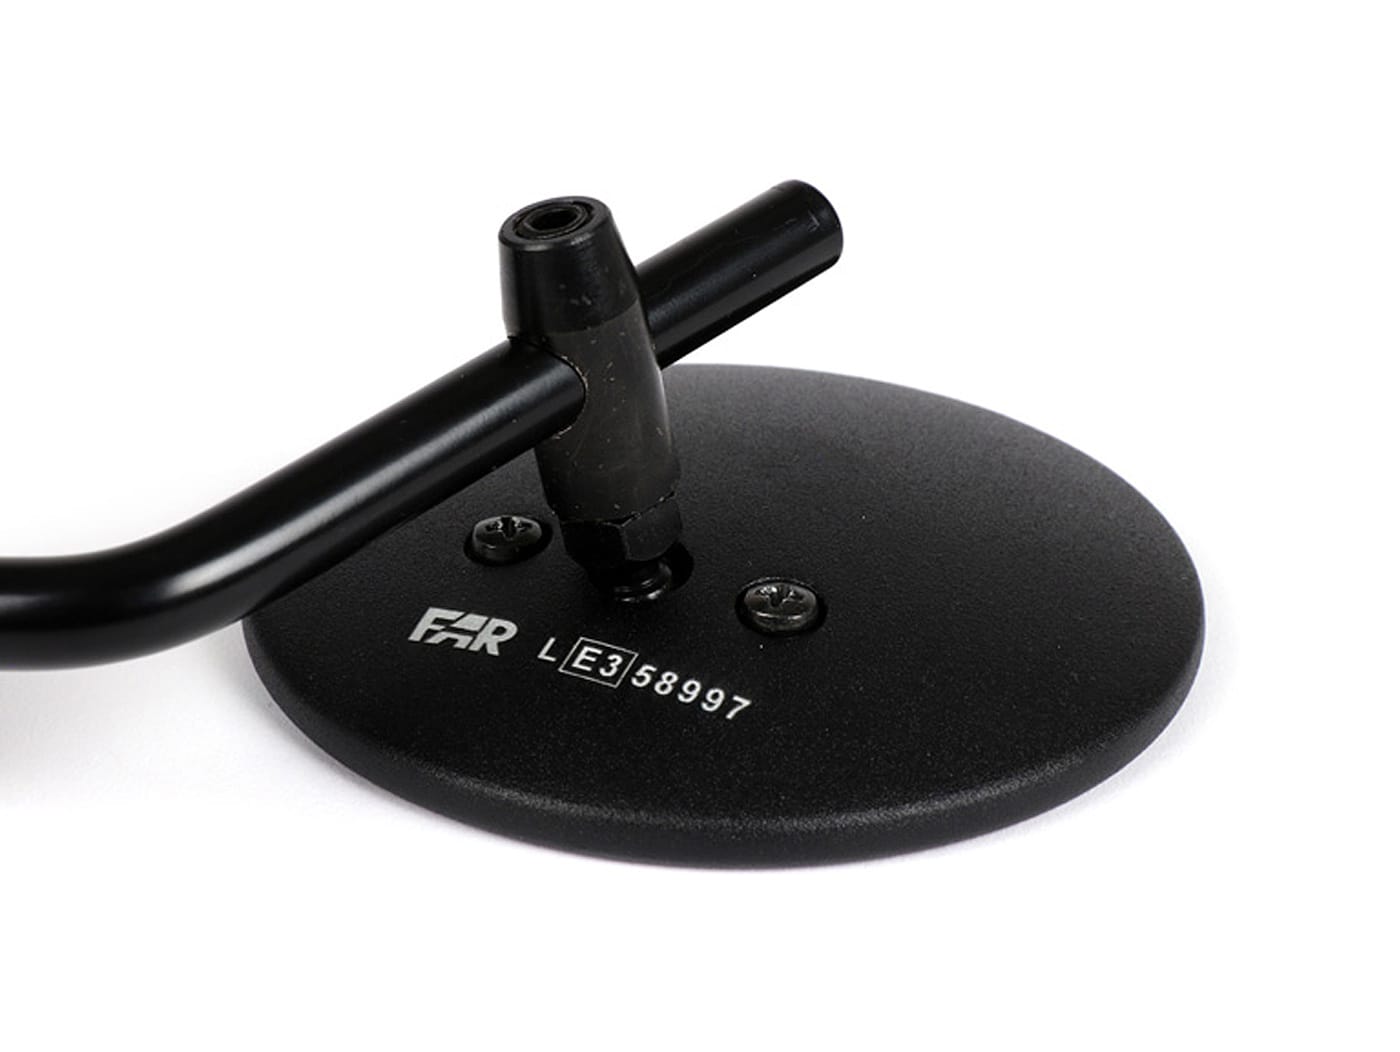
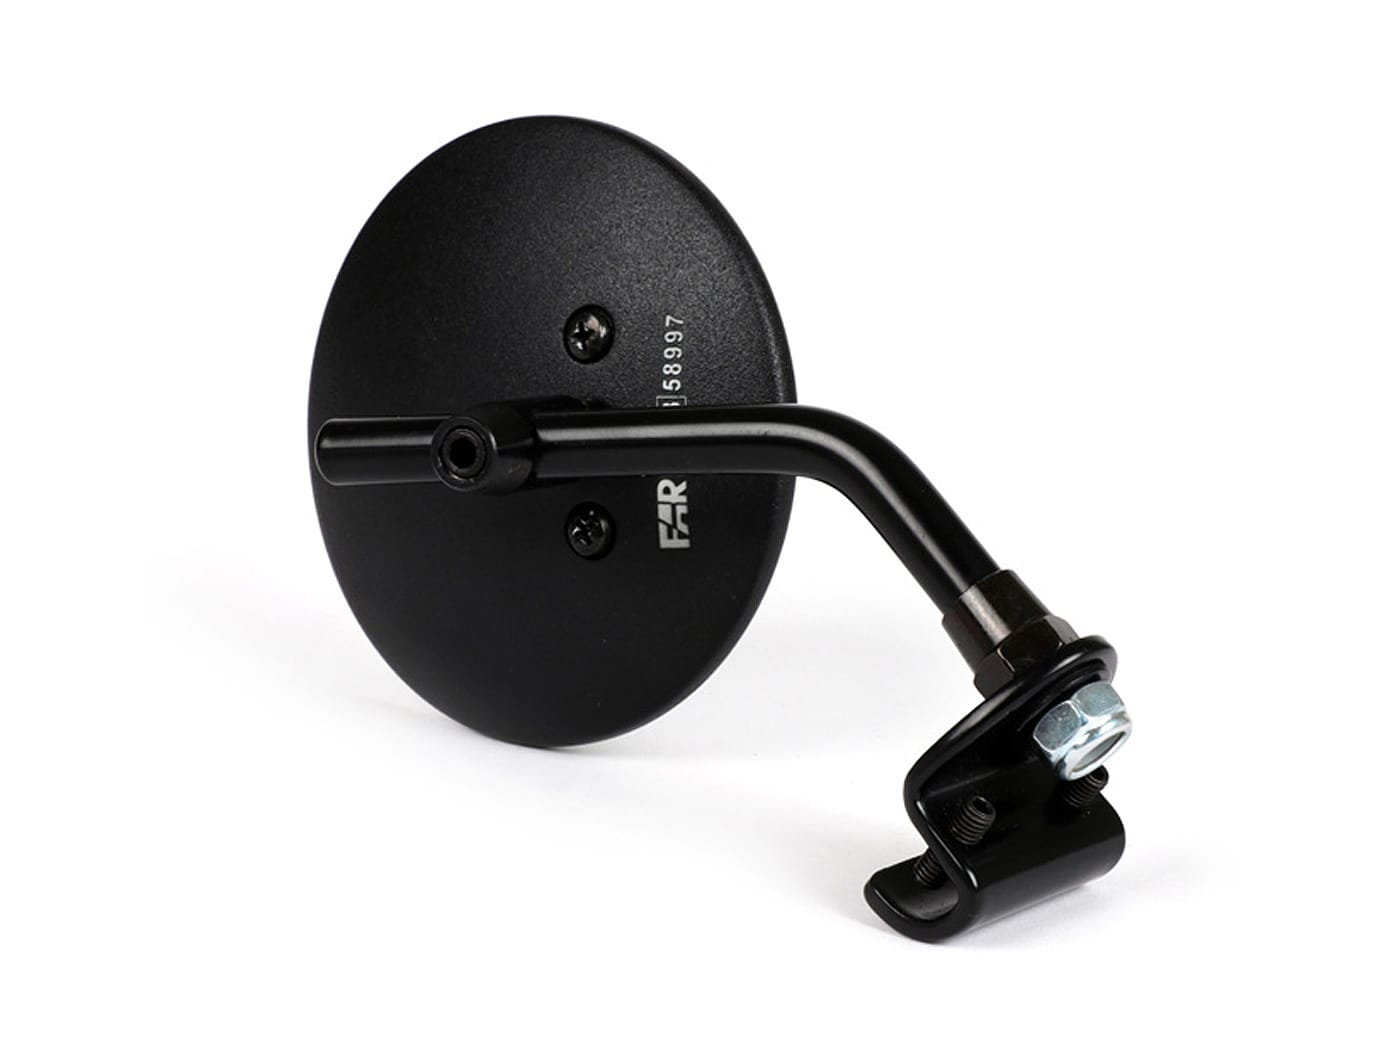
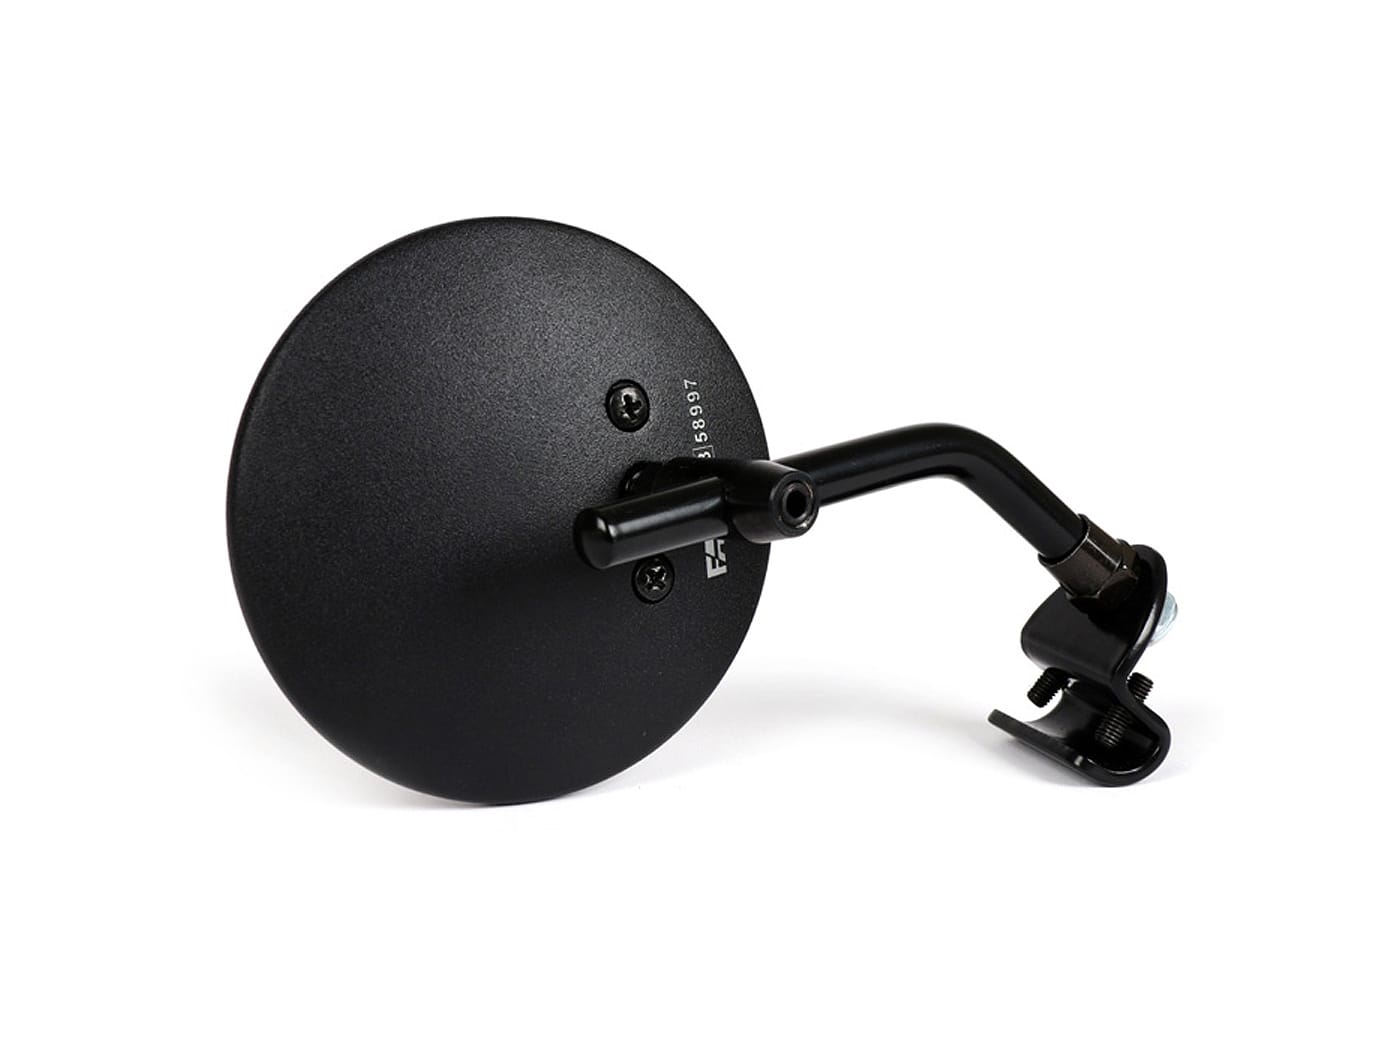
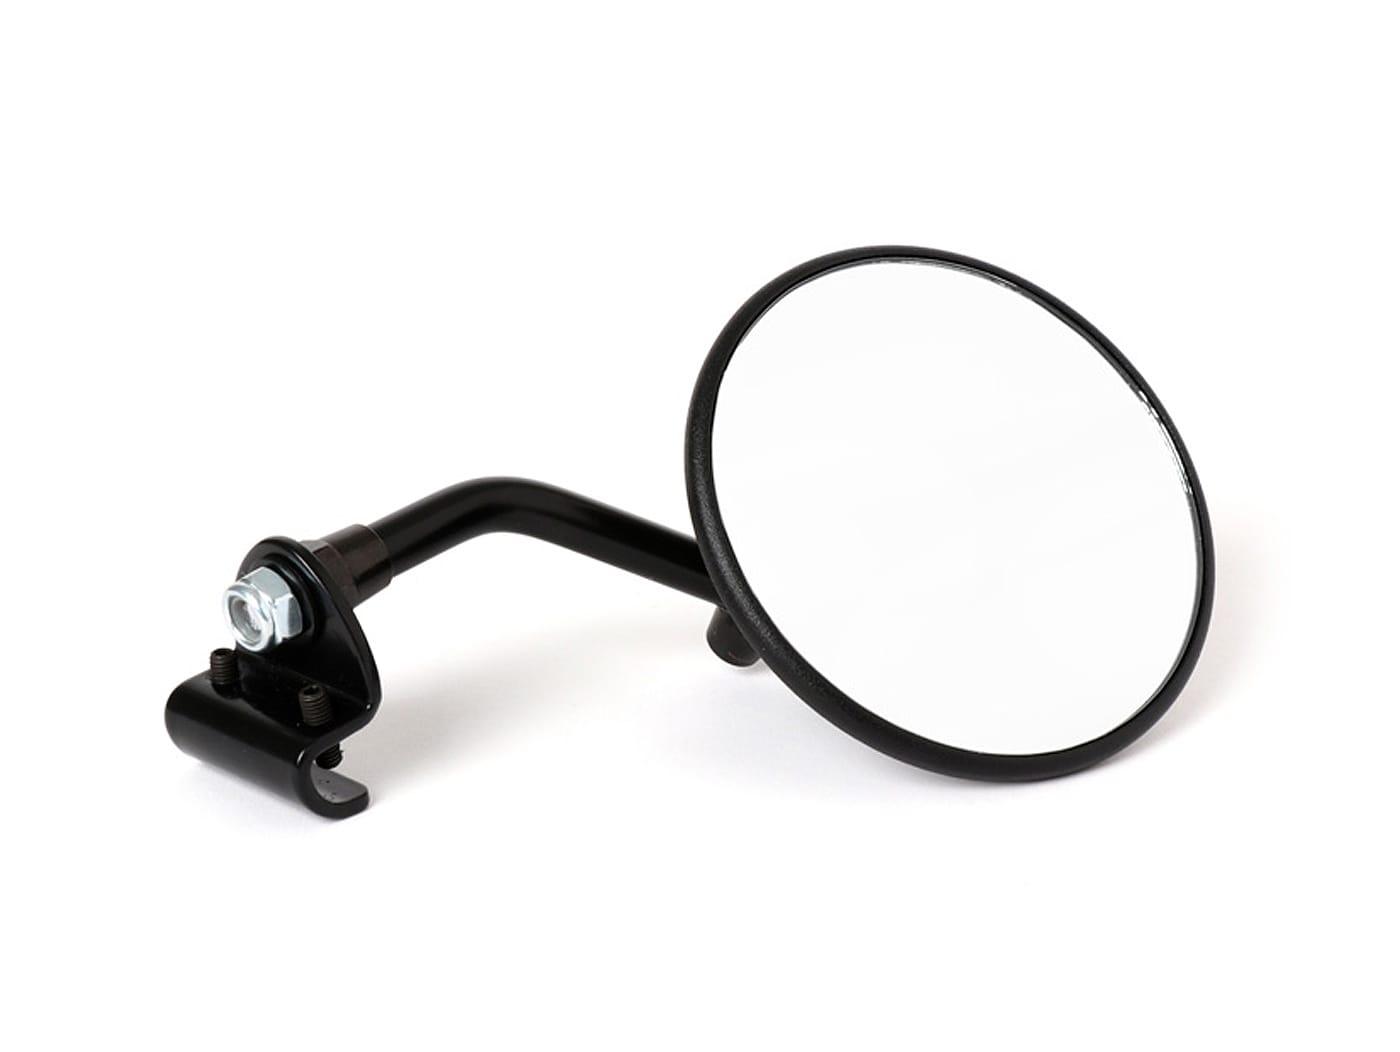
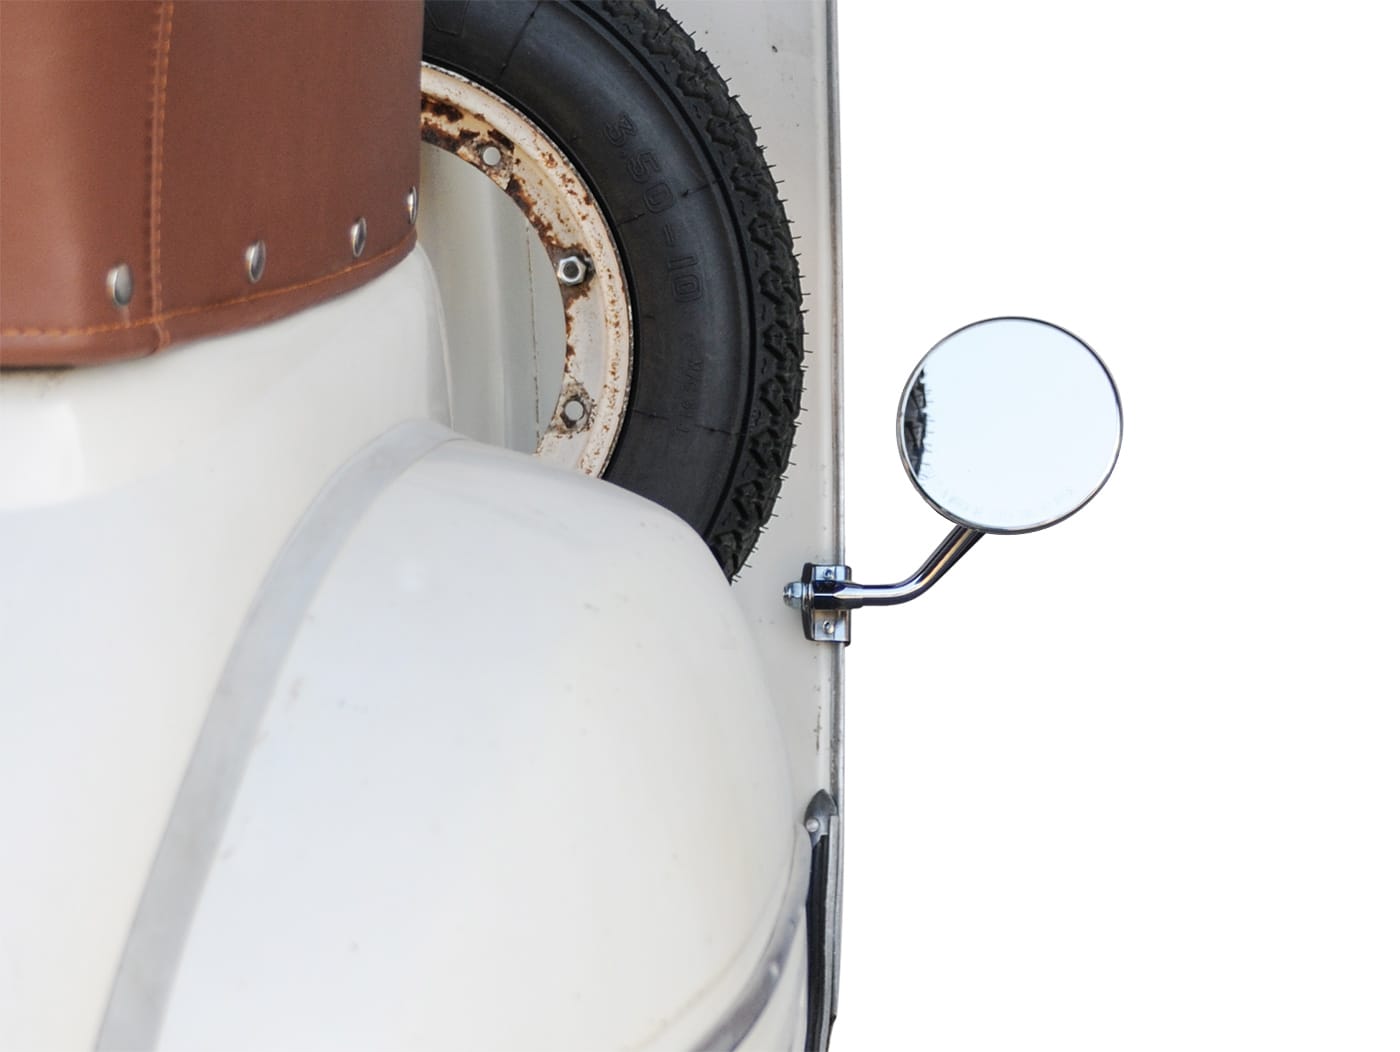
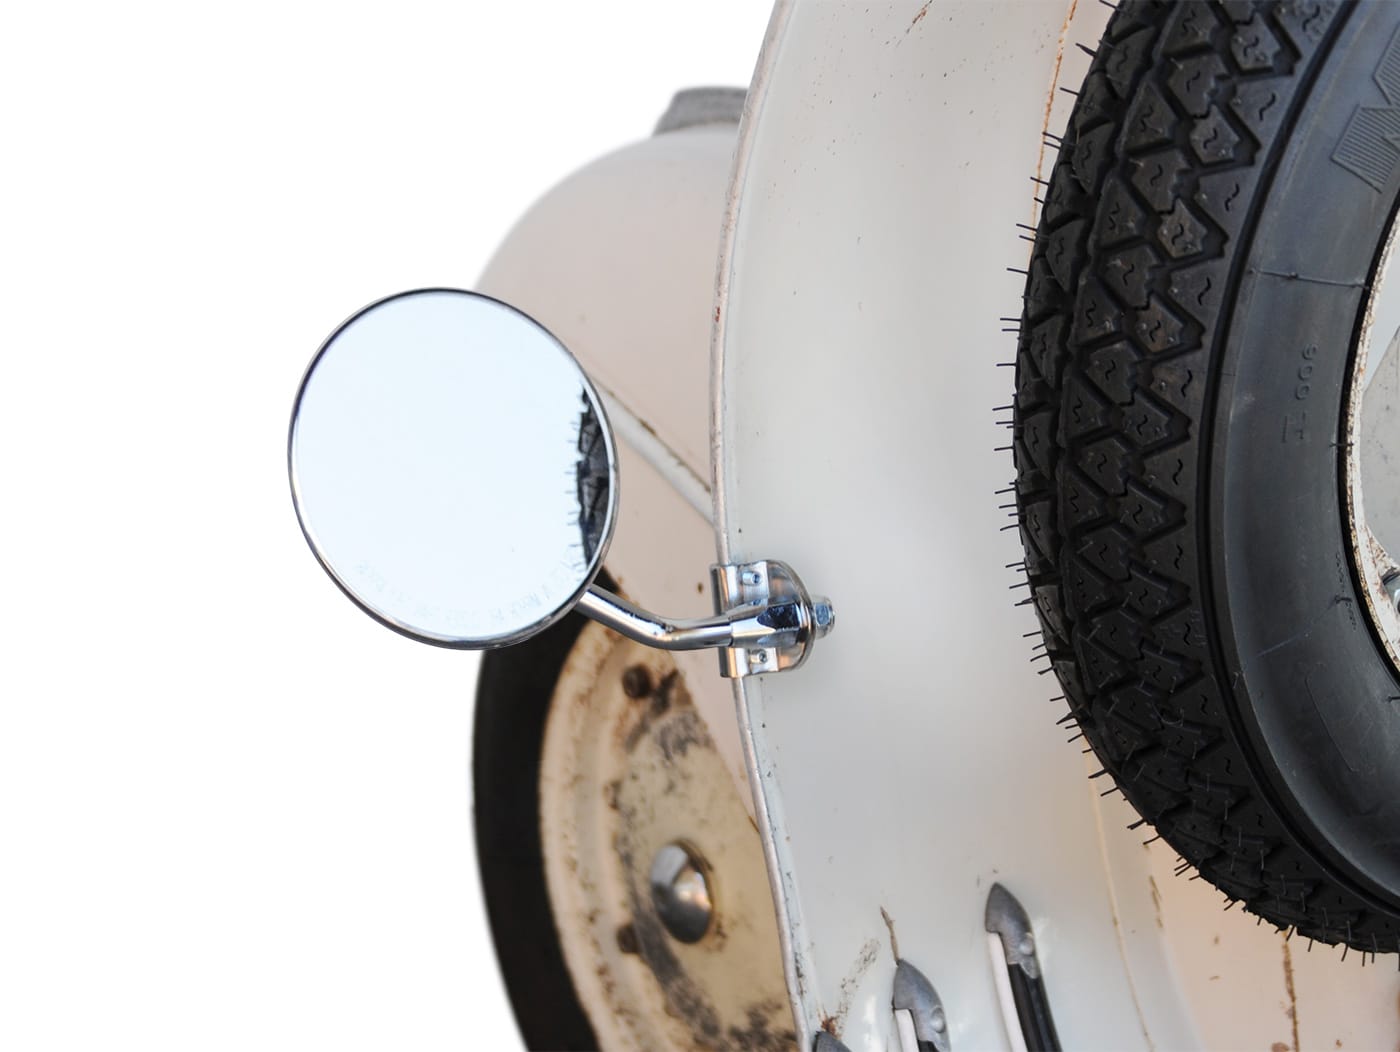
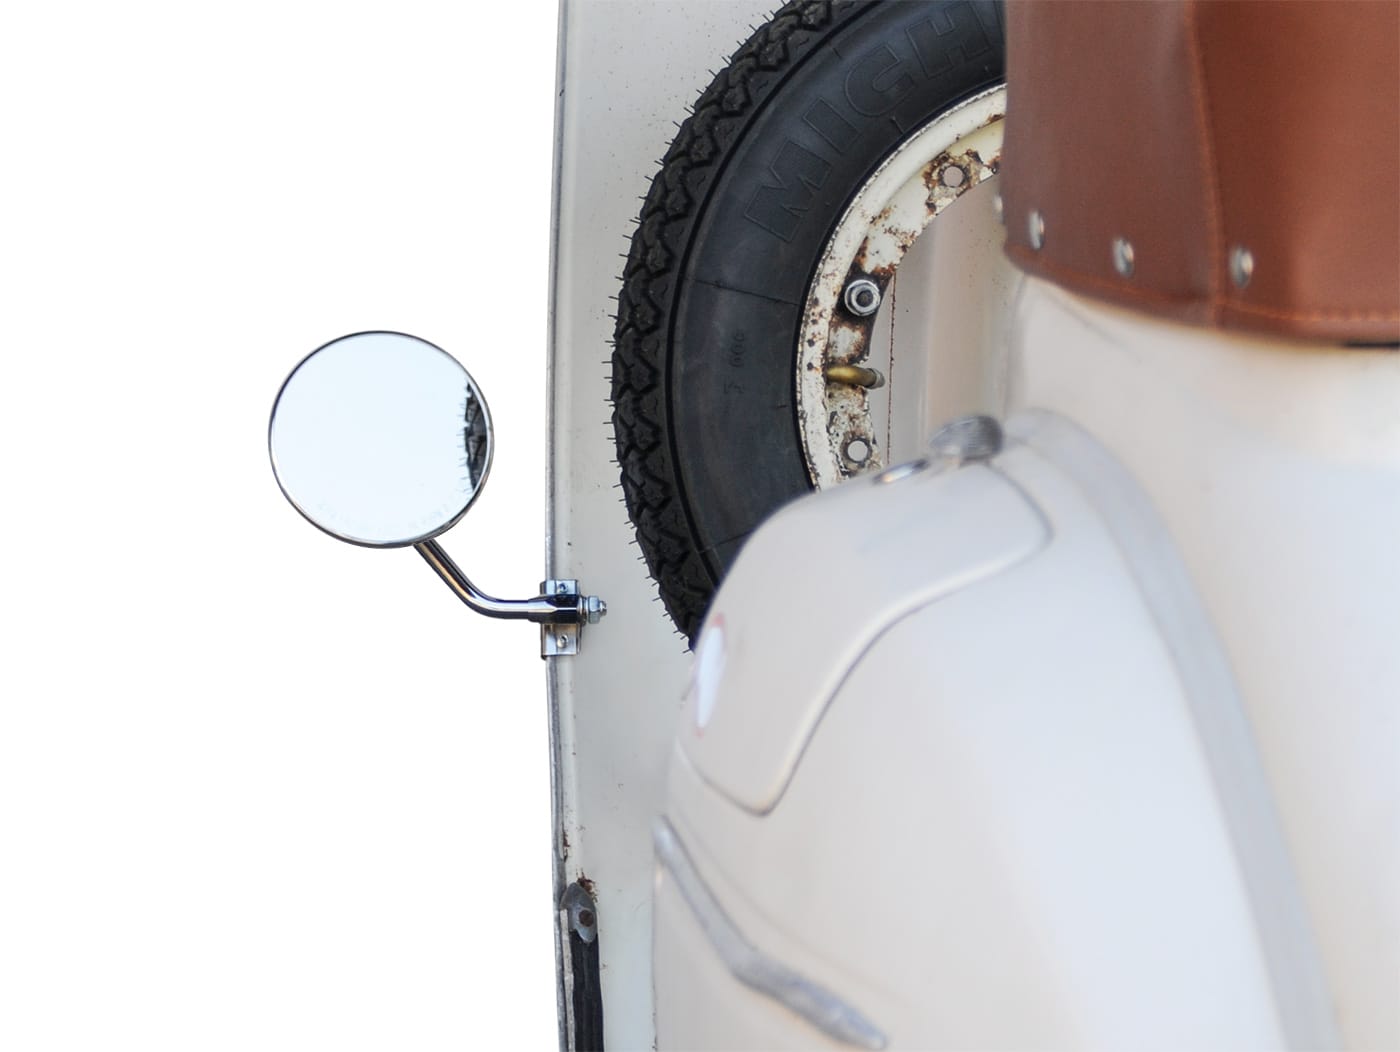
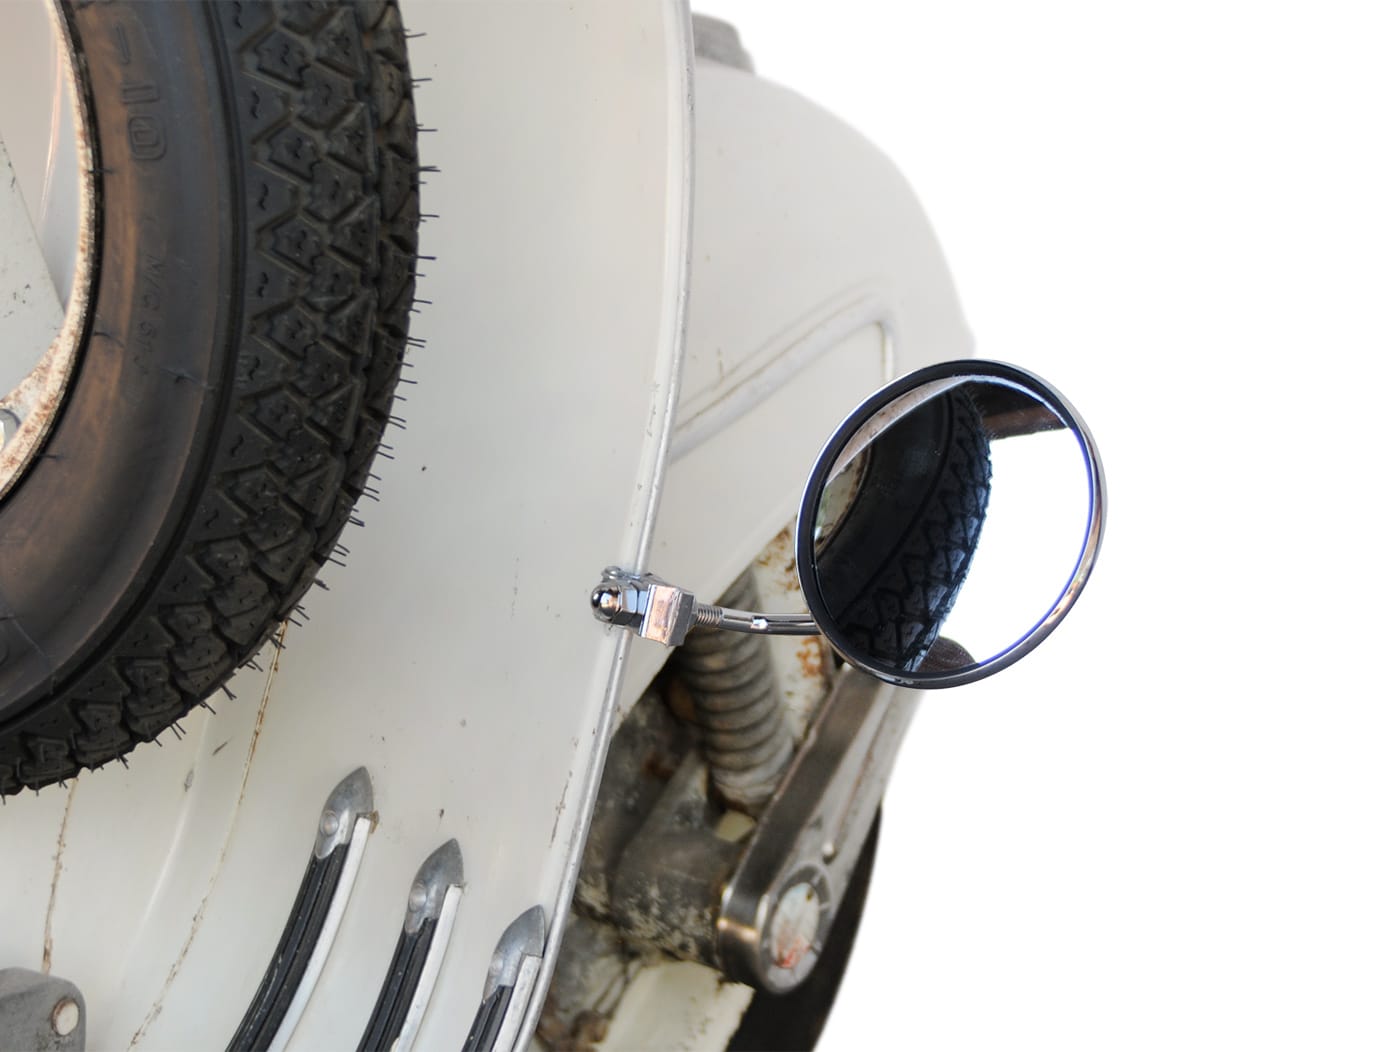
Mirror FAR leg shield clamp mirror round Ø = 105mm - E3 (E-mark)

Beautiful mirror from FAR in a circular shape and a diameter of 105mm. Available in chrome and black. The leg shield mirror has an E-mark (E3).

This round FAR mirror is available in:

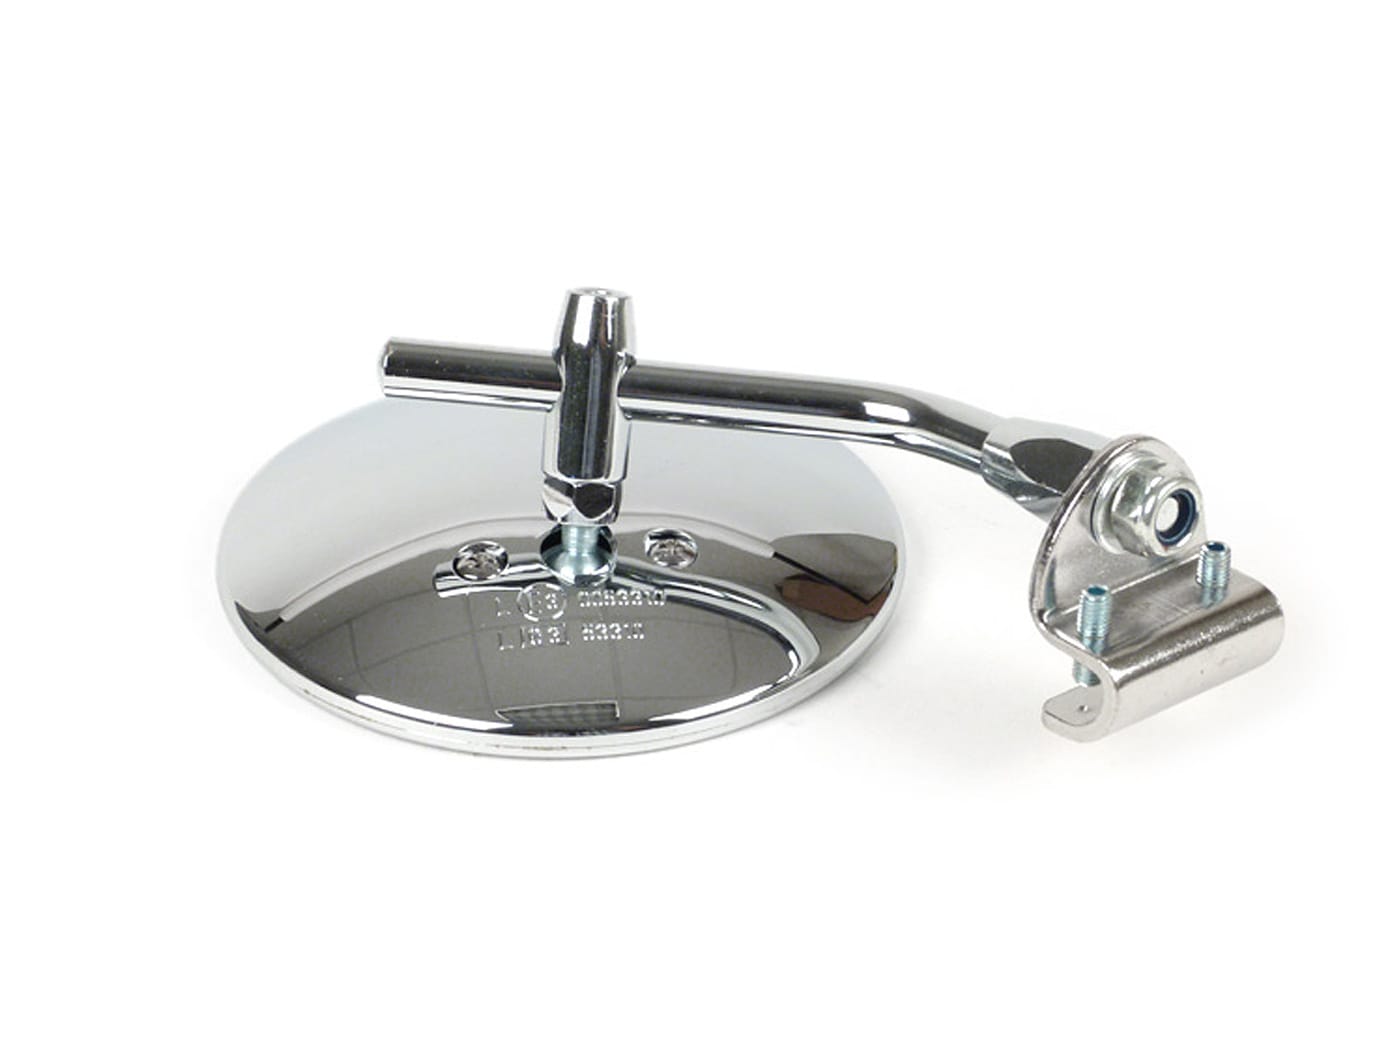
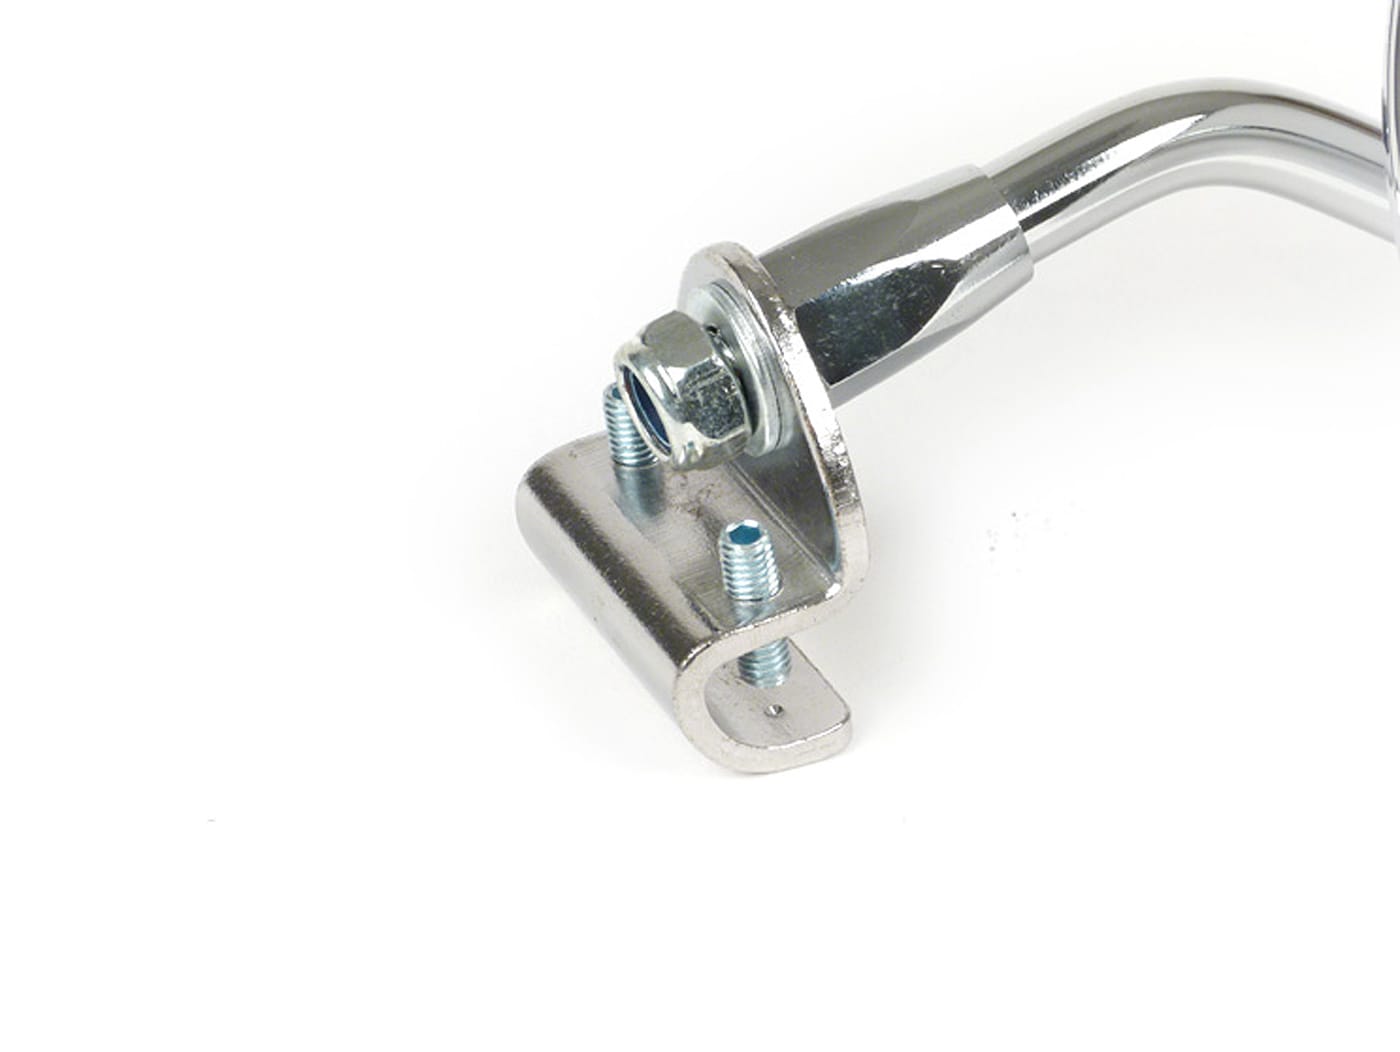
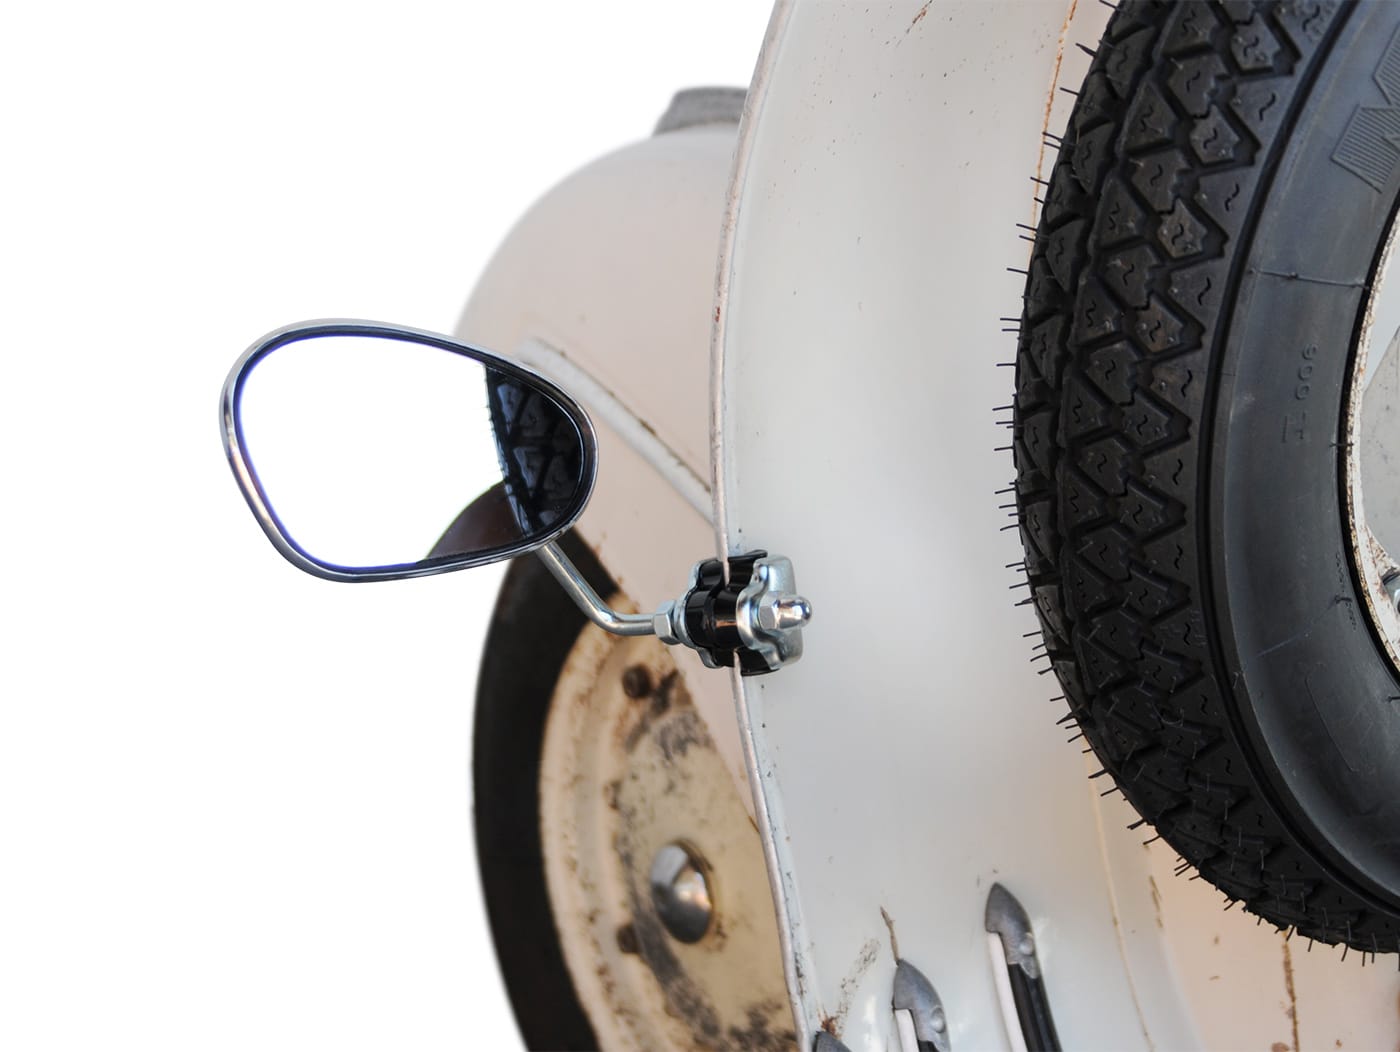
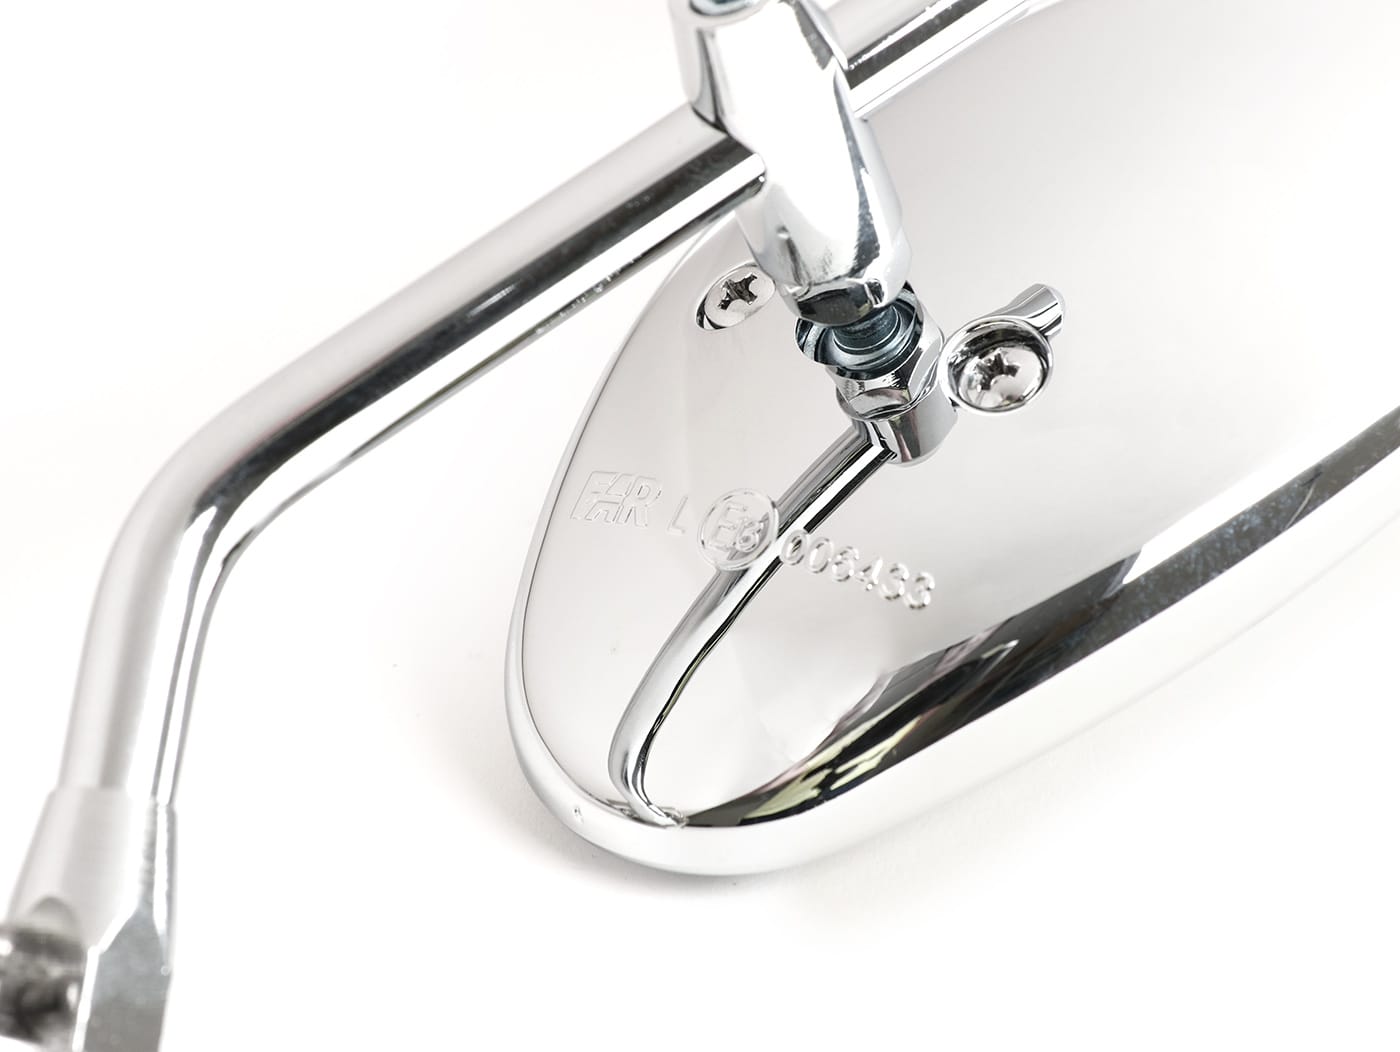
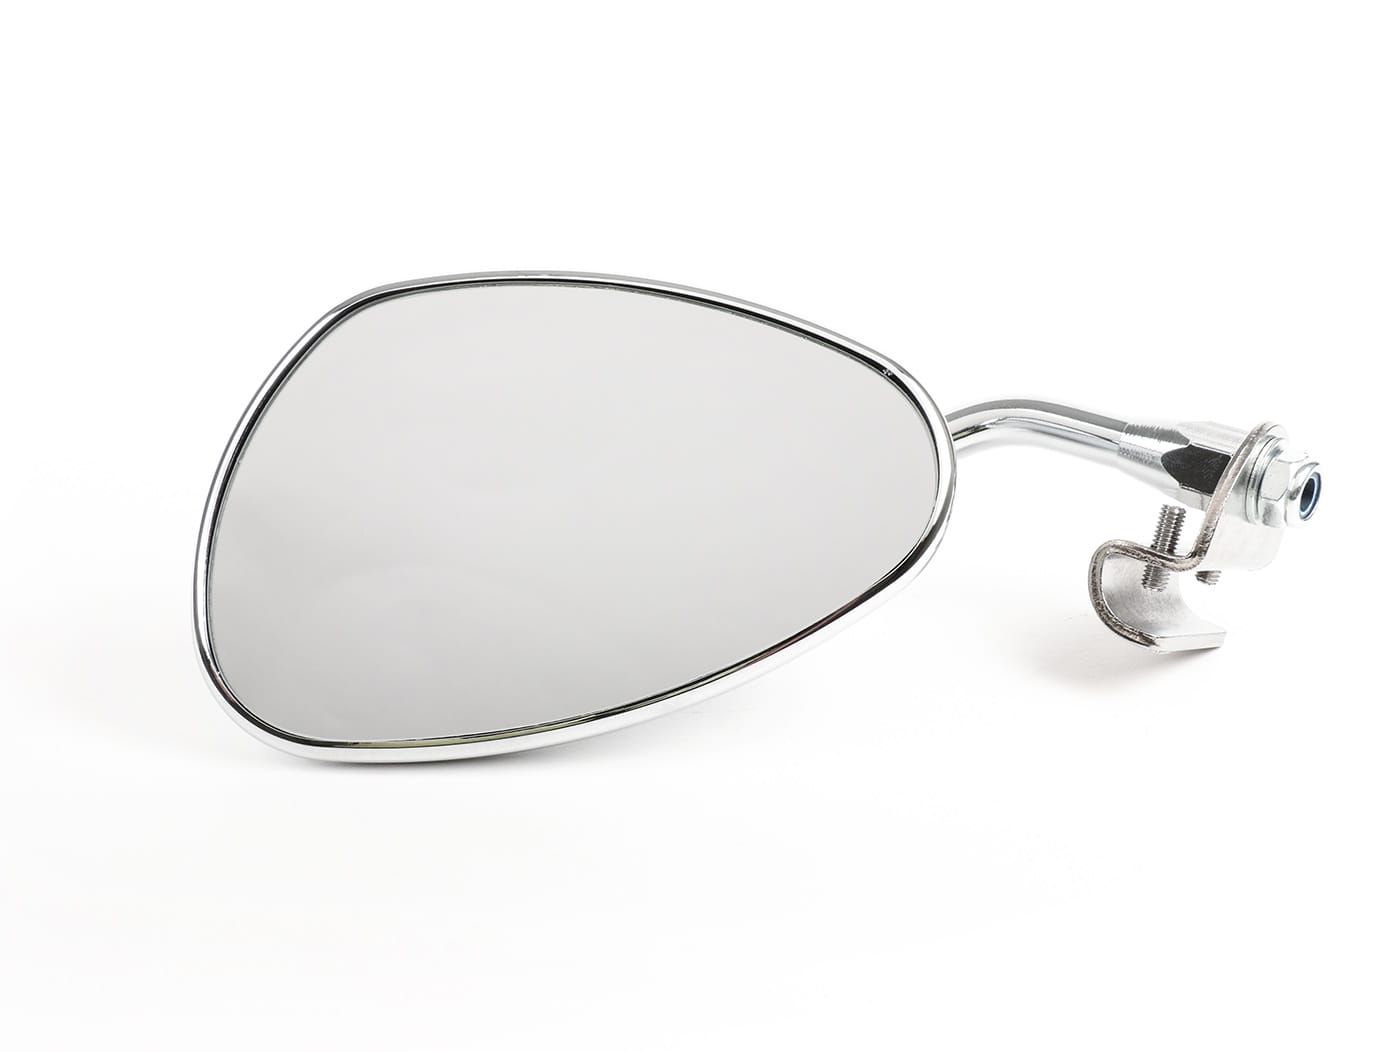
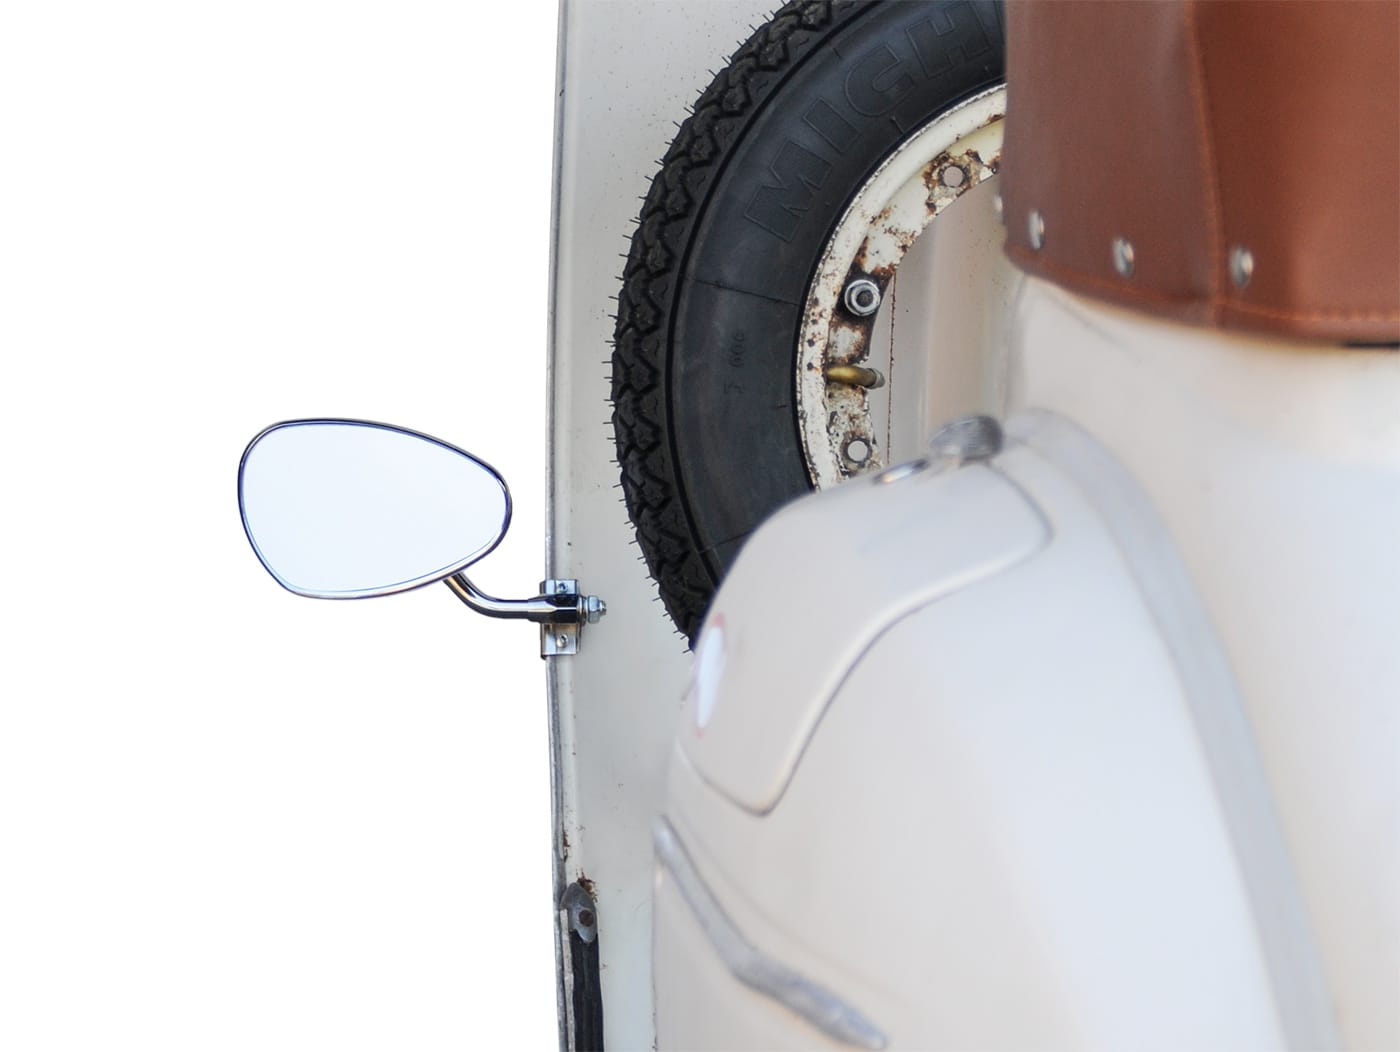
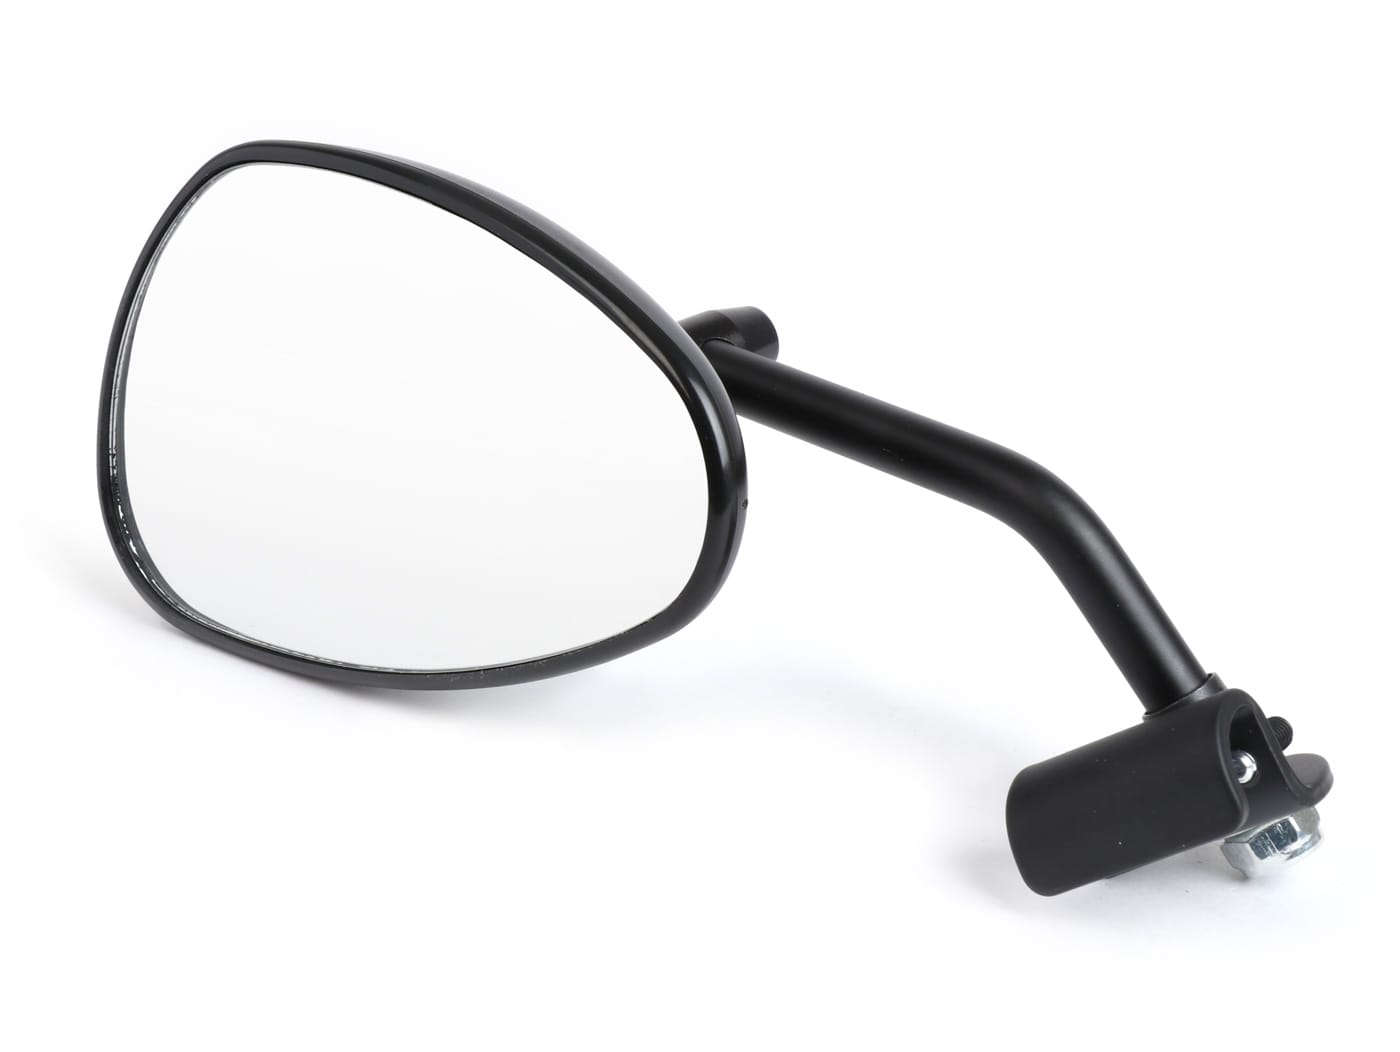
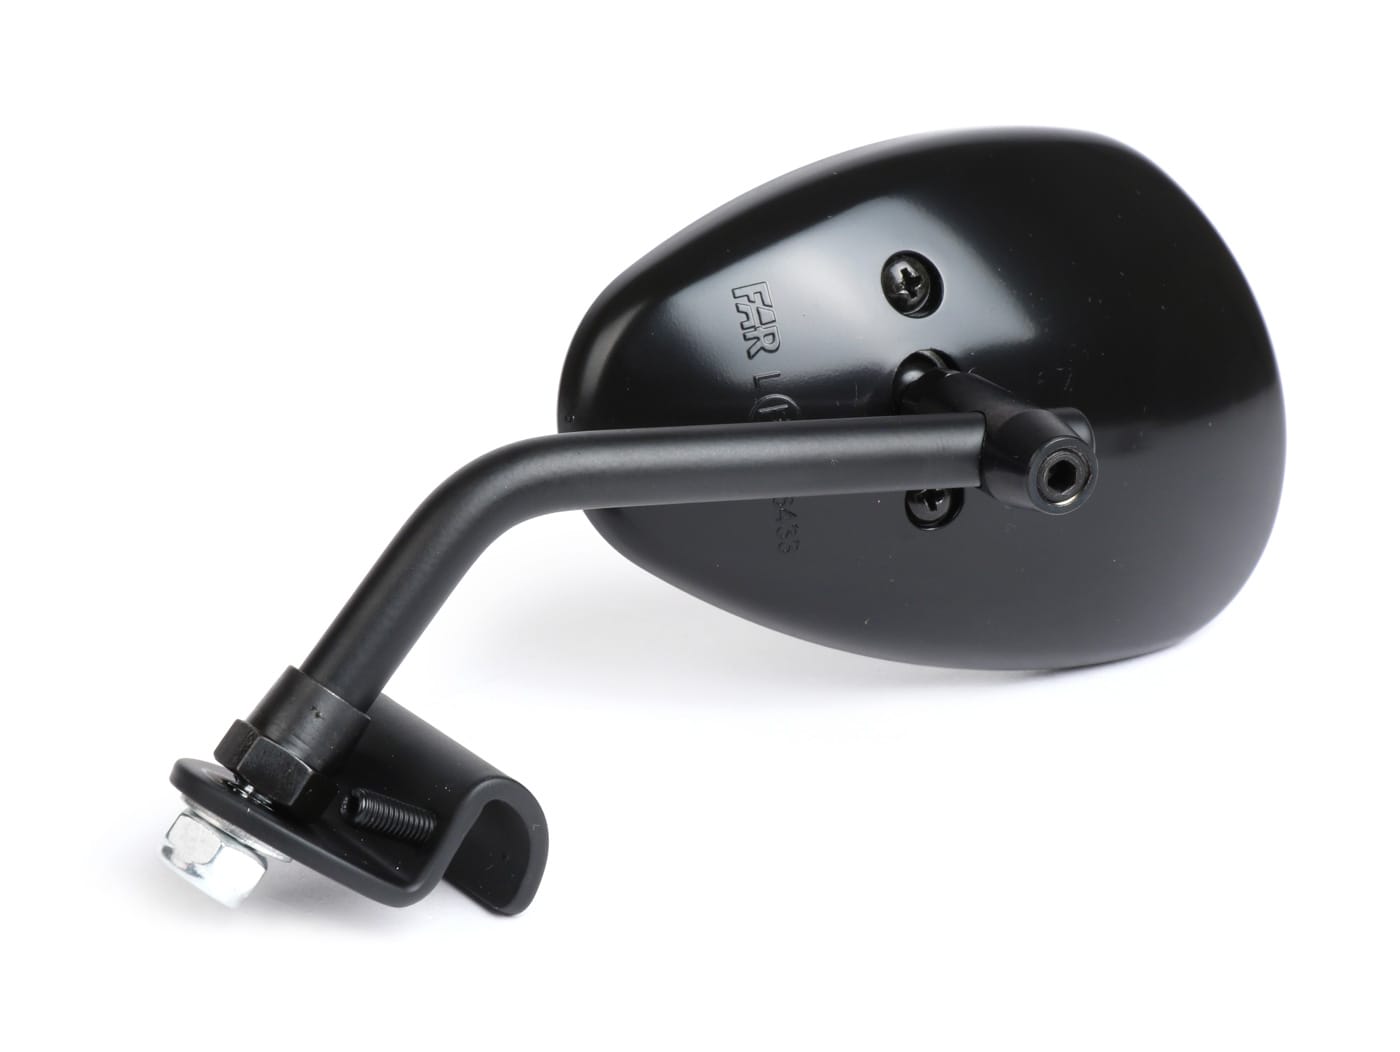
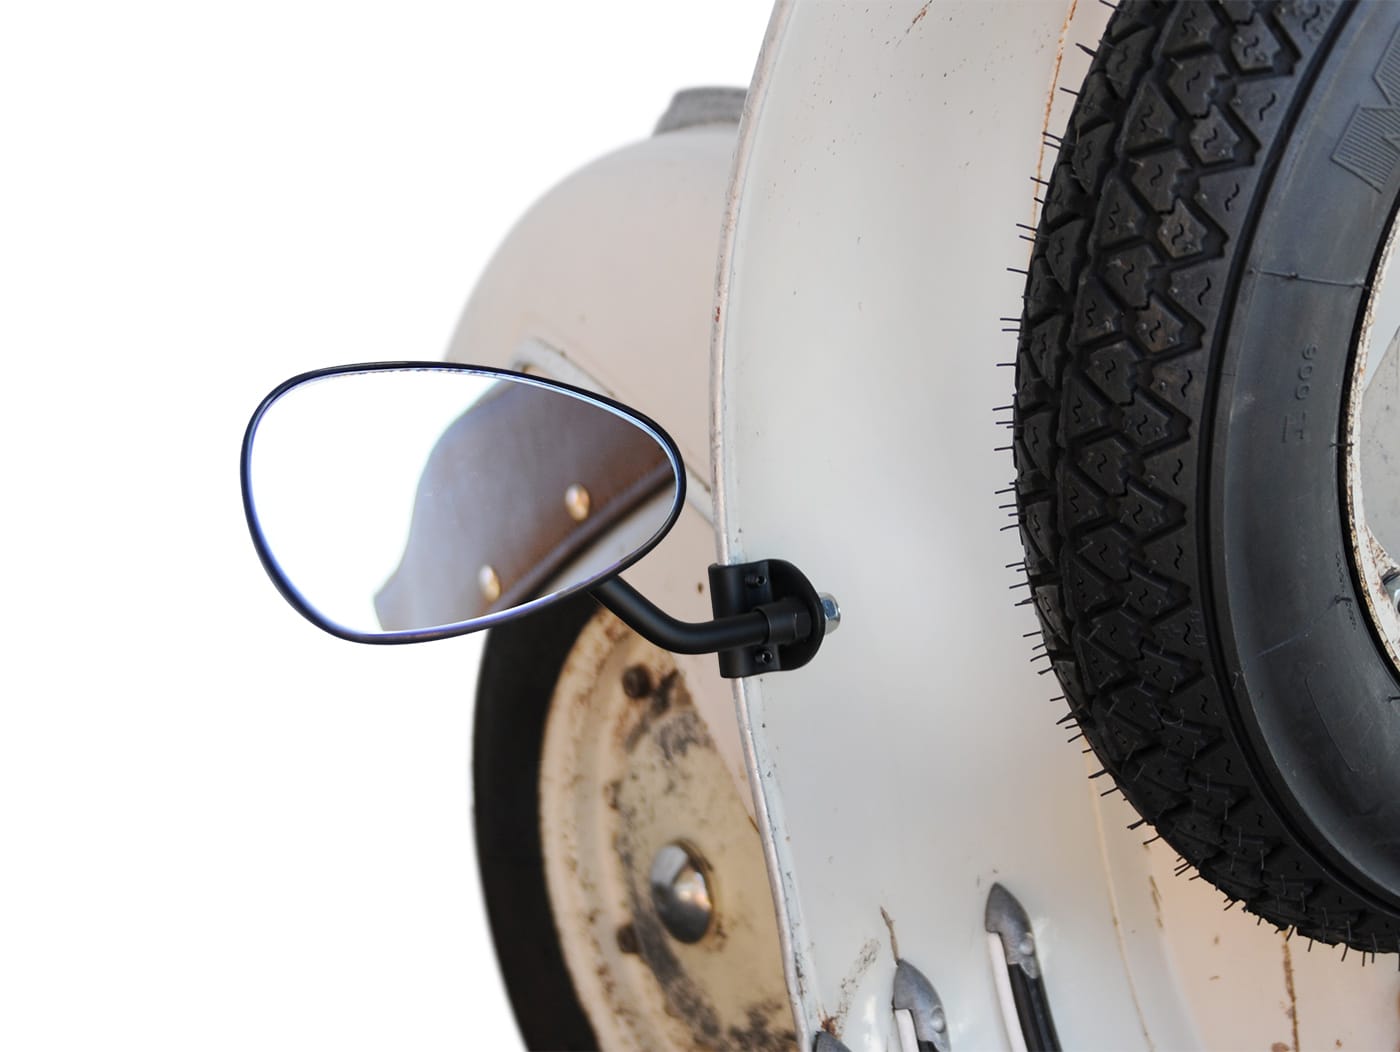
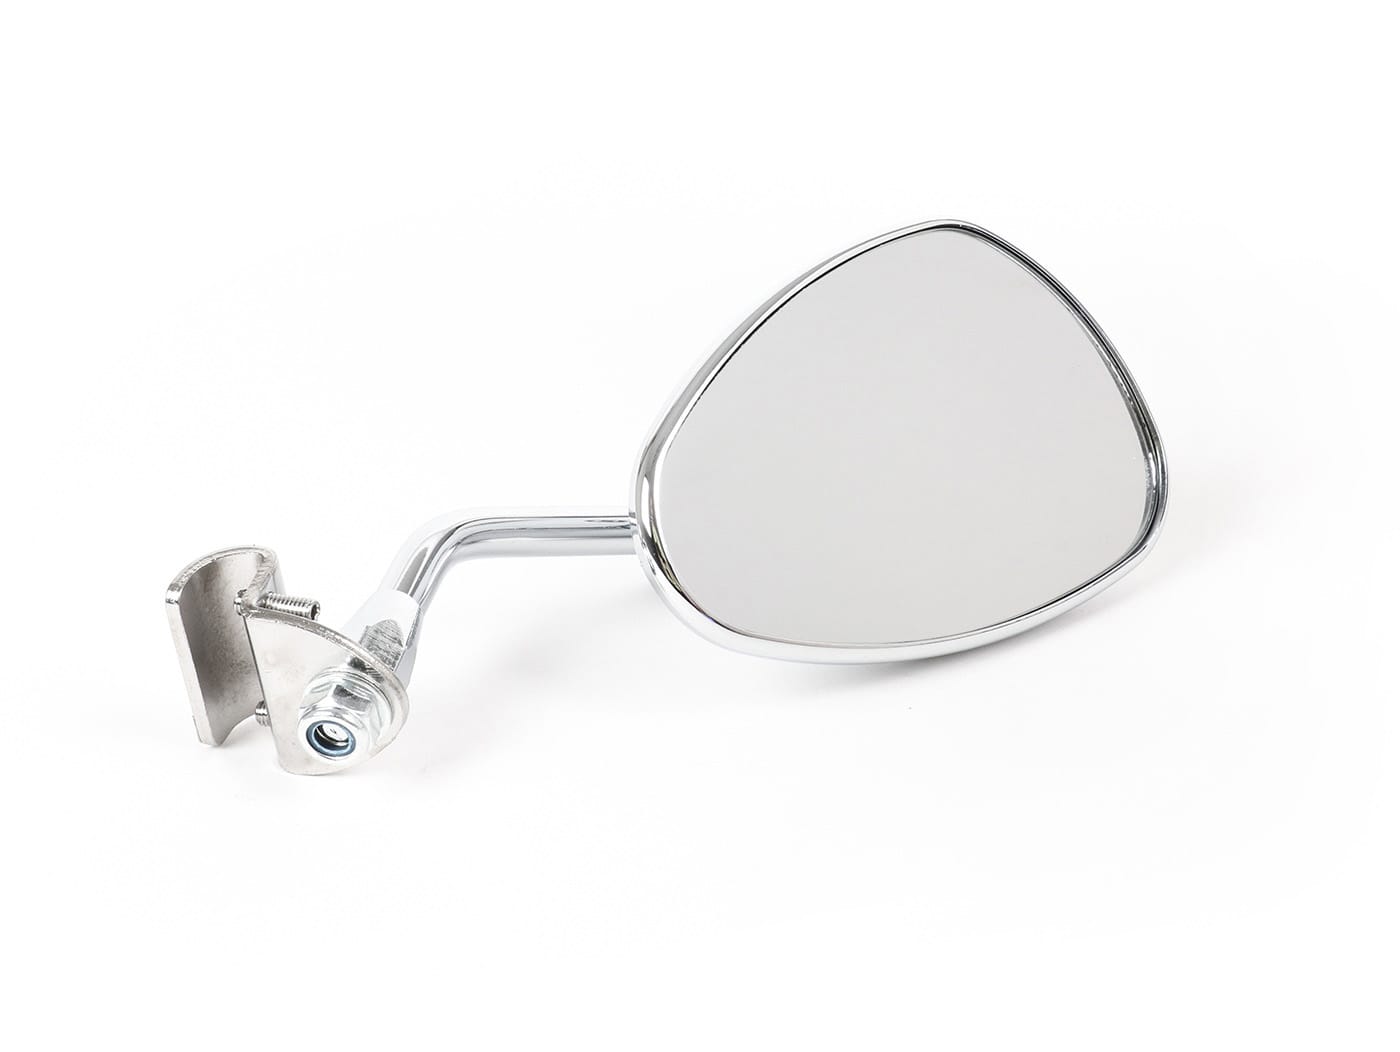
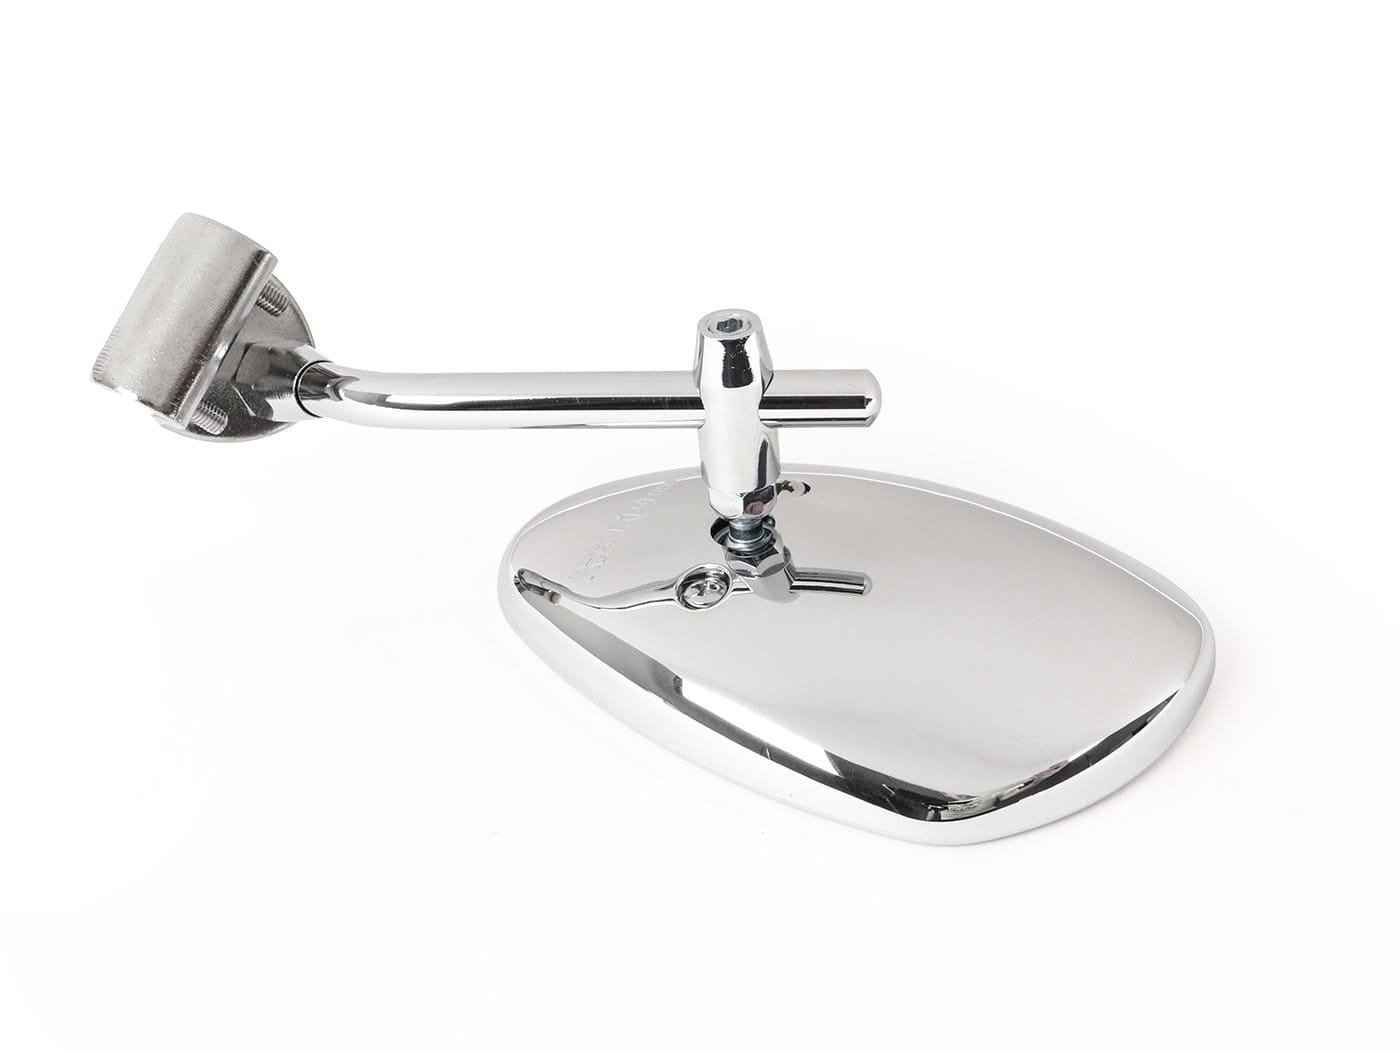
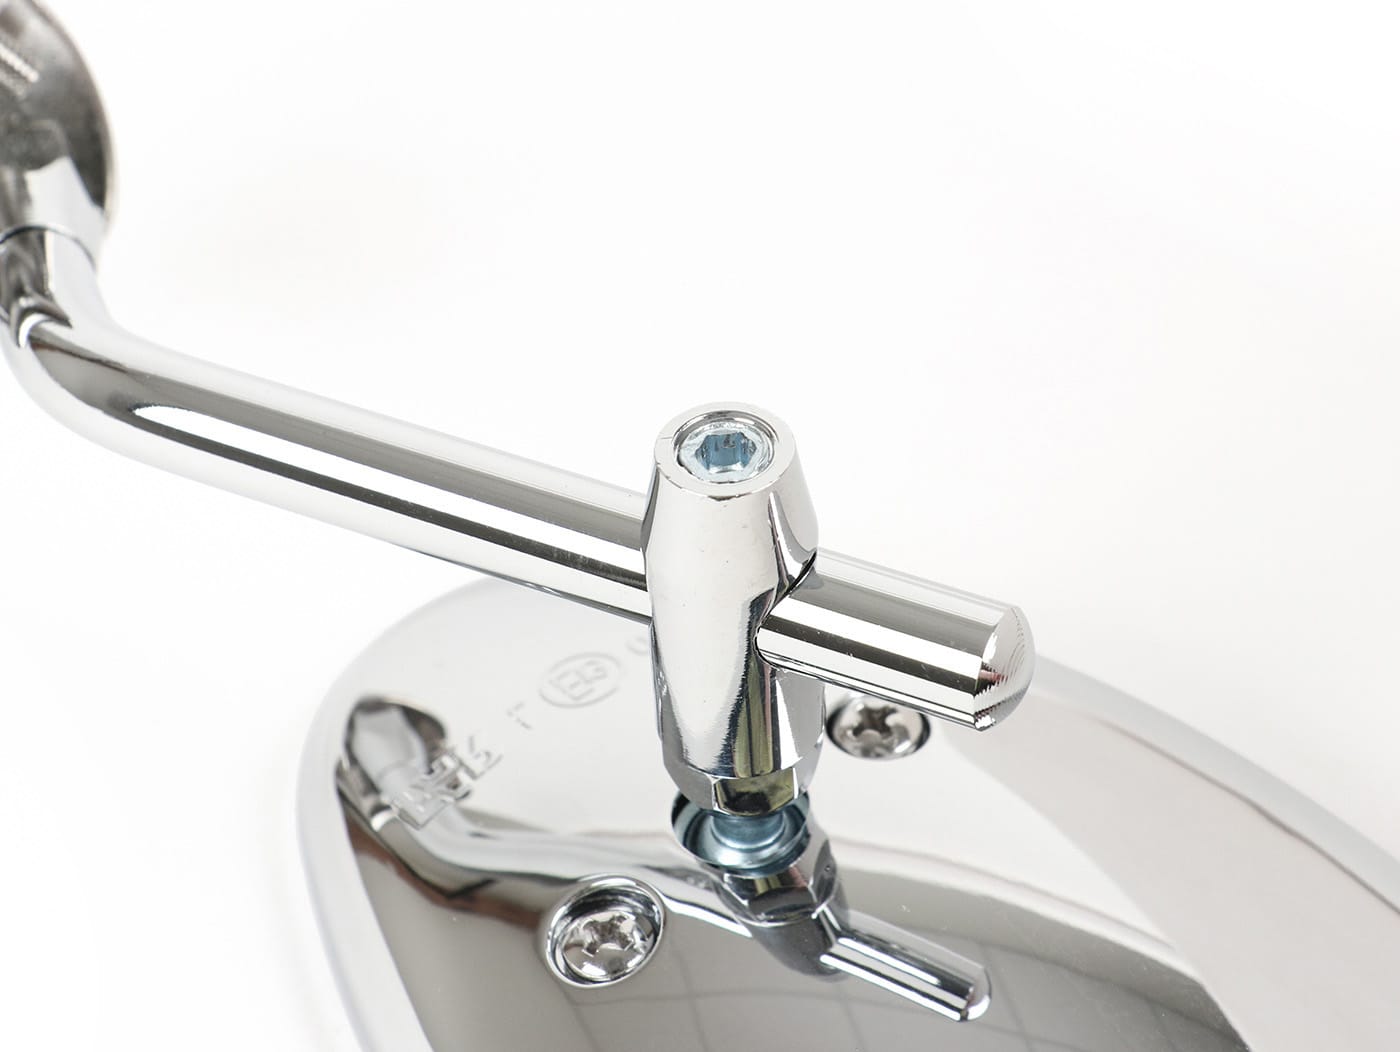
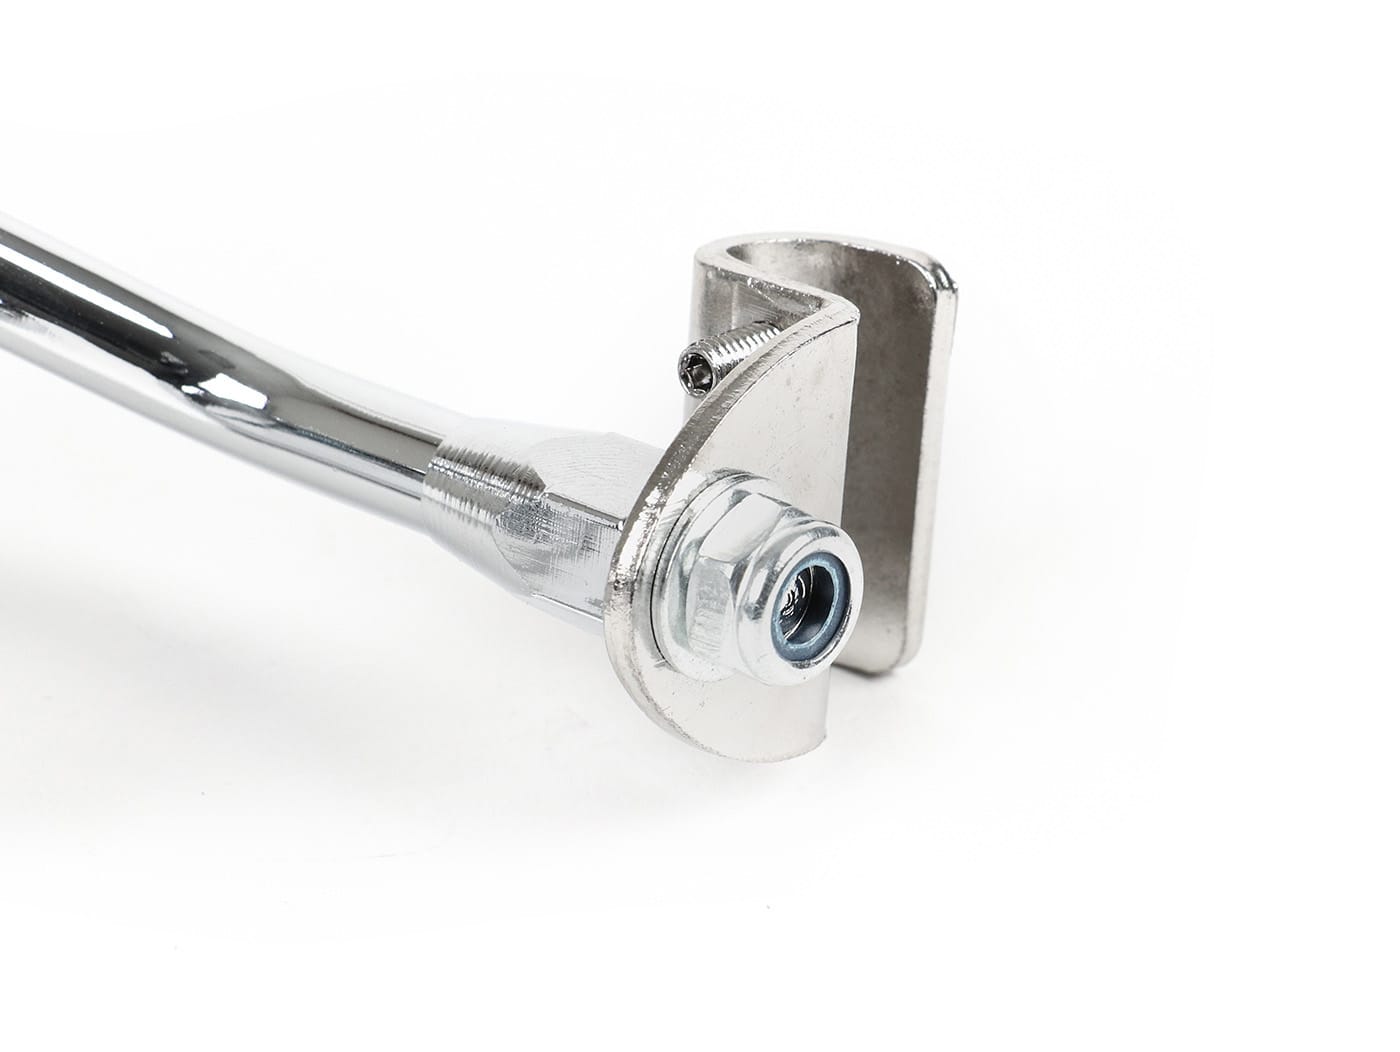
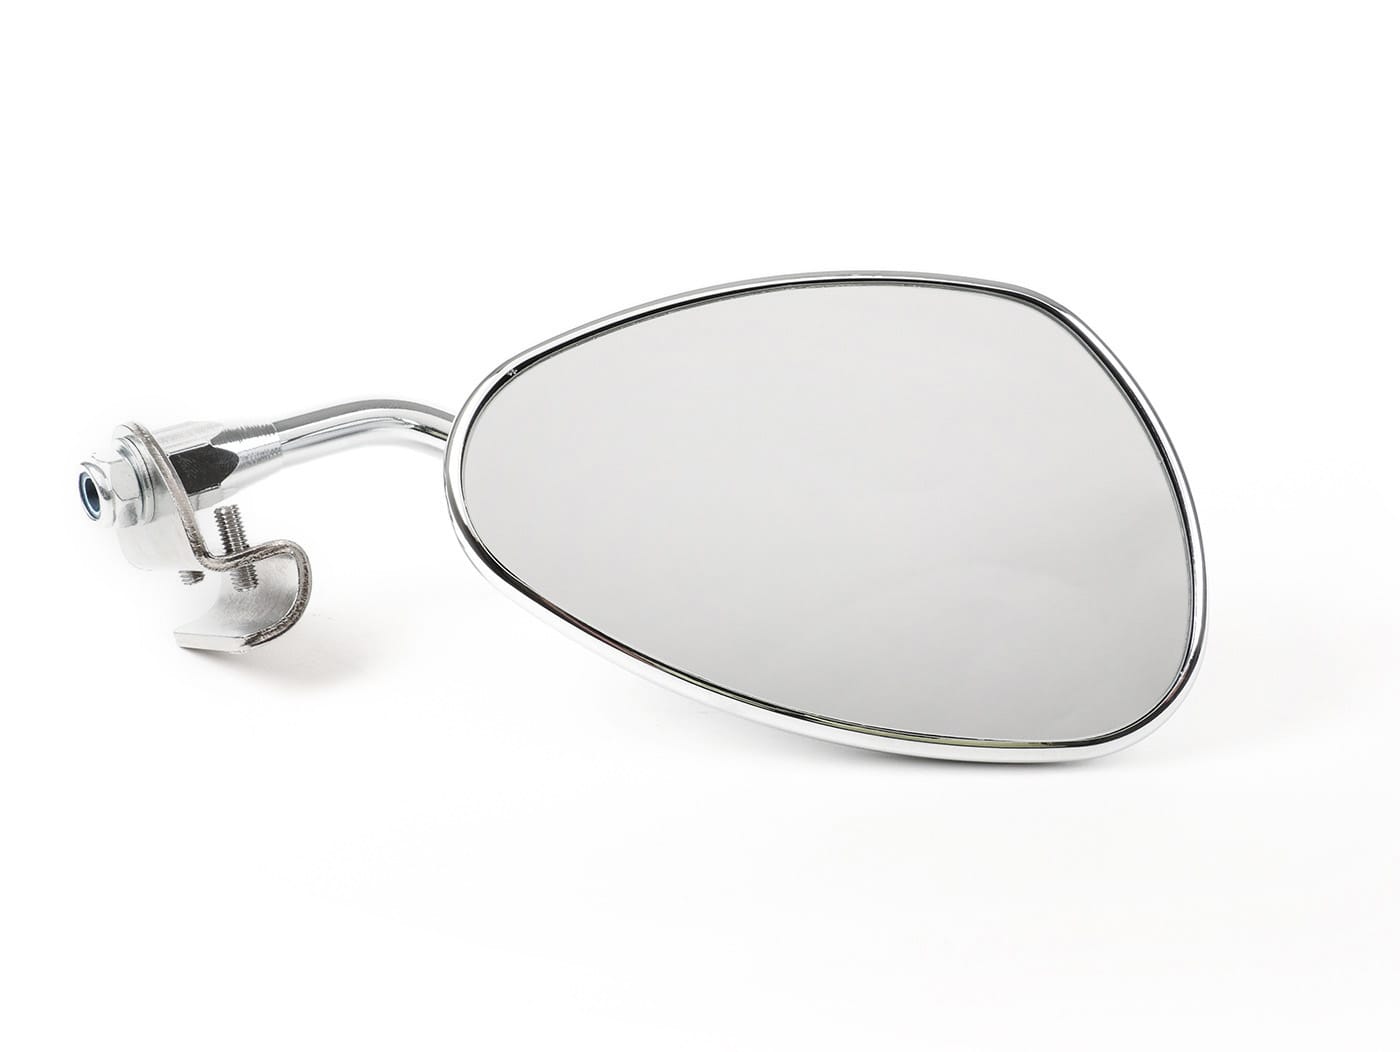
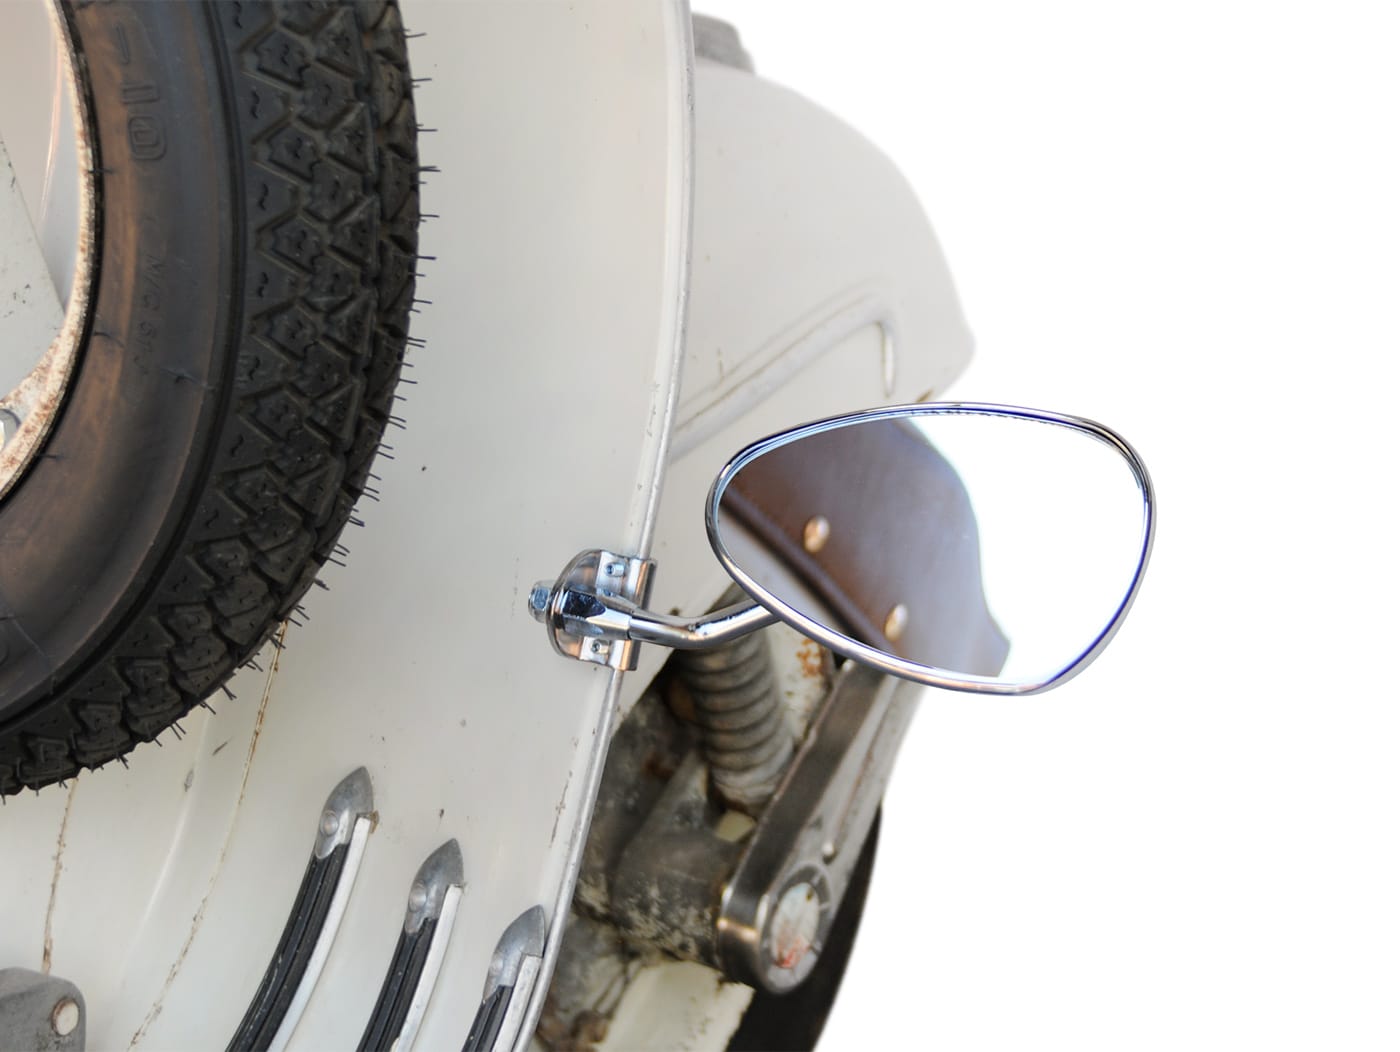
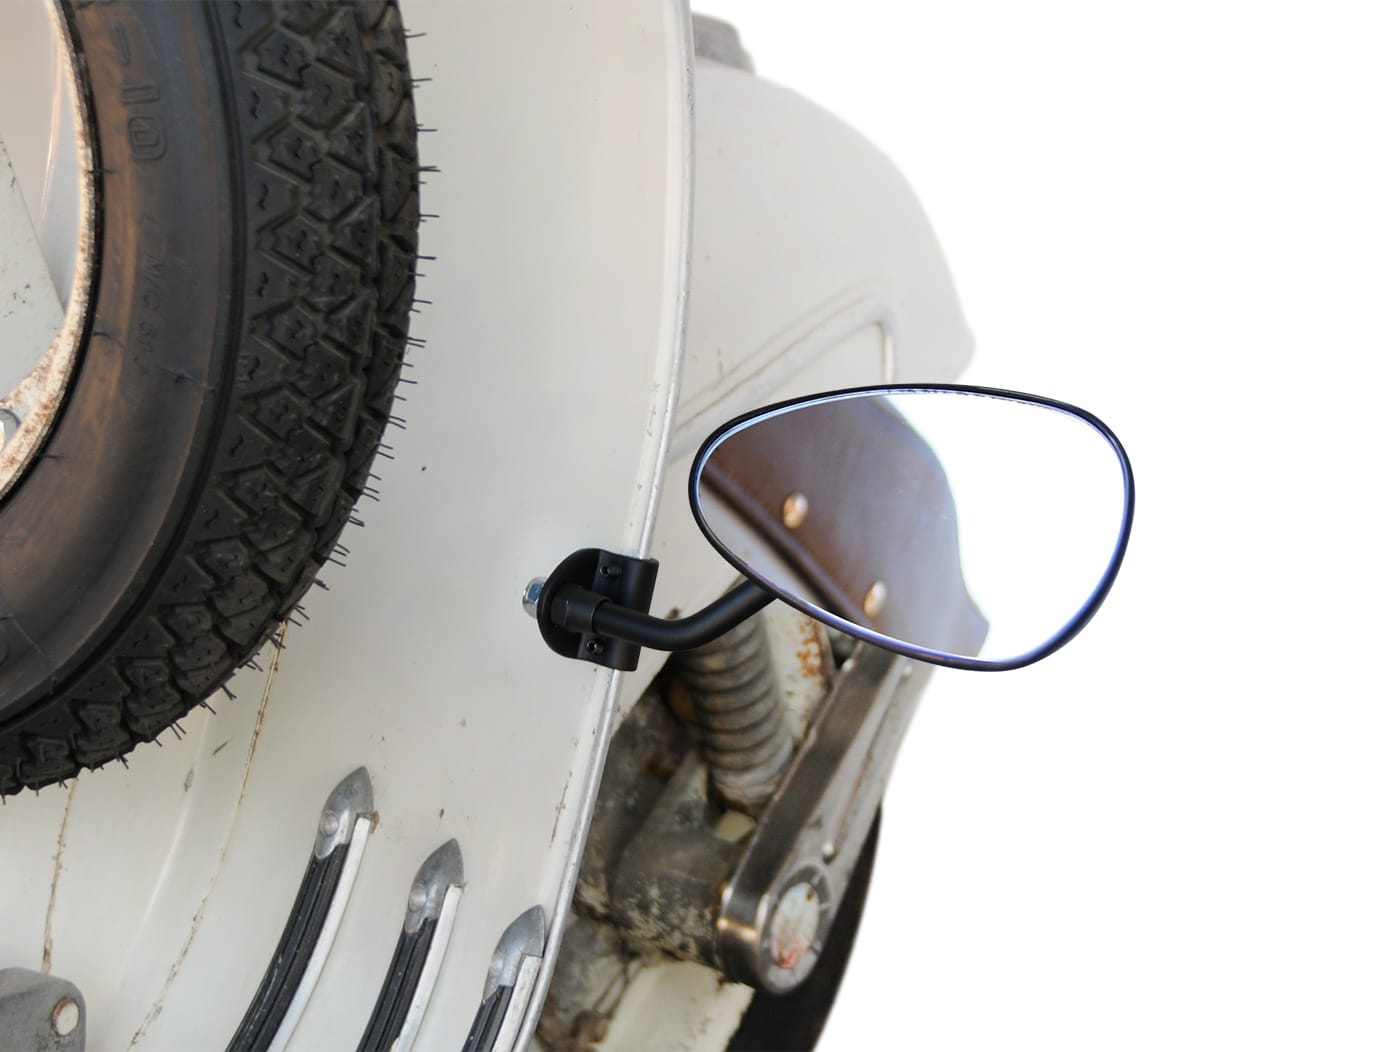
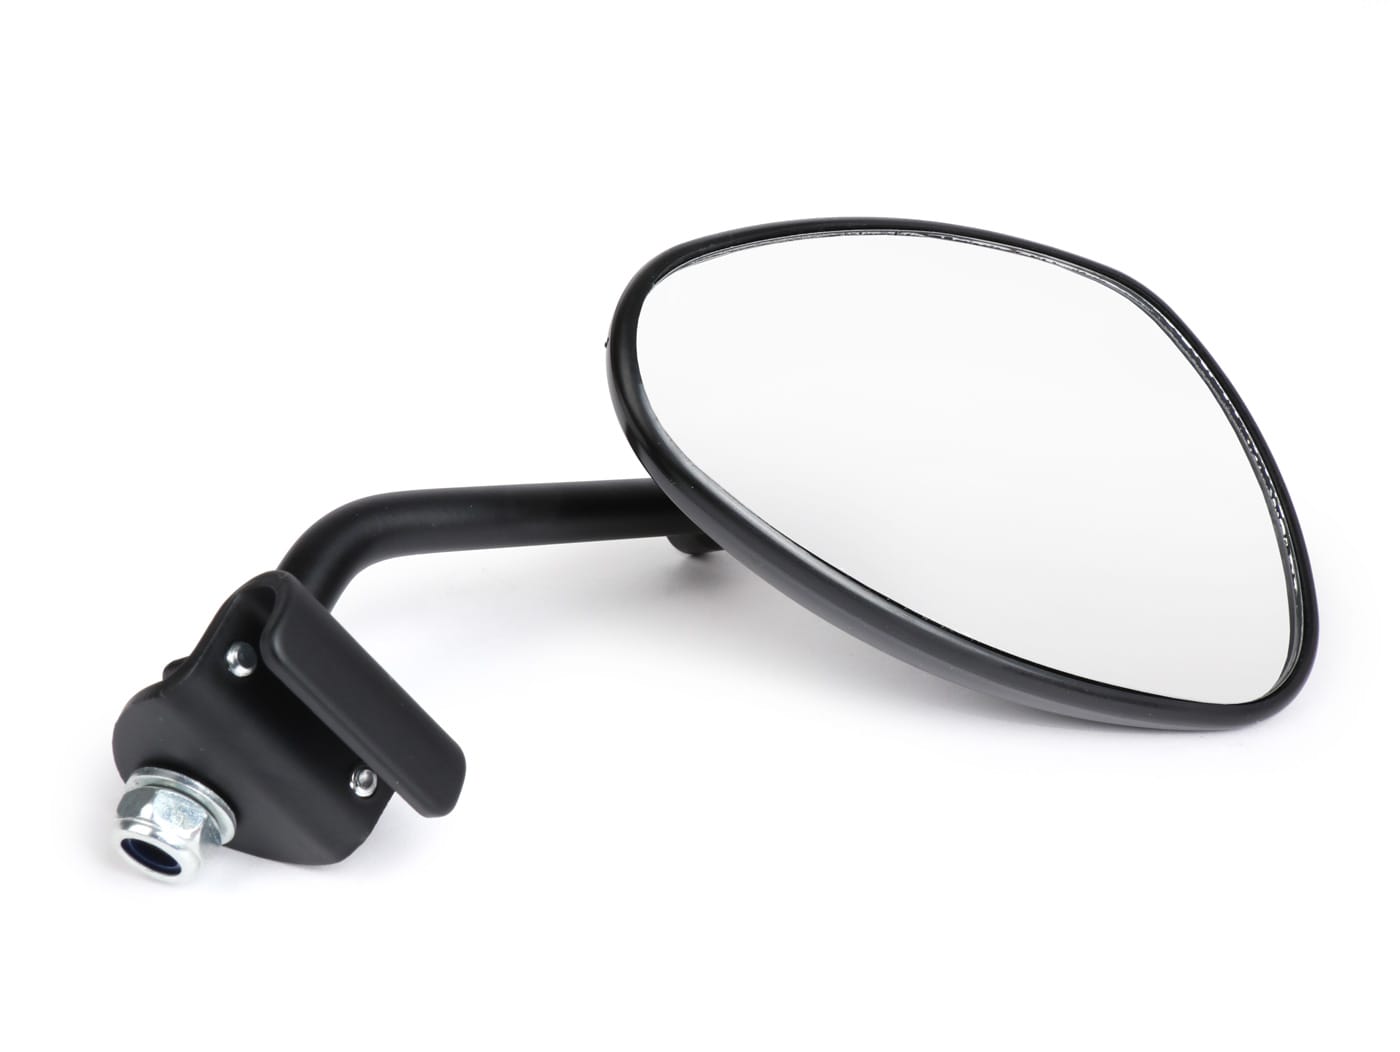
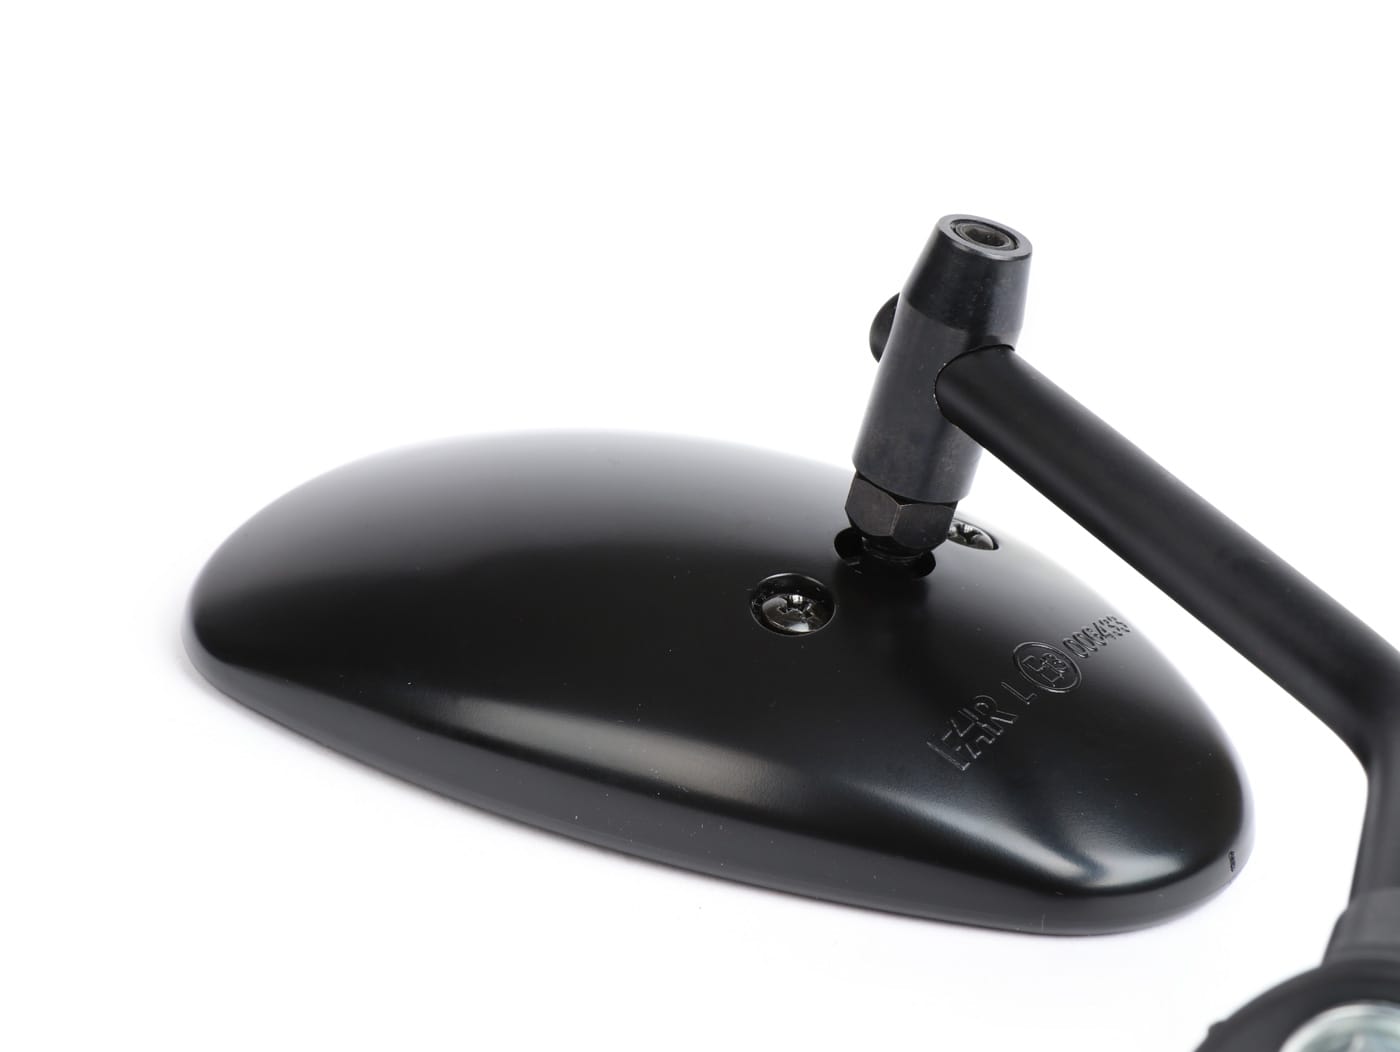
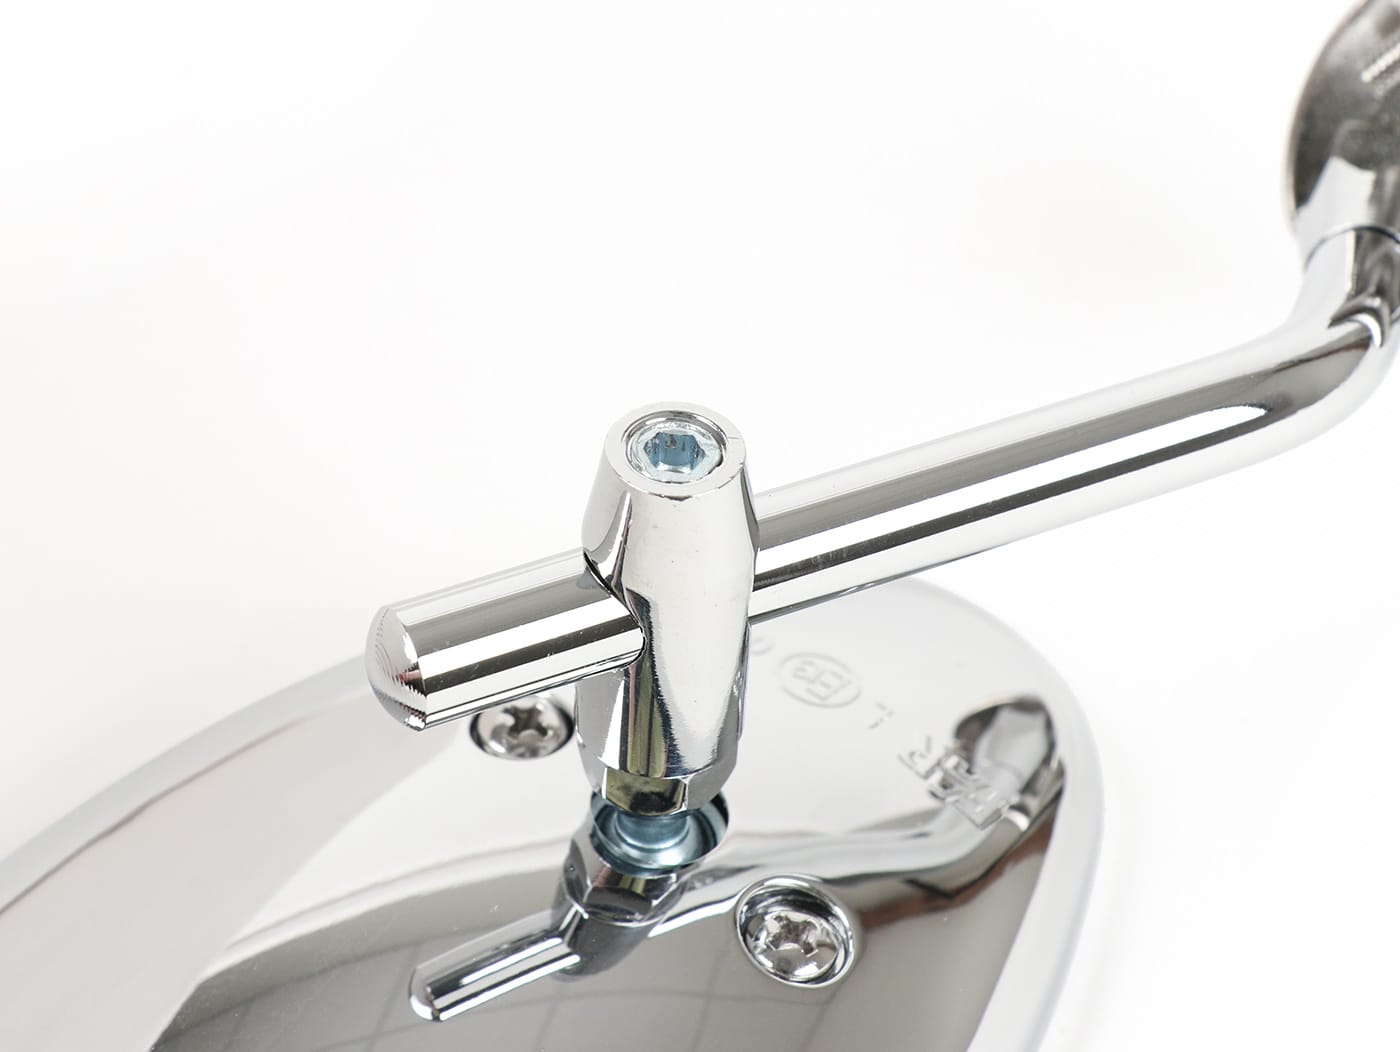
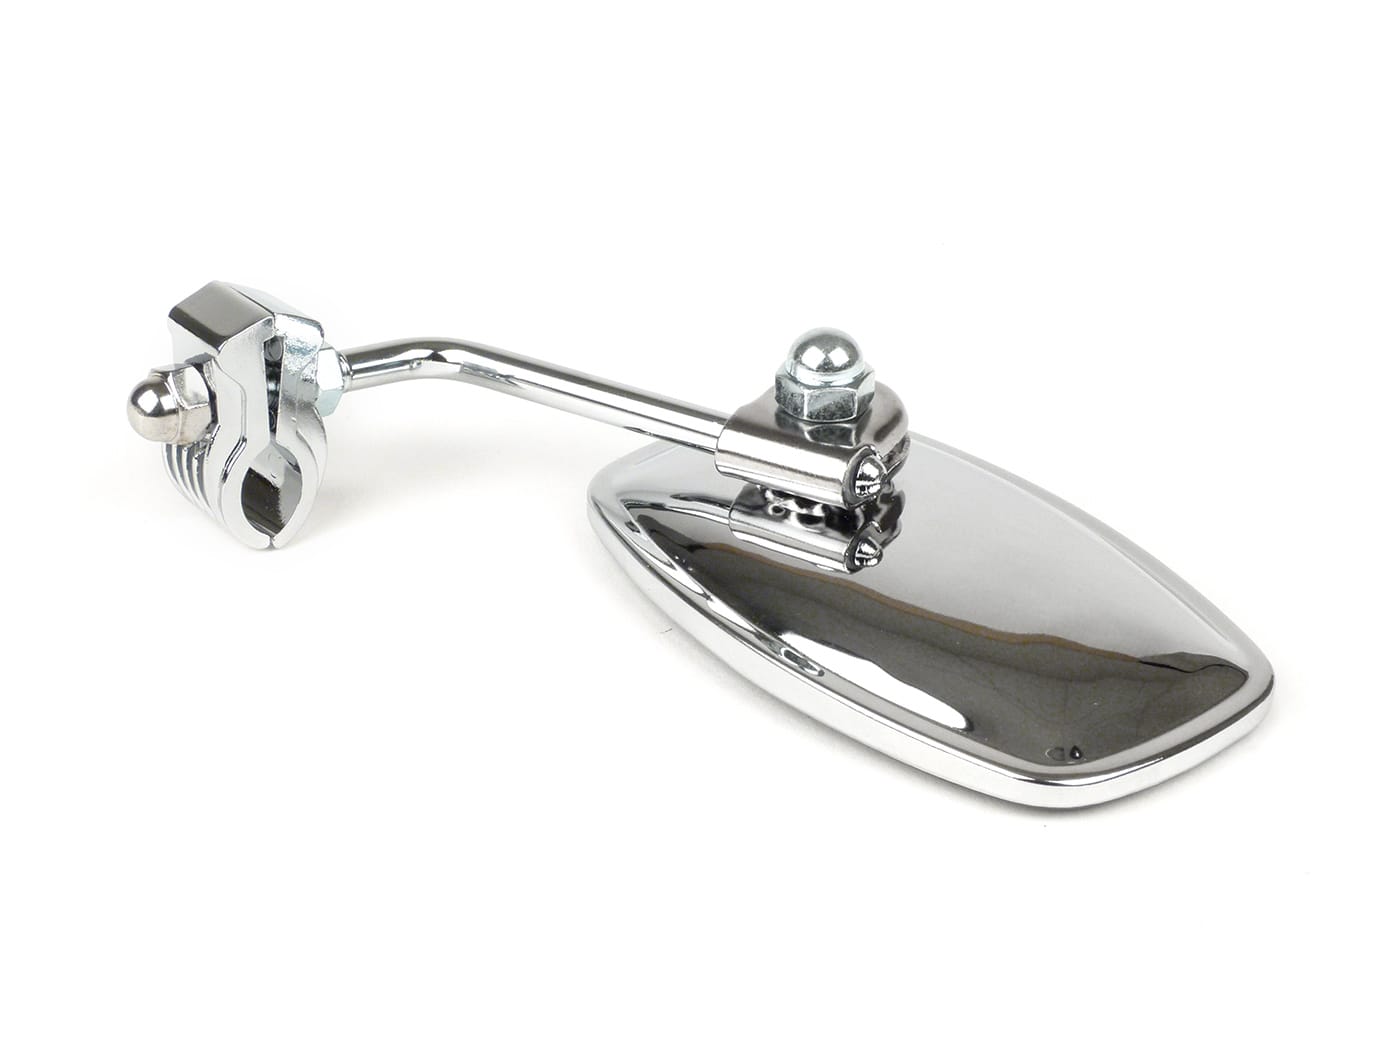
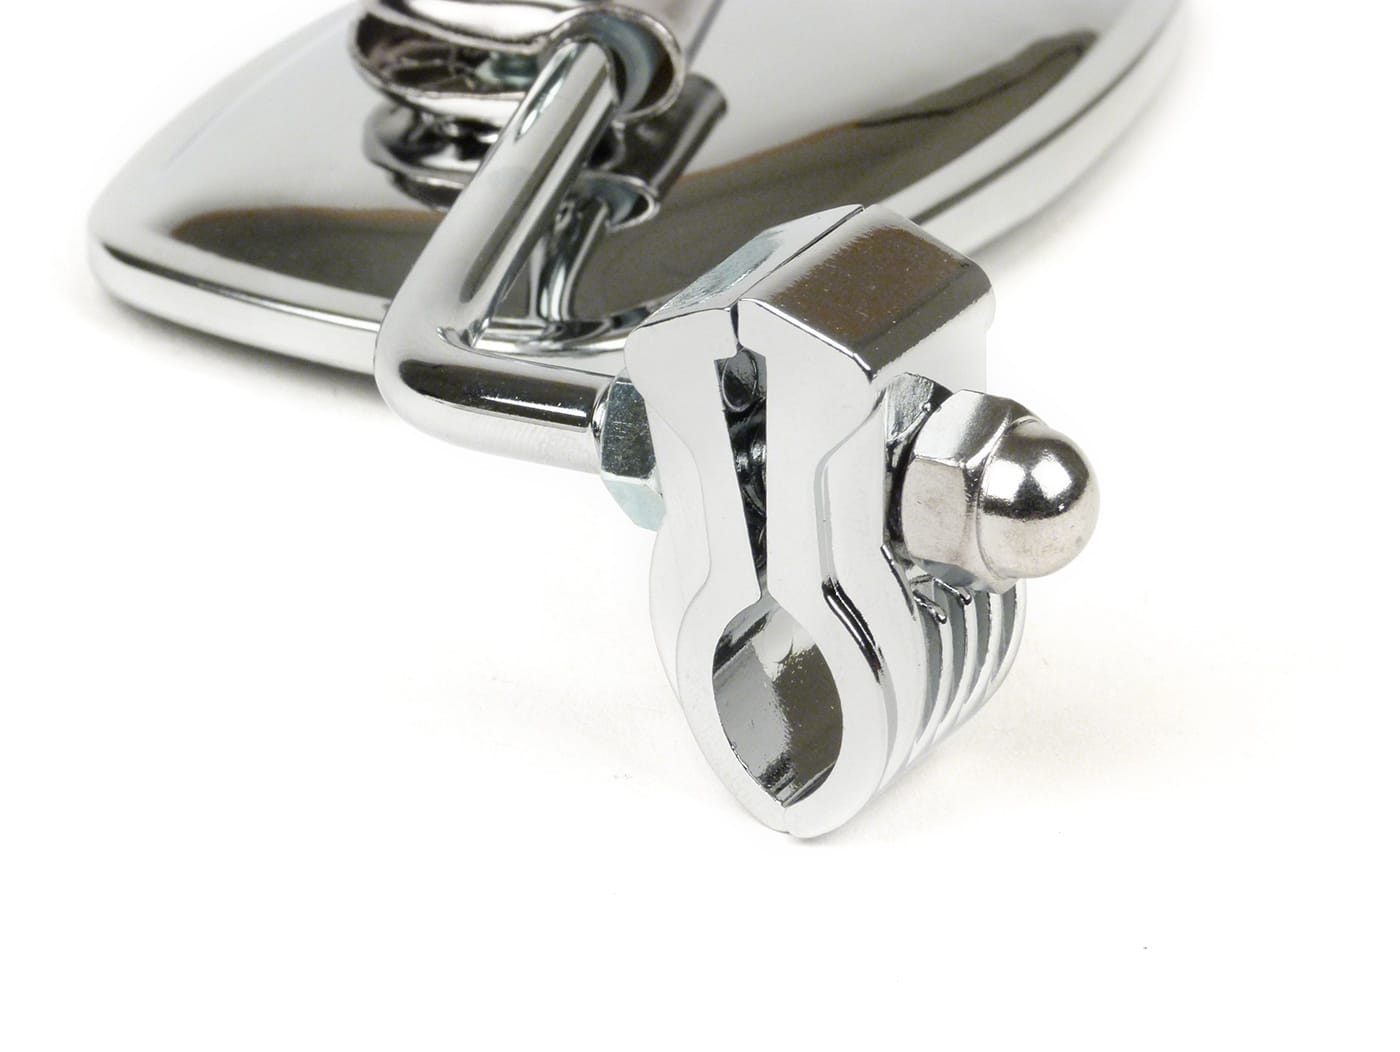
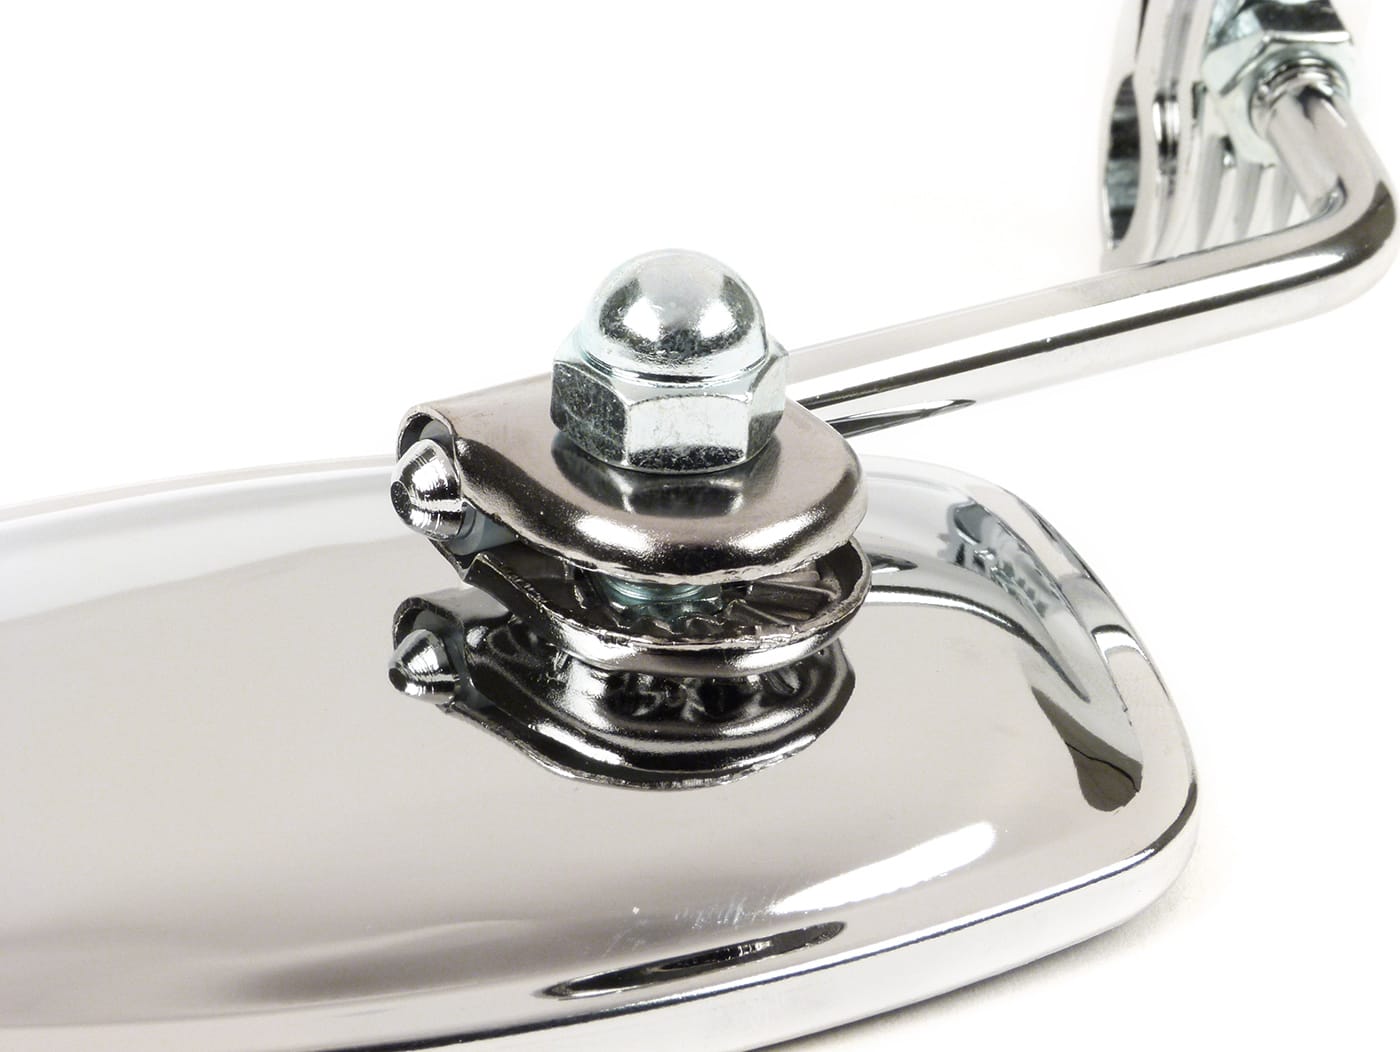
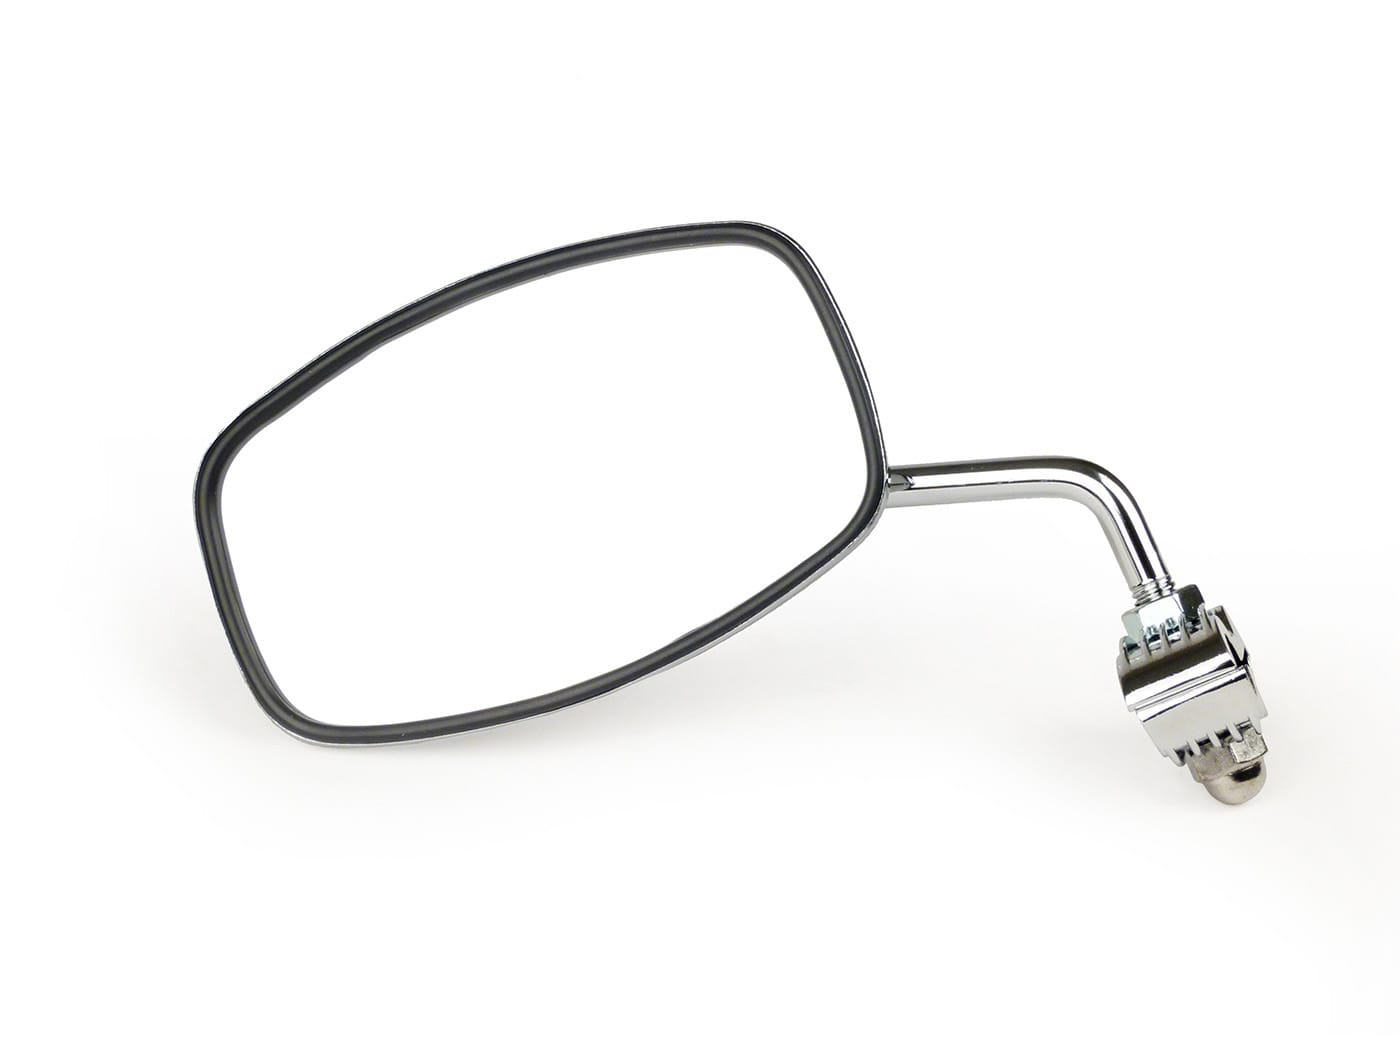
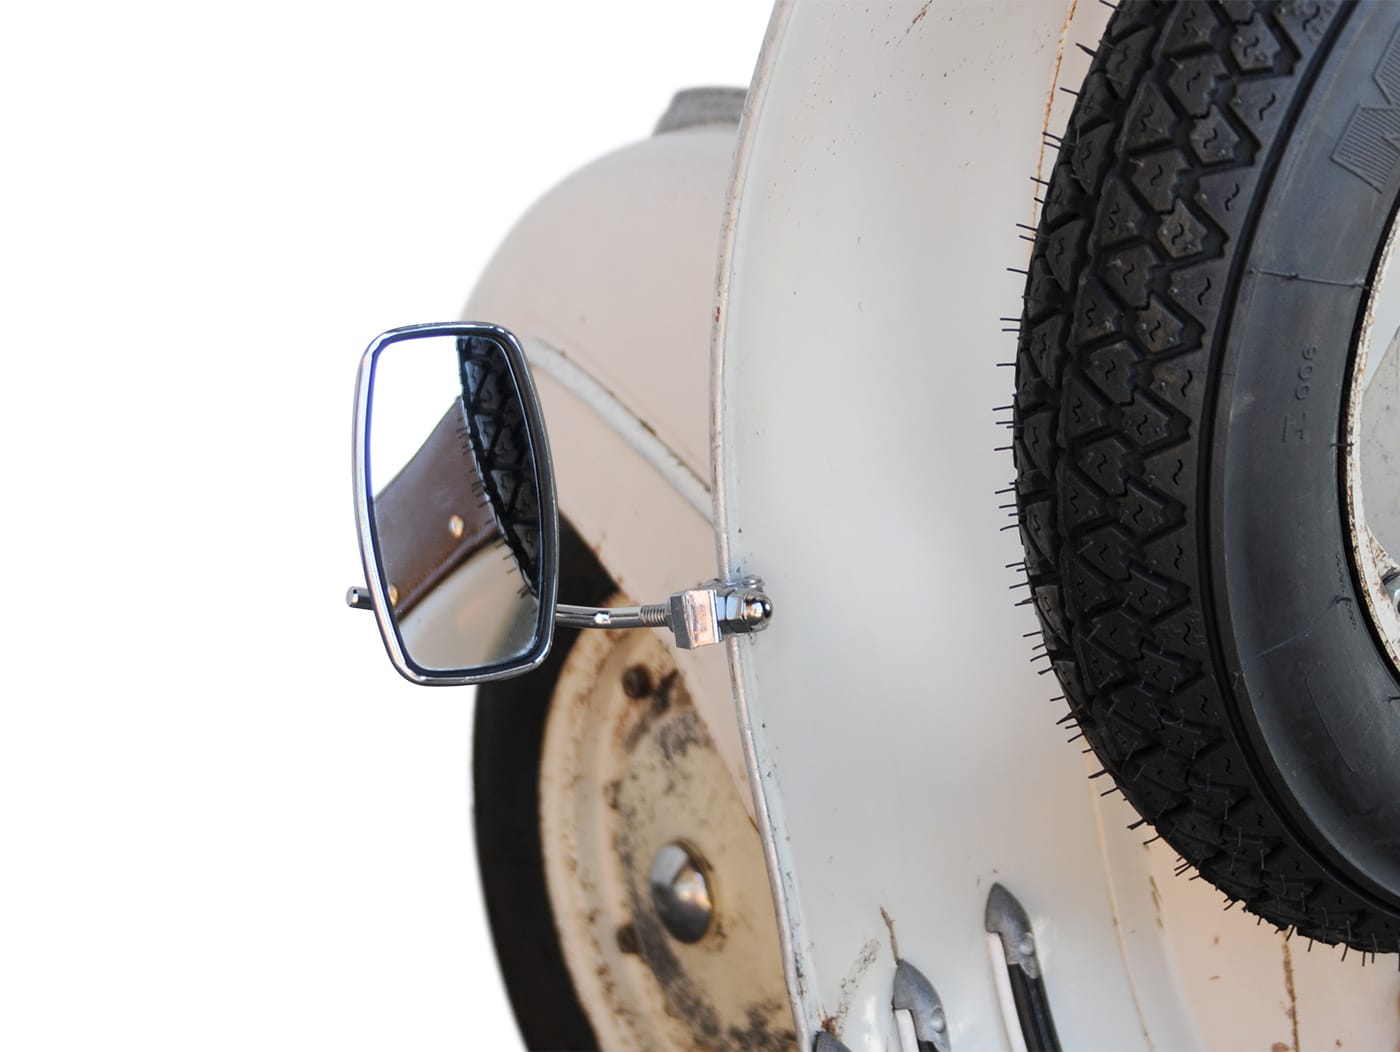
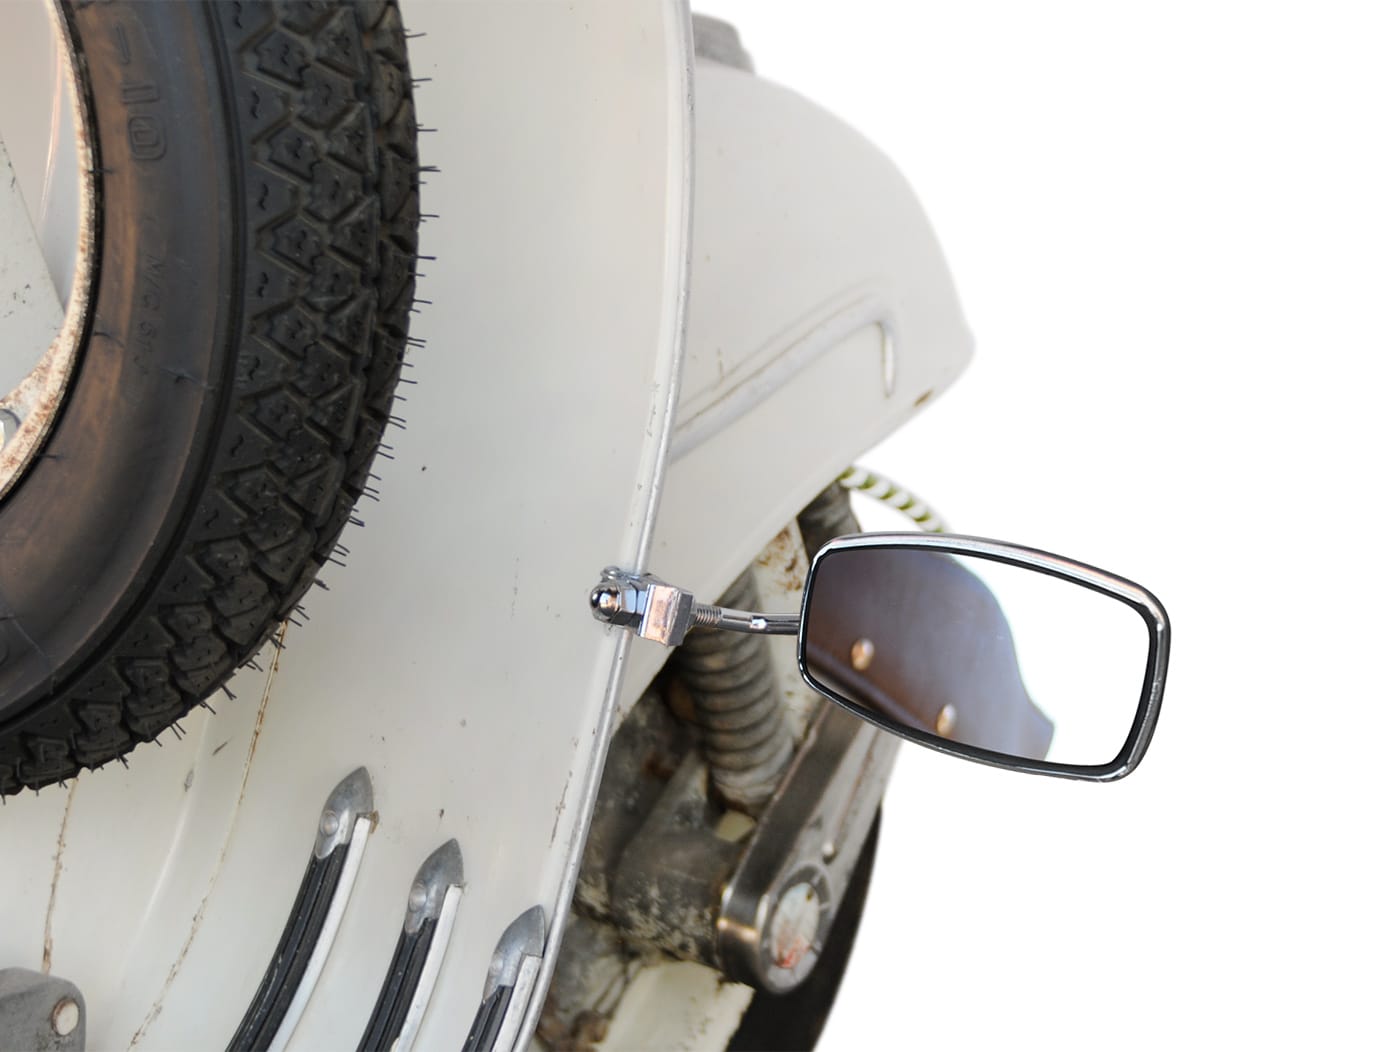
Mirror FAR leg shield clamp mirror trapezoidal

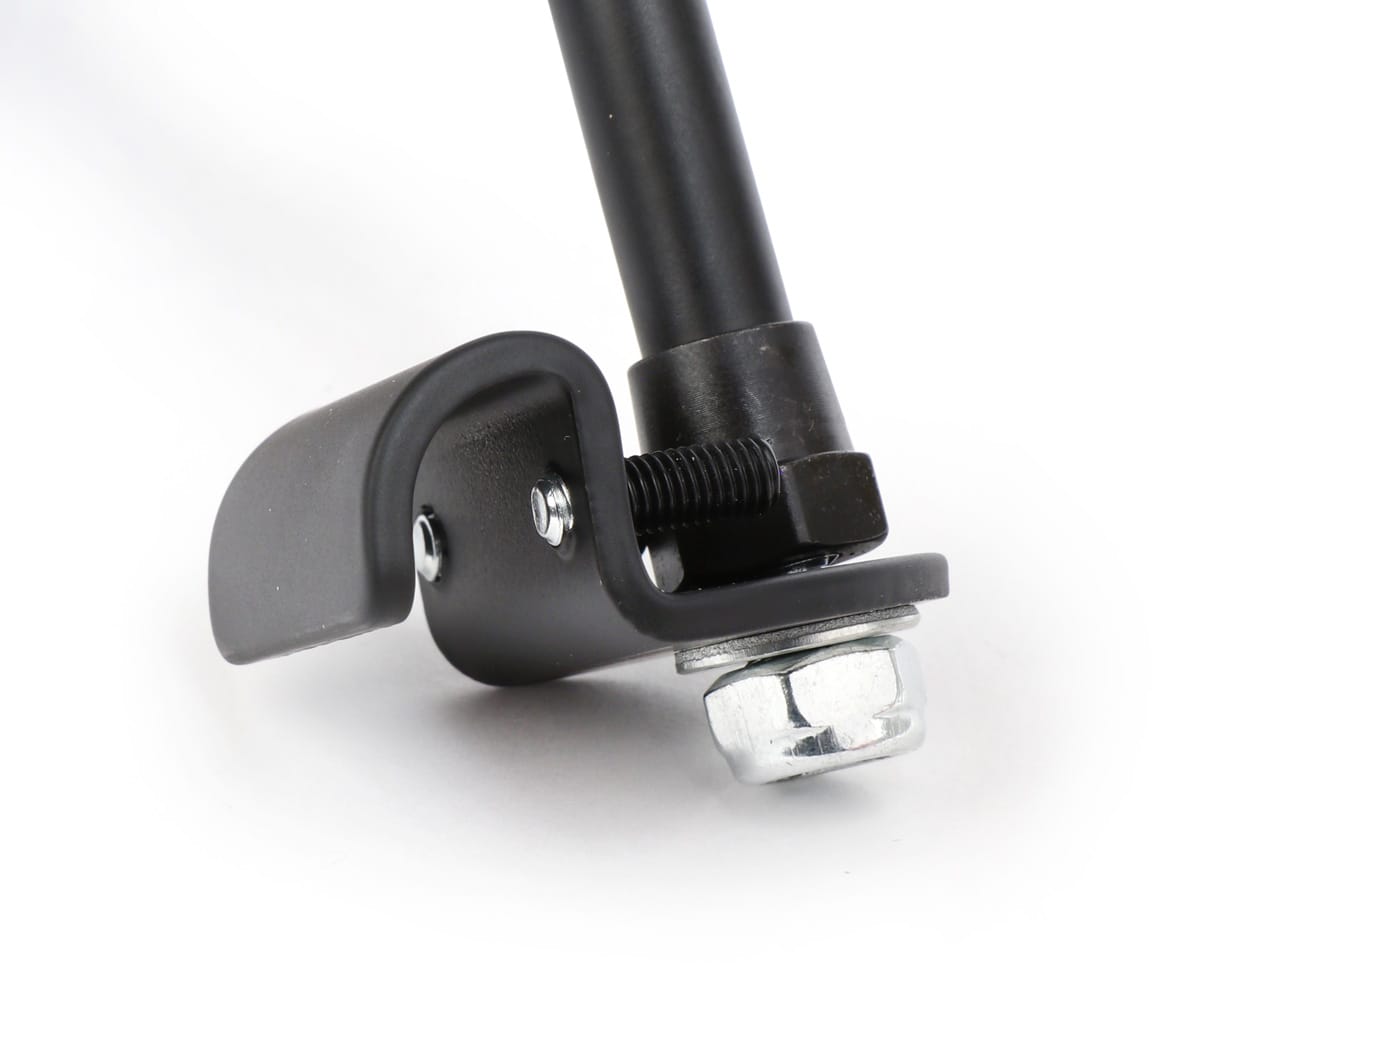
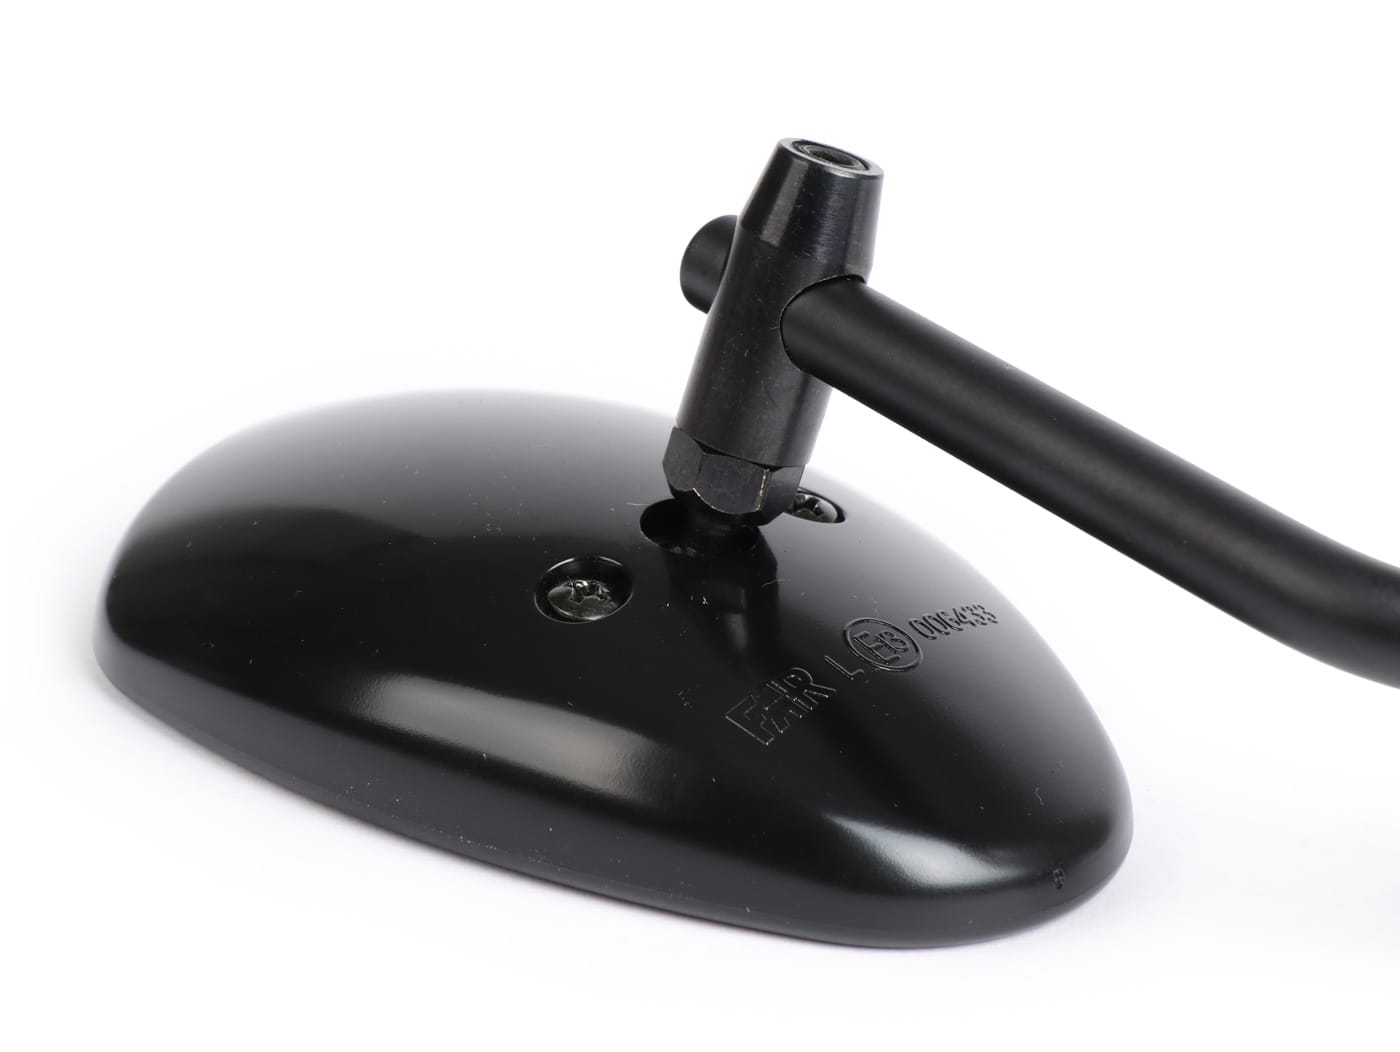
This is a nice alternative to the round mirror from FAR. The trapezoidal FAR chrome mirrors are attached to the leg shield with a screw clamp.

Small grub screws also fix the mirror securely to the edge protection of the leg shield or a slotted tube. The mirror rod is adjustable, the mirror itself can also be slid on the rod and tilted. by means of a ball head.

The mirror is available for the left or right side as well as chrome-plated or in black!

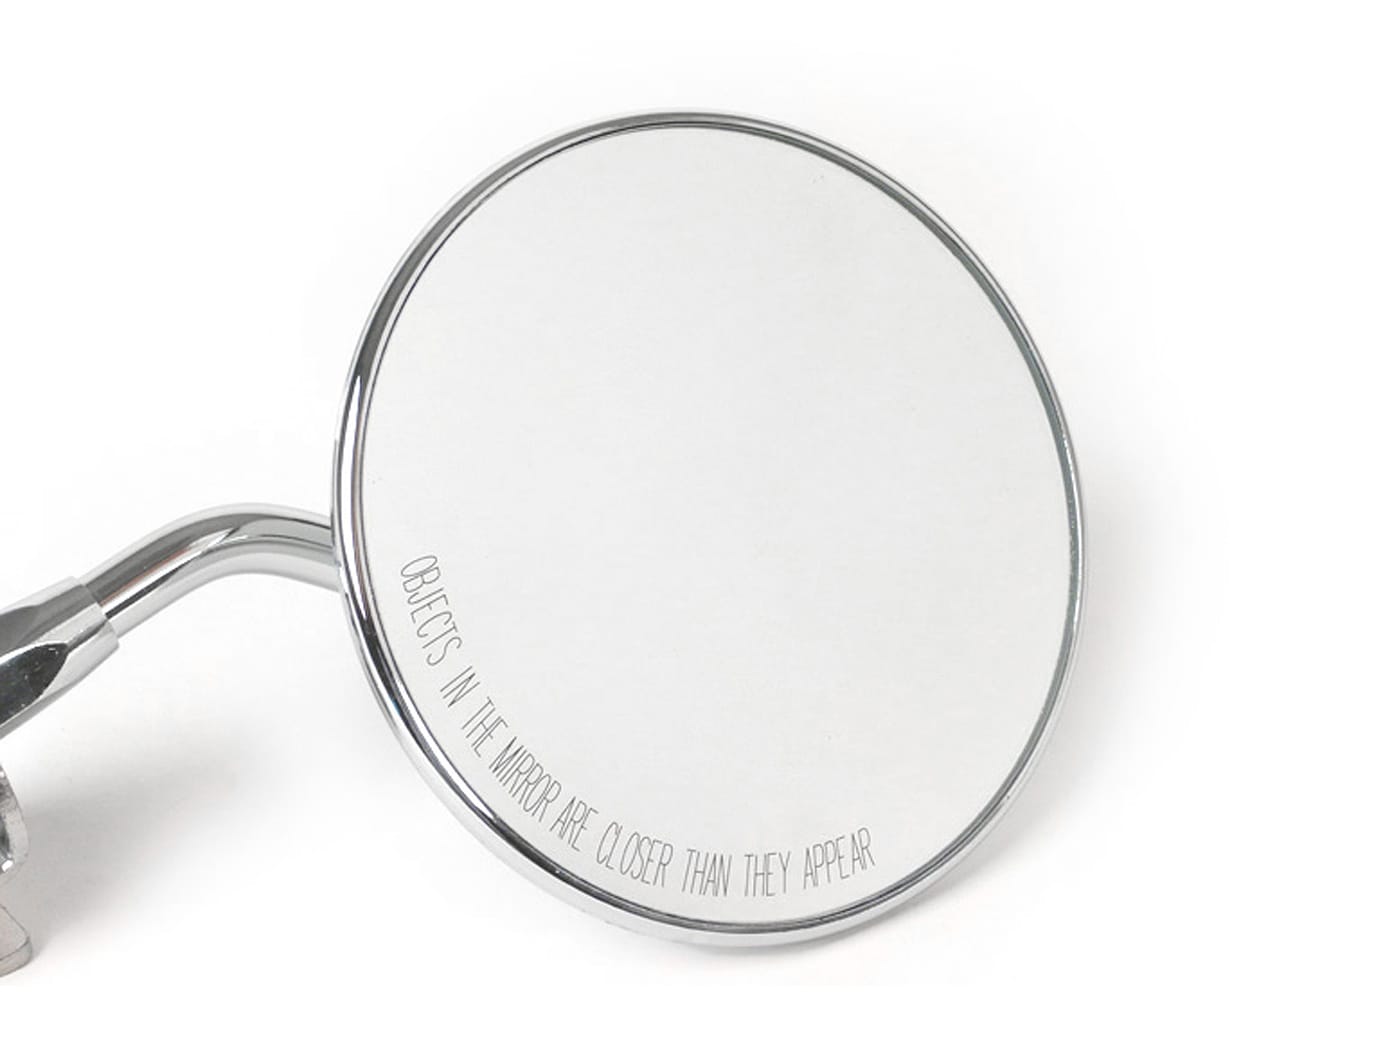
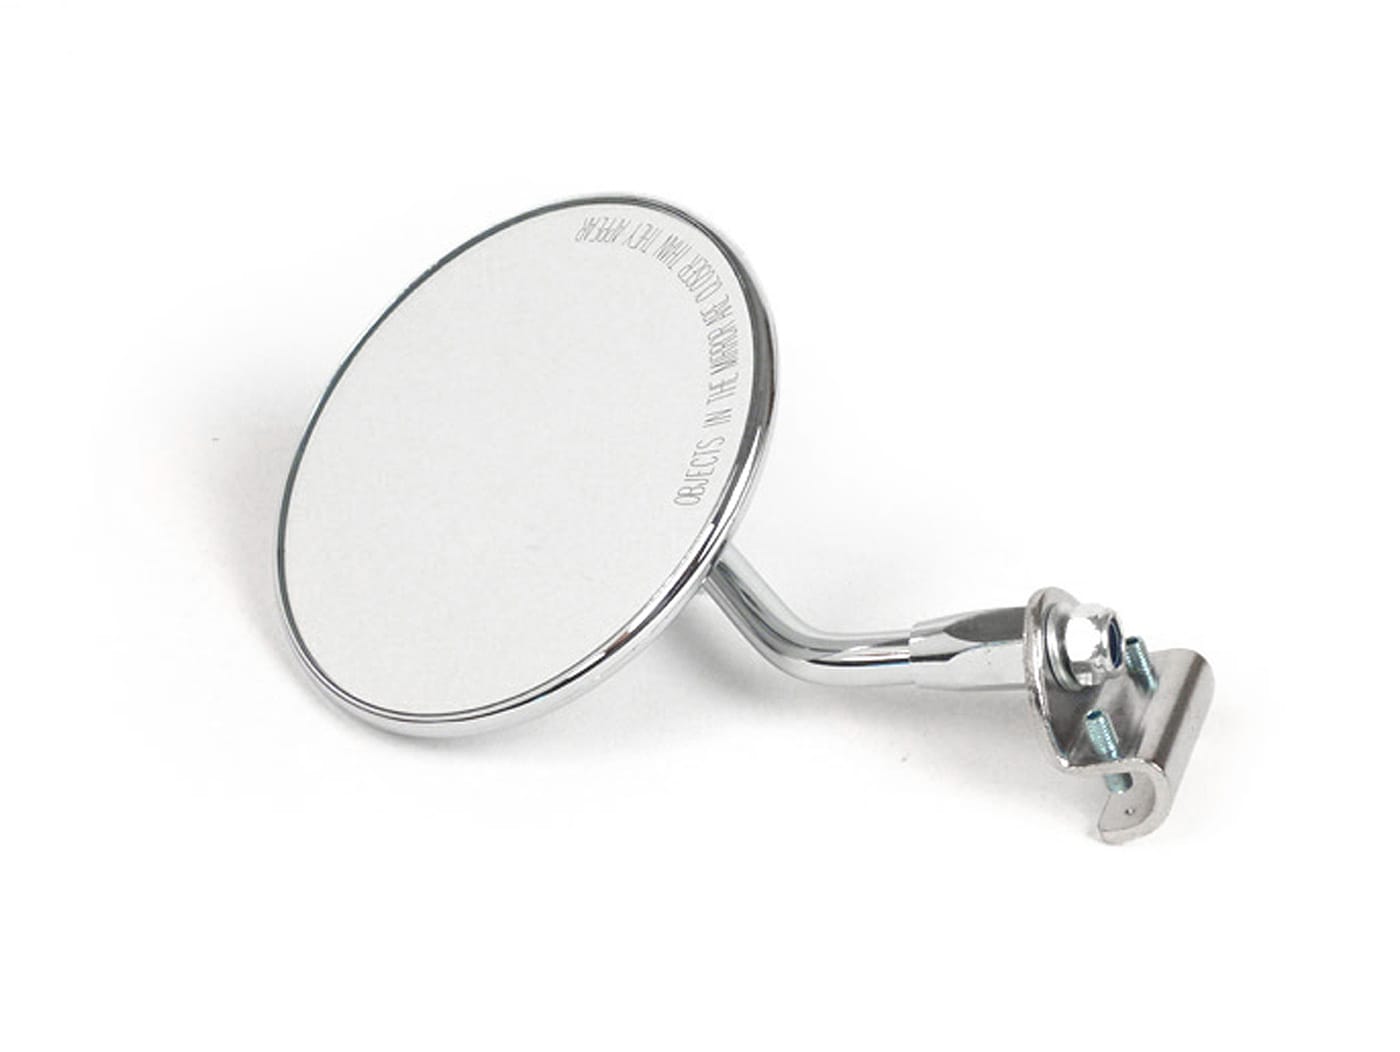
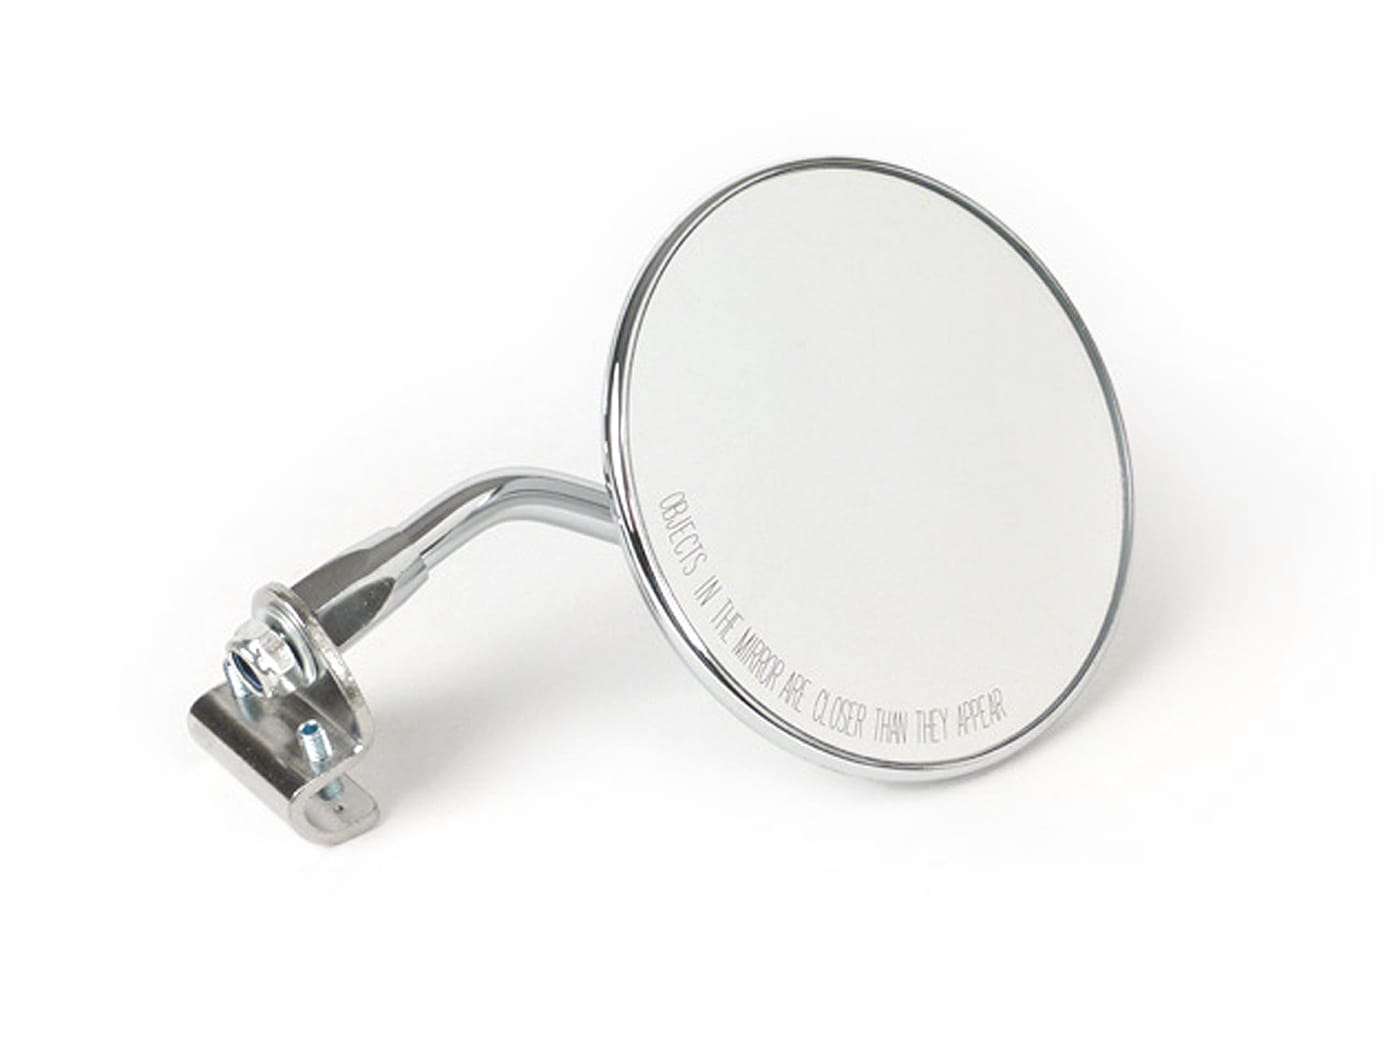
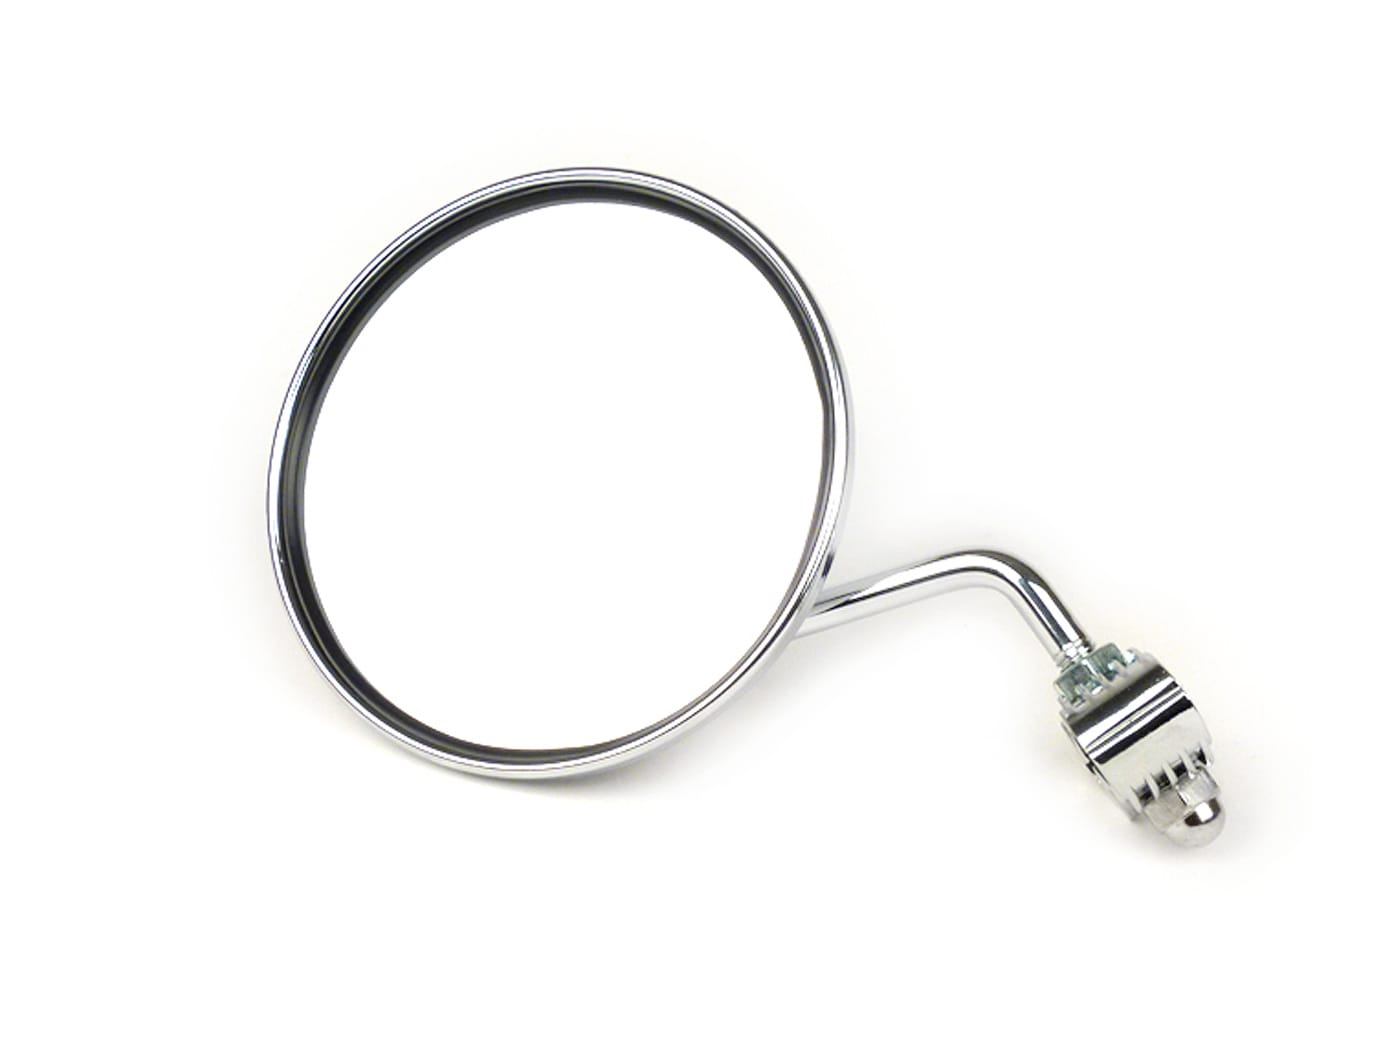
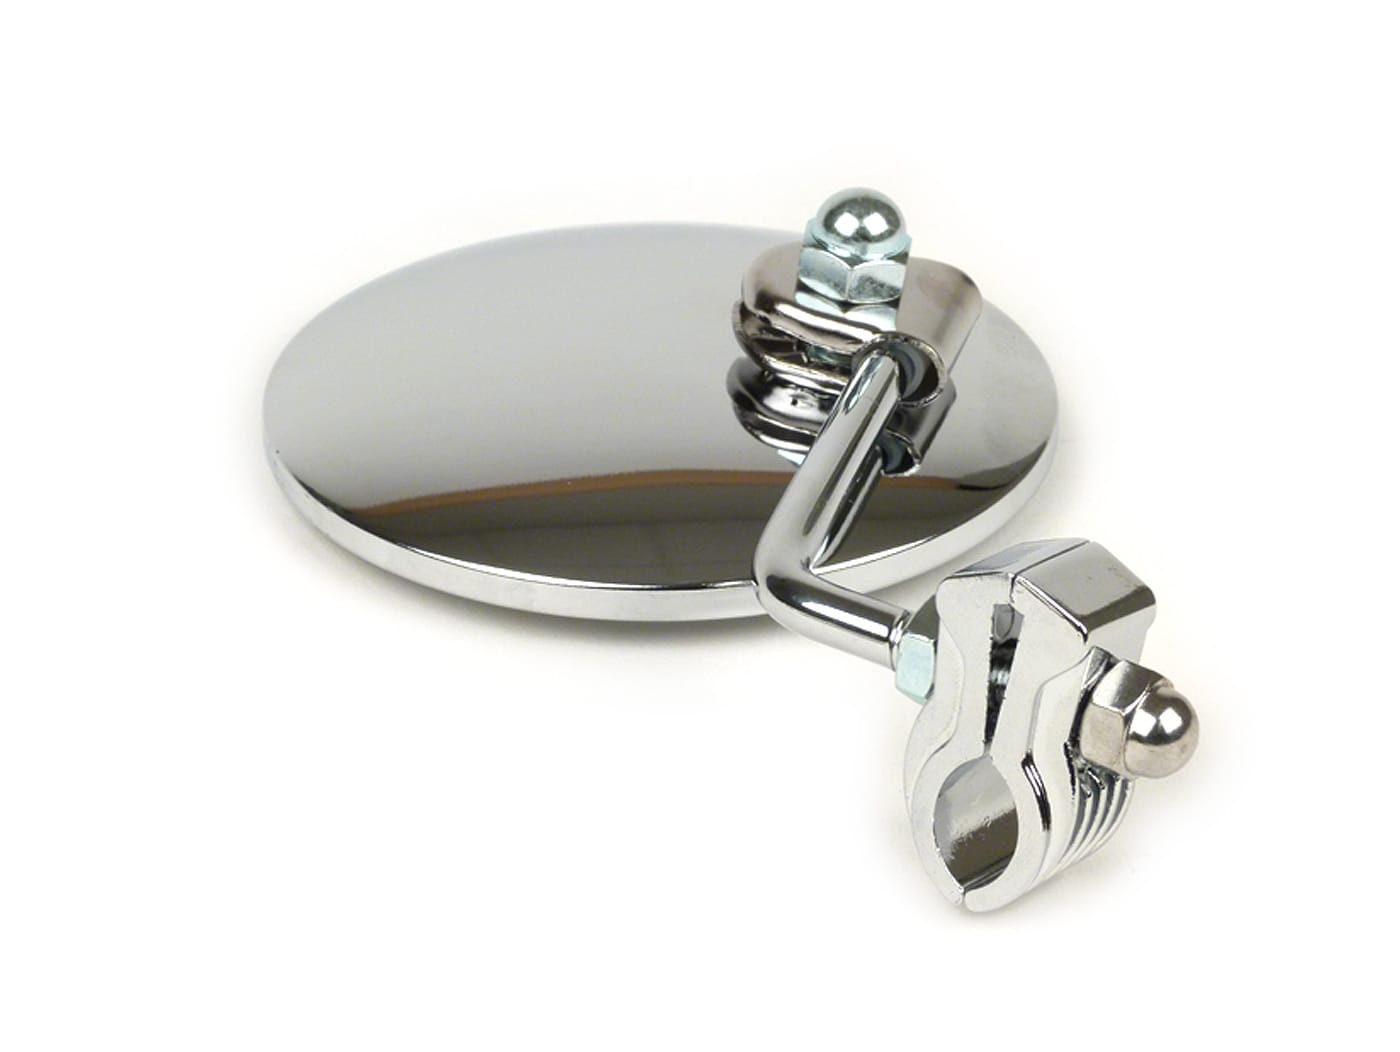
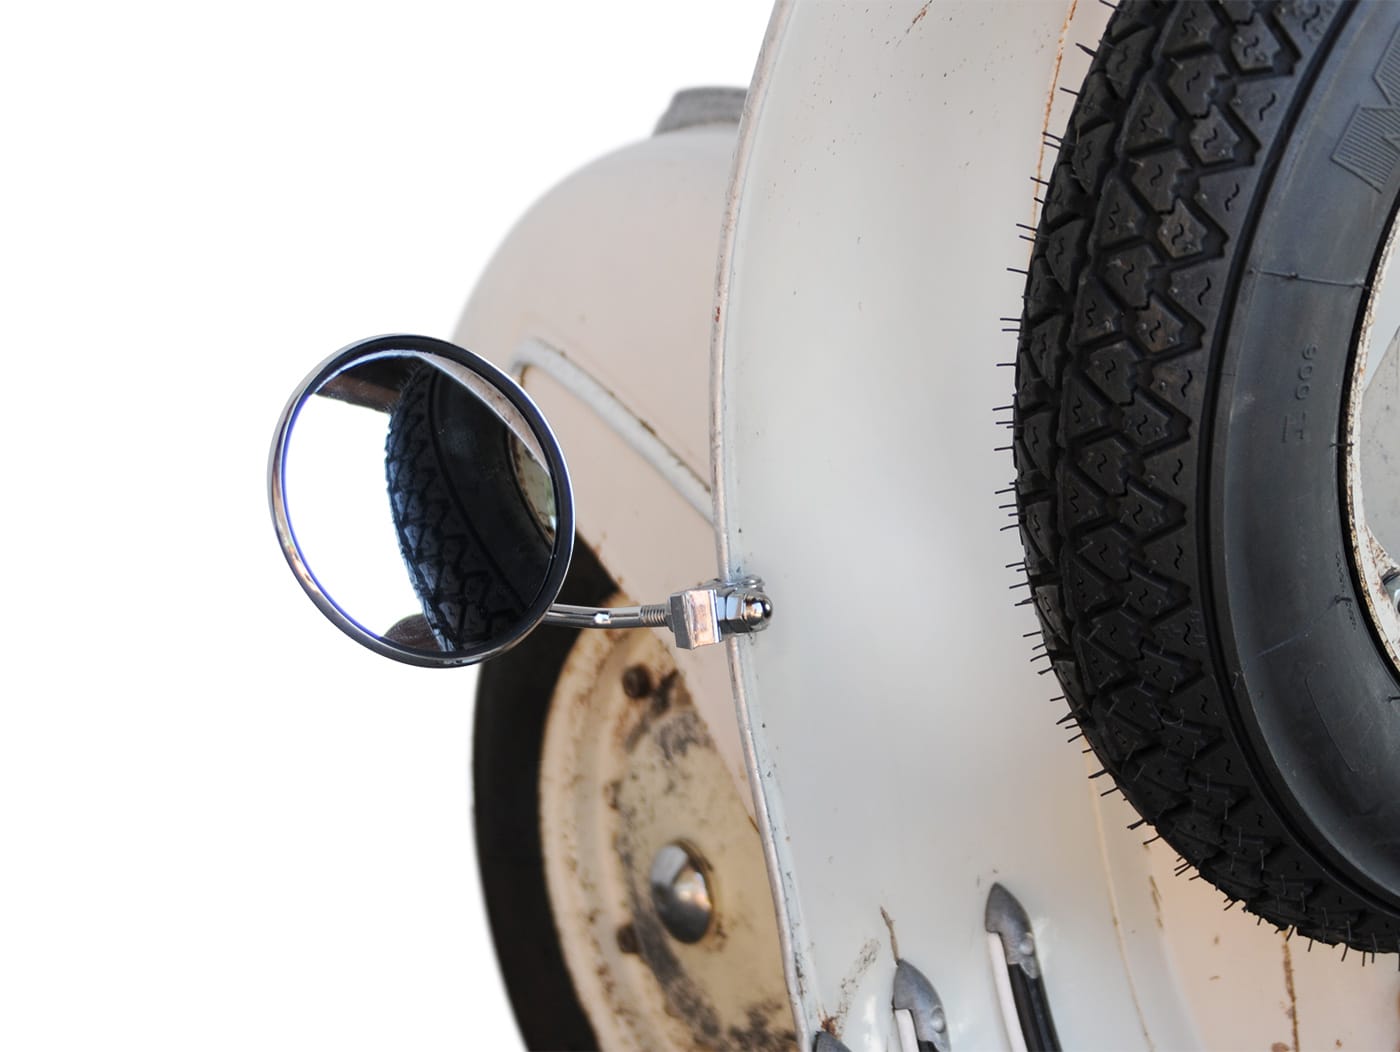
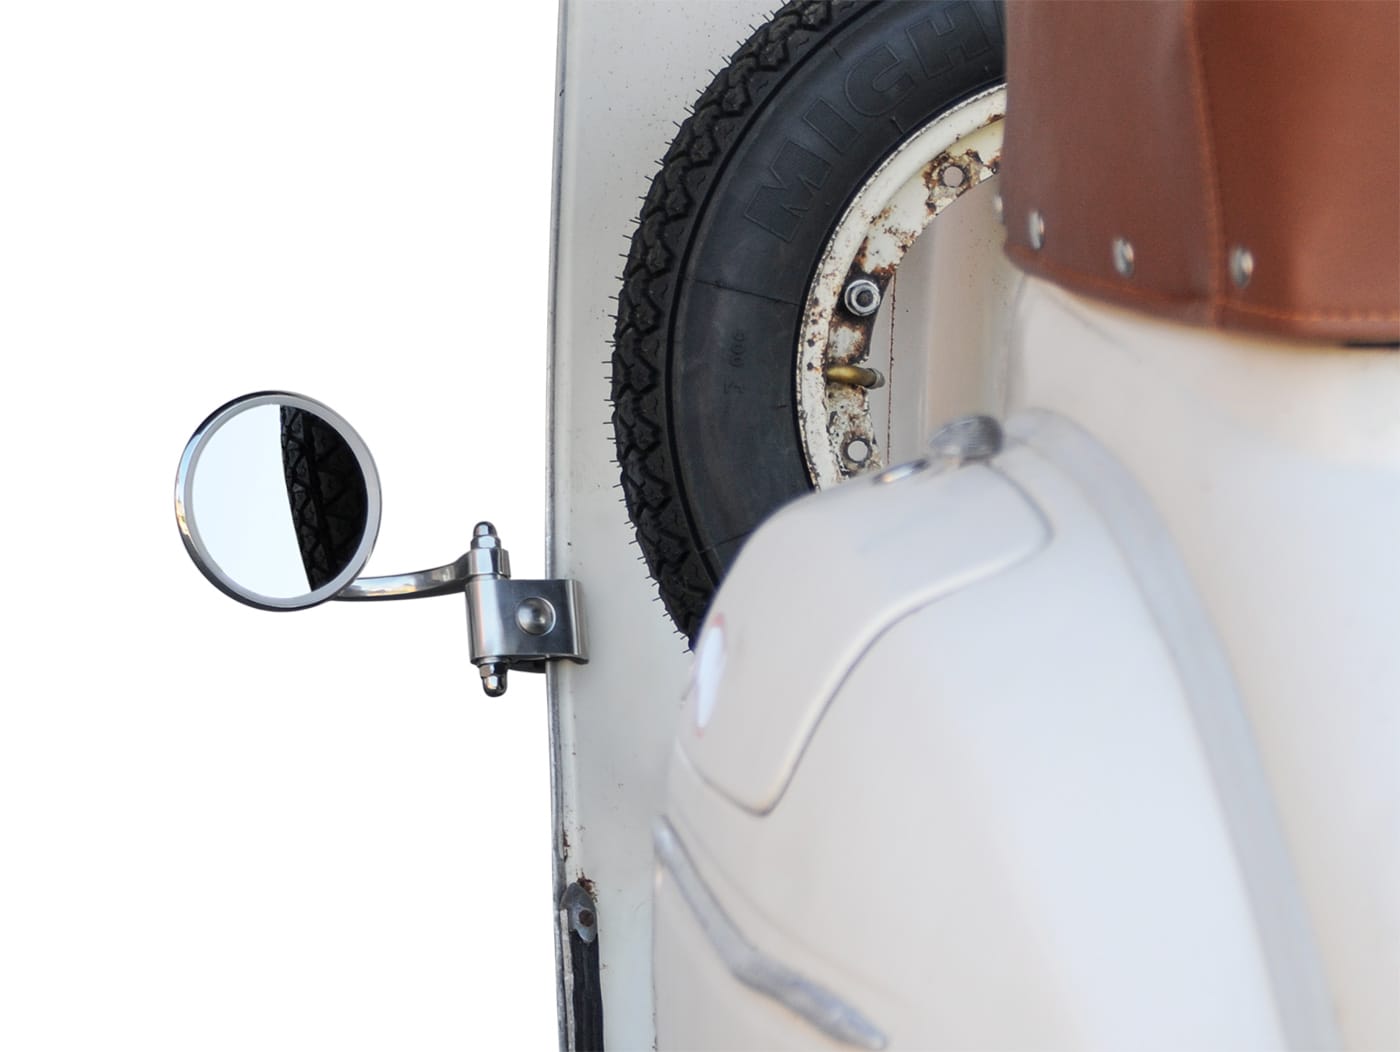
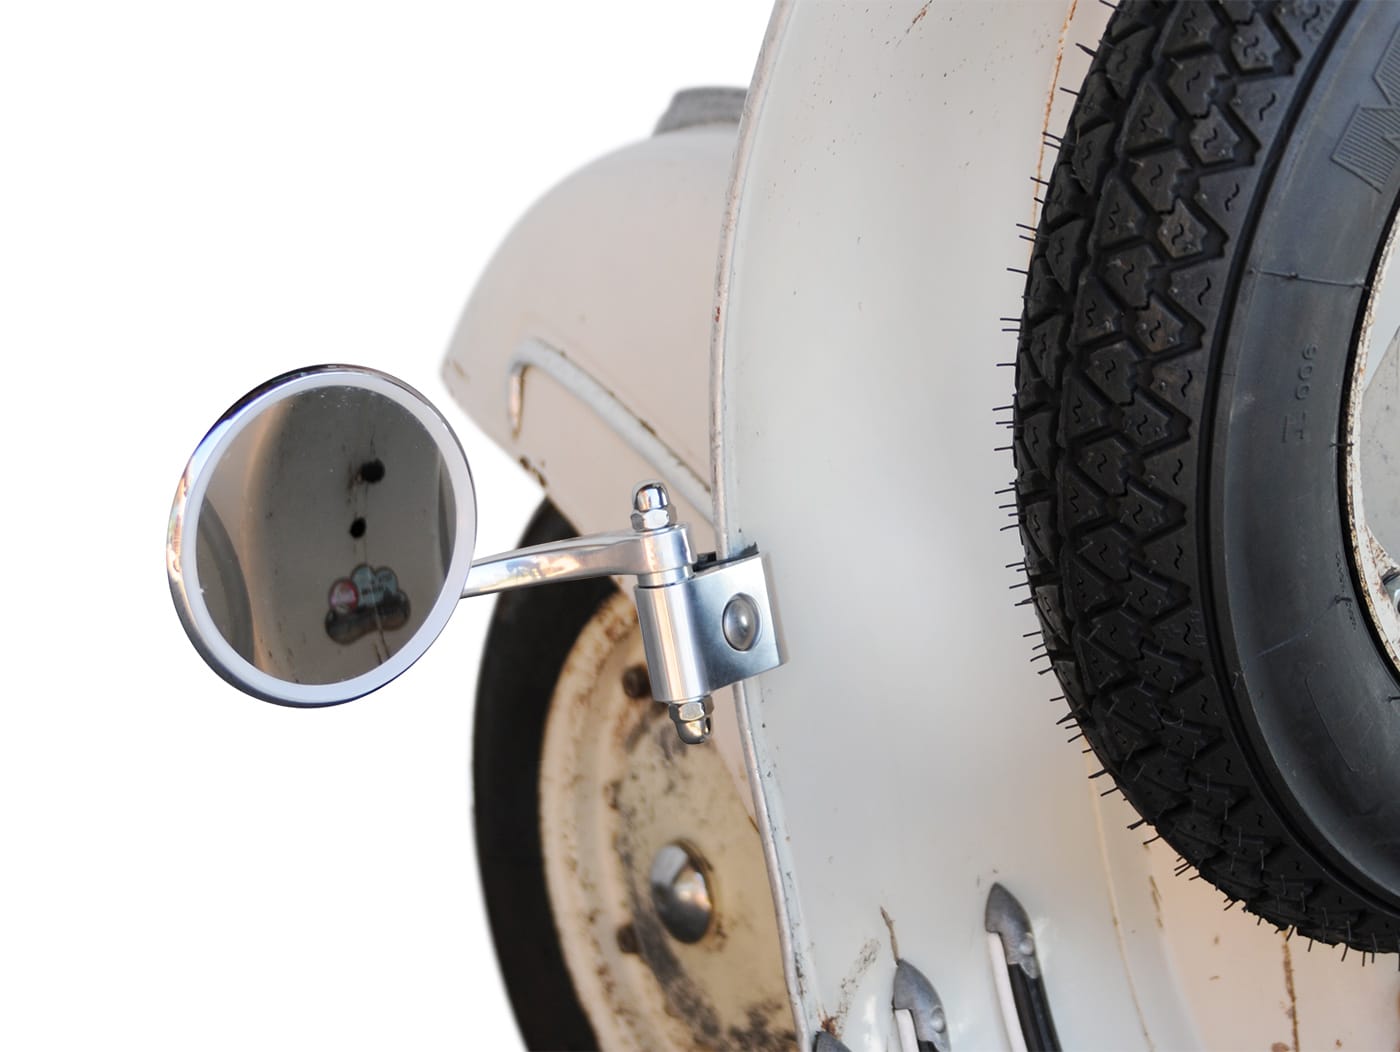
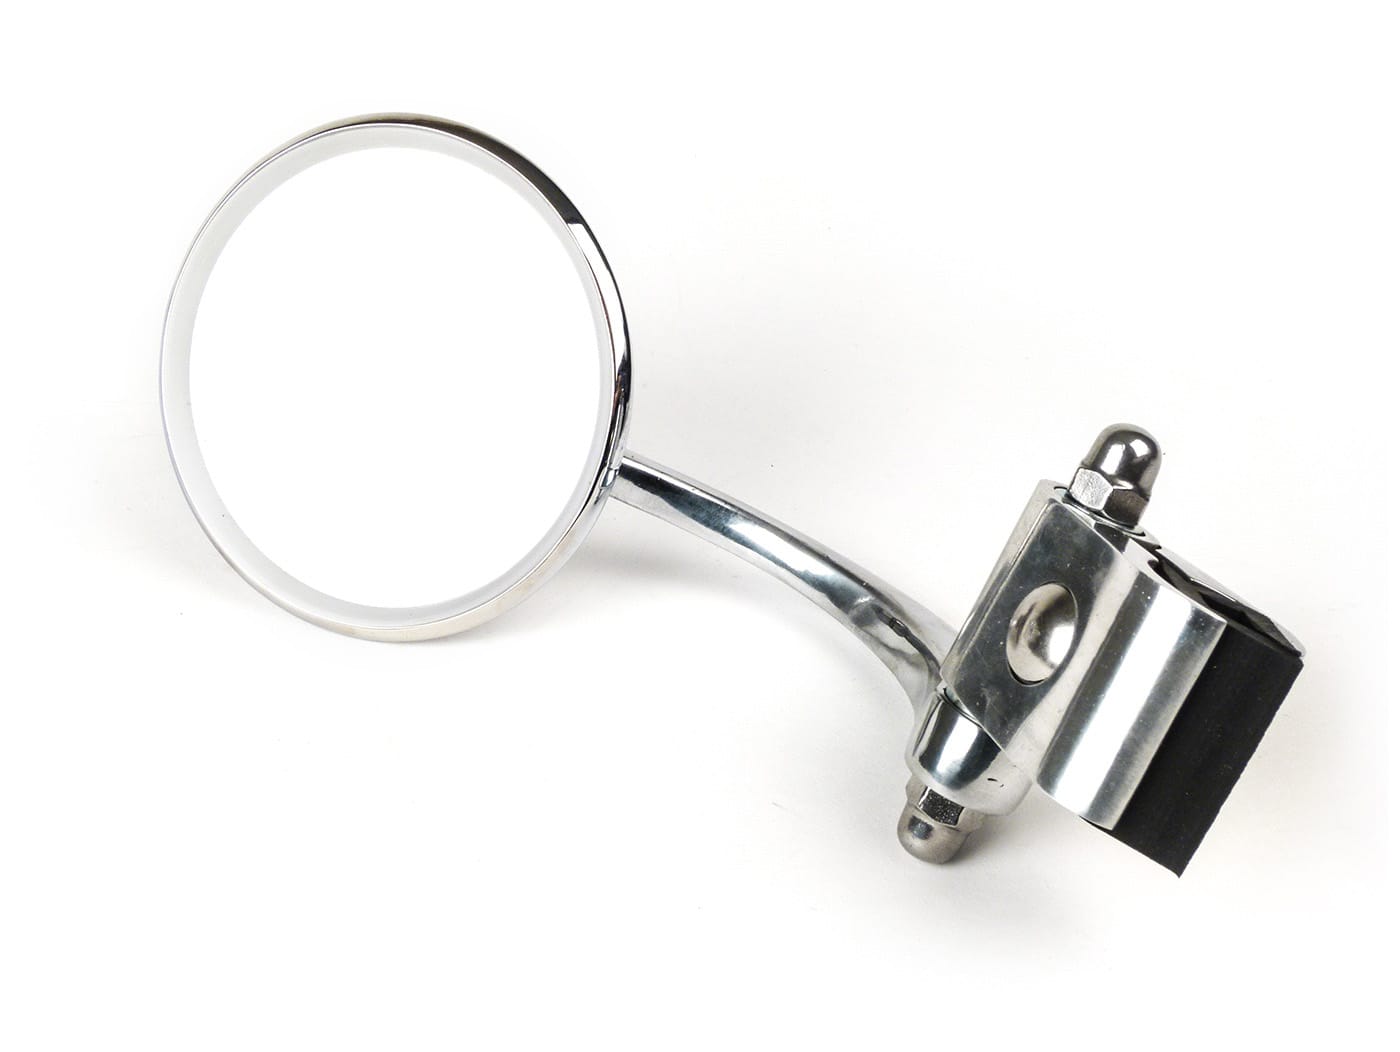
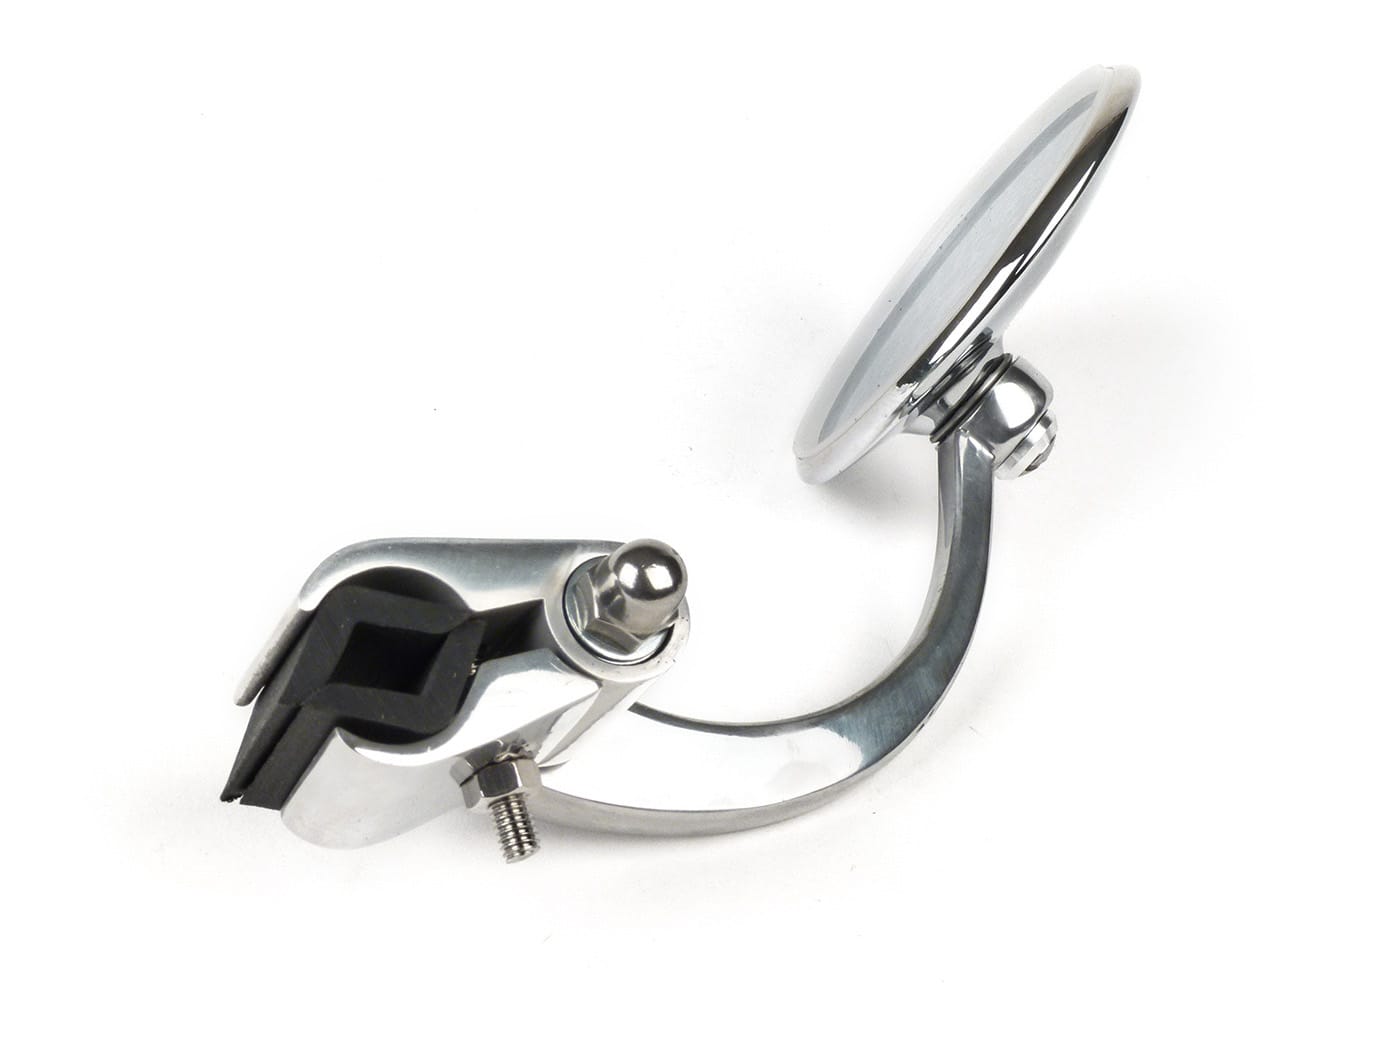
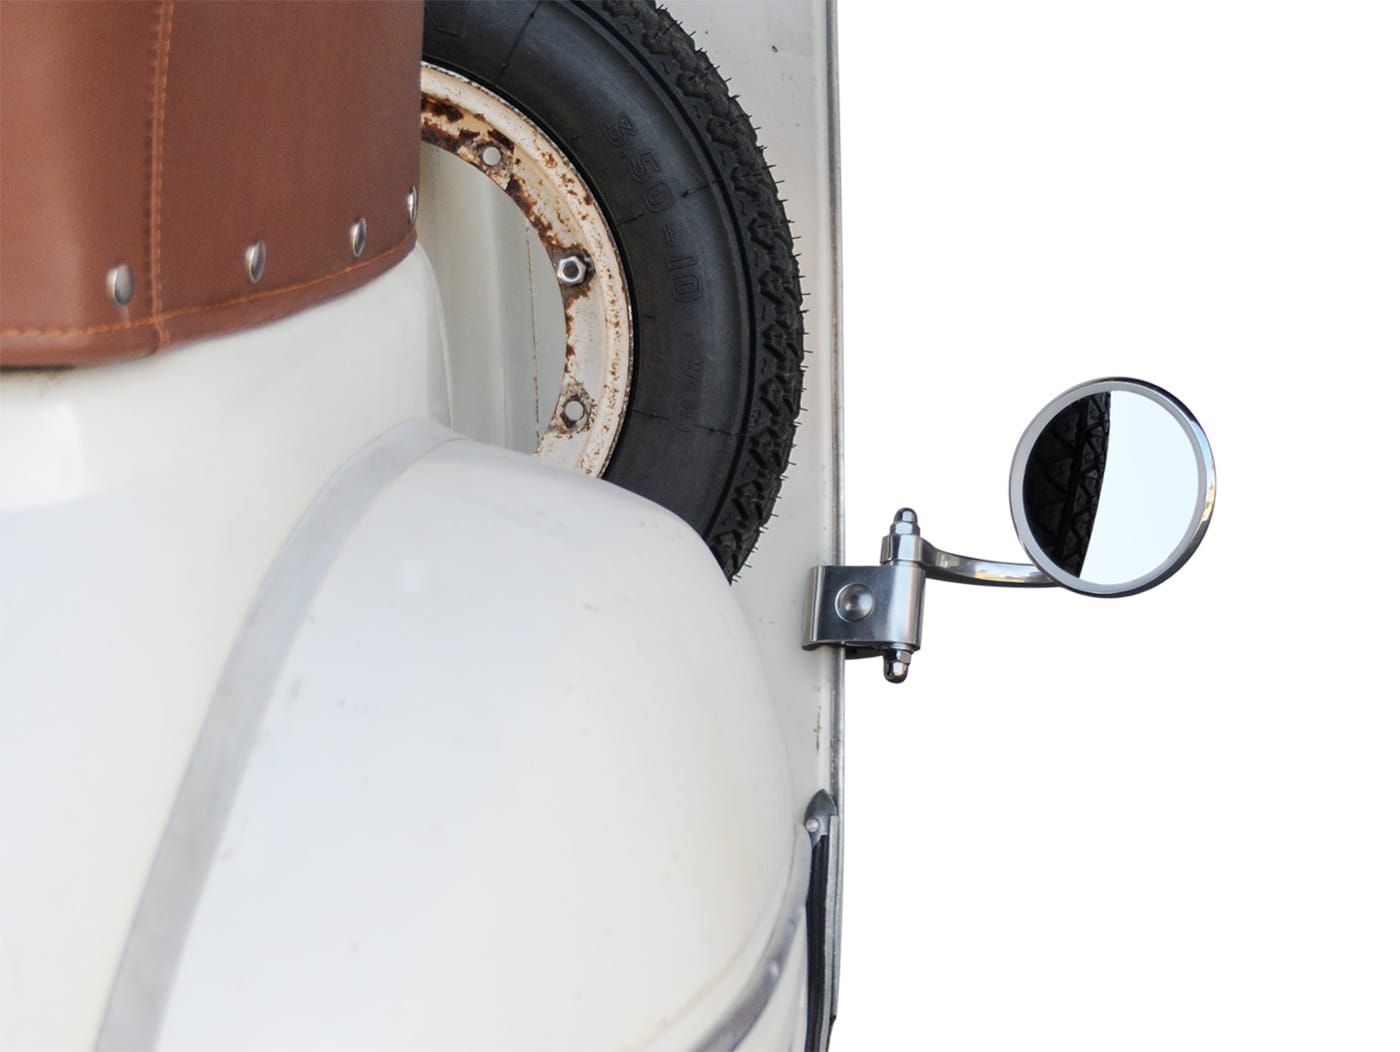
Mirror SKY leg shield clamp mirror chrome round Ø = 105mm

Beautiful, classic round mirror to clamp on the leg shield.
The chrome-plated mirror is fixed with two clamps.
The solid aluminum clamp is ideal for attaching the mirror to the slotted tube of the leg shield. Thanks to the multiple alignment options, the mirror is always quickly brought into the correct position. The stylish cap nuts always clamp the mirror securely and tightly, while the clamp on the mirror body is cushioned in a rubber. The mirror diameter is approx. 10cm, the mirror surface is convex (curved outwards) and thus creates a wide angle. Thus, despite the relatively small mirror surface, a large field of vision can be covered.

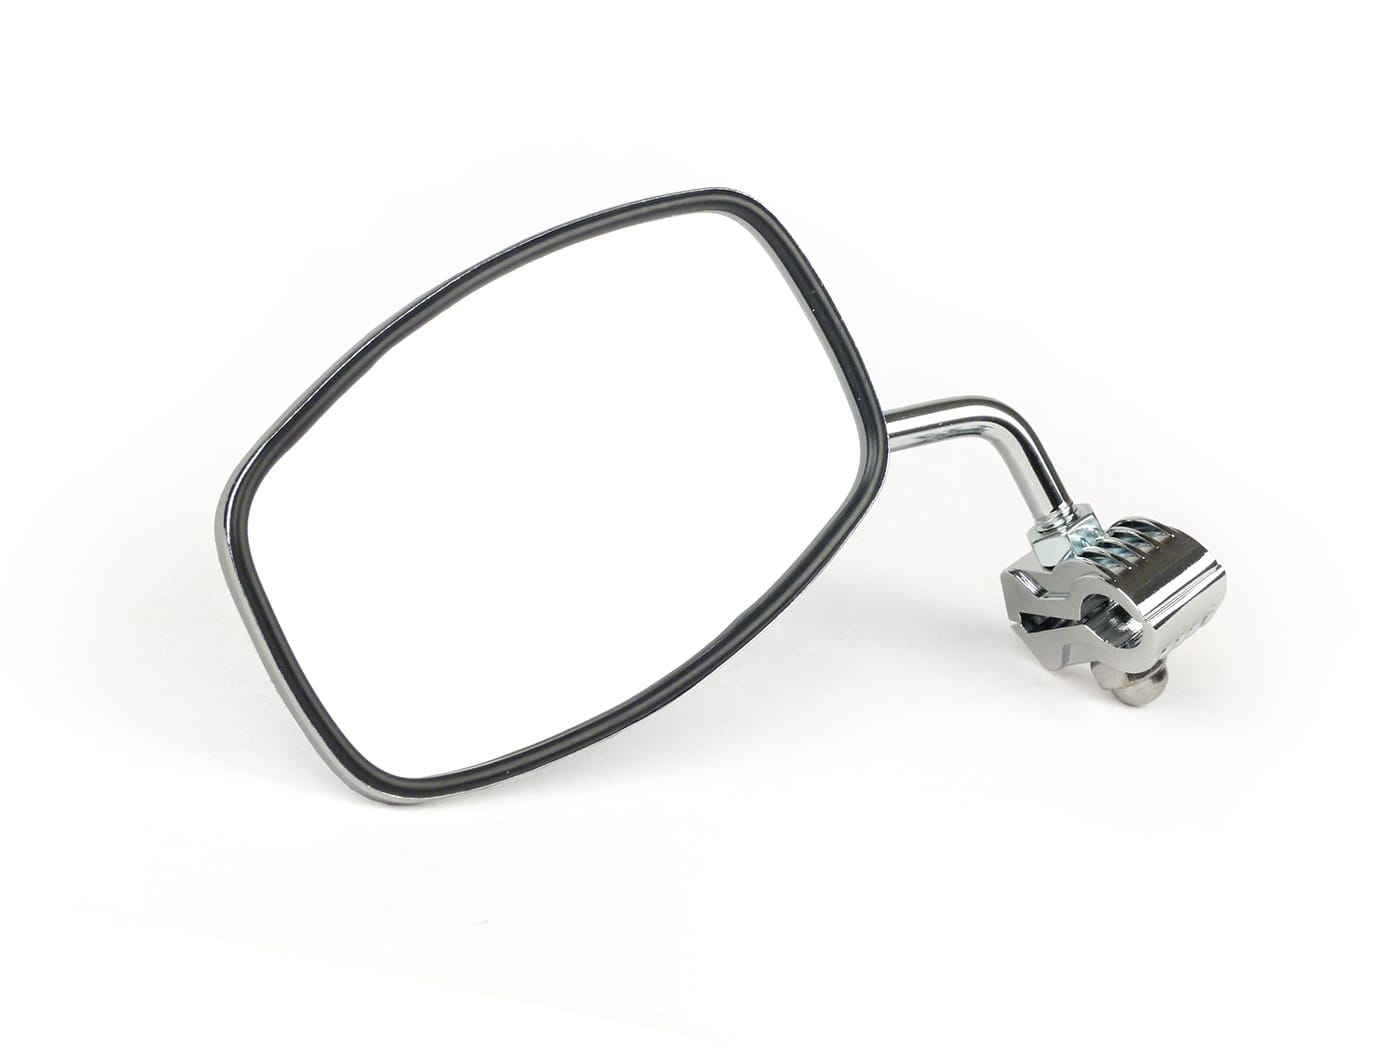
Mirror SKY leg shield clamp mirror chrome rectangular 105 x 70mm

The SKY mirror is also available in the angular version: A very beautiful, classic rectangular mirror that can be clamped to the leg shield.
The chrome-plated clamp mirror is fixed with two clamps.
The massive aluminum clamp is ideal for attaching the mirror to the slit tube of the leg shield. Thanks to the multiple alignment options, the mirror is always quickly brought into the correct position. The pretty cap nuts always clamp the mirror securely and tightly, while the clamp is cushioned in a rubber on the mirror body. The mirror dimensions are about 10 x 6 cm, the mirror surface is not so convex compared to our SKY round mirror.


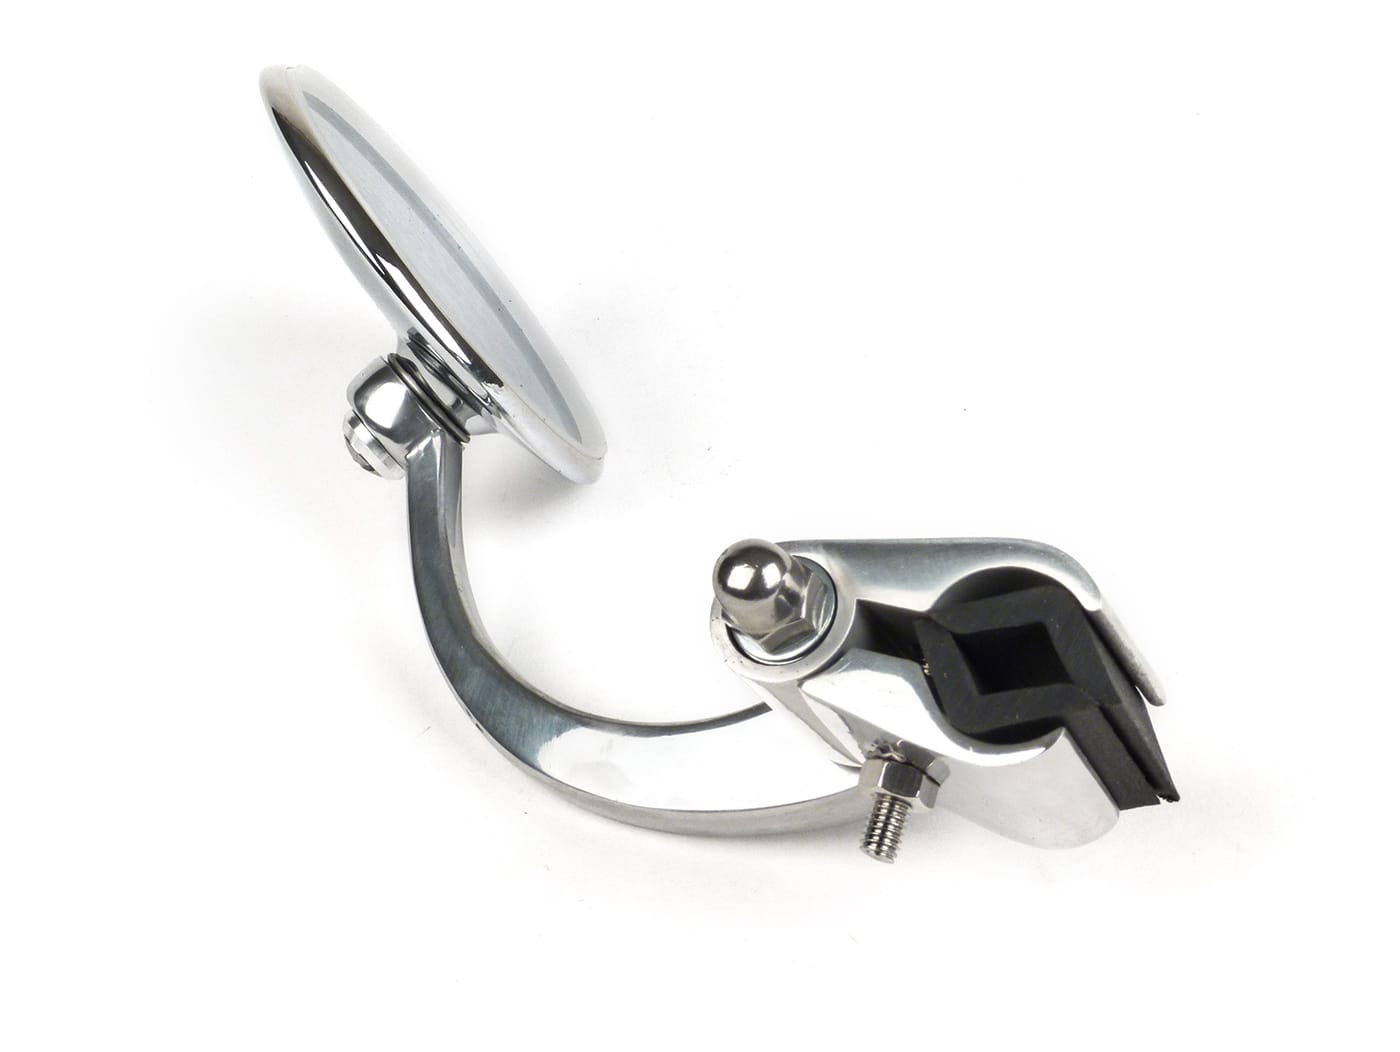
Mirror STADIUM leg shield clip-on mirror, chrome, rectangular

STADIUM mirror MADE IN ENGLAND direct from Caerphilly, Wales, UK.

A real British classic with a long tradition. These legendary clip-on mirrors are made of high-gloss polished stainless steel in top quality and heavy duty. The customers who have consistently rated the mirror at our sim shop top so far, praise the quality and stability of this mirror. Below you can also find a round version of the stadium mirror.

Article no.: Position
7675864 right-wing
7675863 left-wing


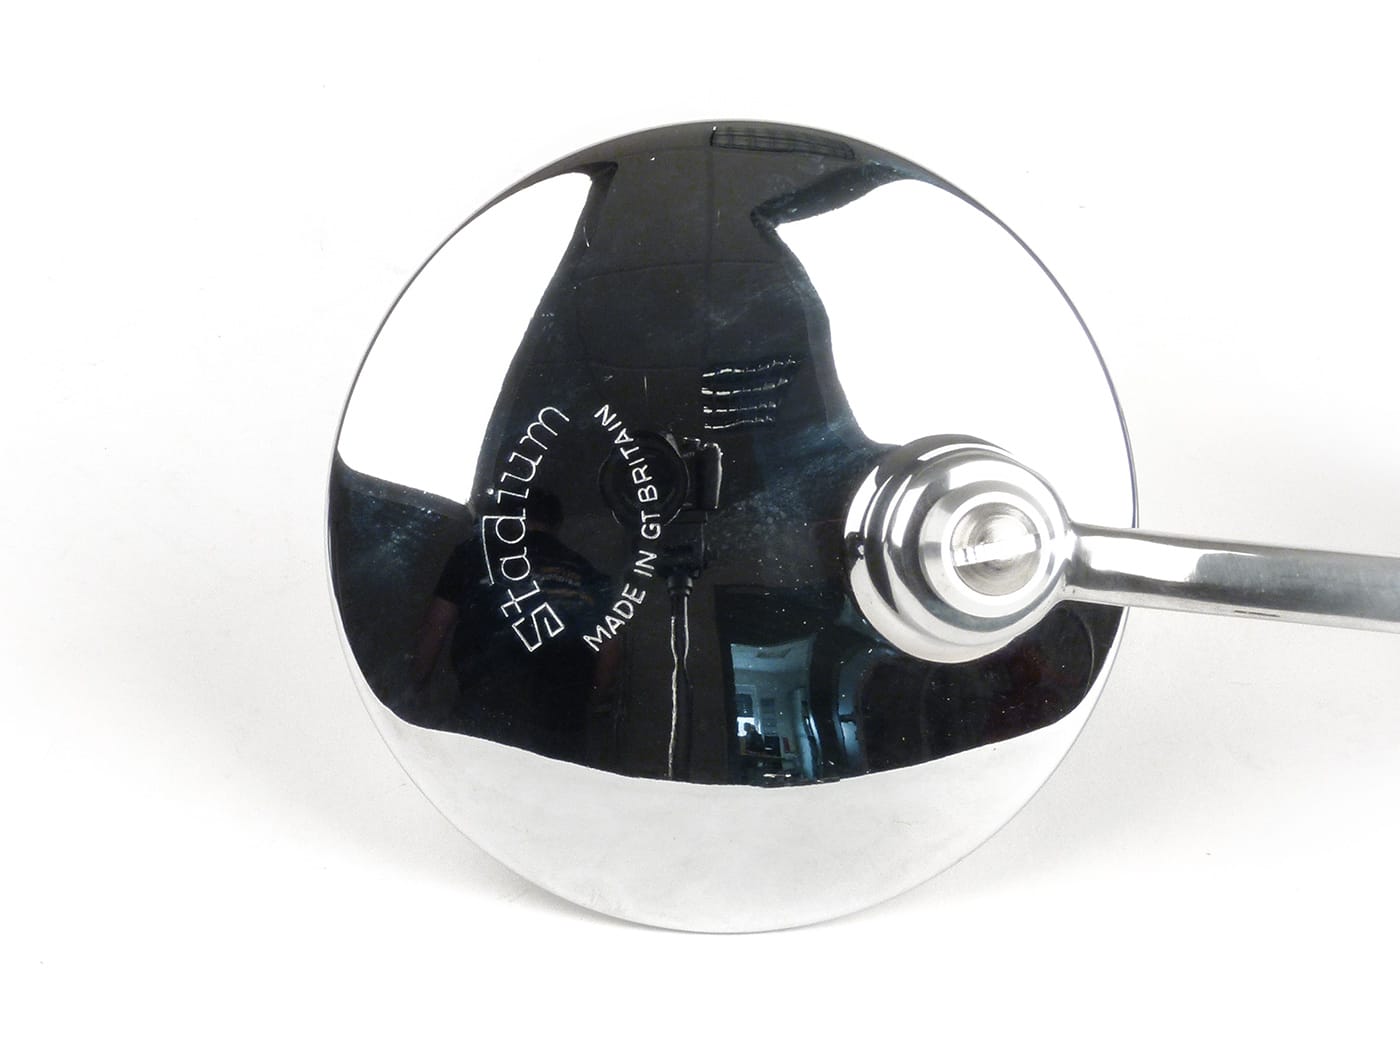
Mirror STADIUM leg shield clip-on mirror, chrome, round

Round version of the stadium mirror approx. 100mm in diameter. A real British classic with a long tradition. These legendary clip-on mirrors are made of high-gloss polished stainless steel in top quality and heavy duty. Our customers have so far only rated this mirror positively and love the good adjustability, the optics and the quality of the mirror. Angular version like this


Article no.: Position
7675940 right-wing
7675939 left-wing


Mirror -VICMA leg shield clip-on mirror- chrome

This inexpensive mirror with a top price-performance ratio from VICMA is available from us in 2 sizes and for left and right: 80mm and 105mm, the large 105mm version also has an E-mark.


Article no.: PAGE & SIZE
7676653 right Ø = 80mm
7676656 right Ø = 105m
7675853 left Ø = 80mm
7675854 left Ø = 105mm


Information about Spiegel and the StVZO in Germany

Do i need a mirror on my scooter?

According to StVZO §56, every motor vehicle in Germany, which also includes mopeds, needs at least one mirror attached to the left side of the vehicle.


How many mirrors do I need on my scooter?

The number of mirrors depends on the first registration (EZ):

  • EZ before 01.01.1990 1 mirror on the left
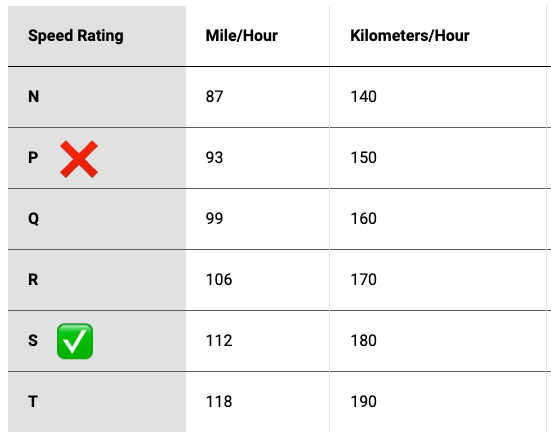
  • Single room from 01.01.1990 up to 100 km / h 1 mirror on the left
  • Single from 01.01.1990 over 100 km / h 2 mirrors


How big does the mirror on my scooter have to be?

The size of the reflective surface must be

  • before EZ 17.06.2003 at least 60cm² (with round mirrors the diameter greater than or equal to 88 mm)
  • according to EZ 17.6.2003 at least 69cm² (with round mirrors the diameter greater than or equal to 94 mm)

be.


Do mirrors on my scooter require a certification mark?


Marked mirrors automatically meet all of the above conditions.

  • For vehicles that are approved according to EC law (from October 01.10.2005st, XNUMX) mirrors with certification marks must be installed.
  • Vehicles with ABE approval (before October 01.10.2005st, XNUMX) only have to use mirrors that meet the above criteria.


Now New!

There are only two original ignitions for the Lambretta lui and Junior series: one for all models with 50 cc displacement 4-pin ignition system from Dansi and for the models with more displacement (lui 75 and J100-125) one 6-pin Ducati ignition.

The power output of both ignitions is very manageable: the Dansi ignition is included 6V / 18 watts and the Ducati version at least with it 6 V / 33 W .

The 50s models have - in a negative sense - absolutely minimal electrics, which usually don't even have a brake light. An upgrade is impossible due to the non-existent performance of this Lambretta alternator.

Comparison of the power output of the ignition systems

Ignition Ducati 6-pin J 100, J 125                  6V / 33W

Ignition Ducati 6-pin lui 75                        6V / 33W

Ignition Dansi 4-pin J 50, lui 50                  6V / 18W

Ignition Vape lui 50-75, J 50-125           12 V / 110 W

vape 80 watts, consider 2.000 U / min

vape 110 watts, consider 6.000 U / min

This means that the new lui and Junior Vape ignition is a more than contemporary update 12V and 110 watts Perfomance. In addition, there is the unbeatable advantage of everyone electronic ignition: There are neither capacitors that burn out nor breakers that are subject to wear. Maintenance work and a weak ignition spark are a thing of the past.
Due to the very high ignition energy at low starting speeds, the vape ignition offers better starting behavior. The CDI is suitable for all original and tuned engines with a static ignition timing.

Thanks to the 12 magnets in the magnet wheel and the 9 coils on the ignition base plate, a high current output is available even at low speeds and the flickering of the light when idling is no longer present. The maximum output of the alternator is 110 watts.

This means that the models with 50 cc displacement can also be perfectly upgraded to the features of the larger models such as high and low beams and a brake light. Additional consumers (USB socket, exhaust gas temperature and the like) are of course no problem either.

The ignition magnet wheel is one-piece, manufactured to a high quality and balanced. The fan blades are CNC milled. The design of the fifteen fan blades has been optimized for higher cooling performance. The weight of the magnet wheel with fan blades is 1,2 kg.

Weight of the pole wheels in comparison

Flywheel Ducati 6-pole (Innocent number 00840134) J 100, J 125 1,35 kg

Polrad Ducati 6-pole (Innocenti number 00860038) lui 75 1,35 kg

Polrad Dansi 4-pole (Innocenti number 00860030) J 50, lui 50 1,4 kg

Polrad Vape with CNC milled fan blades lui 50-75, J 50-125 1,2 kg

Here we have put together the essential components - in addition to the ignition - for converting the on-board electrical system from J 50 to J 100 / J125:

A special feature of the J50 models is the limited space available with the original 50 rear light. A flat LED universal rear light can be the solution here.

When upgrading the lui 50 to lui 75 electrics it looks like this:

The lui 75 terminal board is - so far - only available for the original contact ignitions. When converting to electronic ignitions, all plug connections should be bridged together so that regulated 12 V is available across all of them.

Only green must not be combined with the other colors; here the engine is switched on and off.

The 6 volt horns/buzzers can be retained on all models. However, it is important to avoid honking in the future, otherwise the component will be damaged.

Lui and Junior Vape Ignition:

Holding plates:

Lambretta rear shocker

In 2008 –fifteen years ago- we released one of the very first bgm PRO Lambretta products our rear shocker.

Over the years it got some upgrades and refinements, like rubber bushes for the mounting points. And also some first off ever things like the very clever height adjustment. Copied by many others. The second version of the BGM7772 Black edition was introduced already in 2010 and was so good that we left it untouched until last year.

We had been in contact with Rob Gray of @kickbackgarage fame anyway, then and now. As he offered us his help on redefining the settings of our rear shockers, we did not hesitate one fraction of a second.

The combination of a Lambretta riding suspension technician was hardly to beat, so we provided samples, drawings and everything else he needed and Rob started his mission in improving the setup.

Some new shims and new rebound needle later…

… Rob was happy and did a back to back test against the previously favored rear shocker. And this is Rob's direct comparison:

This super-clever refinements of a real suspension professional lead to a strictly limited edition:

Rob Gray Kick Garage

“The other shock is good but the bgm sample I have followed the road better than it.

 The other is slightly overdamped and still skips and jumps on the road even when set up correctly as high speed compression is too harsh.

 The new bgm has gained some really nice mechanical grip with my mods.

 These are the highlights of the new shock:

  •   Can be set up quite firm without being harsh for faster engines or 2 up.
  •  Rebound control is not just better, but also easier to set up.
  •  The damper shaft might be thinner than on other dampers, but this is good because it doesn`t displace as much oil. This means the oil will not overheat and there is more space for more oil. (win win)
  •  Can be used on Series 1 and 2 and Series 3 without compromising on the stroke length.
  •  The use of more but thinner shims gives more control and the added bonus of pyramid shim stack is that they are progressive. This means that if you hit a hard square edge you automatically have firmer high-speed compression control. A faster movement on the shock gives more support through-out the shock stroke.
  •  We have cured the top-out issue! Yay! No funny noise and better rebound damping.
  •  Because of the shim stack configuration, we do not need to use progressive spring rates. This gives the illusion that the stroke is longer than it is and although we can use the full stroke, it doesn`t bottom out harshly.
  •  I recommend 15-20% say when setting up the shock, and I also recommend just 2-5 turns on the spring preload. 2 =75kg rider 5 =110kg rider. A spring always behaves better under less preload. I used 3 turns but backed it down to 2.5 (82kg with gear) I also have rebound set at 14 clicks from fully open.

Rob

At the time of writing five of these only are left and all of them come or came with this note from Rob:

“Thank you for purchasing, what I believe is the best off the shelf, rear shock for your classic Lambretta scooter.

I have combined my knowledge as a suspension technician and scooter rider to enhance and improve the overall ride characteristics.

Only after countless hours of real world, riding on some of the worst Scandinavian back roads was I happy with the final result.

The magic carpet ride quality is sporty but with fantastic small bump compliance.

This gives great mechanical grip, comfortable and confidence inspiring handling.


Enjoy and Happy Scootering.

Rob Gray

- Kick Garage

As the limited Series is gone or will be gone shortly we are happy to announce that this improved inners are available from now on in serial production:

For all the lui – vega – cometa afficinados, we offer the silver / chrome ones in a set with the reduction bushes by our friends from Casa Performance / Rimini Lambretta Center:

Rear shock absorber bgm PRO R12 V3
Silver Edition RGS 300-310mm - Lambretta LUI, VEGA, LUNA, COMETA 

(Probably) the best Lambretta Touring kit around

Crazy how time flies by! Ten years ago in 2013, we were able to send out the first mass produced MBgm RaceTour cylinder kits for our beloved Lambretta scooters.

The project started early 2012 as a joint venture between MB Developments and Scooter Center. Mark Broadhurst had designed the kits and produced for some time in the UK. The production in England was time consuming for Mark as it involved many steps to see the finished kit and that made it very expensive.

The main differences between the UK MB version and the bgm versions are*:

  • The cast cylinders
  • CNC machined
  • Ceramic plated
  • CNC cylinder head with more cooling
  • Standardized port timings

*According to Mark Broadhurst's excellent mbtechsite.co.uk

Over some beers, mark and we decided to have the RT 195 and 225 kits produced in larger quantities and with a dedicated cylinder head. To cut a long story short the RaceTour kits are considered by many as the best Lambretta Touring kit ever. It is a bulletproof design that gives an ultra-reliable engine with excellent fuel consumption. Therefore, it is not without a reason that even those with much powerful scooters take out their RT kitted bikes for touring or rallying.

TESTING THE PROTOTYPES AND IMPROVING THE SETUP

Here at SC we had eight pre-production kits for testing, four 65mm and four 70mm ones. That went on different machines on the dyno and afterwards for proper road testing. There were slight differences in the setup and we tested many head designs with different compression ratios all machined by hand from Mark. What amazed us at the samples we had and later on in production is the consistency of our cylinder manufacturer. Over the years we have attended so many customers with hints how to set it up and our packer / spacer ideas always worked out and gave the desired squish clearance

FIRST RT 195 AND 225 MBgm RT SAMPLES

Here you see the Excel sheet with some engine info:

DYNO WORK FROM 2011 AND 2012

Here are some dyno sheets done during the development and testing period. 

TOOLING AND INNER CORES

However, it did not go without any problems. Mark as a perfectionist was not totally happy with the tooling; it was simply shipped around the world. Mark than spent 30 hours in modifying the port layout of the inlet, transfers and exhaust port. Job done and ready to go on.

INNER CORES 65mm Lambretta
65 mm
INNER CORE 70mm
70 mm

CNC MACHINED HEADS MADE IN GERMANY

When the perfect compression ratio for good power spread and the build-in reliability of the RT kits was defined, the time had come to get specific cylinder heads made. The first attempt with casted blanks from India failed badly because of the porosity they were not able to get of the casted item. So a master plan was needed and we looked into CNC machining of the head. The CNC machine shop across the road from us came into the game and was the solution.

PROPER PACKING RT Lambretta cylinder

The last point was the packing of the kits. It should be safe and also nice and tidy. Easy goal to achieve.

The first proper production kits went funnily out to good friends of us Andy Gillard of (meanwhile) Scooter Nova fame and Markus Wessner from Jockey's pit stop fame. The history proof in our computer system looks like this:

RT225 Lambretta cylinder

RT195 Lambretta cylinder

Who -back then- would ever have thought that eight years later Sticky would come up with THE COMPLETE SPANNER'S LAMBRETTA Kit Book, where he has reviewed and dyno tested all the available Lambretta tuning kits and complete engines.

Here are some quotes from Sticky's Lambretta Kit Book about the MBgm kits:

RT Lambretta cylinder sticky facts

To be honest the RT kits in the beginning had weak spot. Initially they came equipped with a forged piston that caused some problems with the ring pegs. on 12th of June 2016, a Facebook group named Lambretta BGM RT195 problem Appeared.

The ring peg problem that occurred on some, but not all forged pistons caused many head scratching in England and Germany. The solution was to change the supplier for the pistons. With the Italian company Meteor, we have the perfect source for literally indestructible pistons.

End of January 2017 we had finally been supplied by Meteor with our new pistons, started a recall on the old ones, and swopped the old ones against new ones free of charge. An offer that was valid until the end of 2017 and since our Italian friends supplied the pistons we had not seen a single piston failing again.

Neil who started the problem Facebook group re-named the group into Lambretta bgm RT195/225 User Group. By far the best and most vivid group for all technical questions relating to the bgm RT kits. At least the questions that ours fitting instructions for the RT kits and the extended carb jetting leave unanswered.

We are drunk HAPPY BIRTHDAY RT kit and looking forward for lots of more smiles per miles!

MMW Killercase - Bavaria's answer to the subject of the ultimate Lambretta touring engine

CNC machined motor housing -Made In Germany- around the Simonini light aircraft cylinders in the Li family's Lambretta. The Simonini cylinders with 80 mm x 80 mm hole pattern fit, which are available with 70 mm and as Big Bore with 72,8 mm bore.

The specification of the killer case turns the engine concept into an over-touring engine. Even with a 28 mm or 30 mm carburettor and our bgm Big Box Sport, the 30 hp mark on the rear wheel is scratched or exceeded.

Simonini's Mini Evo cylinders are machined to fit under an original Lambretta cylinder hood. In the Killercase, the inlet sits directly above the crankcase and was made for a type RD350 membrane. By placing the intake system above the crankcase and thus the lower connecting rod bearing, the entire engine concept can be operated permanently and without problems at 1:50.

Apart from the engine housing, the cylinder, (due to) the crankshaft and the intake manifold, conventional Lambretta parts are used to build and complete the killer case. So all parts of the Li series can be used. So all Lambretta ignitions fit for dl/ GP cone, fan wheel housing, all drive components, gears and small parts.

The gearbox cover plate is included in the scope of delivery and is fastened with eight M8 screws. With the correct torque (22 Nm), Schnorr washers and Loctite, this is probably the safest solution for finally fastening the gearbox cover plate.

The killer case is constructed like an original case and all parts can be taken over from the conventional Lambretta engine. With the side hood installed, the Lambretta does not look like it has had a fresh cell treatment.

We offer the killer case in conjunction with the Big Bore cylinder (72,8 mm bore) and a crankshaft with a 64 mm stroke, giving you a displacement of 265 ccm.

crankshaft

Our crankshaft with 64 mm stroke, 120 mm connecting rod and 18 mm piston pin is a German-Italian co-production. The crank webs come from Cosmoto from Turin, the connecting rod from Mazzuchelli and is actually for a Fantic 249 Strada. Helmut von pressed, straightened and shortened the crankpins to the right size www.az-zweitakt-power.de

The work on each shaft is documented, the shafts are numbered and there is a video for each shaft that documents the round trip.

We also checked the running clearance of all cylinders at Helmut and had them adjusted to 0.05 – 0.06 mm if necessary. Better safe than sorry and so (provided the ignition and, above all, the carburettor settings are correct) the engine is fully gas-proof after half a tank of fuel.

The concept is expressly designed as a stable touring engine with a rev range that is easy to use on the road; with full suitability for everyday use, good consumption values ​​and high compatibility with well-known Lambretta components.

Further advantages of the killer case concept:

  • Deco hole for easy launch
  • Torque from idle
  • A 2% oil admixture is sufficient, as the inlet is located above the crankshaft and the lower connecting rod bearing is already sufficiently lubricated
    Unobtrusive, almost production-like appearance, only visible under the side panels
  • Can be driven without modification of the sheet metal parts and with the standard tank
Lambretta street racer book

This book is the fifth part of the Lambretta technical series by Stuart Owen and deals with all topics related to the construction of a so-called street racer.

Details
88 Seiten
400 Abbildungen
22×0,5×28 cm format

Stuart Owen

Before we get into the details of the book, first a word about the author, Stuart Owen. He became involved in the history of scooters in the mid-80s in England's Midlands through the mod scene. He controls the first meetings in the van of the Birmingham band the E Types! at. But then he went to Scarborough in August 1987 on his first restored Lambretta, a Li 150 Special (Pacemaker).

Lambretta street racers

For a short time Stuart worked for Disco Dez Gran Sport in Birmingham before setting up his own business 100mph Lambretta Club becomes self-employed and deals with almost everything to do with the Lambretta, from rather ingenious restorations to quite uncompromising tuning.

Here you can find more about Stuarts Racing and the countless successes on the racetrack: Click!

In any case, it has absolute cult character Duel against the Ferrari F40:

The restorations built by Stuart and the preserved vehicles, which are worked up with a lot of love and understanding for the original substance, are similarly uncompromising. Among other things, the original Lowline Supertune 666 CRK.


As a technology expert, he has been supporting Scootering Magazine for many years and is happy to share his fairly wide-ranging expert knowledge.

A book -Lambretta street racers - technical series

In this fifth volume of the Lambretta technical series Stuart highlights the special features of the street racer category, also in contrast to custom scooters and explains planning, implementation and the finished result, the ultimate Lambretta street racer.

TUNING RACE – for professionals

Book -Lambretta concessionaires the complete story 1951 to 1971- Stuart Owen

In his book about the Lambretta Concessionaires the specific features of some Lambretta models for the English market are dealt with. And more importantly, it explains how and why the English market for Innocenti is becoming the second most important in the world after Italy:

Adventure Lambretta

In June 2022 we were able to introduce you to the (R)ollersack *original* in the blog and shop. Sabine from (R)roller bag *original* develops luggage that is specifically tailored to the needs of scooter riders.
In the late autumn of last year, very good and long-standing friends of ours made Sardinia unsafe with their Lambrettas. Harald and Markus didn't miss the opportunity to put the sack through its paces.

We have summarized the conclusions of the two test persons here:

Overall rating:

"Finally on the topic of roller sacks.... We both give it 9,5 out of 10 points! The DL driver is over 1,80 and got along very well.”

packing practice:

I had packed all my things in a thin travel bag. I just found that more practical because we changed accommodation every day and it was easier to pack and unpack

Robust and durable:

“The sack makes a very robust impression and despite some abuse, nothing broke. The long shoulder strap has proved its worth, for example when towing on the ferry.

Photo in river

Weather test results in weatherproof:

Because it rained very little, my colleague also did the water test.
There is nothing to complain about here either.

Most important – on the road:

“However, I am most impressed by the handling of the bag. Over 2.000 kilometers in Sardinia and most of them on really winding roads. Unlike with the pockets in the back, you just don't feel the weight.”

And that is exactly what is meant by luggage specifically tailored to the needs of scooter riders.

Here you can find the (R)ollersack *original*:

The black variant will be available again from the beginning of April.

hand in horn

6V and 12V buzzers and horns for the Li family of Lambrettas and their attachment

In view of the 14 years of construction of the Li family - starting with the TV 175 Series 1 in September 1957 and ending with the dl / GP 200 in April 1971 - the variation in horns and buzzers and their attachment to the Lambretta frame is not that confusing.

First of all, it should be mentioned that there is either buzzing (for AC systems with alternating voltage) or horns (for DC systems with direct current to be recognized by the battery). All Lambrettas were originally delivered with 6 V on-board electronics.

When converting to 12 V systems, the original buzzers and horns continue to work without any problems, even with the 12 volts that are now available. But humiliations should be avoided, otherwise they will quit the service sooner or later.

Series 1 and early Series 2 models to July 1960

On all Series 1 and Series 2 models through July 1960 the horn mount is welded directly to the frame and looks like this:

The right horn:

art. Number: CLE66D

Horn -GPM 12V DC
Lambretta LI 150 (Series 1), LI 150 (Series 2), TV 175 (Series 1), TV 175 (Series 2)

is screwed directly to the frame and decoupled from the frame with two rectangular anti-vibration rubbers.

Series 2 from 07/1960 and Series 3 up to the end of 1967

During the construction of the Series 2, the attachment of the horn was changed. The welded bracket with two bolts is replaced with a rectangular block with an M8 stud. A retaining plate, often called a Y-bracket, is attached to this. And the original looks like this:

This special retaining plate was not available as a repro for a long time, Timo from TD Customs took care of it and supplies us with it:
Bracket Horn -TD-Customs
Lambretta LI (Series 2), TV (Series 2) -> 07/1960

art. Number: 3333492

We already know the corresponding horn:
Horn -GPM 12V DC
Lambretta LI 150 (Series 1), LI 150 (Series 2), TV 175 (Series 1), TV 175 (Series 2)

art. Number: CLE66D

Since the mounting of the late Series 2 is known to be identical to the Series 3, the Series 3 retaining plate can also be used with the corresponding horn. The retaining plate in the series comes much closer to the name Y-Bracket:

and using this part:

fastened to the frame with M8 nut and corrugated washer on the stud.

art. Number: 7672861

Horns (or buzzers) suitable for the holder are available in 6 V and 12 V:

Horn (buzzer) CASA LAMBRETTA 6V/12V AC
Lambretta LI, LIS, SX, TV (Series 2-3)
Zinc

Horn -GPM 6V DC
Lambretta LI, LIS, SX, TV (Series 2-3)

Horn -GPM 12V DC
Lambretta LI, LIS, SX, TV (Series 2-3)

Series 3 from 1968 and dl / GP

At the end of 1967, i.e. in 1968, the attachment was simplified and the Y-bracket was replaced by a bracket welded to the frame.

In order to decouple the horn from vibrations, the holes in the retaining plate on the horn are enlarged and special Allen screws and vibration rubbers and washers are used.

Here the horn with the anti-vibration rubbers:

Found for alternating current (AC) and direct current (DC) electrical systems:

Horn -GPM 6V/12V DC
Lambretta LIS (1968-), SX (1968-), DL, GP

Horn -GPM 6V/12V AC
Lambretta LIS (1968-), SX (1968-), DL, GP

You can find the screws here:

And this is what it looks like installed on a preserved dl 200:

The background probably doesn't seem unfamiliar to the inclined Lambretta connoisseur.

Many thanks to Markus for the image rights.

And now something about big horns. Originally, the real horns (i.e. the DC things) had a larger diameter. Namely 85mm. Occasionally we also get those from Casa Lambretta:

Horn -GPM 6V/12V DC
Lambretta LIS (1968-), SX (1968-), DL, GP

Horn -GPM 6V/12V AC
Lambretta LIS (1968-), SX (1968-), DL, GP

After the season is before the season! During the season, we are all totally focused on processing orders quickly and shipping them the same day. In winter you can do work that you don't have time for during the season.

There was recently the revision and the filling of the gaps in our Lambretta explosion drawings on the list. Below is a small before and after comparison of the lui / vega / cometa and the Junior series.

For almost all Lambretta models, there is a model history in the shop in which the origin and special features are explained, but the most important vehicle data are also summarized:

Lambretta models

The measured values can be transferred to a PC via the exploded can be searched particularly well for parts of the individual assemblies:

In the small Lambrettas, which are becoming increasingly popular, you can see the before and after effect particularly well:

You can find all this and much more here:

Tools not only please the heart of a screwdriver, with the right tool the work is also easier to do.

Contrary to the usual myth that you need tons of special tools for the Lambretta, only a few tools are really essential.

ESSENTIALS CATEGORY It doesn't work without them

Allen key bgm PRO 3.5mm

Unusual size and used for the clamping nipples on the gearshift and clutch. The bgm key comes with a practical ball head. This means that the rear shift cable can also be reached when the clutch cable is attached and without a special control block.


flywheel

Rotor puller M27x1,25

(A – D, LI, LIS, SX, TV, DL, GP, J, Lui) 
8099000

Rotor puller M30 x 1,5

(motor place ignition)
8099013

Flywheel holder 2+3 windows

LI, LIS, SX, TV, DL, GP, Lui, J50-125
8099008

Flywheel holder for flywheel bgm PRO

LI, LIS, SX, TV, GP, DL with 29cm
bgm2109T

Rotor holder Casatronic (IDM ignition) 

LI, LIS, SX, TV, DL, GP
3332382

Rotor holder Casatronic (Ducati ignition

LI, LIS, SX, TV, DL, GP
3332382D

Flywheel puller and suitable holders are the only way to remove the flywheel from the cone of the crankshaft. This is required for all work on the ignition system. But also if you want or need to penetrate deeper into the innards of the engine.

The flywheel holder 2+3 windows is intended for all original Innocenti and Indian flywheels with the corresponding recesses.

The bgm PRO pole wheel has an external hexagon on which the corresponding holder is attached. The holder is supported on the nut of the large silent blocks to hold it up.

There are two variants of the Casatronic ignition, one based on the IDM ignition and the current variant manufactured by Ducati Energia. The pole wheels are blocked with two or three pins on the pole wheel with the appropriate holder.

Clutch

Clutch compressor bgm PRO 

LI, LIS, SX, TV (Series 2-3), DL, GP, J, Lui 
bgm1220TL

Clutch compressor

LI, LIS, SX, TV (Series 2-3), DL, GP, J, Lui 
7671359

Coupling holder 

LI, LIS, SX, TV (Series 2-3), DL, GP 
8099003

Both of them are irreplaceable. The compressor is used to relieve the circlip on the Lambretta clutch. After removing the ring, the coupling can be removed.
The clutch nut is tightened with 66 - 74 Nm. For both loosening and tightening the nut, the clutch basket should be blocked with the appropriate tool/holder.

brake drum puller

OEM 

LI, LIS, SX, TV, DL, GP             
7676162

CASA LAMBRETTA 

LI, LIS, SX, TV, DL, GP
8099005

MBD 

LI, LIS, SX, TV, DL, GP
3333402

In the mid-1960s the design of the brake drum was changed. At this point, the Series 2 will have three M7 threads instead of the two M6 threads previously used. This goes hand in hand with the use of the retaining ring for the cap nut on the main shaft/brake drum. Our pullers come with both M6 and M7 screws to hold the puller in place. If it is attached to the brake drum, the brake drum is pressed by the main shaft via the large central screw.

The OEM quality of the puller works, but is not the best in terms of haptics.

Casa Lambretta offers the tool in a beautiful workshop quality and it corresponds to the original Innocenti tool.

MBD has optimized the original design and features knurling on the outer edge and a ball in the tip of the central screw. This fits into the recess on the mainshaft and is intended to prevent any damage.

Headset mounting wrench MBD

LI, LIS, SX, TV, DL, GP, J, Lui 

The MBD key for the headset bearing is perfectly adapted to the Lambretta. The holder for countering is separated according to the conditions of the Lambretta.

fork spring compressor

OEM 

LI, LIS, SX, TV, DL, GP             
6660212

CASA LAMBRETTA 

LI, LIS, SX, TV, DL, GP
CBL212

MBD 

LI, LIS, SX, TV, DL, GP
7670992

The compressor for the springs in the fork is used to overhaul the fork. Neither the fork links nor the springs and their spring guide rods can be removed from the fork without compressing the springs. 

Both the Casa Lambretta and the MB compressor are based on the original design of the tool. This is sometimes a bit difficult to handle and a third or even fourth helping hand is usually not bad.

The OEM design, on the other hand, is screwed to the fork and handling is very easy and time-efficient. So here: clear purchase recommendation for OEMs.

Silent block assembly tool bgm PRO

LI, LIS, SX, TV, DL, GP

The silent blocks can only be changed with the appropriate tool and with a sufficiently heated engine housing. The bgm tool for this is a solid turned construction.

HAVING IS BETTER THAN NEEDING

crankshaft pulling sleeve 

LI, LIS, SX, TV, DL, GP             
MRB0012

connecting rod locking tool

LI, LIS, SX, TV (Series 2-3), DL, GP, J50, J100, J125, Lui 50-75
7671543

Crankshaft removal tool -MBD

LI, LIS, SX, TV, DL, GP
7671543

Crankshaft pulling tool 

LI, LIS, SX, TV, DL, GP
CPX231B

It is best to pull the crankshaft into the bearing on the drive side. The original drive sleeve with the screw for the front sprocket can be used for this.

The pull-in sleeve is a length-optimized version of the original drive sleeve and offers comfort and speed when screwing. In both versions, the crankshaft must be fixed (e.g. with a connecting rod locking tool.

The Casa Performance version is a rather ingenious further development, in which the crankshaft does not have to be blocked and the shaft is drawn particularly gently into the bearing seat.

The MB tool is still the first choice for dismantling the crankshaft. It is screwed onto the motor housing and then the shaft can simply be pushed out of the bearing seat

Video CP tool

MB Developments

The MB Tools are still the first choice for crankshaft disassembly. It is screwed onto the motor housing and then the crank can simply be pushed out of the bearing seat.

Crankshaft drive sleeve puller

Exact copy of the original Innocenti tool. This allows tightly seated drive sleeves to be gently pushed off the crankshaft. The drive sleeve has two holes on the outer end for using the tool. The sleeve and tool are connected to each other with the two knurled screws on the side and then the sleeve is pressed off the crankshaft stump using the toggle.

LI, LIS, SX, TV (series2,3), DL, GP             
7671361MB

Main shaft assembly tool

Before installing the gear backlash, it is important that the countershaft is fully torqued into the rear hub bearing. This can be done with the rear brake hub fixed. An alternative to this is Mark Broadhurst's final drive sleeve tool. Once the layshaft is in place, insert the sleeve by locking the socket head cap screw into the layshaft grooves, fitting the special nut provided, holding the sleeve with a wrench and tightening the nut until the layshaft is pulled into place with the correct torque is.

LI, LIS, SX, TV (Series 2-3), DL, GP, J50, J100, J125, Lui 50-75
7671800

Determination of top dead center and ignition timing

The dial gauges and brackets, which are mounted in place of the cylinder head, are precision measuring tools for determining top dead center and ignition timing. A good choice if you already have an engine on the workbench or engine stand. If you need to do ignition timing with the engine installed, it may be easier to use the buzzwangle, beluga, or similar methods.

BUZZWANGLE from Sticky

The buzzwangle tool is a brilliant idea from the sticky. A digital degree disc can be clamped onto the threads for the flywheel puller using an adapter with four mounts. Thus, the digital angle dial gauge is immovably attached and both the ignition point and the control times can be determined and adjusted to an accuracy of 0,1°.

Fits all Lambretta Innocenti models and their derivatives. Just like on most Vespa and Piaggio models.

It's best if you just watch the video

CURIOS the video is also available with a German soundtrack

99,00€

degree disk bgm          
BGM8809

Ignition timing calipers

Series 1-3
CMDTB0010

Dial indicator holder MB

MRB0045

Dial indicator with holder bgm

8099009

dial gauge bgm

7670937

dial gauge holder bgm

7670938

Feeler gauge bgm          
BGM8809

Feeler gauge 

The feeler gauge is great for setting contact breaker or gear backlash.

Feeler gauge Toptul

ICAA0020

Spark plug wrench bgm PRO SW21mm/13mm

LI, LIS, SX, TV, DL, GP, Lui, Junior

The Li family's spark plug accessibility isn't the best. The original spark plug wrench fits, of course, but has the disadvantage that removing a hot spark plug can result in burnt fingers. With the bgm part, the candle can easily be completely unscrewed by hand after loosening. And not only that, an integrated magnet holds the candle securely in the key. There are guaranteed no burnt fingers here.

19,90 €

Assembly stand bgm PRO

Lambretta Series 1-3

Replaces the engine for assembly work. The assembly stand is screwed to the frame via the shock absorber attachment and the engine bolt. The scooter can then be maneuvered as if the engine were inside. Suitable both for keeping the scooter mobile and upright while the engine is on the operating table or for setting up the Lambretta after the preparation or painting when the engine is not yet ready.

109,00 €

Rivet hammer for lettering

Lambretta A, B, C, LC, D, LD, LI, SX, TV, DL, GP, J, Lui

All lettering with pins on the back for attachment can be professionally attached. The pins on the lettering should be shortened so that they protrude by only 2 mm. A top tip from Dean from the Sticky Manual is to drill out the pins of the lettering. For reference page 203 Sticky Manual.

8,90 €

Rivet hammer for rivet luggage compartment lock

LI, LIS, SX, TV, DL, GP

All lettering with pins on the back for attachment can be professionally attached. The pins on the lettering should be shortened so that they protrude by only 2 mm. A top tip from Dean from the Sticky Manual is to drill out the pins of the lettering. For reference page 203 Sticky Manual.

11,95 €

Mounting tool shifter claw bgm PRO 'ball crusher'

LI, LIS, SX, TV, DL, GP

The ball crusher is a cleverly designed tool. With it, the shift balls and spring can be easily and conveniently installed in the main shaft. Without this tool, installing the shift dog can be a real game of patience. Simultaneously get the balls in position on both sides and enough preload without being shot into the endless expanses of the workshop by the switching spring?

Threaded bushing MB

This thread insert is intended for repairing damaged threads on Lambretta engine cases. Easy and saves welding a case.

Threaded socket M10 x M6   
6661083

Threaded socket M10 x M7
6661082

Threaded socket M10 x M8

3331081

Stud mounting tool

Clever tool from BGM for installing stud bolts without damaging them.
Screw the BGM Pro tool onto the stud bolt and counter with the integrated hexagon socket screw. It is braced with the thread of the stud bolt. Now turn the outer wrench flat. The stud bolt is fixed and is loosened or screwed in. Make sure that the counter-locking is sufficiently strong so that the tool does not come loose.

Ideal for short bolts (such as Lambretta gearbox covers).
The required minimum length of grippable stud thread is:

  • M6 / /M7 = 6,5mm
  • M8 = 9mm

Available individually or as a set.
Also available for the rare thread size M7!

Required additional tool:

  • Combination wrench: SW19
  • Allen key: 6mm

NOTE: Please note that stud bolts glued in with screw adhesive/Loctite often have a very high breakaway torque. Here you should first try to heat the stud(s) or the housing around it in order to loosen the adhesive connection.

Stud assembly tool M6 x 1.00mm   
BGM72M6

Stud assembly tool M7 x 1.00mm 
BGM72M7

Stud assembly tool M8 x 1.25mm 

BGM72M8

tool bags

Tool bag without tools CASA LAMBRETTA    

8050083

Tool bag including on-board tools  CASA LAMBRETTA

8050083KT

Toolkit CASA LAMBRETTA

LI (Series1-3)

3331475

Tool bag without tools

CLA331

toolbox

Lui 50 C/CL, Lui 75 S/SL

7674676

Assembly support stand 

LAMBRETTA- LI, LIS, SX, TV (series 2-3), DL, GP, J50, J100, J125, Lui 50-75

Lambretta tool bag retaining clip    

The Innocenti icing on the cake of a beautiful restoration is the original on-board tool kit in the right bag with Lambretta Innocenti ribbons and then fixed with the correct retaining clip.

A nice reading recommendation on the subject of tools is the reprint of the Innocenti tool catalogue.

Oil measuring cup 

Another nice addition to any Lambretta tool box is the Innocenti oil can from Casa Lambretta. This is an exact copy of Innocenti's American market device. It comes complete with a snug fitting cap. It has the 'Lambretta' and 'Innocent' logos embossed on the sides.

Tool catalog -SCOOTERPRODUCTS

Tool catalog -SCOOTERPRODUCTS

Lambretta and Lambro (1960s models)     

And since the right tool is useless without knowing how to use it, here is the ultimate Lambretta reading tip! Since its release in 2004, the Sticky Manual has been the definitive repair manual for the Lambretta. The work steps are explained throughout with color illustrations. In addition to the pure repair instructions, the Sticky Manual is also an indispensable aid for identifying and distinguishing between parts.

Book -Complete Spanner's Manual Lambretta -Third Edition

by Sticky

Thanks to our friend Dean Orton, the Sticky Manual has also been available in Italian for over two years: 8100072IT

TOPTUL HIGHLIGHTS / SELECTED PARTS

Since 1994, Rptar Machinery Industrial Group has used its capabilities to manufacture top-of-the-line tools under the Toptul brand. The price/performance ratio is probably unsurpassed. Only the most reliable tool steel alloys are used, such as chrome-molybdenum steel or chrome-vanadium steel.
We have selected a few products to show the variety, but there is not enough space here for the entire range. 

Digital Torque Adapter

   TTDTA030N

Steckschlüsselsatz 

GCAI4901

Allen key 

GAAL0916

T-handle ratchet

TTCTRM1227


"I did not know the TOPTUL brand and I must say that it is excellent, very hard steel and TOP precision, it will be a reference brand for my next purchases in laboratory equipment, congratulations."

One of the ratings

in the SC shop

Woodlost Cannonball Classic Scooter Run title picture

Woodlost Cannonball Classic Scooter Run was held through the weekend of 26 -29 May in southern Sweden.
It was organized by Lambretta Club Malmo and we had a total of 71 participants divided into 30 teams.

Instead of just pure speed the concept this time for the Woodlost Cannonball was about gaining points. The participants had to navigate smart, performance nice in manned checkpoints and deliver right answers at unmanned checkpoints.
Congratulations to the team “What's Normal Then?!” with Isa and Erk Westberg, Morgan Strandberg and Jörgen Larsson who after two days of driving and performing was the team who went home with victory, glory and the challenge prize.

A big thank you to everyone who contributed this weekend and a big thank you to Scooter Center for your support.

Olaf Fransson
President Lambretta Club Malmo

Photos by @lambrettapics

It's always nice to meet friends and that was when Scooter Center-Team on the EICMA 2022 the case. Here is some news that caught our attention:

New Vespa models EICMA 2022

Piaggio proudly presented the new 2023 model years, which will win many new fans with some new, visible and invisible features. 
The most prominent model is of course the GTS300.
TECHNOLOGY
We can already say in advance: It drives better than ever! Piaggio has finally dedicated itself to the subject of chassis and has now made it much more stable and active. This is accompanied by a new front wheel suspension including a new supplier for the brake components. Nissin from Japan is now on board here and is responsible for a befitting delay. The front shock absorber of the GTS models differs again from the previous models, which brings us to the third stage of evolution. Interestingly, Piaggio has retained the previous fork/brake type for the new GTV models (recognizable by the headlight on the fender). In line with the spirit of the times, a keyless go system has now been rolled out on the GTS/GTV platforms. With that, the conventional key is history. It was replaced by a pure transponder (key fob) that can be used to start and unlock the vehicle when approaching via a rotary knob in the position of the former mechanical steering lock. The engine corresponds to the Euro5 engine which is already known from the previous model years. The models generally known as HPE, which brought a decent increase in performance compared to the Euro4 models, are used unchanged, i.e. with full power (23,8 hp at 8.250 rpm), in the 2023 models. 

EXTERIOR/VISUAL
Externally, the new GTS models can only be distinguished from last year's models with a trained eye. However, Piaggio has hardly left a part untouched, so that the term facelift at this point would not do justice to Piaggio's effort. The clear identification feature of the GTS300 Bj.2023 are the switch units separated from the handlebars and the slightly exposed license plate light. The well-known division into GTS, GTS Super, GTS SuperSport and GTS SuperTech has been retained. While the first three versions are more to be understood as color variants, the SuperTech models also stand out technically with a large TFT display instead of the classic instrument landscape. In order not to lose touch in times of mandatory constant communication, Piaggio offers its new connectivity system MIA as an option. A concession to activate new target groups and to give the vehicle class further features, away from the purpose of a pure means of transport. Certainly a good idea to be able to place the GTS models even more fully and comprehensively on the market. 

Vespa 946 10° Anniversary

The famous 946 models were also presented in a new guise. Always designed less as a technology and more as an image bearer, the 946 is both extroverted and a homage to the company's own history. The fact that with the 946 models Piaggio has strayed very far from the original idea of ​​the simple but robust everyday vehicle is not at all an issue here. On the contrary, the 946 embodies that archetype scooter that any child would paint. This is more than any marketing department of other manufacturers even dares to dream of. Appropriately, Piaggio has dipped the 946 in a beautiful shade of green that is distantly related to the first paintwork of the models from over 70 years ago. In contrast to the GTS models, the 946 models therefore appeal more to artistic finesse, to whom an individual vehicle concept means more than explicitly good driving performance. For this reason, Piaggio has not yet given the 946 models a keyless go, but still relies on the good old key technology. To compensate, it has a modern LCD display and an LED headlight. The 946 models are offered with 125cc and 150cc.

 Vespa GTV

The new GTV models have undergone major visual changes than their GTS brothers. The handlebar fairing as well as the handlebar itself have been completely redesigned. Together with the sports seat including the new cover made of plastic (screwed/removable) and the decorative stripes, a beautiful nostalgic race look is offered, almost retro sport from the factory. With the front wheel fork, Piaggio stayed with the previously produced type so that the retrofit parts (shock absorbers) already available for these models also fit. However, keyless go is also already on board here and makes the GTV a reliable and easy-to-use commuter with a touch of avant-garde. The USB connection, LED headlights and the digital speedometer round off the picture of the modern oldie perfectly.

GTS Supersport 300 HPE ABS ASR

New SpecialModel: Primavera Color Vibe 

The color vibe special models of the Primavera models impress with a modern appearance that Piaggio has created with a simple but very effective trick. A completely different vehicle line is implied by a horizontally applied decorative color tone, which deliberately contrasts strongly with the rest of the vehicle paintwork. This makes the Primavera models appear much sportier and more pleasing. Attached to the side, the engine displacement is also a nice gimmick. The color vibe models are available in 50cc, 125cc and 150cc versions.

Vespa Primavera Color Vibe 125 i-get ABS 

Pinasco

Pinasco is still busy and always inspires with new products. The latest hit is the 244/252cc cylinder which was designed for a standard engine housing. Undoubtedly, the already legendary Quattrini M244 was the inspiration here, with its huge success in 2015 no one expected would have; Too expensive, too exclusive. Pinasco has now also dared to interpret the topic of maximum cubic capacity for the series housing. Here, too, a cylinder is used that no longer has a cylinder base that has to dip into the motor housing. This allows the size of the cylinder bore to be increased to a whopping 72mm (series 66.5mm) without having to rework the engine housing. However, a crankshaft with a significantly longer connecting rod (130mm vs. 110mm series) is absolutely necessary for this, as the channels are located significantly further up in the cylinder. A big difference to the Quattrini M244 cylinder is the intake control. The Pinasco cylinder has a large cylinder inlet which is fired by an intake manifold with a membrane. This makes you completely independent of an intake control via the engine housing. Pinasco will offer matching crankshafts with 60 and 62mm stroke. The connecting rod length is 130mm. According to Pinasco, if a Pinasco engine housing is used, there is no need to spin the crankcase for the crankshafts. This step would only be necessary for original Piaggio motor housings.

New PX200 cylinder kit 252cc 

The cylinder with side outlets is also shown here. These are probably omitted in series production.

Piston 72mm diameter

Clutch bell for Ciao/SI

Cylinder kit for Honda SH300

Motor housing Pinasco Smallframe

Now with a multi-drilling pattern suitable for many cylinders 'out of the box'

Pinasco Eureka

A special feature at the Pinasco stand was the E-conversion kit for the Vespa, dubbed Eureka Smallframemodels.
The solution patented by Pinasco envisages replacing only the crankshaft and the cylinder. The cylinder is replaced by an electric motor with a vertical output shaft. The replacement for the crankshaft, on the other hand, absorbs the power of the engine via spur gearing and transmits it conventionally to the clutch. The scooter can be operated as usual (coupling, shifting, accelerating, uhh, giving electricity).

Polini

New ECU for GTS 300 Euro 5

Polini offers a new cylinder kit including ECU unit for the GTS300 Euro5 models. With this, the injection quantity/time can be adjusted within a certain framework to the installation situation (modified exhaust, air filter, etc.) by simply adjusting a potentiometer.

New exhaust Vespa Sprint

Polini now also offers their popular 'original box' exhaust system for older engine generations such as the Vespa Sprint. With these models, the exhaust is only fixed to a screw on the engine block. Polini has therefore modified and strengthened the bracket. The end tube was also lengthened. This appears to be smaller than in conventional systems. As soon as we have the new systems in the program, we will mention this detail in the shop. It is also unclear whether the main stand of the Sprint models can fold in unhindered. An often voiced point of criticism of the previous Polini systems which were used on the Sprint/Rally models. Apparently Polini only offers the modified exhaust for the small engine blocks (125-150cc).


Dell'Orto

New Lambrettas

Lambretta celebrates its 75th anniversary at EICMA 2022. It is presented with a modern range in different shifts and trendy colors.

Lambretta G350 Special

Lambretta X125

Lambretta V Special

Italjet

Sport Scooter Dragster 500 GP

Italjet presented its new GP500 model to the public for the first time at the EICMA 2022 and shows that motorcycles and scooters are getting closer and closer. A full 450ccm with 43 hp and a six-speed foot switch were paired with a squat and very attractive-looking raw frame including scooter-typical fairing and, for the range of services, rather small tires. According to Italjet, the GP500 should be fast at a whopping 185km/h. For us a real cracker that could certainly take on the legacy of the Gilera Runner 180.

 and some more italjet beauties

The next date for the  EICMA 2023 is here, we're excited to see what next year brings.

The Lambretta Club Sardinia organized the 28th edition of the national meeting in eastern Sardinia, precisely in Ogliastra, a destination that all scooter riders, around 600 participants, enjoyed during these three days in May in the company of a crystal clear sea and great mountains.

Mateo sent us some impressions of this big event in one of the most beautiful landscapes in Italy! Thank you Mateo!

UNI AUTO Lambretta parts from India

We have also been using Lambretta parts from India for a long time. Do you remember? At the very beginning there were two options: browse the parts markets in Italy or the Benelux countries and hope for good used or NOS parts or fall back on parts from India. For the dl / GP series, the quality was justifiable, since many of Scooters India Limited was manufactured in an appealing quality. However, most Indian aftermarket parts were the proverbial pick in the bowl in terms of feel, appearance and durability... But that was the only thing there was. A situation that many can only imagine today with the comprehensive range of tuning parts and the complete range of restorations in excellent quality from Casa Lambretta.

We have been working with UNI Auto since the 90s. With the increasingly uncertain future of SIL (= Scooter Limited India) UNI AUTO INTERNATIONAL not only seen but also seized the opportunity to bring some standard cast parts in optimized quality onto the market. These Lambretta parts are manufactured using the die-casting process. This method is more expensive, but it offers a better structure for the cast and a more attractive appearance.

We have now added more products to our range, have just received a large delivery and can deliver the Lambretta parts immediately.

Uni Auto International India Lambretta


Lambretta highlights from UNI AUTO


Engine cover -UNI Auto, - Lambretta GP, DL - polished

Polished chain cover for the Lambretta GP / DL.

Thanks to the die-casting process, it has a very beautiful and homogeneous texture.

Can also be used with the appropriate clutch pressure plate for the Lambretta Li, TV, GT, Special and SX models.
You can find suitable parts for retrofitting under accessories.


Engine case -UNI Auto, 200 cc- Lambretta GP, DL -

UNI car engine case Lambretta 200 engine

UNI Auto engine housing for all cylinders with the stud spacing of the 200 ccm models. The die-cast engine block impresses with a very beautiful and homogeneous surface.

The scope of delivery includes a GP transmission cover plate from UNI Auto and the cover plate for the 6305 bearing.

Replacement motor housing for all TV, GT, SX and dl / GP 200 ccm Lambrettas or the perfect option to upgrade the Li, TV 175, Special and dl / GP models with 125 ccm - 175 ccm with the corresponding tuning cylinders of the 200 class.


Rear brake drum -UNI Auto- Lambretta LI (series 3), LIS, SX, TV (series 3), DL, GP -

Rear brake drum Lambretta LI (series 3), LIS, SX, TV (series 3), DL, GP

Very good, die-cast rear brake drum for all Lambretta of the Li family (not TV 175 Series 1). One of the best drums available on the market. Has been on countless tuned engines with different power ranges as absolutely reliable proven and convinced by very good concentricity.

Optionally available in silver or white lacquered. Scope of delivery including cone and studs.

Lambretta 100mph Bonneville World of Speed ​​Record

Chasing records with the Lambretta on the salt slope

Our customer Todd Rogers from the USA set out with his 225 Lambretta to hunt for records in Bonneville.

Do you still remember the film "with heart and soul" with Anthony Hopkins? Burt Munro (Anthony Hopkins) travels to Bonneville with his Indian Scout to take part in the annual high-speed race on the Utah Salt Flats. One of my favorite films, below you can find a teaser for the film.


Todd Rogers Lambretta Club USA

So our customer Todd Rogers has set off for Utah with his Lambretta World of Speed made. Here in Bonneville he wants to set a record with his Lambretta on the salt slope.

Todd Rogers from the Lambretta Club USA with his Lambretta


The right tires

During the preparations for the record attempt, there were problems with the tires. Todd has so far ridden tires with a “P approval” on his Lambretta.
But P corresponds to only 93 mph or 150 km / h and with these tires he would not have received approval for an official record attempt at over 100 mph.

Choosing the perfect tire was then relatively easy, after all, ours are ours bgm PRO SPORT tires, the only 10 x 3.50 tires with a Approval of 180km / h or 112 mph! In addition, Todd did not want to expose himself to any risk and so relied on the bgm PRO  Quality tires MADE IN GERMANY.

speedindex


World of Speed ​​the film for a record attempt

Fastest Lambretta 100mph 162km / h in Bonneville Utah / USA bgm PRO Sport tires

The 100mph record in Bonneville with the Lambretta

Todd drove his 225 Lambretta (not a Streamliner !!), a very impressive 100,4203 mph, which corresponds to about 162 km / h. Todd holds the record for the fastest Lambretta in Bonneville!

Congratulations from all Scooter Center & bgm - team!


With heart and soul Trailer Bonneville

With heart and hand (The World Fastest Indian) 2007 speed record Bonneville


BGM6697 bgm PRO IDM CDI

bgm PRO touring CDI for IDM retrofit ignitions

-Original optics in conjunction with a optimized ignition curve for Vespa and Lambretta touring engines-

Our solution for IDM CDIs in touring engines

Use all IDM based ignitions (Vespatronic, Malossi VesPower, Polini IDM, Varitronic, Pinasco Flytech, Parmakit etc.) the same CDI.

The ignition curve of this CDI is based on high performance engines with a late use of power and high speeds designed.
On touring engines, with an early and high torque, this ignition curve is rather counterproductive. Here it often leads to engine jerks in the partial load range due to an ignition point that is too early for the low engine speed.

However, due to the large adjustment range (8 °) of the original CDI, the ignition point must be selected early. Otherwise, the performance in the upper speed range suffers, as the CDI already reduces the ignition point significantly here. We have addressed this problem and a solution developed:


Advantages of our bgm PRO CDI for IDM in tour setup

The bgm PRO CDI has a modified, optimized ignition curve. It offers high-torque touring engines that have a similar power / torque curve as an original engine, ideal working conditions. The adjustment of the ignition point is significantly less, the engine runs quieter and smoother and also develops more efficient, especially in the area above the peak performance (Overrev). As a result, you have an engine that much more tour-friendly is and usually something faster Is on the way.

  • Plug & Play
  • for Vespa & Lambretta
  • replaces the original IDM CDI
  • fits on the original mounting brackets from PK & PX
  • Tour-optimized ignition curve
  • no partial load jerking
  • higher performance
  • original optics
  • screw-in ignition cable

More efficient

Performance diagram measurement bgm PRO CDI for IDM ignitions

Power measurement diagram as PDF

Modern technology in a classic look

The technology of the bgm PRO CDI is housed in the vehicle-specific ignition coil housing from the time it was built. This means that the beautiful old look for classic Vespa and Lambretta is retained despite modern technology.
Compared to an original IDM CDI, that is Ignition cable can be screwed in. Ideal if the CDI should be positioned differently or simply the ignition cable should be replaced.

CONCLUSION:

The perfect addition to high-torque tuning motors that are supposed to get even better.

How do I adjust a carburetor? Tip set tip

Adjust the carburetor with the precision part carburetor nozzle

For the Setting the ignition there are now excellent tools like that buzzwangle or Walthat allow a precise ignition position and make work extremely easy. Adjusting the carburetor, on the other hand, is the most difficult part of tuning a scooter for many.

If setting the air mixture and the idle gas is still child's play, it becomes more time-consuming to determine the correct nozzle sizes for the individual engine setup. Here, the carburetor needles, nozzle assembly, main and auxiliary nozzles interact and, perfectly coordinated, result in a clean setup.

If you choose a nozzle that is too small, the engine runs too lean, gets too hot and major damage is inevitable.
Too large a nozzle and too rich adjustment can lead to engine damage. Quite apart from the fact that the capacity of the engine is not exhausted and working time and money for elaborate tuning literally fizzle out.

How do you adjust a carburetor?

As an example for a Lambretta, we have prepared the PDF, which is described in detail and illustrated, with suggestions for the setup for you.
Free download here: Lambretta carb jetting by Scooter Center

From the tutorial - when does which nozzle come into play?

Adjust the carburetor

Precision product carburetor nozzle

DellOrto nozzles, for example, are stamped with a number that refers to the size of the hole. A 100 nozzle has a diameter of 1 mm, a 115 nozzle is 1,15 mm (!!) only a tiny amount 0,15 mm larger!

If you want to be on the safe side here and rely on high-precision tuning, we recommend using the nozzles bgm PRO or KMT to fall back on. These nozzle sets are characterized by

  • high-precision drilling
  • minimal tolerances
  • meticulously precise graduation of the nozzle sizes
  • easy to read numbers
  • high quality of workmanship and material
  • Quality control
  • including storage box


Precision nozzles from bgm PRO or KMT for clean engine tuning

You have invested a lot of love, time and money in your engine tuning. But the most expensive and complex tuning, with the best components, is of little value if the engine does not run smoothly or if a poorly adjusted carburetor does not allow optimal combustion. In order to be able to tune the engine correctly, high-precision carburetor nozzles are a very important prerequisite and make adjustment a lot easier!


Nozzle sets from bgm PRO

bgm PRO carburetor nozzle set

Nozzle sets from KMT

KMT jets made in england


Quality assurance bgm PRO carburetor nozzles tested under the microscope

We had the new bgm PRO carburetor nozzles checked at an institute. Here is a glimpse into a 118 nozzle, with a dimension of 1,1779 mm, the bore is in the green area with a deviation of only a thousandth of a millimeter and is therefore OK!

part of Scooter Center Being a team also means working with great people. Driving is even better than working! Passionate Lambrettisti sit in the office on both my left and right. So it was only a matter of time before I would go with one of them. Or rather with her, but she is not just any girl, she is: Yoleila (as she is known on Facebook) or Julia. She is president of the Lambretta Club in Germany, drives scooter races, collects old vehicles in their original condition, works as a graphic designer ... and I could go on with the list. That's why we interview them to find out their story, which we always love to hear.

The result was a very exciting project.

Stay until the end to find out what it's about;)


On the couch at Scooter Center | Interview Julia Spitznas - Marketing SC


Classic Castrol collection

Castrol Classic Merchandise

We offer a high quality range of classic items, from oil cans to magnets and wall signs, all with the iconic 1946 Castrol Classic Branding. Whether in the workshop or at home, our nostalgic range combines both retro style and functionality. Including workshop accessories, clothing and more, there is something for every classic car owner or lover.

Castrol Classic Merchandise not only for Vespa & Lambretta fans

Whether as a gift for an enthusiastic scooterist or as a gift for yourself, you will find the perfect something in our range!

The idea with the castor oil

Castrol was founded by Charles "Cheers" Wakefield under the name "CC Wakefield & Company". In 1899, Wakefield left his job at Vacuum Oil to start his own business selling lubricants for railways and heavy machinery.

At the beginning of the 20th century, Charles developed an interest in two new motorized vehicles: the automobile and the airplane. His company started developing oils for the new engines. These oils had to be thin enough for a cold start and at the same time thick enough to work at high temperatures. The company's researchers found that the addition of Castor oil a vegetable oil made from castor seeds. They called the new product " Castrol ". 1919 used John Alcock and Arthur Brown Castrol oil on the first non-stop transatlantic flight in history.

Heiko's idea with the Castrol sponsorship & fast too slow

CC Wakefield not only invented a new type of motor oil, but also a new way of attracting potential customers to its product: the sponsorship. The name Castrol appeared in flight competitions, car races, and speed record attempts Banners and flags.

Over time, the brand name of the motor oil has become far better known than that of the company's founder / company. This fact led to the renaming of "CC Wakefield & Company" in 1960 castrol ltd

I have been driving Vespa and Lambretta for over 32 years. It all started with a red Vespa PK50S that, bought used, was waiting for my driver's license in my parents' garage. But that was me fast too slow.  The first tuning measure was to mount an expensive 50km / h exhaust. But it didn't do that much, the moped boys were still flying past me to the right and left. So it was sold and I was interested in a black PX 80 Lusso, which was very expensive in insurance at the time. During the test drive, the gears have always been blown out. But I was happy to have my mother ready to buy me this scooter ... also, my father was on a business trip and didn't know anything about the new “80s”. So: now or never! So the scooter was bought with this “little hidden flaw”.

Scootershop, Scootering & Mods, Scooterboys and Scooter Scene

We all know what was wrong with the engine: the reason for the uncontrolled gear changes was the worn “round” gearshift cross. The next Vespa dealer wanted 700 DM for the change, but that was no longer in the budget when I sent my scooter update. I got in contact with other scooter riders.

One of them was still on the skateboard as a skater last week and now suddenly motorized on a brand new Vespa PX 80 Lusso. A month later I met him again, there he was sitting in a suit and polished leather shoes on his Vespa, which was now plastered with mirrors and chrome parts. The next time I met him, half was missing on his scooter and on his head too. Instead of fine leather shoes and a suit, he now wore red boots up to his knees, camouflage pants and a bomber jacket. All that was left of his “popper mane” on his head was a small curl of hair that fluttered listlessly in his face after he took off his helmet. Somewhat irritated, I asked him if he had an accident with the scooter and why he looks so strange. He said he was now a Scooterboy and the scooter was a CutDown!

He had probably discovered her before, she was new to me at the time: the MOTORETTA, the Scootermag and still in black and white. And so the evil took its course. Now the 80s became somehow for me too fast too slow, Schoolmates with DT, RD, MBX & Co and even some mopeds, were faster than me. So if I change the gearshift cross anyway and remove and dismantle the engine, I could make the box a little faster ... In the meantime, I had that too ROLLERSHOP catalog and the SCOOTERING discovered.

The custom paintwork from the glossy magazines fascinated me so much that I sat down in my 80s “children's room” and dreamed of great paintwork and scribbled a few of them on paper. Yes, laugh, these are my collected works:

Castrol sponsorship with the “Castrol Vespa Racer”

Somehow my dreams about custom paintwork didn't come true, so I later took the initiative and asked Castrol to sponsor it. To be honest, I'm a bit uncomfortable right now: I was quite sure that I did it at the age of 16. According to the date of the letter to Castrol, which I found in my “Scooter Scene box”, I was a bit older and already doing community service at the time.

Unfortunately I have the drafts of my "Castrol Racer”With 20 HP and targeted 130-140km / h no longer. I had enclosed the drawings with the letter to Castrol, Motorsport Department. From the letter I found this test print with corrections. But I definitely didn't write to UHU and NUTELLA, MÜHLEN KÖLSCH? Perhaps! I do not know anymore…

But the man from Castrol was very nice, invited me to the IFMA in Cologne and after a short chat in the Castrol truck gave me a few Castrol stickers.

If anyone from Castrol reads this: my offer is still available! This is, for example, my Augsburg Vespa T4:

Classic Castrol Store

You don't need to write any sponsorship requests for our Classic Castrol merchandise, you can now get the cool retro Castrol Racing products from us at cheap prices Classic Castrol Store:

Classic Castrol products

Classic Castrol products


New carburetor connection rubbers from bgm PRO

The 12mm wide hose clamps from ABA SAFE have proven themselves in countless long and short distance races and test kilometers.

The ABA Safe ™ clamp uses the elasticity of the suction rubber and protects this relatively soft rubber hose from damage. The tensioning force is increased on the profile beads, there are no sharp edges, which means that the 12mm wide clamps sit tightly without stressing the carburetor connection rubber.

bgm carburetor connection rubbers for 12mm ABA Save clamps carburetor rubbers Vespa & co.


We have new ones now bgm connection rubbers that are wide enough to neatly accommodate these 12mm wide hose clamps.

Carburettor connection rubbers bgm PRO

Carburettor connection rubbers bgm PRO

Another benefit is that our bgm connecting rubbers from the carburetor to the intake manifold from one very oil and gasoline tolerant material are made.
That makes the carburetor connector rubbers a top reliable and durable part on your scooter.

Available sizes & conversion rubber

  1. 28,5 mm Connection rubber carburettor / intake manifold -BGM PRO- AW = 28.5 / 28.5mm
    • Polini CP
  2. 30 mm Connection rubber carburettor / intake manifold -BGM PRO- AW = 30 / 30mm
    • Dellorto PHBL
    • MikuniTM 24
  3. 35 mm Connection rubber carburettor / intake manifold -BGM PRO- AW = 35 / 35mm
    • Dellorto PHBH 28/30
    • Dell Orto VHST 24-36
    • Dell Orto VHSH 30
    • MikuniTM 28
    • Mikuni TMX 27/30
    • Keihin PWK 28/30
    • Polini 28/30
  4. 40 mm Connection rubber carburettor / intake manifold -BGM PRO- AW = 40 / 40mm
    • Mikuni TMX 32-35
    • Keihin PWK 33-35
    • Koso 28-34
  5. 35 / 40mm Conversion rubber connection between carburettor and intake manifold -BGM PRO- AW = 35 / 40mm
    • 35 mm
    • 40 mm

Tips:

  1. Carburetor and intake manifold should be thoroughly degreased before assembly.
  2. The 12mm ABA SAFE hose clamps should also not be over tightened.