TUTORIAL - Sincronización de los tiempos de admisión de la Vespa PX (Inlet timing)

, , , ,

The video and blog de hoy tread on sobre la medición del ángulo o tiempo de admisión.
Los ángulos de admisión deben are en un cierto rango, que se especifica en grados del cigüeñal. Como punto fijo, las mediciones siempre comienzan desde el punto muerto superior (PM).
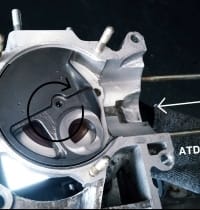
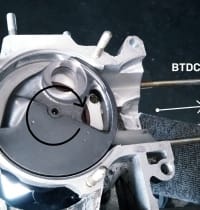
Por lo tanto, the area de entrada se divide en los valores “antes de PM” y “después de PM” porque la entrada se opens en el punto muerto inferior (PMI) y se cierra in the point muerto superior (PMI).

Para un motor Vespa de válvula rotativa, los valores para un buen concepto “touring”, están alrededor de. 100 ° PMI y 65 ° PMS
Para concepts are very orientated performance que a veces tienen que operar a una velocidad más alta, los valores pueden ser significativamente mayores. Aquí se puedenhabenrar 120° PMI and hasta 75° PMS. Los ángulos de entrada siempre deben seleccionarse para que cocidan con el concepto deseado.

Aquí, the principle is a like a juste sencillo del carburador y la entrega de potencia homogénea para hacer que el área de admisión sea tan grande como sea necesario y tan pequeña como sea posible para lograr los valores deseados.
You supone que el corazón de dos tiempos de Platónika es una unidad poderosa y, por lo tanto, la entrada debe estar en el rango de 100 ° PMO y 65 ° PMS

To determine the exact angle of the entry, you need to use all the tools and material.
• Engine cover
Crankshaft
• Cilindro and piston
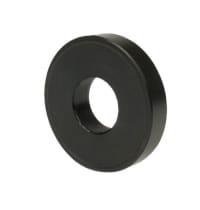
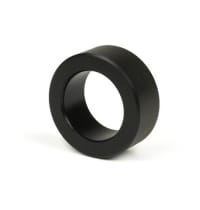
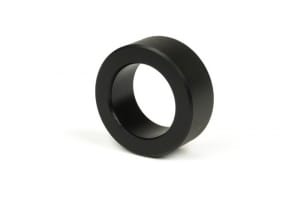
• Rodamientos de imitación: Available for todos los tamaños de los rodamientos de uso común en la gama Vespa y Lambretta.

BGM PRO- 613912 (25x62x12mm)                                                       BGM PRO-NBI 253815 (25x38x15mm)

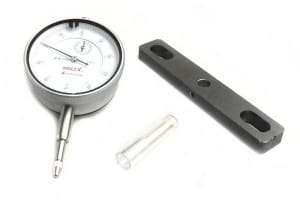
• Reloj comparer with soporte

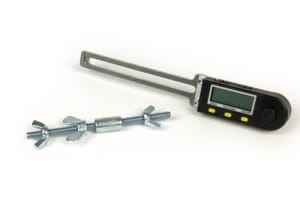
Graduate digital o a dispositivo de medication similar

Rodamientos de imitación

Dado que es muy probable que el area de entrada en la carcasa del motor tenga que ser reformada, para lograr los ángulos deseados, es aconsejable el uso de los denominados rodamientos de imitación; con ellos, el cigüeñal se puede quitar de la carcasa del motor para limarlo, tan a menudo como sea necesario, sin que los asientos de los cojinetes del cigüeñal o la carcasa del motor experiments desgaste incluso antes de la puesta en marcha.

The primer paso es insertar los rodamientos en la carcasa del Motor y luego el cigüeñal se inserta en los rodamientos y la carcasa del motor se atornilla al alojamiento del estator a través de los pernos.

Midiendo los tiempos de administration

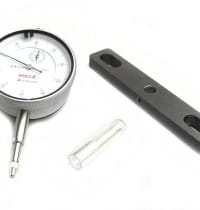
Para determinar el PM, se require el cilindro y el pistón. El pistón se introduce dentro del cilindro sin anillos para que el trabajo se realice sin problems. El reloj comparador It turns on the cylinder with the support and can be used to determine the PM of the cigüeñal.
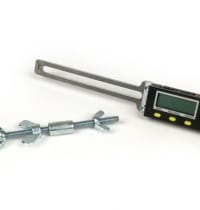
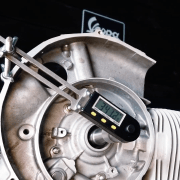
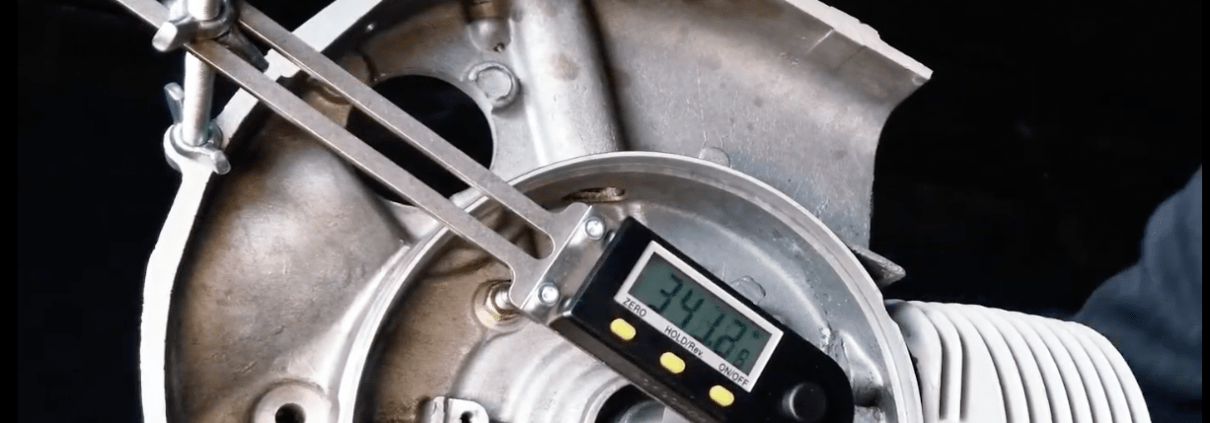
Hacia el lado del steering wheel se installa un graduate . Aunque hay varias opciones available, las herramientas de medición digital son más fáciles de usar, como el medidor Buzz Wangle, which does not require a point of reference for the carcasa of the motor.
The cigüeñal is in the PM, el graduate, independientemente de si es digital o analógico, se establece en “0” y entonces el cigüeñal se gira al inicio y al final de la administration. El Valor, leído en el medidor, muestra cuándo la entrada está abierta o cerrada.

Aumentando the inlet timing

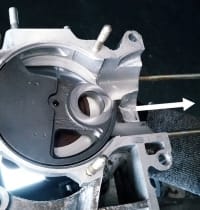
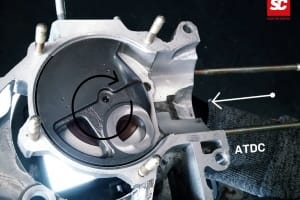
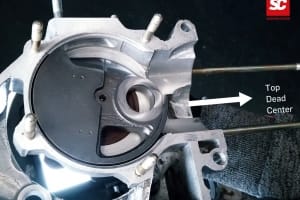
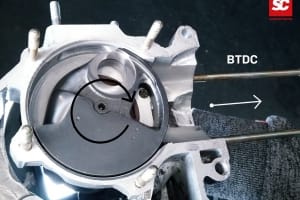
Para llevar la apertura de entrada al tamaño requerido, el cigüeñal se mueve al valor deseado y se marca la posición del cigüeñal en la carcasa del motor.

As for the PMI and PMS, the carcasa of the motor has been reactivated and the cigüeñal can be easily retracted, thanks to the imitation rods.
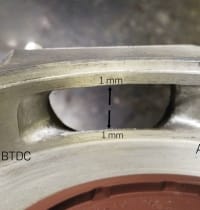
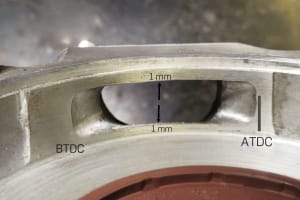
It requires precaución al trabajar en el área de admisión, pues las superficies que sellan la valvula giratoria con el cigueñal, no deben tener una superposición de menos de 1 mm en los Lados, Como se muestra en la foto.

Si la admisión ya se ha agrandado, según las marcas, y se han limpiado los residuos en el cárter, el cigüeñal se vuelve a insertar para su verificación con el graduador, revisando si se ha alcanzado el ángulo deseado o si es necesario volver a trabaj en ello.

Scooter Center Tutorial - Setting the Inlet Timing Vespa PX

TUTORIAL - Measuring the entry time Vespa PX

, , , ,

Our video and blog today is about measuring the inlet angle, also known as the inlet timing.
The inlet angle should move in a certain range which is given in degrees crankshaft. As a fixed point, the measurements always start from the top dead center, or TDC for short.
The inlet area is therefore divided into the values ​​“before TDC” and “after TDC”, since the inlet is opened before top dead center and closed after passing through top dead center.

For a Vespa engine with rotary valve control, the values ​​of approx. 100 ° before OT and 65 ° after OT have resulted for a good touring concept.
For very performance-oriented concepts that sometimes have to operate at a higher speed, the values ​​can also be significantly higher. 120 ° from OT and up to 75 ° after OT can be found here. The inlet angles must always be selected to match the desired concept. Here the principle applies in favor of a simple tunability of the carburetor and a homogeneous power development to make the inlet area as large as necessary and as small as possible in order to achieve the desired values.
The two-stroke heart of Platonika should be a powerful aggregate and therefore the inlet should be in the range from 100 ° BCE to 65 ° BCE.

In order to determine the angle of incidence exactly, some tools and materials are required.
• Motor housing
crankshaft
• cylinder and piston
• Bearing dummies

BGM PRO- 613912 (25x62x12mm)                                                       BGM PRO-NBI 253815 (25x38x15mm)

• Dial indicator with holder

Degree disc or similar measuring device

Bearing dummies

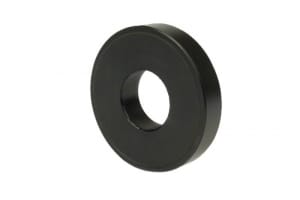
Since it is very likely that the inlet area in the motor housing will have to be machined in order to achieve the desired angle, the use of so-called bearing dummies is advisable.
With these dummies, the crankshaft can be removed from the engine housing for machining any number of times without the bearing seats of the crankshaft or engine housing being stressed each time and already experiencing wear before commissioning.

The bearing dummies are available for every size of the bearings commonly used in the Vespa and Lambretta range.
The first step is to insert the bearing dummies into the motor housing. Then the crankshaft is simply inserted into the bearing dummies and the motor housing is screwed into the stator housing using the stud bolts.

Trade Shows

In order to determine the TDC, the cylinder and the piston are required. The piston is pushed into the cylinder without rings so that the work goes smoothly. The dial gauge is screwed onto the cylinder with the holder and the TDC of the crankshaft can be determined.
The alternator side of the crankshaft is provided with a degree disk or a digital protractor. A wide variety of options are available here. The easiest to use are digital measuring tools such as the Buzz Wangle Indicator that does not require a reference point to the motor housing.
If the crankshaft is in TDC, the degree disc, whether digital or analog, is set to "0" and then the crankshaft is rotated to start and close the inlet. The value read on the gauge then shows when the inlet is open or closed.

Increase the admission time

In order to bring the inlet to the desired level, the crankshaft is moved to the desired value and the position of the crank web is marked on the engine housing.
If this has happened for the value before and after TDC, the engine housing can be opened again and, thanks to the position dummies, the crankshaft can easily be removed again.
Care should be taken when working in the inlet area. The surfaces that seal the rotary valve must not be less than approx. 1mm overlap with the crankshaft on the sides.

Once the inlet has been machined to match the markings set and the crankcase has been cleaned of machining residues, the crankshaft is reinserted for inspection.
The measuring device is then used to check once again whether the desired control angle has been achieved or whether reworking is necessary.

Scooter Center Tutorial - Setting the Inlet Timing Vespa PX

TUTORIAL - Setting the entry time Vespa PX

, , , ,

Our video and blog today is about measuring the inlet angle, also known as the inlet timing.
The inlet angle should move in a certain range which is given in degrees crankshaft. As a fixed point, the measurements always start from the top dead center, or TDC for short.
The inlet area is therefore divided into the values ​​“before TDC” and “after TDC”, since the inlet is opened before top dead center and closed after passing through top dead center.

For a Vespa engine with rotary valve control, the values ​​of approx. 100 ° before OT and 65 ° after OT have resulted for a good touring concept.
For very performance-oriented concepts that sometimes have to operate at a higher speed, the values ​​can also be significantly higher. 120 ° from OT and up to 75 ° after OT can be found here. The inlet angles must always be selected to match the desired concept. Here the principle applies in favor of a simple tunability of the carburetor and a homogeneous power development to make the inlet area as large as necessary and as small as possible in order to achieve the desired values.
The two-stroke heart of Platonika should be a powerful aggregate and therefore the inlet should be in the range from 100 ° BCE to 65 ° BCE.

In order to determine the angle of incidence exactly, some tools and materials are required.
• Motor housing
crankshaft
• cylinder and piston
• Bearing dummies

BGM PRO- 613912 (25x62x12mm)                                                       BGM PRO-NBI 253815 (25x38x15mm)

• Dial indicator with holder

Degree disc or similar measuring device

Bearing dummies

Since it is very likely that the inlet area in the motor housing will have to be machined in order to achieve the desired angle, the use of so-called bearing dummies is advisable.
With these dummies, the crankshaft can be removed from the engine housing for machining any number of times without the bearing seats of the crankshaft or engine housing being stressed each time and already experiencing wear before commissioning.

The bearing dummies are available for every size of the bearings commonly used in the Vespa and Lambretta range.
The first step is to insert the bearing dummies into the motor housing. Then the crankshaft is simply inserted into the bearing dummies and the motor housing is screwed into the stator housing using the stud bolts.

Trade Shows

In order to determine the TDC, the cylinder and the piston are required. The piston is pushed into the cylinder without rings so that the work goes smoothly. The dial gauge is screwed onto the cylinder with the holder and the TDC of the crankshaft can be determined.
The alternator side of the crankshaft is provided with a degree wheel or a digital protractor. Various options are available here. The easiest to use are digital measuring tools such as the Buzz Wangle indicator, which does not require a reference point to the engine housing.
If the crankshaft is in TDC, the degree disc, whether digital or analog, is set to "0" and then the crankshaft is rotated to start and close the inlet. The value read on the gauge then shows when the inlet is open or closed.

Increase the admission time

In order to bring the inlet to the desired level, the crankshaft is moved to the desired value and the position of the crank web is marked on the engine housing.
If this has happened for the value before and after TDC, the engine housing can be opened again and, thanks to the position dummies, the crankshaft can easily be removed again.
Care should be taken when working in the inlet area. The surfaces that seal the rotary valve must not be less than approx. 1mm overlap with the crankshaft on the sides.

Once the inlet has been machined to match the markings set and the crankcase has been cleaned of machining residues, the crankshaft is reinserted for inspection.
The measuring device is then used to check once again whether the desired control angle has been achieved or whether reworking is necessary.

Scooter Center Tutorial - Setting the Inlet Timing Vespa PX