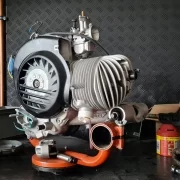
Posts

Once in yours Smallframe the original SHB has to give way to another carburettor, the question arises shortly before the engine is started for the first time: how do I operate the choke?

How do I convert the carburetor from a folding choke to a cable choke?

How do I connect the cable choke of a Dellorto PHBH, VHST, Mikuni, Keihin PWK or Polini CP carburetor to the choke lever of the Smallframe at?

Many carburetors are usually delivered with a so-called folding or pull choke. So that the carburetor can be operated with a cable pull, as is typical for Vespa, we offer the right adapter set for conversion for many carburetor types.

2599091  Dellorto PHBL, PHBH VHST (Shop)

2599098 Mikuni, Keihin, and Polini CP (Shop)


The bgm Pro choke lever is suitable for all carburetor types that are equipped or retrofitted with a cable choke.
Due to the special design of the bgm Pro choke lever, the choke cable can be easily detached in order to remove the carburetor. This saves time and protects your hands in the cramped carburetor room Smallframe. By using a clamping nipple, the choke cable is not kinked every time the choke lever is actuated and is therefore permanently durable and secure against tearing off. Due to the adapted contour of the lever, it can no longer jump out of the choke button guide.


The assembly of the bgm Pro choke lever is easy.


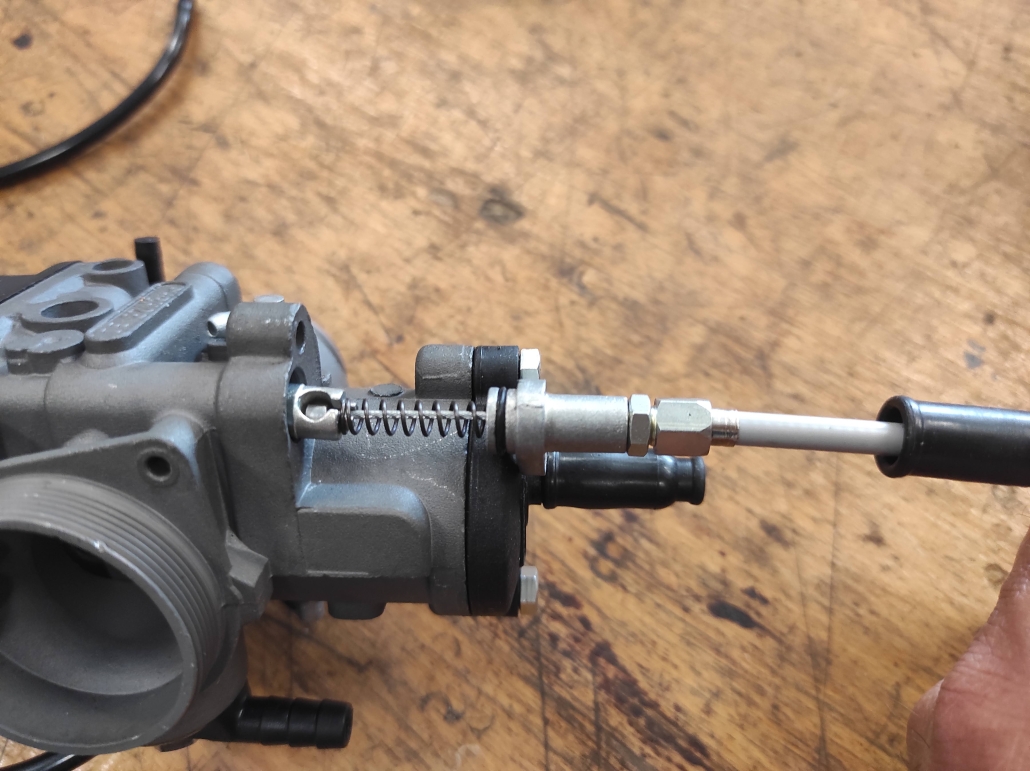
A YSN30 / Dellorto PHBH (YSN8570) carburetor serves as a model example and for the conversion to a cable choke (Blog)  with the matching cable adapter set (2599091 – (Shop).

The universal cable BGM6445 is used as the choke cable. This already has the right length for the outer shell in a Vespa Smallframe to find space.

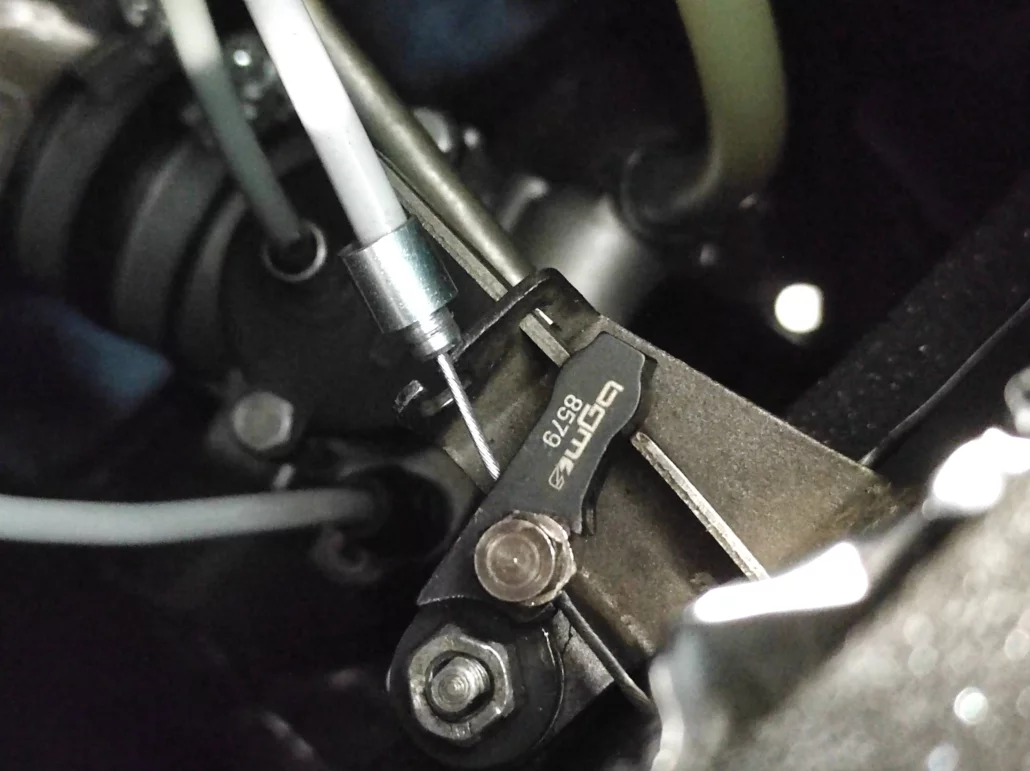
Loosen the nut of the small inner choke lever with SW10 and make sure that the screw does not fall out towards the carburettor chamber. When removing the original choke lever, pay attention to the domed washer (3330468W) which lies between the choke lever and the bracket on the frame. This will also be needed again later.

Guide the screw through the retaining plate from below and then attach the spring washer and the choke lever.

The nut has a so-called clamping part to secure against self-loosening. This clamping part can be recognized by the imprints on the wrench flats of the nut. Depending on the design of the nut, this clamping part is on a front side or on the wrench flats.

When putting on the nut, make sure that the clamping part of the nut faces upwards so that the non-clamping part is screwed onto the choke bolt first.

First tighten the nut until the choke lever can still be moved easily.

The inner cable is first fed through the adjusting screw and the adapter, barrel first, and then pushed through the spring. The barrel of the train is hung in the choke piston.

When inserting the choke piston into the carburetor, make sure that the barrel does not jump out of the choke piston mount. The adapter is then screwed to the carburetor.

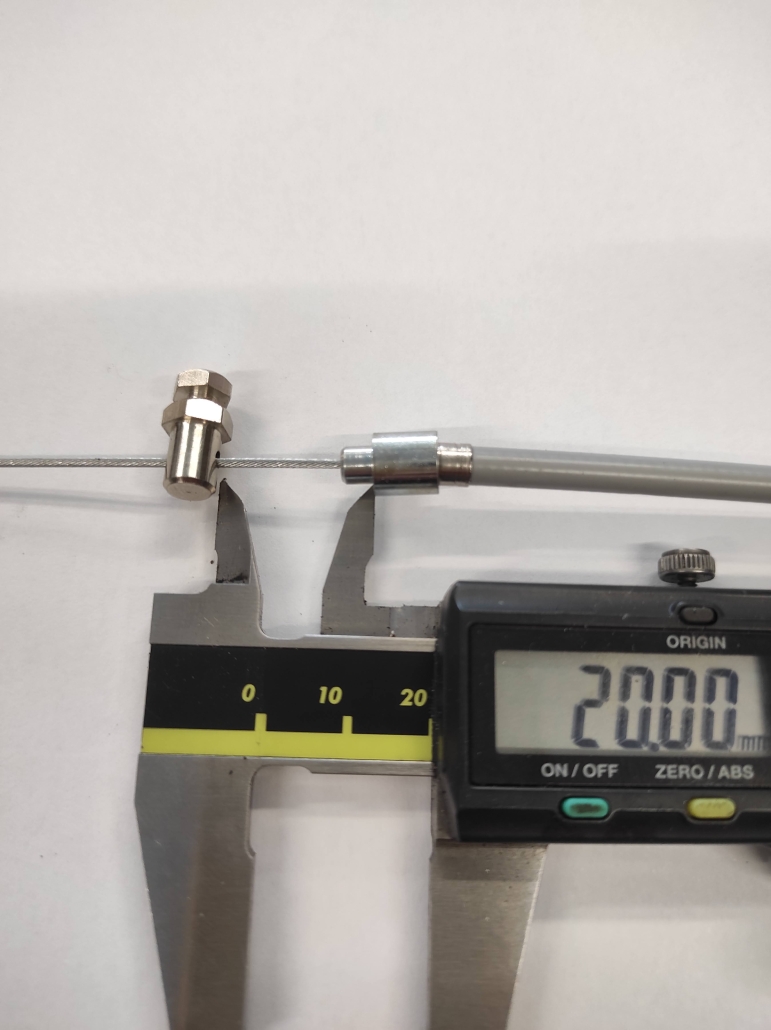
The clamp nipple is now placed on the loose end of the choke cable and fastened at a distance of 20mm from the shoulder of the end cap.

First thread the inner cable into the slotted guide of the choke lever and then hook the clamping nipple into the choke lever. Use the end cap to pull the outer shell back far enough (the choke in the carburetor is actuated in the process) so that the end cap can be hung in the retaining plate.

If the play in the choke cable is too large, this can be easily adjusted using the adjusting screw on the adapter on the carburettor. A safety clearance of approx. 1.5mm between the shoulder of the end cap and the abutment of the retaining plate on the frame should be maintained so that the cable is not tensioned during compression and the movements of the engine while driving and the choke is not activated.

If the necessary safety play of the cable cannot be achieved via the adapter, the adapter on the carburetor is turned back and the cable adjusted by tightening the clamping nipple.

Finally tighten the nut of the choke lever so that the lever can still be operated easily but the spring force of the spring for the choke piston cannot pull it back again.

The BBT V2 is a further development of the well-known Big Box Touring exhaust system. During the revision, we attached great importance to depicting the widest possible spectrum of usable engine concepts.

Our prototype was driven more than 3000km to ensure that the final product delivers what it promises.

It was driven on an original (unprocessed) Rally200 Femsatronic block with standard shaft and Malossi 210 Sport as it comes out of the box.

In our tests, the engine developed just over 17 hp. Due to the higher performance and the higher torque, a straight-toothed 23/63 BGM primary is installed (3% longer than standard). The base plate of the Femsatronic was reworked to a long hole in order to be able to adjust the pre-ignition from a fixed 24° before TDC to 18° before TDC. The squish edge as specified by Malossi with 0.9mm and the air filter without drilling / processing.

Sitting upright on the Autobahn, the scooter runs at a reproducible speed of 120 km/h (according to GPS), corresponding to 7000 rpm with an additional 16 hp on the wheel.

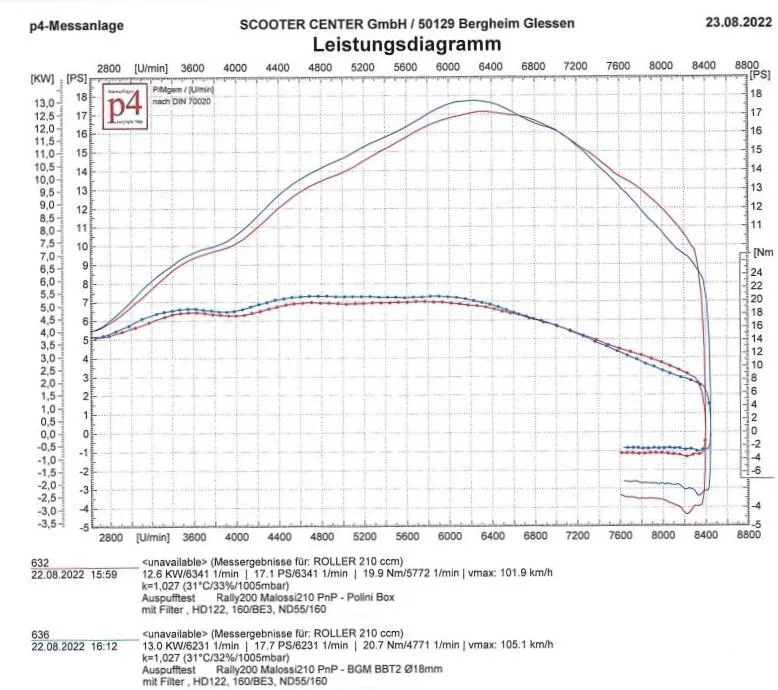
In this graph we show the BBT2 (blue) compared to a Polini Box (red), measured in third gear:


The manifold, the contour of the exhaust shells, the damper chamber and the selectable diameter of the tailpipe are the changes made in detail.

The manifold itself has been modified in the course and to increase performance and the new exhaust shells have been optimized for more ground clearance.

In the damper chamber we have added components to achieve further turning and an increase in torque. The tailpipe can be adapted to the displacement and the speed of the respective engine by removing a plug-in part.

The tailpipe with plug-in part (d=18mm) is suitable for touring-oriented engines such as e.g Malossi Sports, Polini 210/211 and Quattrini 232

After removing the plug-in part, the new BBT has a tailpipe diameter of 20mm Quattrini 244-252 and Malossi MHR very good and also offers significantly more power and speed without thermally influencing the engines too much.

In summary, the BBT V2 achieves more across the entire speed range than the previous version on current engine concepts.

In addition to my everyday driving device, Maryzabel's Platonika also had to be used for experiments.

You can read about the exact equipment of the Platonika with our bgm177 cylinder here in the blog link to blog

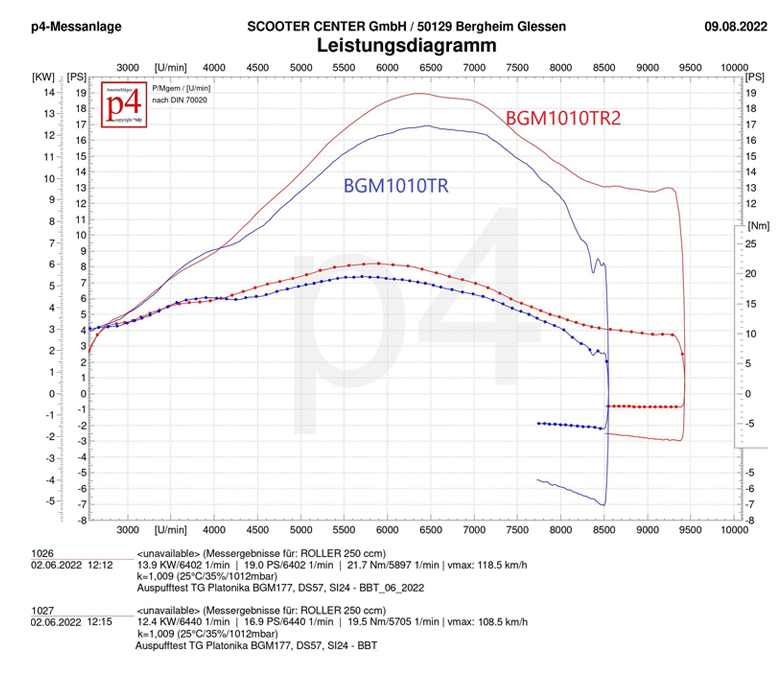
Here is the comparison on the engine of the Platonika:

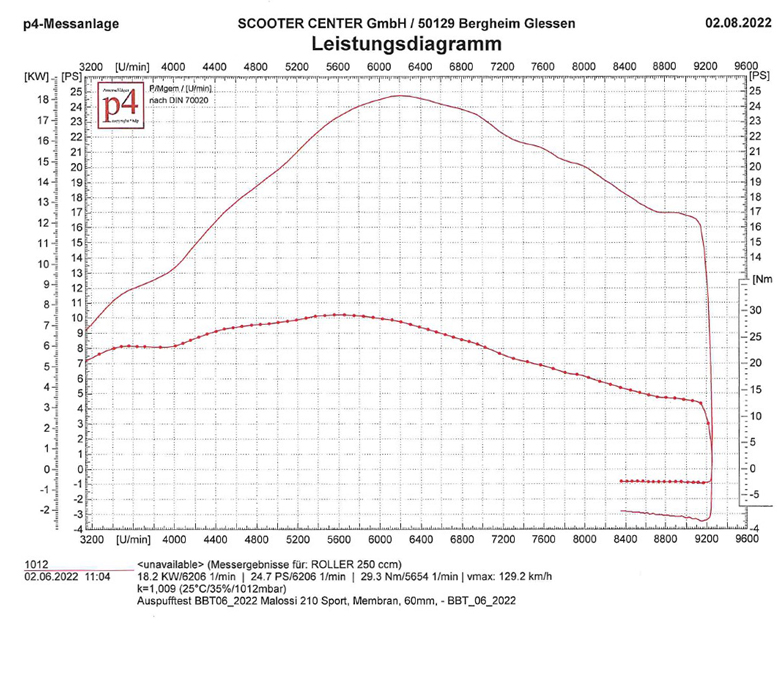
My daily ride, equipped with a Malossi Sport 210, Set primary incl. clutch, Clutch pinion
+ primary + repki
t
 and via a membrane with a YSN30 carburettor link to blog: carburetor YSN30 https://blog.scooter-center.com/fast-30-mm/   )
ventilated, this engine represents a drive machine of the current generation.

Changed course - the manifold runs closer to the exhaust body and is additionally supported with a strut

Depending on the engine concept, the plug-in part can be pulled out

The BBTV2 is available now for the PX80, PX125, PX150 and the like, as well as the PX200 and Rally200: https://www.scooter-center.com/de/search?sSearch=bbt2

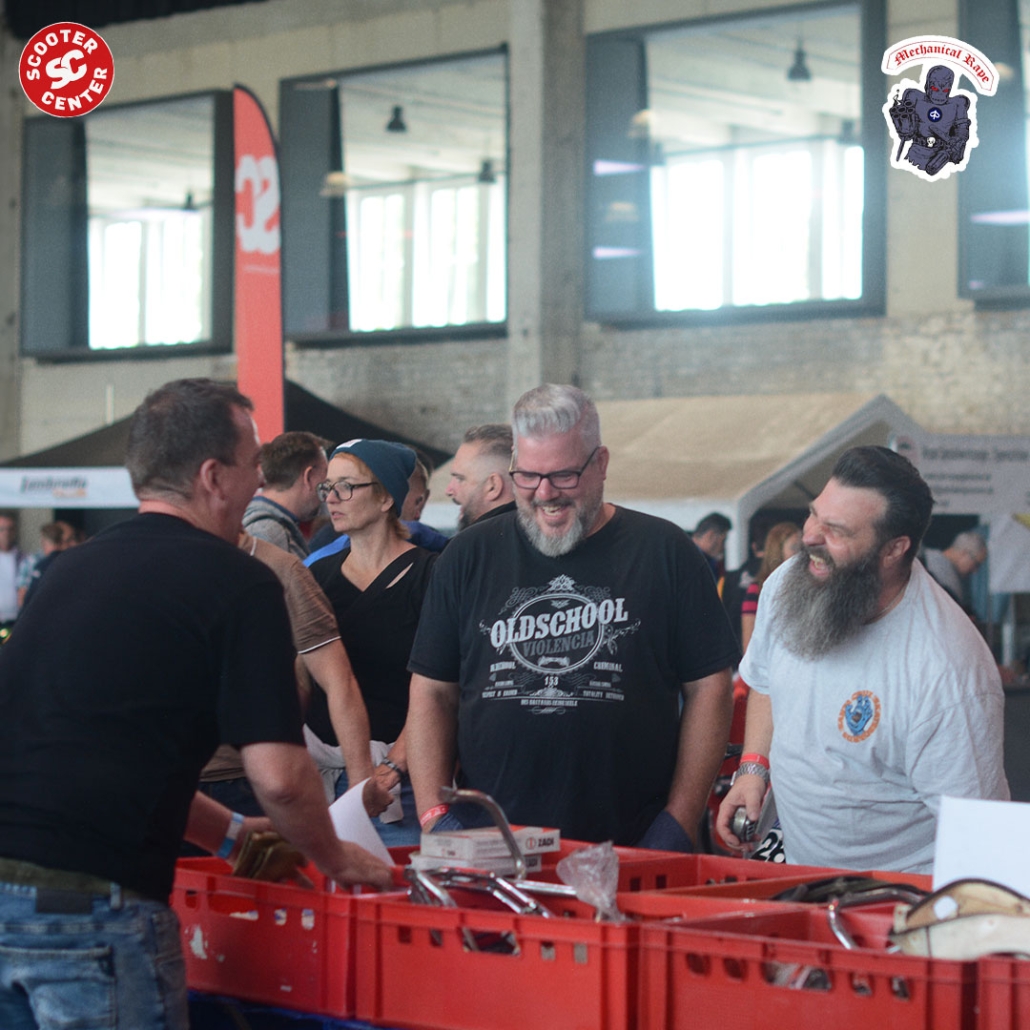
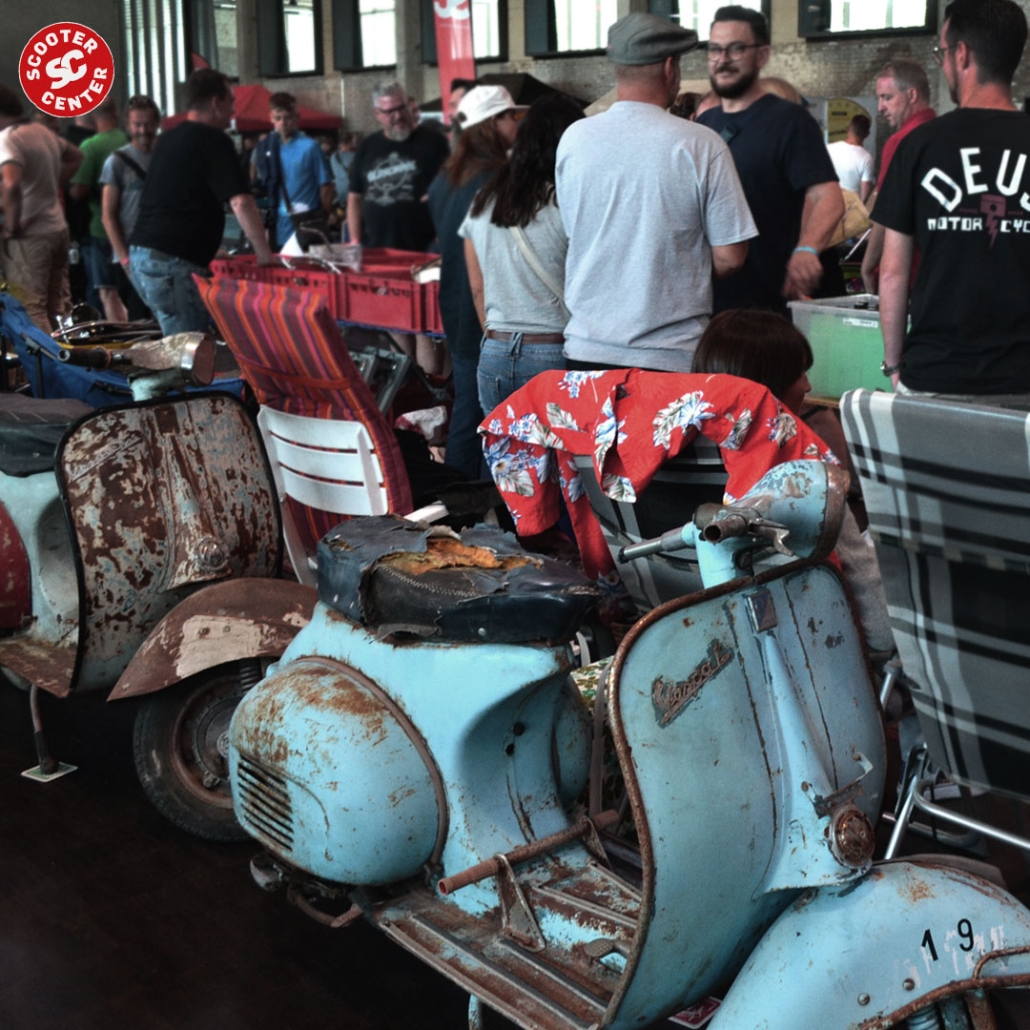
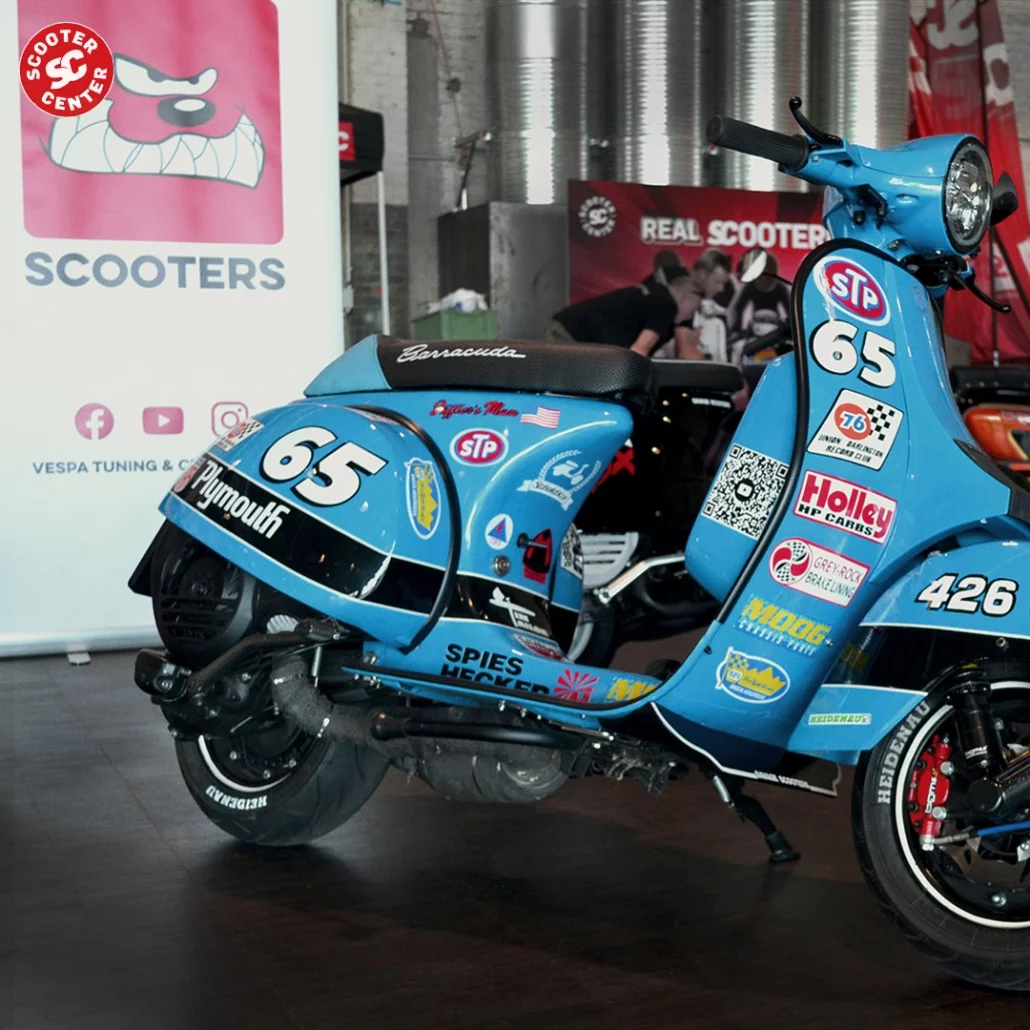
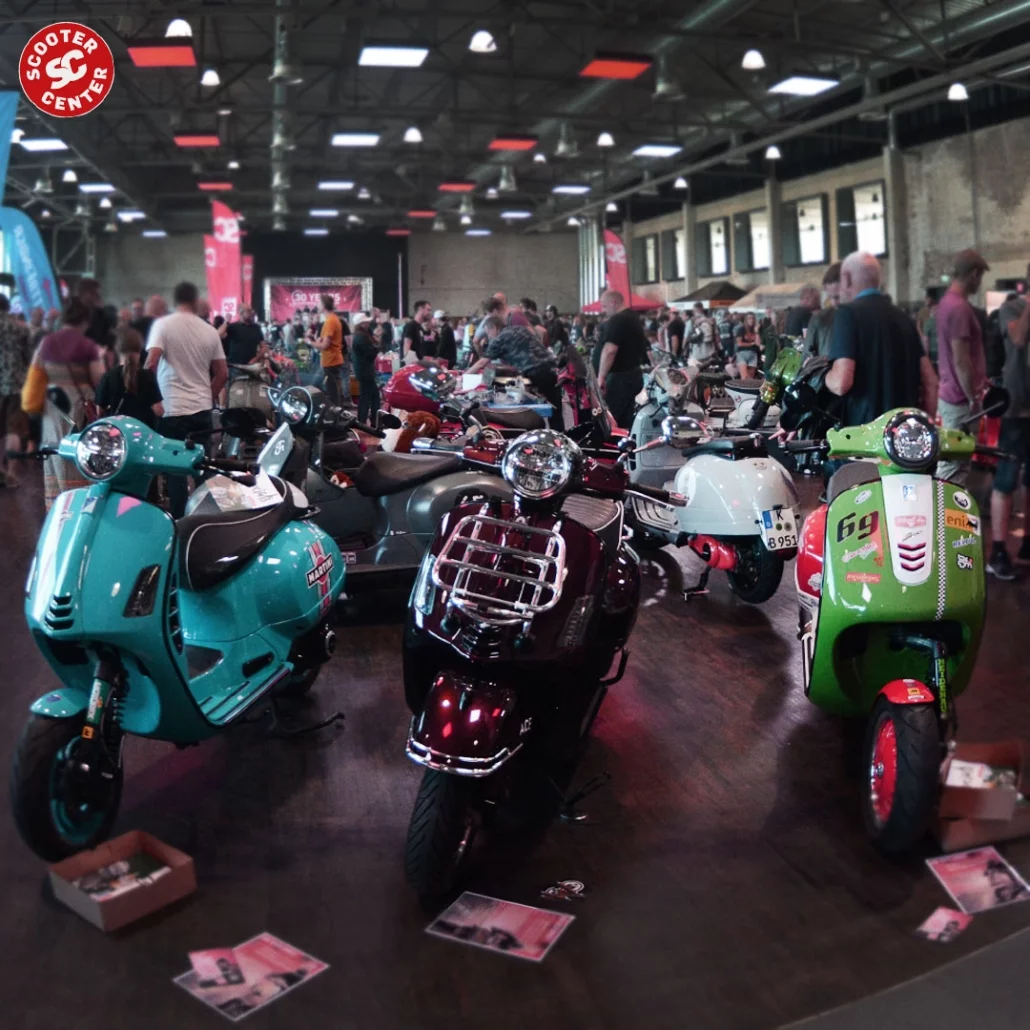
It's almost been a month since our weekend party, but we're still totally thrilled that you all came and made the event what it was: A huge custom show highlight with a consistently great atmosphere in every respect ! The complete Scooter Center Team says: THANK YOU!!!

After presenting the winning scooters of the custom show here, today we will show you which clubs, aftermarket dealers, influencers, youtubers, magazines and of course dealers and workshops have come to Cologne. Here, too, we politely curtsey and say: THANK YOU!

Clubs

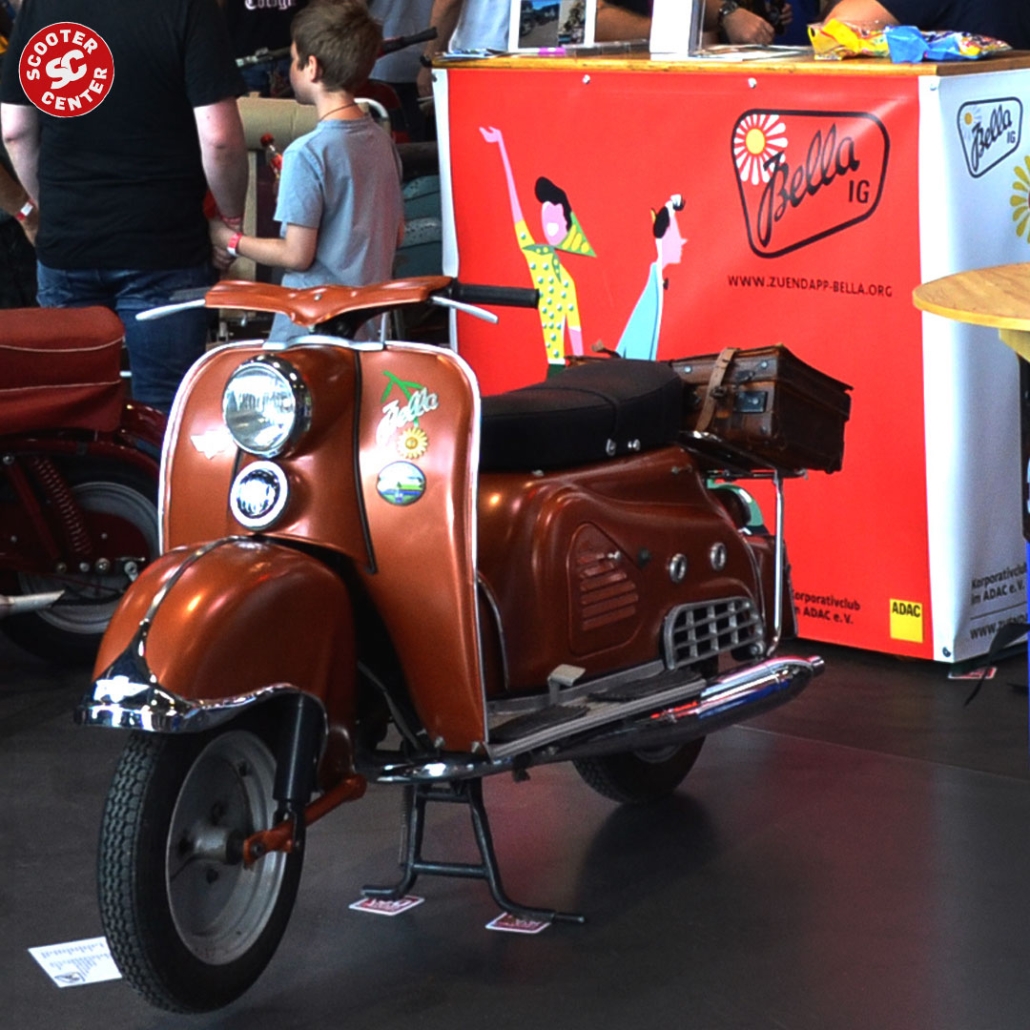
Bella Ig

2004 since the Bella IG a registered association with the purpose of enabling the preservation, restoration and care of historic scooters from the Zündapp works.

The Bella-IG was founded in 1984 by two Bella enthusiasts. Together with its sister clubs in Great Britain and North America, it now has over 250 members. The "Bella Family" runs a colorful club life with the club magazine, forum, supply and replenishment of Bella parts and the annual Bella meeting organized by IG members in different regions. 

Hidden power

Not only because of the local proximity, we have a particularly good relationship with the club founded in 1990 as Hidden Power Scooter Club Hagen. It emerged from the Hagen Modvereinigung, which was founded in 1986 Volme Parka Society Hagen.
The custom shows organized by Hagen at the beginning of the 2000s set standards that we were happy to use as a guide. With the holidays in
Sauerland, the HiH then also set standards in the run calendar. 

Facebook

Celtic Roller Club

Another traditional club from northern Germany whose club stand made us very happy. Founded in 1994 and always at the forefront. At the custom show, the guys across from our bar served ice-cold circulatory stimulants on the rocks with their Jägermeister machine. There were also three trophies for the scooters they brought along.

Facebook

Lambretta Club Espana

Felix is ​​a real jack of all trades and as such also president of the Spanish Lambretta Club! Words are really not enough to describe his zest for action and inventiveness! At our weekender he threw himself on the stand of the Spanish Lambretta Club, offered his wonderful book about the Serveta / Lambretta production in Spain and let the small 45s circling out of his record cases on both nights. 

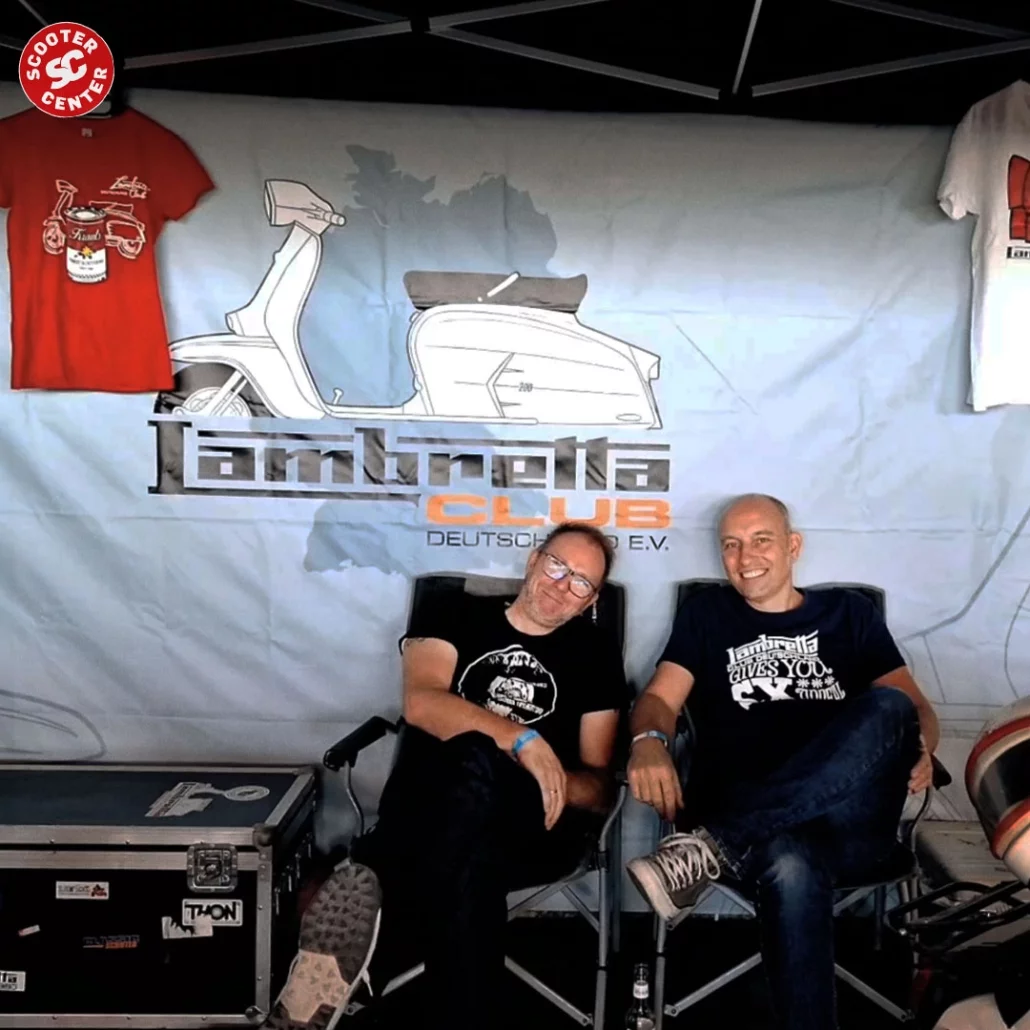
Lambretta Club Germany

Lambretta Club Germany gives you SX appeal. If we have to explain, you wouldn't understand! The usual sympathetic appearance, here in the picture parts of the always cheerful former board member. 

Minus screwdriver

Only a few days left until the 30th anniversary of the minus wrench with drag races as part of the DBM and Nighter in Worpswede. CLICK! With the club name you have to have a sense of humor and be personable! 

minus screwdriver facebook 

Scoot Devils

Christian and Ronny from Scoot-Devils SC Seevetal brought two rollershop Zirri demonstrators to our last Open Day. BLOG. The two brought a prominently owned Scauri racer to the custom show.

Greetings to Mathias Scherer ;-) We're curious to see what Christian and Ronny will present as the next project. 

Scootdevils Fb

Game room

Self Description: "Metal nonsense, mostly on 10 inches." Beautiful North German understatement! What's rolling out here, qualitatively and quantitatively, is just sick shit from another planet. 

Playroom Fb

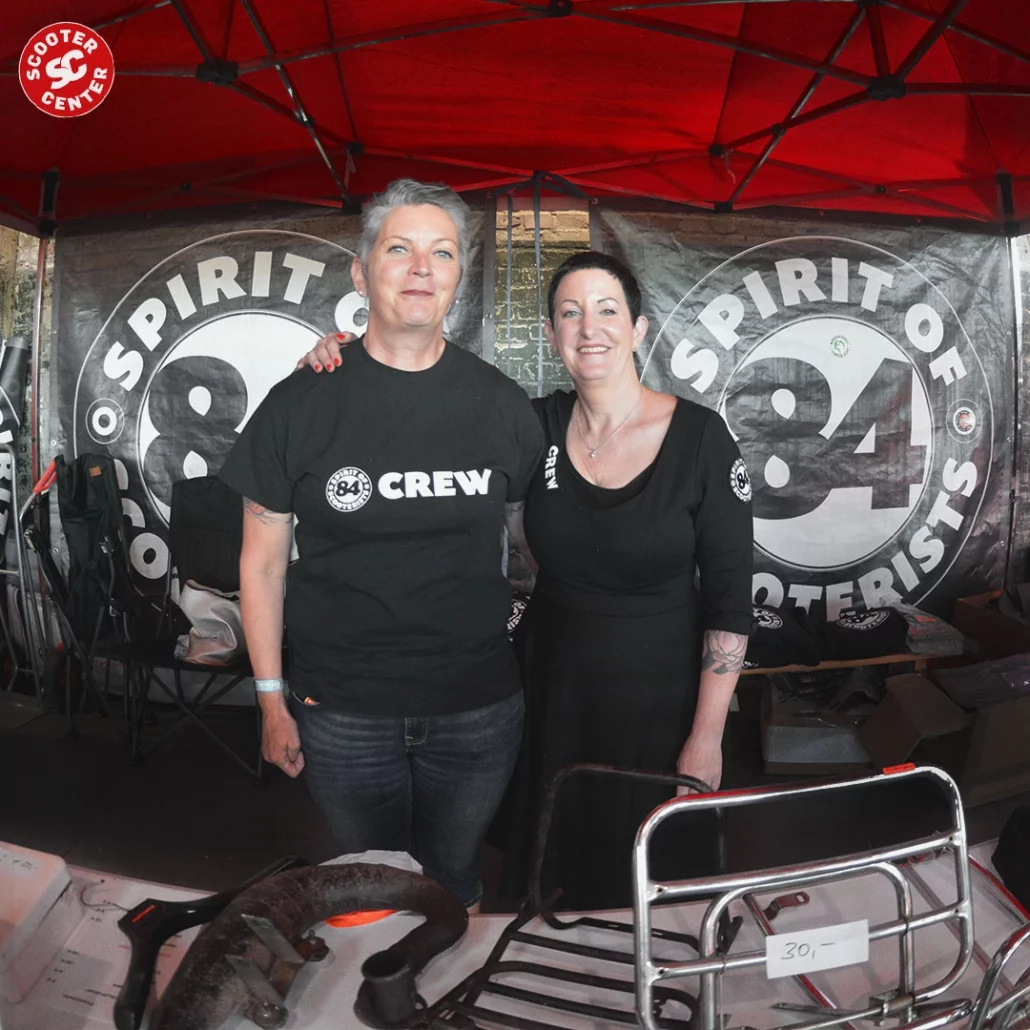
Spirit of Scooterist 84

Marieke and Marcus have been hyper-active in the German and English scooter scene since the 84s. The '90' ​​in the name refers to the year the Scooterboy cult exploded and has grown in popularity since the XNUMX's. As the organizer of Scooterist Meltdown they have established an international event completely outside of the well-known run calendar in February. Registrations are open ;-) 

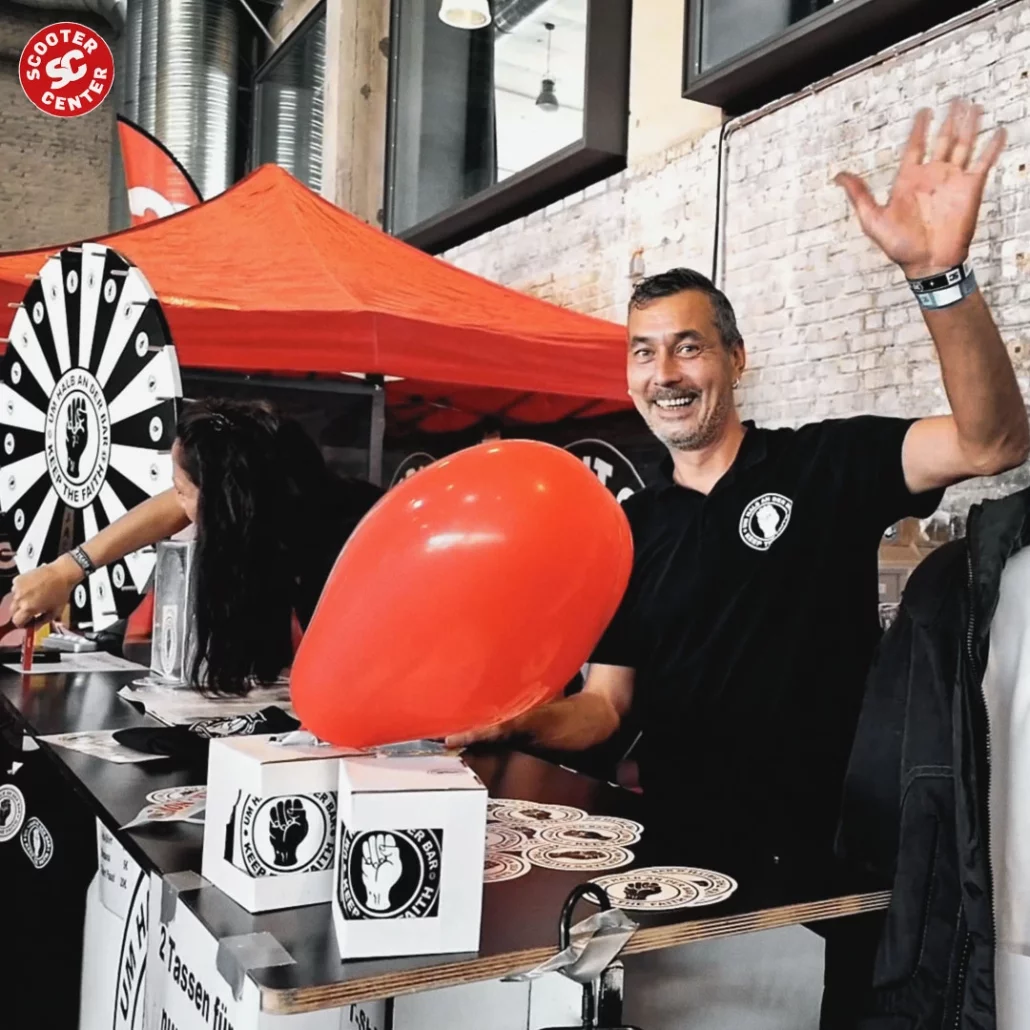
Half past the bar

…is in the Scooterszene is a popular slogan to meet friends and like-minded people at an open time on a run or niter and toast together with a cold drink. The resulting organization of the same name takes care of scooterists who have had an accident and – in the worst case – their dependents who are in need. Because some will never be at the bar again at half past.

Vandalizing drool heads Ostholstein


One of the first clubs in Germany. Founded in Lübeck in 1986, they started a run on Pentecost that same year, which was based on the English rallies and became a complete success and the start of a movement. Here, too, the club could probably equip a complete custom show alone with the club's own scooters.

VsrcHL Fb

Vesbeachy

Vesbeachi is the all-brand tin scooter meet-up on the beach. The Jelto organizes this and it was a super popular meeting right from the start. The second round will be held at the beginning of October on the beach of Beachclub Nethen and, by popular request, will be extended by one evening. He advertised the Vesbeachi a little with us and if you don't have your tickets yet, you can get help here -> http://www.vesbeachi.de/

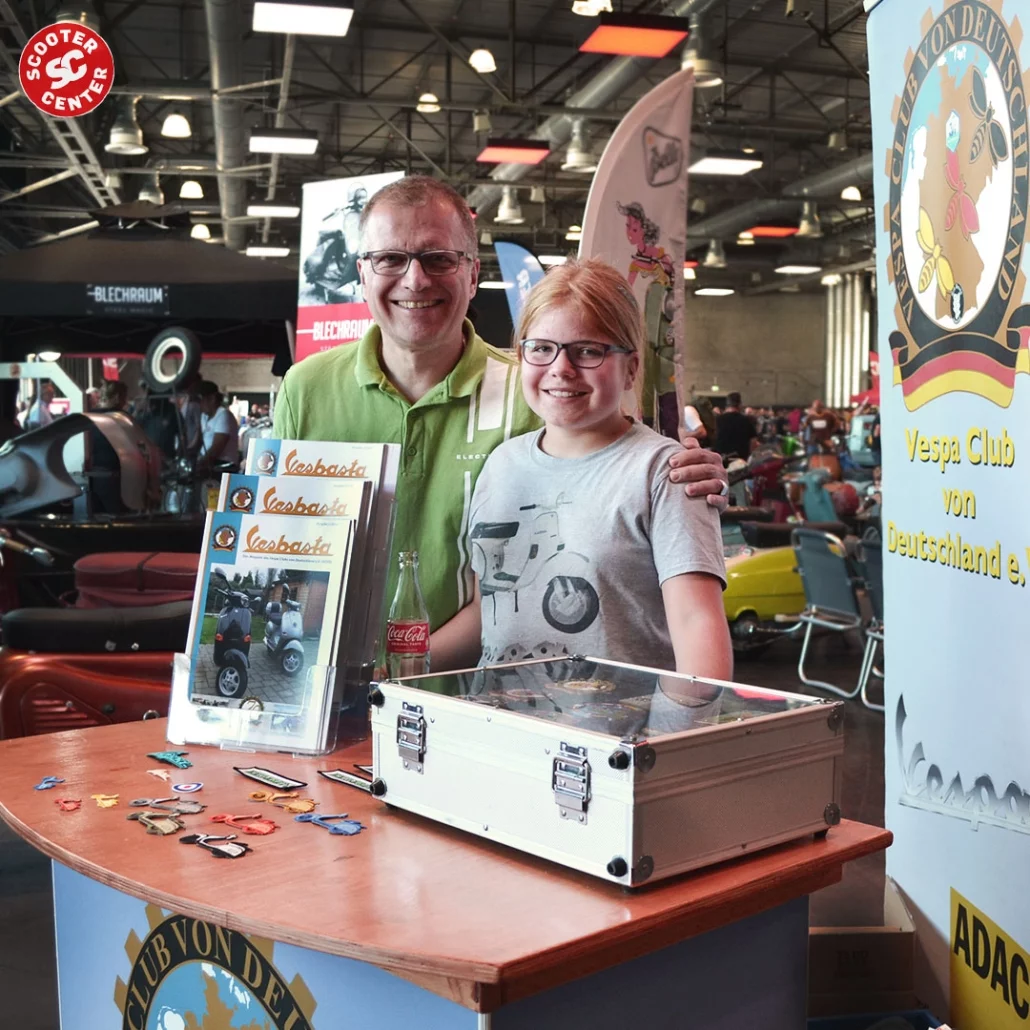
Vespa Club Germany

The Vespa Club of Germany eV (VCVD for short) has been around for almost as long as the Vespa has been inspiring the world.
The oldest Vespa clubs in Germany were founded in 1950. The voluntary Vespa Club of Germany is the umbrella organization of the official German Vespa clubs. If you add up the number of drivers organized there, then the Vespa Club of Germany represents the
Interests of over 4.000 Vespa friends and is therefore one of the largest brand clubs in Germany, so we were happy about the visit of the VCVD. 

Vespa boys Colonia

The Vespa Jungs Colonia are an association of Cologne Vespisti who tackle joint activities related to Vespas. The group is really big and the trips together are legendary. 

VJC Fb

Shaggy Zossen

The Zottel Zossen Scooter Association has been around for 33 years and they have set up a number of runs, nighters and custom scooters during this time. You could probably easily set up your own custom show with their customs. That's not the only reason why it was a great honor for us that they came with a lot of cutlery and set up the two largest club stands together with the playroom. 

Facebook

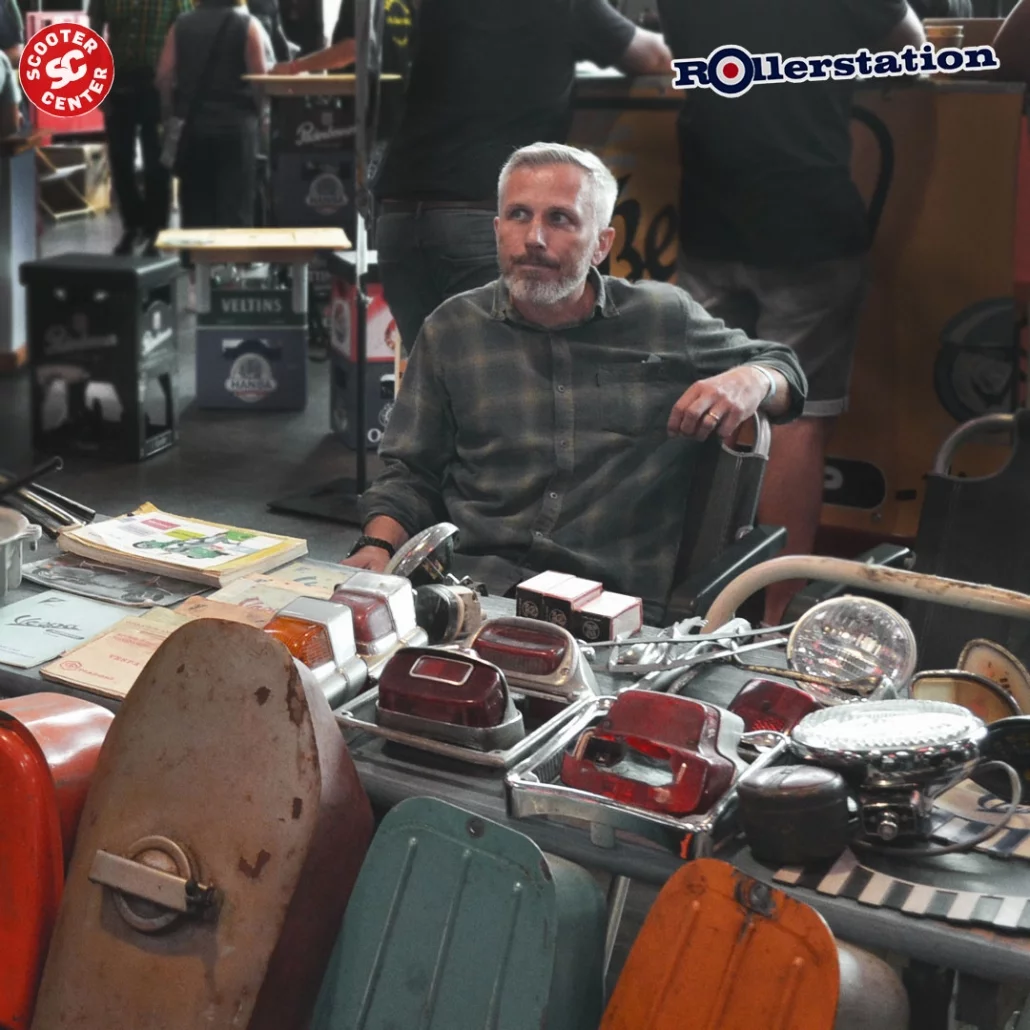
Parts market

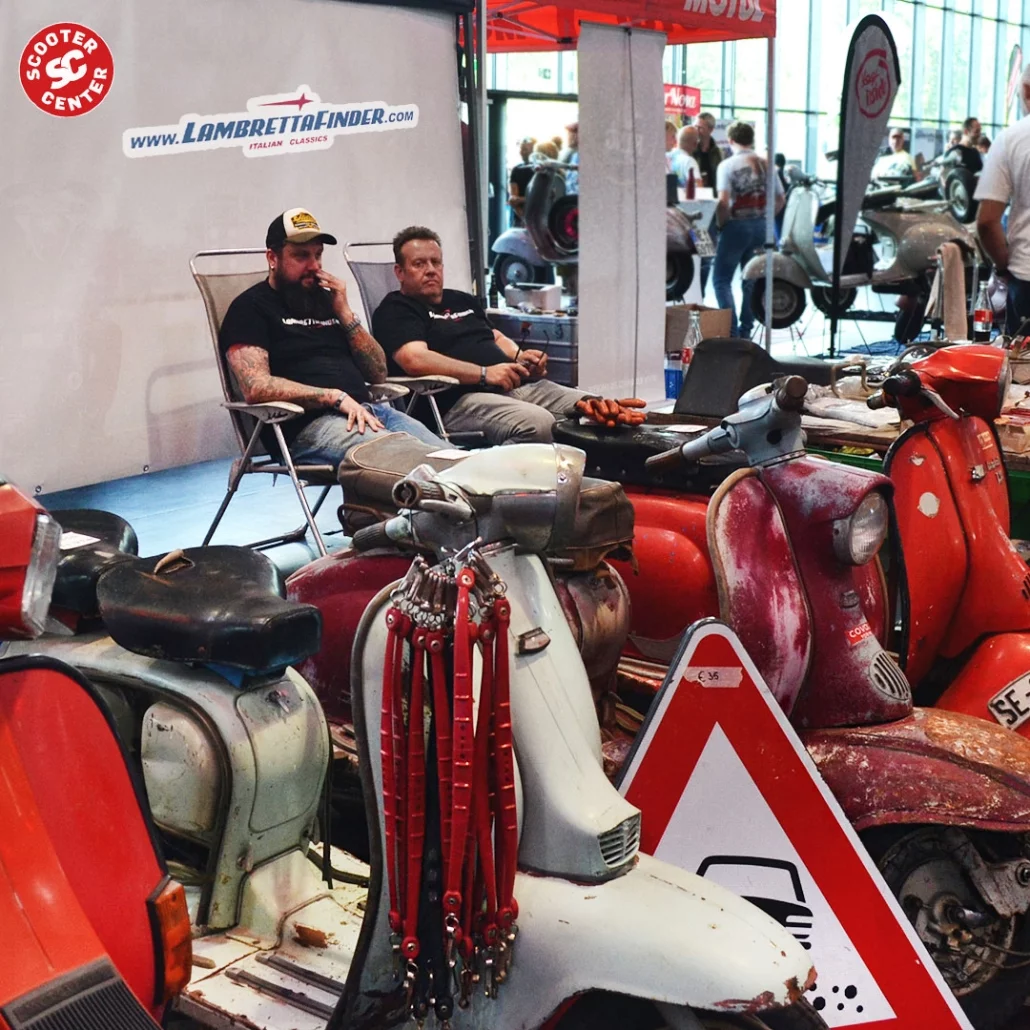
Lambretta finder

The Sam hit the nail on the head with its business name. With more than 60 used Lambrettas and Vespas in stock in 2840, Rumst, Belgium. If you need or are interested, just contact us info@lambrettafinder.com mail.

Lambrettafinder.com

Kolle

scooter station

Thilo & Sebastian

Magazines & Youtube Channels

Tin companions

In addition to his YouTube channel, Timo also has an online shop with selected products that he presented to us. Timo's fairly successful and well-made YouTube channel is all about Vespas. Whether individual conversions, restorations, repairs or tuning. Of course you will also find tutorials on all topics including all sheet metal work or tuning tips. This one Link to YT

Savage Scooters

Savage Scooters is fully committed to PX customizing and tuning. The Kevin knocks out super customs non-stop and his latest work is the CUDA. In addition to Kevin's own scooters, he also had a number of exhibits from his custom calendar project at the start. Kevin introduces customs, shops and everything to do with our scene on his YouTube channel. 

Savagescooters.de

scootering

The Scootering Magazine is the cult magazine from England. Scootering has been published continuously since 1985. Monthly news about customs, restorations, conversions, reviews, technical insights and backgrounds and a deep insight into the scooter scene make Scootering so worth reading. In the current October issue there is also a feature about our weekender.

Scooter Nova

When Andy told us about his plan to publish a print magazine at the Eurolambretta 2016 in Geiselwind, we frowned. And they were completely wrong. ScooterNova has firmly established itself as an independent scooter magazine. ScooterNova Magazine is mega-appealing both in terms of content and aesthetics. The focus is on Lambretta and Vespa scooters, but occasionally there are also reports on DKR, Ducati, IWL, Maico, Moto Rumi, Peugeot, Zundapp and other old scooters. With own words: "Produced in the UK, ScooterNova is a magazine we as scooterists are proud to put our name to, and a magazine that readers are proud to keep on their coffee table." Become!.

Scooteria

If you are into the topic of Modern Vespa and GTS, you will be interested in the Scooteria Youtube channel from Marc can not avoid . His love for Vespas and Lambrettas started as a mod in the late 70's, early 80's! And the influence is still clearly visible today. Together with the Cafe Racer 69 they drove to the custom show on their GTS Customs from Berlin!

Brands & Traders

We would love to introduce each of the thirty exhibitors in detail and all the highlights, special features, services and world firsts presented. Unfortunately, since this is beyond the scope, there are only a few highlights from the engine area. 

tin frind!

Cafe Racer 69

Crazy Monkey Development

Casa performance

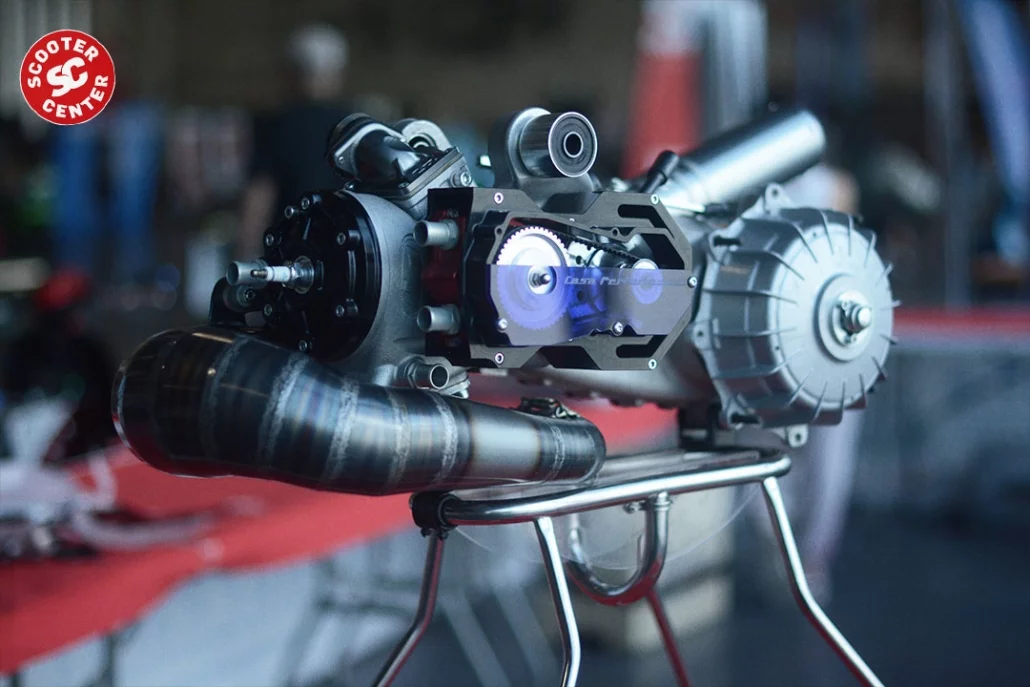
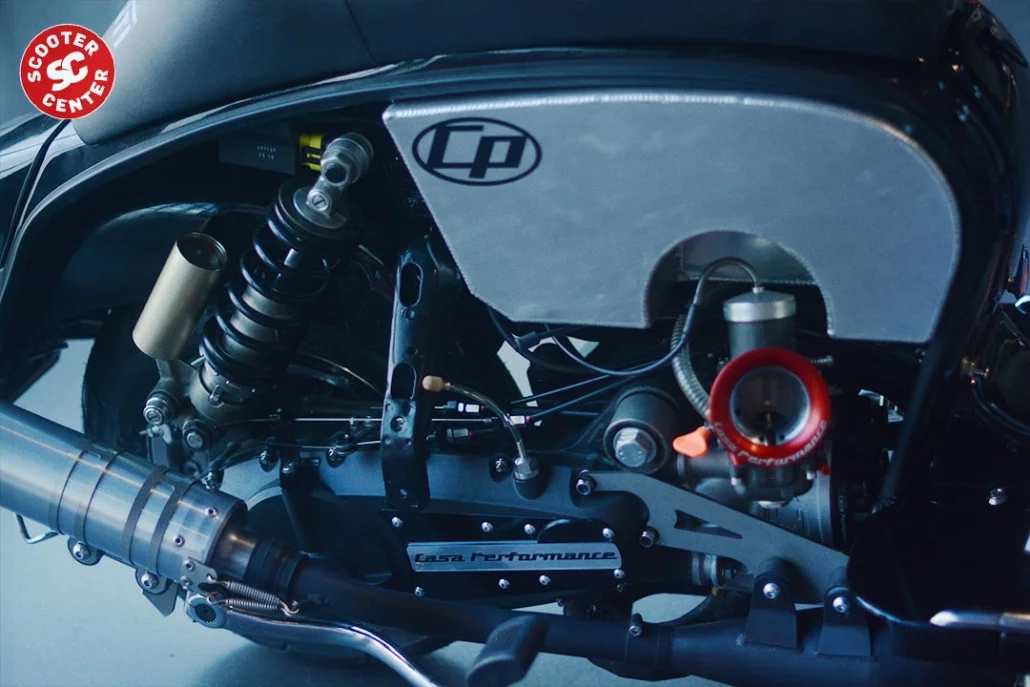
Casa Performance / Rimini Lambretta Center of course stole the show with the world premieres announced well in advance. At 15:2 p.m. sharp, Mickey and Lorenzo unveiled and started their new XNUMX-cylinder on stage. After years of development work, it was a pretty good moment with potential for goosebumps for the two of them and many others.

More about the engine at SLUK written by the sticky

Rimini Lambretta

Flying Classics

GoWoMo

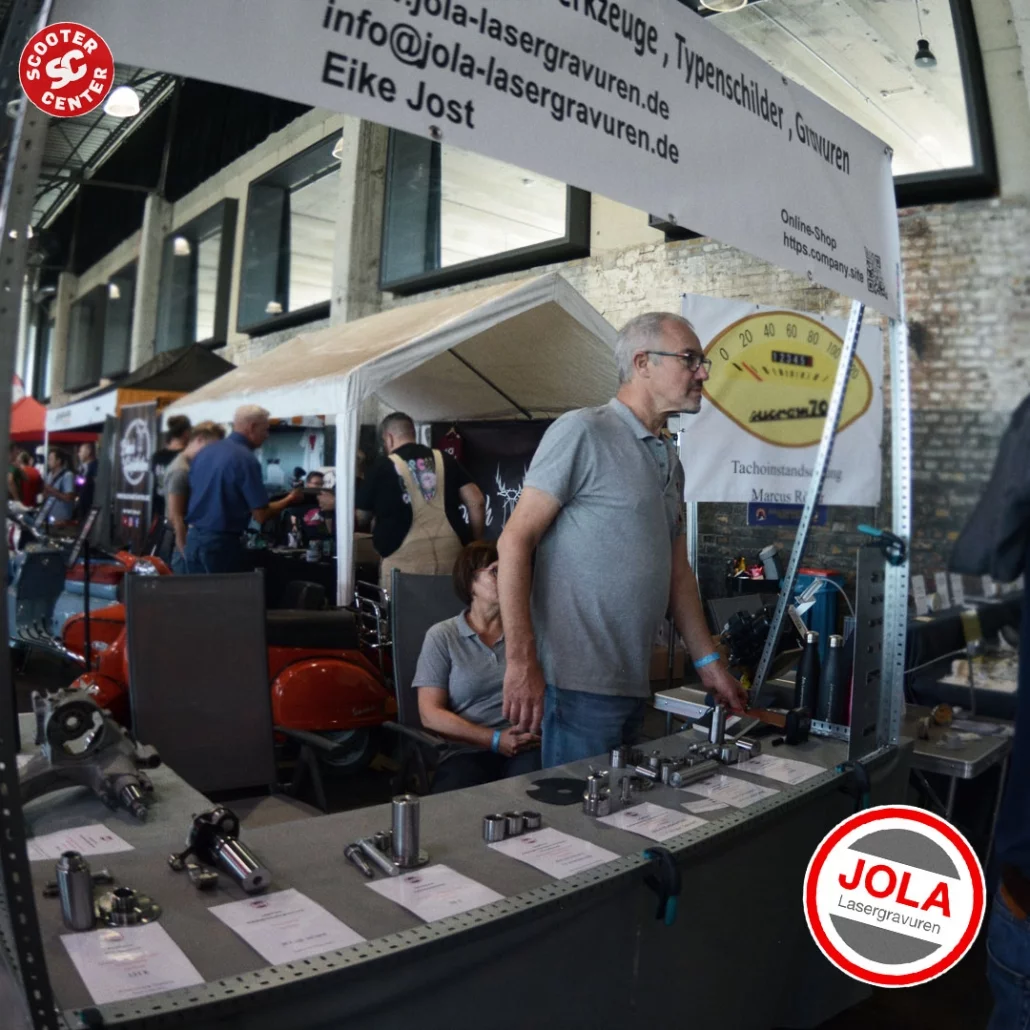
Jola

king wave

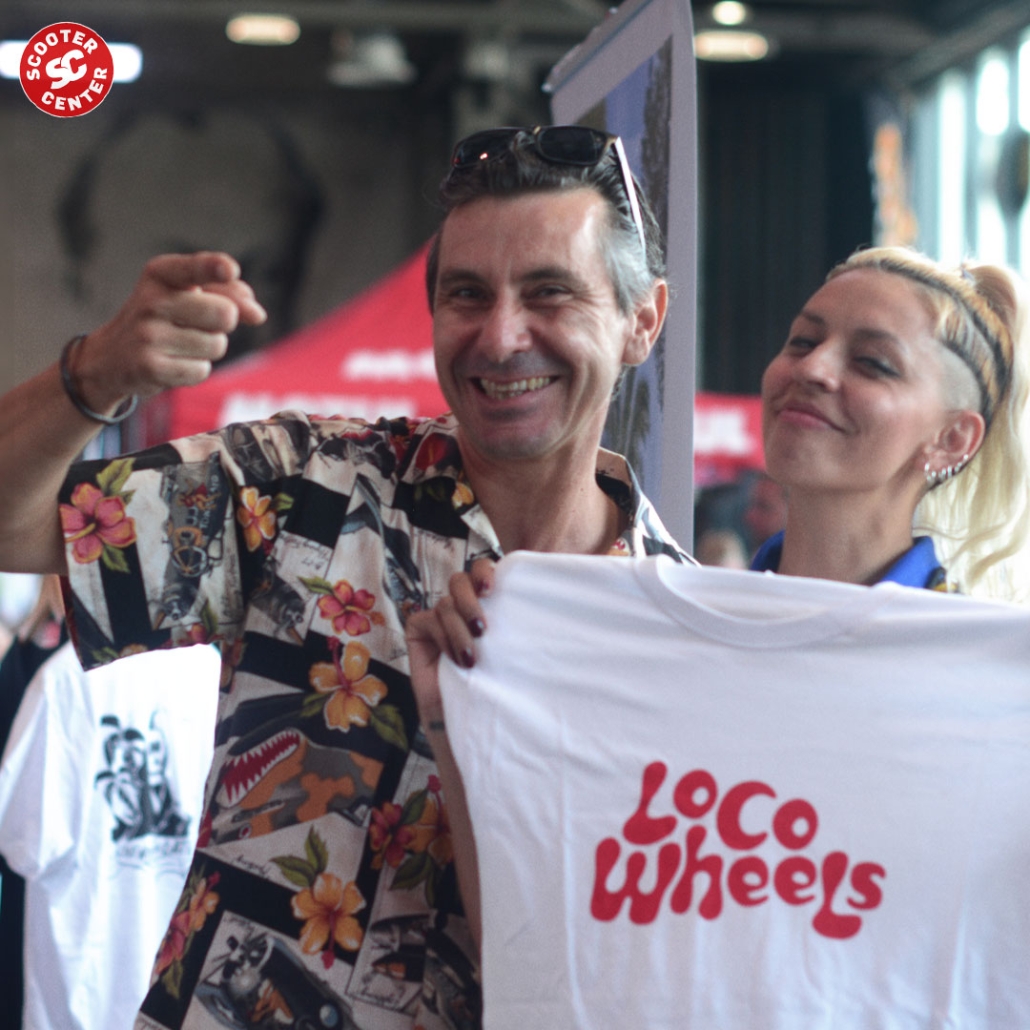
LocoWheels

McCloudts

Nagy tin roller

NICHE

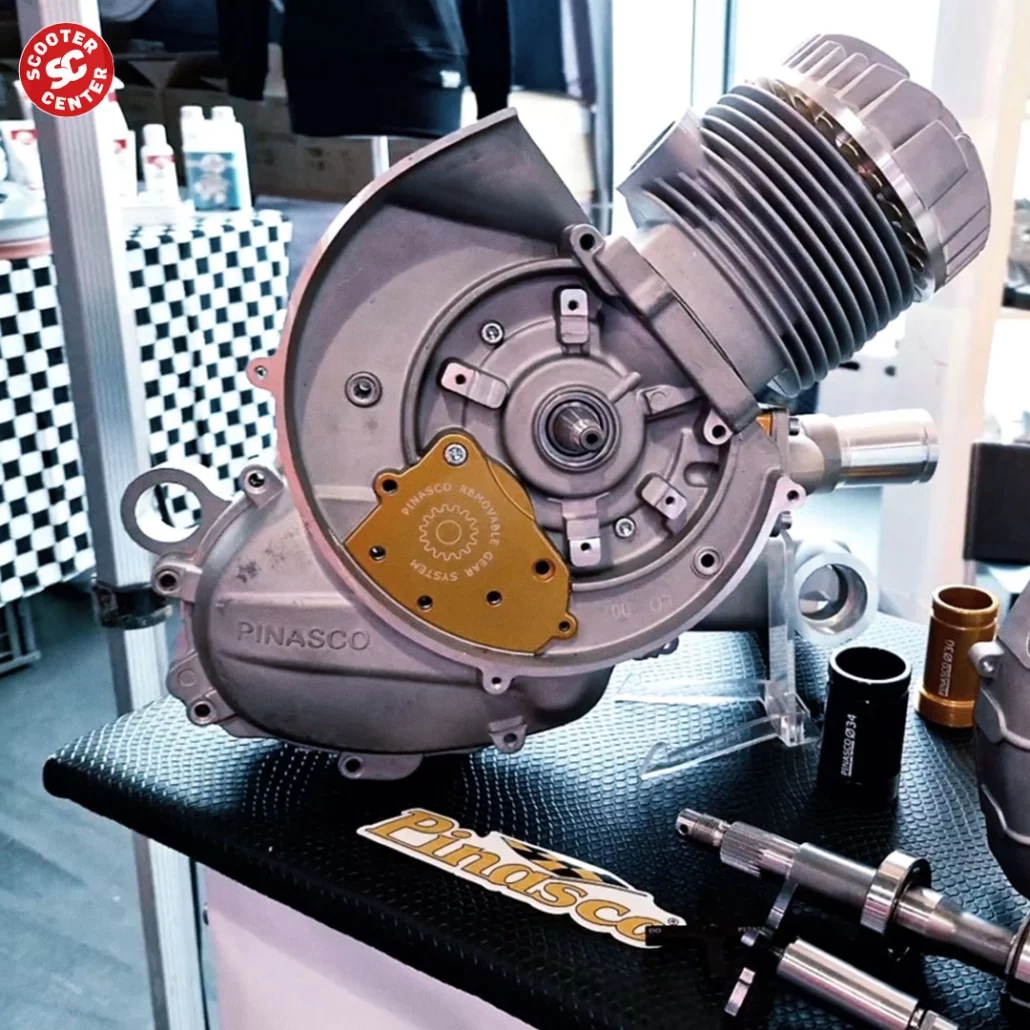
Pinasco

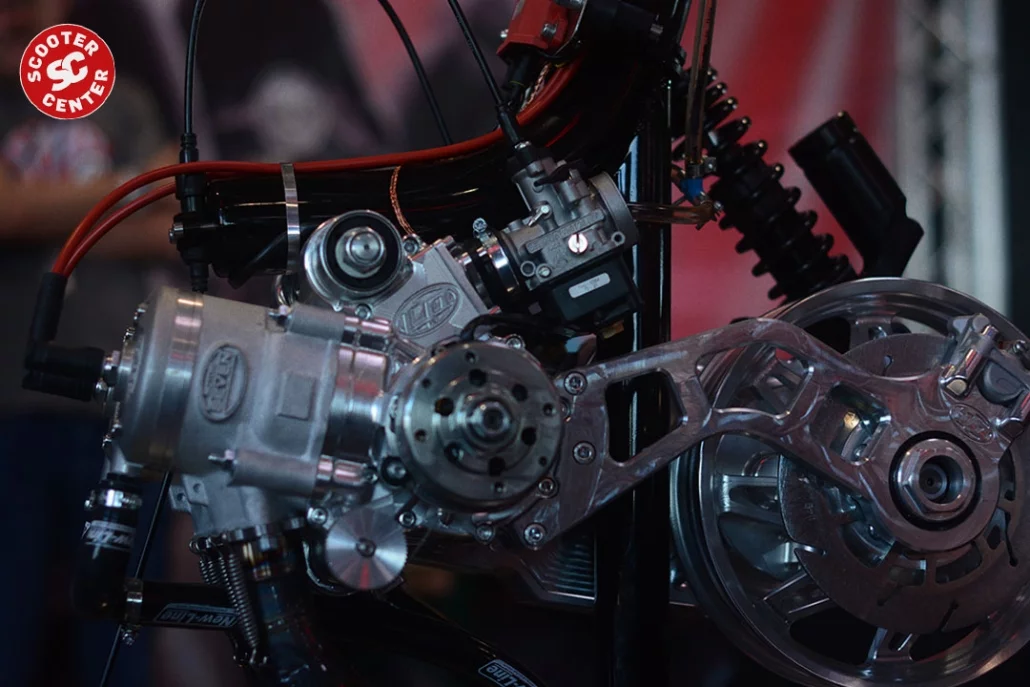
Pinasco has a full 251cc Smallframe engine presented. An old acquaintance is used as the cylinder, the cylinder based on the T5 design with a 73 mm bore and 60 mm stroke, which we already know from the PX motor set know CLICK. The test phase of the engines has been completed and another engine concept will soon be available Smallframe- Ring left. 

PCL Corse

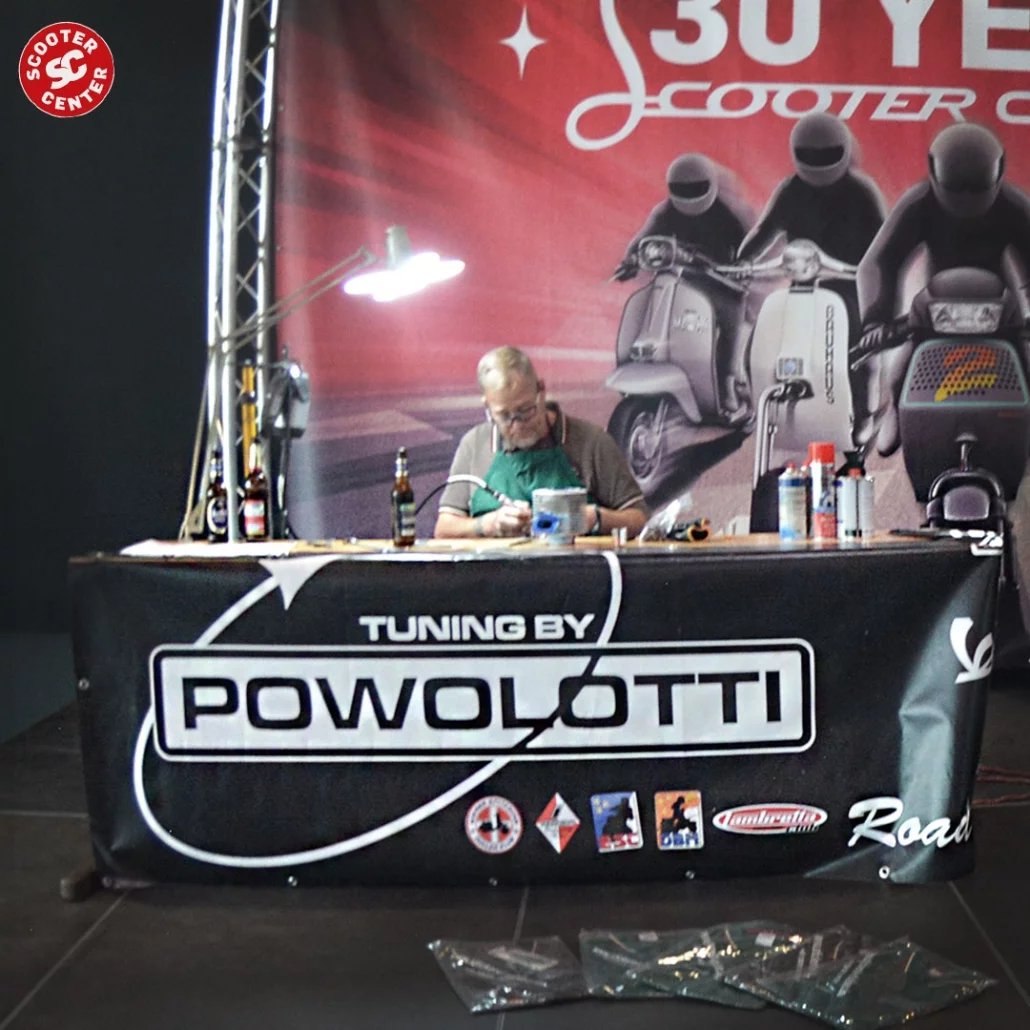
Powolotti

Rehab

Retrospective

roller sack

sucram

bgm

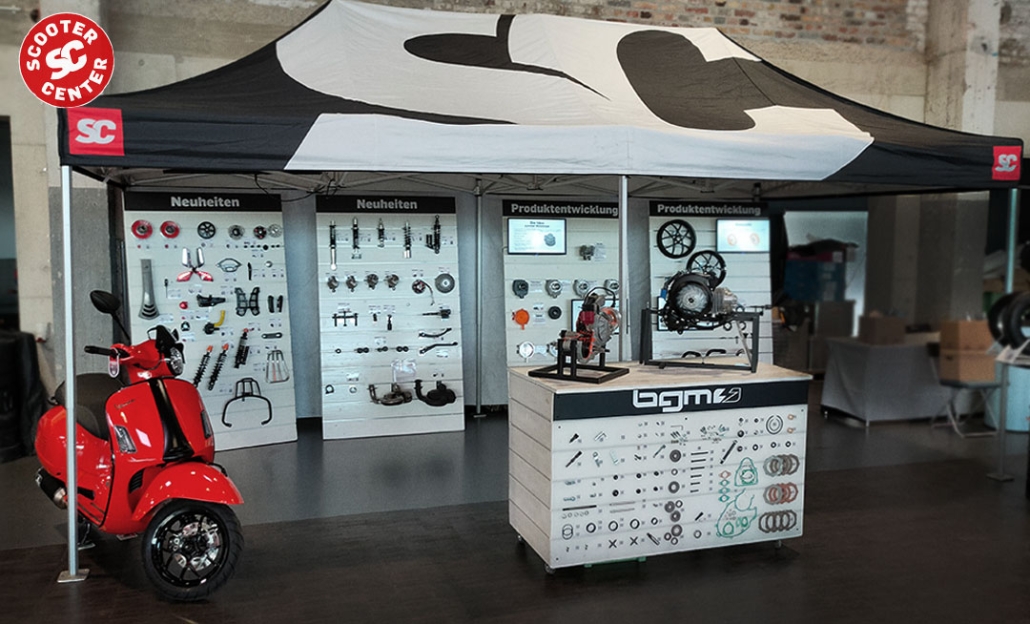
Now comes a little advertising on our own behalf. Development work on a new bgm Cylinder was completed in time for the show. And so, among other things, we presented the development work at our bgm stand.

The cylinder is for all MotoVespa 160 engines and can either be piston-controlled or driven with an additionally available diaphragm suction device. This means that the MotoVespa engines can finally be given a contemporary power output without having to install another engine directly.

Due to the 125 driver's license regulation, the cylinder will also be available with a downscaled bore.

The new cylinder series is rounded off by a tuning cylinder for the Vespa GS 150. More about that here soon! 

Superb Lambrettas

Super Lui Tom

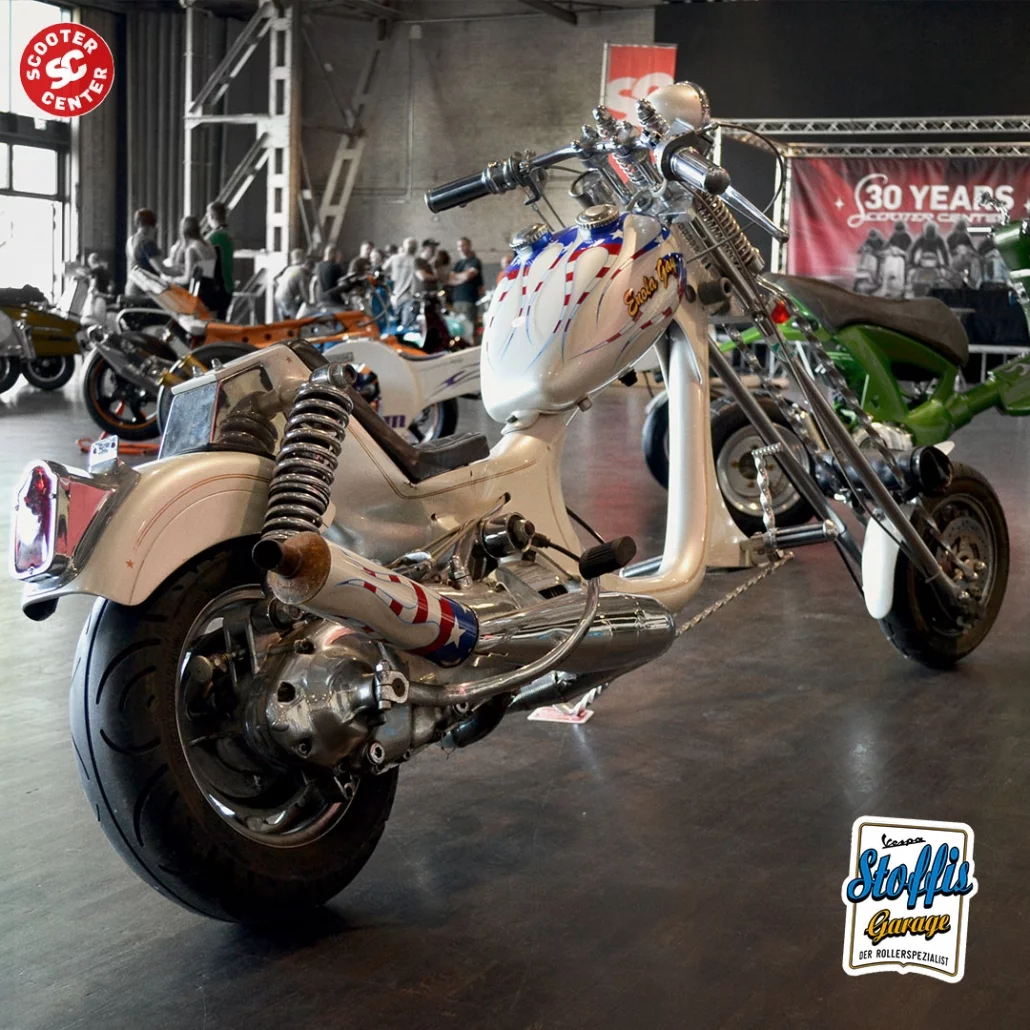
Stoffi's garage

vehicle

Wolke xnumx

ZDesign

Thanks to our photographers:

Crisis Studio®

& Zoe Leon

Video

Part 5 for stage 4

Fortunately, as with so many things in life, everyone has their preferences...
More RPM and more peak power or more torque at low RPM.

That's why in today's part I'm looking for more... But not top performance, but for speed range and torque. The "tractor engine" is sought.

In part 4 with stage 3, I looked in the direction of the higher control angle by raising the cylinder and making a small adjustment to the exhaust. If I were now to increase the exhaust further in order to perhaps achieve higher peak performance and speed, the way would be backwards; to try the cylinder with more blowdown at lower control angles installed.

So today I lower the cylinder. Overall, this results in lower control angles, but the pre-release increases slightly. The smaller transfer angle should allow the cylinder to produce a little more torque at low rpm.

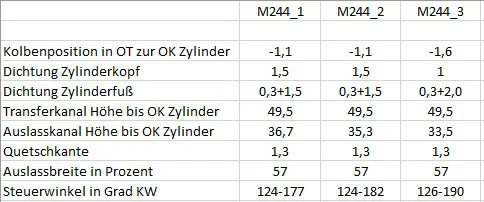
The spacer on the cylinder head was changed from 1mm to 3mm compared to the third construction stage. At the cylinder base, the 2mm spacer leaves the field and the cylinder is only supported by a normal 0.3mm thick gasket. The squeezing edge remains at 1.3mm, as with the other construction stages.

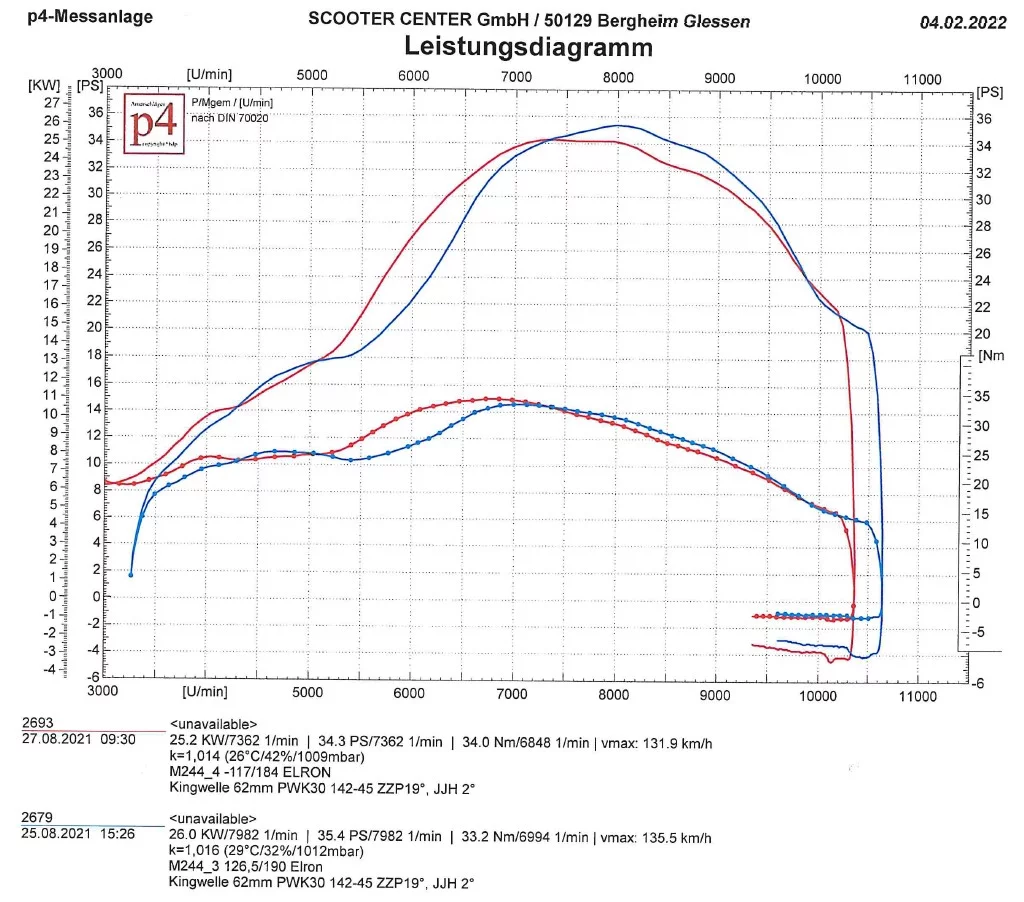
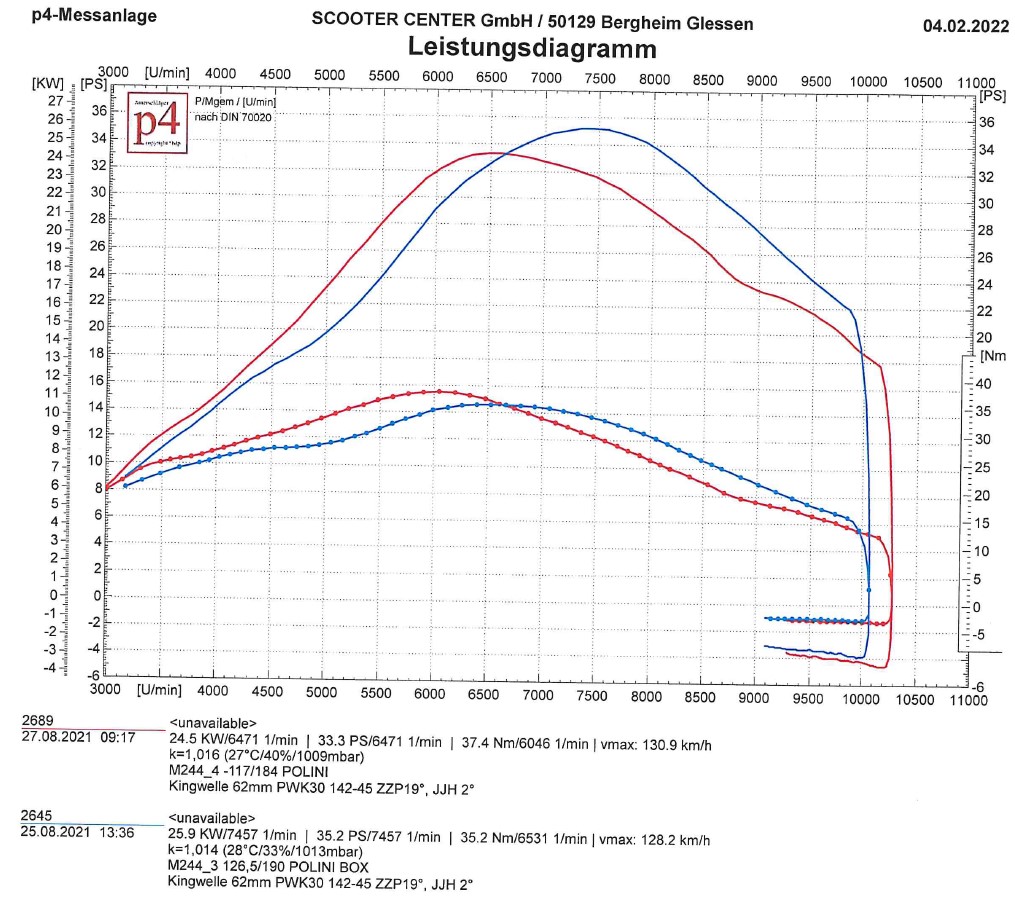
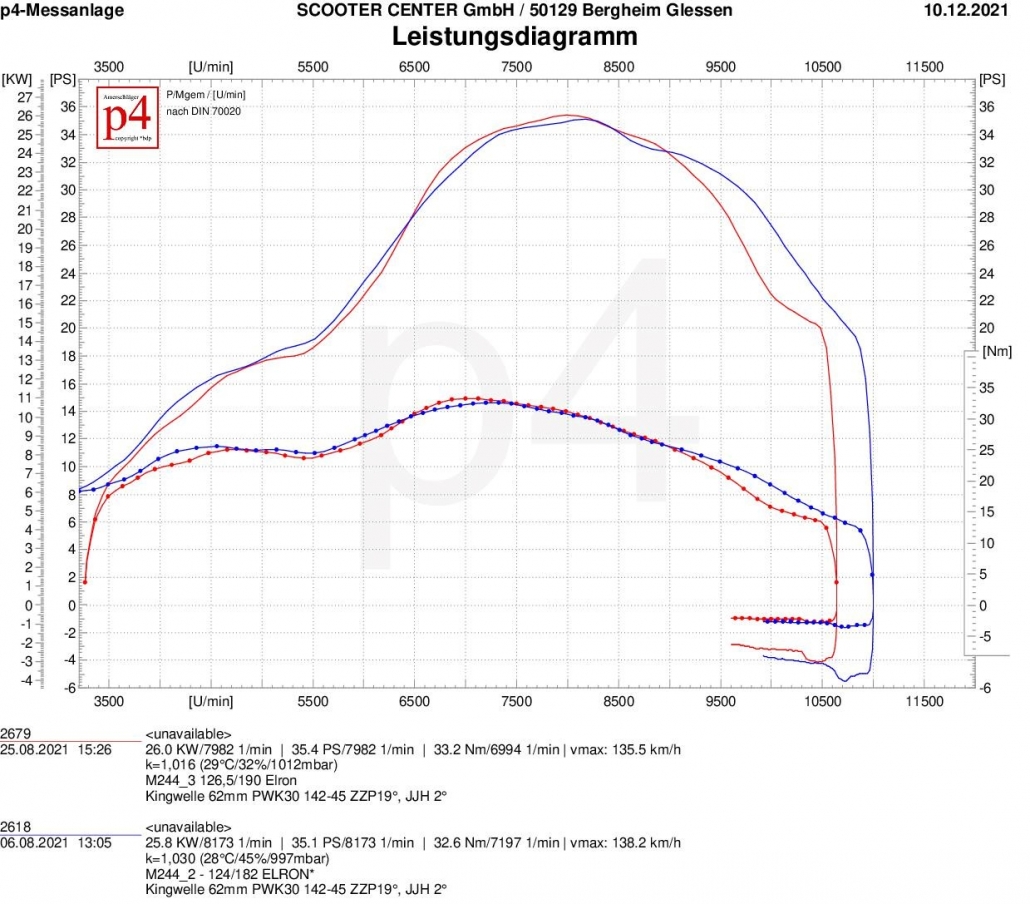
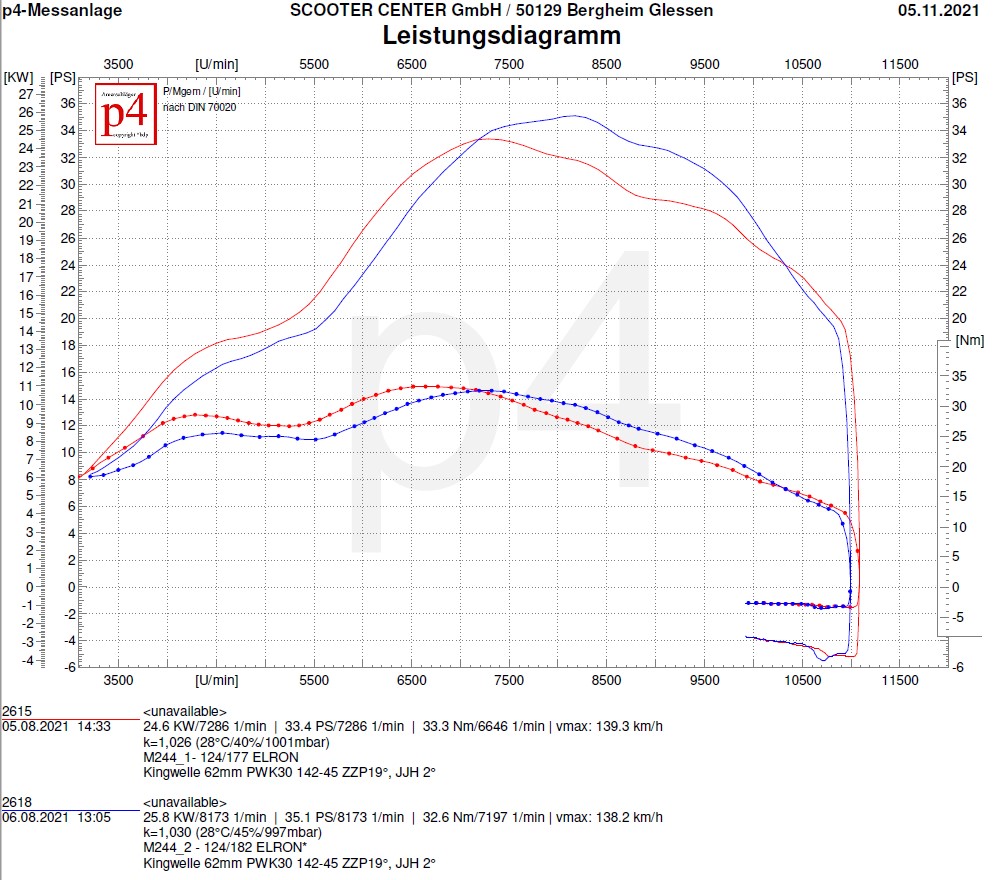
In the following graphs are the current curves of construction stage 4 RED to see. The curves from the previous stage three appear in BLUE.

Elron is the first to show what he thinks of the change.

As can be expected, the absolute top performance drops slightly, but the maximum performance and torque shift in the direction of lower speeds. The torque increases slightly and feeds the range between 5100 and 7000 rpm.

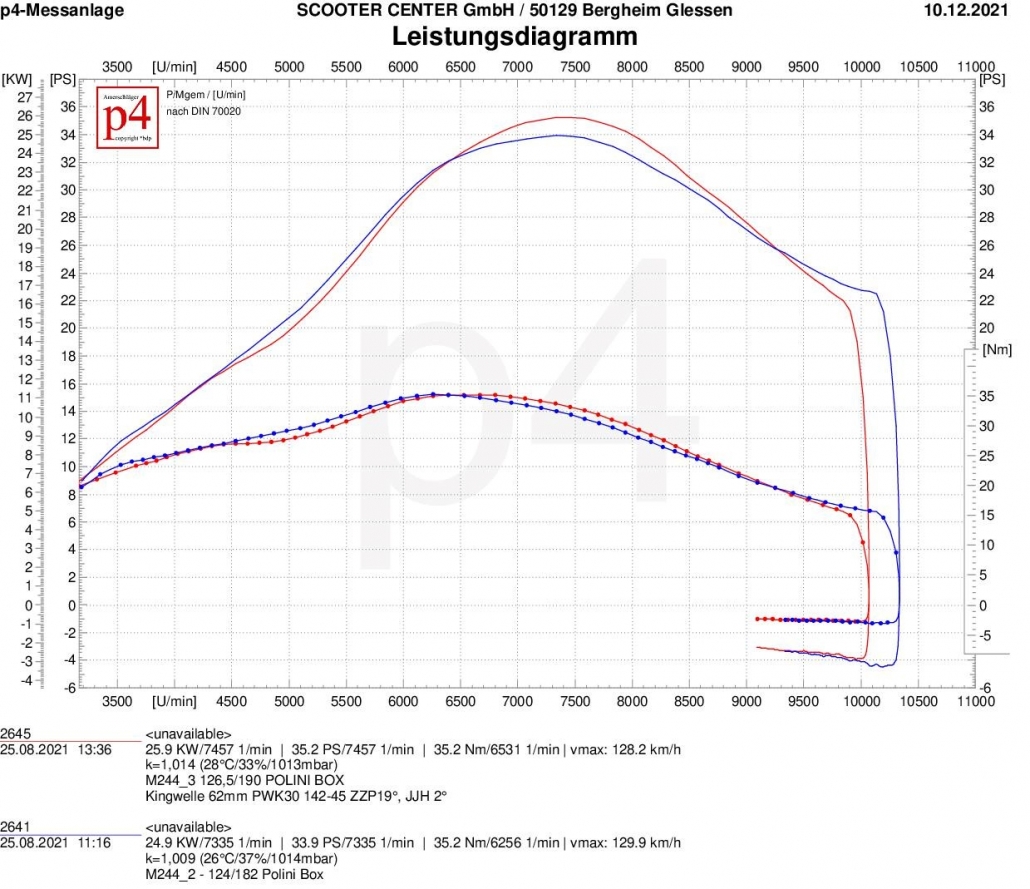
The Polini box, which is more intended for engines with less transfer time, is placed next on the exhaust port.

At first glance, the curves may seem sobering. On closer inspection, the Polini Box turns out to be a real torque animal. At the end of this series of tests, it will rank second in terms of torque with 37.4Nm. The graph already passes the 4700 hp mark at 20 rpm. The maximum power shifts by an impressive 1000 rpm in the direction of a lower speed, culminating at 6400 rpm. The maximum torque pulls at the rear wheel at 6000 rpm. An engine constructed in this way is just begging for a long gearbox.

This allows the M244 to move over the asphalt with extreme shift laziness. Jack off the stand, shift into gear 4 and just pull the cable. Don't worry, it will be quick...


The aged all-rounder in the field.

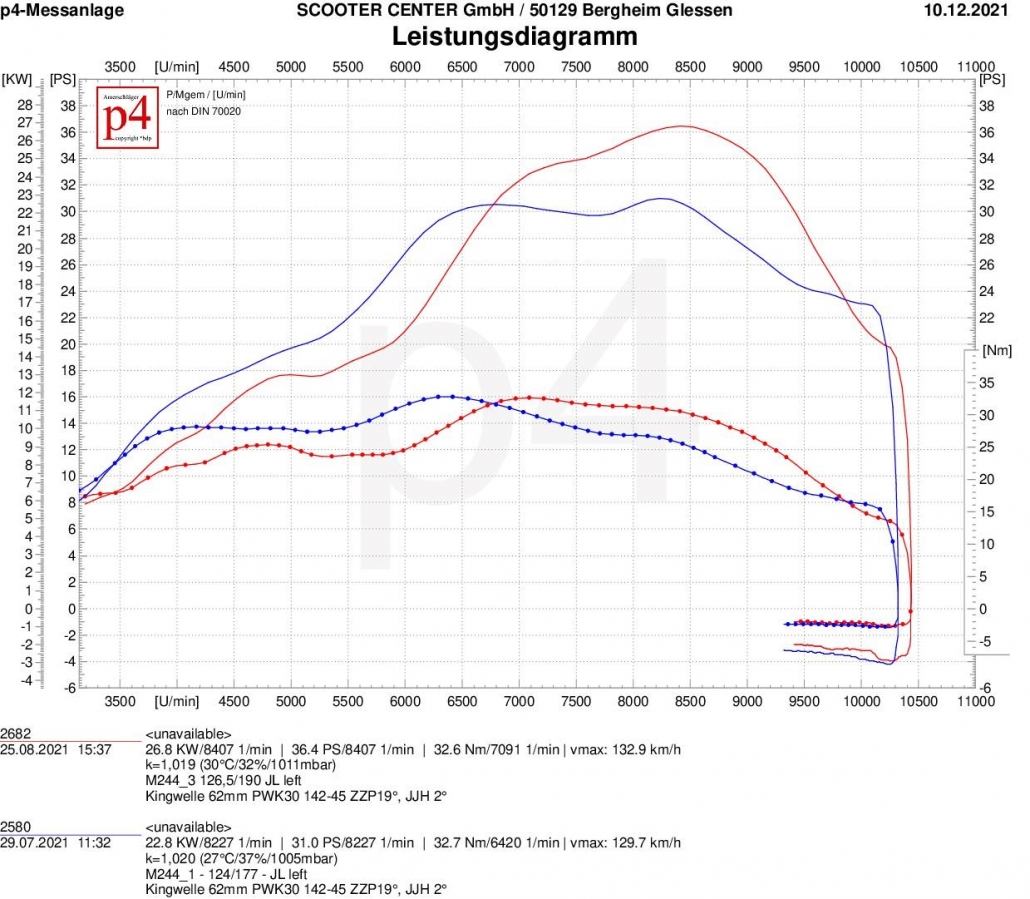
The JL left arm puts its torque in the range between 5000 and 7000 rpm and thus offers more drivability. Although the peak power falls by one hp, the JL can still offer very good drivability in the field of resonance exhaust systems.

New Line

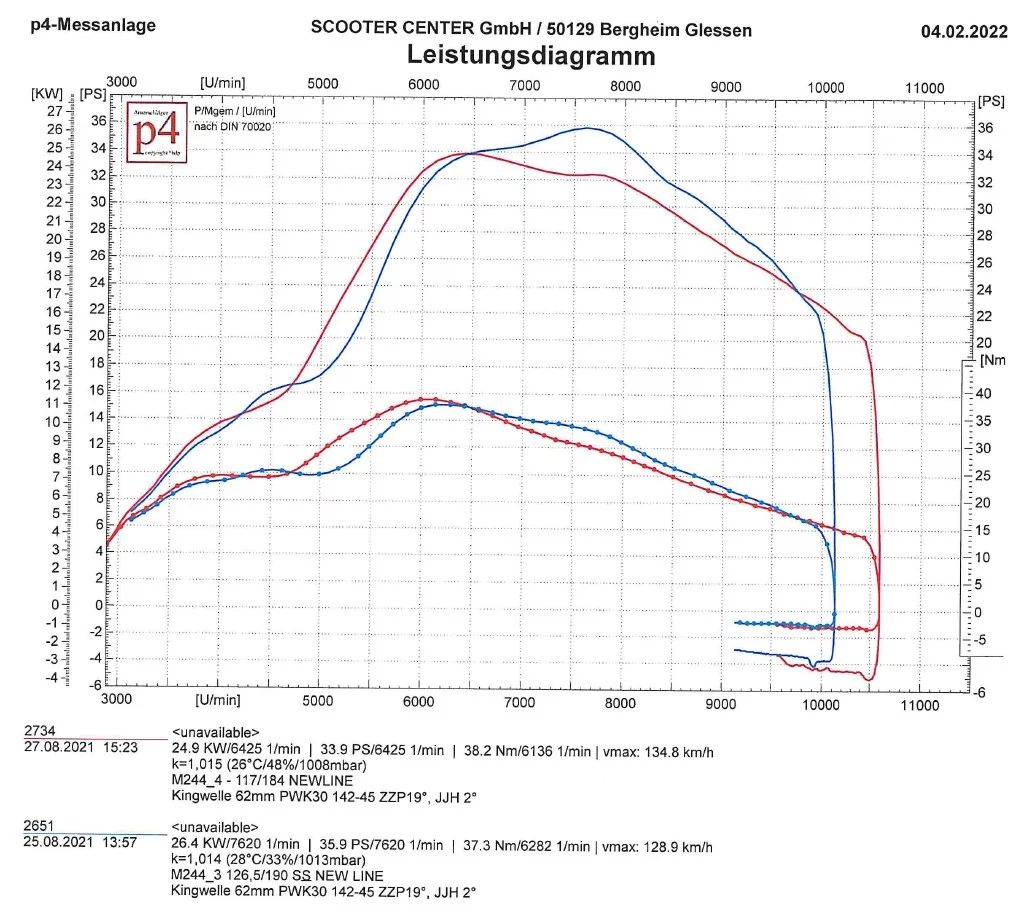
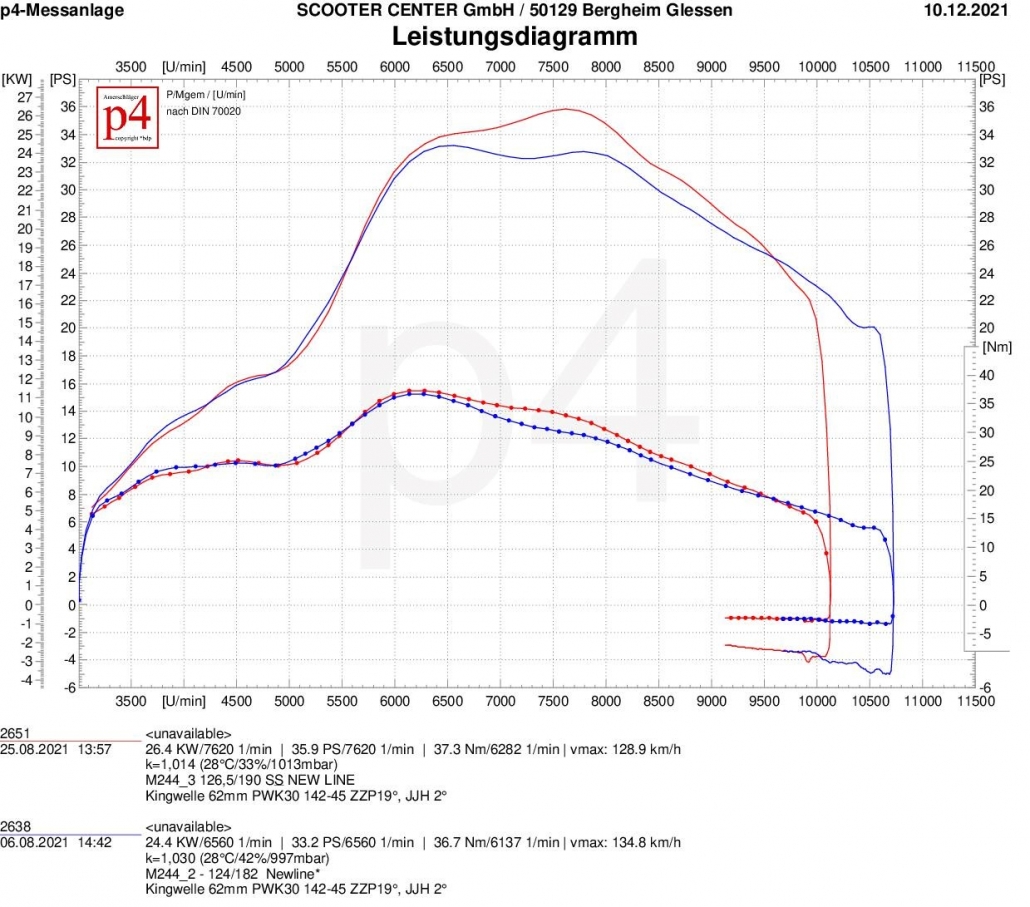
The handwork from the north is also responding to the adjustments as expected. Already at 5000rpm, 20 horses are ready to move significantly. Full torque is available at 6100 rpm. Although it pushes the absolute top performance down a bit and the Newline gives up 2 horses in favor of the early torque, it is happy to take the larger pre-release in order to go over 10.000 rpm and maintain it there with over 20 hp.
The Newline behaves here almost like a box exhaust system, seasoned with a significant torque kick.

Posch Nessi

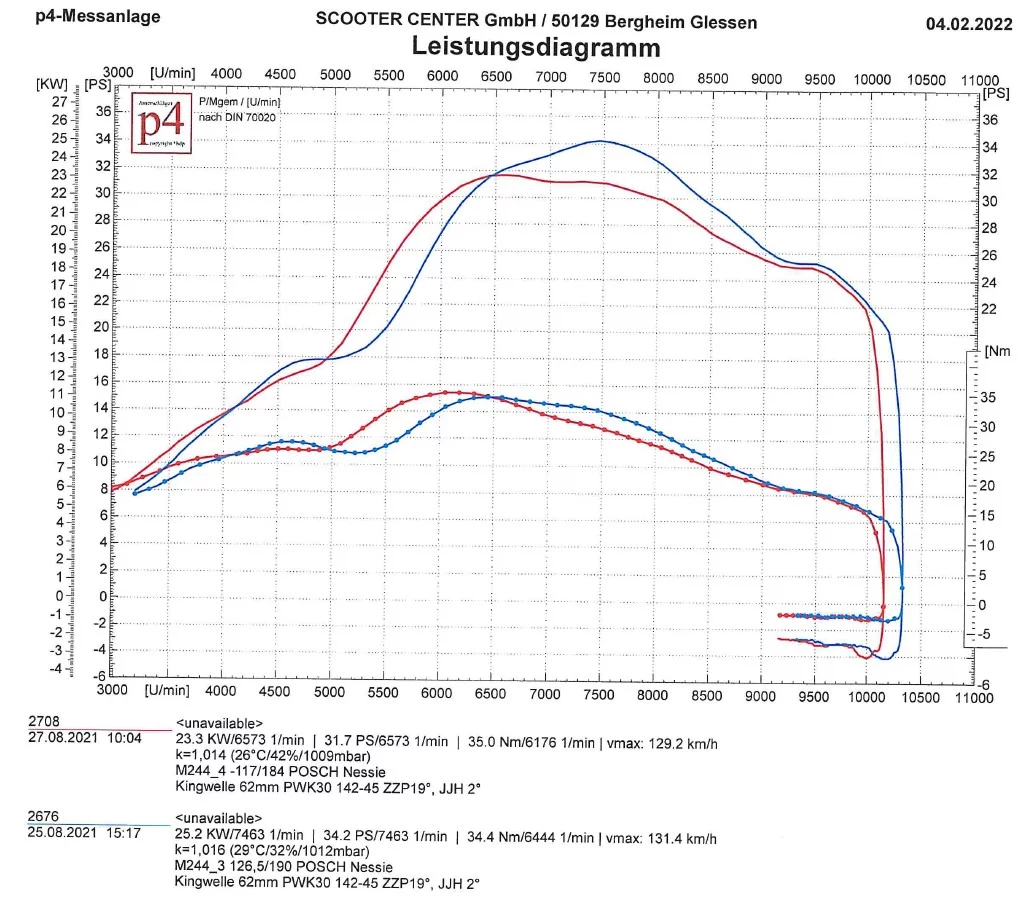
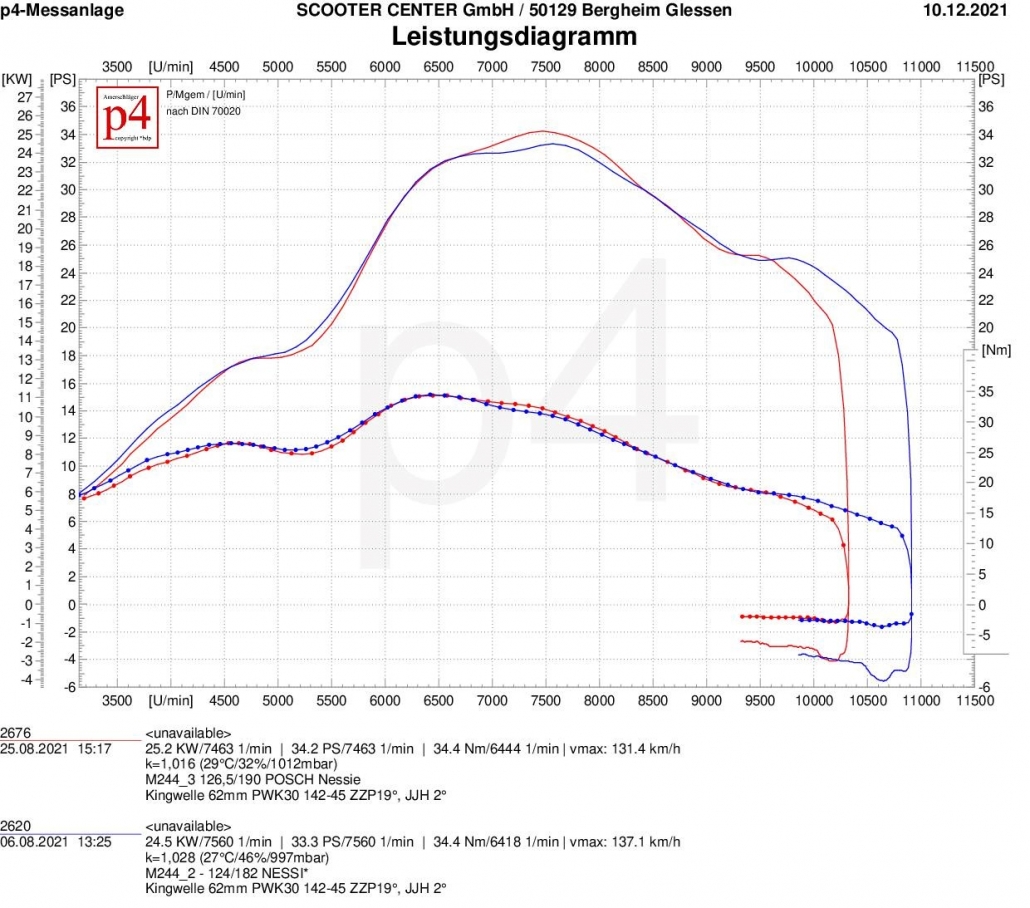
The sea monster ducks its head slightly due to the reduced steering angles. But that's not bad at all. As with the Newline, the rev range shifts slightly towards early revs and develops more torque in the process. At 5200 rpm the curve already exceeds the 20 hp mark. The slightly increased pre-let helps the Nessi to a wider speed range.

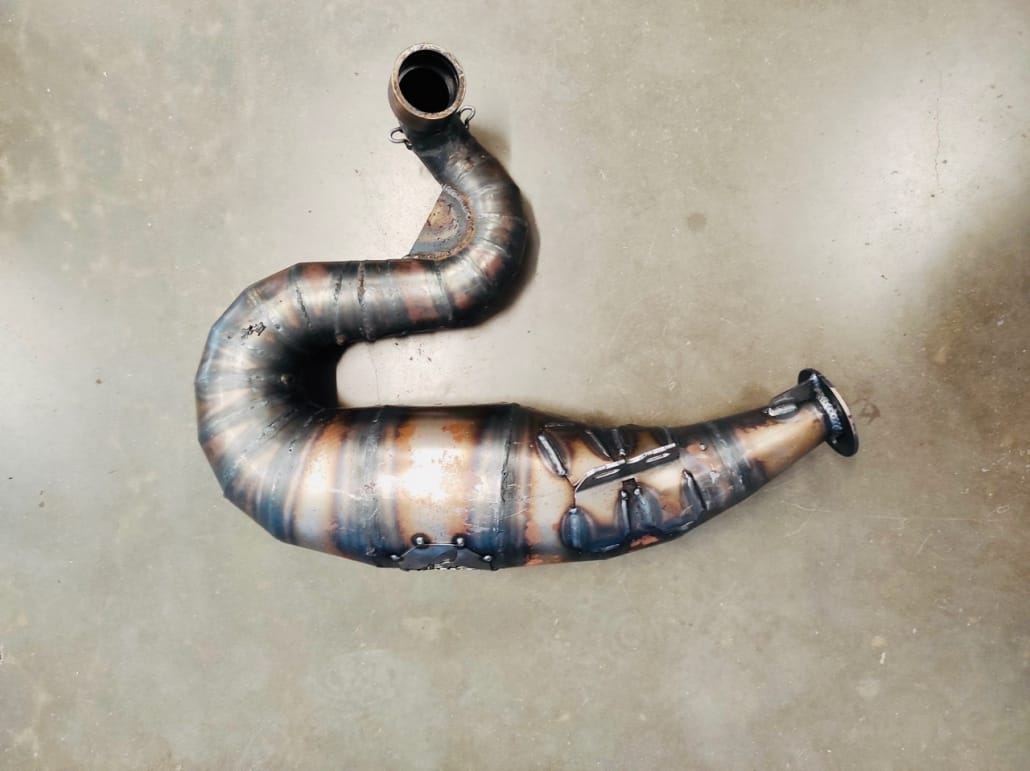
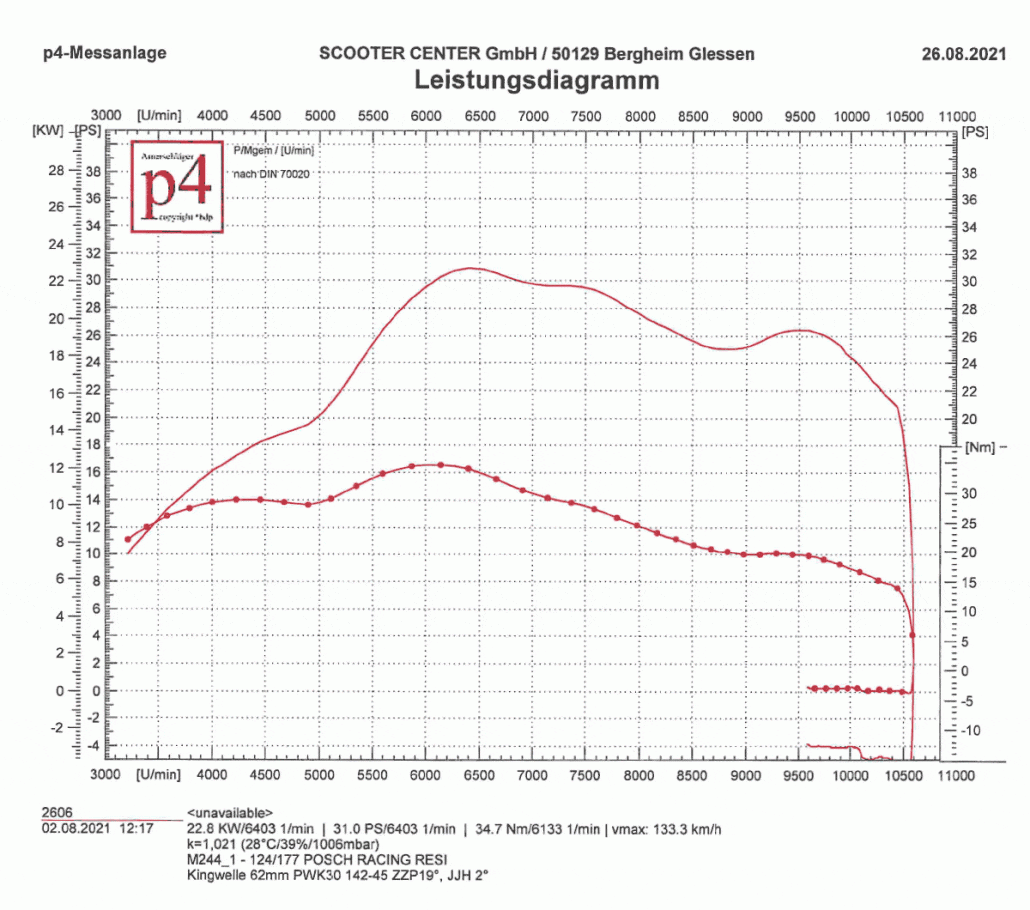
Posch Racing Resi

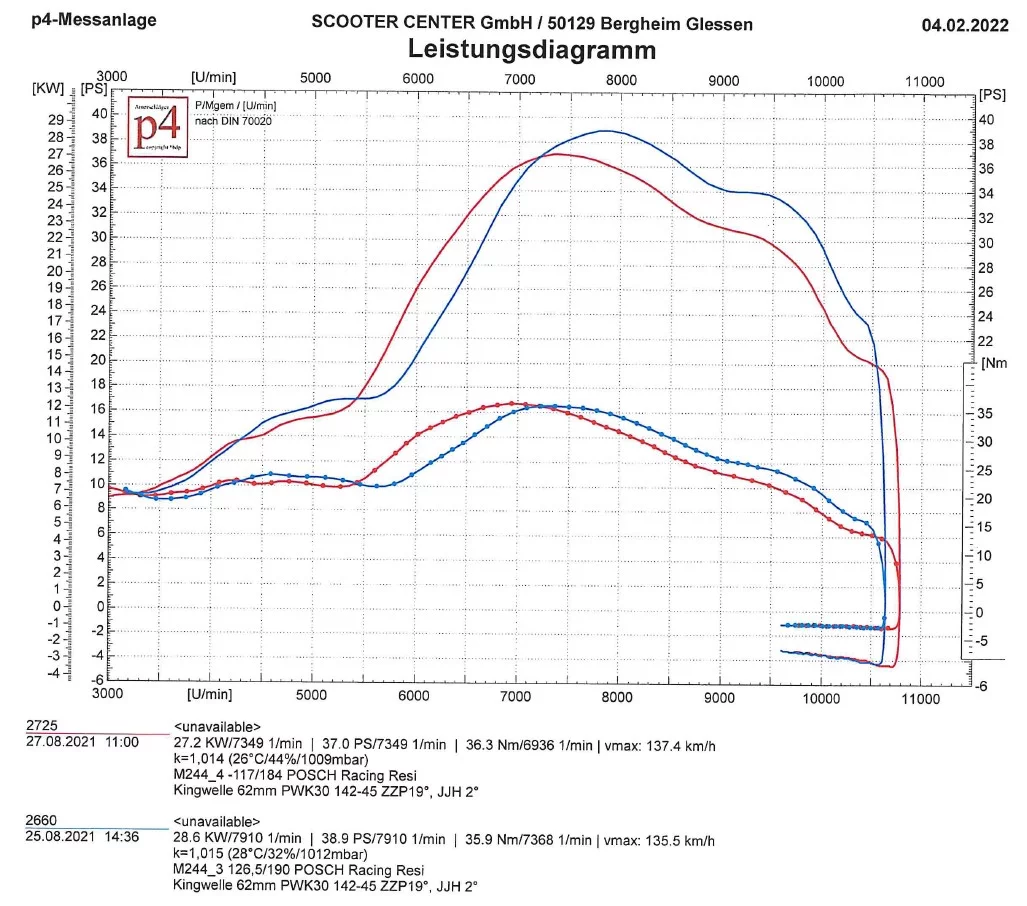
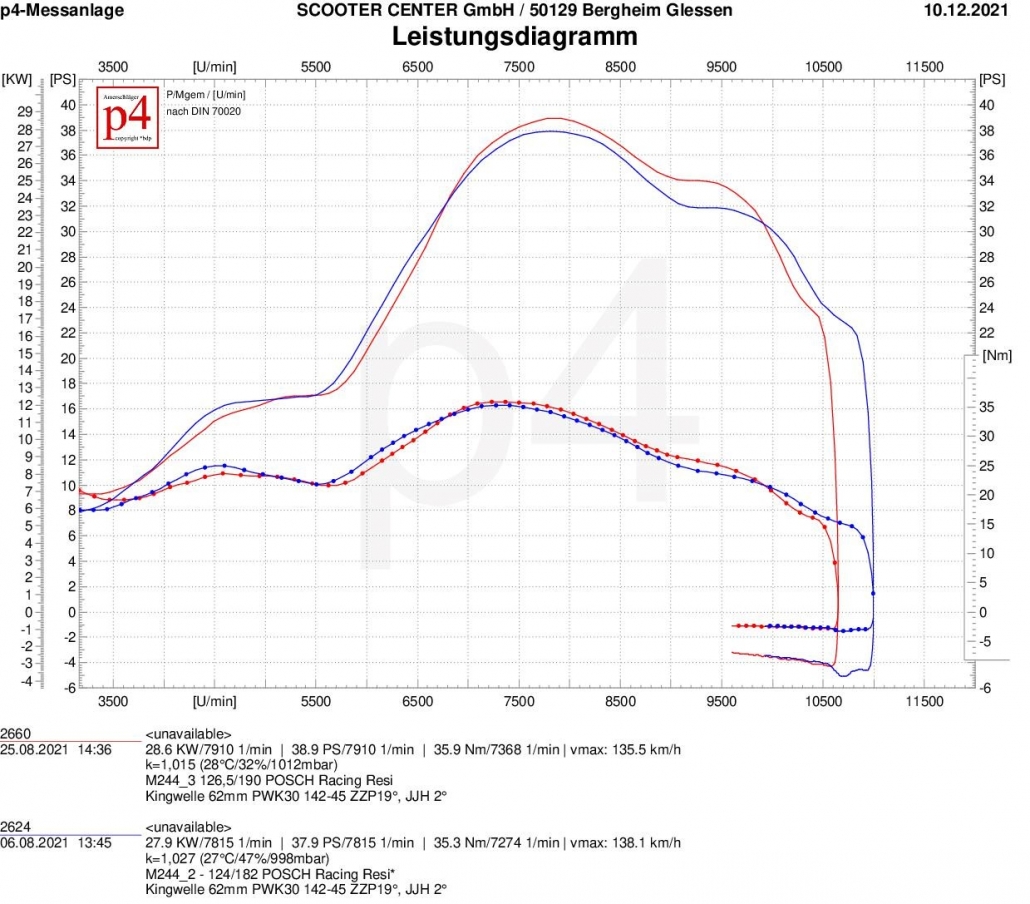
The lush Resi handles the steering angle that is unsuitable for you amazingly well. Although it also loses peak performance, it gives an idea of ​​the bandwidth that can be possible with the appropriate control angles and more forward airflow. With a speed range of almost 4100 rpm, it is in the top league here.

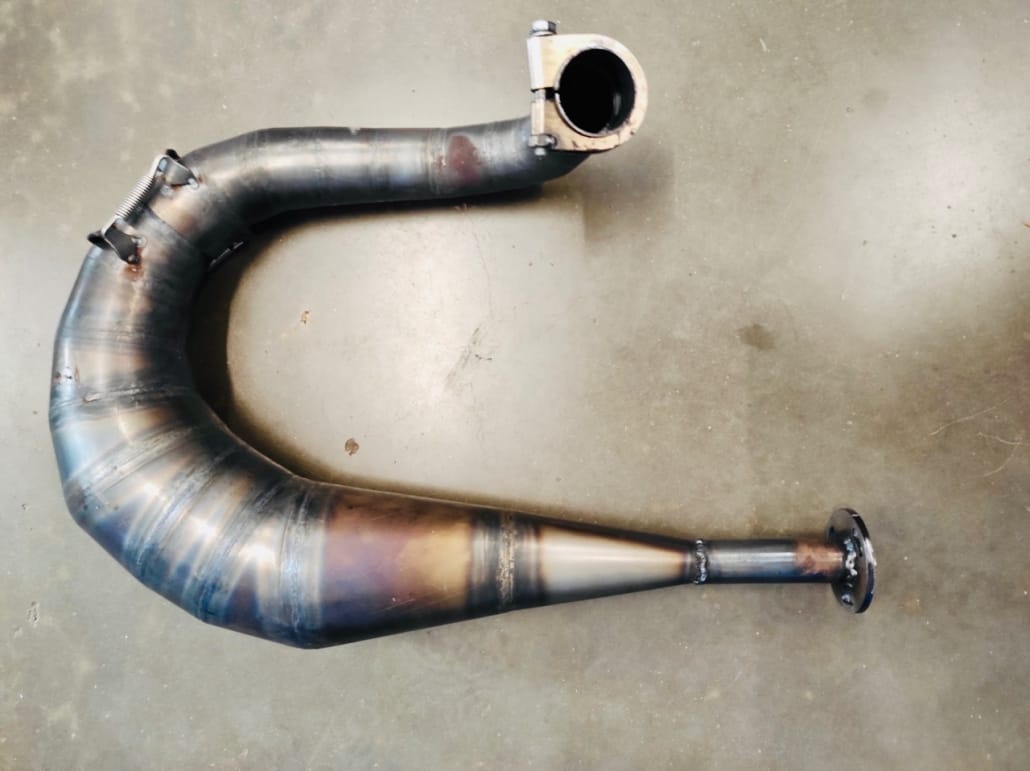
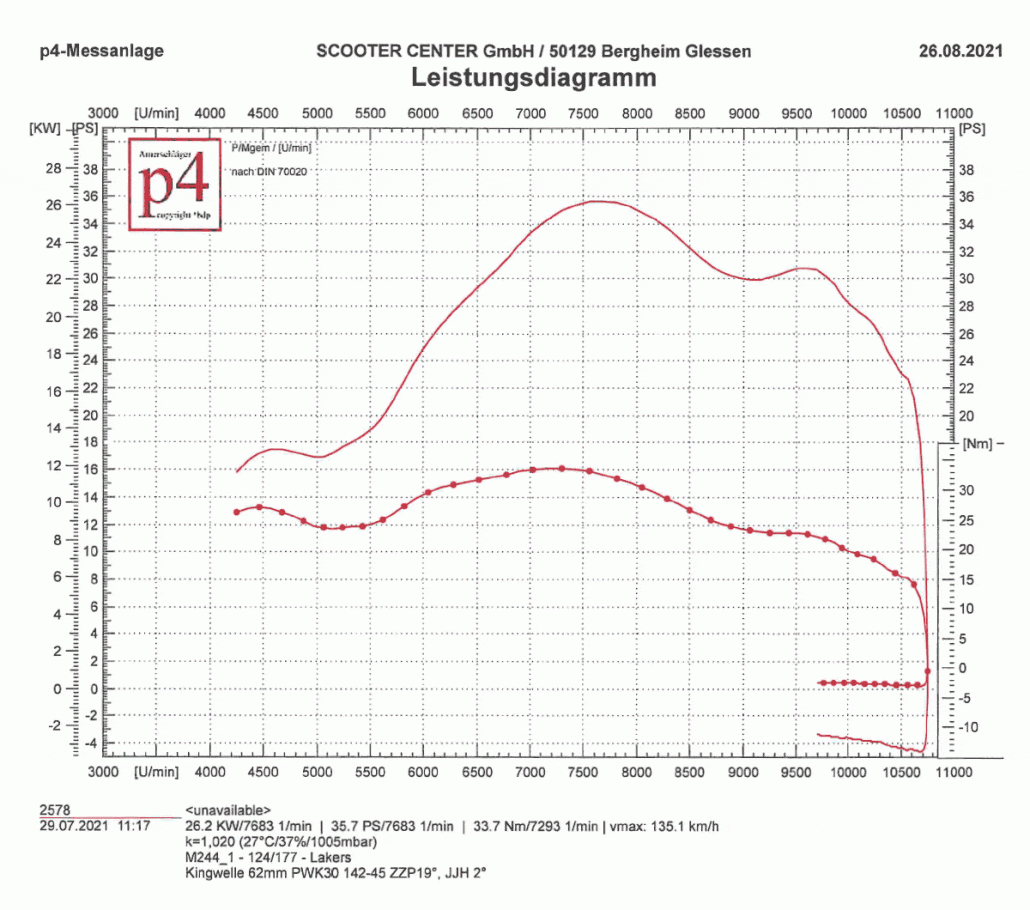
Lakers

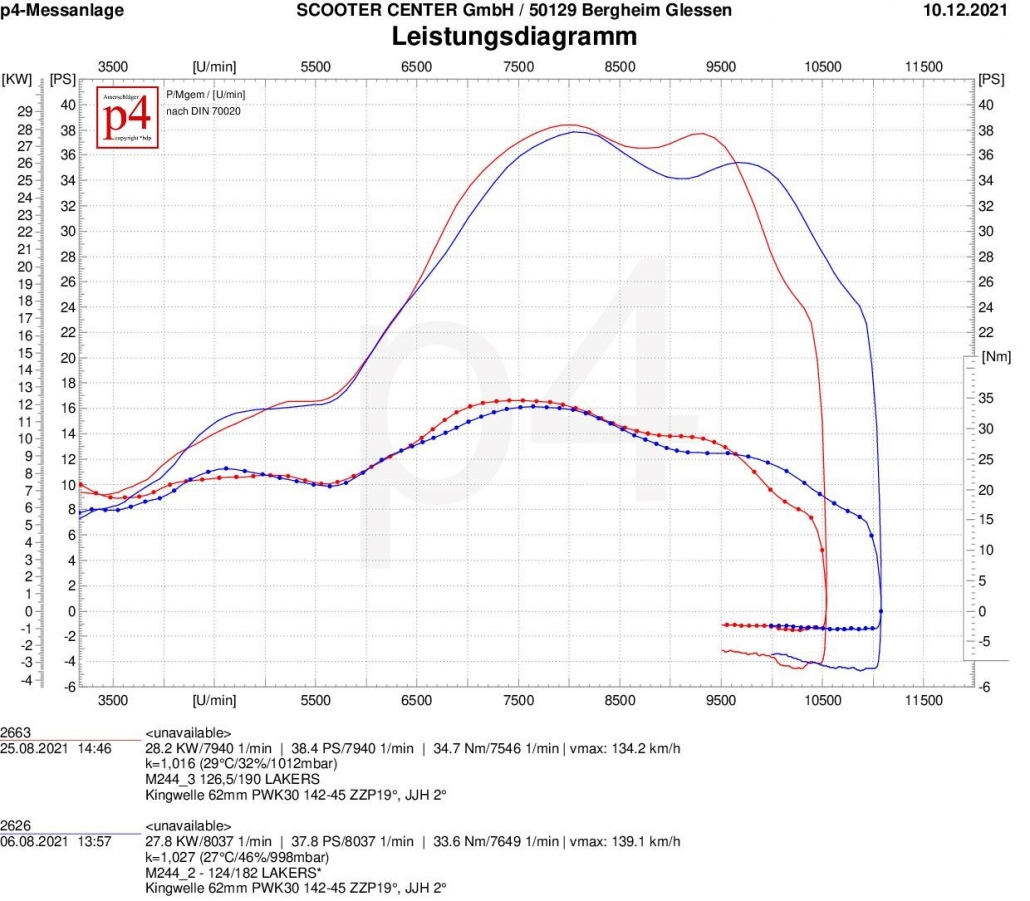
The Lakers, made for a lot more alert, don't like the slack head angles that much. The exhaust craves for larger time cross sections. The speed range shifts to lower speeds as expected, but the low time cross sections are not the right playing field for the Lakers. But his chance will come with the following expansion stages...


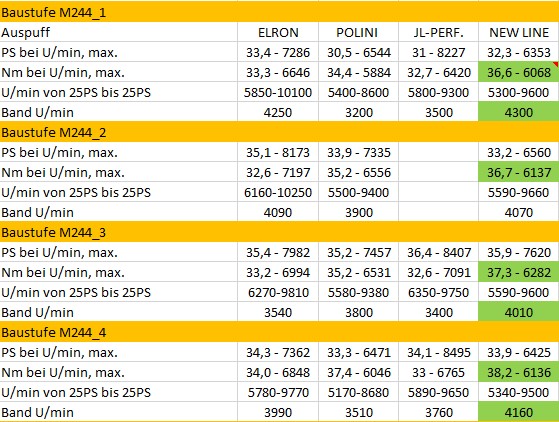
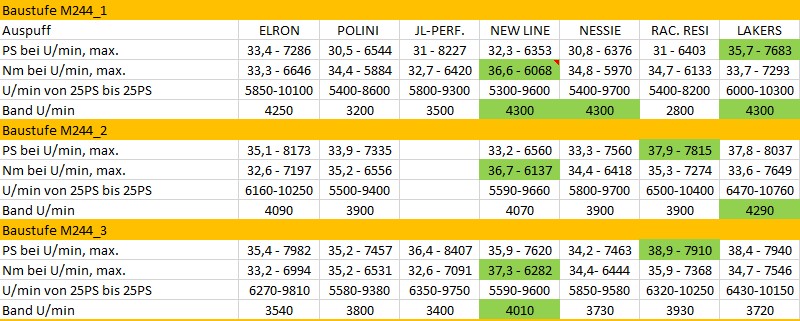
Here again all maximum values ​​in the overview

In the fourth part of our little blog series we make the following changes to our test engine:

The cylinder is attached at the foot with two 1mm Spacers increased by a further 2mm compared to level 0.5. This changes the steering angle of the transfer channels from 124° to 126°. The outlet is adjusted to a control angle of 190° by milling. To do this, the outlet in the cylinder was raised by 1.8mm. The outlet width remains unchanged at 57%.


The first attempts are made with the Elron


A little more nervous exhaust systems would show a clear shift in the direction of performance with the changes made, but the Elron is almost unimpressed by the specifications of the cylinder and retains control over the characteristics of the engine. A slight increase in the maximum values ​​after the decimal point only indicates that the Elron has noticed that the cylinder is sending a clearer signal through the exhaust. However, the maximum torque remains at the same level as in the first construction stage.
The available speed range is reduced by 500 rpm to 3540 rpm.


Polini box


As a box exhaust, the Polini exhaust system reacts more as expected. Similar to the Elron, the can from Italy only shows small reactions. The lower effective compression makes the curve dip a bit in the rise between 4000 rpm and 6200 rpm. The system converts the slightly increased time cross-section at the outlet window with a gain of just over one horsepower at peak.
The maximum torque remains the same at 35.2Nm and is only shifted by a few hundred revolutions in the direction of higher speeds.
With a bandwidth of 3800 revolutions, the Polini system is slightly behind stage 2, but this test shows that the box does not necessarily prefer the very small steering angle. In a direct comparison to stage 1, the bandwidth and maximum values ​​have increased significantly.


JL left hand / JL performance


Our test subject had a short break in the previous construction stage due to appointments away from home; but now plays again in the third construction stage. So here is the comparison between levels 1 and 2.
This also shows how clearly an exhaust can behave when it is operated from other steering angles. The JL, which is considered good-natured, turns out to be a very approachable partner in the search for performance.
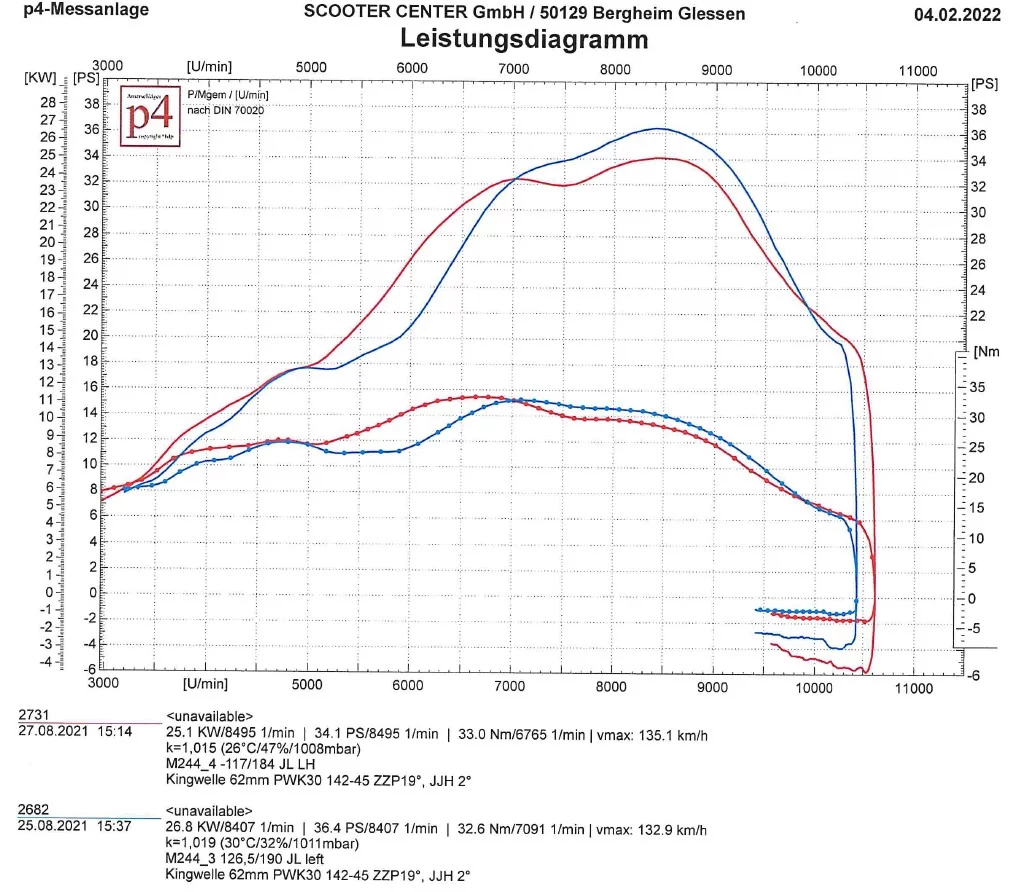
At the top, the JL provides almost five and a half more horses and climbs over the 36PS line in the graph. The torque remains at 32.6Nm at the same level as in the first attempt. However, the torque extends over a much wider range - beyond 7000rpm. The performance peak is reached with 36.4PS at 8400rpm. The JL falls below the 25 HP line considered in the bandwidth only beyond 9600 rpm and can therefore not be described as a lazy speed. In general, the graph shifts significantly in the direction of higher speeds. With a bandwidth of only 3400 revolutions, the JL even lags behind the Elron and brings up the rear in terms of bandwidth in this construction stage.


Scooter and Service Newline


The edgy powerhouse from the north feels really comfortable in this expansion stage and takes two best values ​​with it.
There are no notable changes in the rise in the newline, but it does quite a bit due to the larger advance angle in the engine speed range. With 37.3Nm, it takes the top position in terms of torque in the third construction stage. The available speed range is narrower compared to the previous tests, but here too the Newline achieves a range of 4000 revolutions. With these values, considerations germinate after a longer primary with 24-60 ...


Nessie


Like the Elron, the sea monster from Posch Performance is not quite sure what to do with the changed control angles. Maximum torque remains the same and peak power increases by one horsepower. While the Nessie was still way ahead in level 1 with 4300 rpm in terms of bandwidth, the available speed range in level three is a bit on the dip station and is in the upper midfield with 3700 rpm.


Racing Resi


The Racing Resi taste the changes better. Rather devoted to the higher control angles, the Resi develops one more horsepower at the top and adds torque, which hardly affects the bandwidth on the 25hp line. In absolute terms, the Resi holds the position of the highest peak power with 38.9 hp in this level. We are slowly approaching the 40hp mark with the expansion stages.


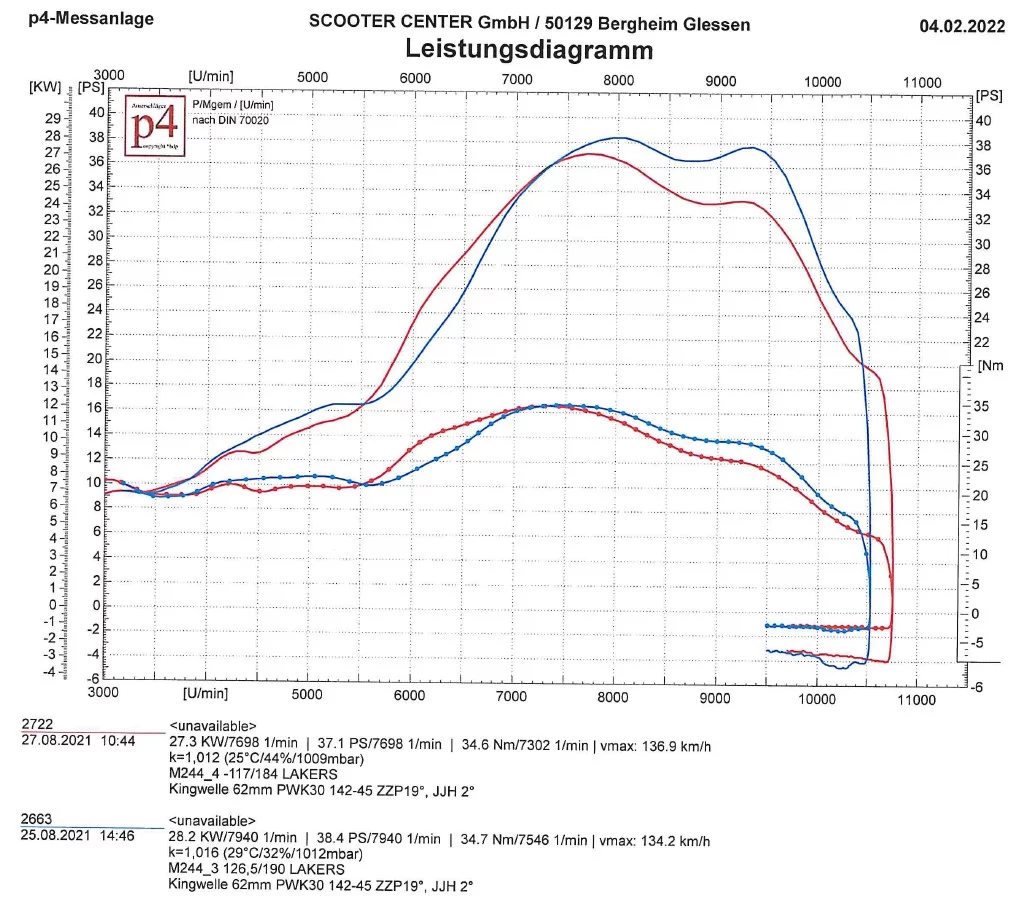
Lakers


With 126° to 190°, the Lakers are not yet playing in their comfort zone. Although it also clearly converts the changed control angles into performance. With 38.4 hp at the top, it is only just behind the Resi. With a speed range of 3700 rpm, which already extends to 10.100 rpm, the Lakers shows where the journey can go with suitable peripherals.

Here is an overview of the results. Best values ​​are highlighted in green.

M244 Quattrini cylinder Vesoa on the test bench

Quattrini M244 king shaft - the super tourer in the second expansion stage "outlet" M244_2

M244 - part 3

Im second part this Series we simply adapted the cylinder and the engine housing to each other and put the cylinder on the engine without further processing "Plug & Play".

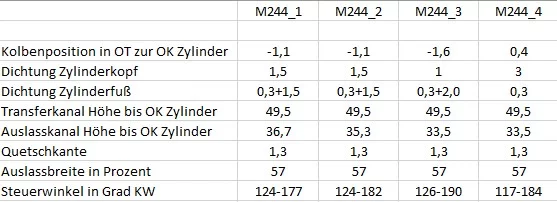
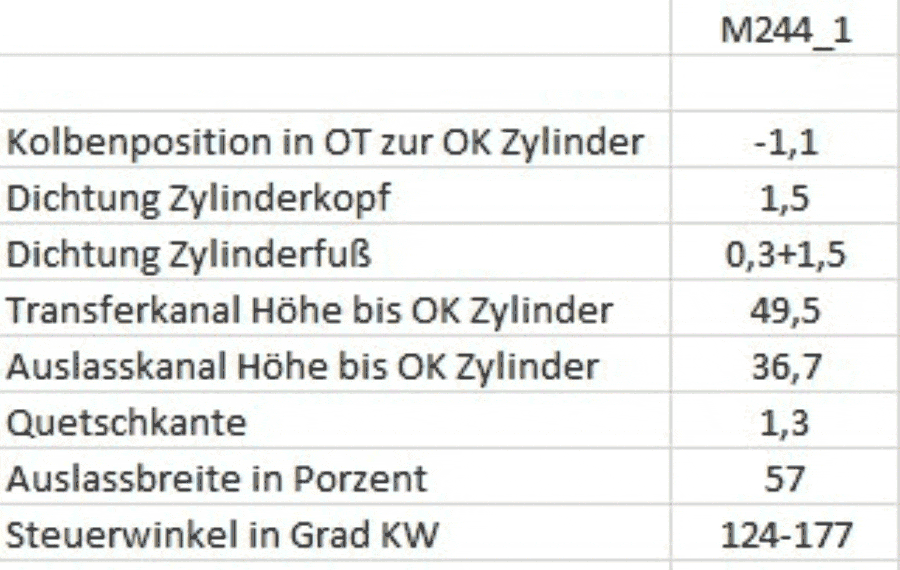
This resulted in very moderate control angles:

  • with 124 ° transfer angle
  • and 177 ° outlet angle

Some exhaust systems get along well with these short steering angles and thus provide quite astonishing performance.

On the other hand, the exhaust systems, which are trimmed more for performance, require larger steering angles.
In the course of the test series, the character of the performance curve of one or the other exhaust system will change.
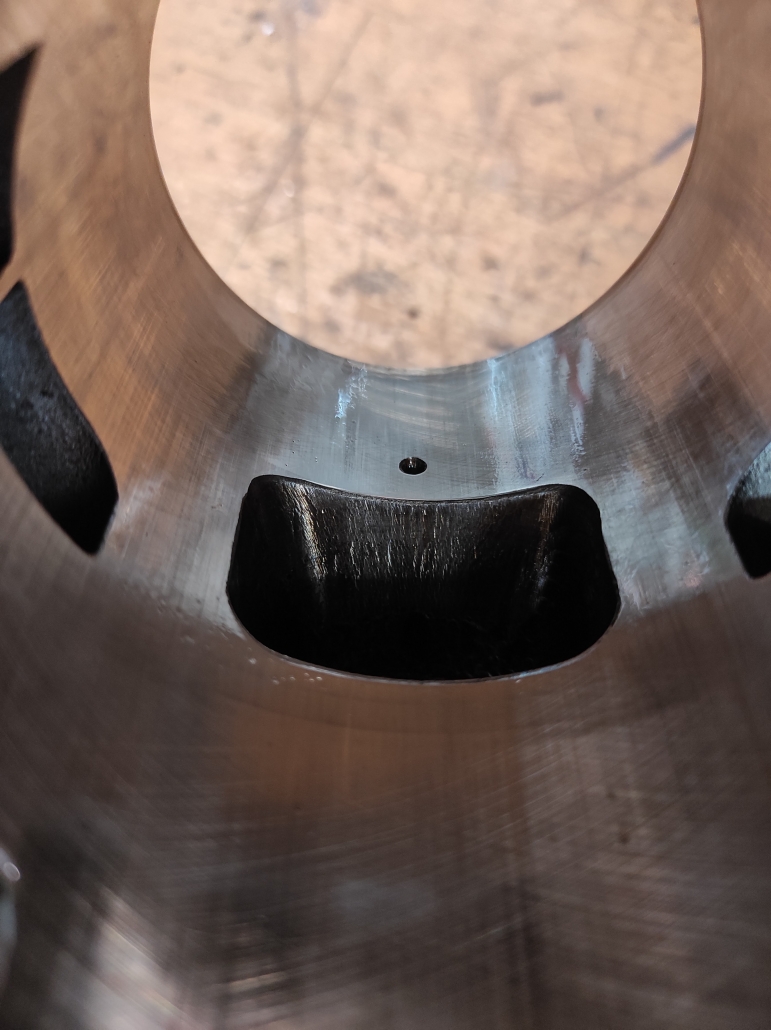
Therefore we remove some material from the M244 in the exhaust duct and set the upper edge of the exhaust to 182 °. The outlet width remains unaffected and remains at a chord dimension of around 57%.

As a spacer, we use 1.5 mm on the cylinder head and the cylinder base plus a 0.3 mm seal on the cylinder base. This means that the control angles remain at 124 °:

  • 124 ° transfer angle
  • 182 ° outlet angle
  • 57% tendon size

Cylinder cooling hood for the long M244 Quattrini

In the meantime we have also received a matching cylinder cooling hood from GRP specialist BSK. You can find the blog here -> QUATTRINI GRP CYLINDER HOOD


TEST ELRON

The Elron uses the larger steering angle rather cautiously. With a 1,7 HP increase in peak performance, a slight loss in torque and a little less band due to the 300 rpm later entry, the exhaust shows that it takes note of this requirement but does not yet represent the right playing field for the concept . However, the Elron takes this very calmly. Presumably, the exhaust will deliver a very pleasing performance curve even with significantly different control angles and thus the concept does not completely submit to the dictates of the control angle.

Test bench diagram as PDF:  M244_1_2_ELRON

TEST POLINI BOX

The Polini Box reacts very clearly to the small change in the outlet and provides a lot of power. The box adds over 3PS and not quite 1 Nm. The speed range is even wider by 700 rpm, whereby the graph does not even pass the 100 hp mark at 25 rpm until 5.500 rpm later and the output lasts significantly longer up to 9.400 rpm. The control angles of 124 ° to 182 ° seem to be clearly pleasant to the Polini Box.


Test bench diagram as PDF:  VGL_M244_1_2_POLINI

Test Scooter and Service NEWLINE

The Newline generally shows a different character in terms of power increase at small steering angles than the Elron or the Polini Box.

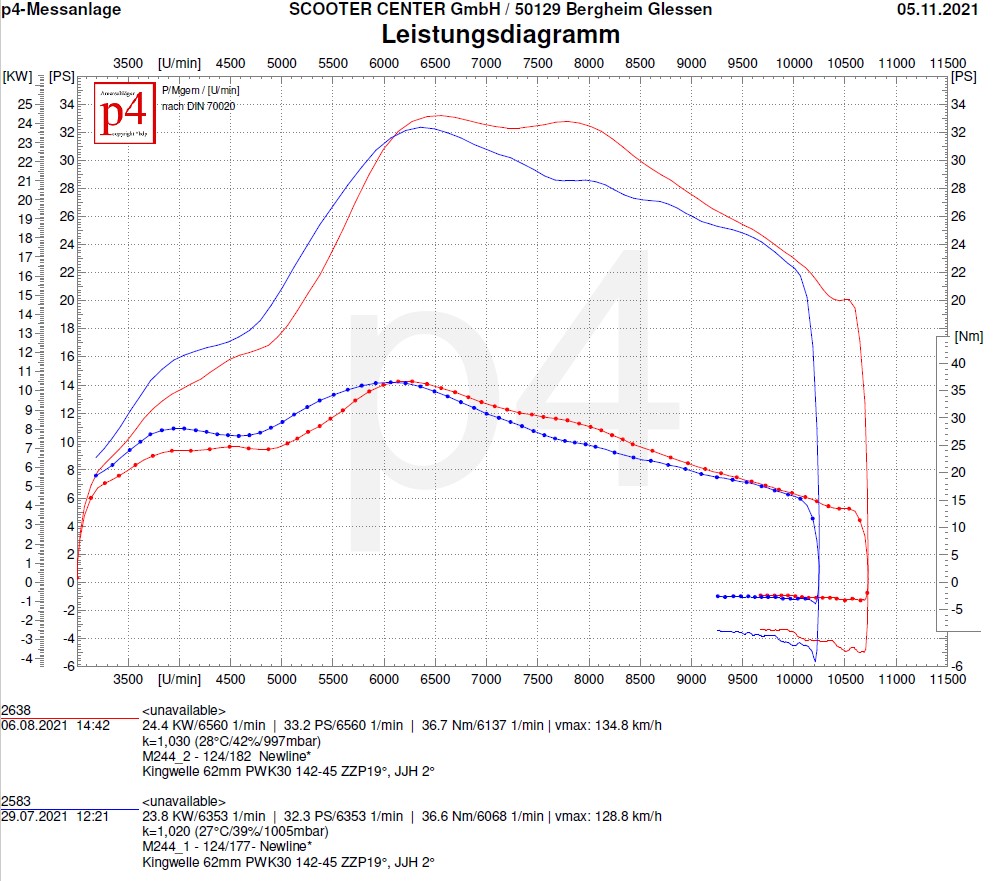
Similar to the Elron is the rather unimpressed behavior on the changed exhaust control angle. The peak power increases by almost one hp, the maximum torque remains almost identical and the speed range becomes somewhat narrower, as with the Elron, due to the later start of resonance. Even in the second expansion stage, the Newline retains the top position when it comes to torque with 36,7 Nm at 6.137 rpm.


Test bench diagram as PDF:  M244_1_2_NEWLINE

Test Posch Nessie

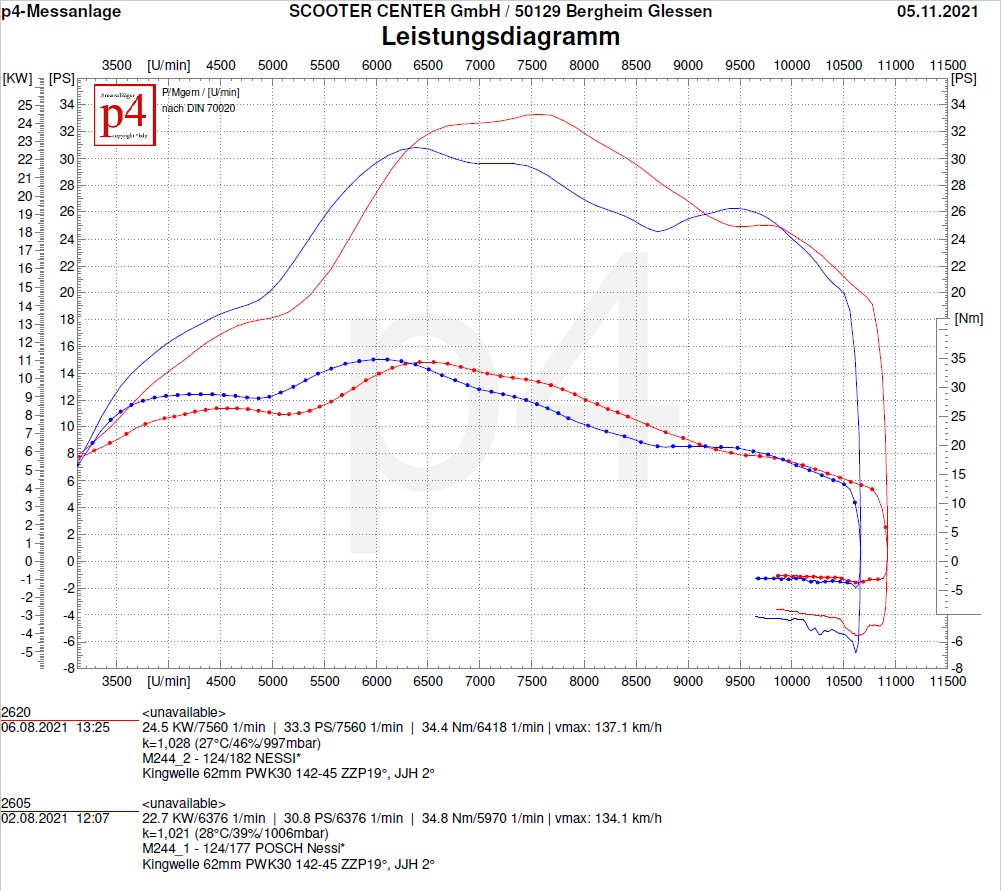
The Nessie, like the Newline, is intended for moderate control angles, and also shows the clear shift at the start of resonance. Viewed in absolute terms, the Nessie “only” adds 2,5 HP to the top, but in the range between 6.300 rpm and 9.000 rpm it can be clearly seen that the larger outlet angle significantly increases the performance over this range.


Test bench diagram as PDF: M244_1_2_NESSIE

Test Posch Racing Resi

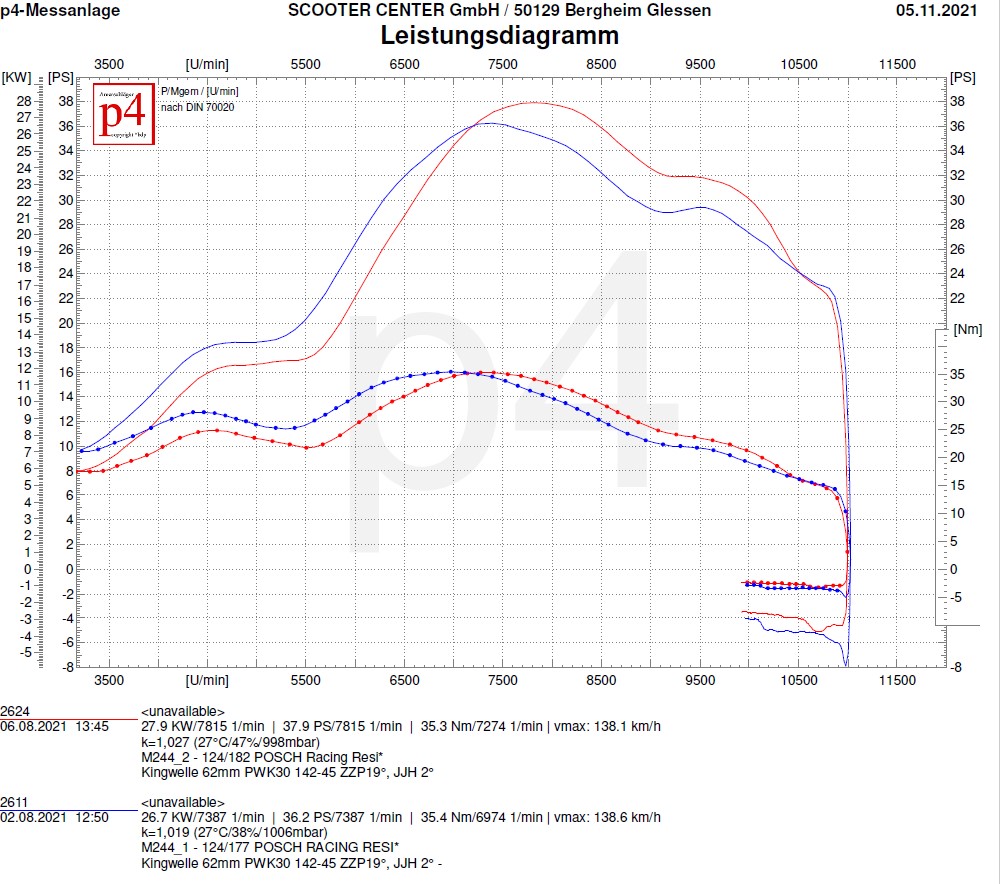
The Racing Resi with its imposing, bulbous appearance already gives the impression of performance and the greed for steering angles. Therefore, the slightly increased outlet angle is not enough to achieve absolute top performance. Here, too, the start of the response is much later. At its peak, the Resi increases by 1,7 HP and this can use the slightly increased exhaust control angle between 7.300 rpm and 10.000 rpm to increase power and torque.


Test bench diagram as PDF: M244_1_2_RAC_RESI

Kingwelle Lakers test

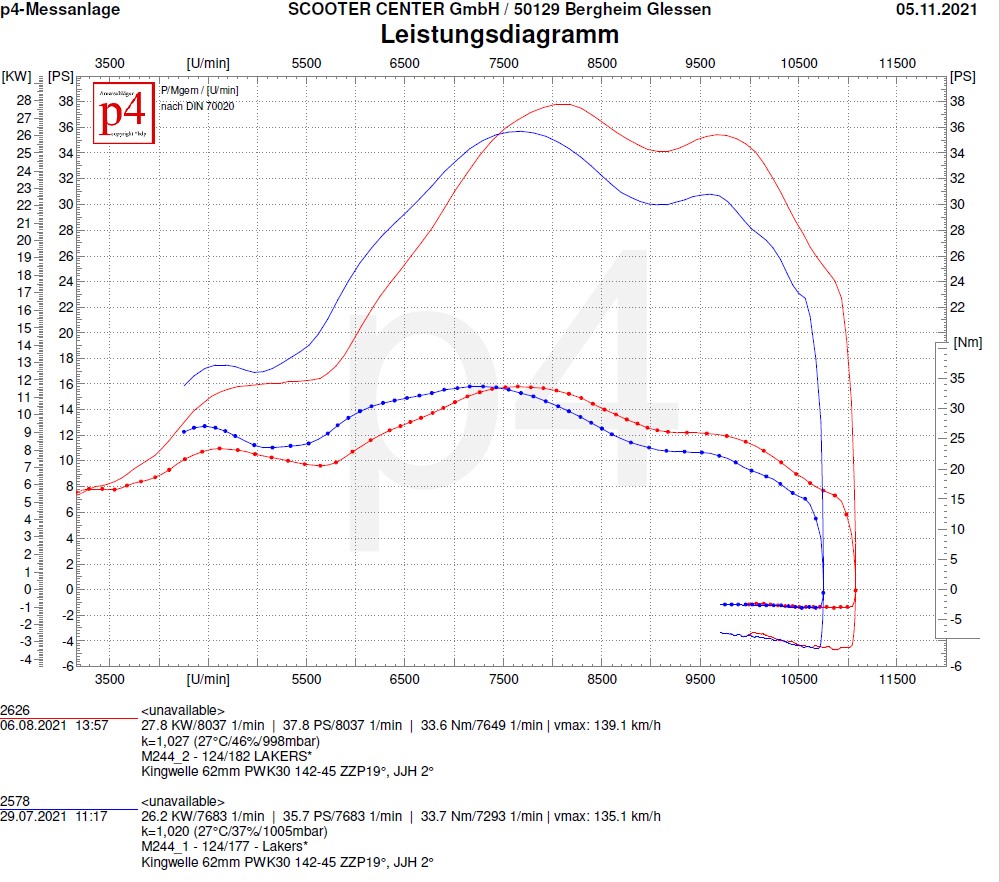
The robust racing exhaust from Lake Constance has already shown on the plugged-in version of the M244 that it is also a good all-rounder. As with all other tested resonance systems, the speed range also shifts in the direction of higher speed, but without the bandwidth being affected. With a band of almost 4.300 rpm, it provides the largest bandwidth in this expansion stage. With 37,8 PS at its peak, the Lakers, at least in this expansion stage, has to admit defeat to the Resi with 37,9 PS - but we are only just warming up on the subject of the steering angle.


Test bench diagram as PDF: M244_1_2 LAKERS

The results of the test bench runs, expansion stage 1_2

Here again the results in tabular form. The best values ​​are highlighted in green for each construction stage

Part 4 is already in progress ...


Quattrini M244 Kingwelle - the super tourer

Quattrini M244 king shaft - the super tourer in the first expansion stage "Plug & Play" M244_1

This is part 2 of this Quattrini M244 - Series. In this first construction stage, M244_1, we have the M244 without any further changes, only with spacers on the cylinder head and the cylinder base our engine eingerichtet.

We have entered the resulting control angles in the list for the test plan.

In terms of design, this setup is in the middle of the range of expansion stages.


We have the control angle in the list for the test plan

TEST POLINI BOX

First we send the all-purpose weapon from Polini into the race.

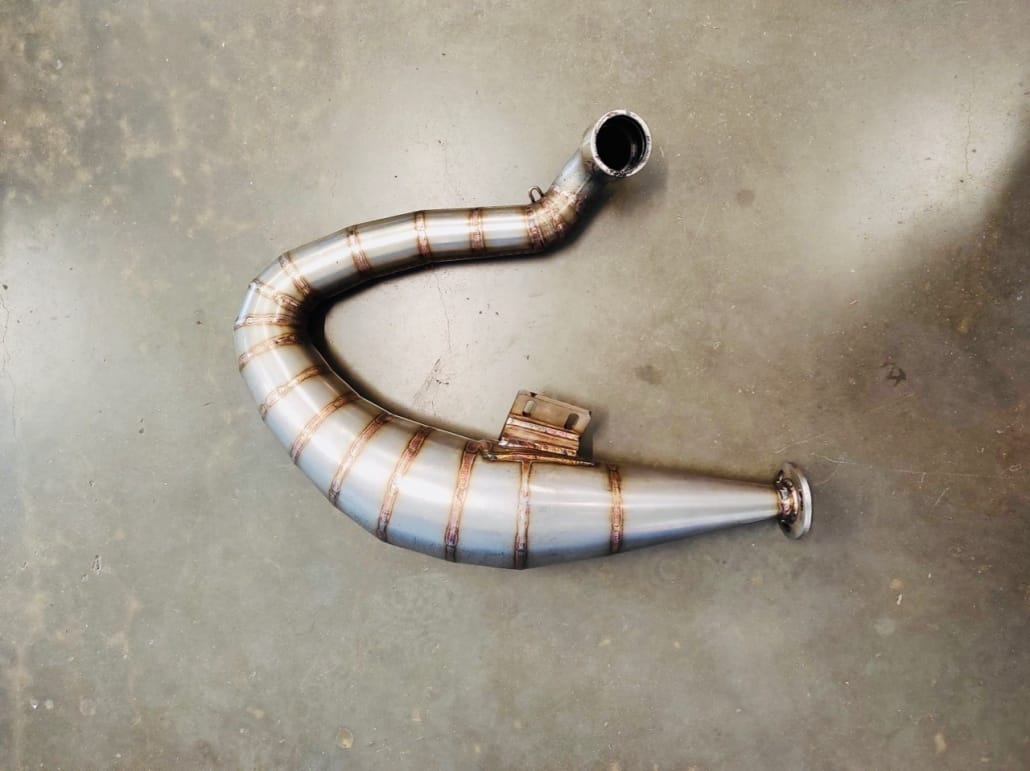
Polini box exhaust Vespa

Performance diagram Polini exhaust on Quattrin M244i

Test bench diagram POLINI BOX exhaust on Quattrini as PDF: M244_1_POLINI

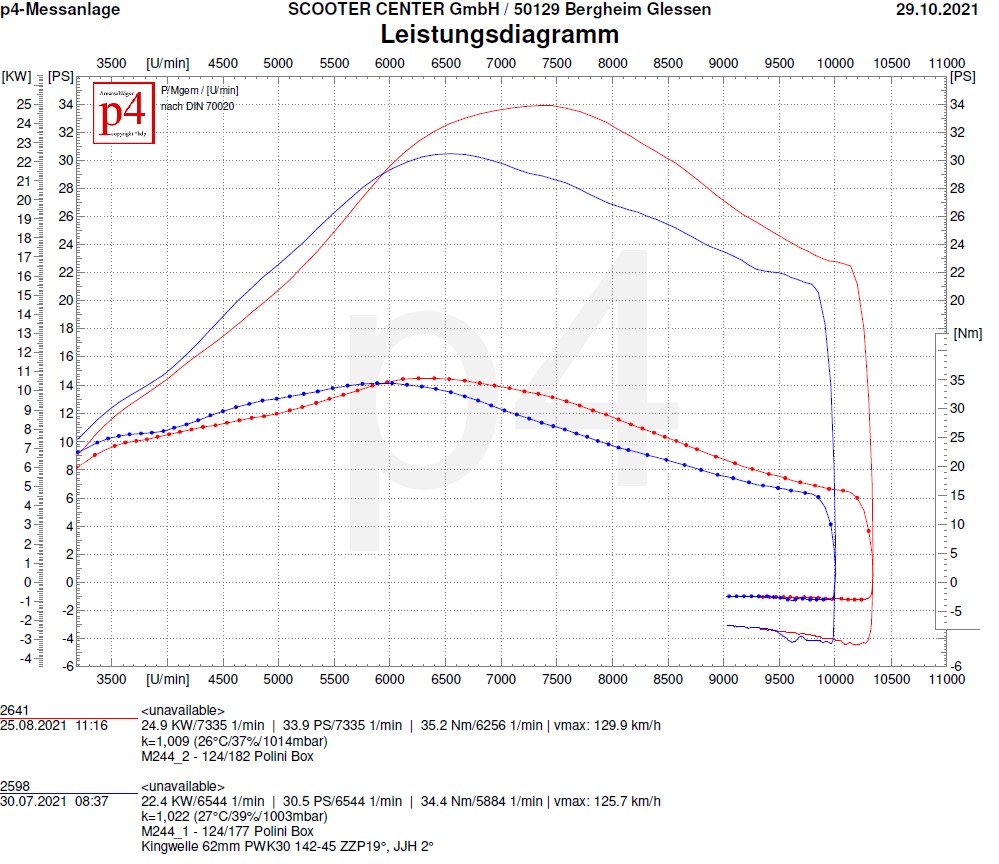
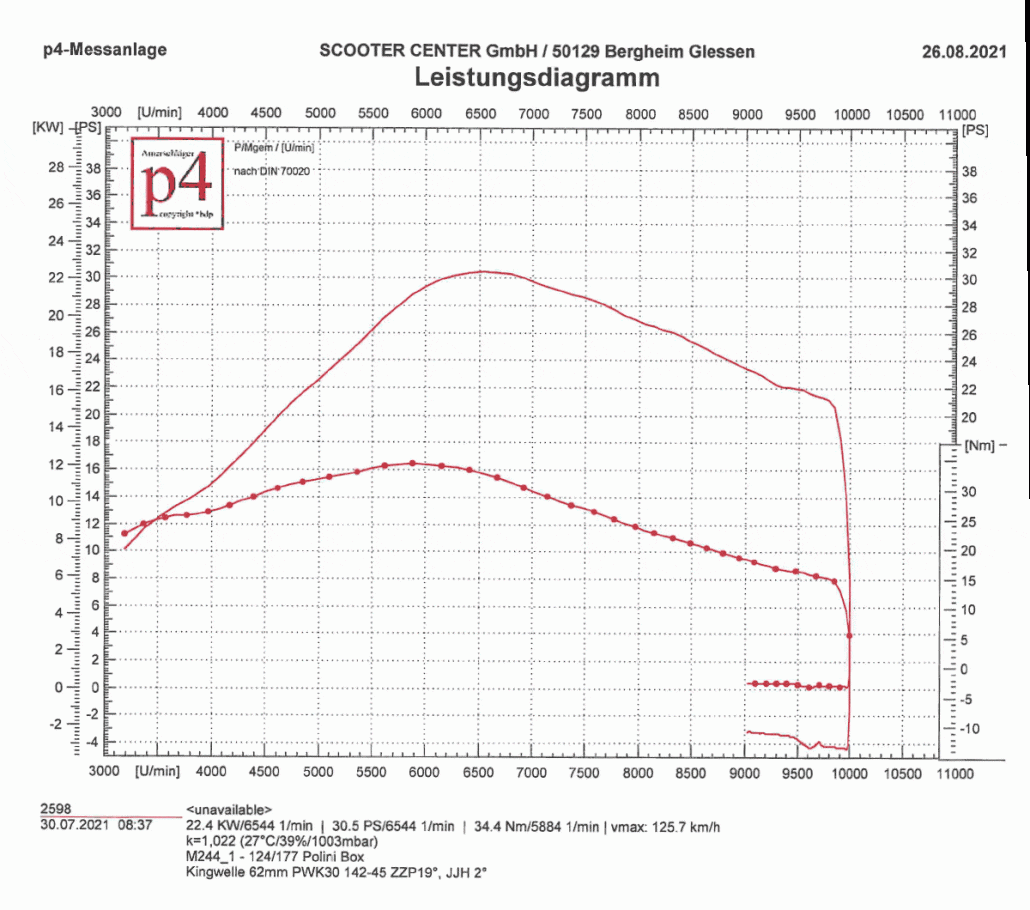
The result is quite clear. Already at 4000rpm there are 15 HP and 26Nm on the rear wheel.

The maximum values ​​are 30.5PS at 6500rpm and 34.4Nm at 5900rpm.
Even at 9500rpm there are still 22PS on the rear wheel. This constellation already calls for a longer primary translation.


TEST FALKR ELRON

The next test subject comes from FalkR and listen to the name Elron's.

Performance diagram FALRR ELRONi exhaust on Quattrin M244i

Test bench diagram FALKR ELRON exhaust on Quattrini as PDF: M244_1_ELRON

With regard to the maximum values, the Elron ranks as real resonance exhaust already above the Polini Box. But the tide is turning only beyond the 6500rpm in favor of the Elron. In the range before 6500 rpm, the Polini Box has the lead here. After passing the 6500rpm mark, the Elron gains significantly and is above the Polini Box up to the end of revs beyond the 10500rpm.


TEST JL PERFORMANCE

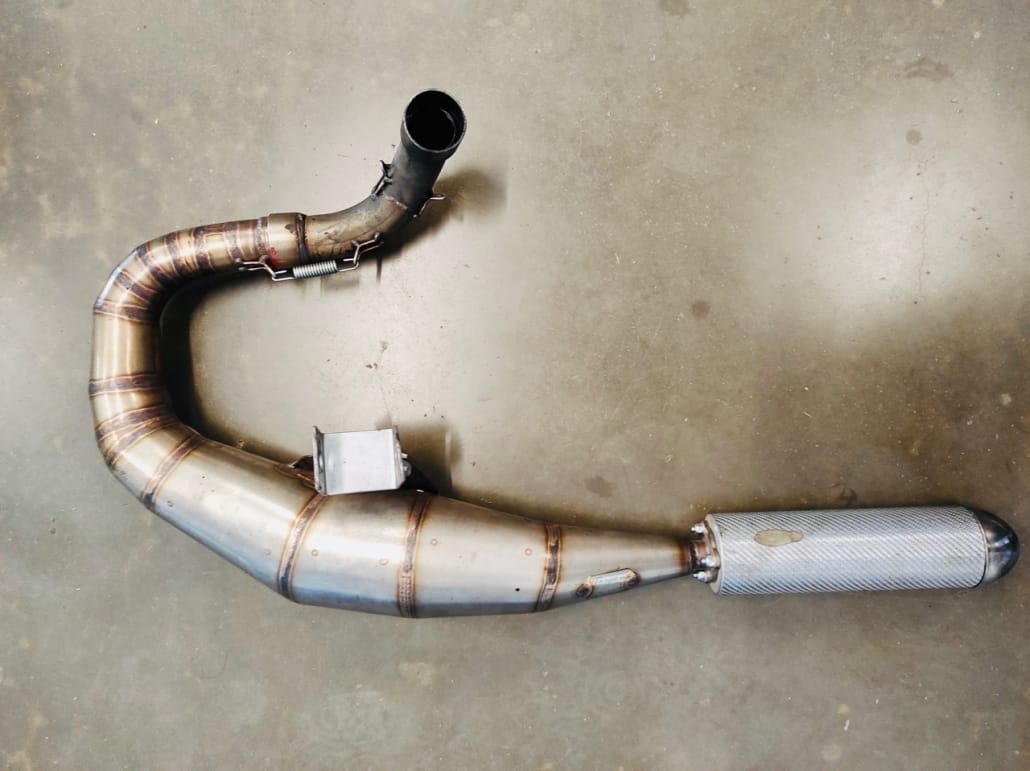
Another old friend is that JL performance.

JL performance

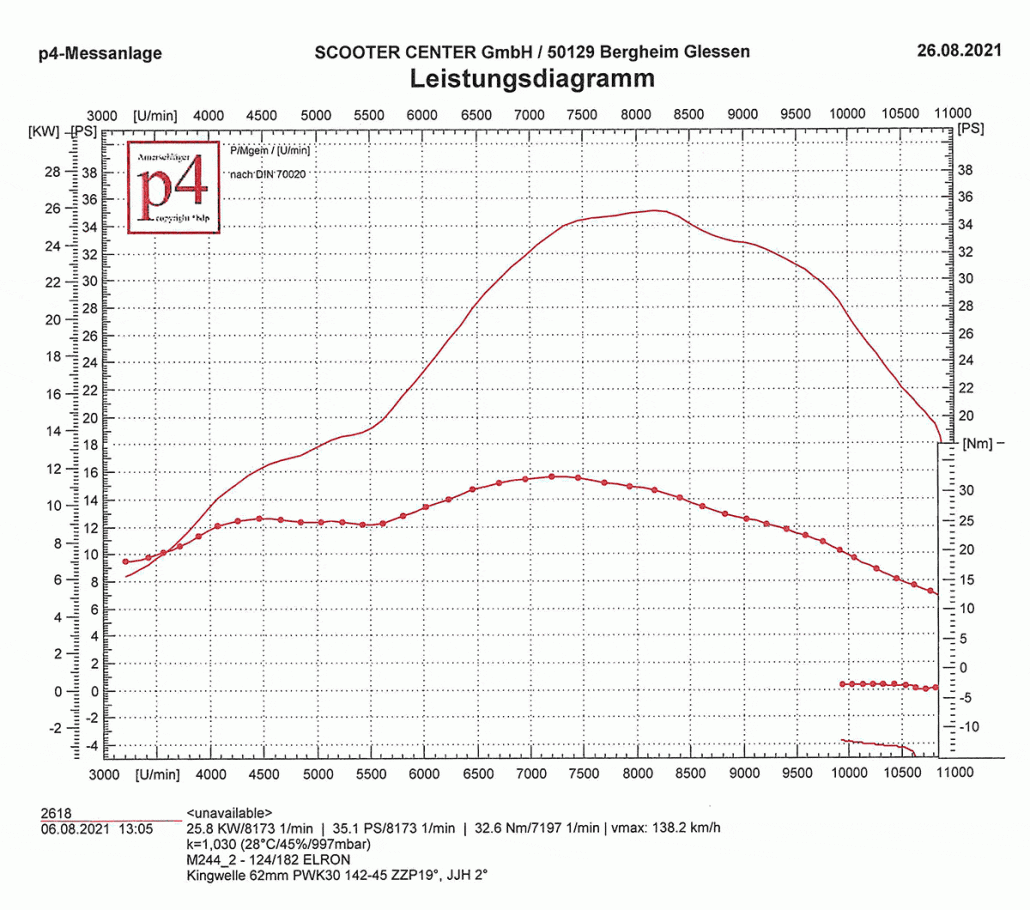
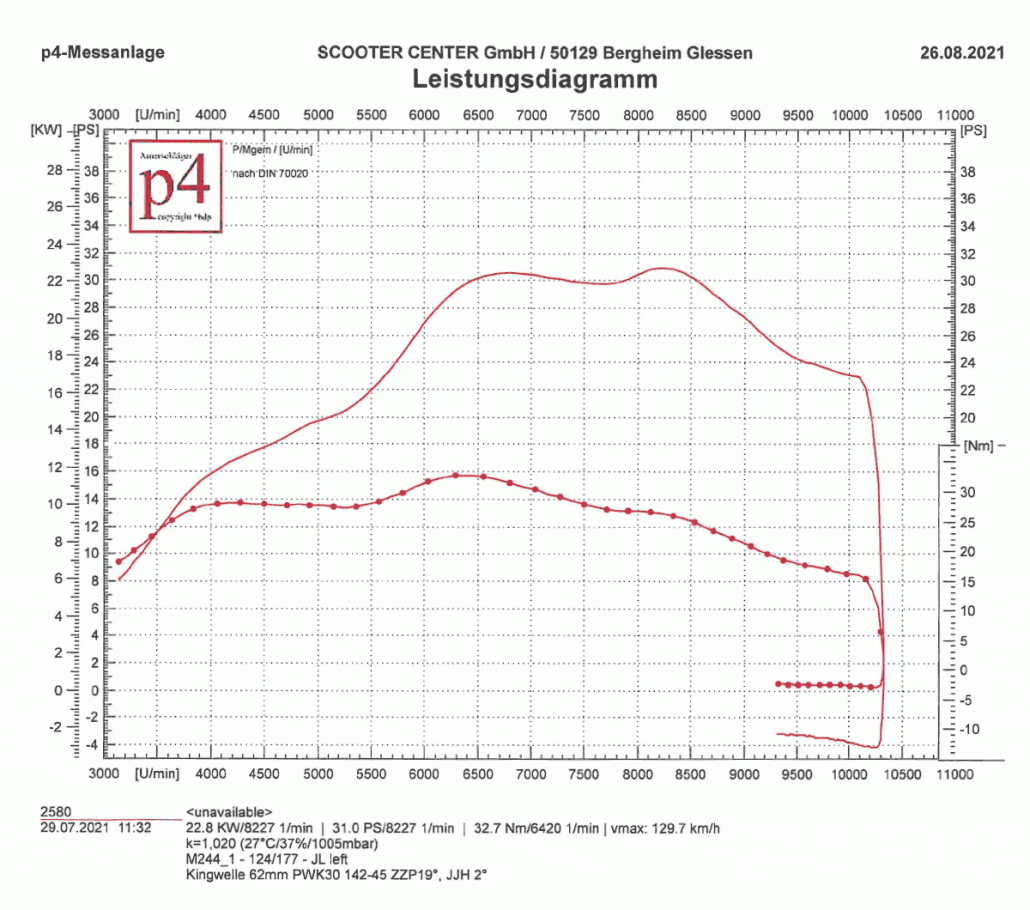
Performance diagram JL PERFORMANCE exhaust on Quattrin M244i

Test bench diagram JL-PERFORMANCE exhaust on Quattrini as PDF: M244_1_JL_LH

The somewhat outdated concept of the JL still delivers reliable values ​​today. The JL does not cope with the first stage of the engine quite as well as the Elron. With 31PS at 8200rpm, that's something like suffering at a high level. The rather gentle entry and a good performance of 16PS at 4000rpm make the JL a very drivable exhaust with a good start in Reso optics.


TEST NEWLINE SCOOTER & SERVICE

The Newline exhaust from Scooter & Service is with us in Scooter Center Shop .

SCOOTER & SERVICE NEW LINE

Performance diagram SCOOTER & SERVICE NEWLINE exhaust on Quattrin M244i

Test bench diagram NEWLINE exhaust on Quattrini as PDF: M244_1_NEW_LINE

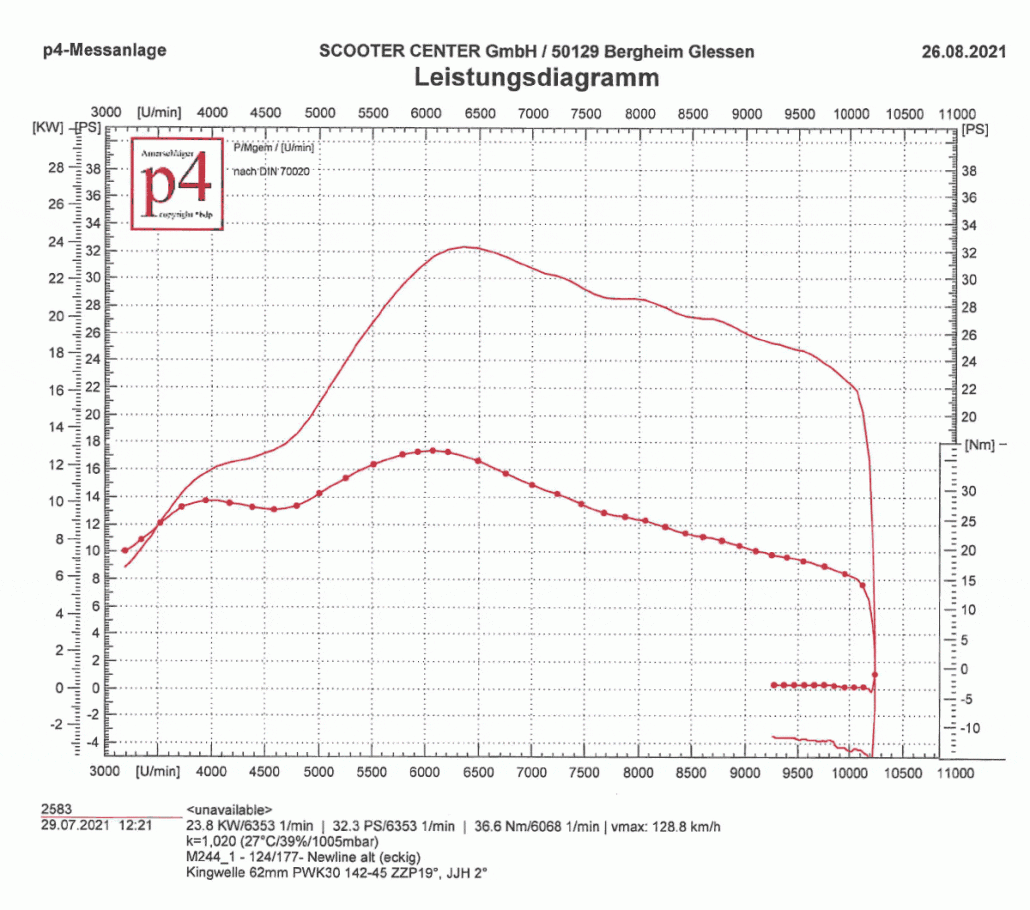
The new line of Scooters and Service from Hamburg already delivers its maximum power of 6300PS at 32rpm. Even if the playing field doesn't quite fit the Newline, which would like to see a little more steering angle, the manual work from Hamburg delivers a remarkable 6000Nm already at 36rpm. The torque beast in this expansion stage


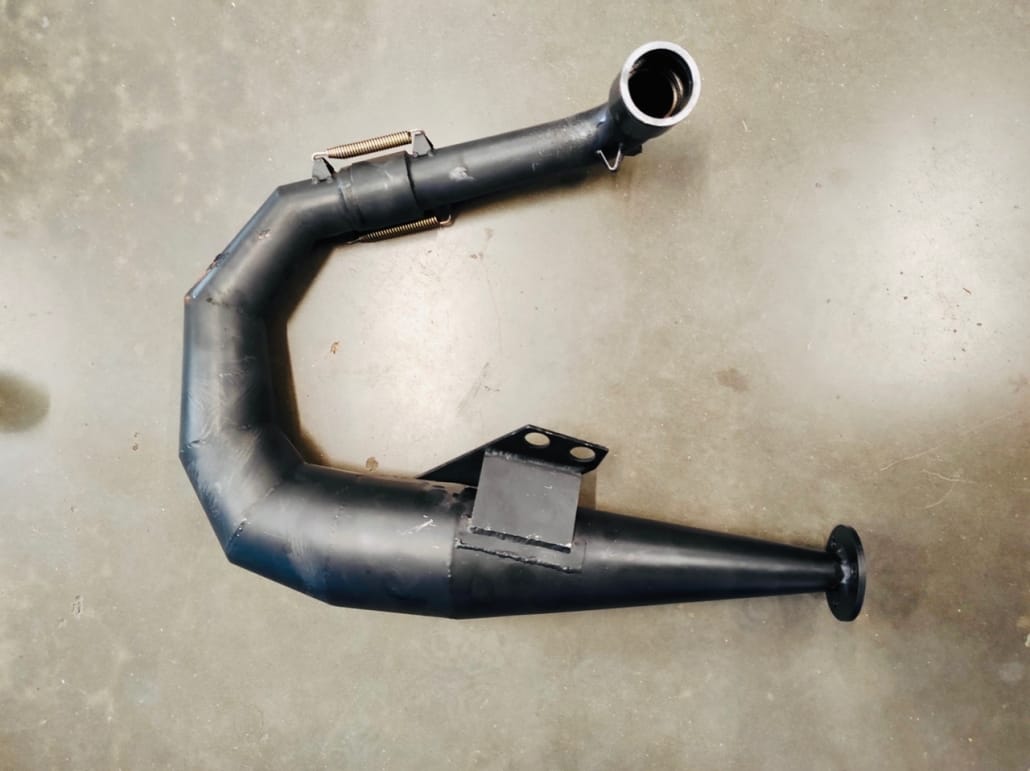
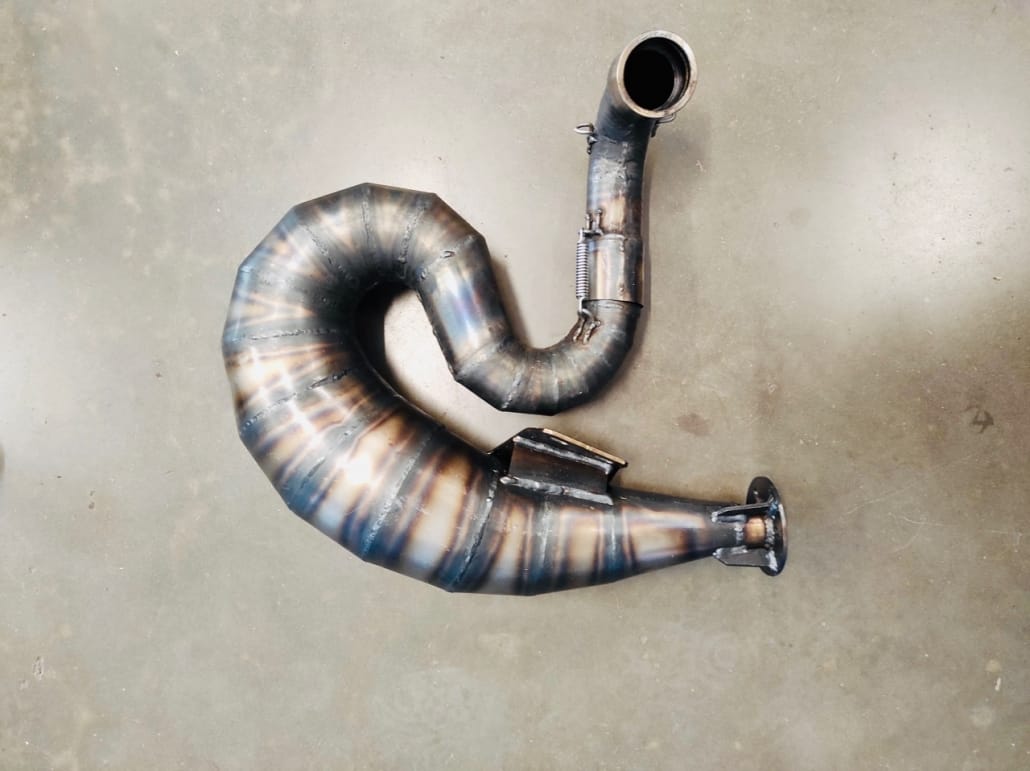
TEST POSCH PERFORMANCE NESSIE

As the first representative of the "Performance" department, we let Nessie from Posch Performance work on the M244.

Test bench diagram NESSIE - POSCH exhaust on Quattrini as PDF:

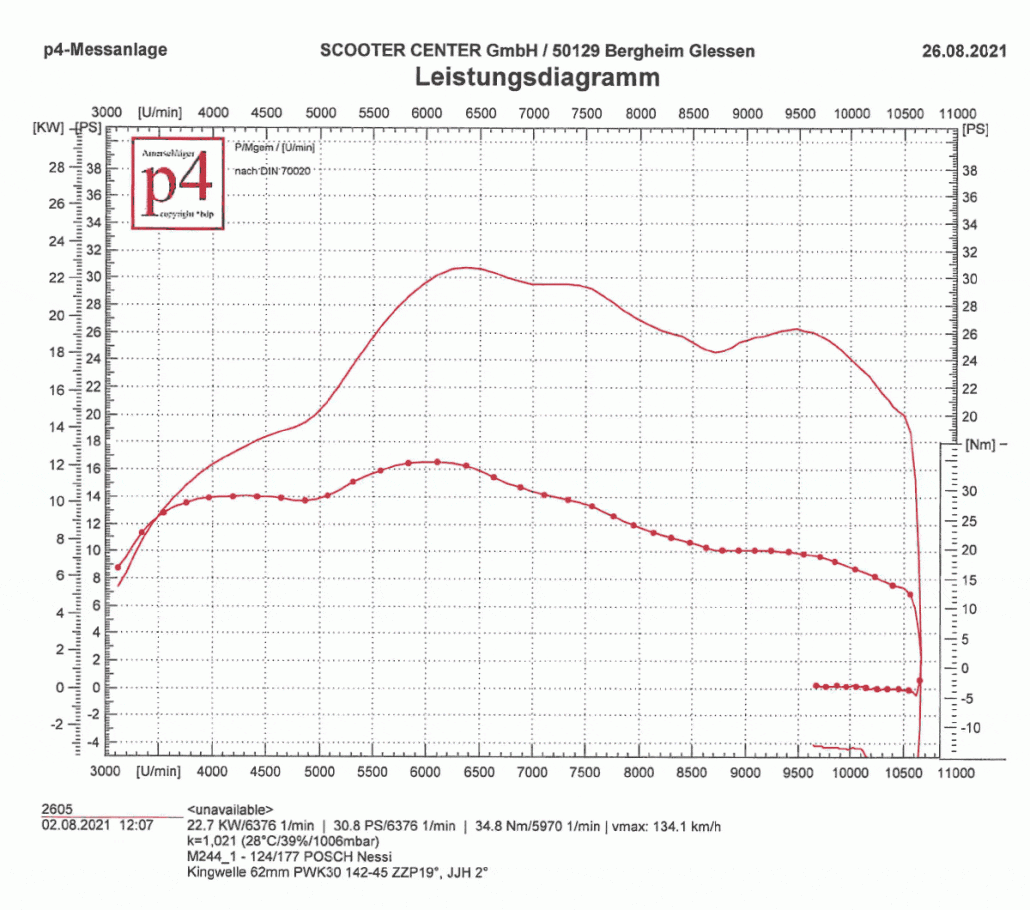
Test bench diagram NESSIE - POSCH exhaust on Quattrini as PDF: M244_1_POSCH_NESSIE

Until just before 6500rpm, the world is pretty fine for the Nessie. Then the curve takes a course that suggests that the Nessie would like to see significantly more outlet angles.

Nevertheless, the Nessie with 34.8Nm at approx. 6000 rpm can be counted among the clearly high-torque systems.


TEST POSCH PERFORMANCE RACING RESI

Of course we also tested the Racing Resi from Posch Performance.

Test bench diagram RACING RESI- POSCH exhaust on Quattrini as PDF: M244_1_POSCH_RAC_RESI

The Racing Resi from the same manufacturer runs very similar to the Nessie and also requires more ventilation over longer control angles. With almost 35Nm at 6100rpm, the Resi is also well ahead in the league of absolute torque animals.


TEST LAKERS KINGWAVE

The Lakers as a thoroughbred racing exhaust, stands well in the feed despite the high performance and engine speeds to be expected with the low control angles.

Test bench diagram KINGWELLE LAKERS exhaust on Quattrini as PDF: M244_1_LAKERS

With almost 36PS at 7700rpm, it is the front runner in terms of performance in this expansion stage.
In the later expansion stages, when higher control angles and a wider outlet come into play, this exhaust can probably live out much better.


Overview test run 1 Quattrini M244 exhaust systems

Quattrini cylinder M244 in the first construction stage, M244_1 "Plug & Play" without further changes only with spacers on the cylinder head and on the cylinder base on the Malossi engine and Kingshaft crankshaft adapted.

Exhaust comparison overview Quattrini M244


Be curious to see how the second expansion stage will continue ...

Alex builds a Quattrini engine

Vespa Quattrini M244 engine 252ccm - from super tourers to top racers

The story of the Quattrini cylinder

Towards the end of 2015, rumors grew that Max Quatrini launches a potent cylinder for the PX200.

The time has come at the beginning of 2016. The M232 and the big brother M244 are available on the market.

A construction that took some getting used to seemed to follow the concept, a cylinder with a maximum bore of 72mm in the M244 and without a supporting cylinder base.

Due to the design of the crankshaft by Quattrini, with a connecting rod of 126mm, which is rather long for the Vespa engines, the piston does not work so deep in the engine housing and therefore does not need a long, classic cylinder base.

Today, in 2021, the cylinder is enjoying increasing popularity due to its very high torque values ​​and the smooth-running design thanks to the long connecting rod of the Quattrini crankshaft.

Reason enough for us to build an engine with it and play through many possible scenarios for you and see what comes out of it. We have tested exhaust systems and carburettors for you in various stages of expansion.

In the delivery note attached here for our technology department, you will find all the components that we have used for this engine and that, in our opinion, function permanently with this concept.

200 test runs on our test bench

In total, we have over 200 test runs with the Quattrini M244 Completed on our P4 test bench with various engine expansion stages. We have more than 50km measured runs documented and almost 20 liters of fuel burned.
We would like to share the experiences gained from this test with you in this blog series.
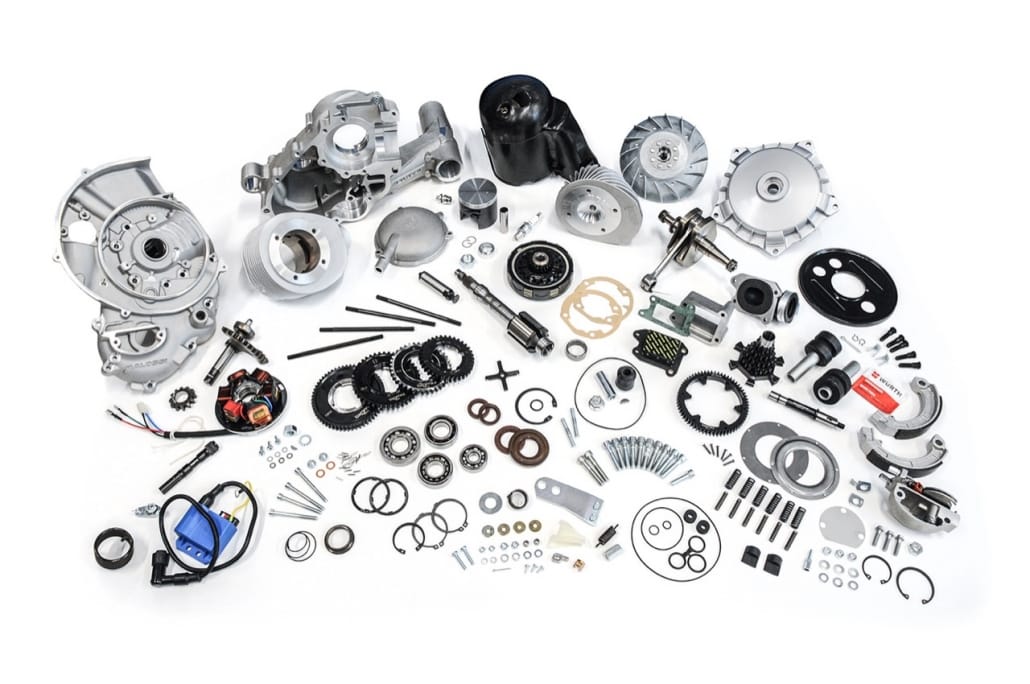
 

Quattrini Vespa Motor - All Parts


To select the parts:

The expected high torques of the M244 speak in any case for a reinforced motor housing.

The experience from many kilometers on the road with our own scooters has taught us that engines in the range from 22 to 25 HP can be implemented as "durable" in conjunction with a Piaggio engine housing.

Our M244 Quattrini cylinder but should be expanded a bit in the course of the test. This is why the choice here is a motor housing from Malossi with membrane inlet.

An Displacement of over 220ccm at erhigher engine speed, can no longer be supplied with sufficient fresh gas via a classic rotary valve on the narrow Vespa crankshaft. That's why we choose this Malossi motor housing with membrane control .

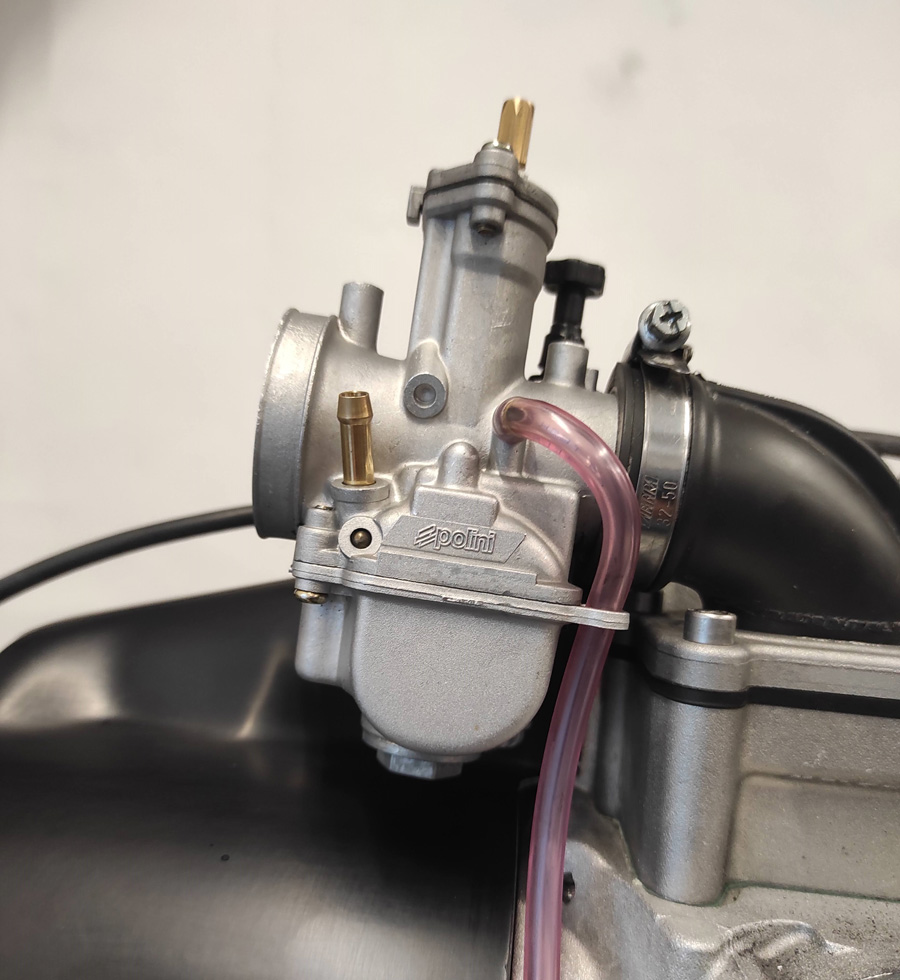
To make the fuel mixture we have one Polini 30mm carburetor used. In this experiment he stands for one Carburettor with 30mm bore. In the course of the tests, we also tried a PHBH30 in a counter-test. We will present the result of this in the following part of this blog series.

On the topic crankshaft we trust king wave. Here we find exactly what we are looking for to build a high-torque, smooth-running and durable engine.

The choice falls on one king wave with 62mm stroke and 128mm connecting rod. Due to the 2mm longer connecting rod and increased stroke, we have the opportunity to work with the control angles by moving the cylinder using spacers on the cylinder head and the cylinder base in the stroke direction. The longer connecting rod in connection with the weighty crankshaft also brings a significant plus in smoothness.

The stroke of 62mm results Cubic capacity 252,4ccm - already very promising to build a torque-oriented engine.

The ignition should keep our tourer running smoothly, so we chose the one here bgm ignition with our PX pole wheel with a mass of 2300g.

The performance of the 252ccm unit is controlled by a bgm superstrong Clutch, the bgm primary 25-62 and one bgm Transmission with the graduation 12-13-17-20 passed on to the rear wheel. The short, fourth gear on the auxiliary shaft keeps the most frequently used gear more stable. With one tooth less in fourth gear, the teeth become significantly wider in the tooth base and thus offer a significantly higher load capacity than the variant with a gear wheel with one more tooth.
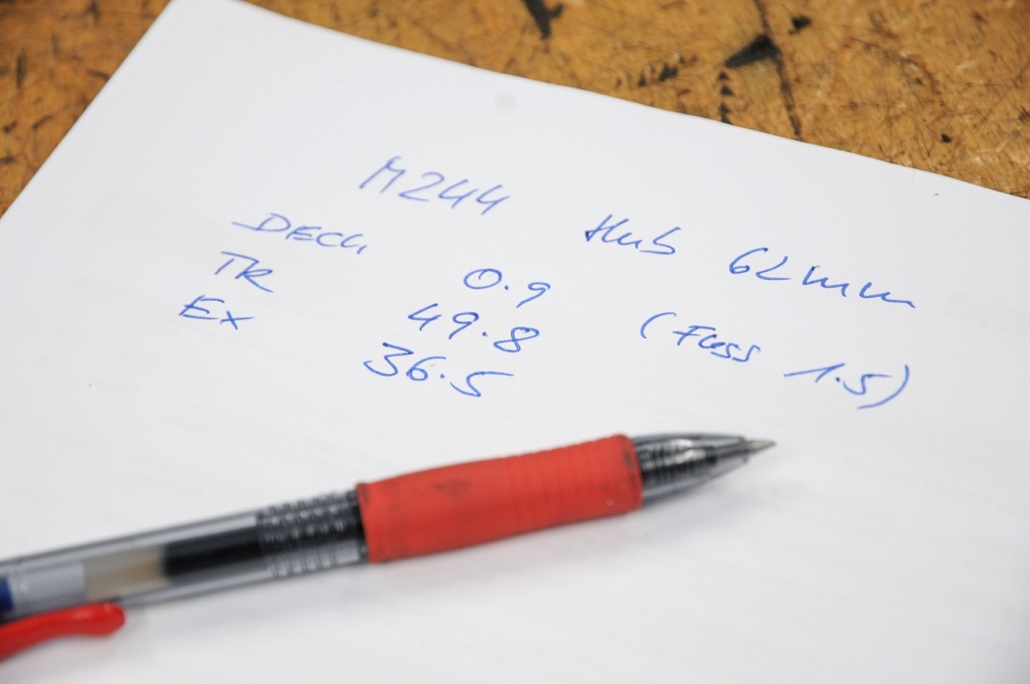
 

Concept and test plan

The requirement for the test setup is that we work from a rather good-natured touring design to a sporty design. Just to be able to depict a section through the possible variants. As a starting point for the test series, we set a basis with small control angles in order to be able to test as many sensible variants as possible later

To determine a starting point, the crankshaft is mounted with bearing dummies and the cylinder is attached to determine the control angle.
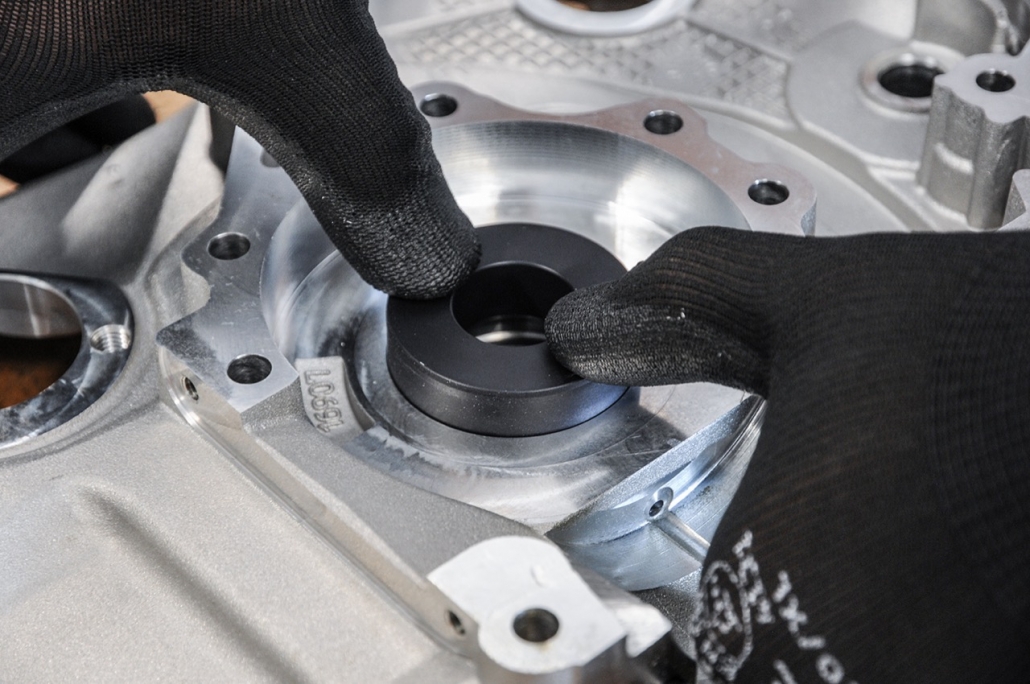
Based on this initial data, we can consider to what extent we can sensibly set up the cylinder with spacers and work on the outlet in later stages of expansion.
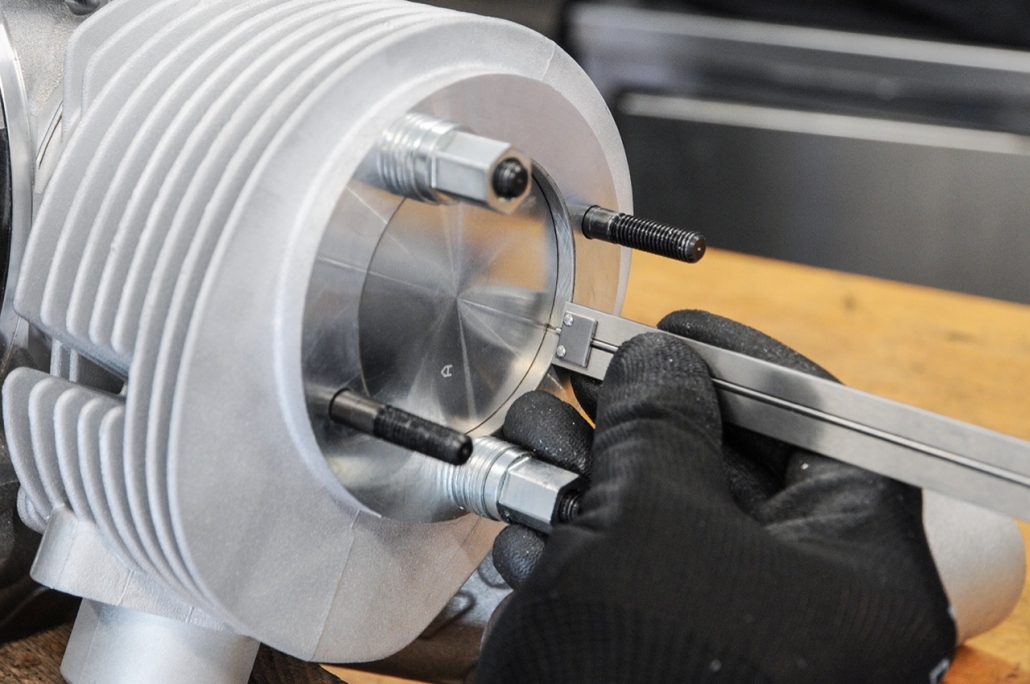
After measuring back and forth a bit, we decide to start from the middle position of the control angle with one Transfer angle of 124 ° and a Outlet angle of 177 °.


Assembling the engine

Dream team: Malossi | bgm PRO | Kingwelle | Quattrini

The factory new Malossi motor housing will be finished by king wave for the crankshaft with 62mm stroke and the enlarged diameter of the crank webs with 99,4mm. The bearing seat for the bearing on the alternator side is also checked and reworked in individual cases, as the bearing seat is manufactured by Malossi with a very tight tolerance.

We also offer the completely machined housing with a high-quality crankshaft from Kingwelle as a set. We use the set for this engine KWM46228.

The one attached by Malossi Bearing Kingwelle does not recommend 6205 for the alternator side. We follow Kingwelle's recommendation and use a here NU205.

Before inserting the bearings, we process the motor housing and adapt the cylinder and the overcurrent ducts to each other. On a Piaggio engine case, this tends to degenerate into an evening event. The Malossi housing is already designed for the channels of the Malossi Sport and MHR cylinders and requires little rework for the Quattrini M244. Most of the work goes into removing the sealing surface on the cylinder base, which allows the M244 to be used on Piaggio engine housings.

Adjusting the transfer channels to the motor housing is done quite easily. The cylinder base seal shows how little needs to be adjusted here.
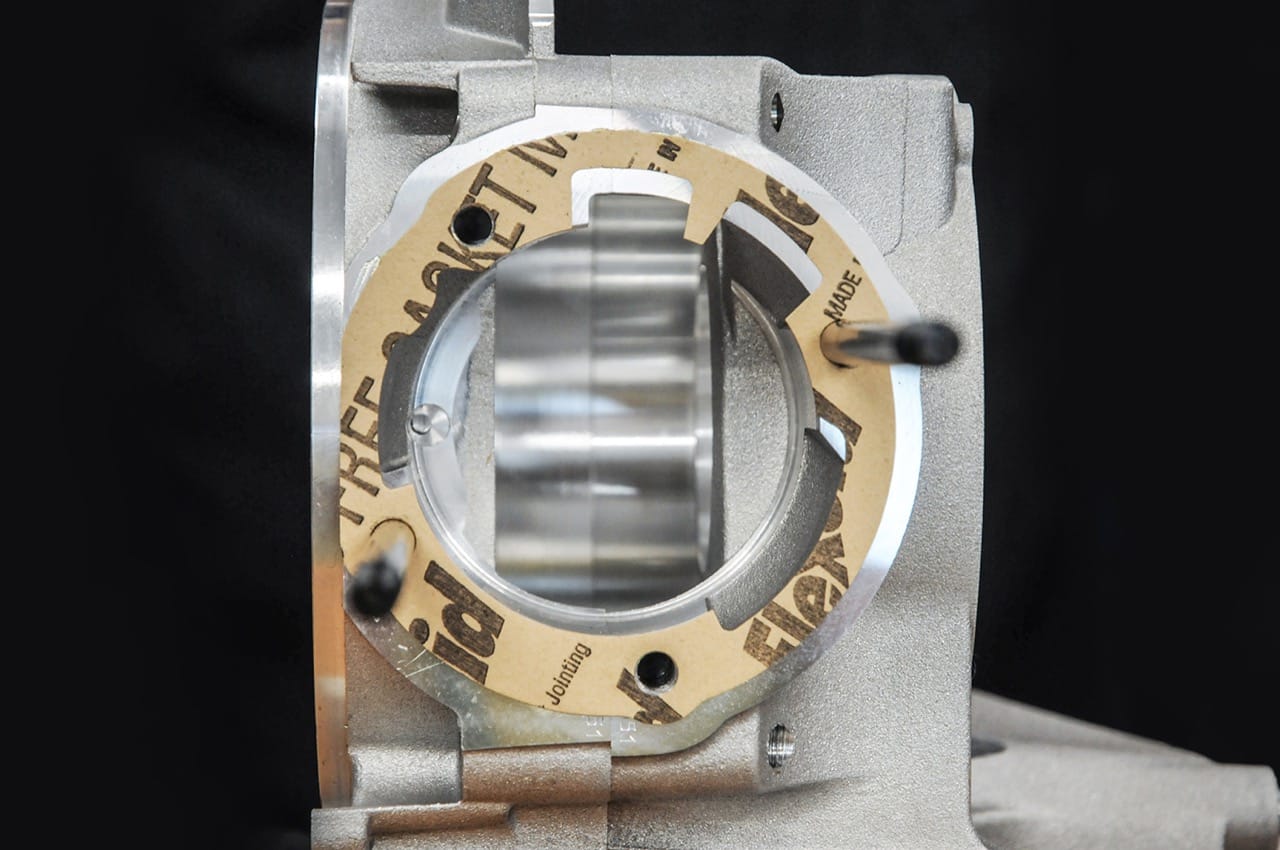
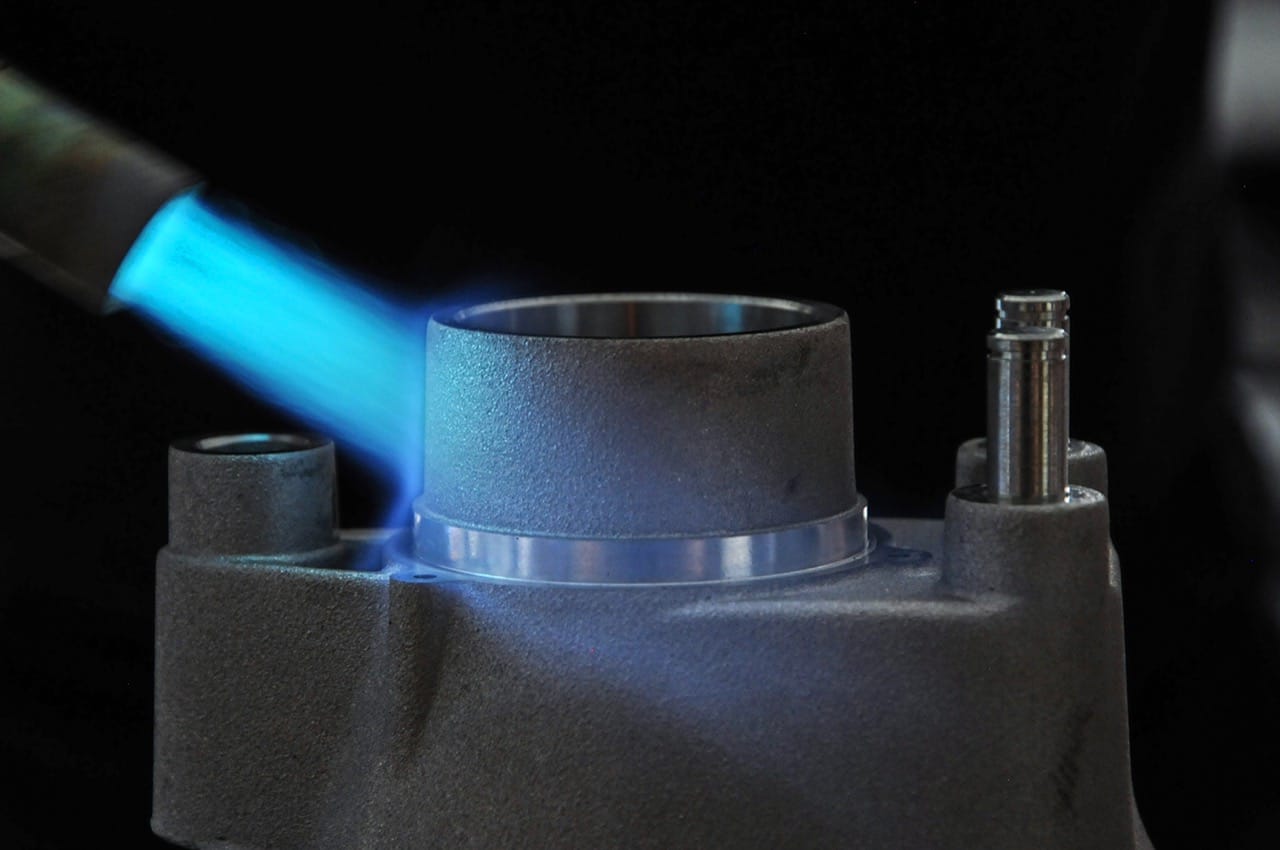
All bearings are traditionally used by shrinking in order to avoid damage to the bearing seats by simply pulling in the bearings. The shrinking or cold / warm process offers the advantage that no mechanical stress acts on the surface of the bearing seats and the seat is not widened as a result.
 

Wandering Malossi engine cases

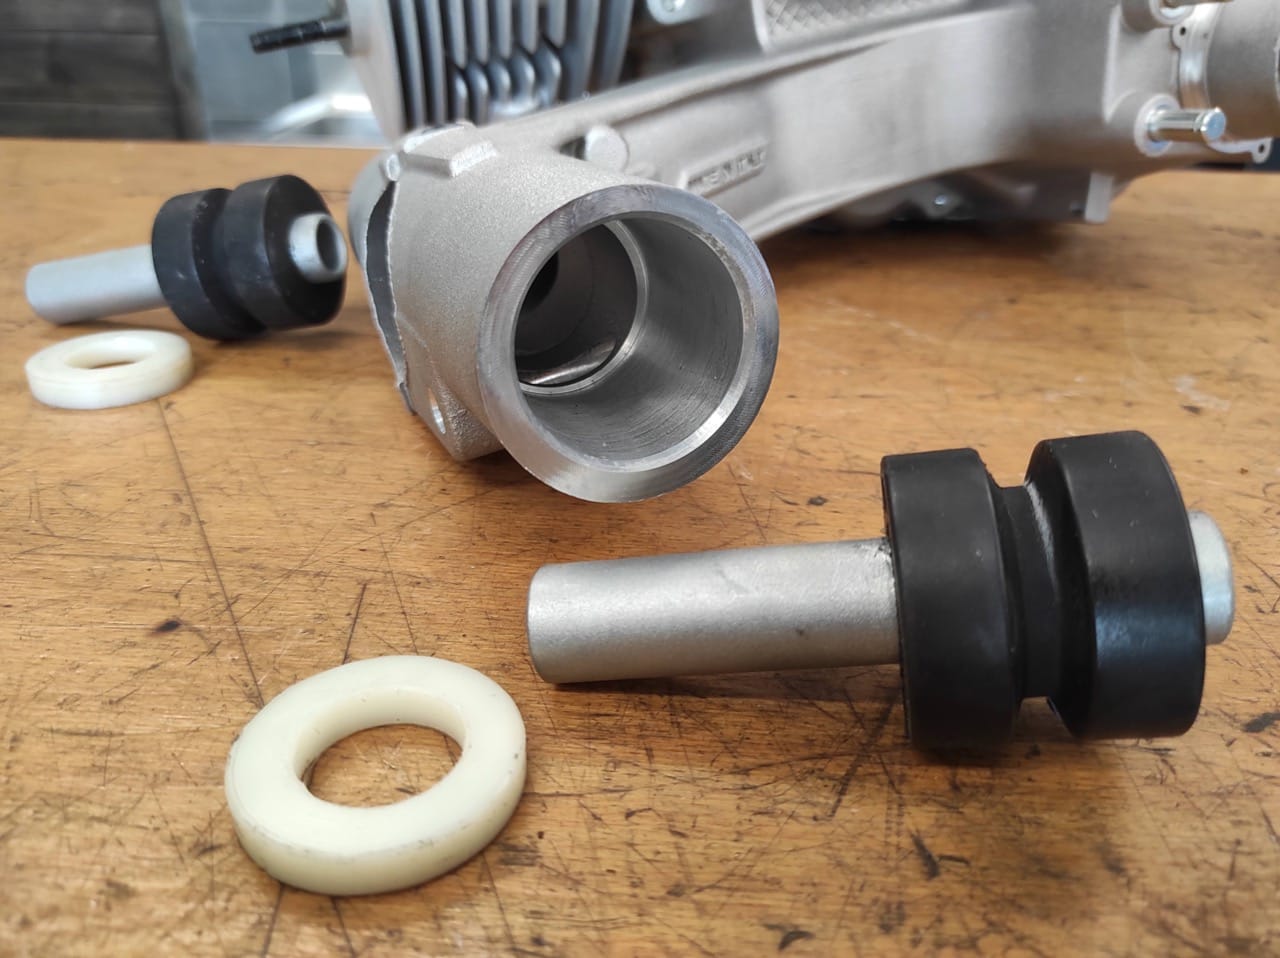
Another peculiarity of the Malossi motor housing is that the supplied original silent rubbers are too narrow for the motor housing. Or rather, here Malossi has simply oriented the seats for the silent rubbers deeper in the housing than was originally the case. This allows the motor housing to move over the silent rubbers in the direction of the frame.

We have been here with one quite a while ago Spacer set BGM7952SP A remedy was created for the silent rubbers and thus ensured a secure fit of the silent rubbers in the correct position.
The gear

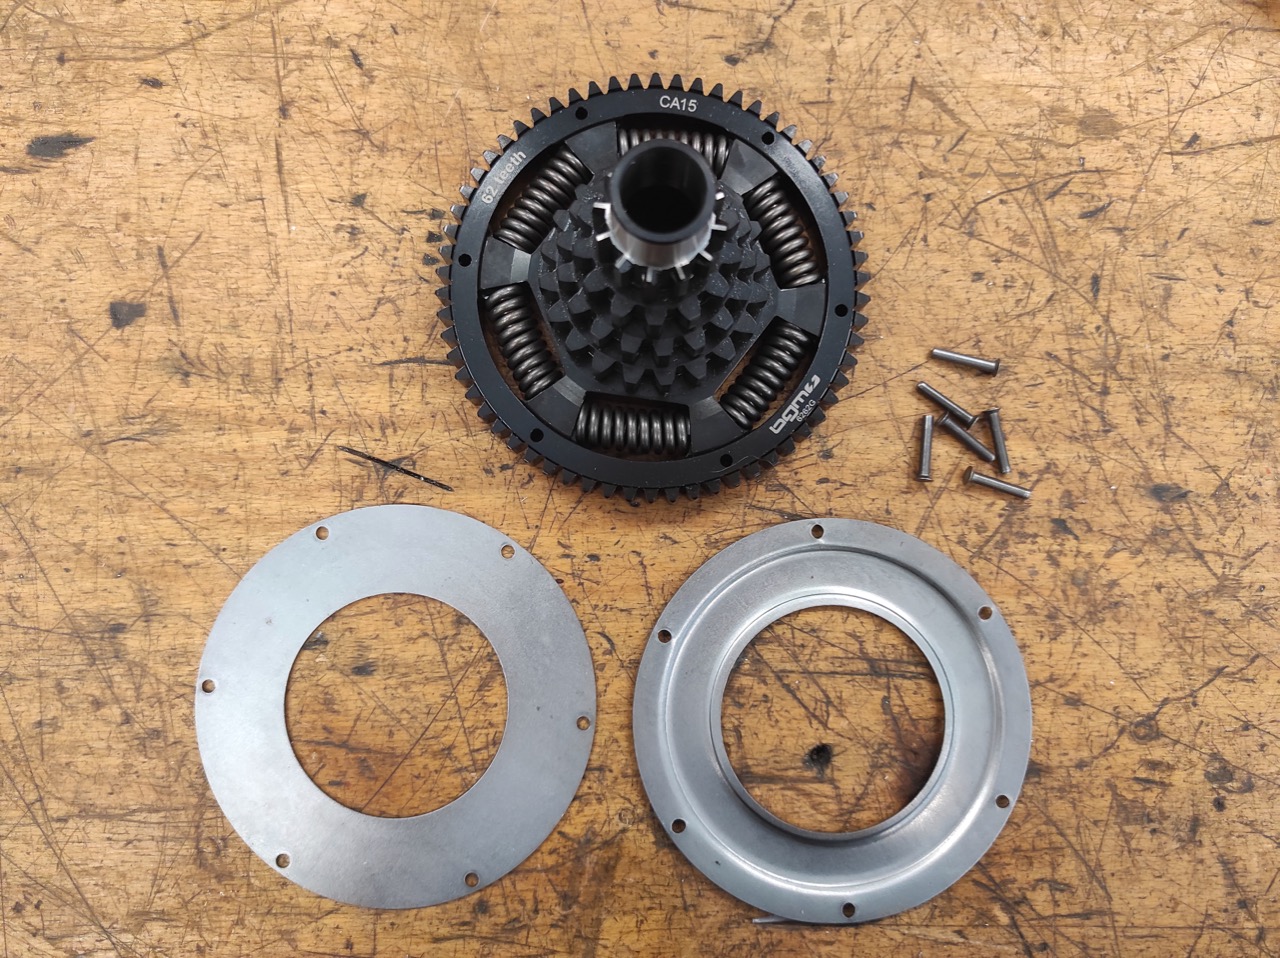
The M244 with a 62mm stroke of the king shaft brought to 252ccm, will transfer a lot of torque to the rear wheel. A guarantee to achieve a high cruising speed at a reduced speed. That enables the primary. Starting from a massive and early onset of torque mountain, the primary can be selected to be long or even very long. With 25 to 62 teeth, we use the longest primary offered by bgm. The reinforced primary repair kit from bgm creates a durable primary drive.
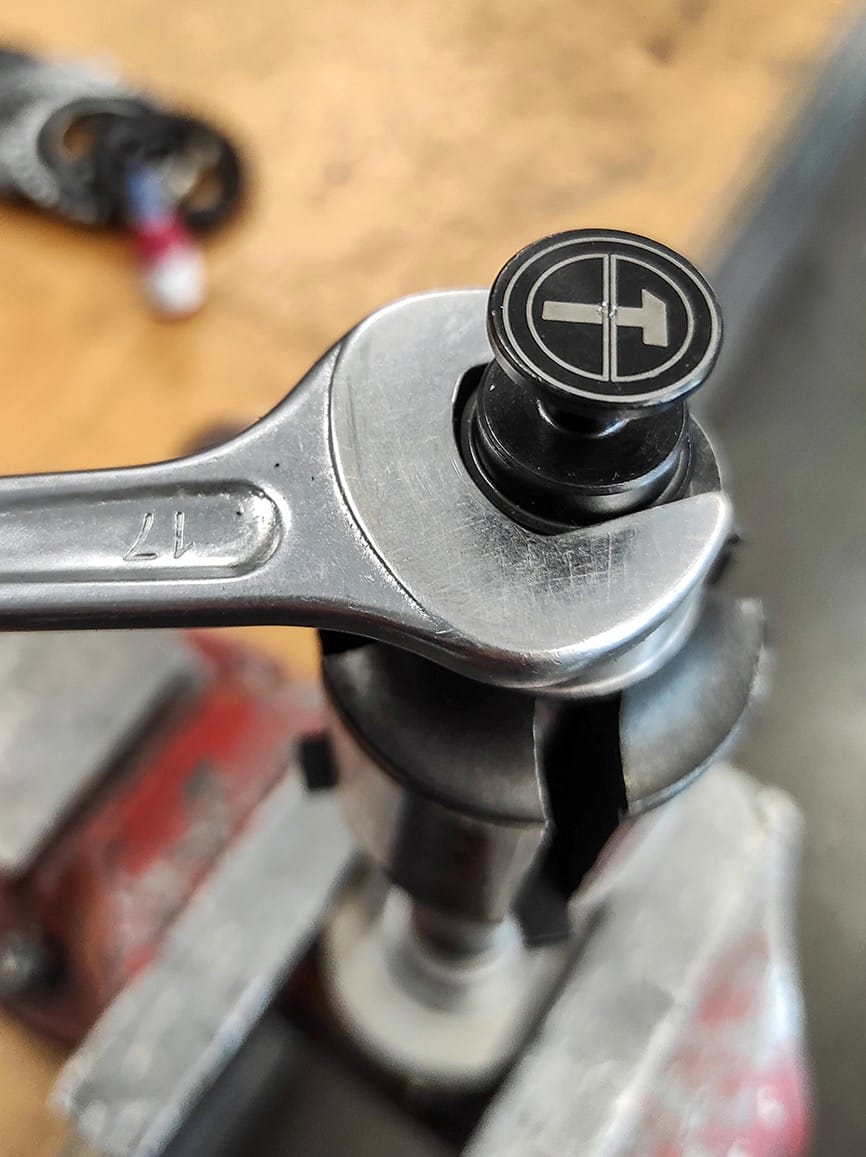
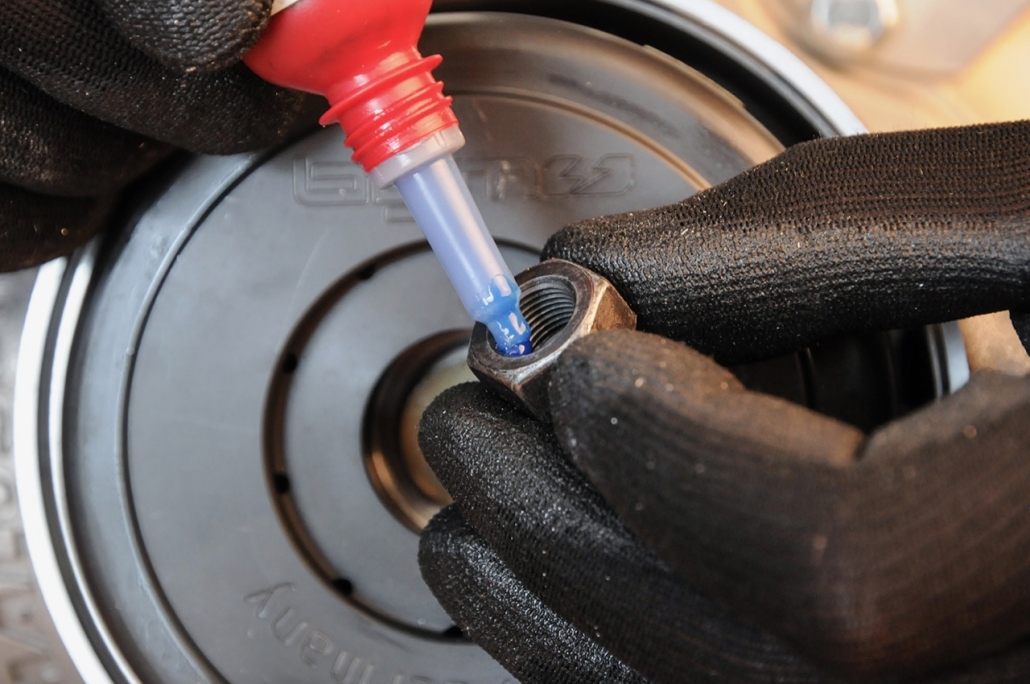
Shift pins and crossbar are included threadlocking assembled.

The bgm secondary gear is set with the smallest possible clearance with the bgm shoulder rings.
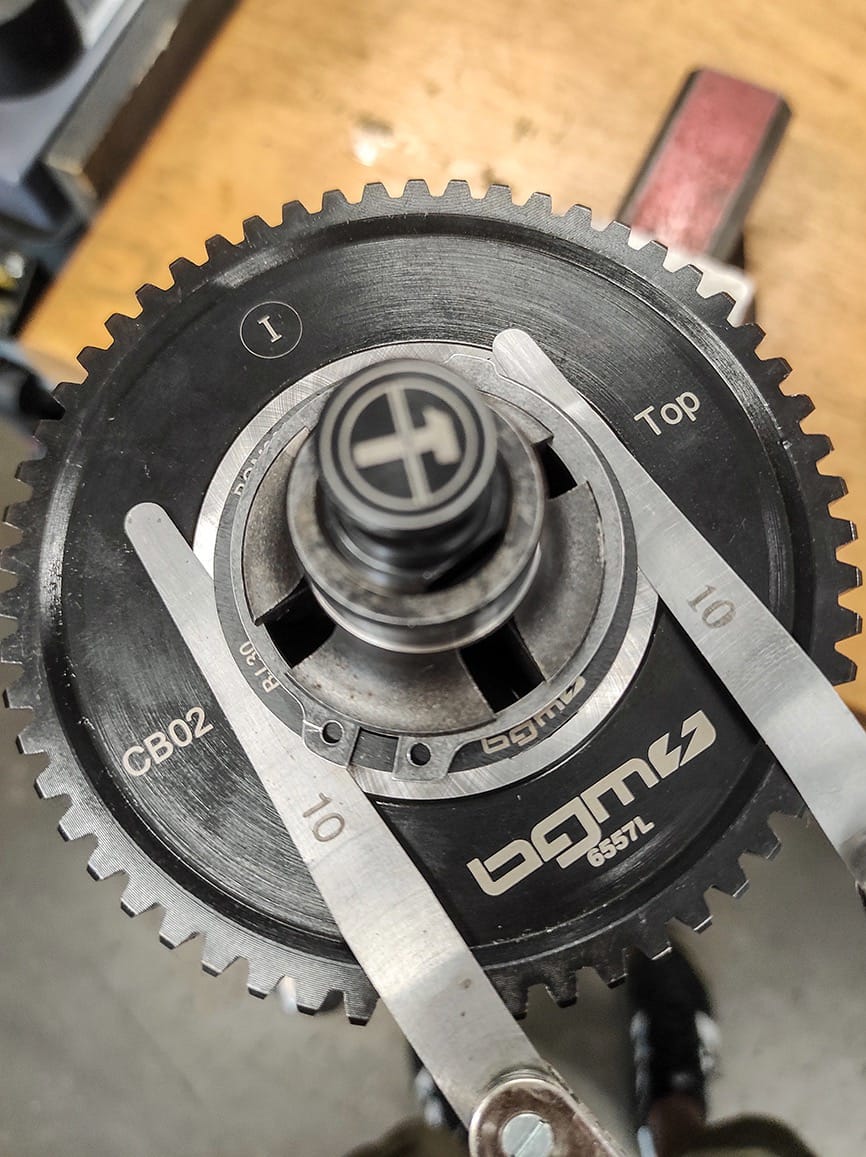
Assemble the Malossi motor housing

Further adjustments to the motor housing are no longer necessary and all other innards find their way into their place.
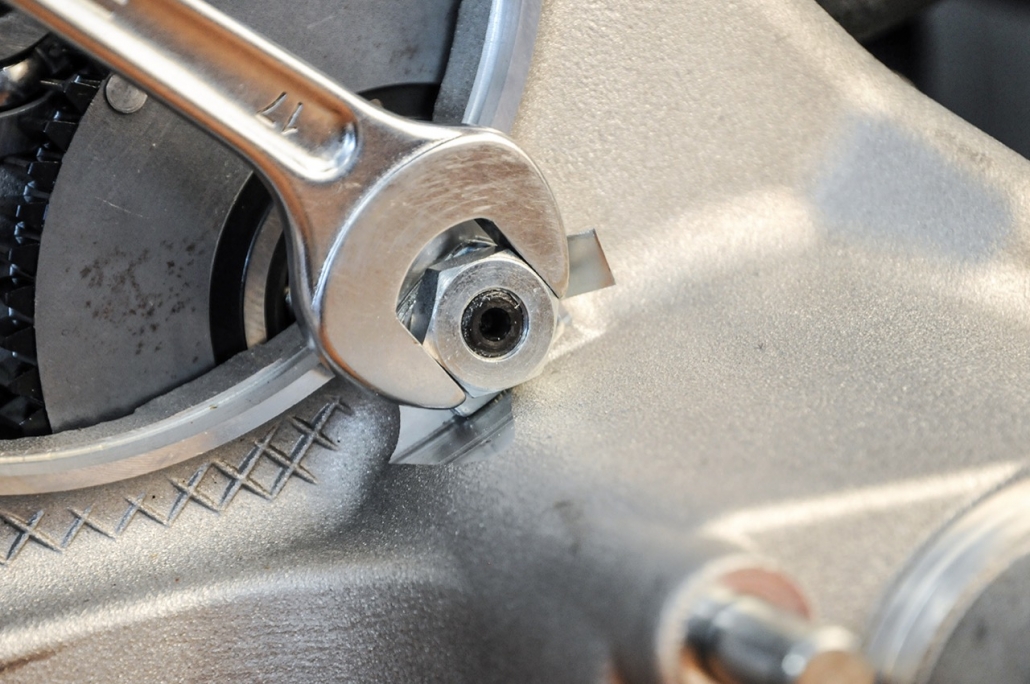
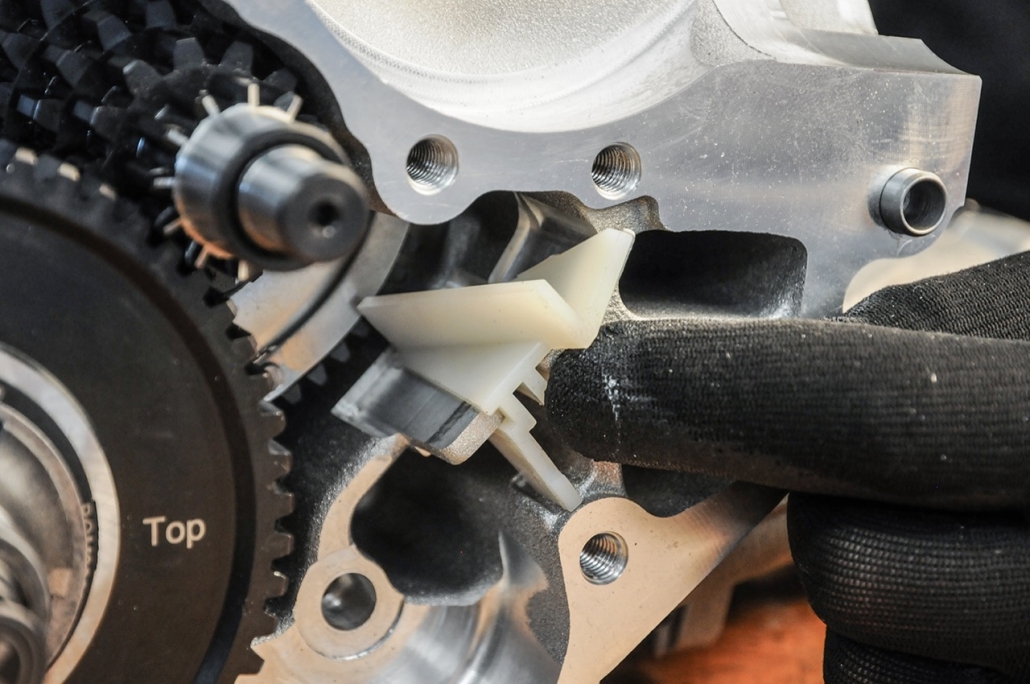
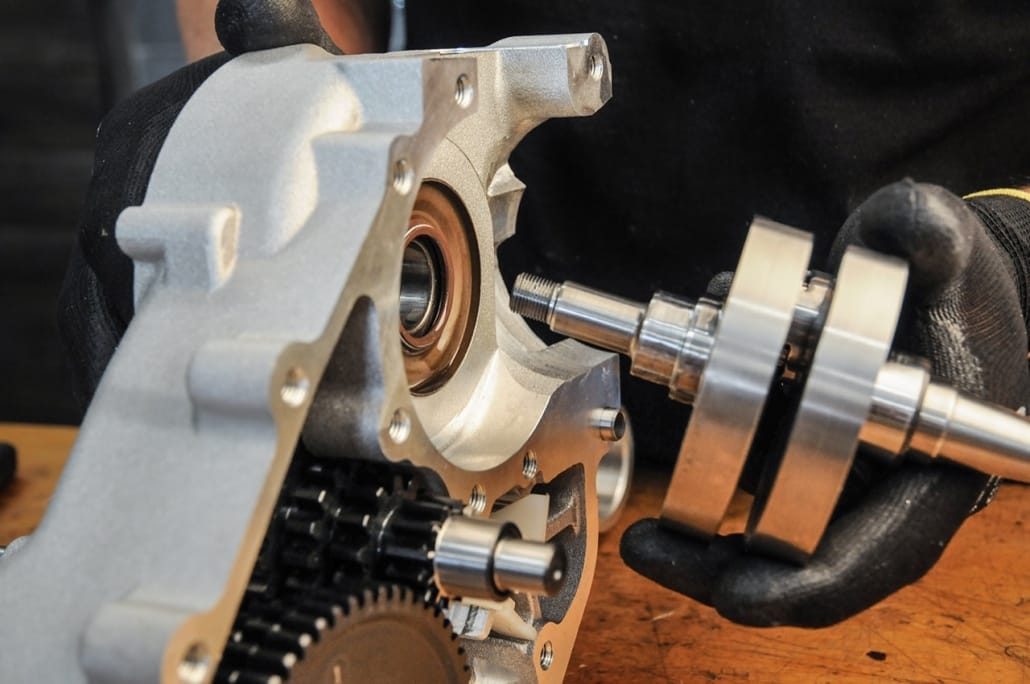
To assemble the crankshaft, the shaft sealing ring is moistened with a little oil so that the sealing lips slide cleanly onto the crankshaft and are not damaged.
The Malossi engine case, contrary to the Piaggio engine case, is without a solid seal composed. Instead of the paper seal, as in a modern engine concept, the housing is Surface seal sealed.
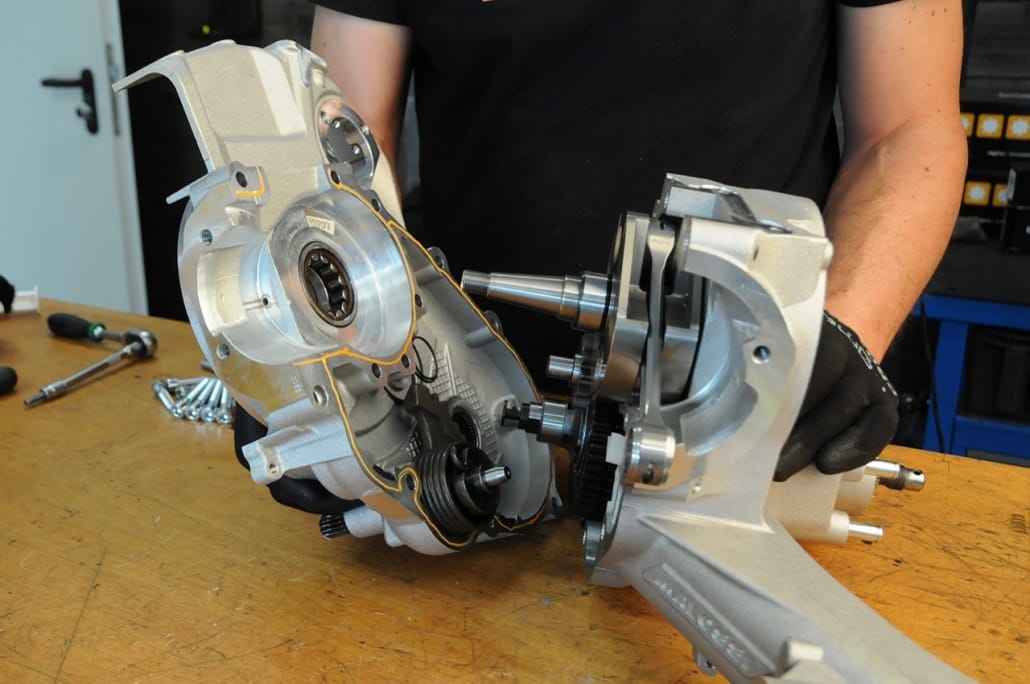
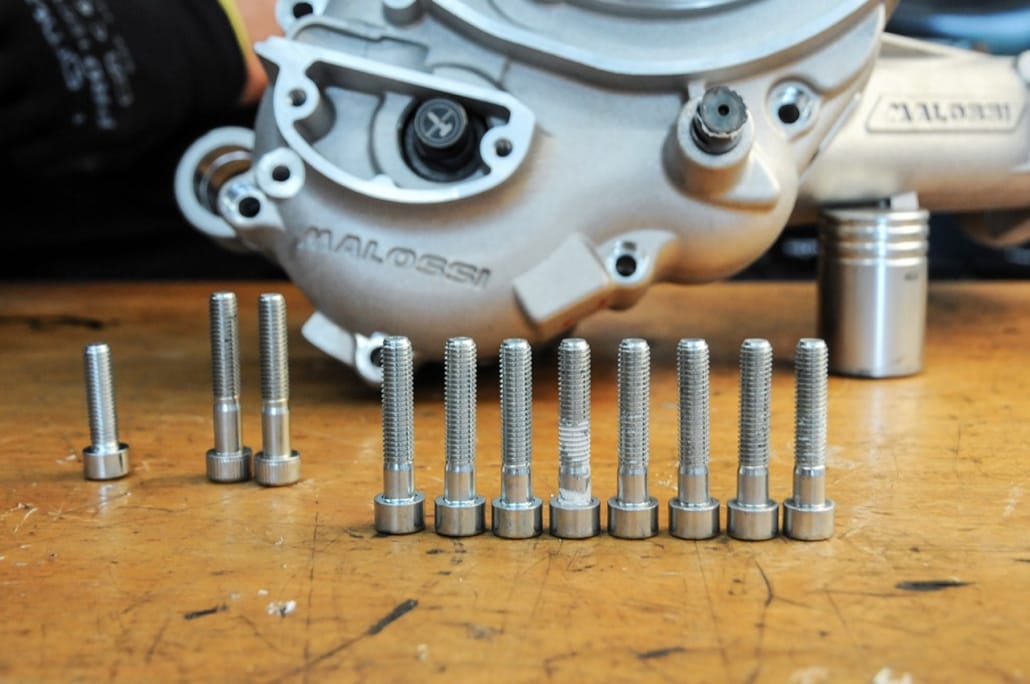
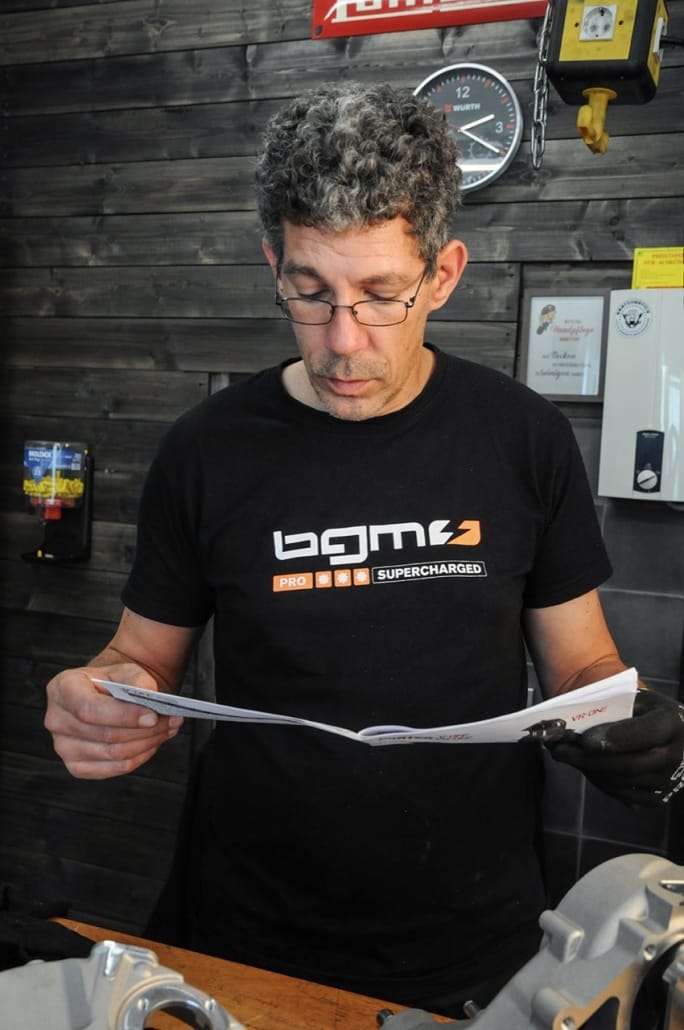
To connect the housing halves, Malossi uses M8 hexagon socket screws. Due to the different lengths of the screws used, a look at the Application listto find the correct attachment point.


bgm PRO Superstrong clutch & King shaft

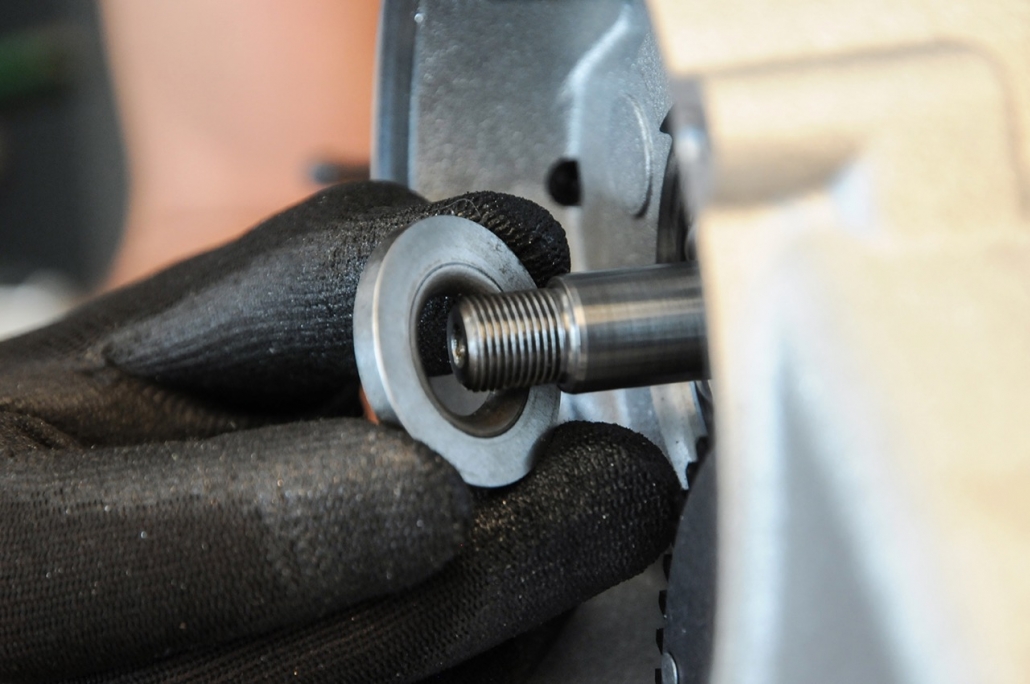
The King Shaft is supplied with its own thrust washer and special key. The thrust washer has a clear radius that fits exactly to the radius of the crankshaft. A breaking thrust washer is almost impossible.


The Kingwelle has a special feather key on the drive side, which is specially manufactured for Kingwelle and fits exactly into the groove of the coupling hub.
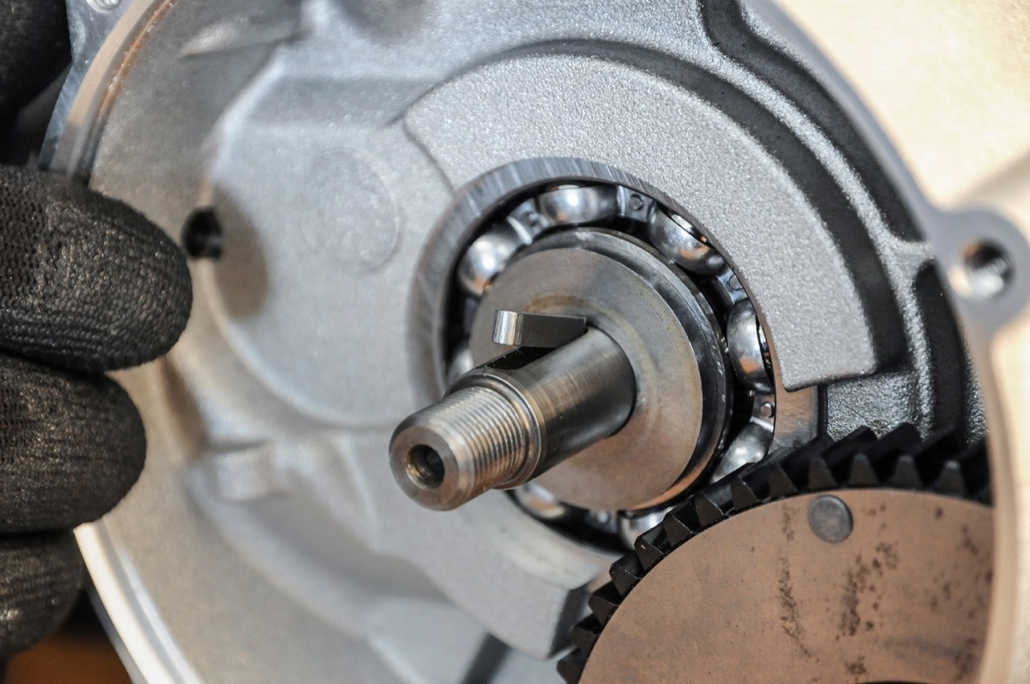
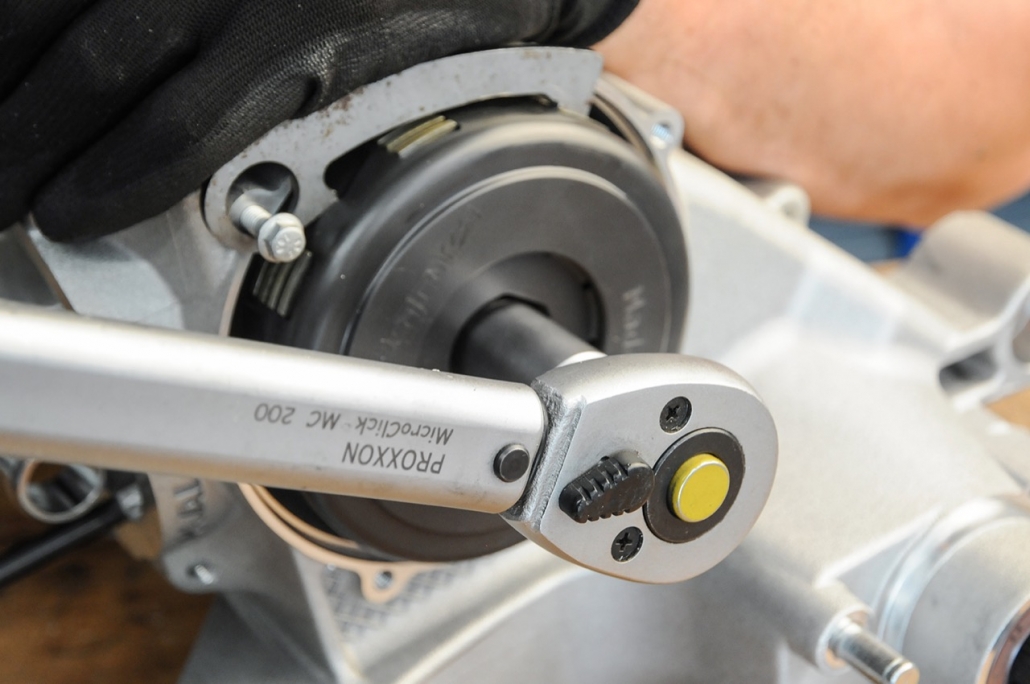
We use one as a coupling bgm Superstrong CR a. With the standard equipment, 10 bgm springs XL, the CR clutch manages a reliable transmission of power up to 40hp. The king shaft coupling nut has a fine thread of the dimension M12x1. The nut comes with screw lock and a Tightening torque of 70Nm attached.
 

Assembly of further components

The engine is then completed with the rest of the components.
Intake manifold with the Malossi 2-valve membrane. Clutch cover, switch latch, cover for the starter motor and the bgm ignition system with static ignition timing.
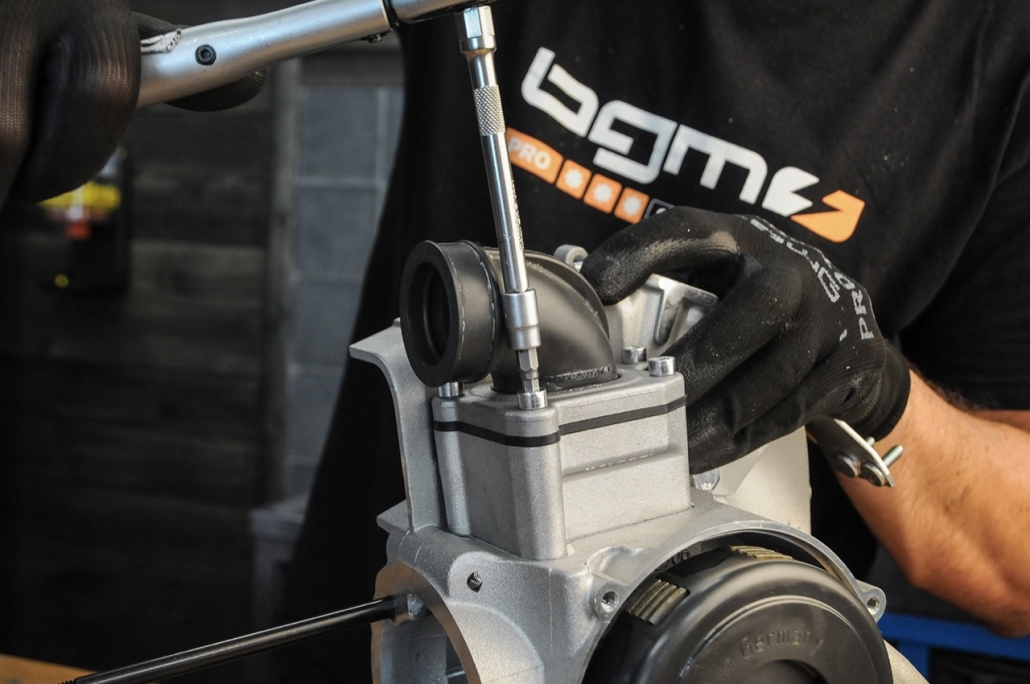
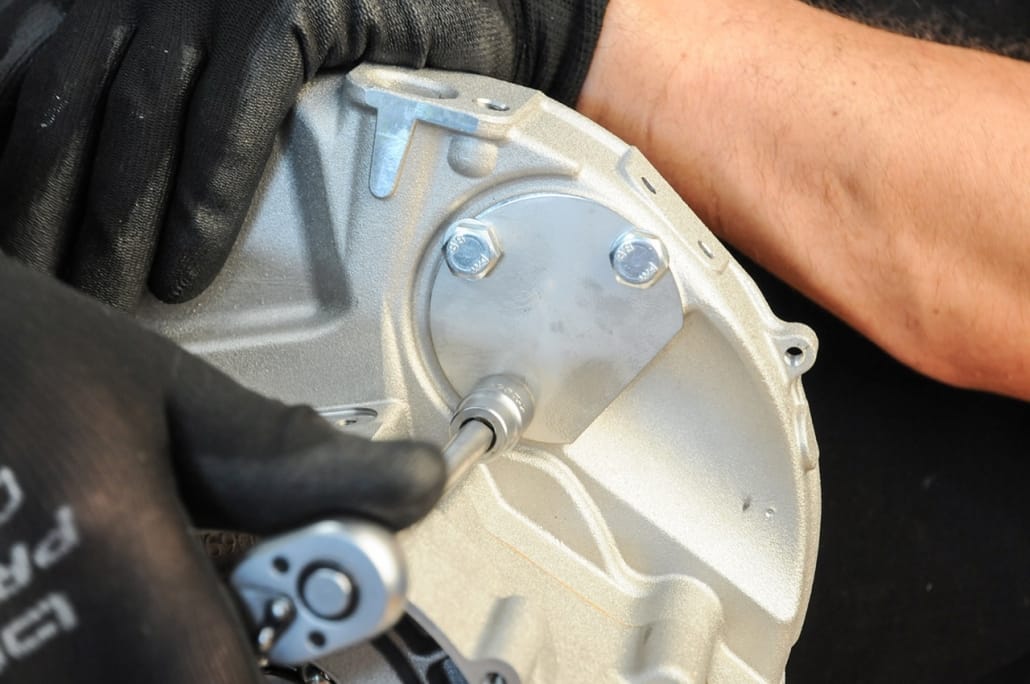
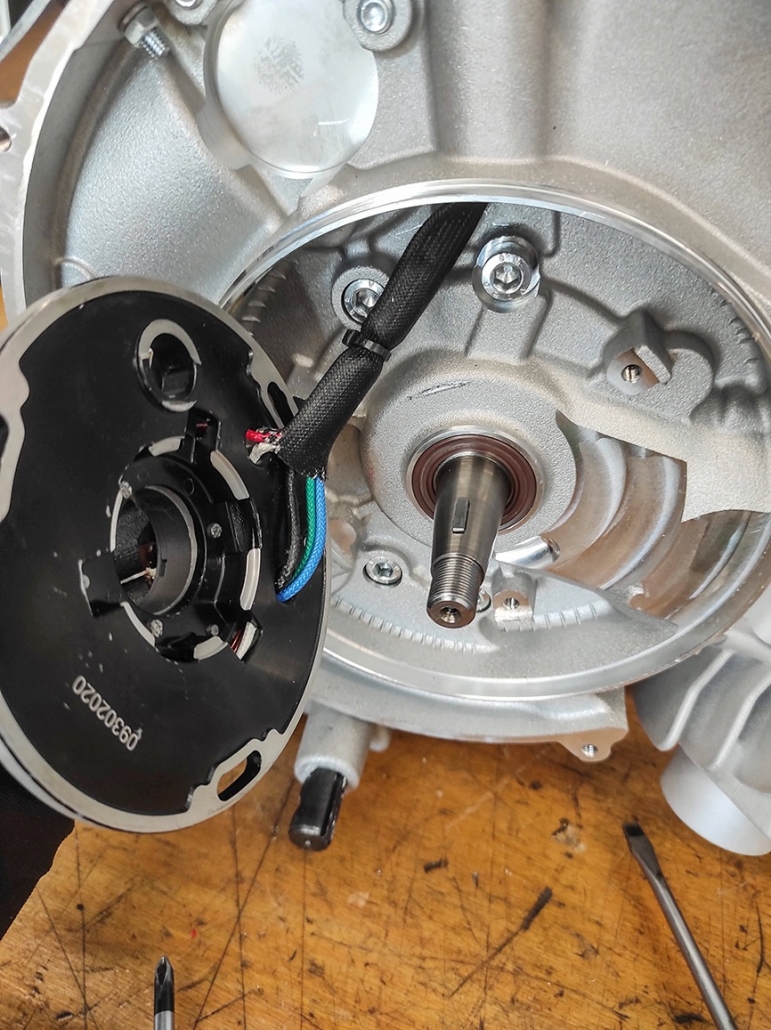
Stress-free assembly of the ignition base plate on Malossi engine housings

The Malossi motor housing is reinforced in many places. This can lead to contact between the base plate and the bearing seat when the ignition is installed. The base plate of the ignition must sit tension-free in the centering, so in individual cases the base plate and / or the motor housing must be slightly reworked to ensure a tension-free fit of the base plate.
 

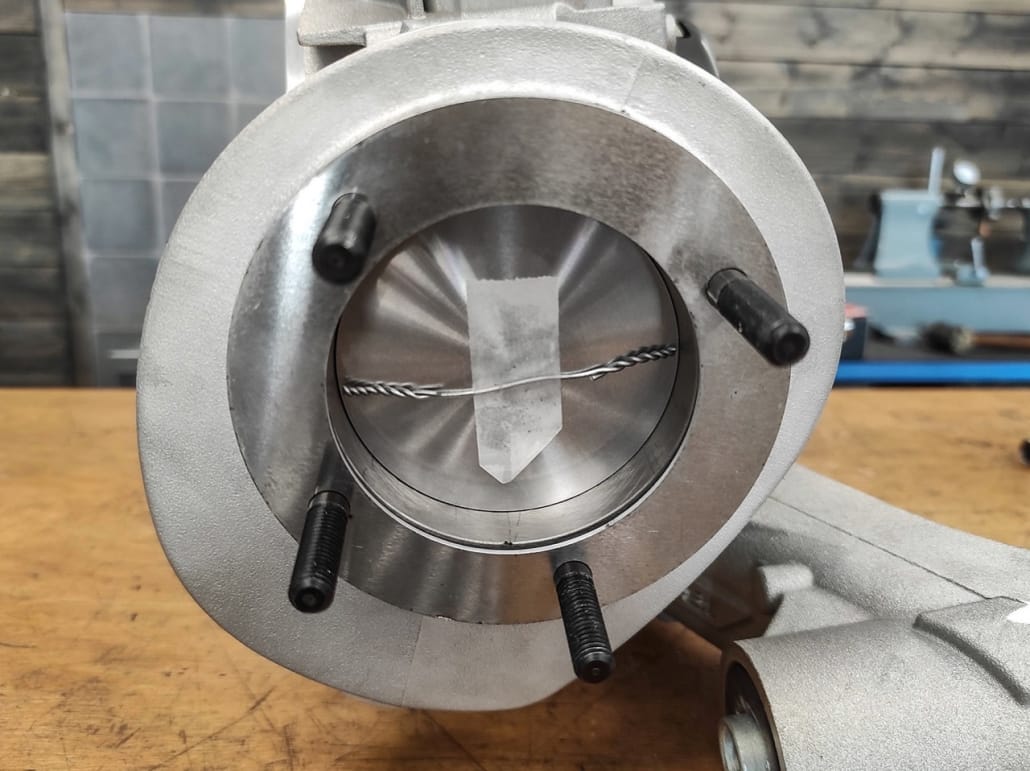
Check crush dimension

Before the final assembly of the cylinder, we check the pinch size using solder.
Due to the increased stroke, we aim for the squeeze dimension in the range from 1.3mm to 1.4mm and set this using the enclosed cylinder base seals.
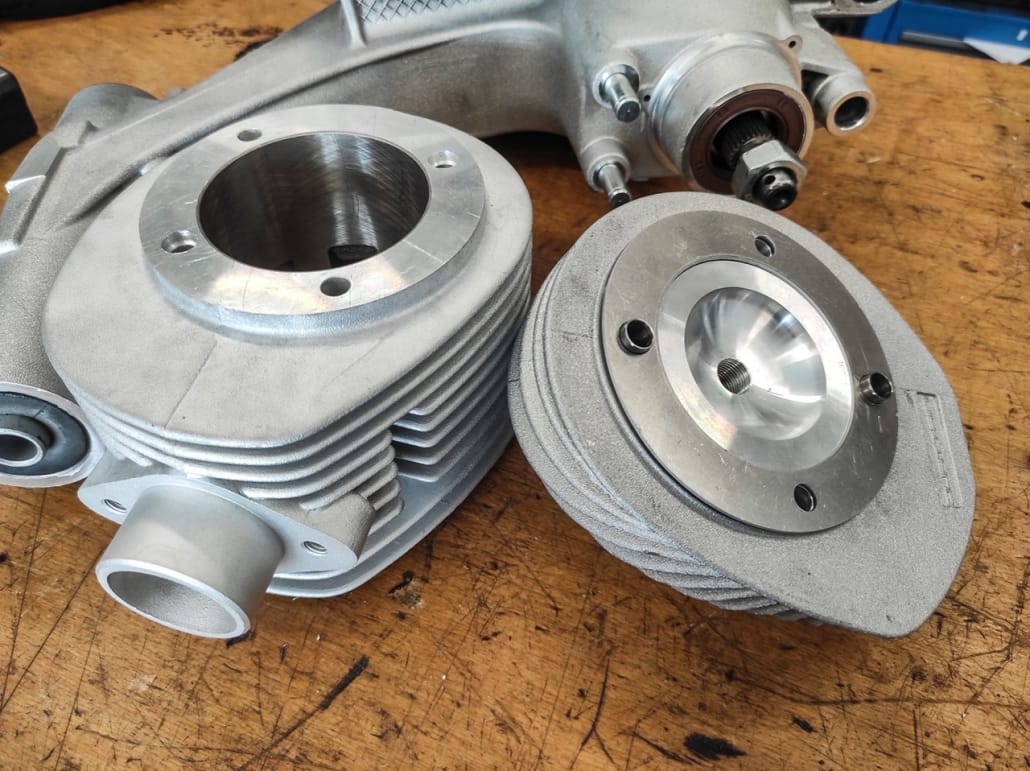
By compensating for the larger stroke, there is no need for centering on the cylinder head. For this reason, holes for fitting sleeves are made in the cylinder head and cylinder. The adapter sleeves prevent the spacers used for the cylinder head in the course of the test from protruding into the combustion chamber and causing unwanted damage there.
 

The new Quattrini engine on the test bench

For the test runs, we set the ignition to 19 ° BTDC.

The runs of the first expansion stage We will introduce M244_1 to you in the next blog post before…

Just a quick note - none of the runs were below the 30PS Mark on the unprocessed M244


Lambretta 100mph Bonneville World of Speed ​​Record

Chasing records with the Lambretta on the salt slope

Our customer Todd Rogers from the USA set out with his 225 Lambretta to hunt for records in Bonneville.

Do you still remember the film "with heart and soul" with Anthony Hopkins? Burt Munro (Anthony Hopkins) travels to Bonneville with his Indian Scout to take part in the annual high-speed race on the Utah Salt Flats. One of my favorite films, below you can find a teaser for the film.


Todd Rogers Lambretta Club USA

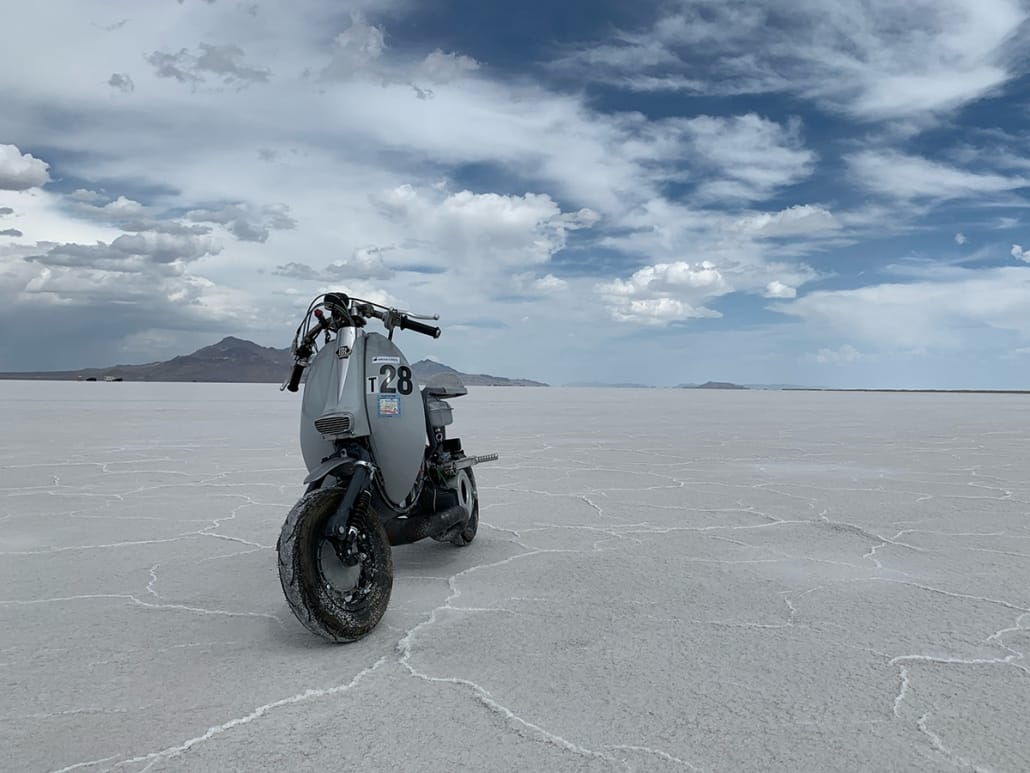
So our customer Todd Rogers has set off for Utah with his Lambretta World of Speed made. Here in Bonneville he wants to set a record with his Lambretta on the salt slope.

Todd Rogers from the Lambretta Club USA with his Lambretta


The right tires

During the preparations for the record attempt, there were problems with the tires. Todd has so far ridden tires with a “P approval” on his Lambretta.
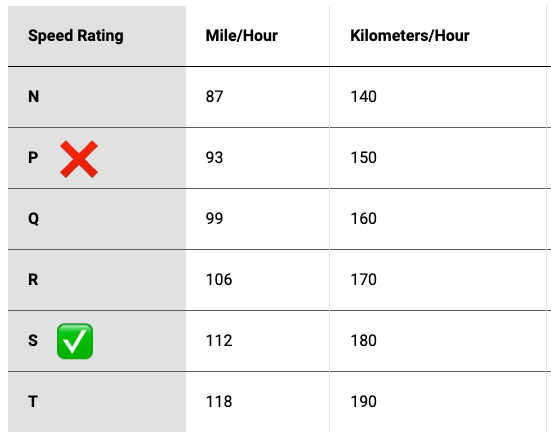
But P corresponds to only 93 mph or 150 km / h and with these tires he would not have received approval for an official record attempt at over 100 mph.

Choosing the perfect tire was then relatively easy, after all, ours are ours bgm PRO SPORT tires, the only 10 x 3.50 tires with a Approval of 180km / h or 112 mph! In addition, Todd did not want to expose himself to any risk and so relied on the bgm PRO  Quality tires MADE IN GERMANY.

speedindex


World of Speed ​​the film for a record attempt

Fastest Lambretta 100mph 162km / h in Bonneville Utah / USA bgm PRO Sport tires

The 100mph record in Bonneville with the Lambretta

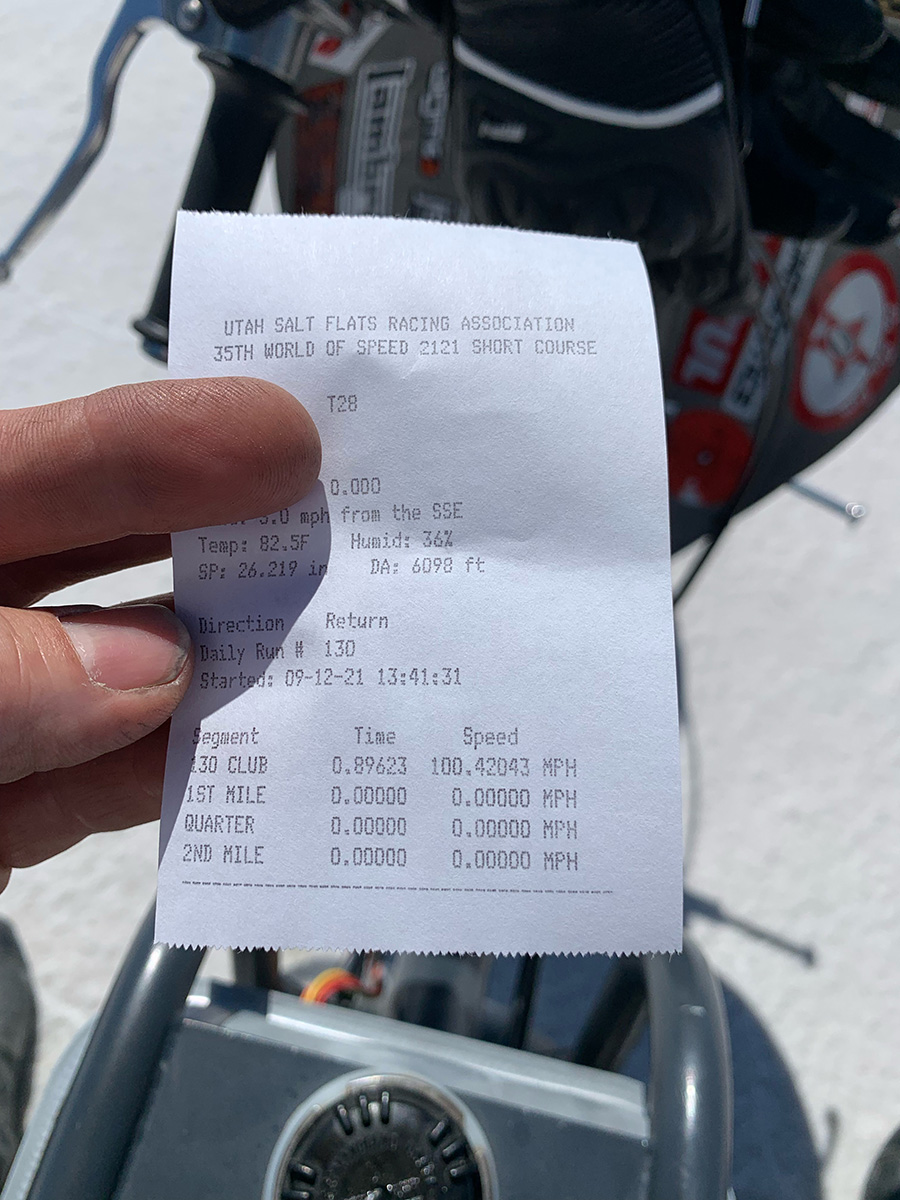
Todd drove his 225 Lambretta (not a Streamliner !!), a very impressive 100,4203 mph, which corresponds to about 162 km / h. Todd holds the record for the fastest Lambretta in Bonneville!

Congratulations from all Scooter Center & bgm - team!


With heart and soul Trailer Bonneville

With heart and hand (The World Fastest Indian) 2007 speed record Bonneville


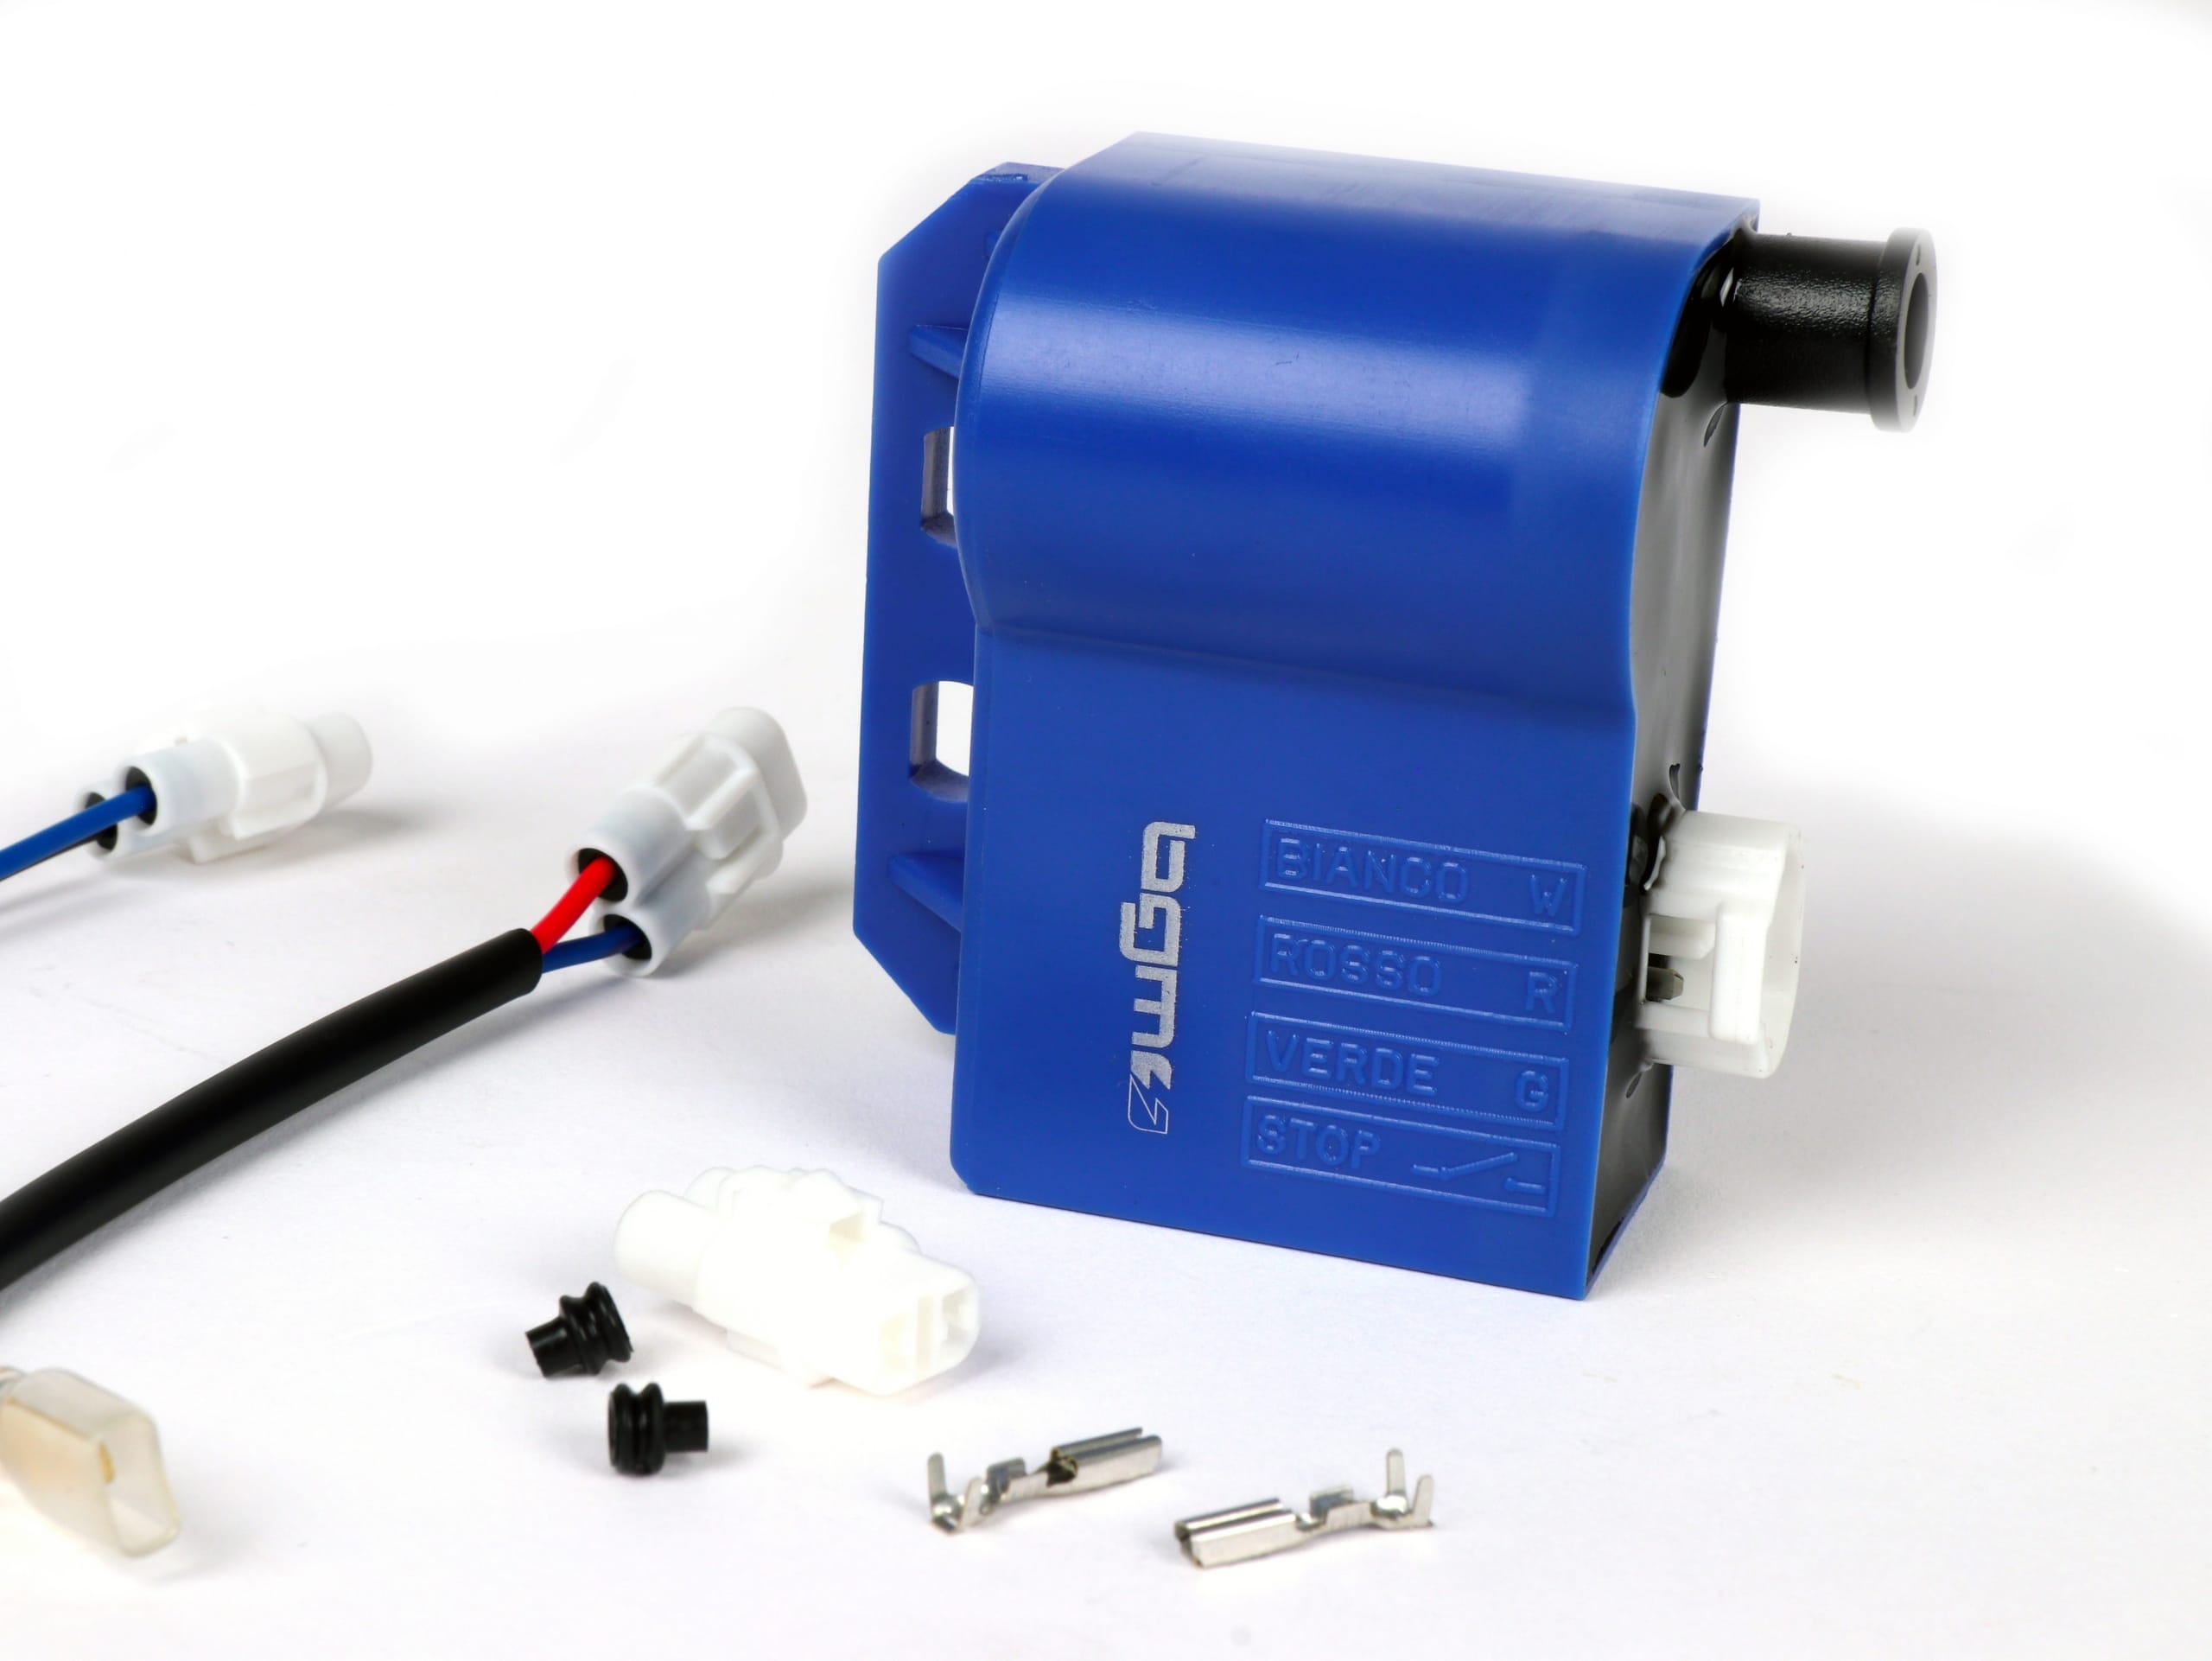
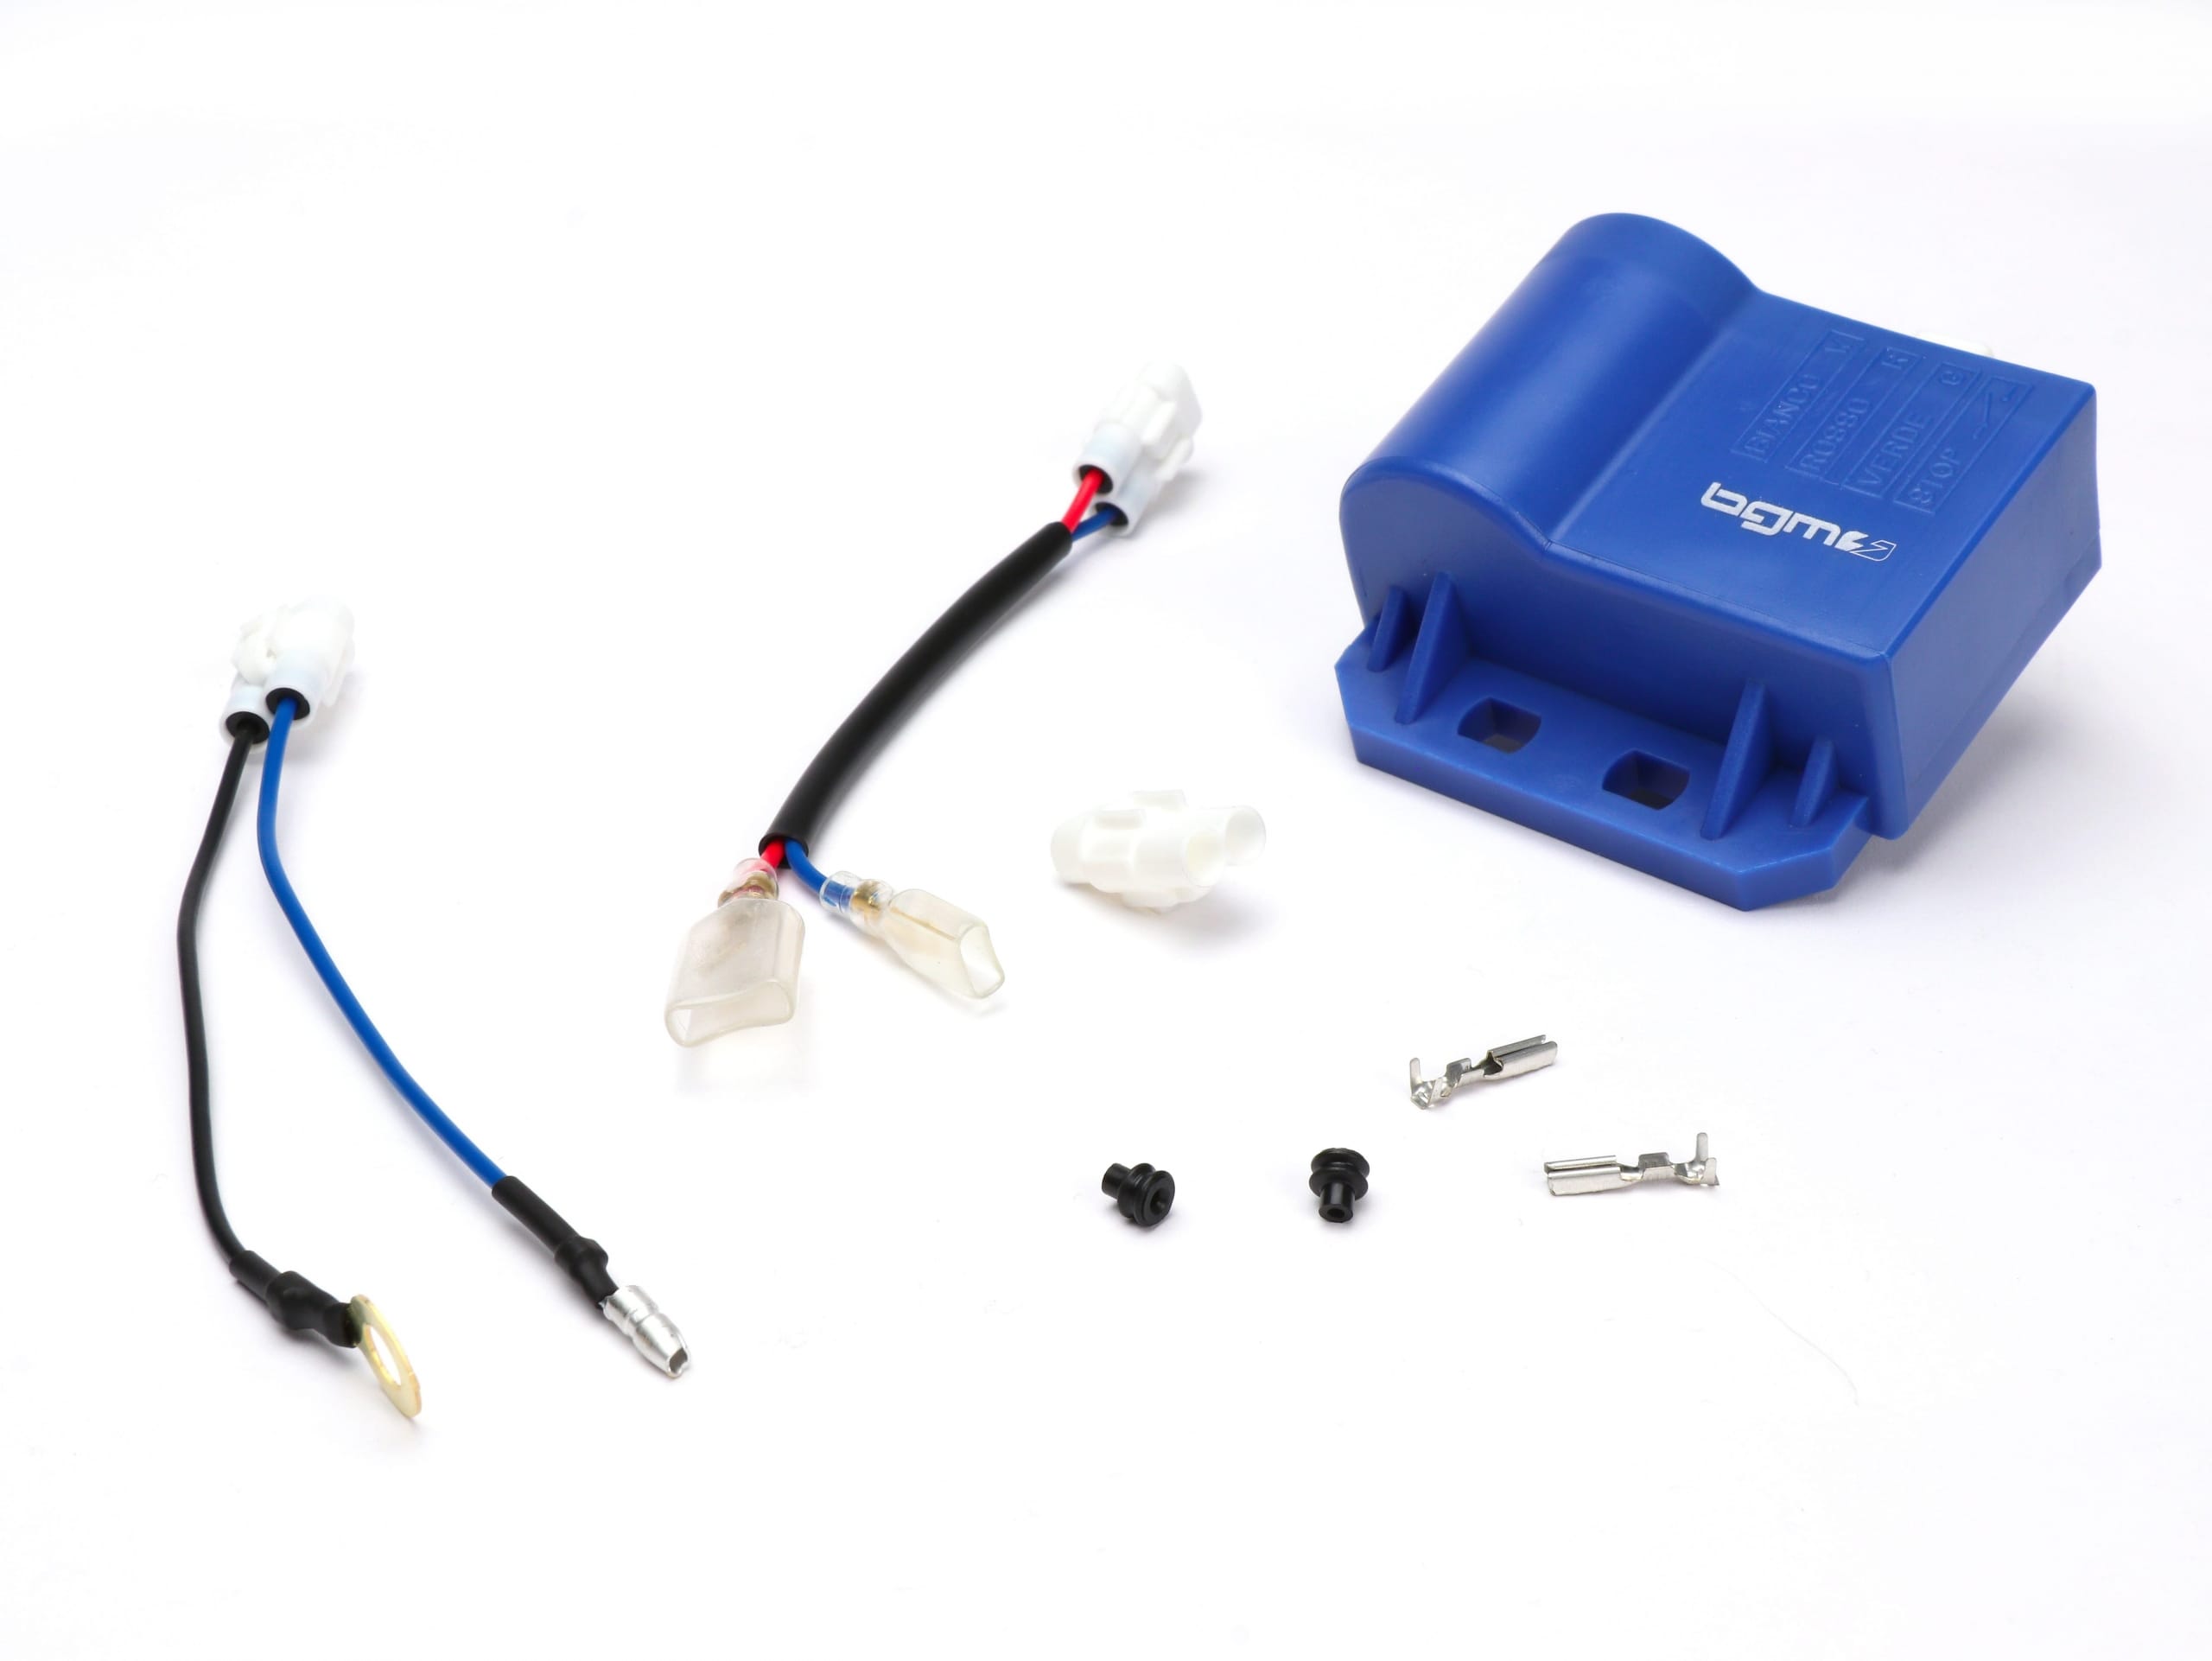
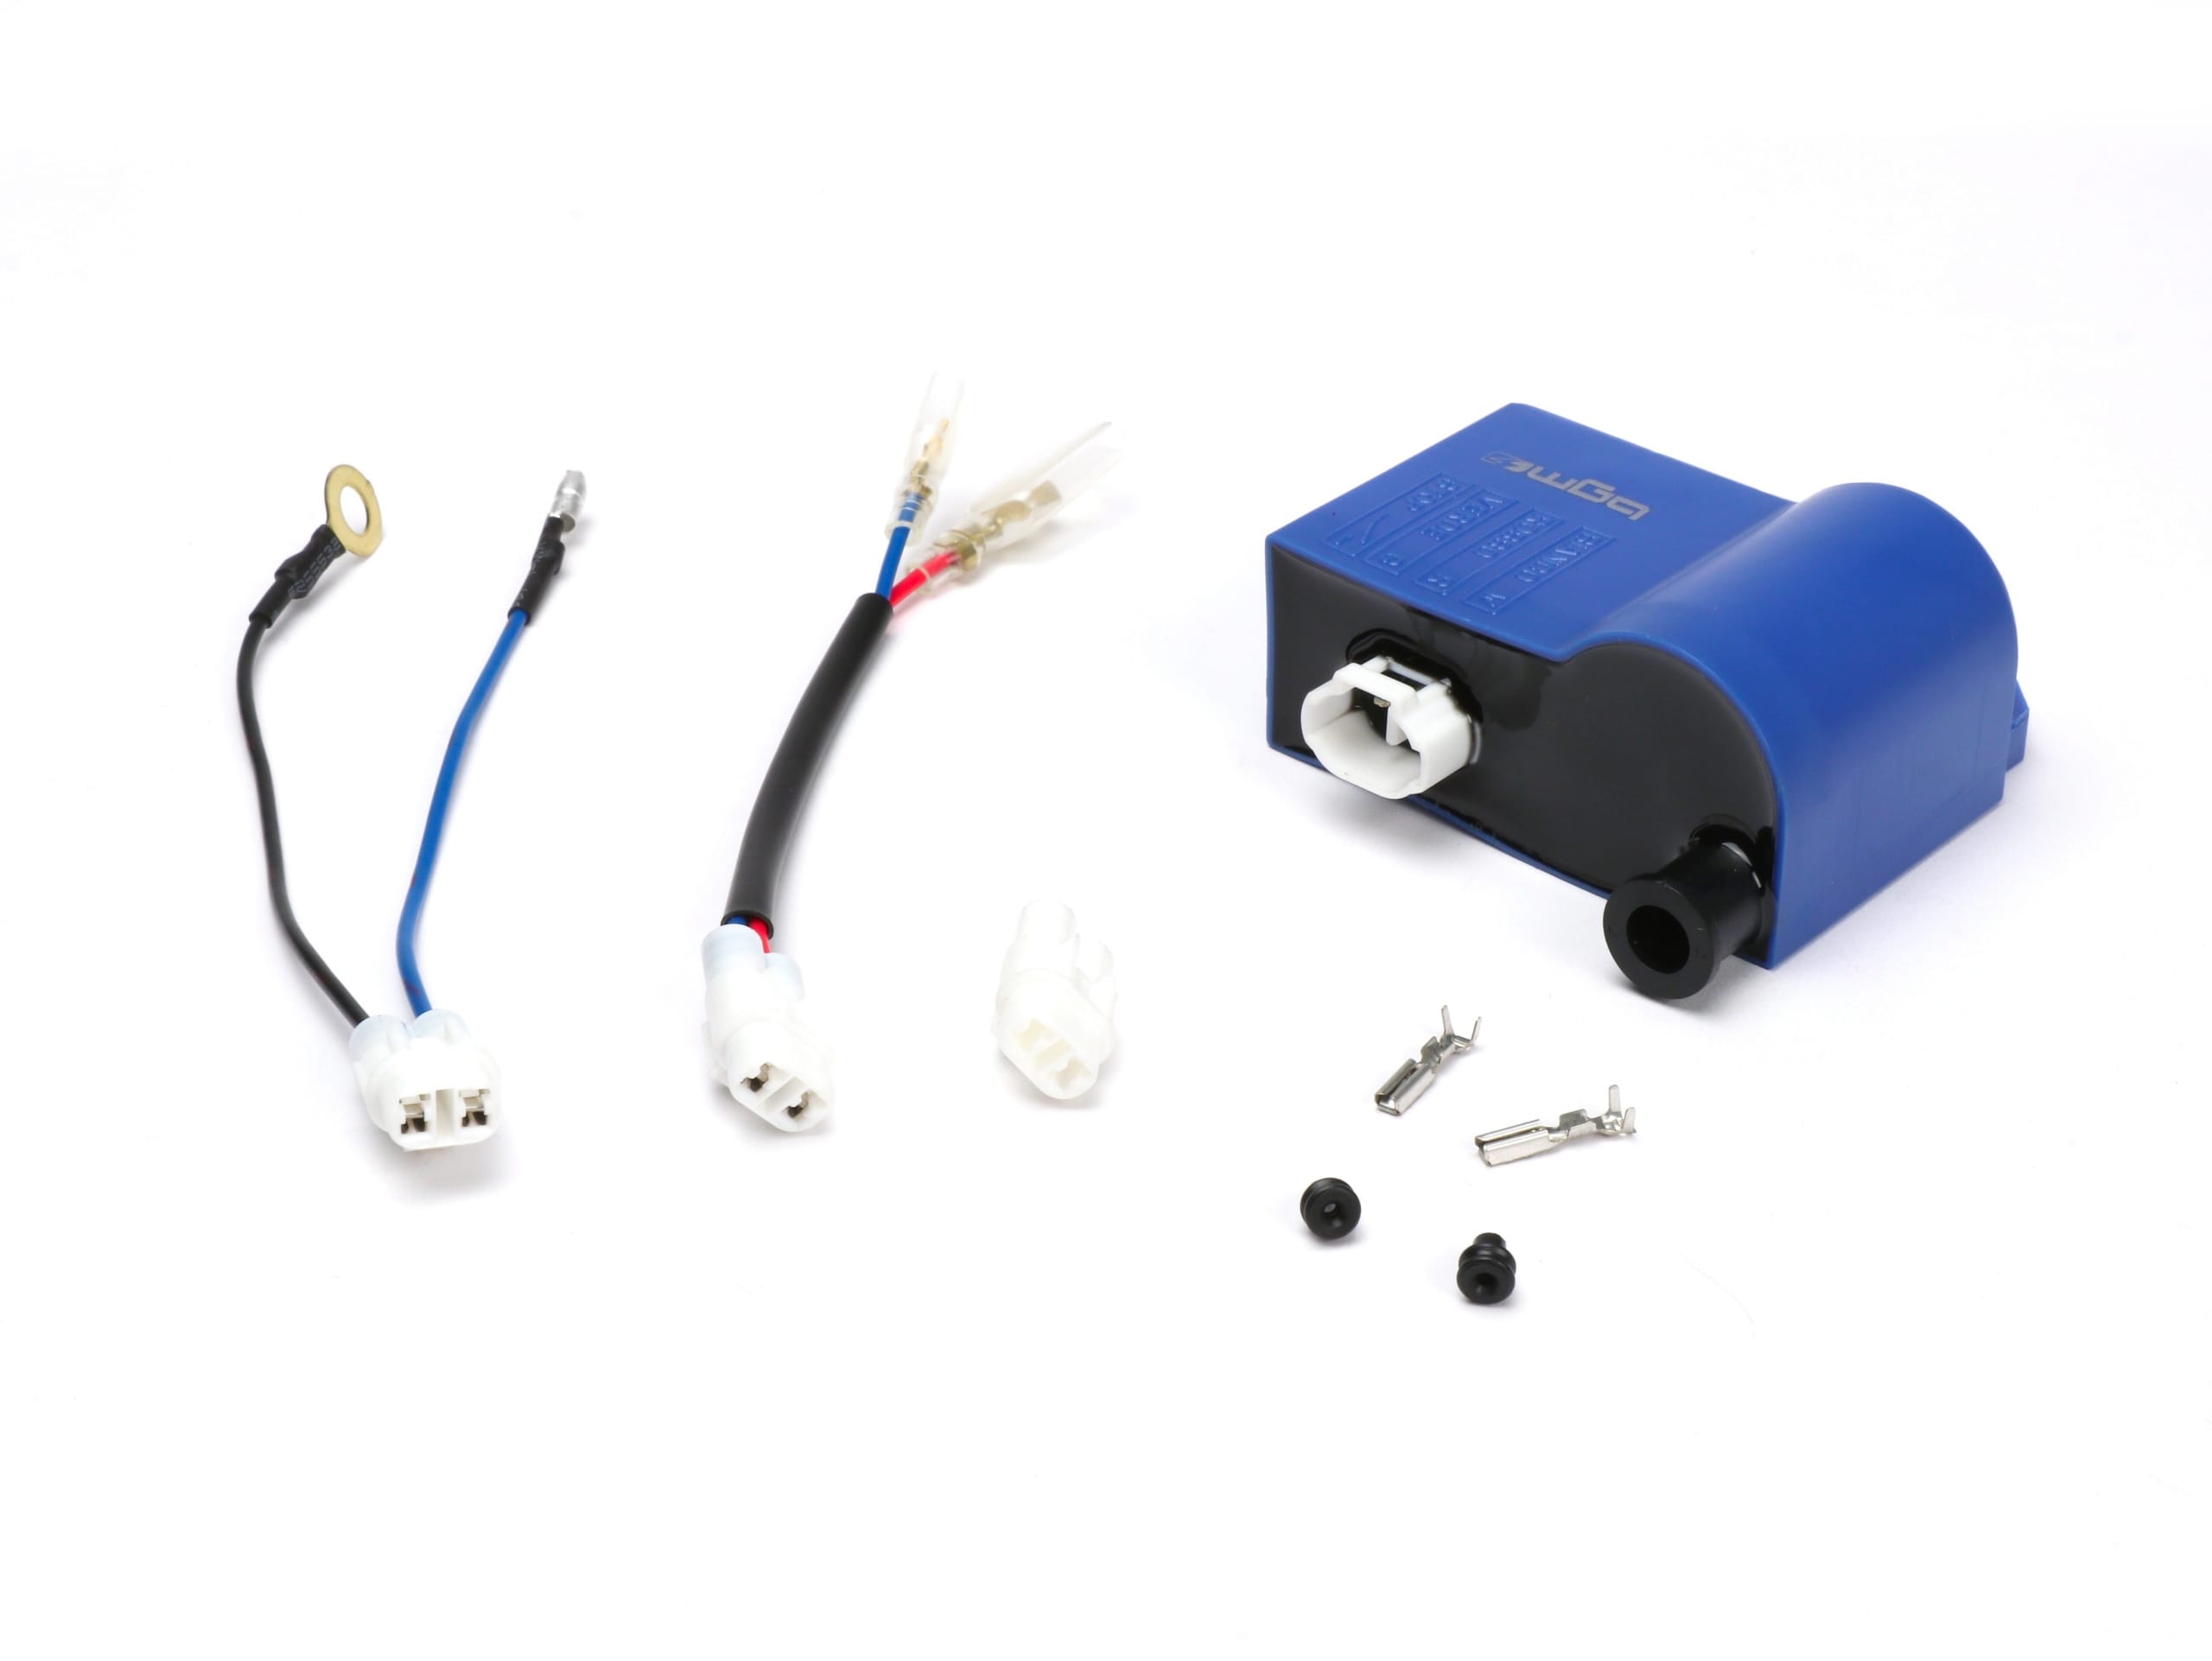
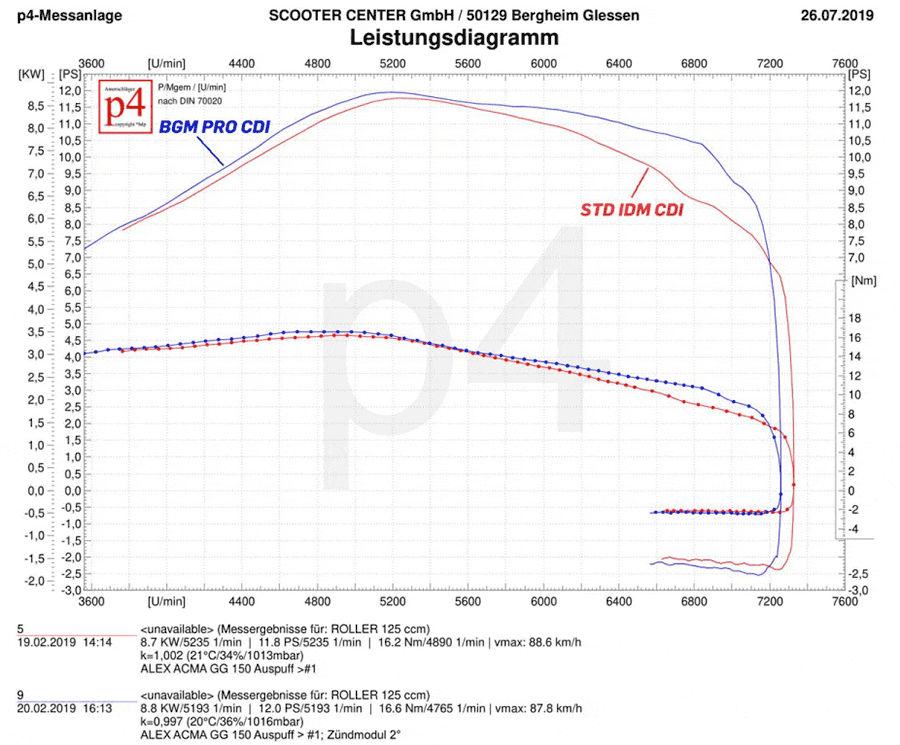
BGM6697 bgm PRO IDM CDI

bgm PRO touring CDI for IDM retrofit ignitions

-Original optics in conjunction with a optimized ignition curve for Vespa and Lambretta touring engines-

Our solution for IDM CDIs in touring engines

Use all IDM based ignitions (Vespatronic, Malossi VesPower, Polini IDM, Varitronic, Pinasco Flytech, Parmakit etc.) the same CDI.

The ignition curve of this CDI is based on high performance engines with a late use of power and high speeds designed.
On touring engines, with an early and high torque, this ignition curve is rather counterproductive. Here it often leads to engine jerks in the partial load range due to an ignition point that is too early for the low engine speed.

However, due to the large adjustment range (8 °) of the original CDI, the ignition point must be selected early. Otherwise, the performance in the upper speed range suffers, as the CDI already reduces the ignition point significantly here. We have addressed this problem and a solution developed:


Advantages of our bgm PRO CDI for IDM in tour setup

The bgm PRO CDI has a modified, optimized ignition curve. It offers high-torque touring engines that have a similar power / torque curve as an original engine, ideal working conditions. The adjustment of the ignition point is significantly less, the engine runs quieter and smoother and also develops more efficient, especially in the area above the peak performance (Overrev). As a result, you have an engine that much more tour-friendly is and usually something faster Is on the way.

  • Plug & Play
  • for Vespa & Lambretta
  • replaces the original IDM CDI
  • fits on the original mounting brackets from PK & PX
  • Tour-optimized ignition curve
  • no partial load jerking
  • higher performance
  • original optics
  • screw-in ignition cable

More efficient

Performance diagram measurement bgm PRO CDI for IDM ignitions

Power measurement diagram as PDF

Modern technology in a classic look

The technology of the bgm PRO CDI is housed in the vehicle-specific ignition coil housing from the time it was built. This means that the beautiful old look for classic Vespa and Lambretta is retained despite modern technology.
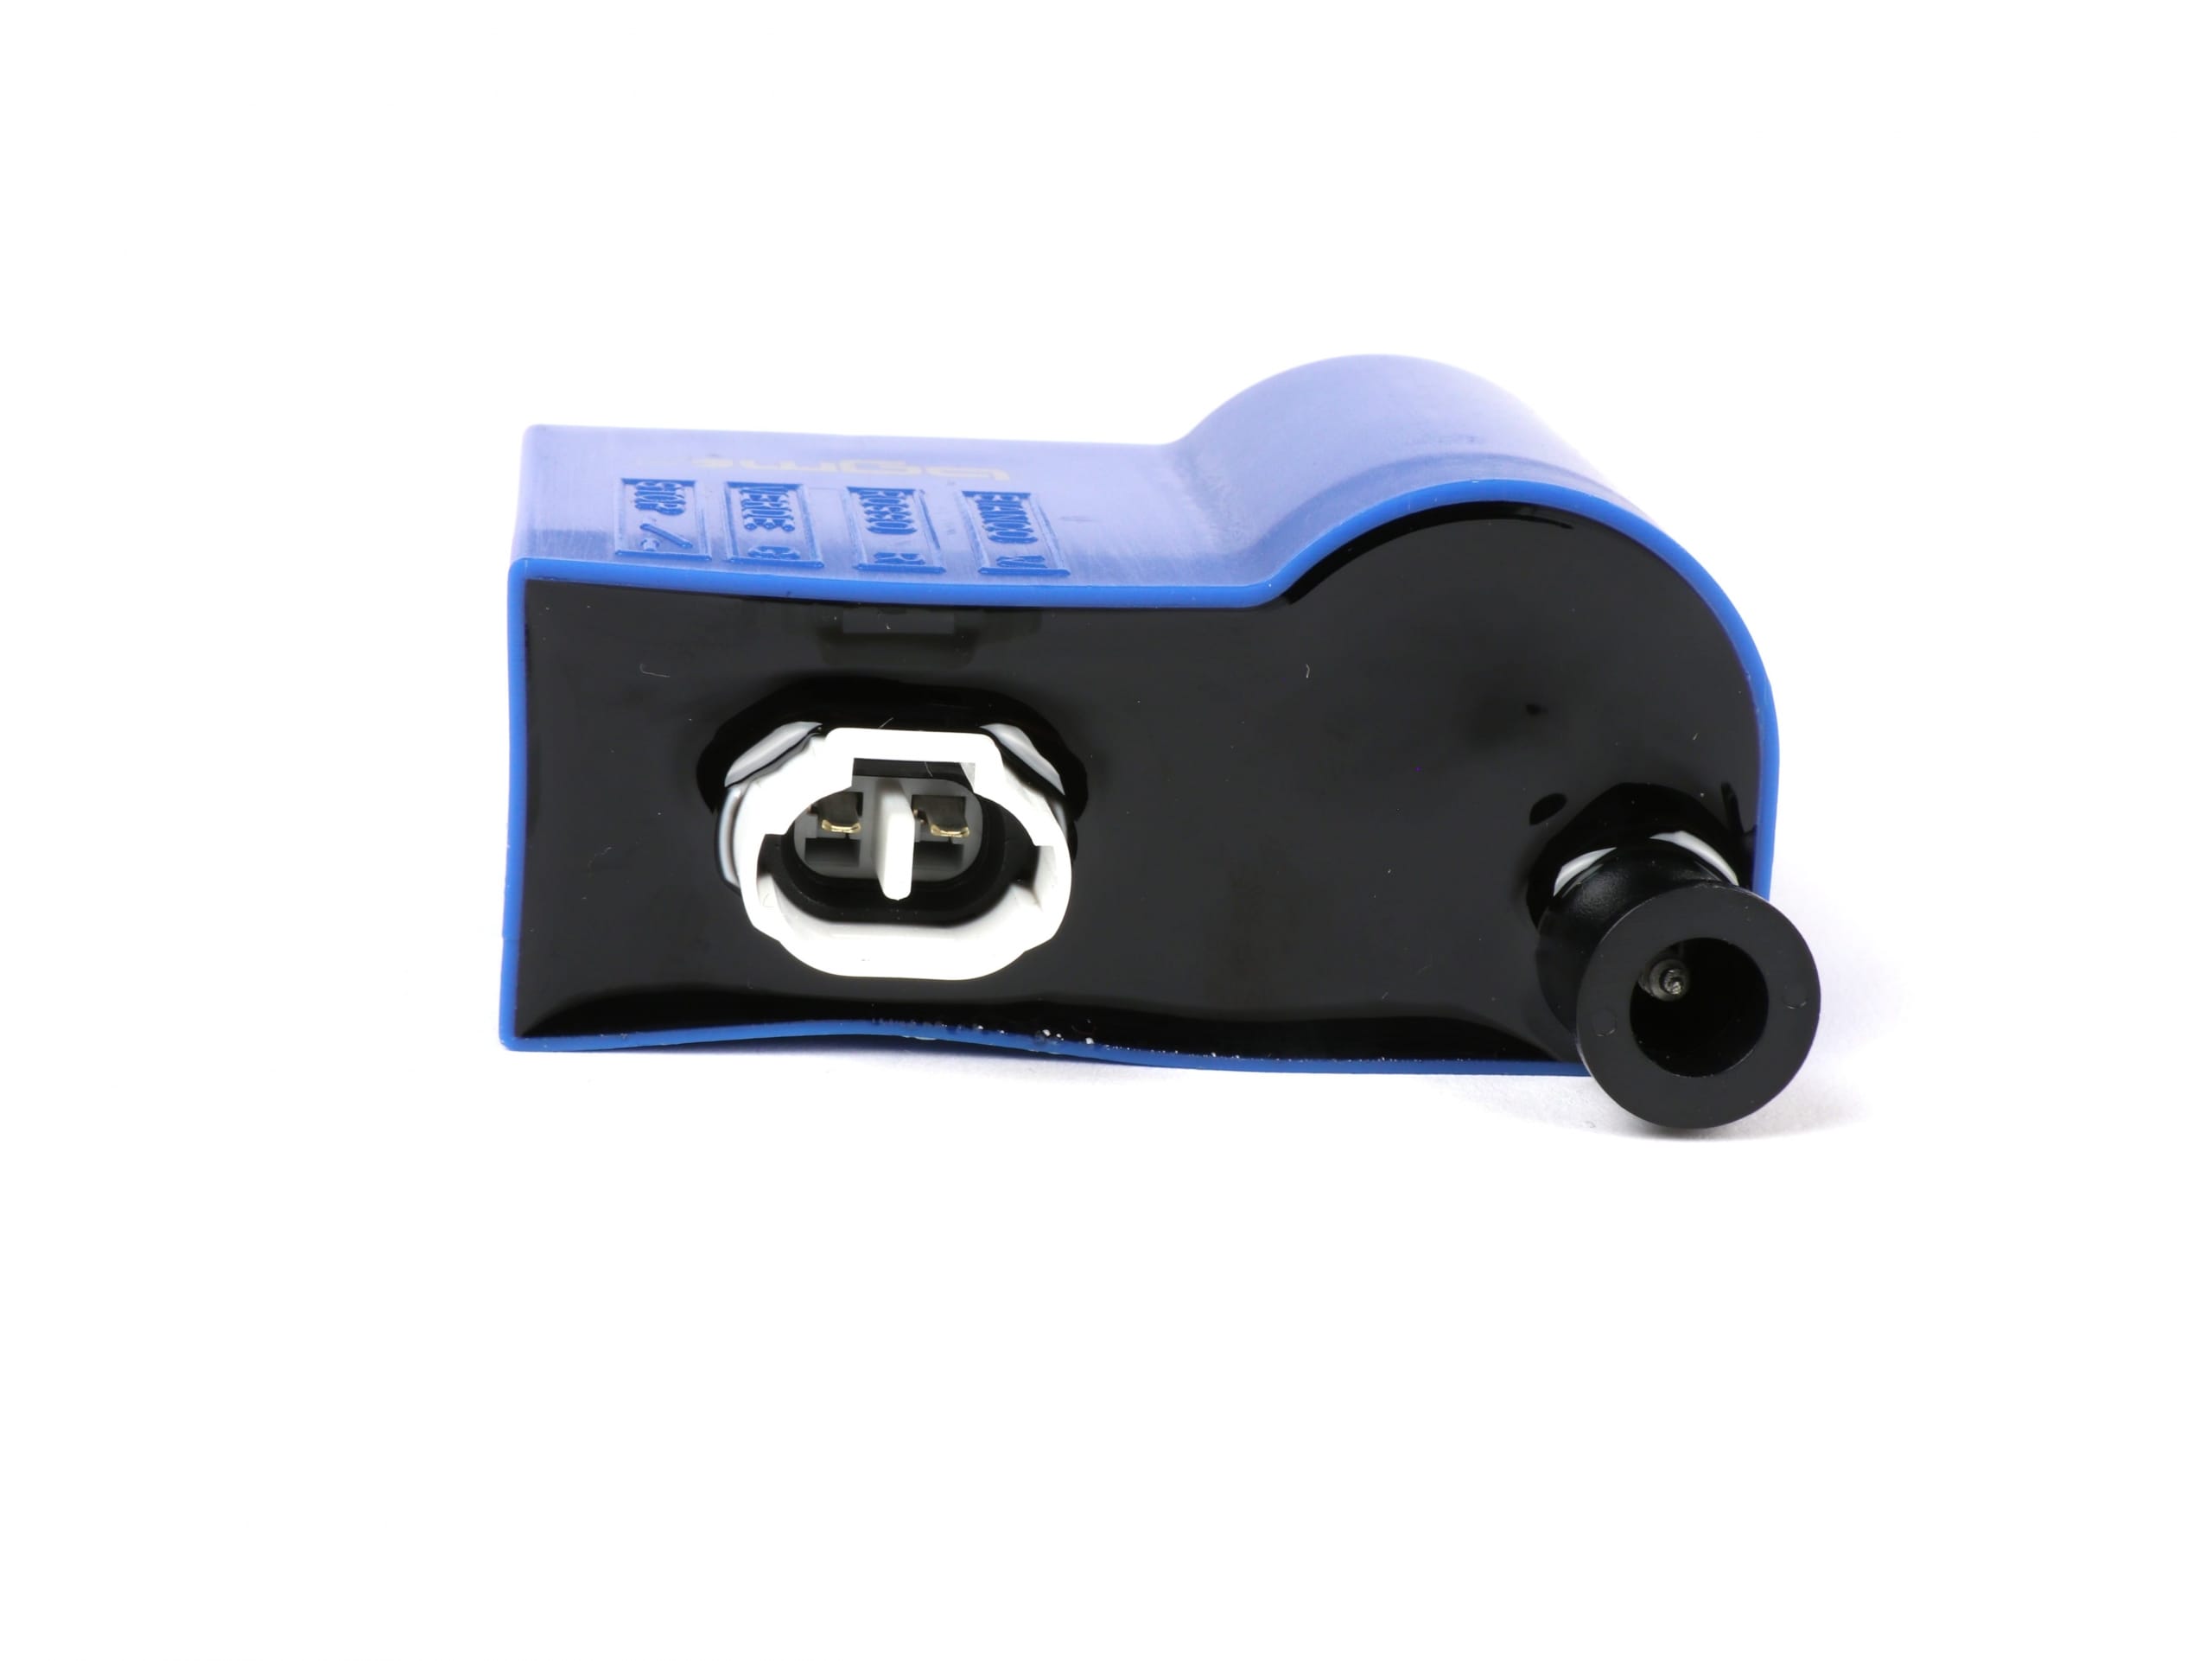
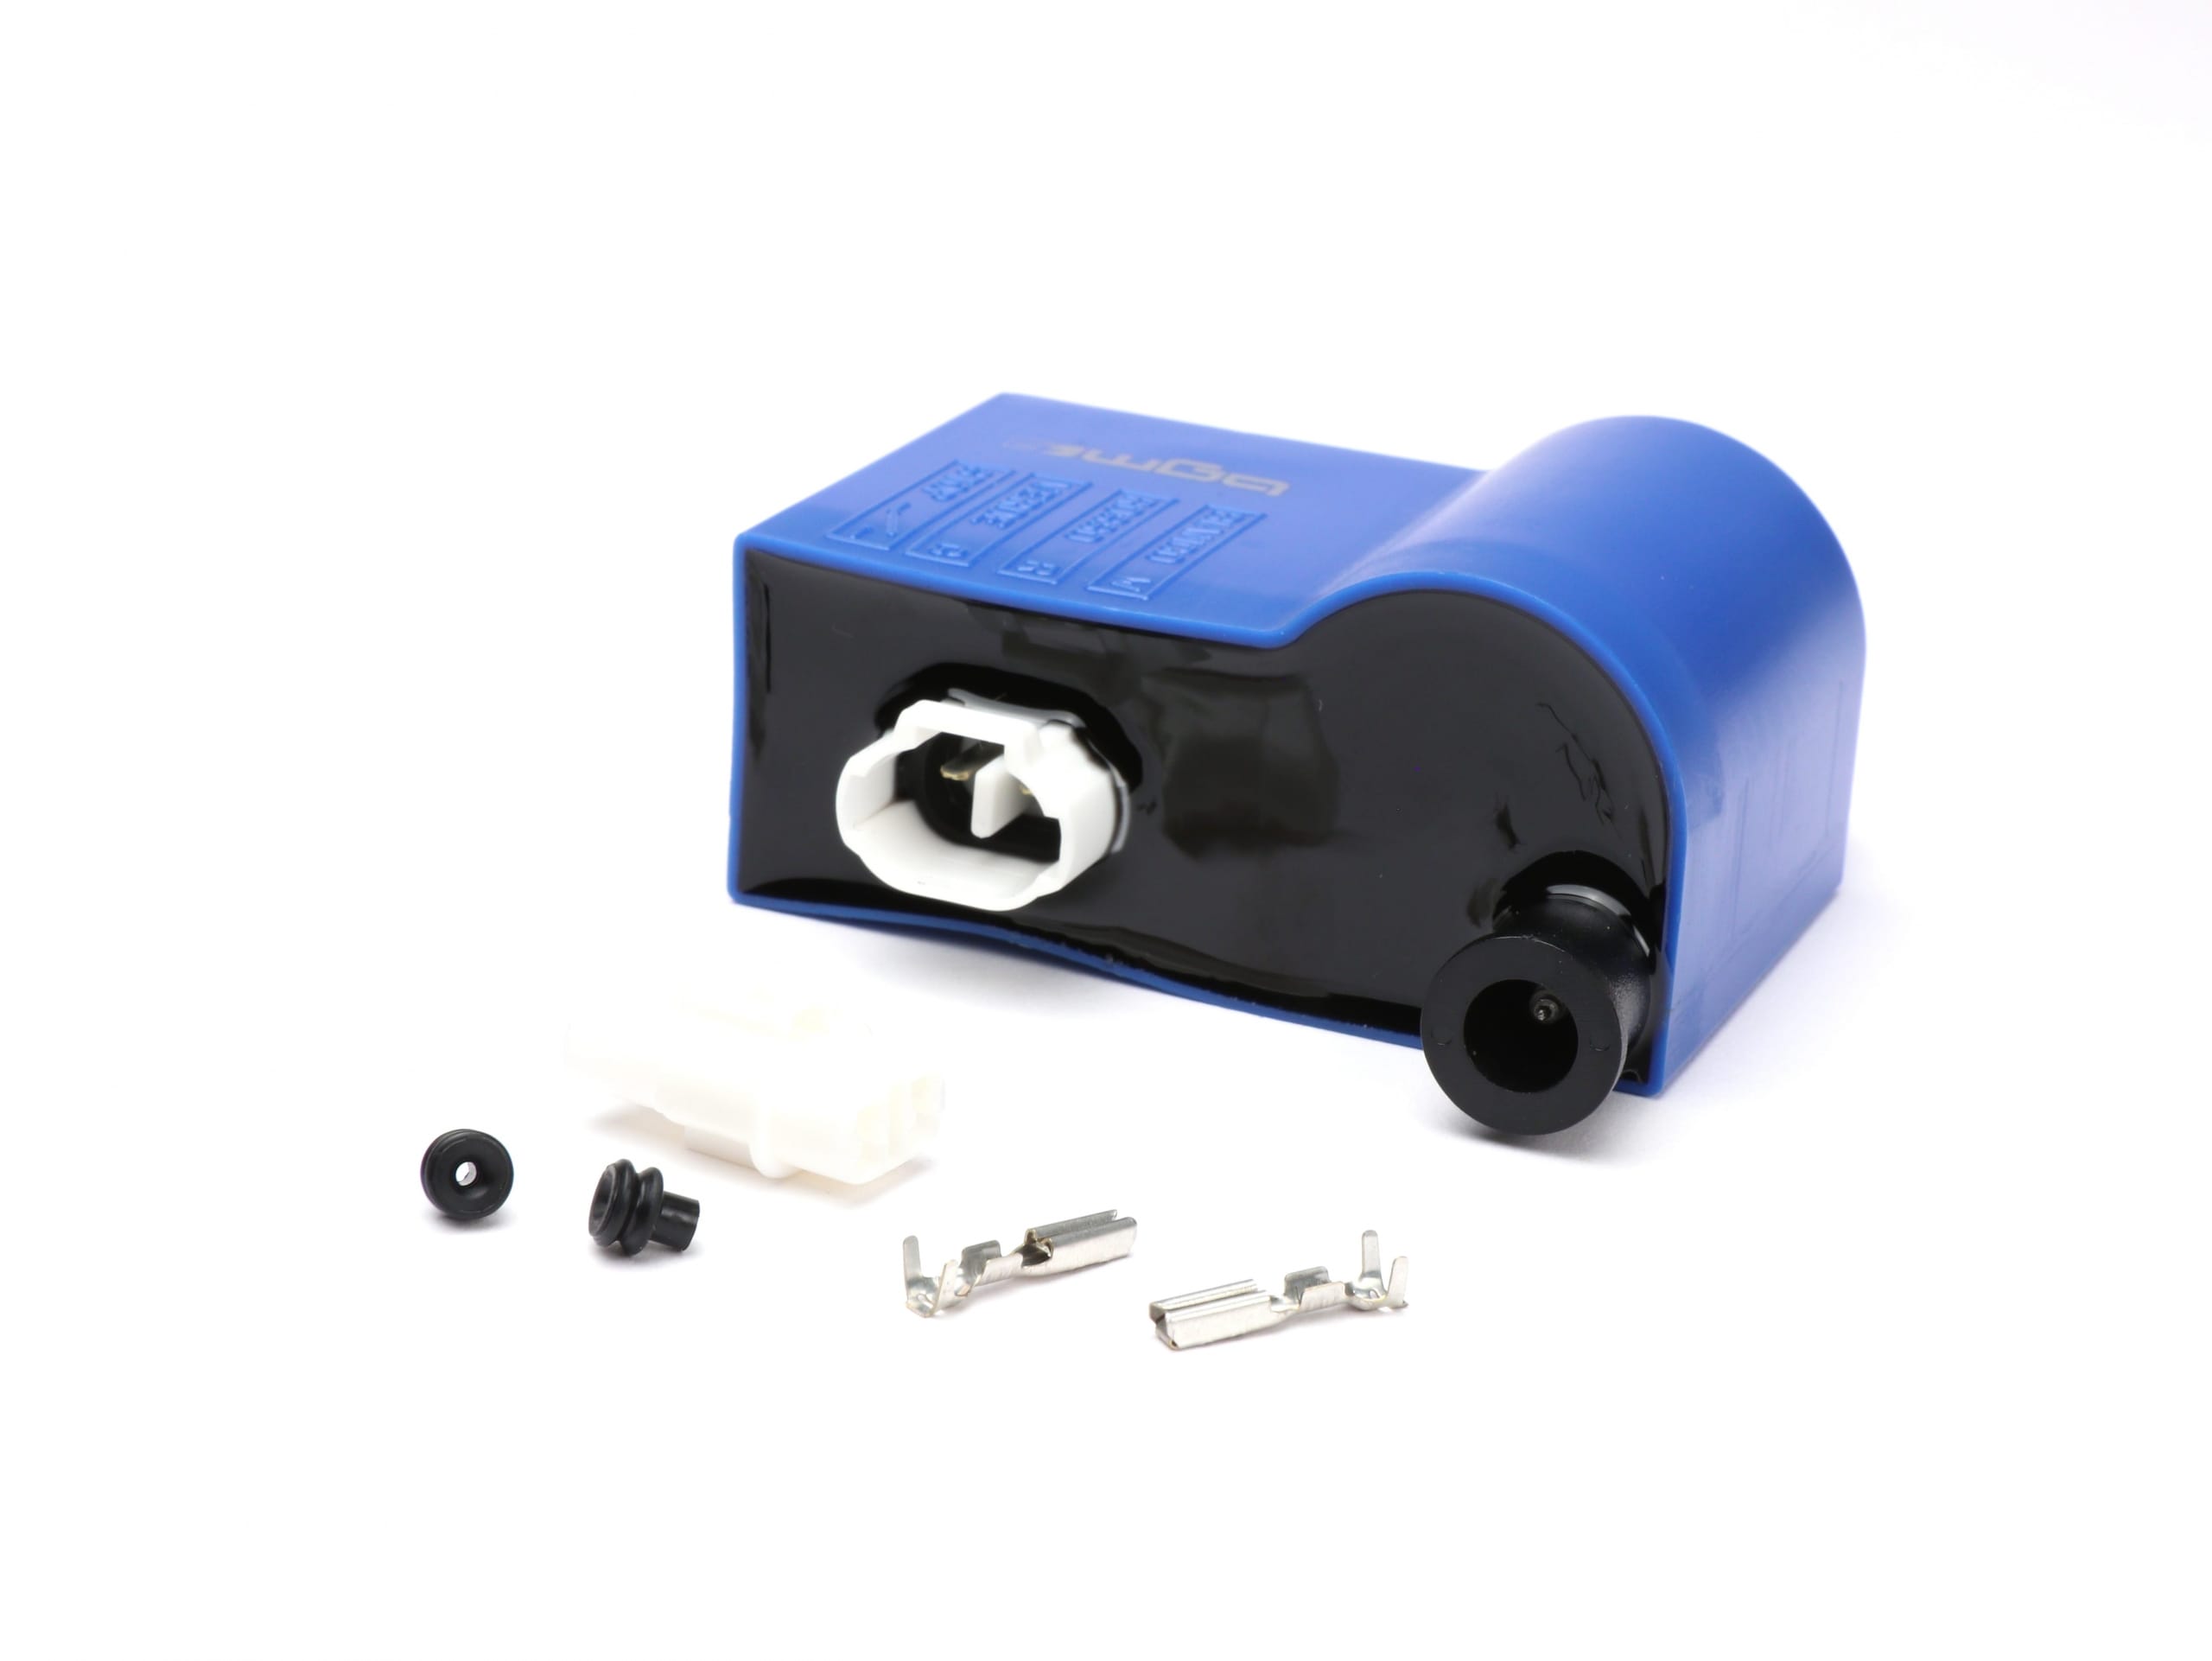
Compared to an original IDM CDI, that is Ignition cable can be screwed in. Ideal if the CDI should be positioned differently or simply the ignition cable should be replaced.

CONCLUSION:

The perfect addition to high-torque tuning motors that are supposed to get even better.

How do I adjust a carburetor? Tip set tip

Adjust the carburetor with the precision part carburetor nozzle

For the Setting the ignition there are now excellent tools like that buzzwangle or Walthat allow a precise ignition position and make work extremely easy. Adjusting the carburetor, on the other hand, is the most difficult part of tuning a scooter for many.

If setting the air mixture and the idle gas is still child's play, it becomes more time-consuming to determine the correct nozzle sizes for the individual engine setup. Here, the carburetor needles, nozzle assembly, main and auxiliary nozzles interact and, perfectly coordinated, result in a clean setup.

If you choose a nozzle that is too small, the engine runs too lean, gets too hot and major damage is inevitable.
Too large a nozzle and too rich adjustment can lead to engine damage. Quite apart from the fact that the capacity of the engine is not exhausted and working time and money for elaborate tuning literally fizzle out.

How do you adjust a carburetor?

As an example for a Lambretta, we have prepared the PDF, which is described in detail and illustrated, with suggestions for the setup for you.
Free download here: Lambretta carb jetting by Scooter Center

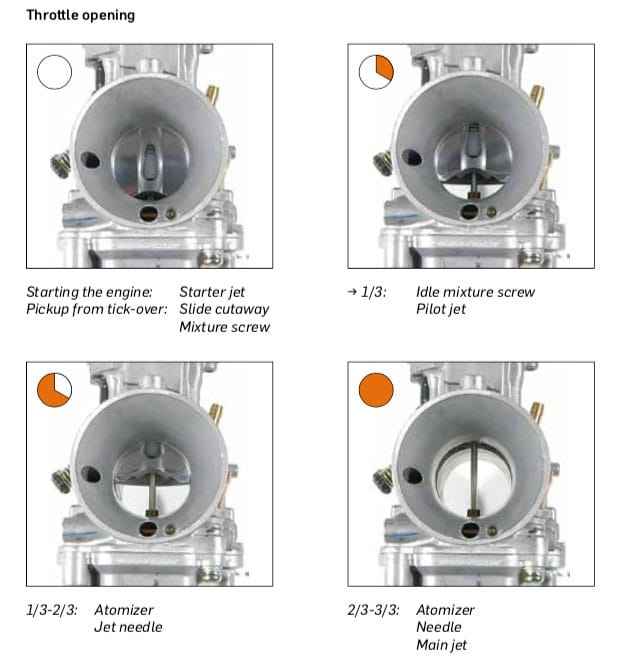
From the tutorial - when does which nozzle come into play?

Adjust the carburetor

Precision product carburetor nozzle

DellOrto nozzles, for example, are stamped with a number that refers to the size of the hole. A 100 nozzle has a diameter of 1 mm, a 115 nozzle is 1,15 mm (!!) only a tiny amount 0,15 mm larger!

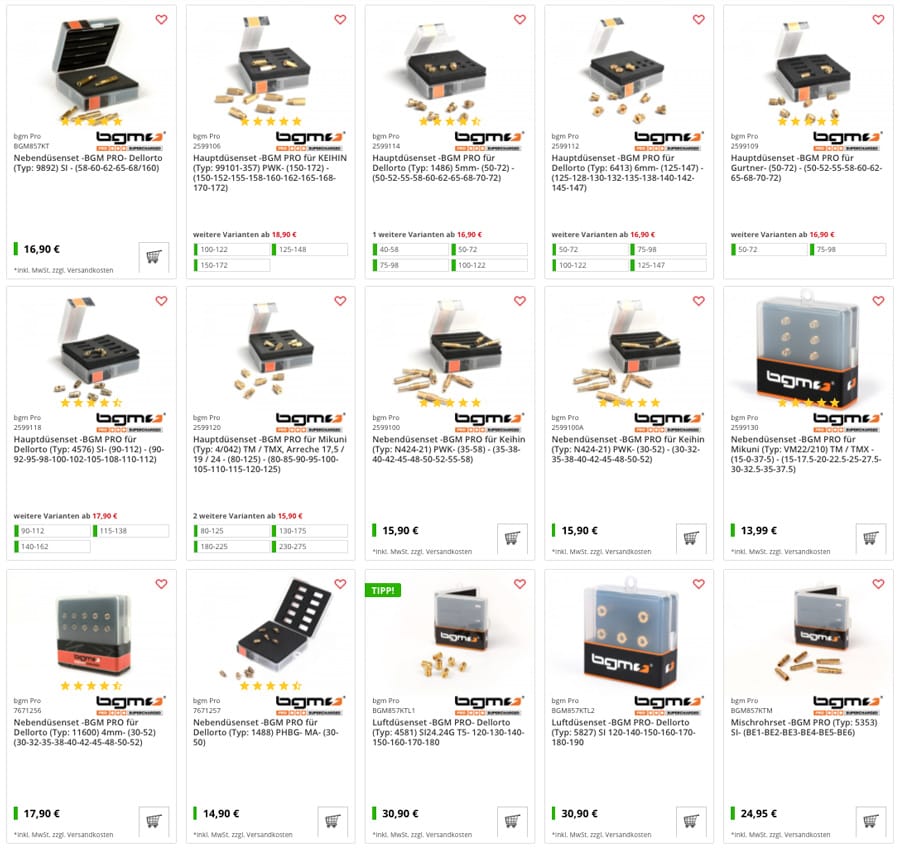
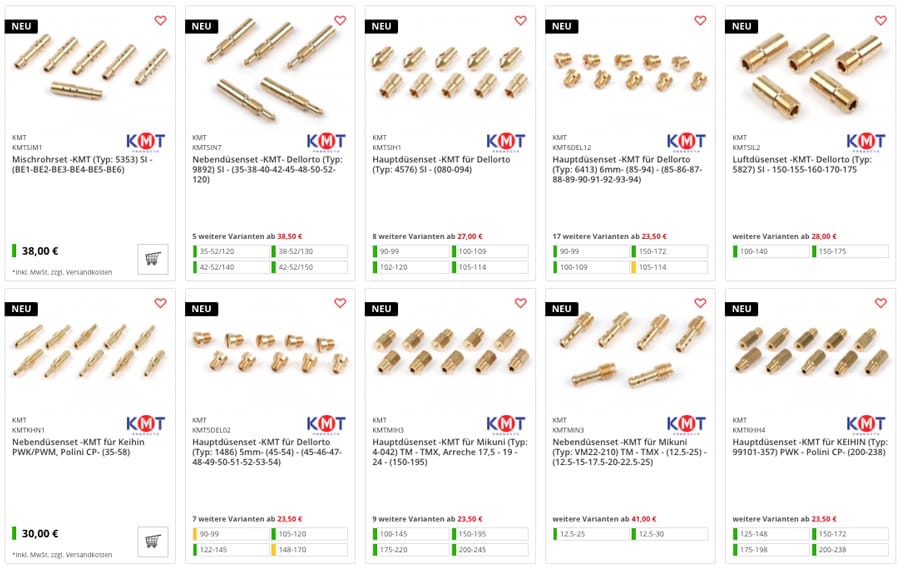
If you want to be on the safe side here and rely on high-precision tuning, we recommend using the nozzles bgm PRO or KMT to fall back on. These nozzle sets are characterized by

  • high-precision drilling
  • minimal tolerances
  • meticulously precise graduation of the nozzle sizes
  • easy to read numbers
  • high quality of workmanship and material
  • Quality control
  • including storage box


Precision nozzles from bgm PRO or KMT for clean engine tuning

You have invested a lot of love, time and money in your engine tuning. But the most expensive and complex tuning, with the best components, is of little value if the engine does not run smoothly or if a poorly adjusted carburetor does not allow optimal combustion. In order to be able to tune the engine correctly, high-precision carburetor nozzles are a very important prerequisite and make adjustment a lot easier!


Nozzle sets from bgm PRO

bgm PRO carburetor nozzle set

Nozzle sets from KMT

KMT jets made in england


Quality assurance bgm PRO carburetor nozzles tested under the microscope

We had the new bgm PRO carburetor nozzles checked at an institute. Here is a glimpse into a 118 nozzle, with a dimension of 1,1779 mm, the bore is in the green area with a deviation of only a thousandth of a millimeter and is therefore OK!

Air filter fleece insert Vespa

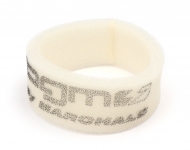
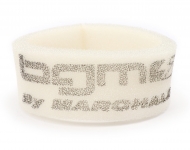
bgm PRO air filter fleece insert for air filter box Vespa Smallframe V50, 50N, PV, ET3

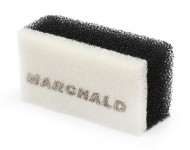
For the Vespa SmallframeModels with DellOrto SHB carburetor we have a high quality Filter fleece from bgm PRO developed. Made in Italia by Marchald.

The new bgm PRO air filter element replaces on all Vespa Smallframe-Motors with sheet metal air filter box use the original wire mesh and can be exchanged 1: 1 easily, quickly and safely.

bgm Vespa air filter fleece Vespa Smallframe & Motovespa – without wire!

Benefits

  • Significantly better and finer filtering
  • Protects the engine as no fragments of the old wire mesh can be sucked in
  • Also ideal for performance-enhanced engines with increased air requirements
  • washable
  • Easy installation


Installation

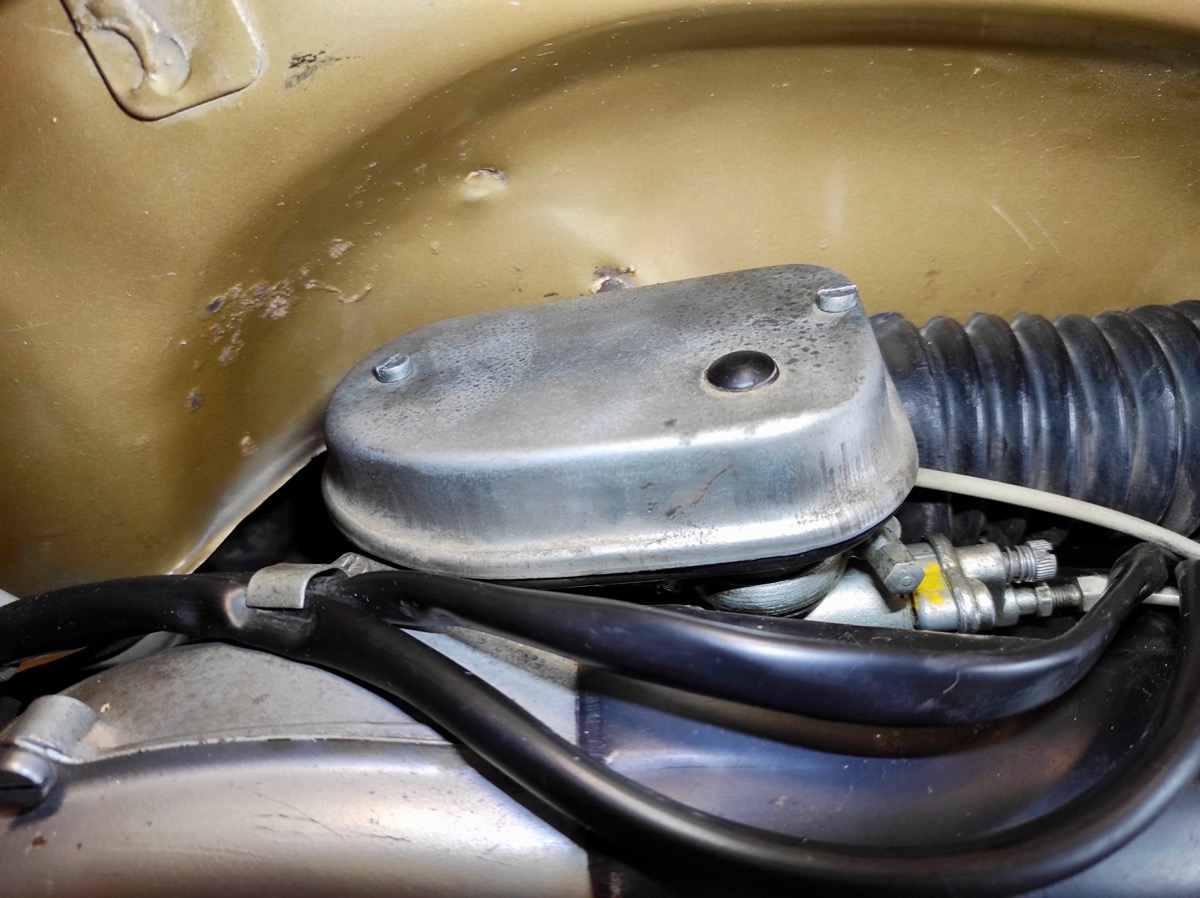
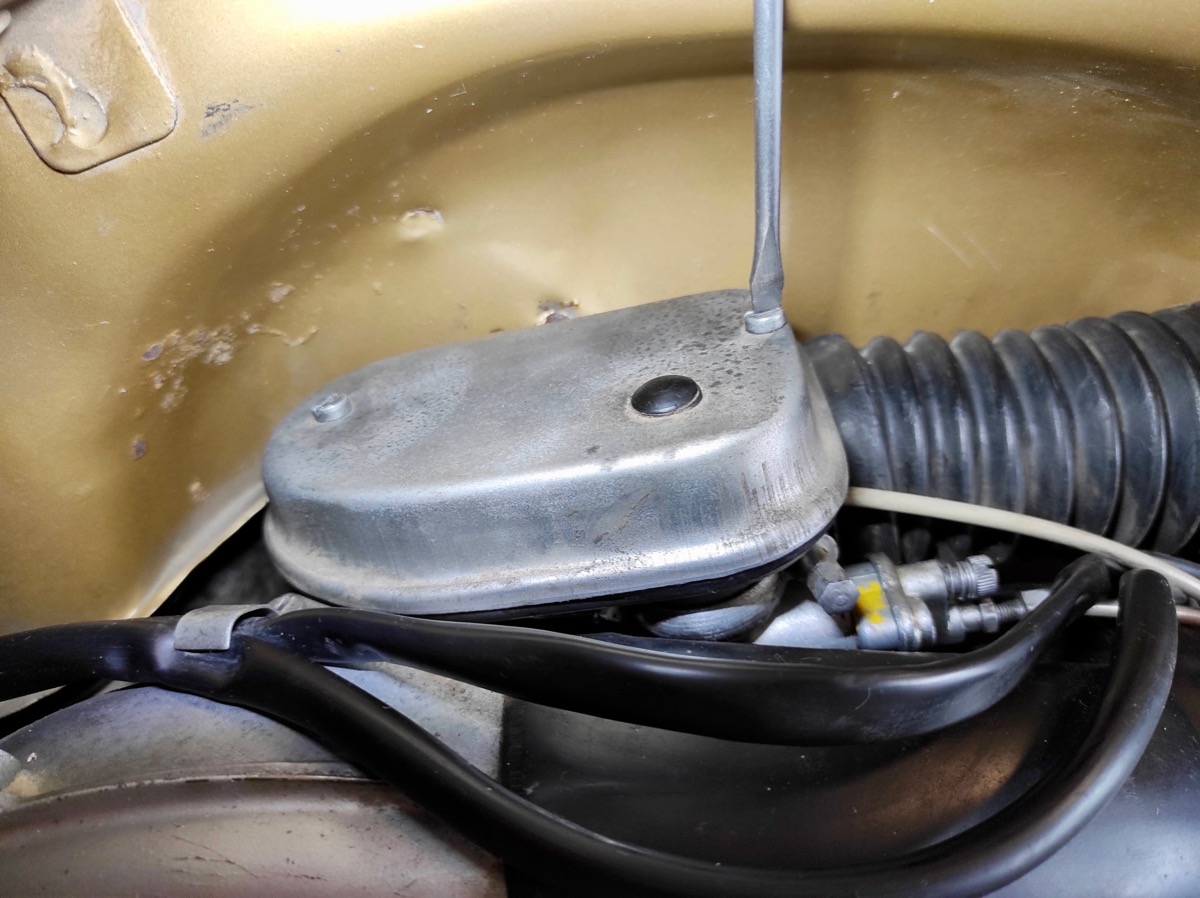
1. The air filter box

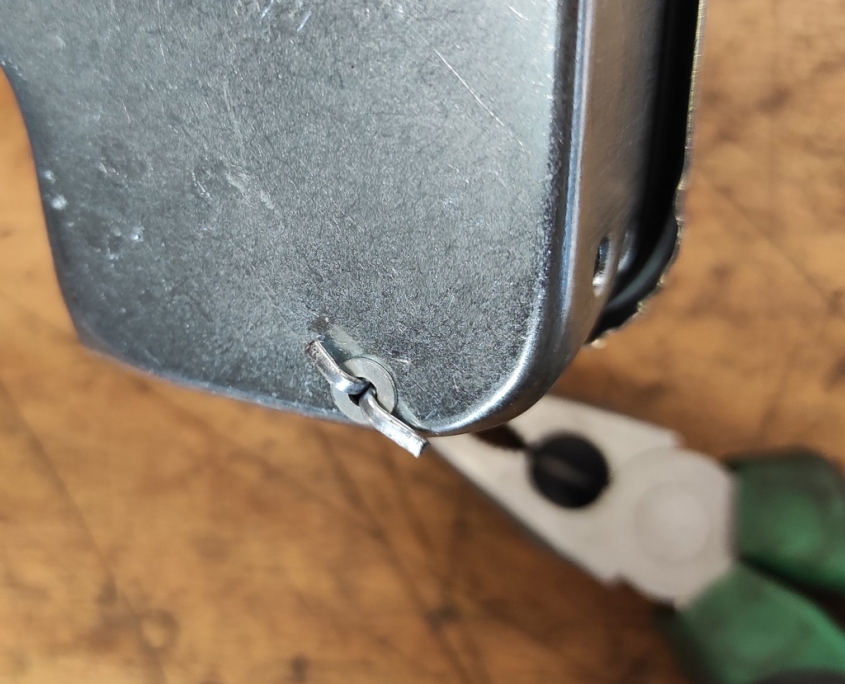
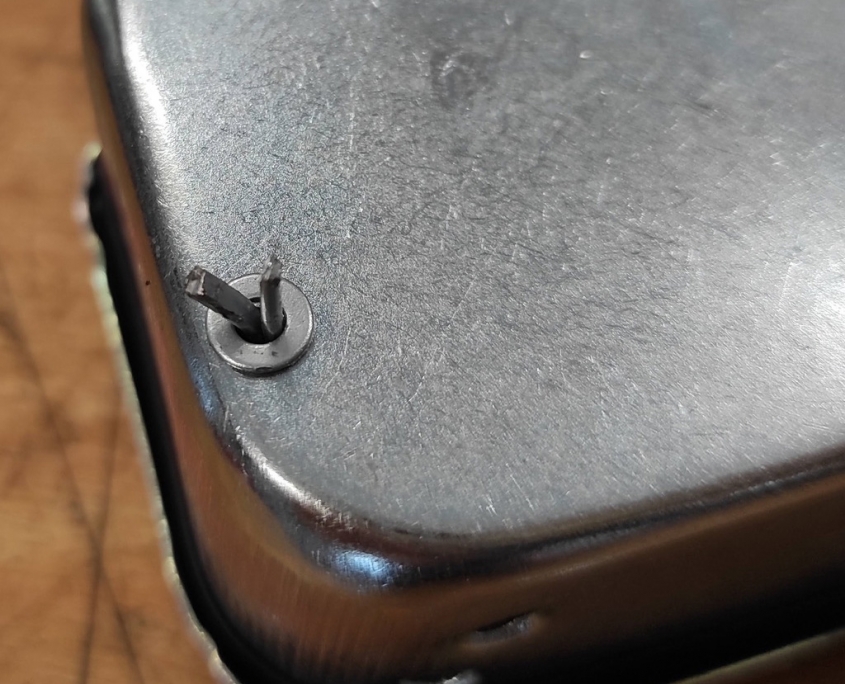
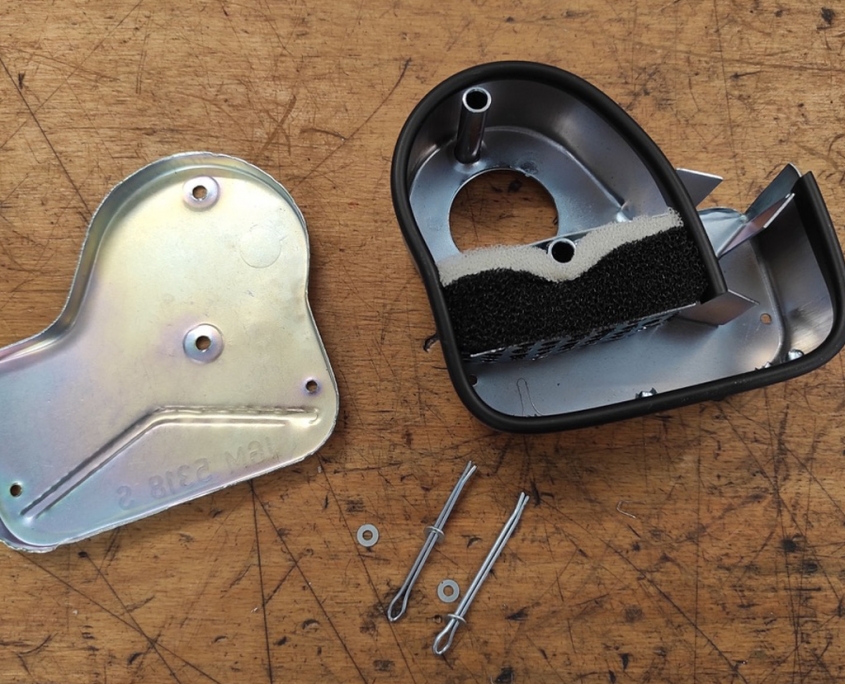
The sheet metal air filter box of the Vespa is held together with two split pins. On the back of the air filter box, the ends of the split pins are bent over as a safety device.

Vespa sheet metal air filter box

2. Remove the split pins and collect the washers

Use suitable pliers to straighten the ends of the two split pins and pull out the split pins. Pay attention to the location of the washers.

Vespa air filter box fuse with cotter pin and washer

3. Remove the cover

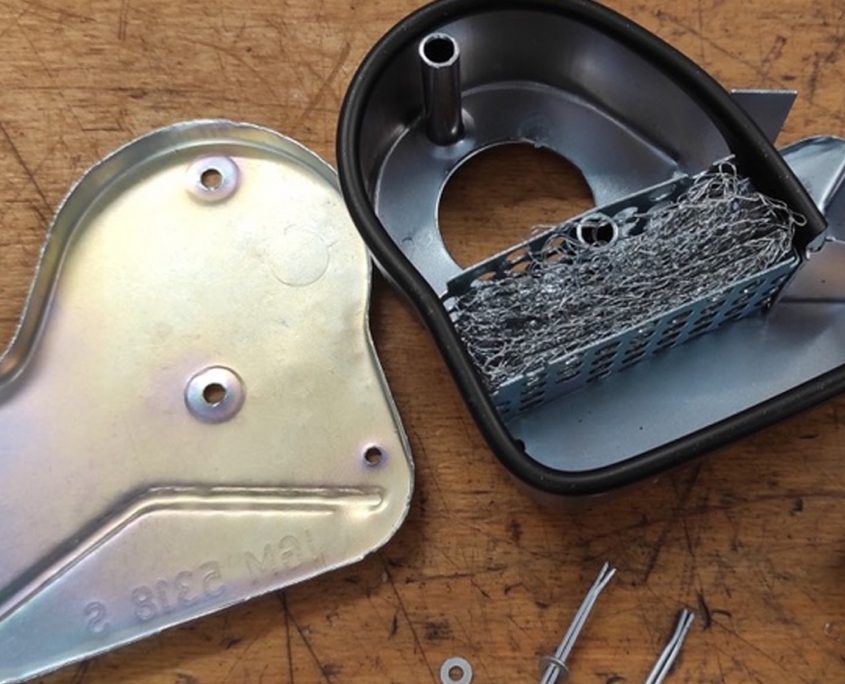
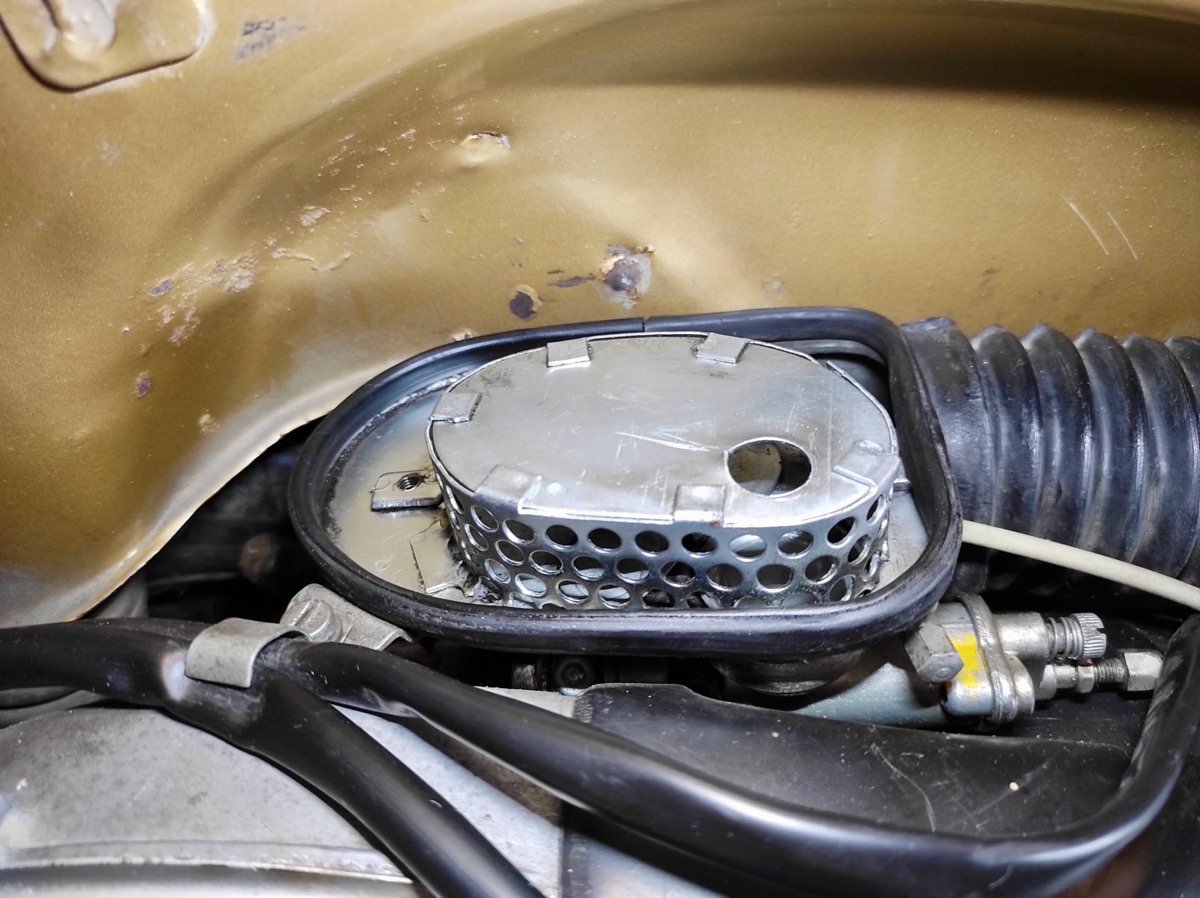
The lid can now be easily removed and the original wire mesh, the air filter, becomes visible.

Vespa air filter box wire

4. W-Lan air filter? Our wireless solution

Simply pull the old wire mesh out of its compartment and clean the air filter box.

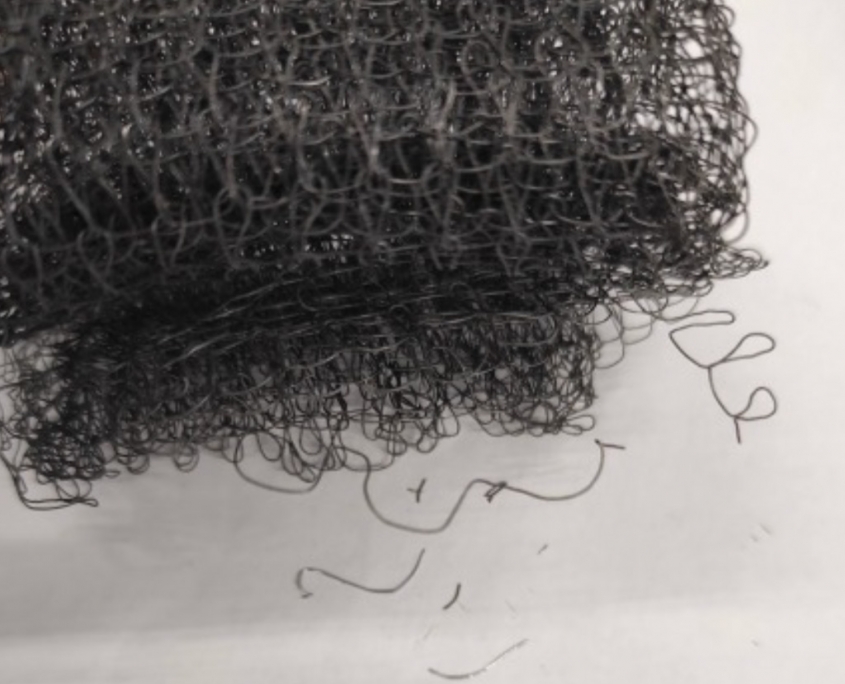
Due to aging and vibrations, the original wire air filter has a tendency to break the individual wires. These fragments are then loosely in the air filter box and can be sucked in by the engine.

Wireless air filter

5. Insert new bgm PRO fleece

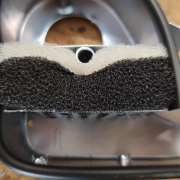
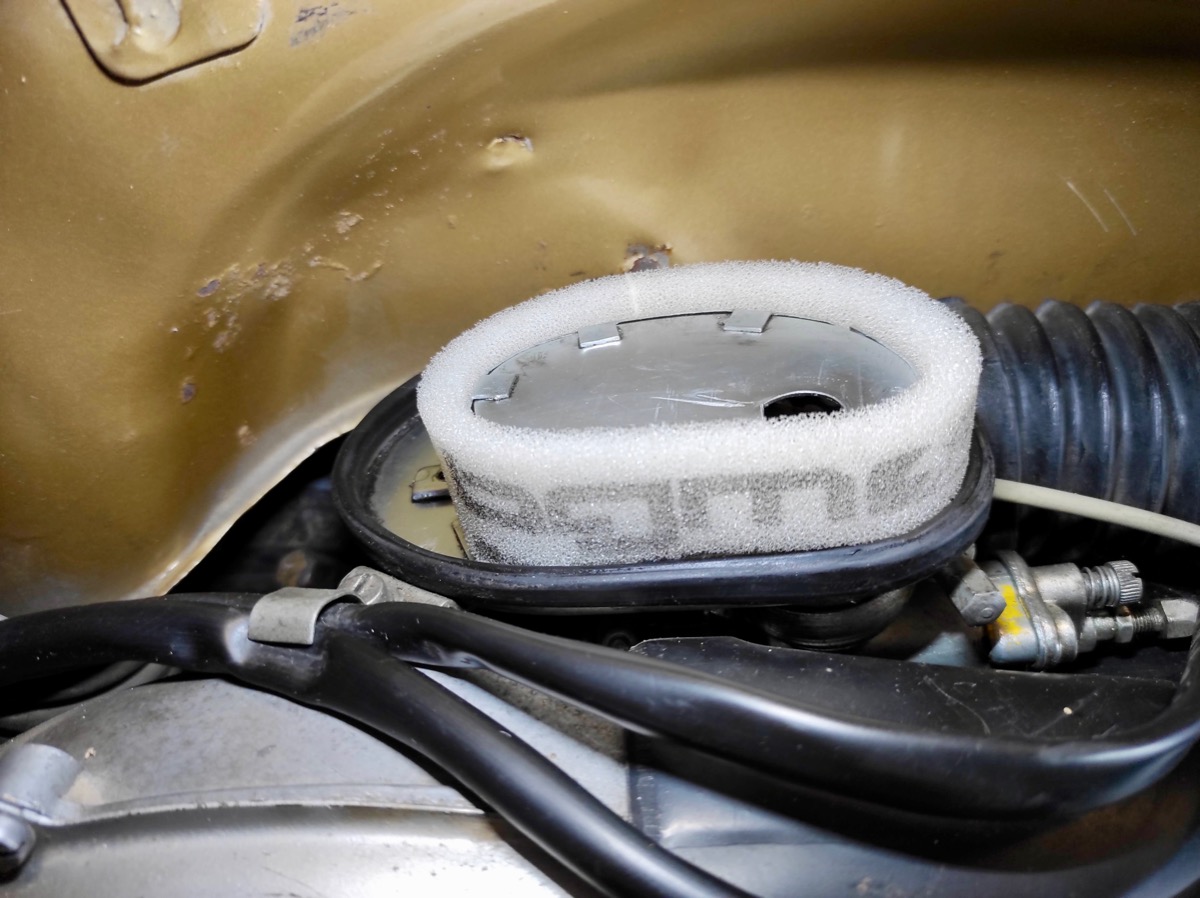
After you have cleaned the box well and freed it from the dangerous wire residues, you can now insert the bgm air filter insert into the compartment of the air filter box. Position the fleece in such a way that there is sufficient protrusion for sealing in the direction of the air filter box cover.

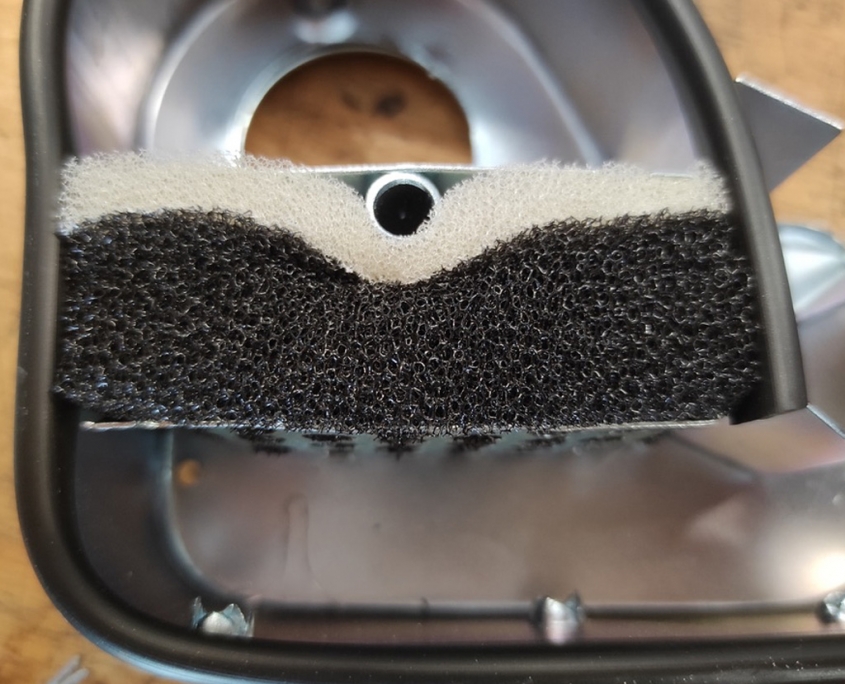
When inserting the air filter insert, make sure that the black, coarse part of the filter mat points in the suction direction, i.e. downwards.

Air filter fleece insert Vespa

6. Close and mount the air filter

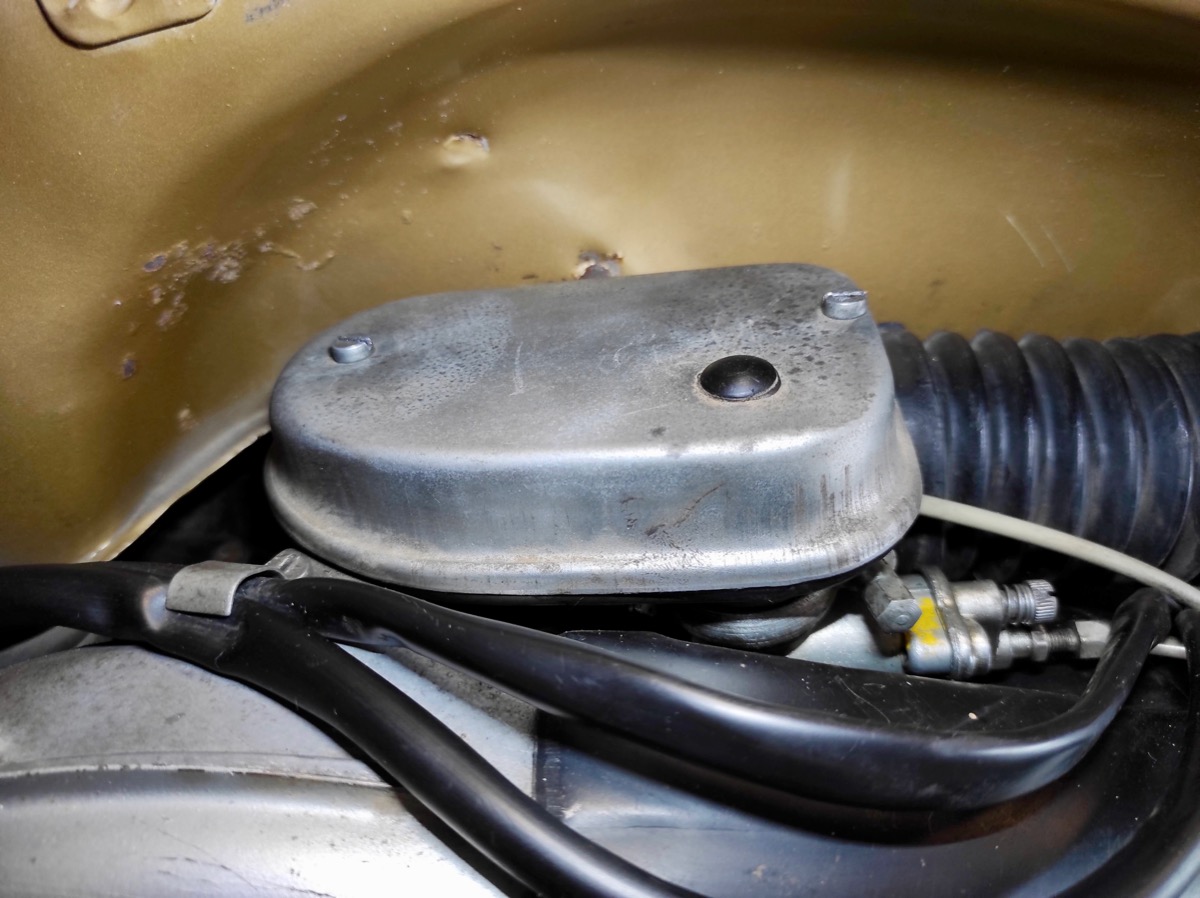
Then put the air filter cover back on and secure with the split pins.

When installing the split pins, make sure that a washer is positioned under the head and one under the ends.

Vespa air filter Smallframe

Vespa Smallframe Vehicles with sheet metal air filter box

Motovespa air filter element bgm PRO

Air filter insert BGM for Motovespa air filters

With many Motovespa Largeframe The identical air filter inserts are installed in the models.

Often the important component to protect the engine is missing or is no longer in a usable condition. That's why we have the Vespa for the Spanish license builds Largeframe Models one high quality air filter insert made.

bgm Vespa air filter fleece Vespa Smallframe & Motovespa – without wire!

Air filter fleece bgm PRO for Motovespa Largeframe

High quality filter fleece from Marchald (Italy), manufactured for bgm PRO.
Suitable for the direct intake engines (carburetor sits directly on the cylinder) of the Largeframe Motovespa engines.

  • 1: 1 replacement for the original wire mesh.
  • Significantly better and finer filtering with a higher air throughput at the same time.
  • Therefore also ideal for engines that have already been upgraded.
  • Washable.

Installation instructions air filter element Motovespa

Replacing the air filter element is very easy. After removing the right side panel, the view of the air filter box is immediately clear.

Motovespa air filter box Vespa

Open and remove the air filter box

The cover is attached with two M5 screws.

These can be loosened with a screwdriver size 5 to 6.

The Motovespa air filter

After removing the two screws, the cover can simply be lifted off.
Here, in our example, is the original one Motovespa air filter insert no longer available at first!

Attach the air filter insert

The air filter insert has no installation orientation and can simply be pushed onto the filter housing from above.

Close the air filter box

The remaining protrusion of the air filter insert seals against the air filter box cover when installed.

Fasten the cover of the air filter box again with the two screws, reassemble the side panel and the change is complete.


Air filter cleaner and oil

In order to achieve an even higher filter performance, the air filter insert with air filter oil can be used.
However, this is necessary due to the high quality filter material of the bgm PRO filter is not absolutely necessary.

Air filter oil and cleaner

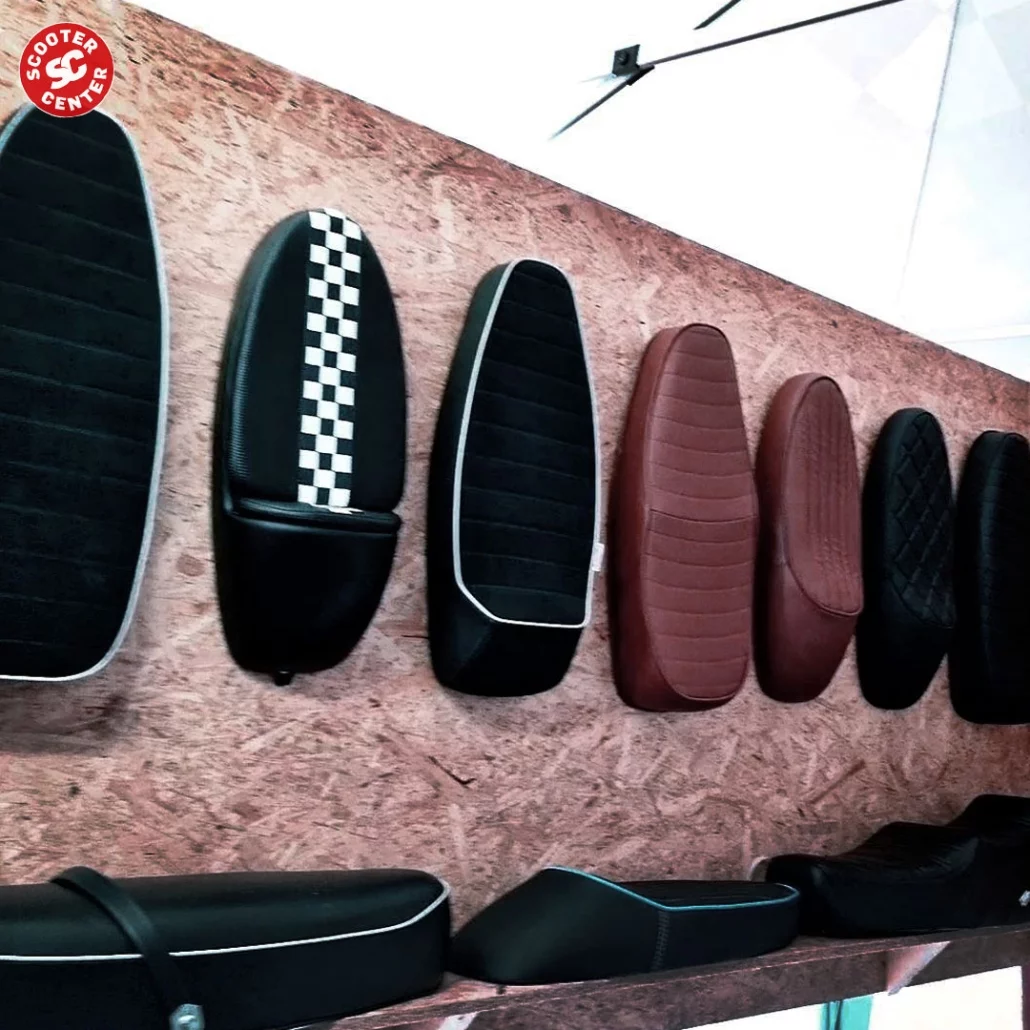
bgm PRO Sport seat Vespa sport seat

bgm PRO “Sport” sports bench made by Nisa Italy

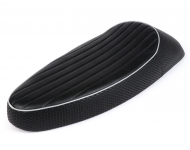
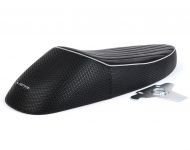
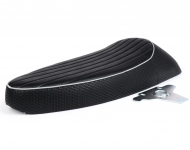
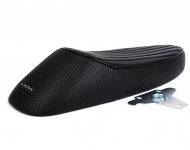
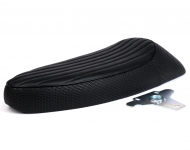
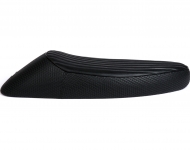
We have one based on the very popular Nisa 'Sport 20' bench Sports bench Designed for the classic Vespas in bgm design and had the bench made by the Italian bench manufacturer NISA as a bgm version. The new bgm PRO sports seat is available for Vespa Largeframe and Vespa Smallframe and is available in two versions:

Sports bench with an authentic look

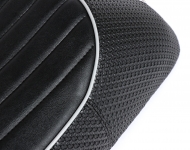
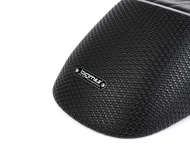
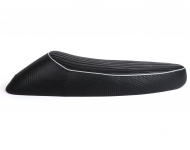
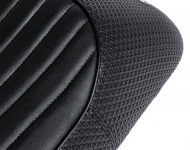
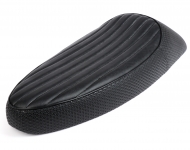
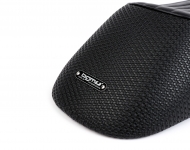
The BGM Pro Sport bench has a beautiful Alfatex cover (embossed waffle pattern) on the sides and back and is also available with gray piping. The seat is also provided with a smooth cover with parallel longitudinal seams. For a waterproof surface, these are embossed, not sewn.
The appearance of the BGM Pro Sport is strongly reminiscent of the classic seat humps of the 70s and conveys a cool race flair even when the vehicle is standing.

Vespa Sport seat bgm PRO Made in ITALY by NISA Vespa seat

Vespa seat configurator

You can also find the bench in the Scooter Center Bench configurator, take a look at the seat on your Vespa model:

Sports bench suitable for everyday use

In everyday practical use, it is very easy to drive despite its sporty look. The bench has a pleasantly dimensioned foam padding on which even long tours are fun. A nice feature is the completely padded hump. This offers a good grip when riding solo, but can also be used as a pillion seat if necessary.


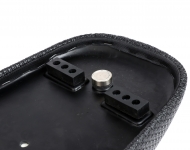
Modern magnetic closure

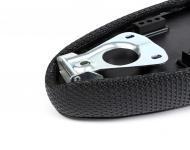
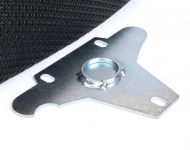
Another intelligent feature is the bank's magnetic lock with an extremely powerful neodymium magnet. The bench can be opened easily with one hand, but still holds better than many classic hook fasteners. The greatest advantage of the magnet technology is that the bench rests on the mounting plate, which is supplied and is firmly screwed to the frame. The magnetic force is so high that the ignorant who try to open the bench, assume that the bench is locked.

Top quality - handmade in Italy

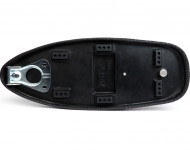
The bench frame is made of impact-resistant and durable ABS plastic. The cover is stapled all the way around and is therefore very securely and permanently attached (in contrast to pure gluing as is otherwise usual). The frame is provided with six rubber pads. So the load is distributed very well over the entire frame and the bench gives a very solid and full seating feeling. The bench hinge is typically very solid and solid and therefore very resilient. In addition, it is screwed and can be exchanged (in the highly unlikely event of a defect).

Available for Vespa Smallframe and Largeframe (Largeframe-Models with a high tank (GS160, SS180, Rally180 / 200 require the flat tank of the Sprint / PX models without an oil tank)

CONCLUSION: Nice flat bench with a great racing look but touring qualities!

Note for the LargeframeVersion and Vespa PX
For PX models only suitable for tank versions with a hinged lid.
Not suitable for Lusso models / vehicles with oil tank.


Order a seat:

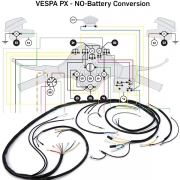
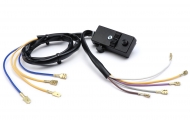
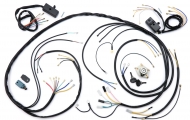
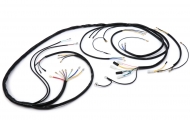
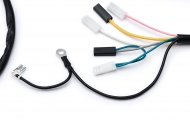
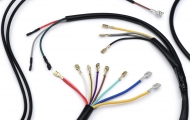
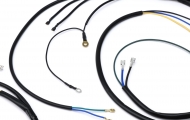
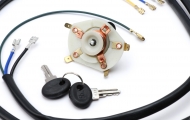
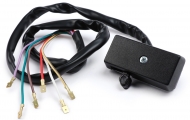
Cable harness BGM ORIGINAL suitable for all Vespa PX models up to year of construction 1982

You can now easily convert your old Vespa PX with battery

A modern electrical system without a battery on your scooter does not destroy the optics, it is a invisible and economical additional gain in security and comfort, then

  • Without a battery, there is no need to purchase / replace or maintain the battery
  • Your electrics and all consumers work regardless of the condition or charge level of the battery
  • You efficiently prevent corrosion damage to your Vespa PX from battery / battery acid that has boiled over
  • Significantly more safety through increased light output = increased visibility = better to be seen & and better seeing


Conversion wiring harness for all Vespa PX models built up to 1982

This wiring harness is perfect for connecting your Vespa PX, which has a battery from the Piaggio factory, to a modern and maintenance-free  Electrical system retrofitting without battery. We offer an inexpensive and practical set with all the new switches and ignition lock you need (BGM6685KT).

In addition, this is for an exchange / restoration of the PX wiring harness in the Italian version for models without battery. In this case, the indicators, the horn (so-called buzzing) and all other consumers are supplied with power directly via the AC on-board network. The ignition base plate used in these vehicles is suitable for this with only 3 cables (contact ignition models) or 5 cables (vehicles with electronic ignition).

Vehicle models:

Vespa PX battery-free: conversion without battery

For the conversion of your scooter to the modern electrics, you need the following parts and in the future you will save the battery, the wintering and the care / maintenance of the vehicle battery

  • VOLTAGE REGULATOR
    Basically, the simple 3-pin voltage regulator (G | G | M) is used with this wiring harness (e.g. 9100001). The originally used 5-pin voltage regulator (A | A | B + | G | M) can still be used in vehicles that were delivered from the factory with a battery. Only connections B + and G remain unoccupied (formerly charging current for the battery). A better alternative is the compact and powerful BGM Pro voltage regulator (BGM6690). This can, for example, also supply a USB socket with 12V DC voltage for charging the mobile phone / navigation system etc.
  • IGNITION / IGNITION BASE PLATE / LIMA
    The type with 5 cables is used as the ignition base plate (also recognizable by the blue and black cables for the single power supply). The original 7-wire Lima of the battery models can no longer be used. However, due to their age, these very often show damage to the cable insulation anyway. A conversion to the more powerful ignition base plate of the later Lusso models (e.g. BGM8025N or BGM8032N) is therefore highly recommended. This increases the overall light output of the AC network considerably, as no more electricity is diverted to charge the battery. This means that old PX models can also be equipped with a 35 / 35W lamp. Most 5-wire alternators have a circular connector. The wiring harness offered here has (as in the Italian original) 6,3mm flat plugs. Either the wiring harness can be converted to a circular connector or the ignition base plate to a flat connector. The necessary parts can be found in the accessories.
  • FLASHING RELAY
    The battery models use a DC (direct current) flasher relay.
    After the conversion, an AC (alternating current) flasher relay is required (e.g. 1195703).
  • INSTRUCTIONS / WIRING DIAGRAM
    The following will help you connect the cables Instructions / wiring diagram.

Checklist: Spare parts / parts that are connected to the wiring harness

In order for everything to work, you should go through this list and check that your old parts are still OK. If not, you can order them directly in our Vespa shop using the link:

* 9512115? 9520072 + 9520074 / ** 9512027? 7675200 + 7675201
CONCLUSION: Absolutely sensible conversion to modern, more powerful and maintenance-free electrics


Tutorial installation wiring harness video instructions

This is a PX Lusso harness, it has different connections, so don't get confused. The basic principle of the pull-in is the same and this video tutorial may help you to route and connect the wiring harness in the body of your Vespa.


Tutorial SC – Vespa PX Lusso wiring harness instructions assembly installation Vespa wiring harness

New carburetor connection rubbers from bgm PRO

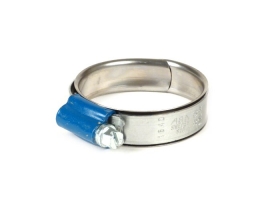
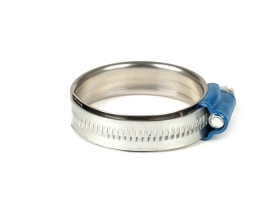
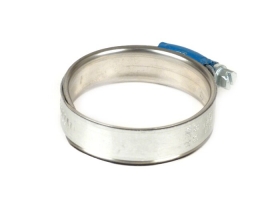
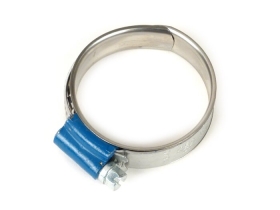
The 12mm wide hose clamps from ABA SAFE have proven themselves in countless long and short distance races and test kilometers.

The ABA Safe ™ clamp uses the elasticity of the suction rubber and protects this relatively soft rubber hose from damage. The tensioning force is increased on the profile beads, there are no sharp edges, which means that the 12mm wide clamps sit tightly without stressing the carburetor connection rubber.

bgm carburetor connection rubbers for 12mm ABA Save clamps carburetor rubbers Vespa & co.


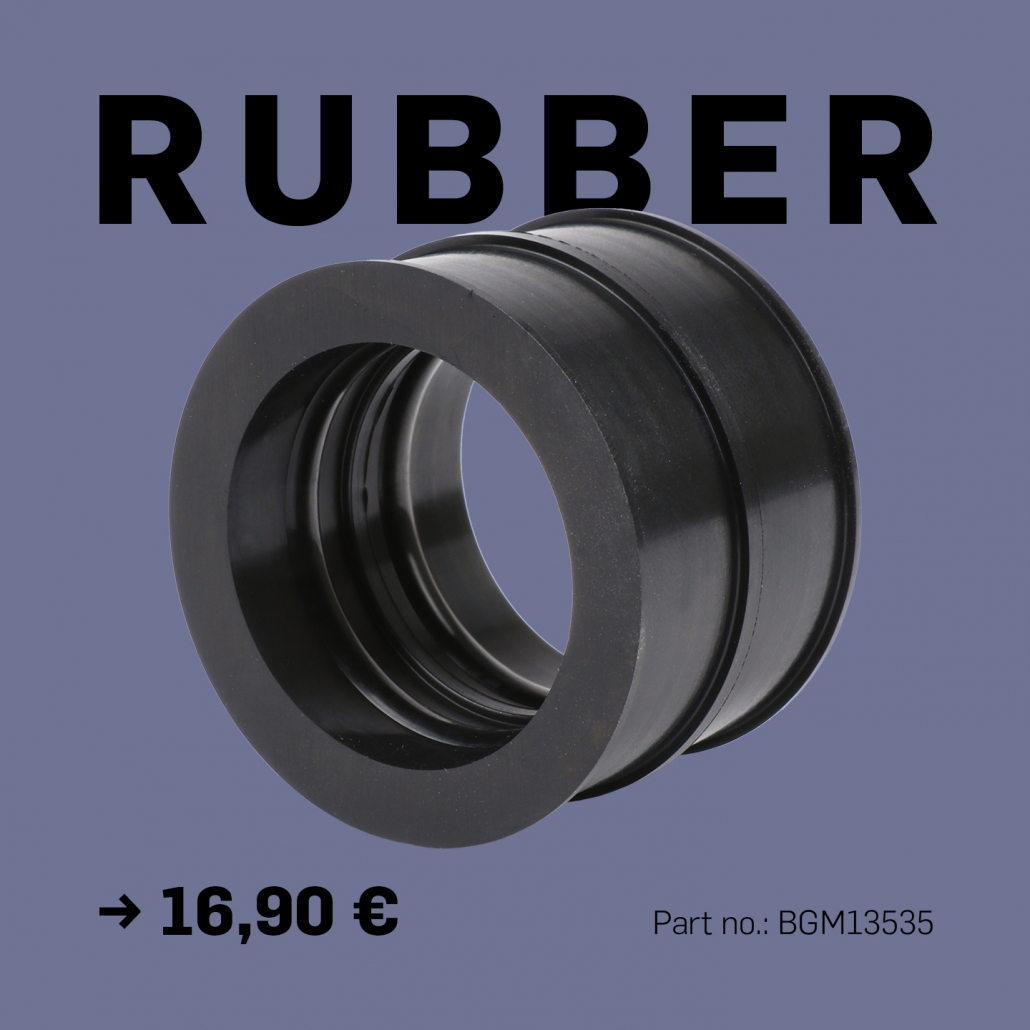
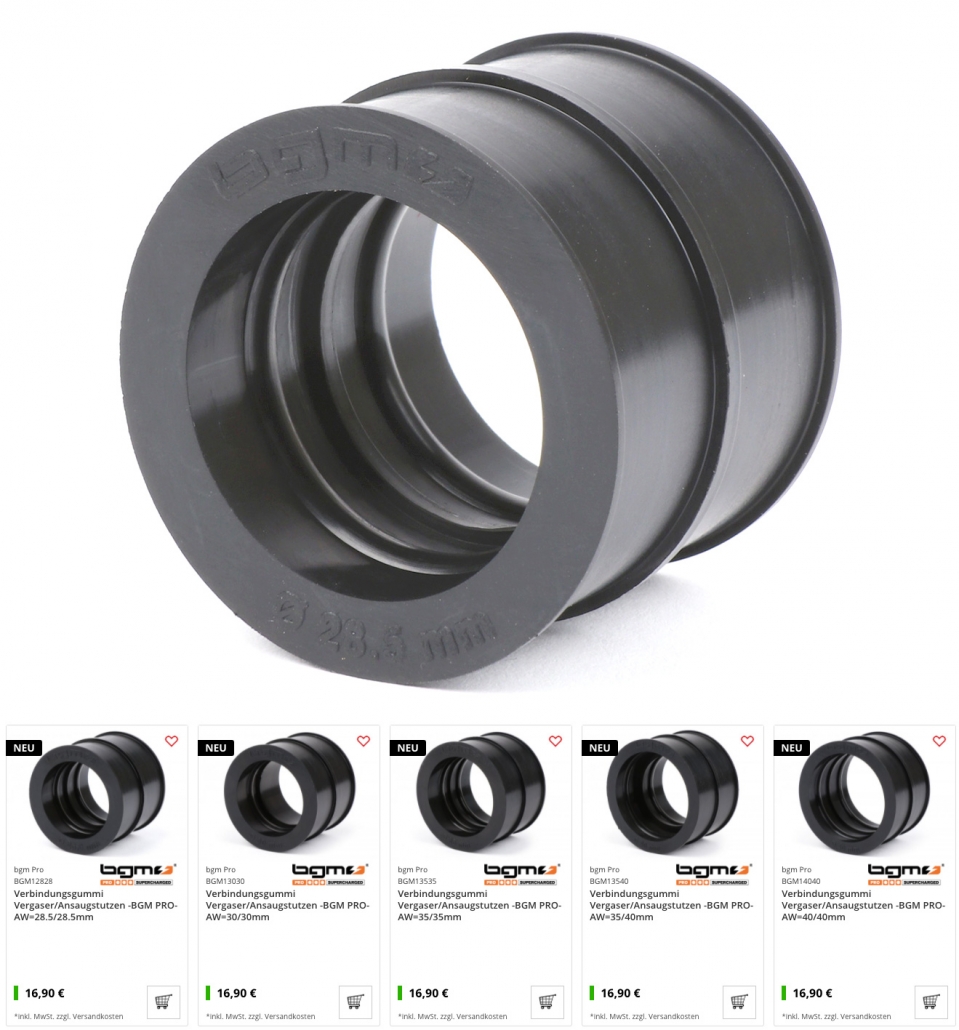
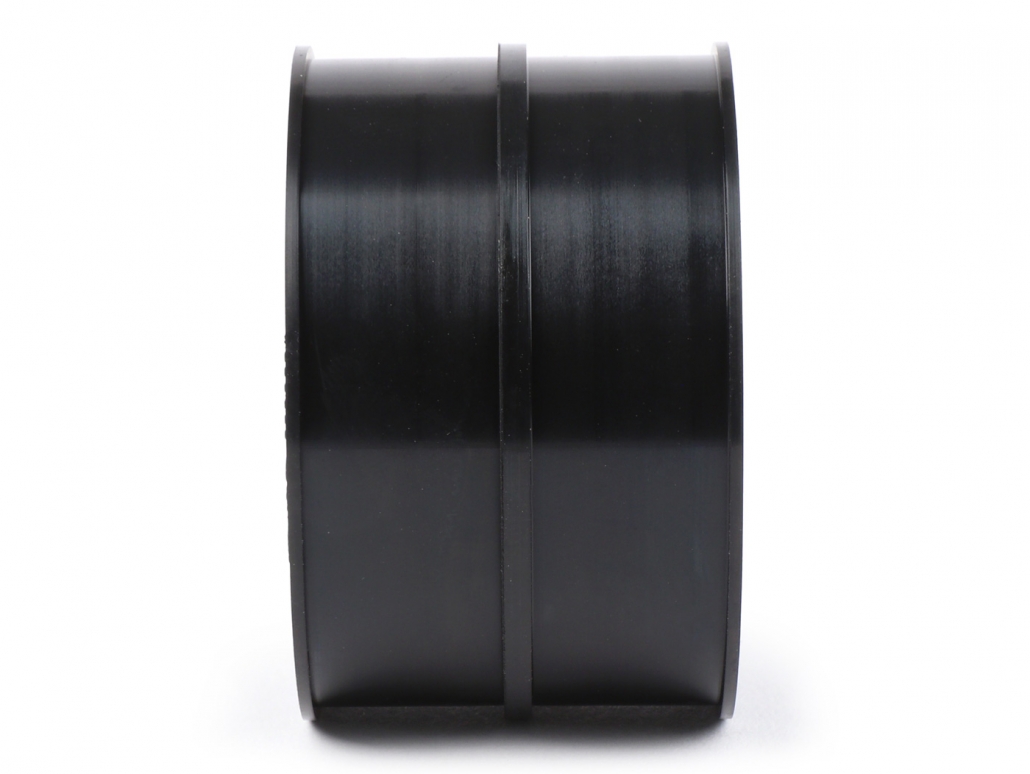
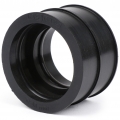
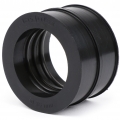
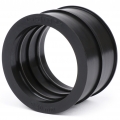
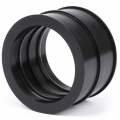
We have new ones now bgm connection rubbers that are wide enough to neatly accommodate these 12mm wide hose clamps.

Carburettor connection rubbers bgm PRO

Carburettor connection rubbers bgm PRO

Another benefit is that our bgm connecting rubbers from the carburetor to the intake manifold from one very oil and gasoline tolerant material are made.
That makes the carburetor connector rubbers a top reliable and durable part on your scooter.

Available sizes & conversion rubber

  1. 28,5 mm Connection rubber carburettor / intake manifold -BGM PRO- AW = 28.5 / 28.5mm
    • Polini CP
  2. 30 mm Connection rubber carburettor / intake manifold -BGM PRO- AW = 30 / 30mm
    • Dellorto PHBL
    • MikuniTM 24

  3. 35 mm Connection rubber carburettor / intake manifold -BGM PRO- AW = 35 / 35mm
    • Dellorto PHBH 28/30
    • Dell Orto VHST 24-36
    • Dell Orto VHSH 30
    • MikuniTM 28
    • Mikuni TMX 27/30
    • Keihin PWK 28/30
    • Polini 28/30
  4. 40 mm Connection rubber carburettor / intake manifold -BGM PRO- AW = 40 / 40mm
    • Mikuni TMX 32-35
    • Keihin PWK 33-35
    • Koso 28-34
  5. 35 / 40mm Conversion rubber connection between carburettor and intake manifold -BGM PRO- AW = 35 / 40mm
    • 35 mm
    • 40 mm

Tips:

  1. Carburetor and intake manifold should be thoroughly degreased before assembly.
  2. The 12mm ABA SAFE hose clamps should also not be over tightened.
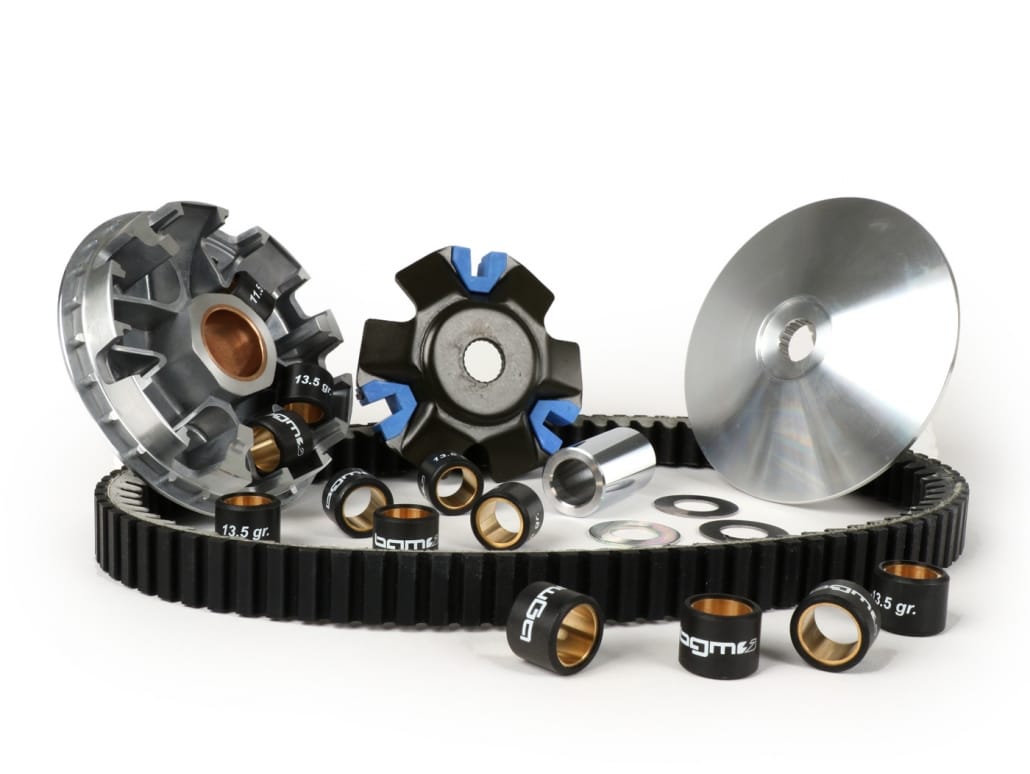
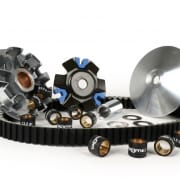
bgm PRO variator for Piaggio Quasar engines, e.g. Vespa GTS

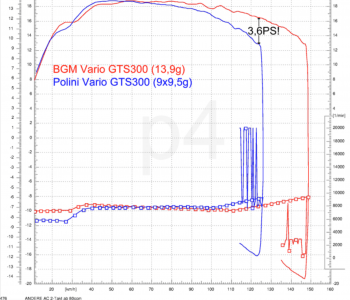
The bgm PRO V2 variator for Vespa GTS in the test

Our bgm PRO Vario for the Vespa GTS models is very popular. In this beautiful video Marc von tests Scooteria the bgm PRO V2 variator on his Vespa GTS.

“A cheap and effective tuning measure for all Vespa Gts 300 drivers. I compare it with the performance of the series variator of the Vespa Gts 300 in the city, on the country road and the motorway. "Marc, Scooteria

Conclusion of the test

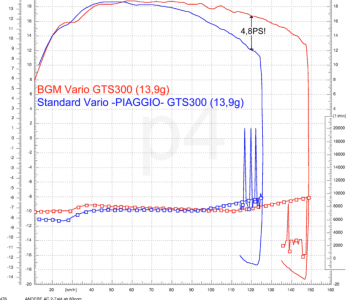
  • Sportier: faster and higher in the speed range
  • Much higher speeds
  • Greatly improved acceleration
  • Much more aggressive driving performance
  • Without annoying noises
  • +5 km / h top speed 125 km / h according to GPS with 13 "rims without disc

Buy the bgm PRO Vario-Kit here


Video variator test

BGM Pro V2 Sport Variomatic Test Vespa Gts 300


BGM2311V2 variator

BGM2311V2 variator

How do I install the bgm PRO variator on a Vespa GTS?

Installation of the bgm PRO V2 variator in the Vespa Gts 300 hpe Supertech. Marc from Scooteria is at Cafe Racer 69 and Micha from the Cafe Racer 69 team explains very sympathetically and in detail in 25 minutes what needs to be considered when installing a Vario.

There are also tips, such as using the bgm Vario on your new GTS to use the old one GTS vario cover can drive, which many find more beautiful.

Buy the bgm PRO Vario-Kit here

Variomatic test

You are not sure yet? In this video Marc tests the variator in detail and shows the effect of the bgm PRO Sportvario in a driving test.

Video installation instructions Varioamtik Vespa GTS bgm PRO

BGM Pro Variomatik Vespa Gts 300 – installation