Expandable luggage rack

New extendable luggage racks

One of the main challenges we face at Vespa meetings is getting our drinks on the Vespa properly.
Moto Nostra brings the solution with a discreet luggage rack. It features a spring-loaded, extendable luggage carriage. Even a crate of drinks can be transported without any problems.

Everyone's dream Real Scooterist!

Porters with beers

Vespa PX, Rally, Sprint, TS125, GT/GTR, SS180, Motovespa DN, Iris, LML Star, Deluxe, Stella

The ABE booklet and the bgm brake system with TUV logo

bgm brake levers with ABE? What is an ABE anyway?

ABE stands for the general operating permit, which must be available for attachments to the vehicle.
If the attachments do not have an ABE, the vehicle may not pass the TÜV.

Appropriate tests, which the components must pass, are required for approval.

Three pairs of the bgm brake lever sets

bgm brake lever sets with ABE - Next Level!!

The story goes on…
Now our Vespa drivers can be completely relaxed on the road with our ergonomic brake lever sets.

Detail picture of a Vespa from the manual brake lever
Brake lever set bgm PRO

CNC, drum brake
Vespa Largeframe: 1957-1998 - PX, T5, Sprint, Rally, GT, GTR, TS, VNA, VNB, VBB, VBA, GS, SS180, Smallframe 1963-1989 V50, 50N, V90, PV125, ET3, PK S, PK XL1

Black: bgm4560
Black Matt: bgm4561
steel gray: bgm4562

Three bgm brake levers in all colors with ABE
Brake lever set bgm PRO

Disc brake (Heng Tong)
Vespa PX: (year 2004-)

Black: bgm4540
Black Matt: bgm4541
steel gray: bgm4542

Three pairs of the bgm brake lever sets
Brake lever set bgm PRO

CNC, sport, short (130mm)
Vespa GT, GTL, GTS 125-300

Black: bgm4500
Black Matt: bgm4501
Chromium: bgm4502

 long (165mm):

Black: bgm4503
Black Matt: bgm4504
Chromium: bgm4505

installed brake levers in a Primavera with ABE
Brake lever set bgm PRO

cnc sports, 
Vespa LX, LXV, S, Primavera 50-150, Sprint 50-150

short (130mm):
Black: bgm4506
Black Matt: bgm4507
Chromium: bgm4508

short (130mm):

Black Matt: bgm4510
Chromium: bgm4511

Leaf through ABE and installation instructions for brake and clutch levers online here

This is our new ABE + installation instructions.
You can already browse here, all article numbers are linked and you can go directly to the current price and current availability display in the shop!

Plug and play coupling

Available now

You may have already found an Easter egg in one of our videos ;-) but now you can find it in our webshop

Here we go!

It is questionable how long the supply of spare parts from Piaggio will be secured for some components. Unfortunately, the quality of the clutch cover from the original manufacturer has also fluctuated in recent years.

The clutch covers from LML were sometimes a resilient alternative, but unfortunately there is LML no more. and various attempts by other companies can be smiled at as a well-intentioned interpretation. The manufacturers Ramp and Silking should definitely be avoided here. Apart from the basic material, these clutch covers have nothing in common with the original.

Based on this drive, we have dedicated ourselves to creating our own clutch cover.

Development

Specifications were that the cover, as always with many of our own developments, can be used with original parts and shows further improvements.

The clutch cover for Largeframe from BGM PRO Superstrong CNC therefore fits all couplings currently available on the market. Whether with 6 springs or 7 springs of the old design or the latest models with 4-disc CR pad material and enlarged CNC clutch basket.

One of the reasons was that the bar in the clutch cover had to be removed if the original cover for the CNC clutches had to be machined. Therefore, the BGM PRO SUPERSTORNG clutch cover has an adapted contour that allows the web again and thus supports the oil supply for the separator and the protected Ultralube principle of the bgm Superstrong clutches.

The inner contour was therefore determined and defined very quickly. A bigger challenge, however, was determining the position of the bleed screw.

The worldwide scooter riders network keeps hearing reports that the engines are pushing out oil through the vent screw. So we thought about whether there was a better position for the vent. Always under the condition that it fits on an original vehicle. The first attempt was to orientate the hole with the direction of rotation. A fatal misconception.

Although the slanted hole is in the opposite direction to the oil, significantly more oil is pumped out of the vent here.

After testing three alternative positions and designing the bore channels, we are almost back to the original position of the vent. However, the hole is located further out in the cover at a slightly different angle and therefore does not get as much of the flung oil. With this position it was possible to move a 221cc Malossi MHR engine with more than 9500rpm permanently with an oil filling quantity of 500ml without the oil being pushed out through the vent screw.

As a variant, there are also clutch covers for the older ones Largeframe models. Here the clutch cover is higher to create space for a PX clutch.

The old engine housings of the VNA to VGLB engines with their flat clutches are flatter in size than a Sprint or PX engine housing - the sealing surface for the clutch cover on the VNA to VGLB engines is therefore practically closer to the crankshaft. This residue is compensated by the BGM PRO SUPERSTRONG clutch cover and thus offers the advantage of using a normal PX clutch on these engines.

 Due to the dimensional adjustment in the clutch cover, there is no risk of the rear tire rubbing against the clutch cover. Due to the flat motor housing, there is enough space for the tire wall.

The matching clutch arm for the BGM PRO clutch cover has a double O-ring seal and the option of hanging the clutch cable in a position for shortened lever travel.

The inner position on the clutch arm is intended for the use of adjustable clutch levers on the handlebars, as these levers pull less than, for example, the standard lever on a PX.

The coupling arm is already provided with all clearances that are required for the use of reinforced couplings.

When manufacturing the clutch cover, we initially opted for CNC production from solid material. This means that we always have control over the material used and access to the material certificate. The high-strength material used and the CNC production, we can guarantee very low tolerances and consistent quality.

If you are now curious, you have to be patient. The final acceptance of the samples has been confirmed and we expect the delivery date to be in 2022.

Complete with clutch arm, the clutch cover will be under €200.

We will provide you with more information at the start of sales in the blog and in the shop.

Have a good trip

Adventure Lambretta

In June 2022 we were able to introduce you to the (R)ollersack *original* in the blog and shop. Sabine from (R)roller bag *original* develops luggage that is specifically tailored to the needs of scooter riders.
In the late autumn of last year, very good and long-standing friends of ours made Sardinia unsafe with their Lambrettas. Harald and Markus didn't miss the opportunity to put the sack through its paces.

We have summarized the conclusions of the two test persons here:

Overall rating:

"Finally on the topic of roller sacks.... We both give it 9,5 out of 10 points! The DL driver is over 1,80 and got along very well.”

packing practice:

I had packed all my things in a thin travel bag. I just found that more practical because we changed accommodation every day and it was easier to pack and unpack

Robust and durable:

“The sack makes a very robust impression and despite some abuse, nothing broke. The long shoulder strap has proved its worth, for example when towing on the ferry.

Photo in river

Weather test results in weatherproof:

Because it rained very little, my colleague also did the water test.
There is nothing to complain about here either.

Most important – on the road:

“However, I am most impressed by the handling of the bag. Over 2.000 kilometers in Sardinia and most of them on really winding roads. Unlike with the pockets in the back, you just don't feel the weight.”

And that is exactly what is meant by luggage specifically tailored to the needs of scooter riders.

Here you can find the (R)ollersack *original*:

The black variant will be available again from the beginning of April.

Real Deals March

REAL DEALS is our monthly pick! In the March issue we have everything in one, in the new Catalog for Modern Vespas, the new expandable Luggage rack for the Spanish Motovespa, Toptul brings us super useful tools and discrete solutions for Lambrettas.

Rear rack, extendable

Vespa PX, Rally, Sprint, TS125, GT/GTR, SS180, Motovespa DN, Iris, LML Star, Deluxe, Stella

It features a spring-loaded, extendable luggage carriage. Even a crate of drinks can be transported without any problems. When retracted, the rack is compact and unobtrusive.

Brake pump set

incl. lever and gas shaft

Lambretta LI (Series 1-2), TV (Series 2)

MOTORINO DIAVOLO, hidden assembly under the steering head cover

Our latest Vespa Modern 2023 catalog is ready : )
You can get the catalog with your next order in the Scooter Center just order it for free. and here you can already leaf through the catalogue, all article numbers are linked and come directly in the shop to the current price and current availability display! 😉

intake bgm PRO

for Polini SpeedEngine and Pinasco Powercasing

Piaggio Ciao, Bravo, Boxer and Si

The shape of the BGM intake manifold is chosen so that the engine housing itself
as little as possible has to be removed so that the carburettor can be installed.

New from Toptul

Quick-release mechanism ensures sockets are held securely and are easy to remove

We've salvaged some NOS* treasures for you again! Including extremely rare parts such as the ignition lock on the shifter of German Vespa Sprint models with a key. Also there are great style-defining legends of the 80's, such as the rear light grille and colorful plastic levers from Utah.
Just browse around and see if there might be something for you.

*Here we present you so-called NOS goods, which we were able to secure for you, for example, from stock purchases or business closures.
These are new items from the original manufacturer, which are often better than replicas produced today.
As a rule, the goods always show traces of long storage, be it due to corrosion, scratches or simply dust.
If you are willing to refurbish such a product, you will receive a high product quality for little money. Please note that this product is only available in small quantities and is often sold out quickly. Only while stocks last.

Video:

Light

headlights -SIEM 'Torino' Ø=115/120mm (glass/outside)

3334129

Vespa GS150 / GS3, GS160 / GS4 (VSB1T), VB1T, also suitable for VBB1T (71001-), VNB3-6T, GL150 (VGLB1T 37269-) 

headlights-TRIOM (NOS) Ø=146mm yellow lens

3334253

Headlight -TRIOM (NOS) Ø=146mm yellow lens 

Blinker – REAR RIGHT TRIOM – Orange

3334267 

Vespa PX80, PX125, PX150, PX200, T5 125cc

headlight connector (round) -PIAGGIO

3333789 

Vespa PK XL/XL2 – Ba20d Bilux 35/35W

headlight connector -PIAGGIO (trioma)

9520044NOS 

Vespa PX Lusso


 7674543B Headlight trim ring -BIEMME (NOS) Ø=105/115mm (glass/outside)

Vespa VL1 to VL2 (No. 48300)

Rear light lens -SIEM

7672270

Vespa V50 S, V50 N, V50 L

Taillight -SIEM 

3334255 

Vespa V50 Elestart (V5A3T), V50 N Special (V5A1T, V5A2T)

light switch Battery models – without kill switch

187559

Vespa VBA1T (-76050), GL150 (VGLA1T, -15860), VBB1T, VNB4T, GL150 (VLA1T), Super125 (VNC1T), Super150 (VBC1T), GT125/GTR125 (VNL2T), Sprint150 Veloce (VLB1T), PV125 (VMA2T ) 


Ignition lock – Turn signal switch -SIEM/GRABOR

7672621 

Vespa Sprint, GL150 (VLA1T, German models 1963-1964)

turn signal switch
CEV

61351NOS 

Vespa V50 S, SR50, V50 R, V90, SS90, Nuova 125, PV125, ET3, Super, GS150 / GS3, GS160 / GS4 (VSB1T), Sprint, Rally180 (VSD1T), Rally200 (VSE1T) - also suitable for USA models

Brake Light Switch -BIEMME angled sheet metal closer

3334257 

Vespa Wideframe/Largeframe (1946-1958) V98, V1T-V15T-V30-33T, VM1T, VM2T, VN1T, VN2T, VU1T, VL1-3T, GS150 (VS1-3T), VB1T, GL150 (VGL1T), VNA1T, VNA2T

ignition

ignition PIAGGIO/DUCATI base plate (contact ignition, 5 cables, 12V, AC)


3334252 

 Vespa PX - P125X, P150X, with voltage regulator, with battery, with 4-fold indicator system, 2x yellow cable

Ignition lock -SIEM

3334256 

Gilera Giubileo 98-125-175-200

clutch linings -FDM

FDM150GS1

Vespa GS150 / GS3 VS1T

Brake lever + clutch lever (set)


STYLE MOTOR - Plastic

Vespa Sport, PX -1997, T5, TX, T5 Classic, PK S, XL
666SM180 black

UTAH  - Plastic 
VESPA Sport -Vespa PX -1997, T5, TX, T5 Classic, PK S, XL

666UF117 white
666UF118 Red
666VP123 Yellow

Cable box Engine -PIAGGIO

9010115

Vespa 125 VNB6T, Super, GT125 (VNL2T), GTR125 (VNL2T), TS125 (VNL3T), Sprint150 (VLB1T), Sprint Veloce, Rally180 (VSD1T)

Motor cable box -GPM Italy (NOS) – black

3334266 

Vespa VNB6T, VBB2T (from 216489), GL150 (VLA1T) (VLA1T from 070722), Super, GT125 (VNL2T), GTR125 (VNL2T), Sprint150 (VLB1T), Sprint Veloce, Rally180 (VSD1T)

Exhaust -SITO Sport B goods

2010001 SPB

Vespa V50, 50N, 50S, 50L, 50R, 50 Special, V50 Elestart, PV125

Catalog with "New Catalog" Spaulders

Our latest Vespa catalog is ready: Vespa Modern 2023. You can do the Vespa catalog for your next order in Scooter Center Simply order the shop for free.

Browse the catalog online here

This is our new Vespa Modern as a preview.
Here you can already leaf through the catalog, all article numbers are linked and come directly in the shop at the current price and current availability display!

Vespa catalog download

real deals logo on a red Vespa gts

REAL DEALS is our monthly selection and in the February issue we have discounts for modern Vespa riders and news for Smallframes as well as highly recommended items for Lambrettas and mopeds.


Vespa GTS

Indicator set

Vespa GTS

This new technology increases the optical width of the rear end in the dark, improves perception in traffic and now drivers of modern Vespas can issue the set for a limited time* at a special price
MN623KTB,   MN624KTB   and MN629KTB :  229,00€   199,00 €

* 03/03/2023.

The bgm PRO SC shock absorber series is one of the finest suspension components you can treat your scooter to and now modern Vespa riders can get their shock absorber at a special price until 03/03/2023.

Bgm7788NB  329,00€    299,00 €

Bgm7749NB       369,00€   329,00

Exhaust Smallframe bgm 

Vespa V50, 50 Special, 50N, 50S, 50L, 50R

Our bgm touring exhaust family has a baby.
True to its name, the touring exhaust system is ideal for a fast, powerful but visually and acoustically inconspicuous street engine. It harmonises very well with the common tuning cylinders with displacements of 75-112ccm, but is also more than clearly superior to the standard exhaust on a 50ccm series engine.

Horn -GPM 6V/12V, Ø=85mm DC

Lambretta LIS (1968-), SX (1968-), DL, GP

Something with horns today!

More in userem SC Blog

Ciao, si, bravo, super bravo

Footrest set -MC PROPARTS

Piaggio, Bravo, Ciao, Boxer, Si, SuperBravo

The stylish & high quality plug and play solution for your Piaggio moped,
if you want to convert to footrests.
Unpack, install, ready!

hand in horn

6V and 12V buzzers and horns for the Li family of Lambrettas and their attachment

In view of the 14 years of construction of the Li family - starting with the TV 175 Series 1 in September 1957 and ending with the dl / GP 200 in April 1971 - the variation in horns and buzzers and their attachment to the Lambretta frame is not that confusing.

First of all, it should be mentioned that there is either buzzing (for AC systems with alternating voltage) or horns (for DC systems with direct current to be recognized by the battery). All Lambrettas were originally delivered with 6 V on-board electronics.

When converting to 12 V systems, the original buzzers and horns continue to work without any problems, even with the 12 volts that are now available. But humiliations should be avoided, otherwise they will quit the service sooner or later.

Series 1 and early Series 2 models to July 1960

On all Series 1 and Series 2 models through July 1960 the horn mount is welded directly to the frame and looks like this:

The right horn:

art. Number: CLE66D

Horn -GPM 12V DC
Lambretta LI 150 (Series 1), LI 150 (Series 2), TV 175 (Series 1), TV 175 (Series 2)

is screwed directly to the frame and decoupled from the frame with two rectangular anti-vibration rubbers.

Series 2 from 07/1960 and Series 3 up to the end of 1967

During the construction of the Series 2, the attachment of the horn was changed. The welded bracket with two bolts is replaced with a rectangular block with an M8 stud. A retaining plate, often called a Y-bracket, is attached to this. And the original looks like this:

This special retaining plate was not available as a repro for a long time, Timo from TD Customs took care of it and supplies us with it:
Bracket Horn -TD-Customs
Lambretta LI (Series 2), TV (Series 2) -> 07/1960

art. Number: 3333492

We already know the corresponding horn:
Horn -GPM 12V DC
Lambretta LI 150 (Series 1), LI 150 (Series 2), TV 175 (Series 1), TV 175 (Series 2)

art. Number: CLE66D

Since the mounting of the late Series 2 is known to be identical to the Series 3, the Series 3 retaining plate can also be used with the corresponding horn. The retaining plate in the series comes much closer to the name Y-Bracket:

and using this part:

fastened to the frame with M8 nut and corrugated washer on the stud.

art. Number: 7672861

Horns (or buzzers) suitable for the holder are available in 6 V and 12 V:

Horn (buzzer) CASA LAMBRETTA 6V/12V AC
Lambretta LI, LIS, SX, TV (Series 2-3)
Zinc

Horn -GPM 6V DC
Lambretta LI, LIS, SX, TV (Series 2-3)

Horn -GPM 12V DC
Lambretta LI, LIS, SX, TV (Series 2-3)

Series 3 from 1968 and dl / GP

At the end of 1967, i.e. in 1968, the attachment was simplified and the Y-bracket was replaced by a bracket welded to the frame.

In order to decouple the horn from vibrations, the holes in the retaining plate on the horn are enlarged and special Allen screws and vibration rubbers and washers are used.

Here the horn with the anti-vibration rubbers:

Found for alternating current (AC) and direct current (DC) electrical systems:

Horn -GPM 6V/12V DC
Lambretta LIS (1968-), SX (1968-), DL, GP

Horn -GPM 6V/12V AC
Lambretta LIS (1968-), SX (1968-), DL, GP

You can find the screws here:

And this is what it looks like installed on a preserved dl 200:

The background probably doesn't seem unfamiliar to the inclined Lambretta connoisseur.

Many thanks to Markus for the image rights.

And now something about big horns. Originally, the real horns (i.e. the DC things) had a larger diameter. Namely 85mm. Occasionally we also get those from Casa Lambretta:

Horn -GPM 6V/12V DC
Lambretta LIS (1968-), SX (1968-), DL, GP

Horn -GPM 6V/12V AC
Lambretta LIS (1968-), SX (1968-), DL, GP

After the season is before the season! During the season, we are all totally focused on processing orders quickly and shipping them the same day. In winter you can do work that you don't have time for during the season.

There was recently the revision and the filling of the gaps in our Lambretta explosion drawings on the list. Below is a small before and after comparison of the lui / vega / cometa and the Junior series.

For almost all Lambretta models, there is a model history in the shop in which the origin and special features are explained, but the most important vehicle data are also summarized:

Lambretta models

The measured values can be transferred to a PC via the exploded can be searched particularly well for parts of the individual assemblies:

In the small Lambrettas, which are becoming increasingly popular, you can see the before and after effect particularly well:

You can find all this and much more here:

REAL DEALS is our monthly selection of recommended, new, best selling or just products, among the thousands of items for classic and modern Vespa, Lambretta and mopeds that Scooter Center in its online shop.

rear shock absorber

Lambretta

lamp grid -OEM 

Piaggio Ciao


mudguard

Vespa ACMA VL

Tools not only please the heart of a screwdriver, with the right tool the work is also easier to do.

Contrary to the usual myth that you need tons of special tools for the Lambretta, only a few tools are really essential.

ESSENTIALS CATEGORY It doesn't work without them

Allen key bgm PRO 3.5mm

Unusual size and used for the clamping nipples on the gearshift and clutch. The bgm key comes with a practical ball head. This means that the rear shift cable can also be reached when the clutch cable is attached and without a special control block.


flywheel

Rotor puller M27x1,25

(A – D, LI, LIS, SX, TV, DL, GP, J, Lui) 
8099000

Rotor puller M30 x 1,5

(motor place ignition)
8099013

Flywheel holder 2+3 windows

LI, LIS, SX, TV, DL, GP, Lui, J50-125
8099008

Flywheel holder for flywheel bgm PRO

LI, LIS, SX, TV, GP, DL with 29cm
bgm2109T

Rotor holder Casatronic (IDM ignition) 

LI, LIS, SX, TV, DL, GP
3332382

Rotor holder Casatronic (Ducati ignition

LI, LIS, SX, TV, DL, GP
3332382D

Flywheel puller and suitable holders are the only way to remove the flywheel from the cone of the crankshaft. This is required for all work on the ignition system. But also if you want or need to penetrate deeper into the innards of the engine.

The flywheel holder 2+3 windows is intended for all original Innocenti and Indian flywheels with the corresponding recesses.

The bgm PRO pole wheel has an external hexagon on which the corresponding holder is attached. The holder is supported on the nut of the large silent blocks to hold it up.

There are two variants of the Casatronic ignition, one based on the IDM ignition and the current variant manufactured by Ducati Energia. The pole wheels are blocked with two or three pins on the pole wheel with the appropriate holder.

Clutch

Clutch compressor bgm PRO 

LI, LIS, SX, TV (Series 2-3), DL, GP, J, Lui 
bgm1220TL

Clutch compressor

LI, LIS, SX, TV (Series 2-3), DL, GP, J, Lui 
7671359

Coupling holder 

LI, LIS, SX, TV (Series 2-3), DL, GP 
8099003

Both of them are irreplaceable. The compressor is used to relieve the circlip on the Lambretta clutch. After removing the ring, the coupling can be removed.
The clutch nut is tightened with 66 - 74 Nm. For both loosening and tightening the nut, the clutch basket should be blocked with the appropriate tool/holder.

brake drum puller

OEM 

LI, LIS, SX, TV, DL, GP             
7676162

CASA LAMBRETTA 

LI, LIS, SX, TV, DL, GP
8099005

MBD 

LI, LIS, SX, TV, DL, GP
3333402

In the mid-1960s the design of the brake drum was changed. At this point, the Series 2 will have three M7 threads instead of the two M6 threads previously used. This goes hand in hand with the use of the retaining ring for the cap nut on the main shaft/brake drum. Our pullers come with both M6 and M7 screws to hold the puller in place. If it is attached to the brake drum, the brake drum is pressed by the main shaft via the large central screw.

The OEM quality of the puller works, but is not the best in terms of haptics.

Casa Lambretta offers the tool in a beautiful workshop quality and it corresponds to the original Innocenti tool.

MBD has optimized the original design and features knurling on the outer edge and a ball in the tip of the central screw. This fits into the recess on the mainshaft and is intended to prevent any damage.

Headset mounting wrench MBD

LI, LIS, SX, TV, DL, GP, J, Lui 

The MBD key for the headset bearing is perfectly adapted to the Lambretta. The holder for countering is separated according to the conditions of the Lambretta.

fork spring compressor

OEM 

LI, LIS, SX, TV, DL, GP             
6660212

CASA LAMBRETTA 

LI, LIS, SX, TV, DL, GP
CBL212

MBD 

LI, LIS, SX, TV, DL, GP
7670992

The compressor for the springs in the fork is used to overhaul the fork. Neither the fork links nor the springs and their spring guide rods can be removed from the fork without compressing the springs. 

Both the Casa Lambretta and the MB compressor are based on the original design of the tool. This is sometimes a bit difficult to handle and a third or even fourth helping hand is usually not bad.

The OEM design, on the other hand, is screwed to the fork and handling is very easy and time-efficient. So here: clear purchase recommendation for OEMs.

Silent block assembly tool bgm PRO

LI, LIS, SX, TV, DL, GP

The silent blocks can only be changed with the appropriate tool and with a sufficiently heated engine housing. The bgm tool for this is a solid turned construction.

HAVING IS BETTER THAN NEEDING

crankshaft pulling sleeve 

LI, LIS, SX, TV, DL, GP             
MRB0012

connecting rod locking tool

LI, LIS, SX, TV (Series 2-3), DL, GP, J50, J100, J125, Lui 50-75
7671543

Crankshaft removal tool -MBD

LI, LIS, SX, TV, DL, GP
7671543

Crankshaft pulling tool 

LI, LIS, SX, TV, DL, GP
CPX231B

It is best to pull the crankshaft into the bearing on the drive side. The original drive sleeve with the screw for the front sprocket can be used for this.

The pull-in sleeve is a length-optimized version of the original drive sleeve and offers comfort and speed when screwing. In both versions, the crankshaft must be fixed (e.g. with a connecting rod locking tool.

The Casa Performance version is a rather ingenious further development, in which the crankshaft does not have to be blocked and the shaft is drawn particularly gently into the bearing seat.

The MB tool is still the first choice for dismantling the crankshaft. It is screwed onto the motor housing and then the shaft can simply be pushed out of the bearing seat

Video CP tool

MB Developments

The MB Tools are still the first choice for crankshaft disassembly. It is screwed onto the motor housing and then the crank can simply be pushed out of the bearing seat.

Crankshaft drive sleeve puller

Exact copy of the original Innocenti tool. This allows tightly seated drive sleeves to be gently pushed off the crankshaft. The drive sleeve has two holes on the outer end for using the tool. The sleeve and tool are connected to each other with the two knurled screws on the side and then the sleeve is pressed off the crankshaft stump using the toggle.

LI, LIS, SX, TV (series2,3), DL, GP             
7671361MB

Main shaft assembly tool

Before installing the gear backlash, it is important that the countershaft is fully torqued into the rear hub bearing. This can be done with the rear brake hub fixed. An alternative to this is Mark Broadhurst's final drive sleeve tool. Once the layshaft is in place, insert the sleeve by locking the socket head cap screw into the layshaft grooves, fitting the special nut provided, holding the sleeve with a wrench and tightening the nut until the layshaft is pulled into place with the correct torque is.

LI, LIS, SX, TV (Series 2-3), DL, GP, J50, J100, J125, Lui 50-75
7671800

Determination of top dead center and ignition timing

The dial gauges and brackets, which are mounted in place of the cylinder head, are precision measuring tools for determining top dead center and ignition timing. A good choice if you already have an engine on the workbench or engine stand. If you need to do ignition timing with the engine installed, it may be easier to use the buzzwangle, beluga, or similar methods.

BUZZWANGLE from Sticky

The buzzwangle tool is a brilliant idea from the sticky. A digital degree disc can be clamped onto the threads for the flywheel puller using an adapter with four mounts. Thus, the digital angle dial gauge is immovably attached and both the ignition point and the control times can be determined and adjusted to an accuracy of 0,1°.

Fits all Lambretta Innocenti models and their derivatives. Just like on most Vespa and Piaggio models.

It's best if you just watch the video

NEW the video is also available with a German soundtrack

99,00€

degree disk bgm          
BGM8809

Ignition timing calipers

Series 1-3
CMDTB0010

Dial indicator holder MB

MRB0045

Dial indicator with holder bgm

8099009

dial gauge bgm

7670937

dial gauge holder bgm

7670938

Feeler gauge bgm          
BGM8809

Feeler gauge 

The feeler gauge is great for setting contact breaker or gear backlash.

Feeler gauge Toptul

ICAA0020

Spark plug wrench bgm PRO SW21mm/13mm

LI, LIS, SX, TV, DL, GP, Lui, Junior

The Li family's spark plug accessibility isn't the best. The original spark plug wrench fits, of course, but has the disadvantage that removing a hot spark plug can result in burnt fingers. With the bgm part, the candle can easily be completely unscrewed by hand after loosening. And not only that, an integrated magnet holds the candle securely in the key. There are guaranteed no burnt fingers here.

19,90 €

Assembly stand bgm PRO

Lambretta Series 1-3

Replaces the engine for assembly work. The assembly stand is screwed to the frame via the shock absorber attachment and the engine bolt. The scooter can then be maneuvered as if the engine were inside. Suitable both for keeping the scooter mobile and upright while the engine is on the operating table or for setting up the Lambretta after the preparation or painting when the engine is not yet ready.

109,00 €

Rivet hammer for lettering

Lambretta A, B, C, LC, D, LD, LI, SX, TV, DL, GP, J, Lui

All lettering with pins on the back for attachment can be professionally attached. The pins on the lettering should be shortened so that they protrude by only 2 mm. A top tip from Dean from the Sticky Manual is to drill out the pins of the lettering. For reference page 203 Sticky Manual.

8,90 €

Rivet hammer for rivet luggage compartment lock

LI, LIS, SX, TV, DL, GP

All lettering with pins on the back for attachment can be professionally attached. The pins on the lettering should be shortened so that they protrude by only 2 mm. A top tip from Dean from the Sticky Manual is to drill out the pins of the lettering. For reference page 203 Sticky Manual.

11,95 €

Mounting tool shifter claw bgm PRO 'ball crusher'

LI, LIS, SX, TV, DL, GP

The ball crusher is a cleverly designed tool. With it, the shift balls and spring can be easily and conveniently installed in the main shaft. Without this tool, installing the shift dog can be a real game of patience. Simultaneously get the balls in position on both sides and enough preload without being shot into the endless expanses of the workshop by the switching spring?

Threaded bushing MB

This thread insert is intended for repairing damaged threads on Lambretta engine cases. Easy and saves welding a case.

Threaded socket M10 x M6   
6661083

Threaded socket M10 x M7
6661082

Threaded socket M10 x M8

3331081

Stud mounting tool

Clever tool from BGM for installing stud bolts without damaging them.
Screw the BGM Pro tool onto the stud bolt and counter with the integrated hexagon socket screw. It is braced with the thread of the stud bolt. Now turn the outer wrench flat. The stud bolt is fixed and is loosened or screwed in. Make sure that the counter-locking is sufficiently strong so that the tool does not come loose.

Ideal for short bolts (such as Lambretta gearbox covers).
The required minimum length of grippable stud thread is:

  • M6 / /M7 = 6,5mm
  • M8 = 9mm

Available individually or as a set.
Also available for the rare thread size M7!

Required additional tool:

  • Combination wrench: SW19
  • Allen key: 6mm

NOTE: Please note that stud bolts glued in with screw adhesive/Loctite often have a very high breakaway torque. Here you should first try to heat the stud(s) or the housing around it in order to loosen the adhesive connection.

Stud assembly tool M6 x 1.00mm   
BGM72M6

Stud assembly tool M7 x 1.00mm 
BGM72M7

Stud assembly tool M8 x 1.25mm 

BGM72M8

tool bags

Tool bag without tools CASA LAMBRETTA    

8050083

Tool bag including on-board tools  CASA LAMBRETTA

8050083KT

Toolkit CASA LAMBRETTA

LI (Series1-3)

3331475

Tool bag without tools

CLA331

toolbox

Lui 50 C/CL, Lui 75 S/SL

7674676

Assembly support stand 

LAMBRETTA- LI, LIS, SX, TV (series 2-3), DL, GP, J50, J100, J125, Lui 50-75

Lambretta tool bag retaining clip    

The Innocenti icing on the cake of a beautiful restoration is the original on-board tool kit in the right bag with Lambretta Innocenti ribbons and then fixed with the correct retaining clip.

A nice reading recommendation on the subject of tools is the reprint of the Innocenti tool catalogue.

Oil measuring cup 

Another nice addition to any Lambretta tool box is the Innocenti oil can from Casa Lambretta. This is an exact copy of Innocenti's American market device. It comes complete with a snug fitting cap. It has the 'Lambretta' and 'Innocent' logos embossed on the sides.

Tool catalog -SCOOTERPRODUCTS

Tool catalog -SCOOTERPRODUCTS

Lambretta and Lambro (1960s models)     

And since the right tool is useless without knowing how to use it, here is the ultimate Lambretta reading tip! Since its release in 2004, the Sticky Manual has been the definitive repair manual for the Lambretta. The work steps are explained throughout with color illustrations. In addition to the pure repair instructions, the Sticky Manual is also an indispensable aid for identifying and distinguishing between parts.

Book -Complete Spanner's Manual Lambretta -Third Edition

by Sticky

Thanks to our friend Dean Orton, the Sticky Manual has also been available in Italian for over two years: 8100072IT

TOPTUL HIGHLIGHTS / SELECTED PARTS

Since 1994, Rptar Machinery Industrial Group has used its capabilities to manufacture top-of-the-line tools under the Toptul brand. The price/performance ratio is probably unsurpassed. Only the most reliable tool steel alloys are used, such as chrome-molybdenum steel or chrome-vanadium steel.
We have selected a few products to show the variety, but there is not enough space here for the entire range. 

Digital Torque Adapter

   TTDTA030N

Steckschlüsselsatz 

GCAI4901

Allen key 

GAAL0916

T-handle ratchet

TTCTRM1227


"I did not know the TOPTUL brand and I must say that it is excellent, very hard steel and TOP precision, it will be a reference brand for my next purchases in laboratory equipment, congratulations."

One of the ratings

in the SC shop

Attention!

Please note that Scooter Center will remain closed for inventory on January 13, 2023

Telephone hotline and Click & Collect on Friday, 13.01.23/XNUMX/XNUMX: not possible!

From Monday, January 16th, 2023 we will be back for you!

Our online shop is of course still available for you 24/7 and your order will be processed quickly as usual:

Here you go directly to our:


Please excuse the inconvenience!

Discover the tips we recommend this month ;)

Double SC calendar 2023

12 Vespas / 12 Lambrettas

shock absorber rear Lambretta

Luggage racks -Moto Nostra Ciao Front


bgm clutch linings 

Racing Vespa Smallframe

Gasket set carburetor

for all Dell'Orto

Motovespa GT 160

The Spanish licensee Motovespa SA based in Madrid has developed the Motovespa 160 (09C).

Definitely an odd specimen - electronic ignition similar to the Serveta Lambrettas but still with piston connections. The body is basically a sprint/rally, but the engine is an odd mix of old and new technology.

The Motovespa 160 is often confused with the Super Sport 180, but at second glance you can see the many differences.

Finally, the Vespa 160 GT was a version with a series of side panels and accessories that made it even more attractive.

Exploded views here


BGM Pro crankshaft

The BGM Pro crankshaft for the GT160 is available in different versions.

In general, the original Femsatronic ignition of the GT160 fits all versions. On the drive side there are variants for the original GT160 clutch or the variant to use the PX clutch type.

All PX 6 and 7 spring clutches as well as all Cosa and bgm Superstrong clutches can be used here.

The thrust washer is also used on crankshafts with type PX coupling stub BGM6033 and the woodruff key 9999002 thats it!

We offer both variants with the standard stroke of 57mm and as a long-stroke version with a stroke of 60mm.

For the crankshafts with 60mm stroke, the engine case has to be modified to create space for the lower connecting rod eye.

Since only a small amount of material has to be removed here with a radius of 0.8 to 1mm, this task can easily be completed in a few minutes with a hand milling cutter.

With the 60mm stroke variant, the control angle of the cylinder changes.

Typical for the GT160 cylinder are the relatively large control angles for the transfer ports in connection with the very short control angle of the exhaust port.

With the original 57mm stroke, the cylinder has the following control angles:

Piston recess 0.5mm

Inlet angle: 131°

Outlet angle: 144 °

Transfer angle: 119°

Forward outlet: 12,5°

If the same cylinder with 60mm stroke is used, the following control angles result:

Piston protrusion: 1mm

Inlet angle: 132°

Outlet angle: 148 °

Transfer angle: 124°

Forward outlet: 12°

This is the best flowing Vespa fuel tap bgm Faster Flow and is our recommendation for every Vespa engine.

Item no. BGM3030N is a straight replacement for the standard fuel tap with exactly the same fuel tap lever positions like the original tap: ON / OFF / RESERVE.

Item no. BGM3031N is an ON / OFF fuel tap featuring a reserve warning light instead of three fuel tap lever positions. A nice feature that can be easily installed. The wire coming from the fuel tap is led to a warning light (e.g. LED bulb) and connected to the bulb. The second connection on the bulb is fed to a 6V or 12V current wire. Very easy! As soon as the fuel level gets below the reserve amount the warning light starts to glow.

  • Massive flow rate of more than 900ml per minute.
  • Essential part of all gear shifted Vespa scooters from standard to heavily tuned.
  • Fits almost every gear shifted Vespa build since 1958.

For questions or feedback, please contact:
info@bgm-tuning.com

Rare Vespa chrome accessories original from the 60's

Individualizing your Vespa and giving it a personal touch is a seemingly everlasting zeitgeist that surrounds every Vespa like an aura. Italian companies began developing special accessories early on and marketing them very successfully.
A particularly popular, but also expensive, special accessory was the chromed aluminum horn cover. The look of Vespa VBB and Co., which was already looking a bit old-fashioned in the late sixties, could be given a much more modern look with the help of these add-on parts. The world was in a spirit of optimism, the first flight to the moon, rocket technology, nothing seemed out of reach. Style icons like the Chevrolet Impalla inspired many designers and playful chrome tail fins were more than en vogue.

Vigano picked up on this trend and offered a particularly nice piece of individuality for retrofitting with the horn cascade shown here. Formally replicating a mini-format radiator grille, the horn could be concealed, similar to the contemporary Lambretta models. Translucent plastic may not be anything out of the ordinary today, but on the Vigano Kasakde it resulted in the desired very modern, almost futuristic style, which fully met the taste of the time aka 'Thunderbirds are Go'.


We were able to get hold of the cascades in small numbers from a warehouse clearance. These are well-preserved, new/unused horn covers that show signs of ageing/storage. The chrome has some scratches or is slightly tarnished. We offer the cascades in an A and B grade.
The A-ware is in good condition but also has minor flaws
The B-stock has some traces of oxidation or heavier scratches:

Scope of delivery and fastening

The cascade is delivered with a retaining plate and colored rubber profile.
The retaining plate is screwed to the original attachment points of the horn.
The plastic parts are also screwed to the cascade and can therefore be removed for cleaning.

These goods are sold by us as so-called NOS (New old stock = new item that has been stored for a long time) marked. While stocks last.

Once in yours Smallframe the original SHB has to give way to another carburettor, the question arises shortly before the engine is started for the first time: how do I operate the choke?

How do I convert the carburetor from a folding choke to a cable choke?

How do I connect the cable choke of a Dellorto PHBH, VHST, Mikuni, Keihin PWK or Polini CP carburetor to the choke lever of the Smallframe at?

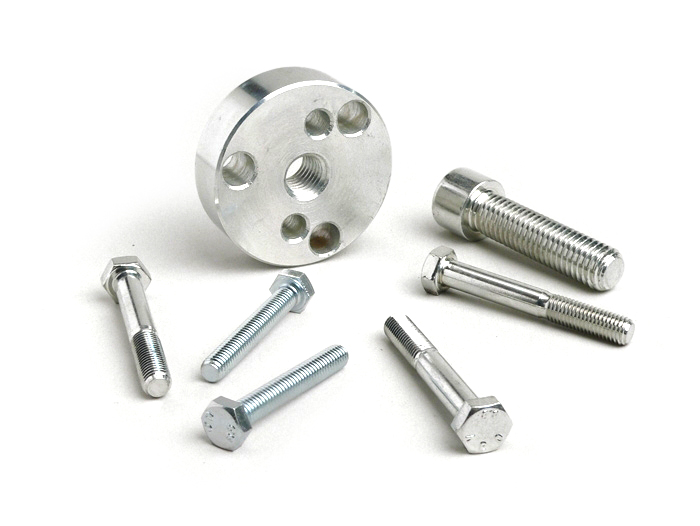
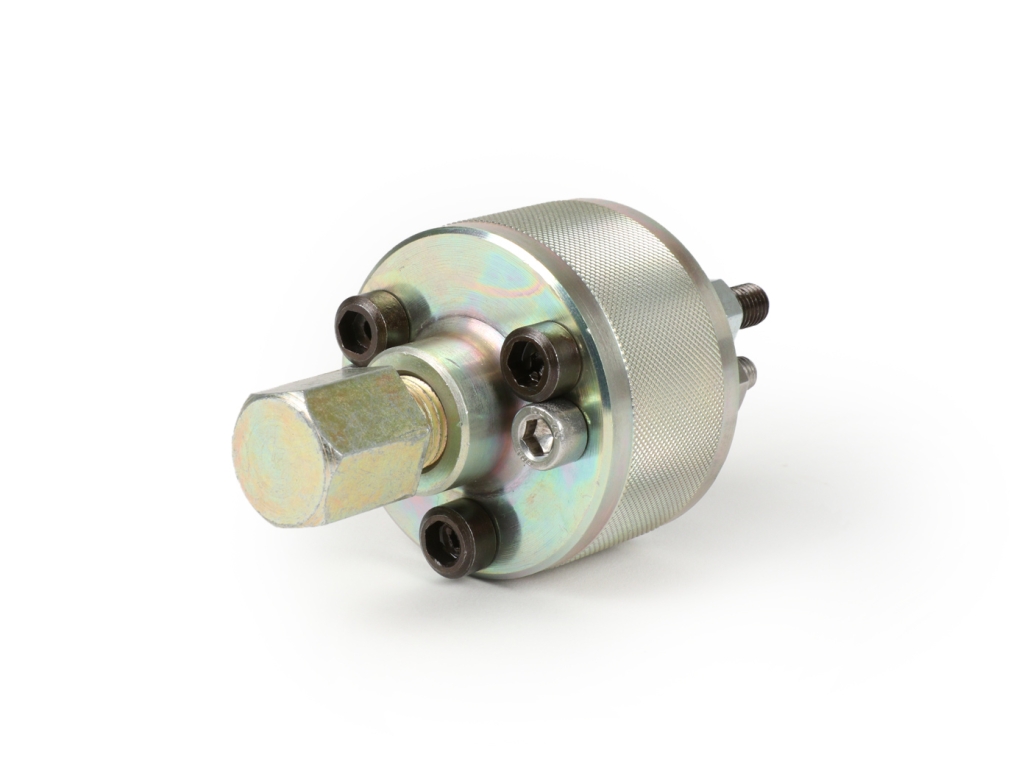
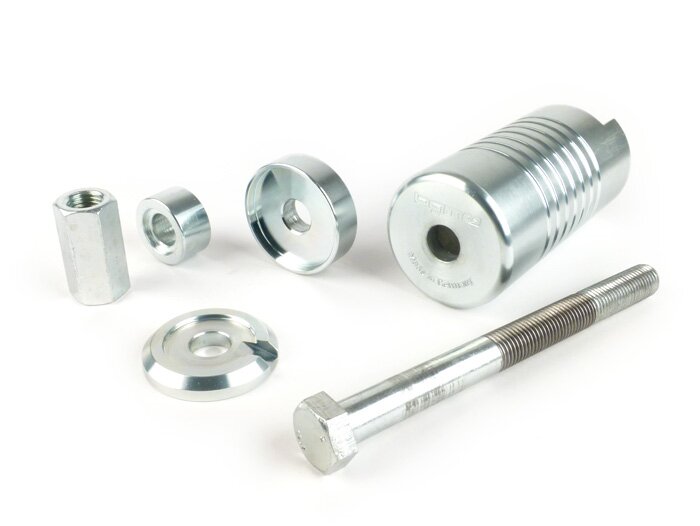
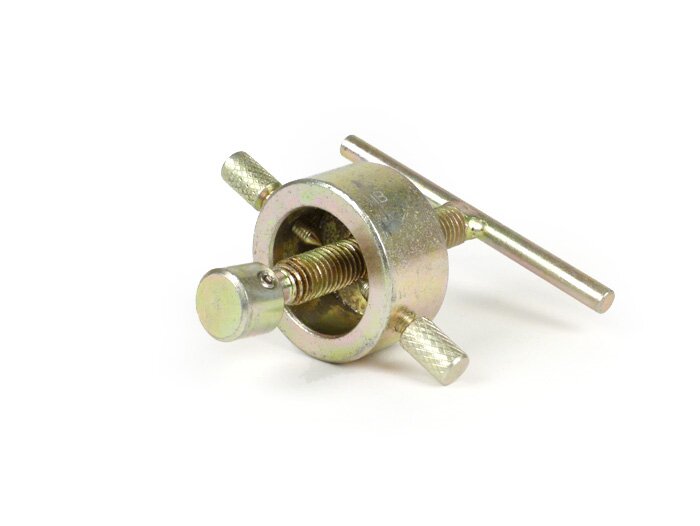
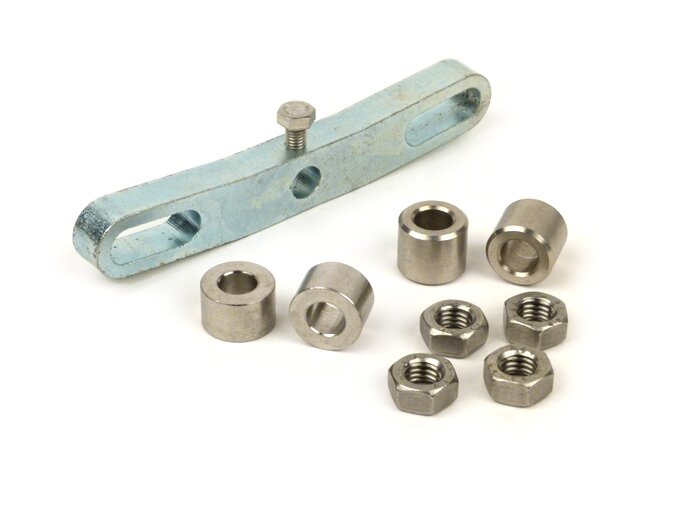
Many carburetors are usually delivered with a so-called folding or pull choke. So that the carburetor can be operated with a cable pull, as is typical for Vespa, we offer the right adapter set for conversion for many carburetor types.

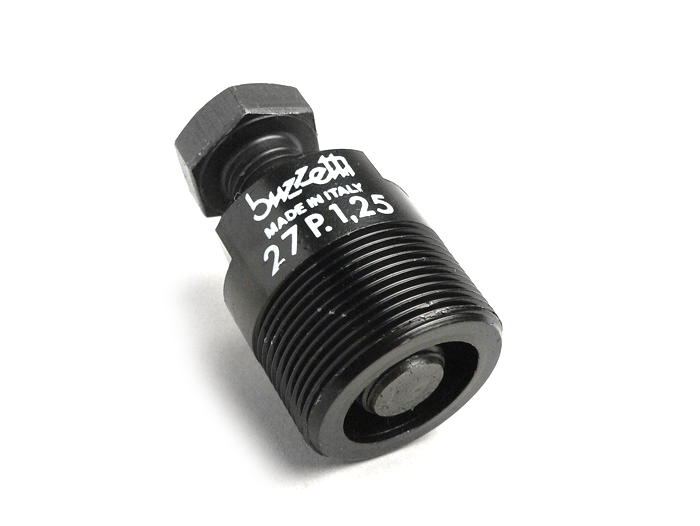
2599091  Dellorto PHBL, PHBH VHST (Shop)

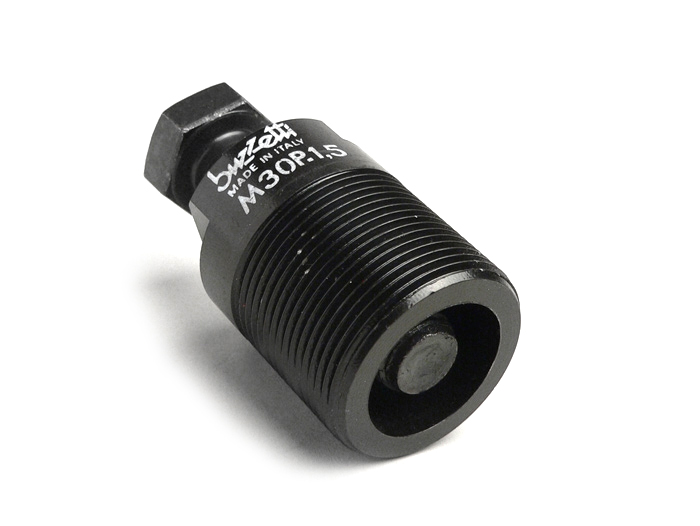
2599098 Mikuni, Keihin, and Polini CP (Shop)


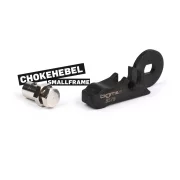
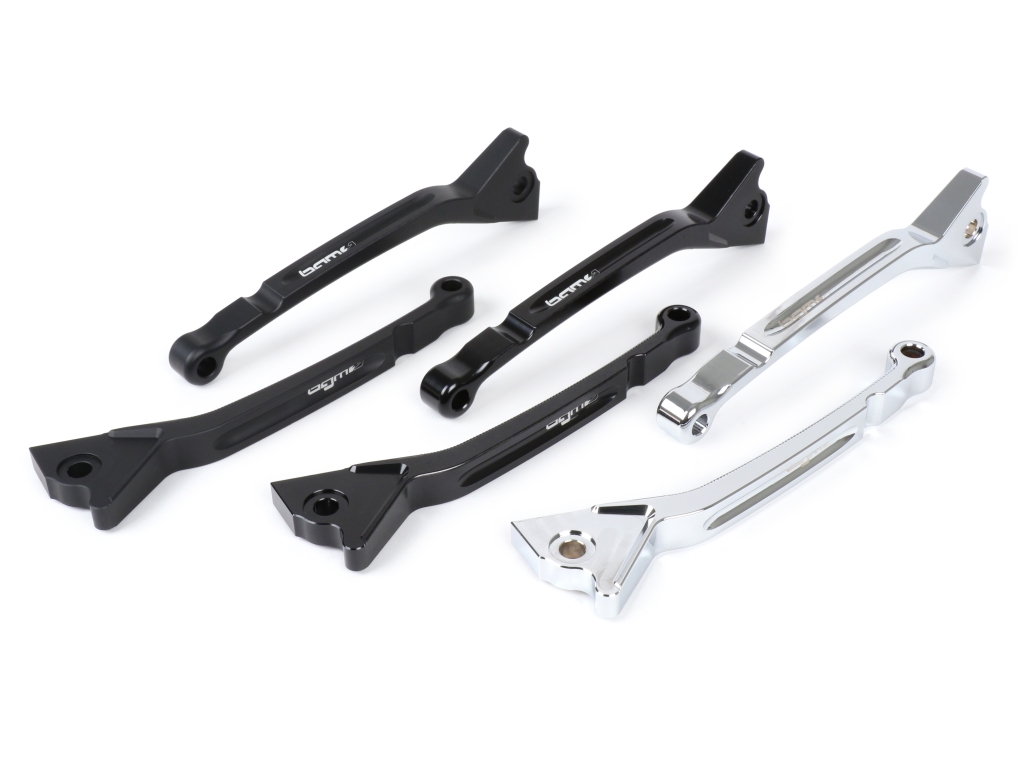
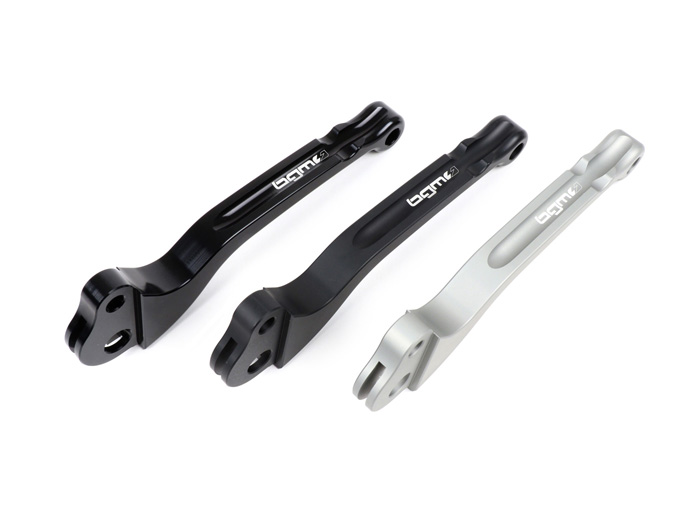
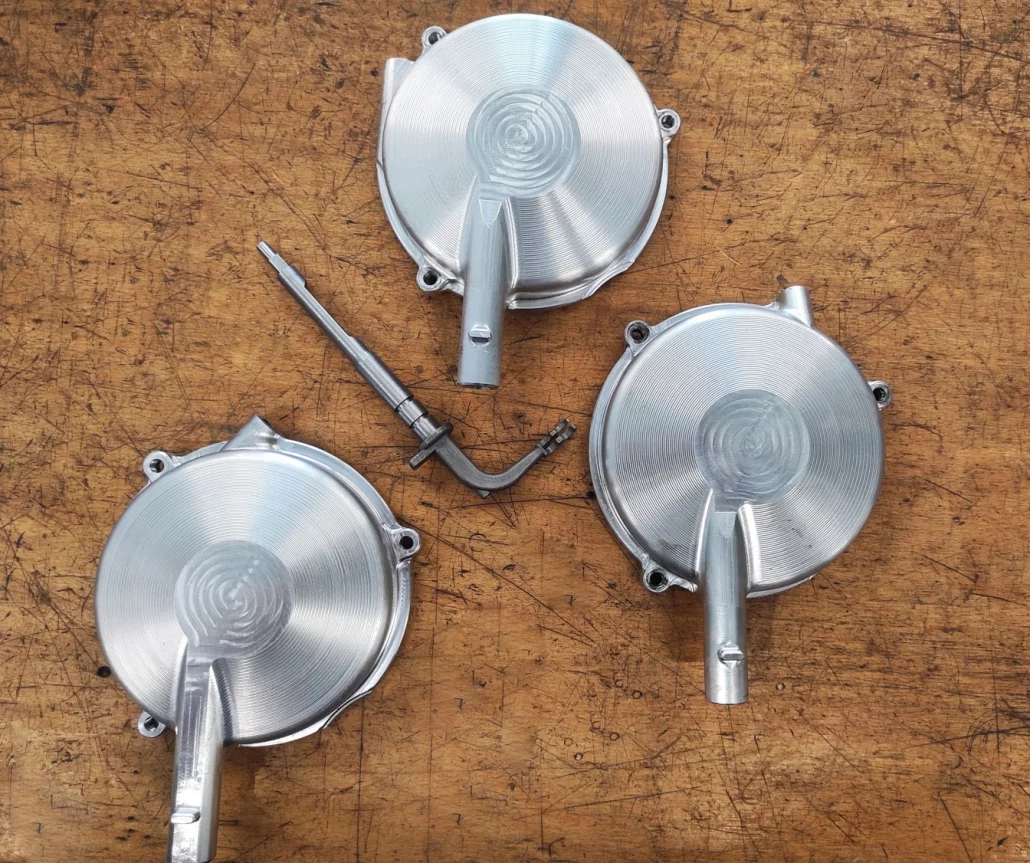
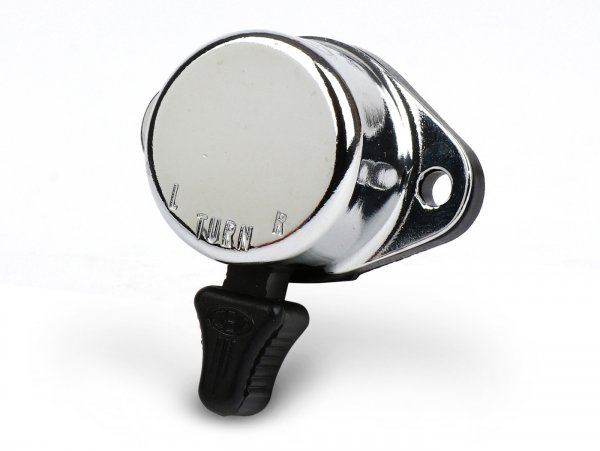
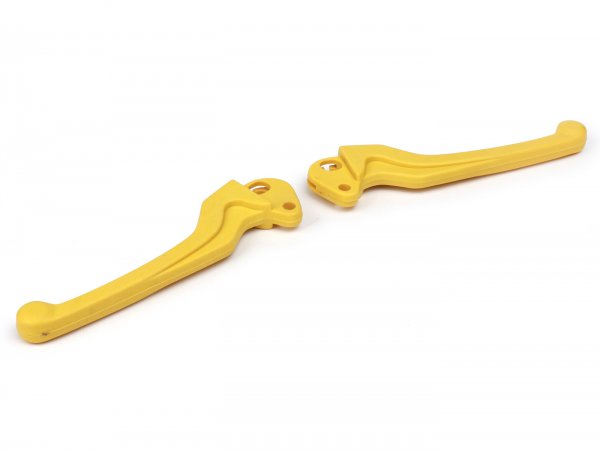
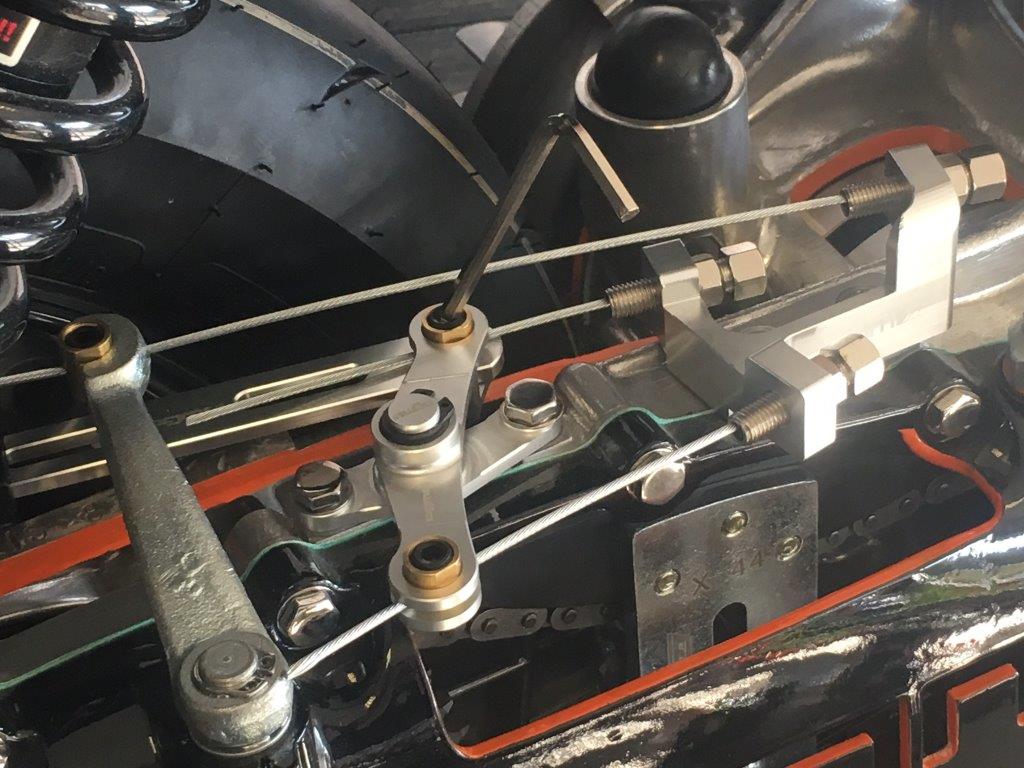
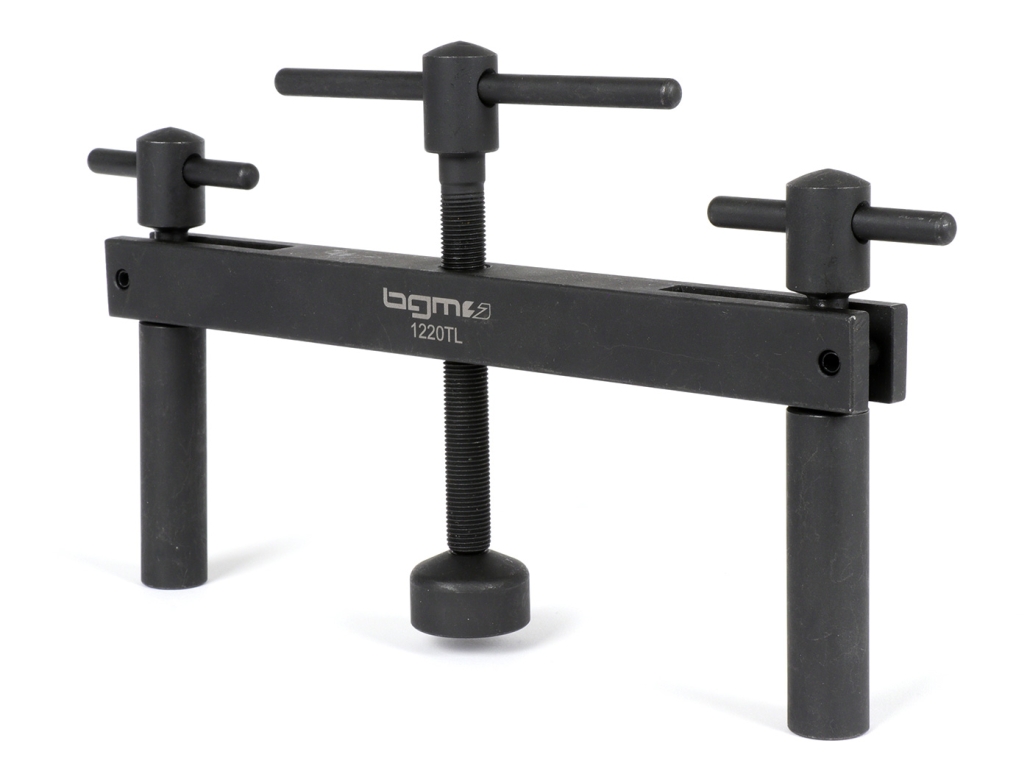
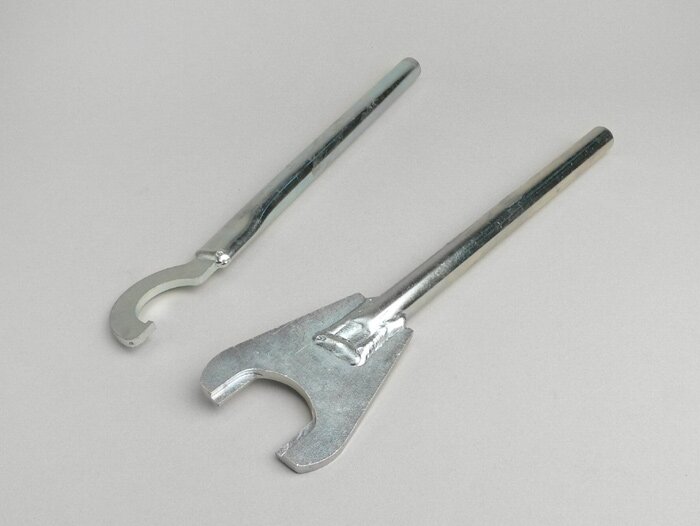
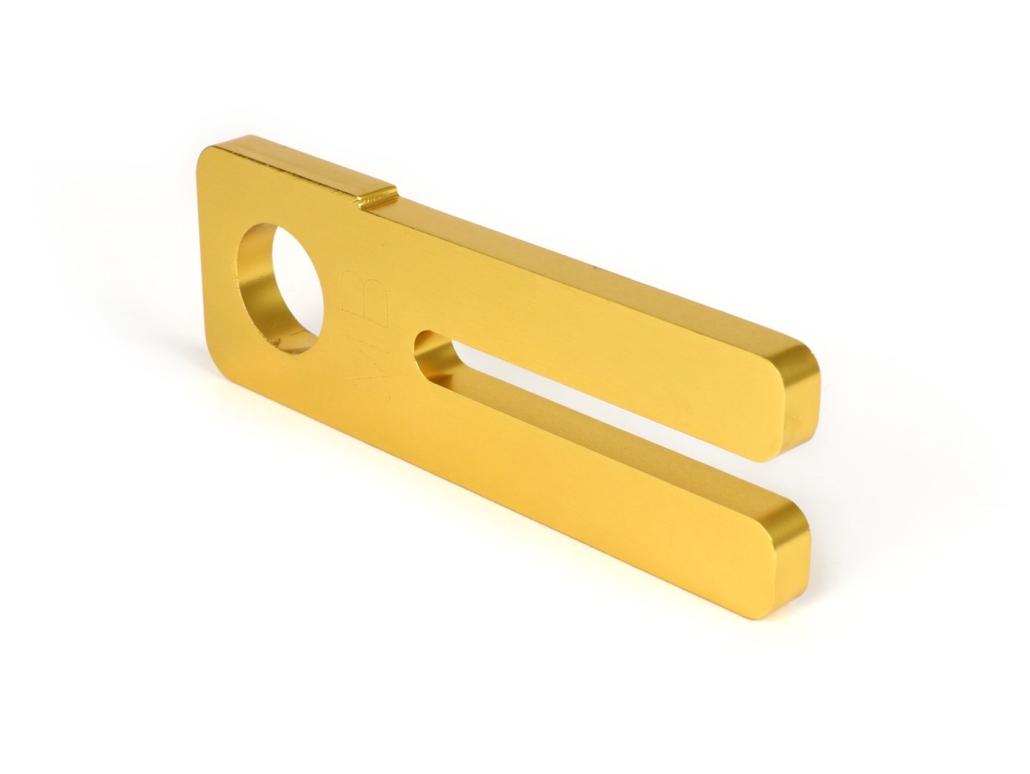
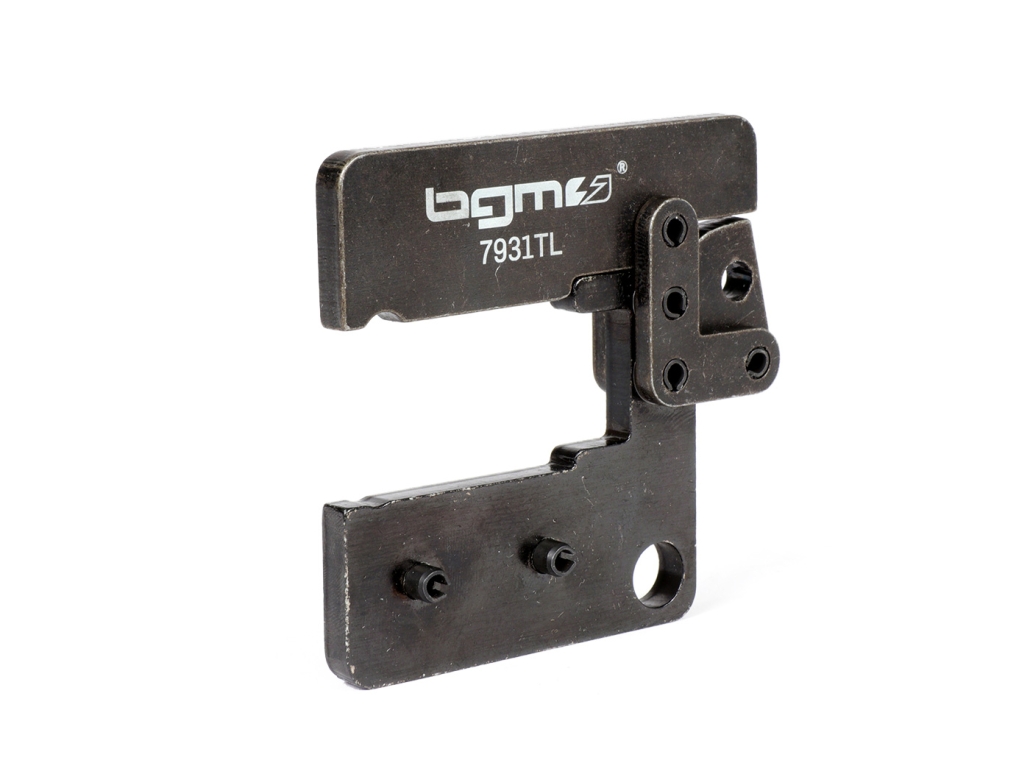
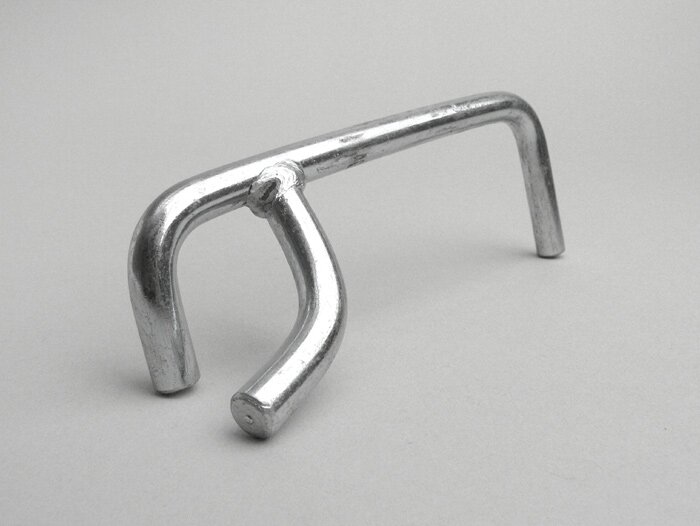
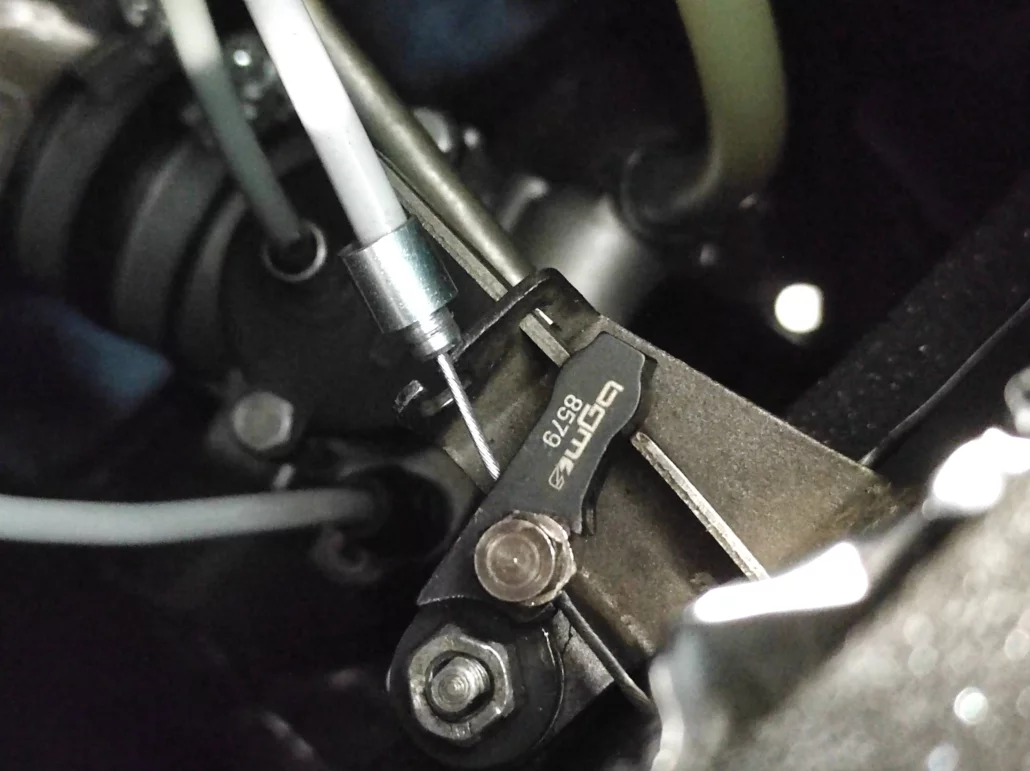
The bgm Pro choke lever is suitable for all carburetor types that are equipped or retrofitted with a cable choke.
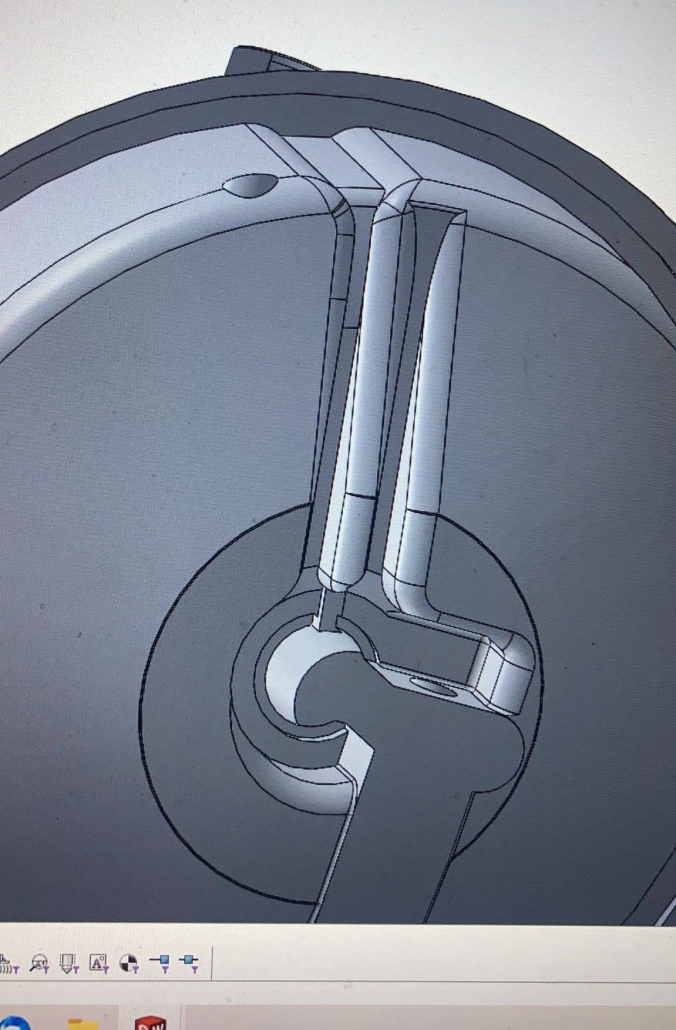
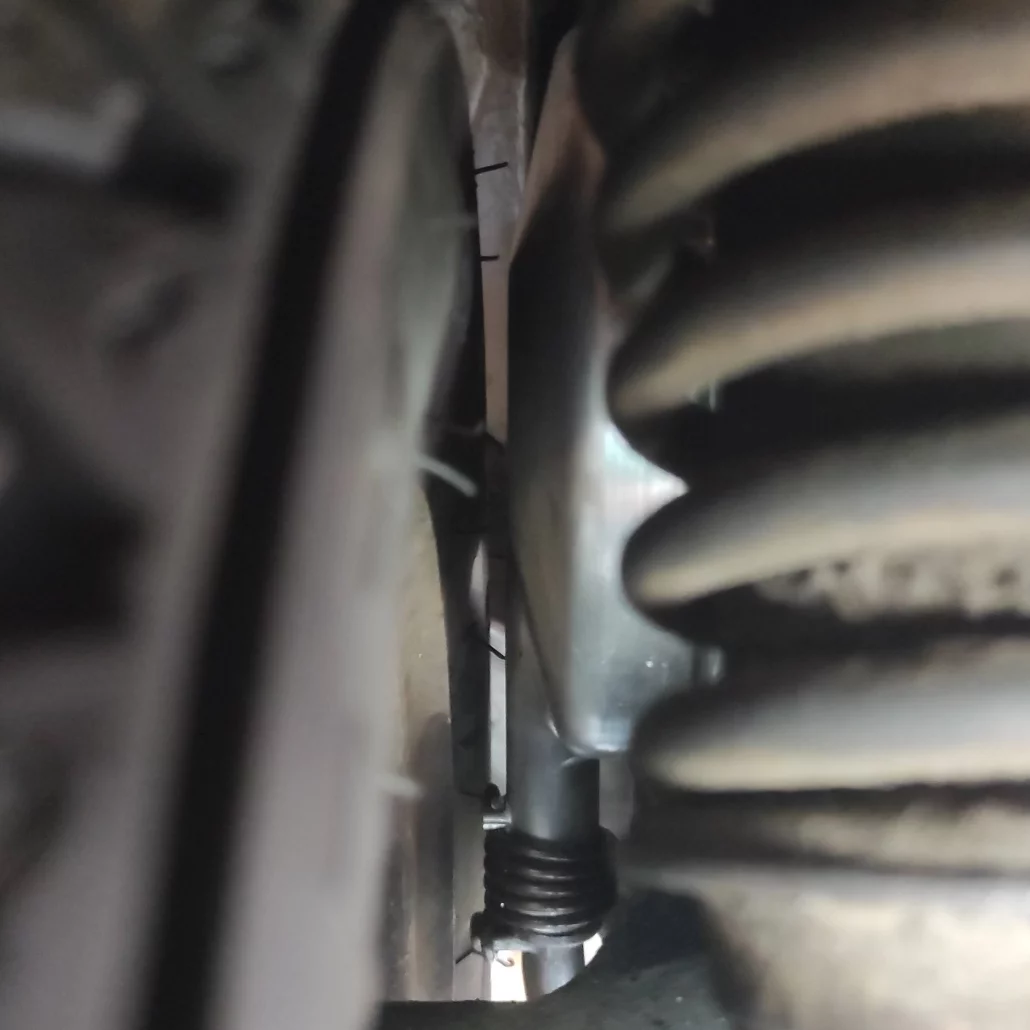
Due to the special design of the bgm Pro choke lever, the choke cable can be easily detached in order to remove the carburetor. This saves time and protects your hands in the cramped carburetor room Smallframe. By using a clamping nipple, the choke cable is not kinked every time the choke lever is actuated and is therefore permanently durable and secure against tearing off. Due to the adapted contour of the lever, it can no longer jump out of the choke button guide.


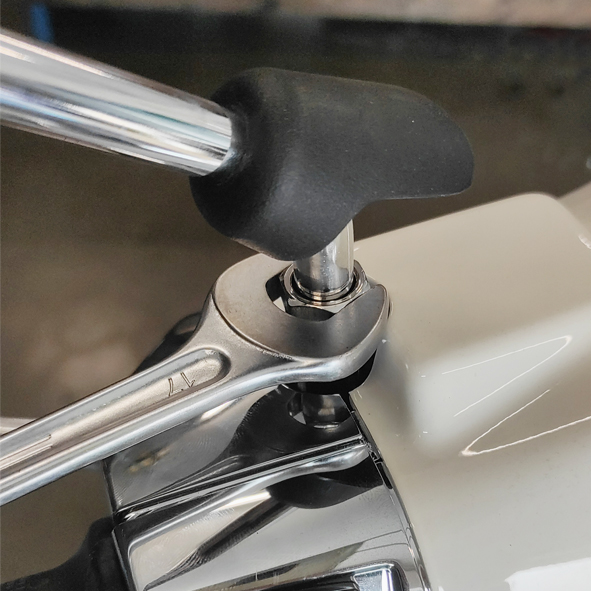
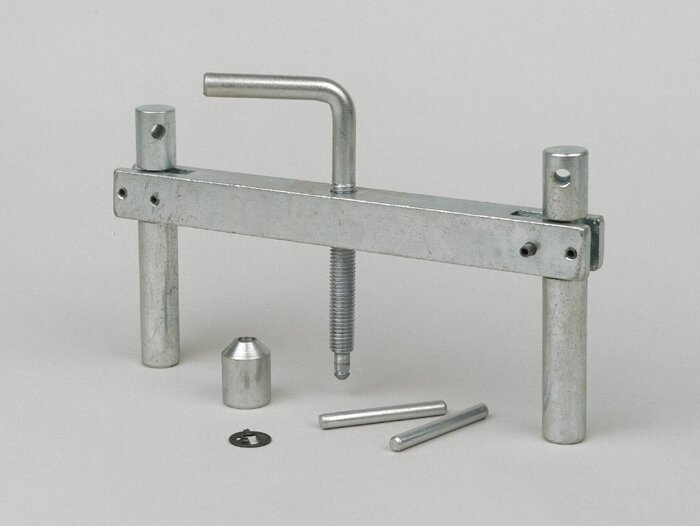
The assembly of the bgm Pro choke lever is easy.


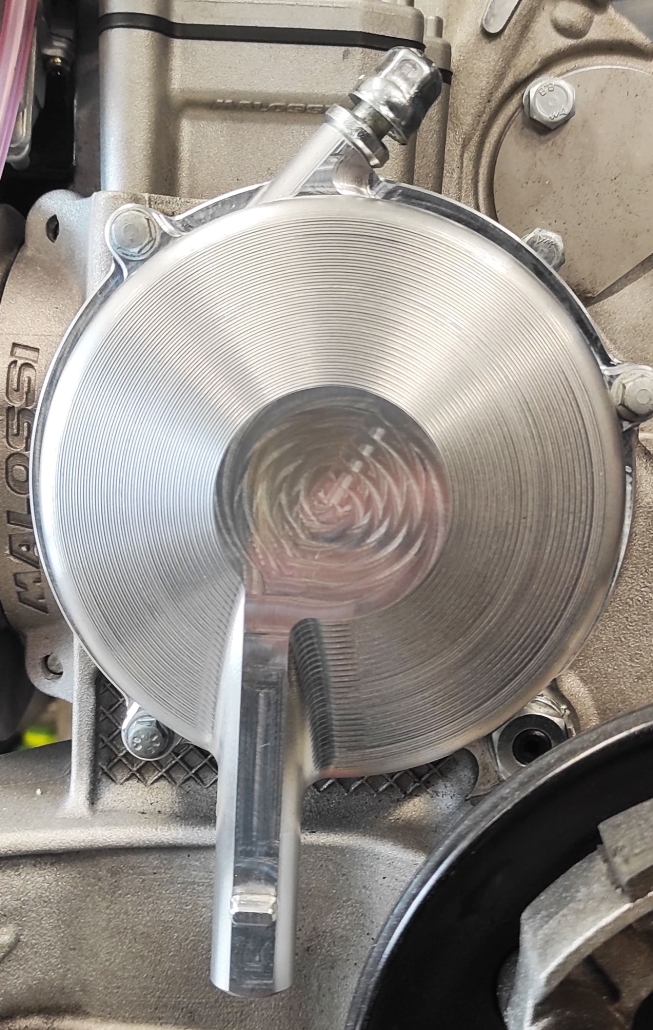
A YSN30 / Dellorto PHBH (YSN8570) carburetor serves as a model example and for the conversion to a cable choke (Blog)  with the matching cable adapter set (2599091 – (Shop).

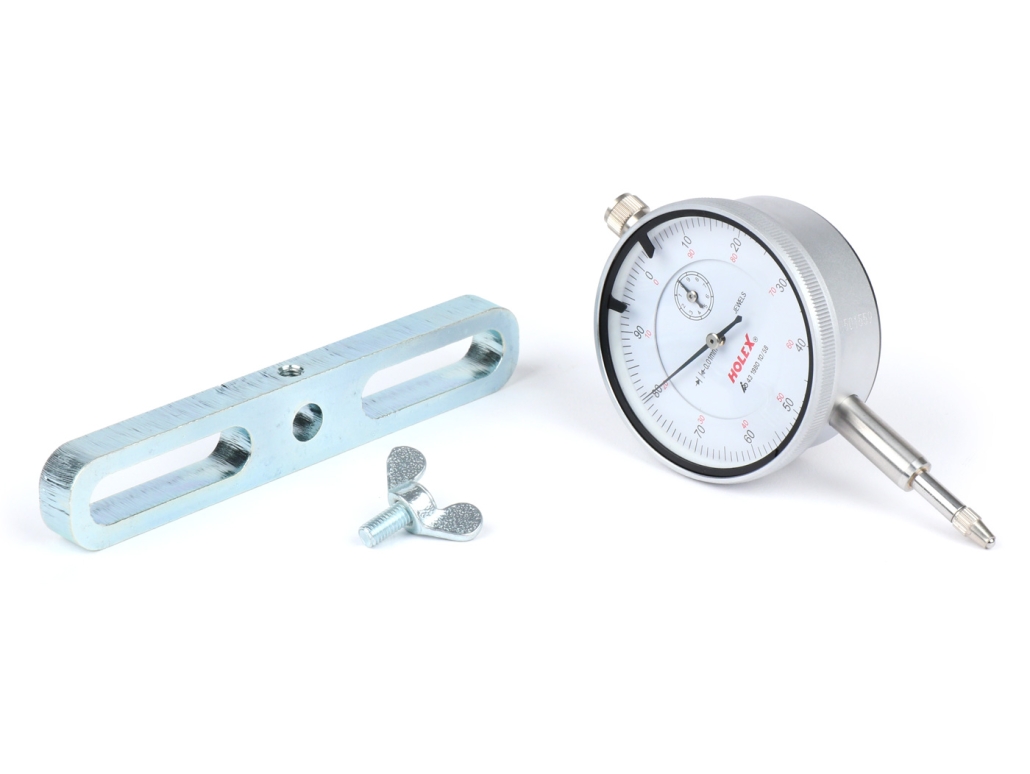
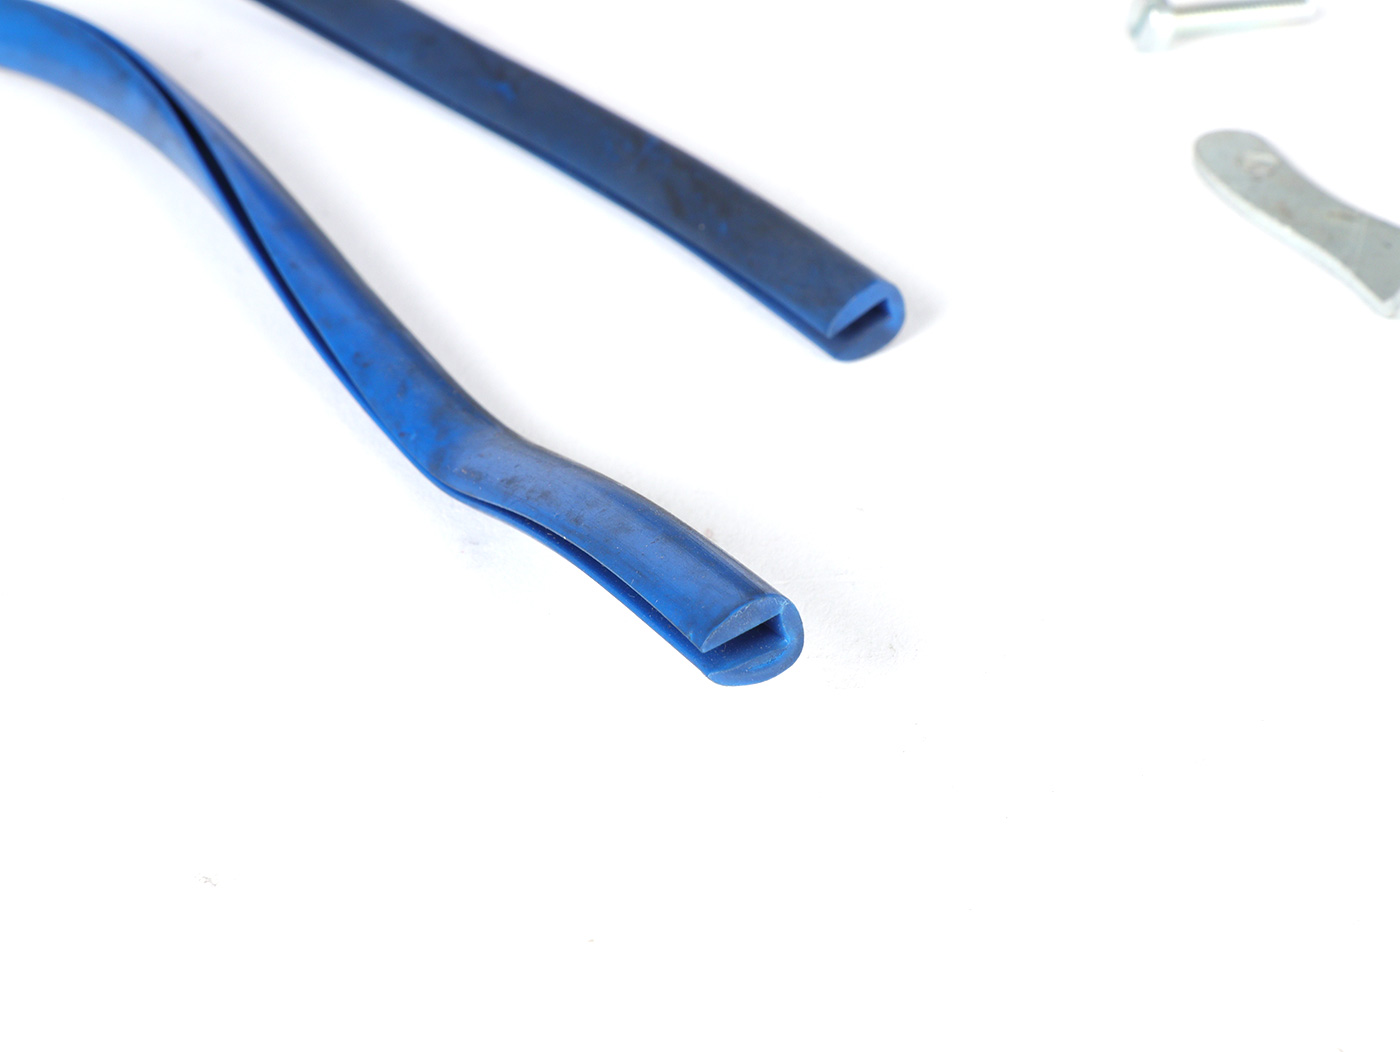
The universal cable BGM6445 is used as the choke cable. This already has the right length for the outer shell in a Vespa Smallframe to find space.

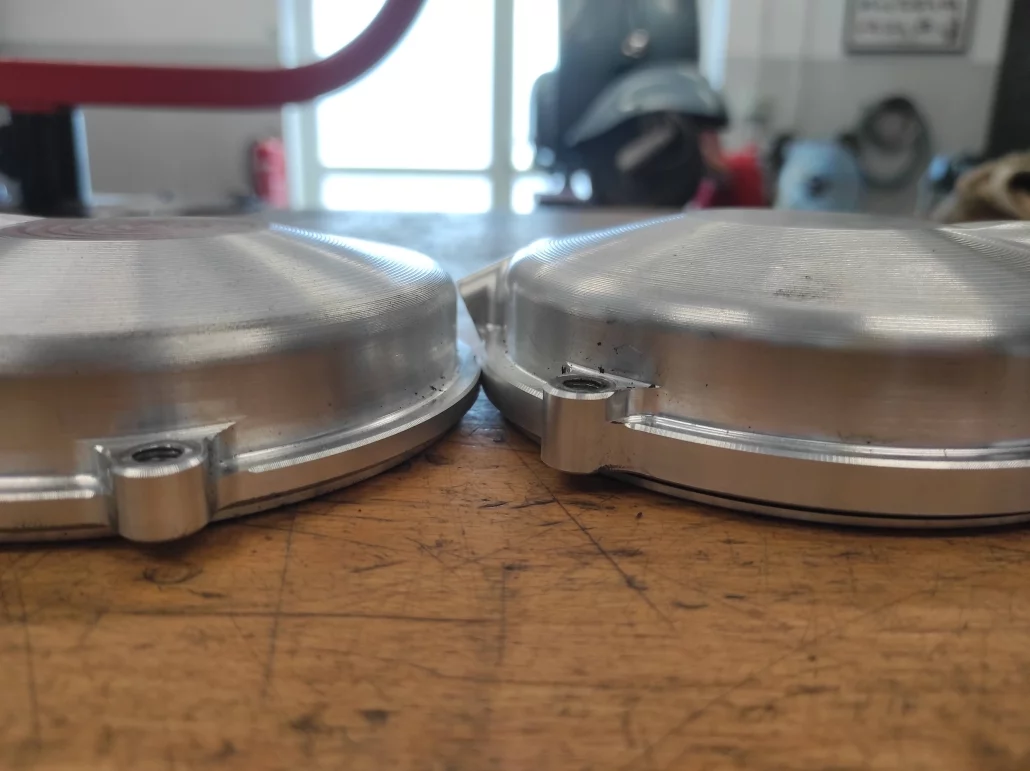
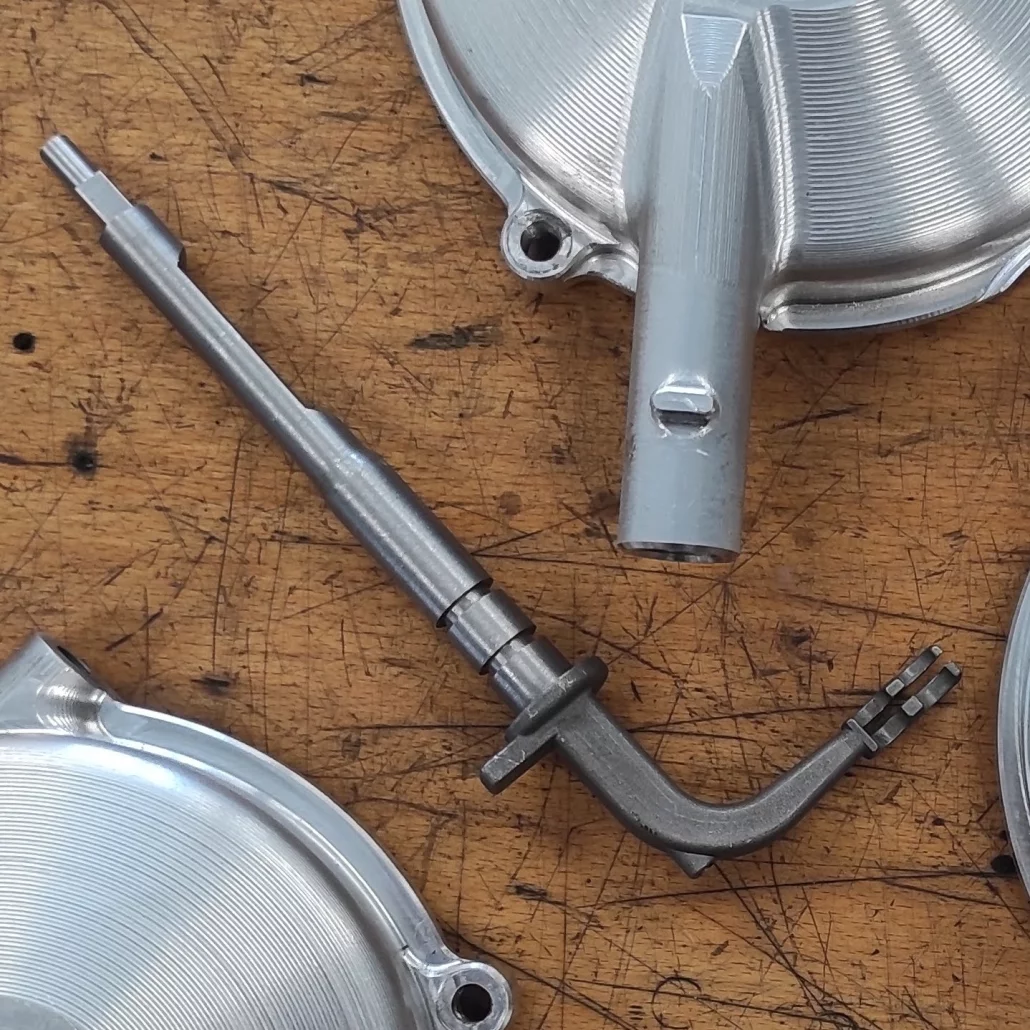
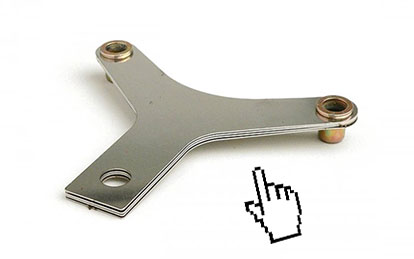
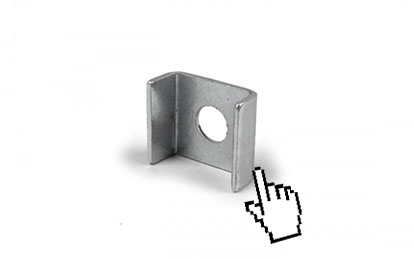
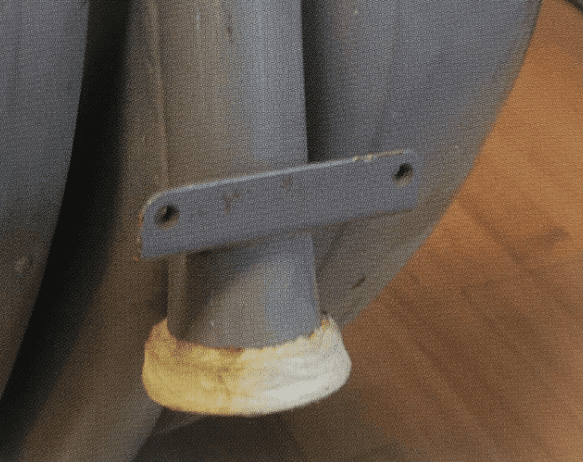
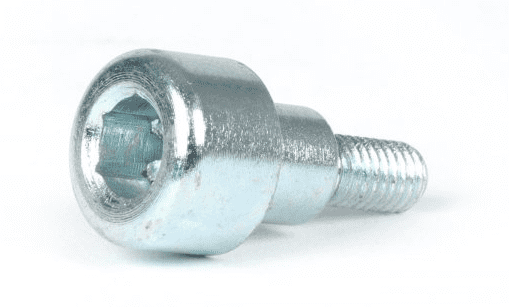
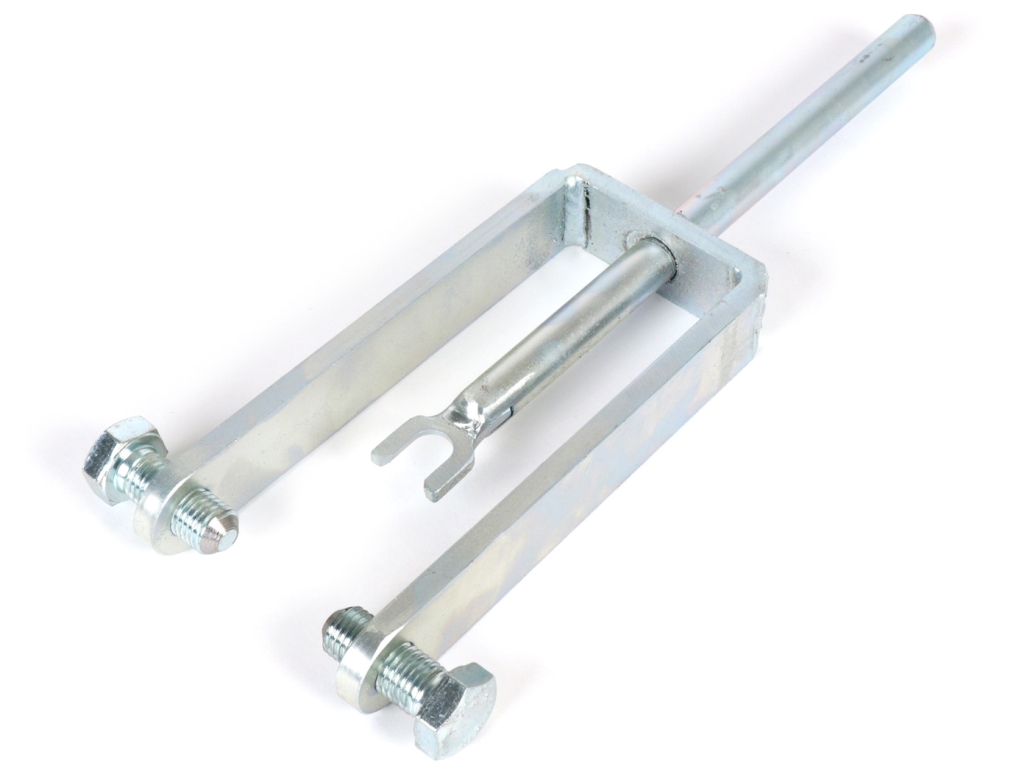
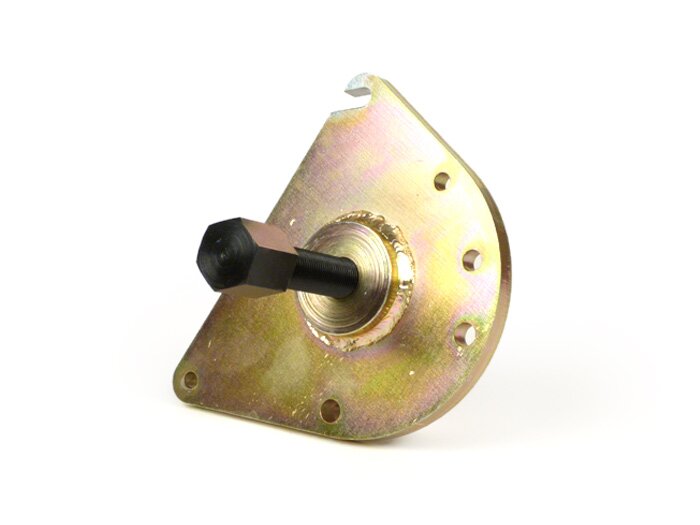
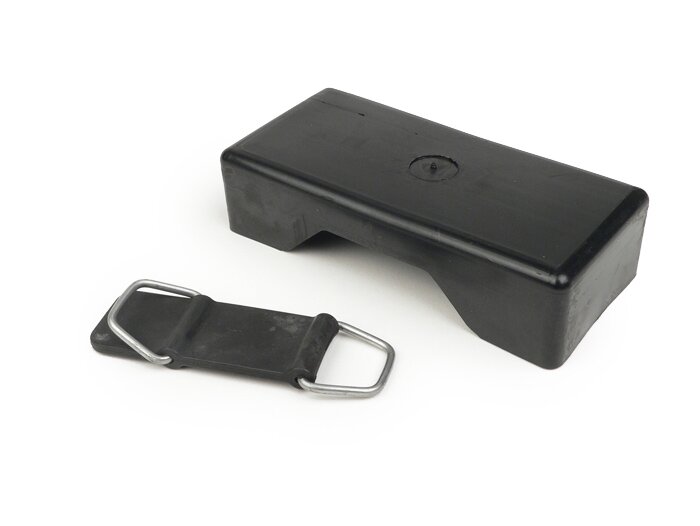
Loosen the nut of the small inner choke lever with SW10 and make sure that the screw does not fall out towards the carburettor chamber. When removing the original choke lever, pay attention to the domed washer (3330468W) which lies between the choke lever and the bracket on the frame. This will also be needed again later.

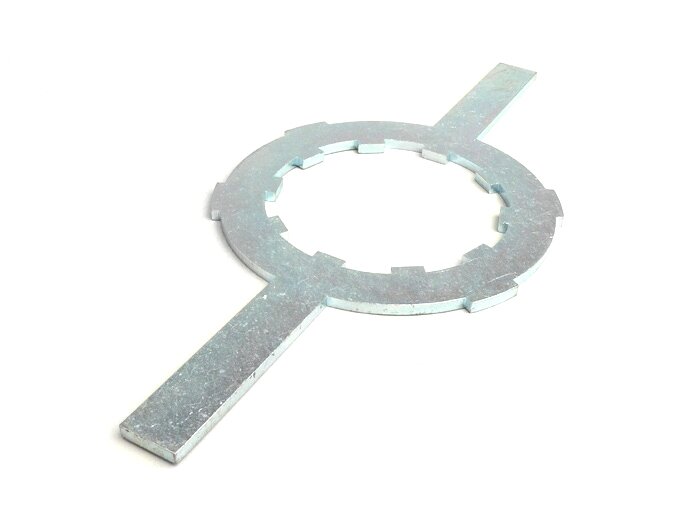
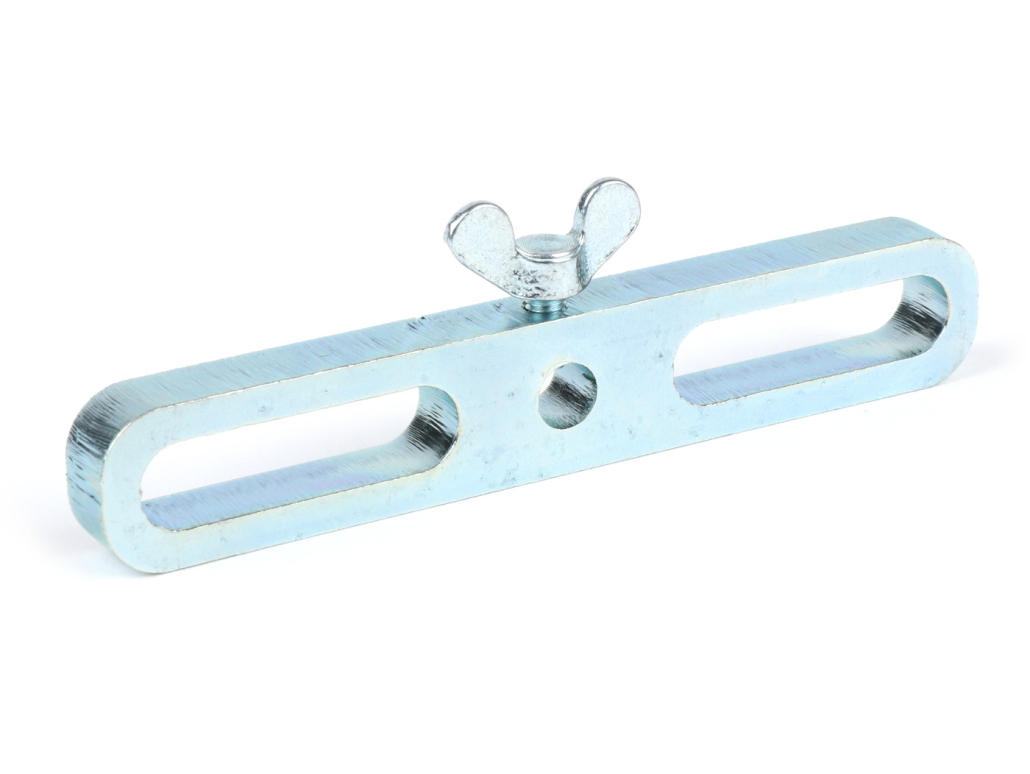
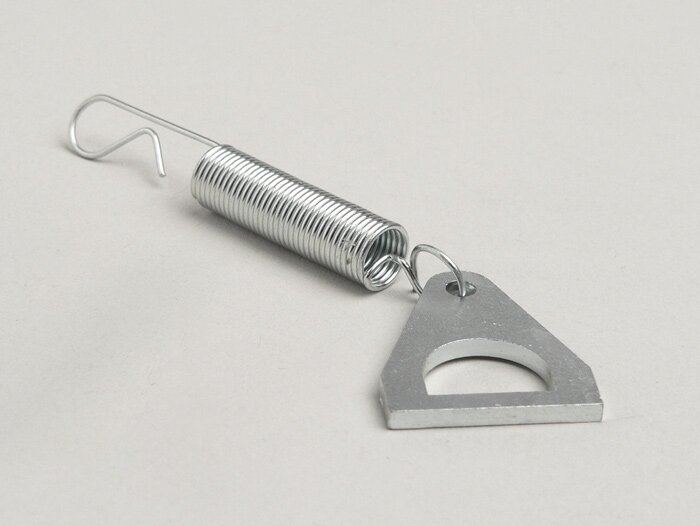
Guide the screw through the retaining plate from below and then attach the spring washer and the choke lever.

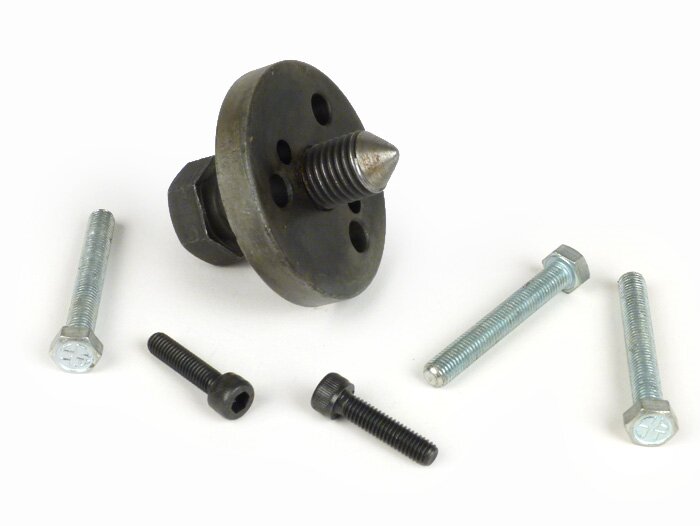
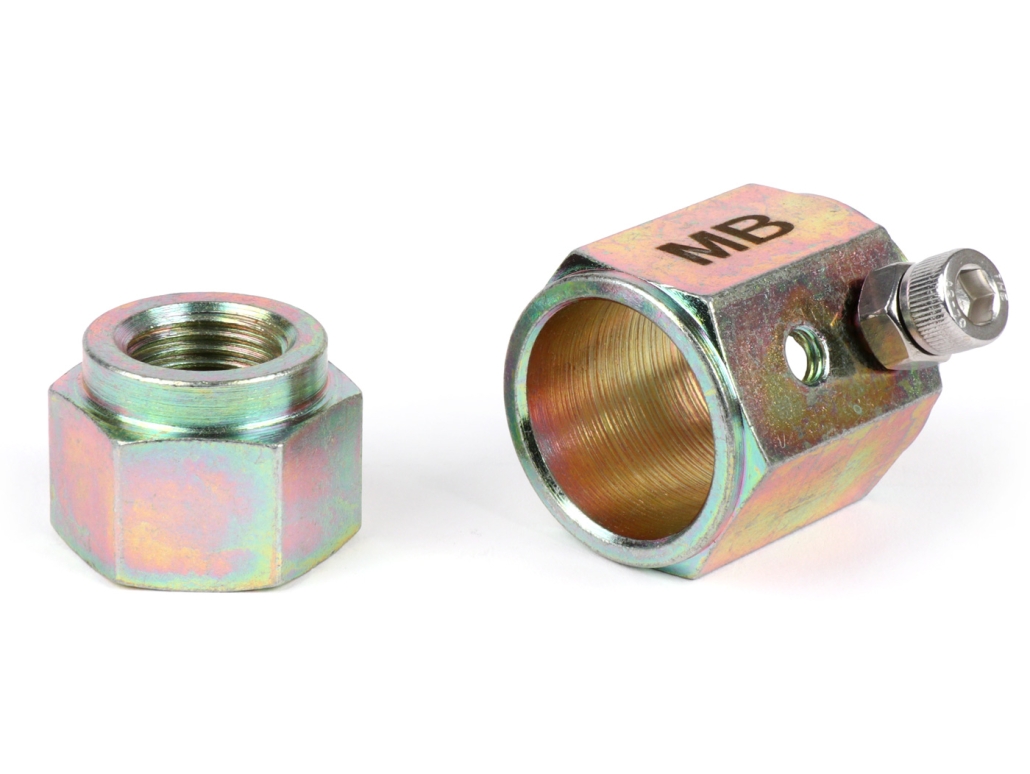
The nut has a so-called clamping part to secure against self-loosening. This clamping part can be recognized by the imprints on the wrench flats of the nut. Depending on the design of the nut, this clamping part is on a front side or on the wrench flats.

When putting on the nut, make sure that the clamping part of the nut faces upwards so that the non-clamping part is screwed onto the choke bolt first.

First tighten the nut until the choke lever can still be moved easily.

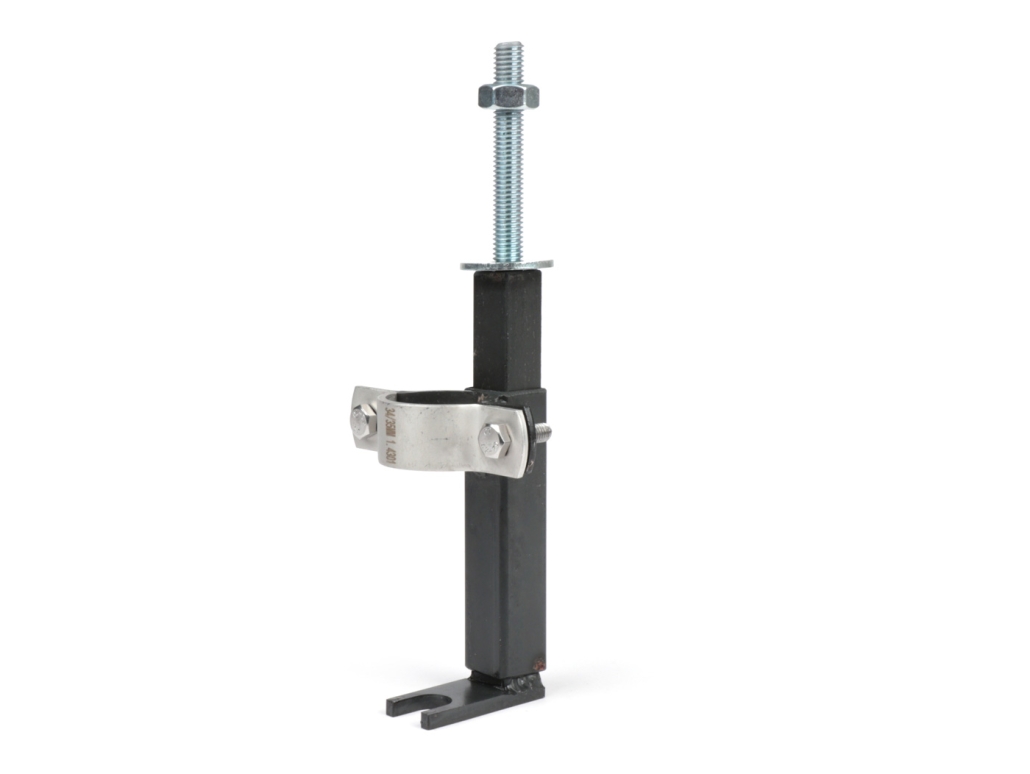
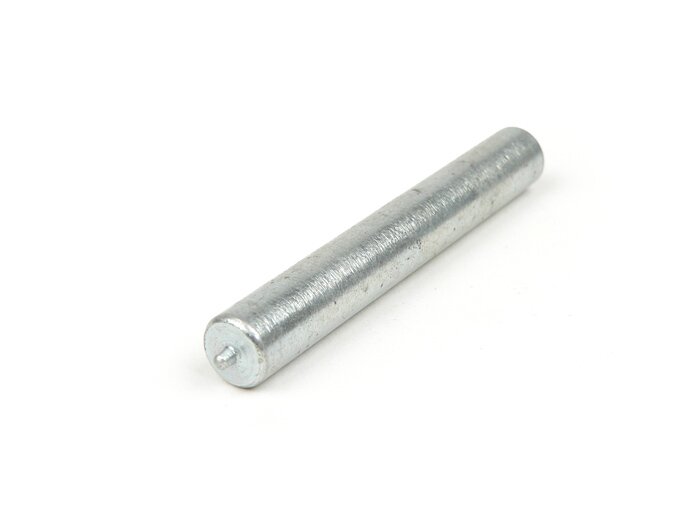
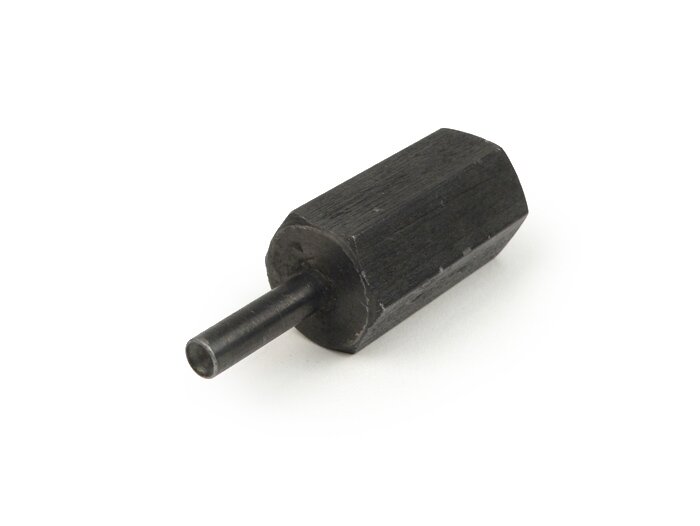
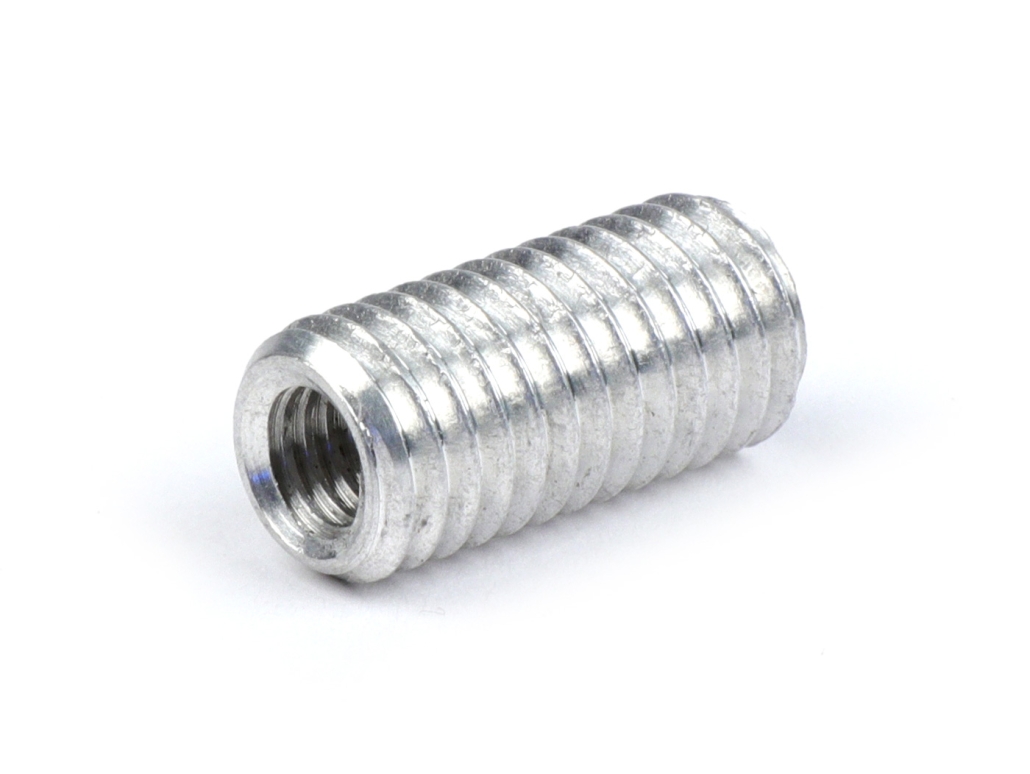
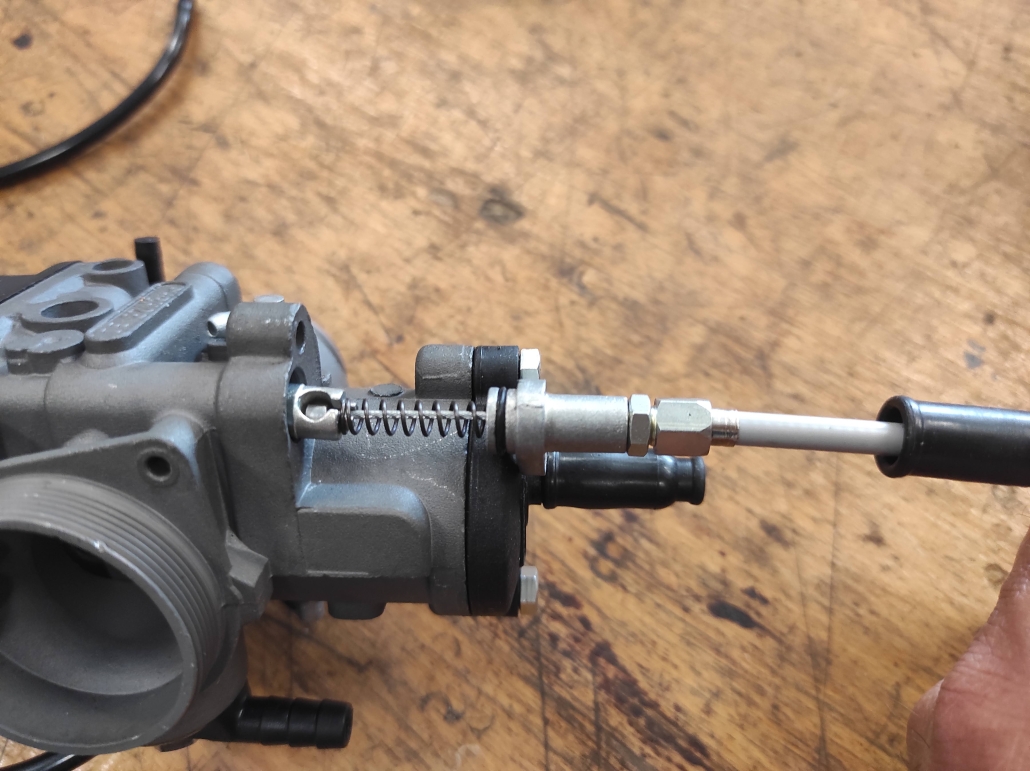
The inner cable is first fed through the adjusting screw and the adapter, barrel first, and then pushed through the spring. The barrel of the train is hung in the choke piston.

When inserting the choke piston into the carburetor, make sure that the barrel does not jump out of the choke piston mount. The adapter is then screwed to the carburetor.

The clamp nipple is now placed on the loose end of the choke cable and fastened at a distance of 20mm from the shoulder of the end cap.

First thread the inner cable into the slotted guide of the choke lever and then hook the clamping nipple into the choke lever. Use the end cap to pull the outer shell back far enough (the choke in the carburetor is actuated in the process) so that the end cap can be hung in the retaining plate.

If the play in the choke cable is too large, this can be easily adjusted using the adjusting screw on the adapter on the carburettor. A safety clearance of approx. 1.5mm between the shoulder of the end cap and the abutment of the retaining plate on the frame should be maintained so that the cable is not tensioned during compression and the movements of the engine while driving and the choke is not activated.

If the necessary safety play of the cable cannot be achieved via the adapter, the adapter on the carburetor is turned back and the cable adjusted by tightening the clamping nipple.

Finally tighten the nut of the choke lever so that the lever can still be operated easily but the spring force of the spring for the choke piston cannot pull it back again.

I am Heiko Froese, owner of HT Motors (HTPARTS.EU), born 1980 in Dordrecht, The Netherlands. My passion for mopeds and motorbikes was there when I was still in diapers but took serious shape from the age of 14. My first moped was a Puch Maxi, which I liked to drive, but I soon tweaked more than driving it. It wasn't so much because it was always broken, but because I just wanted to get more performance out of it.

The mopeds, scooters and manual mopeds that followed never drove the specified factory speed 😊. From the age of 16 I worked in my parents' garage or in a client's backyard. My customer base grew through word of mouth from friends and acquaintances in Dordrecht and the surrounding area, advertising on the Internet led to a customer base throughout the Netherlands and Belgium.

At the age of 21 I took part in the 150m scooter sprint for the first time and immediately got a 5th place. I wanted to have my engine and cylinder tuned and I went to Freddy Koopmans with my story of being the fastest in the Netherlands. He then immediately said that this was not feasible.

I left my stuff and over the next few days I kept thinking that according to Freddy it wasn't feasible. But I wanted it so much that I picked up my stuff and started “tuning” myself. And so it started on the coffee table in my 40m2 apartment with the well-known Dremel.

Of course, not everything happened by itself, but in the following years I developed more and more knowledge and skills, which I and later my driver and good friend Henk van den Heuvel (Henk from the Hill DSSC) used to achieve many titles and records with the scooter sprint won.

HT - Parts Maxiscooters

In the years that followed, the company grew with customers all over the world. In 2018, HT Engineering started shifting from tuning, overhaul and maintenance to the development and production of maxiscooter, moped and classic car parts. The focus is mainly on the production of Plug and play quality products for the road, all made in the Netherlands.

Now, 4 years later, we find that most of our orders come from abroad and no longer from the Netherlands where we are based. Mainly customers from Europe, mainly from Germany, Italy, UK, Austria and Spain, but also from New Zealand, United States, Mexico, Aruba, Bonaire, Curaçao, St. Maarten etc.

We manufacture CNC turned and milled parts in series for customers and colleagues at home and abroad, although we want to focus more and more on business-to-business sales from 2023.

In addition to some other international providers, this also has Scooter Center our products in theirs Webshop recorded.

I would like to thank you for this Scooter Center and especially to Michael, Daniel, Alex, Uwe and Frank!

Sincerely yours,
Heiko

Christmas gift ideas

The Christmas season has officially arrived at the Scooter Center and the decorations were not long in coming.

The whole team worked together to decorate the Christmas tree and a few suggest productsthat any scooterist would enjoy this holiday season.

If you don't know what to give as a gift, here are some of our recommendations:

Castrol oil can

Oil mat “Saubermann”

Gas tank

tool bag

First aid kit

flashlight

hand washing paste

Oil “bgm PRO STREET”

Motorcycle cleaner

Safety vest

Oil measuring cup

Custom Show Calendar 2023 (Vespa / Lambretta)

Bags

Keyrings

winter tires

The whole Scooter Center-Team wishes you a great Christmas and have a good time with your loved ones !