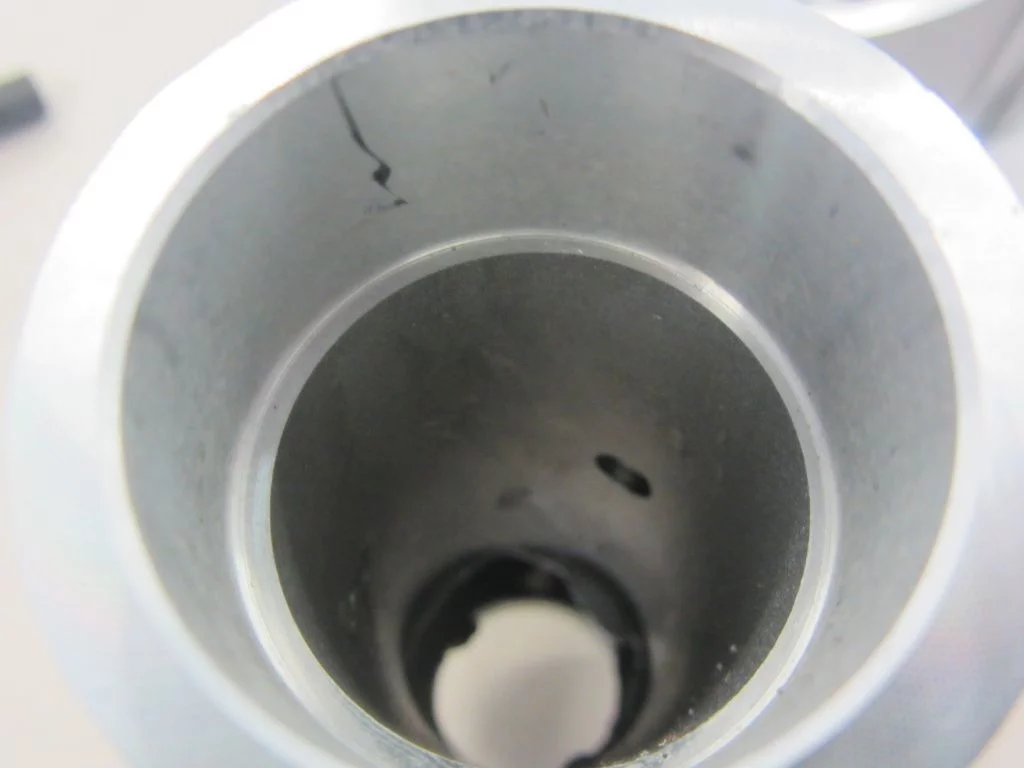
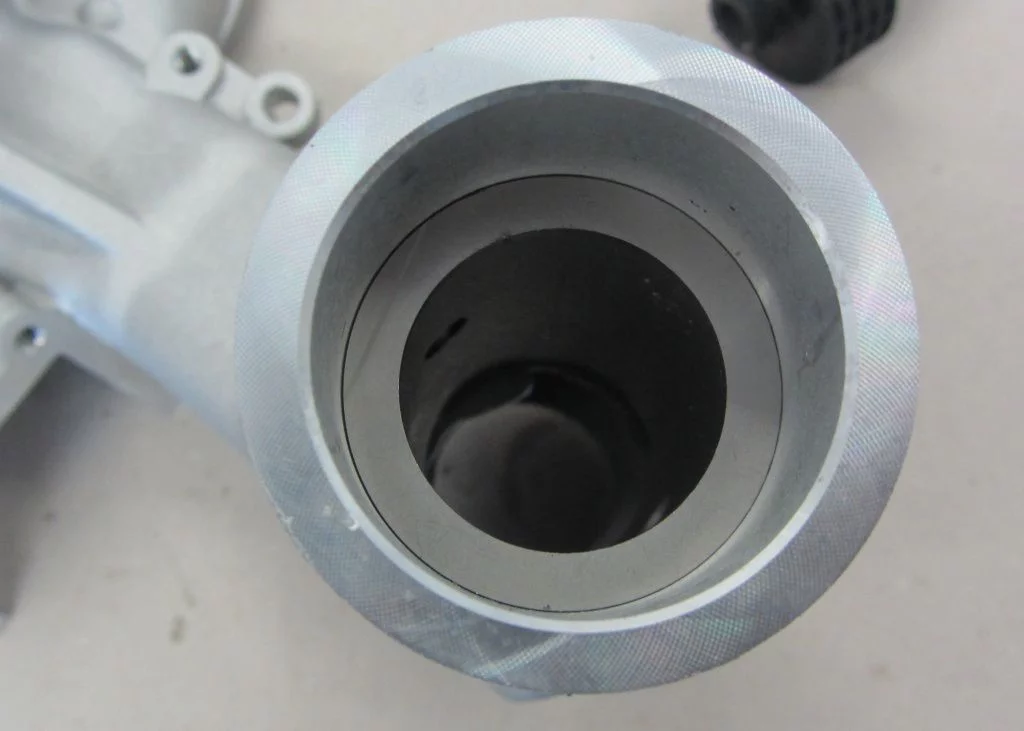
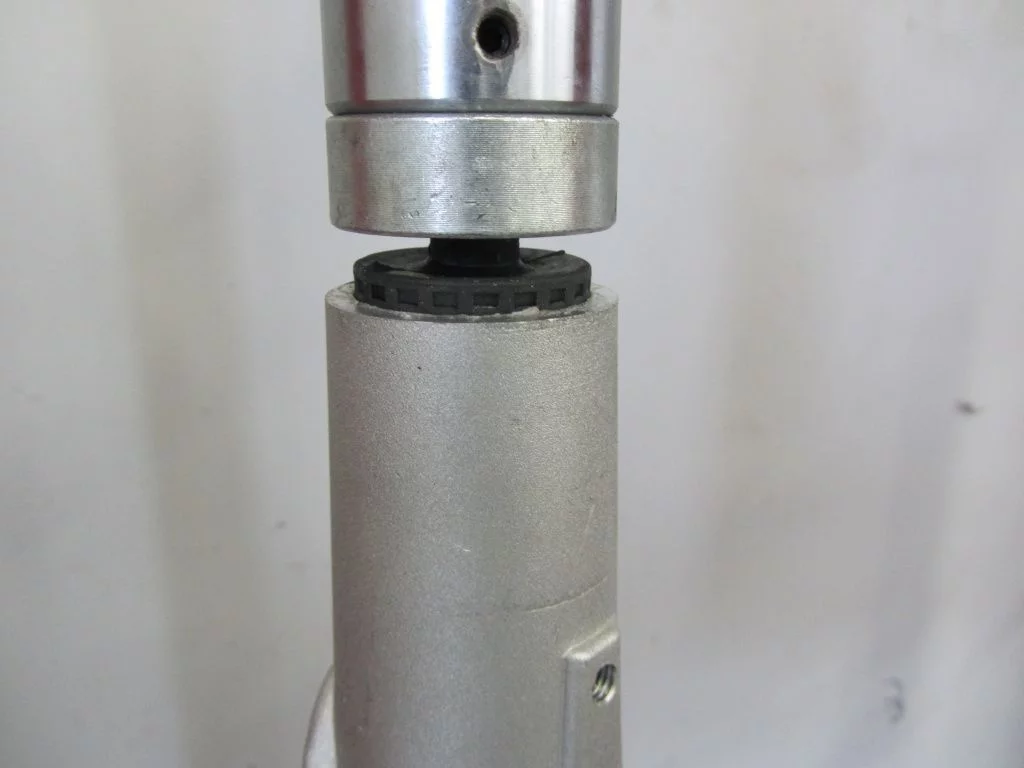
Vespa 235cc

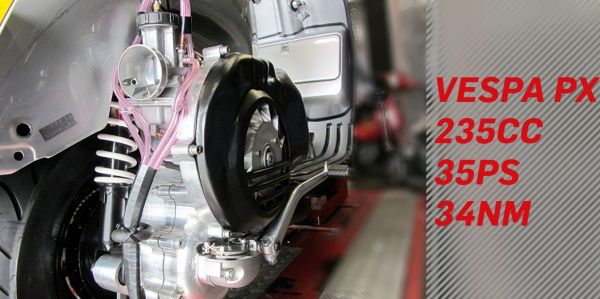
35PS and 34NM to start with

Vespa 235cc

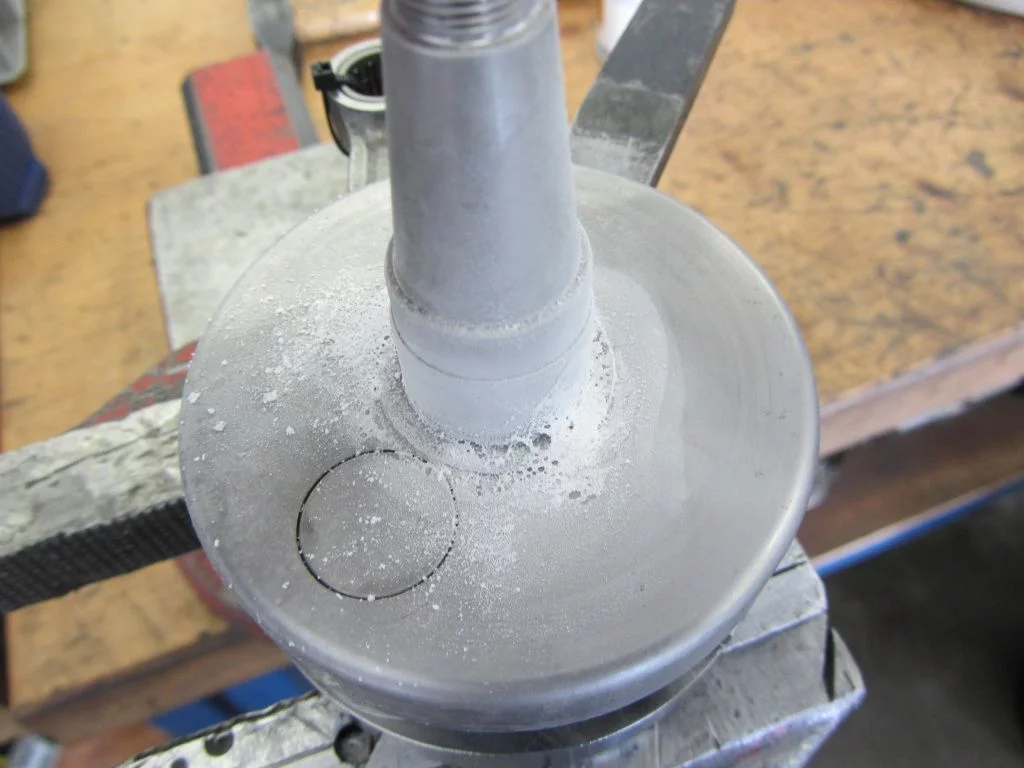
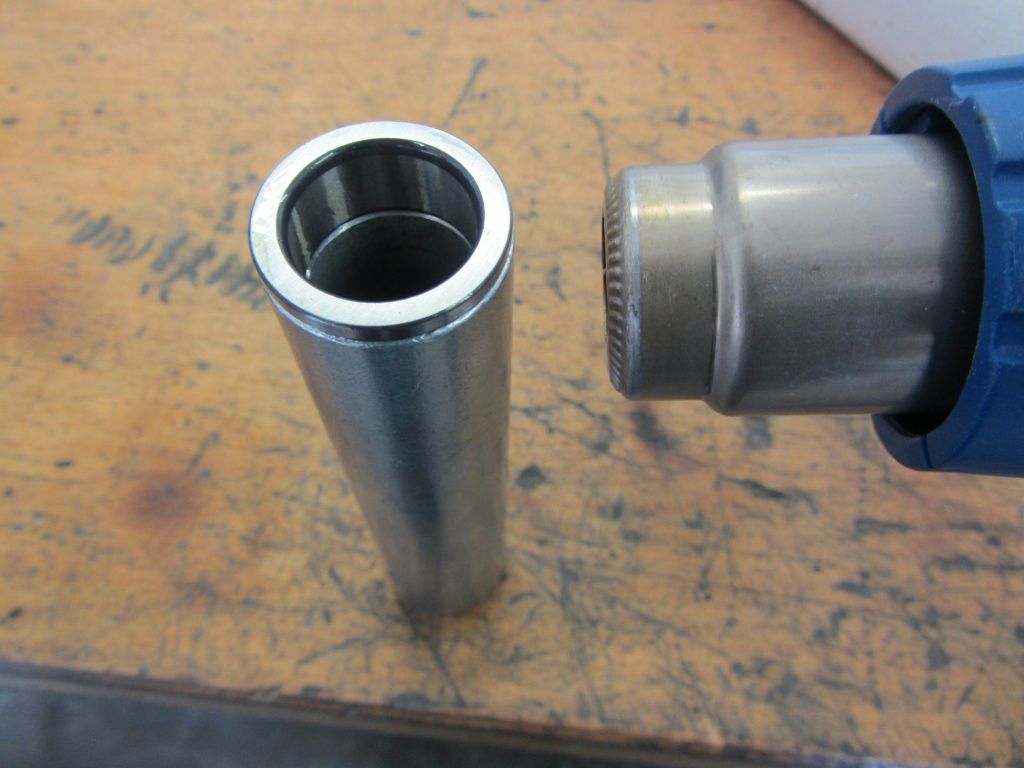
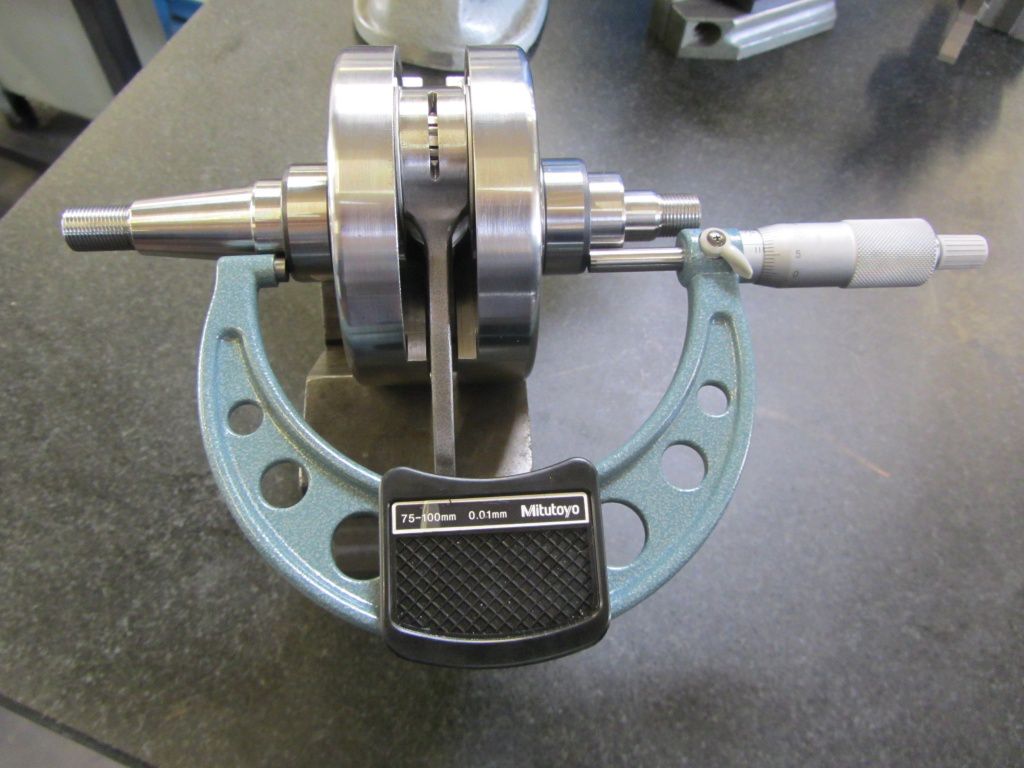
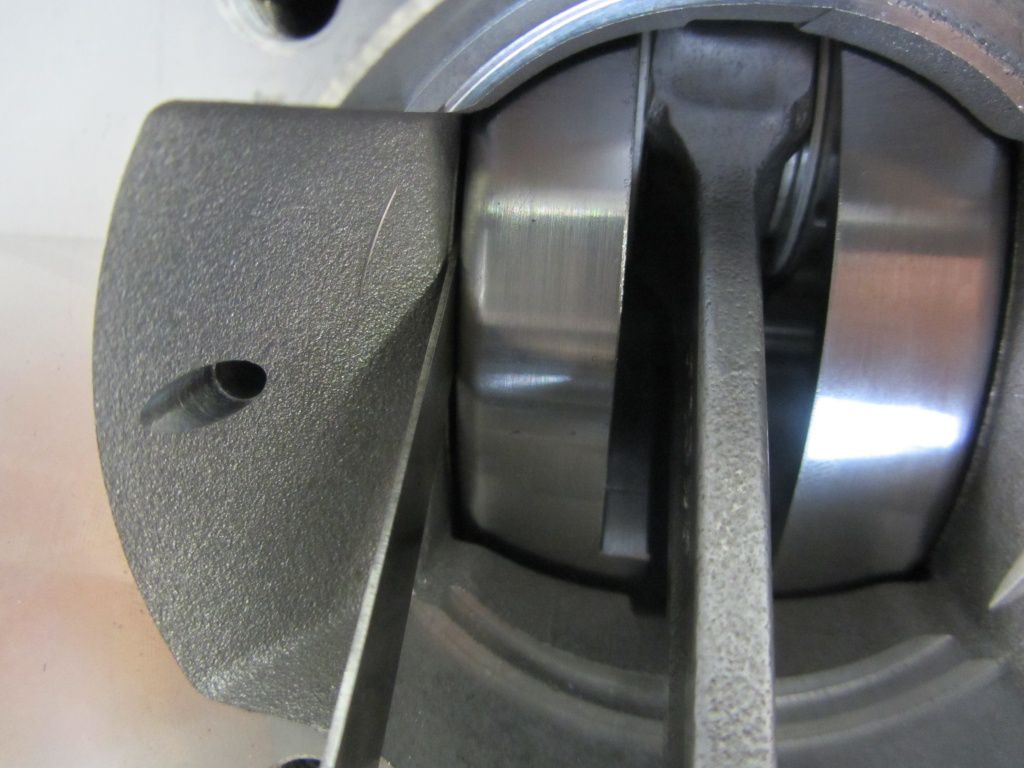
About 235ccm on one CNC motor housing are also more of an exception to the test for us.

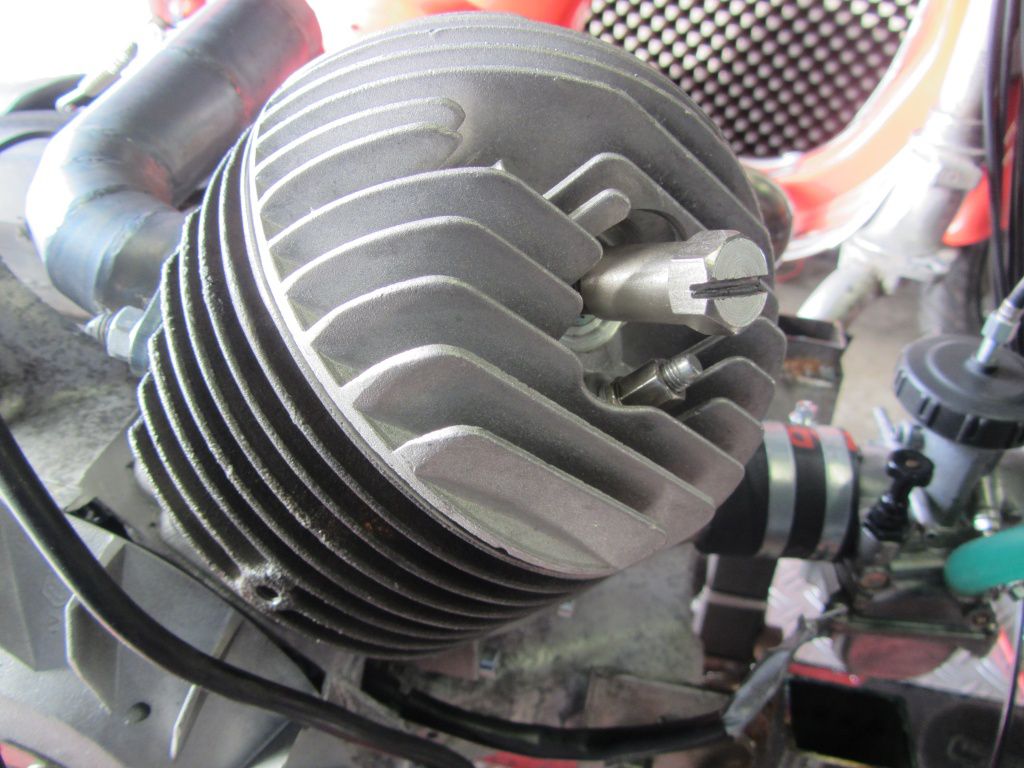
Few enthusiasts dare to take on such a financial and mechanical challenge. The outwardly rather inconspicuous, silver Vespa PX, hides the technical eye-catcher under the right hood.


27.06.2014 007

The engine, carved out of solid aluminum, is manufactured with a sufficiently large membrane intake manifold.

The crankcase is filled by a 38 Keihin Airstriker in a very short and direct way.

27.06.2014 002

Gearbox is designed for over 50HP

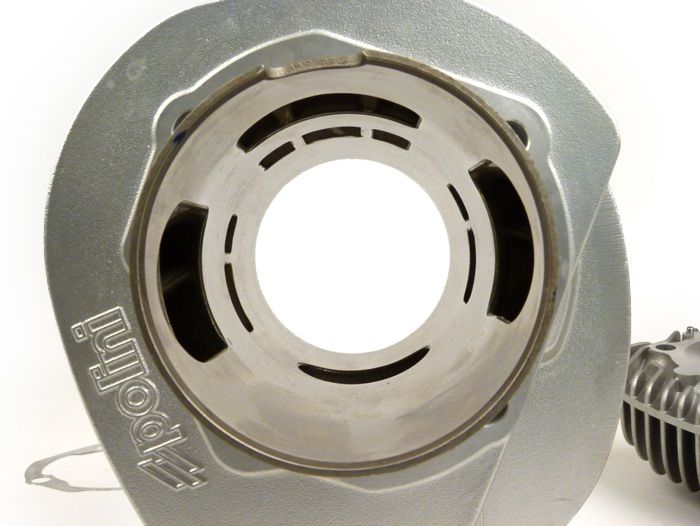
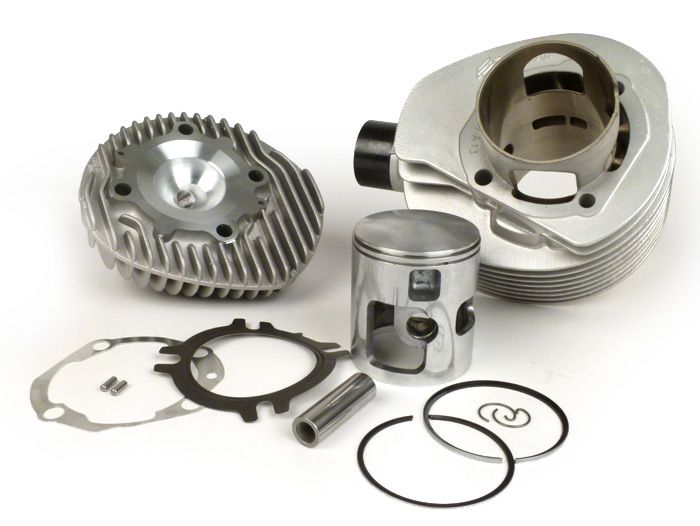
The valuable filling from the crankcase is then transported into a Simonini cylinder borrowed from aircraft engine construction during the flushing process. The 70mm bore results in 235ccm on this engine!

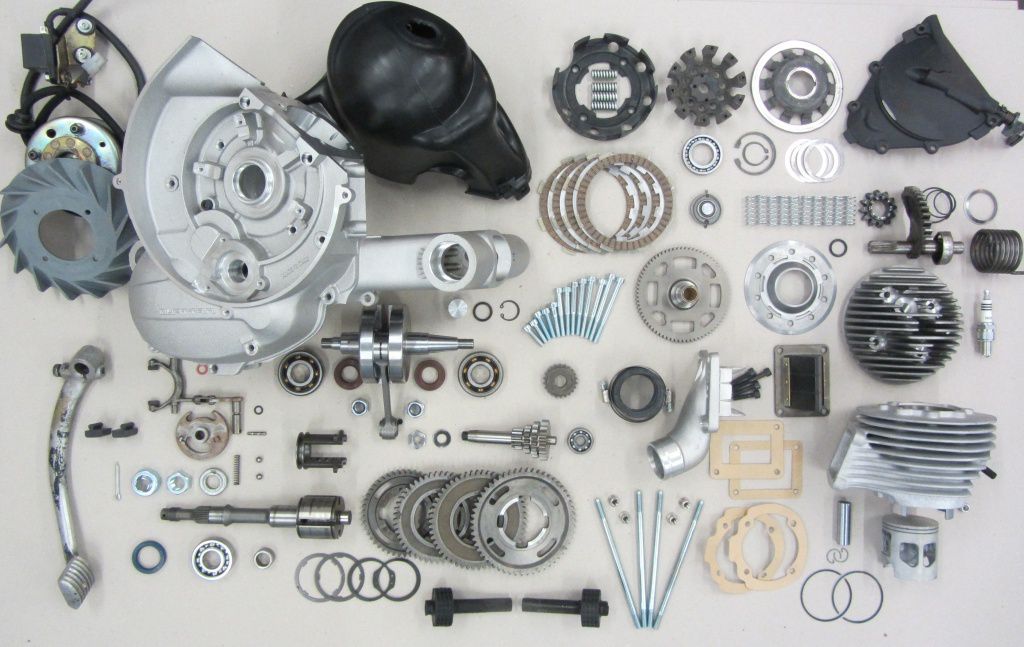
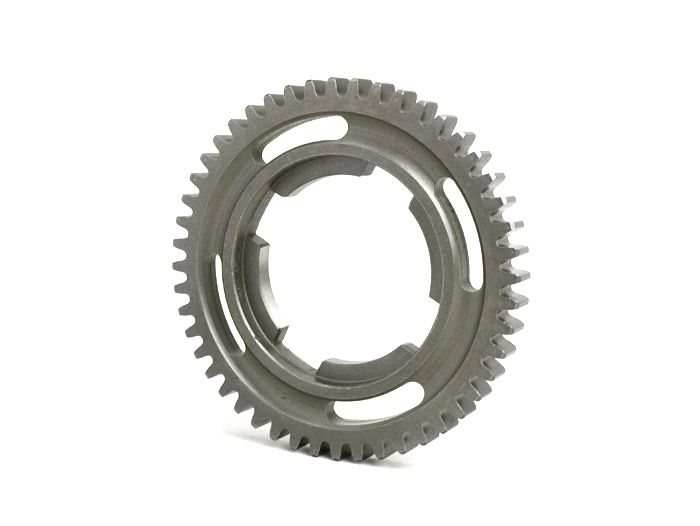
The gearbox of this Vespa PX200, actually 235, is of course not off the shelf either. The company KR-Automation has reached into buttons and developed a very elaborately manufactured Vespa gearbox that can withstand a power of over 50HP over the long term.

Here are the inner values

Simoninii 235

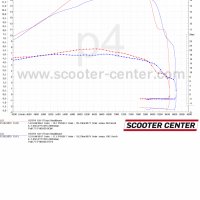
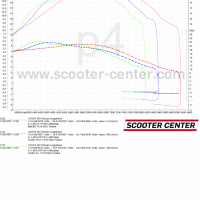
At the moment “only” 35HP and 34Nm are pulling on the main shaft.

However, as the owner credibly assured us, this will be further optimized and we will soon meet again on the test bench to look for more horses.

We are very curious!


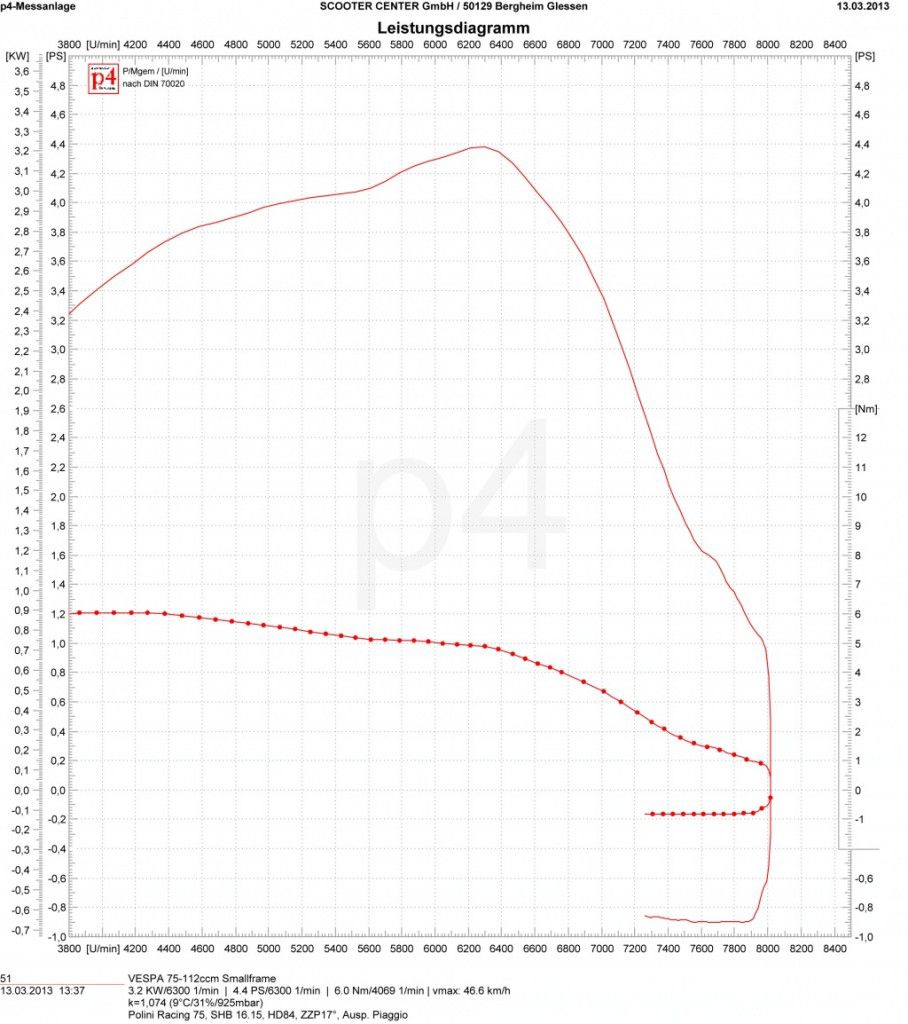
Vespa PX80 cylinder Malossi 139ccm tuning performance km-h

Vespa PX 80 with Malossi 139ccm cylinder

In many cases, the TüV requires a performance report to enter changes to the engine.

Next to the 135cc DR cylinder is the  Malossi cylinder with 139ccm one of the most popular cylinders to help the little PX on the jumps. So also in this case, our customer Timur needs such a diagram for the demonstration and entries with the TüV.

Vespa PX80 tuning Malossi 139 cylinders

Performance graphs cylinder MALOSSI 139 cc Vespa PX80

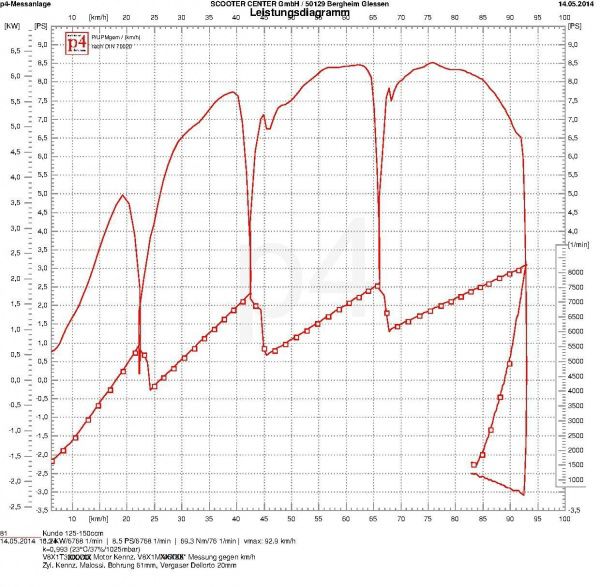
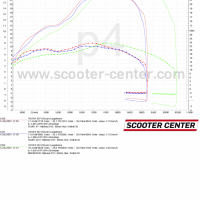
When measuring according to DIN on the Amerschläger P4 test bench, we have to enter the key data of your engine in the diagram so that the tester can correctly assign the diagram to the vehicle. All scooters with gear shift and four gears are usually measured in third gear. This information is also noted in the diagram.


Vespa PX80 cylinder Malossi 139 tuning speed versus power       So that the changed maximum speed can also be entered during the test, we carry out a performance versus speed run. Here all available aisles are simply extended.

Cylinder POLINI 133ccm Evolution membrane ESC version

Polini 133cc Evolution membrane

ESC2014

From 2014, a standardized package is permitted in class 1 of the ESC. The direct suction serves as the basis for this package Polini Evolution cylinder modified to the ESC version.

The one-size-fits-all solution with the Polini 133cc Evolution membrane In class 1 the ESC may only be operated unchanged and with the intended exhaust. After consulting Polini and Ludwig & Scherer, we were able to achieve a package price of currently € 625 for ESC drivers. Approval for the purchase of the kit must be obtained through the ESC respectively. You can find the current set of rules at www.eurochallenge.de

The basic idea of ​​the standard solution is that as a driver, as in class 5, in class 1 you can concentrate more on actually driving on the track than on the sometimes quite complex engine concepts.

With the “big one-size-fits-all” and the Polini 133ccm Evo, an output of approx. 25PS is possible. In close cooperation with the ESC, we have created this kit for you and run some tests on our P4 test bench.
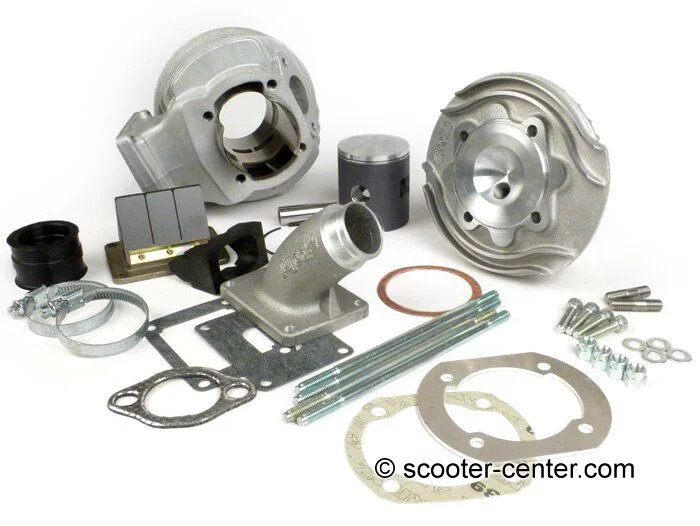
Cylinder POLINI 133ccm Evolution membrane ESC version

That up 51mm stroke reworked cylinder kit You can of course also move normally on the street after the TüV blessing. Even if you do not take part in racing events in the ESC, we can prepare this kit for you. But then at the regular price, as the cylinders for ESC use are specially discounted by Polini.
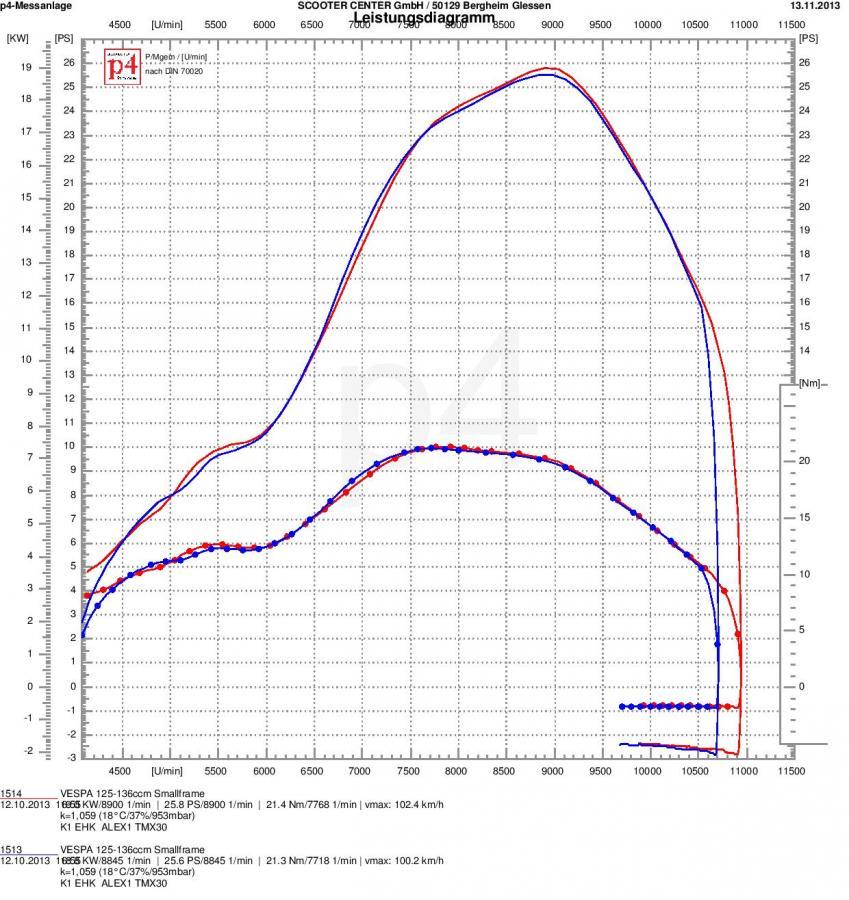
ESC EHK K1 Ausp ALEX1-page-001

So that you can install the cylinder, you should pay attention to a few things in detail.

Crankshaft / crankcase

The cylinder kit has been revised for the use of a crankshaft with 51mm and 105mm connecting rods and supplemented with a matching spacer.

The following crankshafts fit this:

bgm Pro 51/105 ETS 24mm and bgm Pro 51/105, 20mm and of course all other crankshafts, which have a stroke of 51mm and a connecting rod length of 105mm.

A crankshaft with a standard connecting rod length of 97mm cannot be used.

To install the bgm crankshaft you have to prepare your crankcase.
In the “small engine half”, ie on the generator side, the diameter of the crankcase must be enlarged to 88mm.

In the large half of the housing, the drive side, it is usually sufficient to remove the rotary valve sealing surface.
Copy of 25.03/002/XNUMX

You must also pay attention to the clearance of the crank webs and the connecting rod above the rotary valve sealing surface.
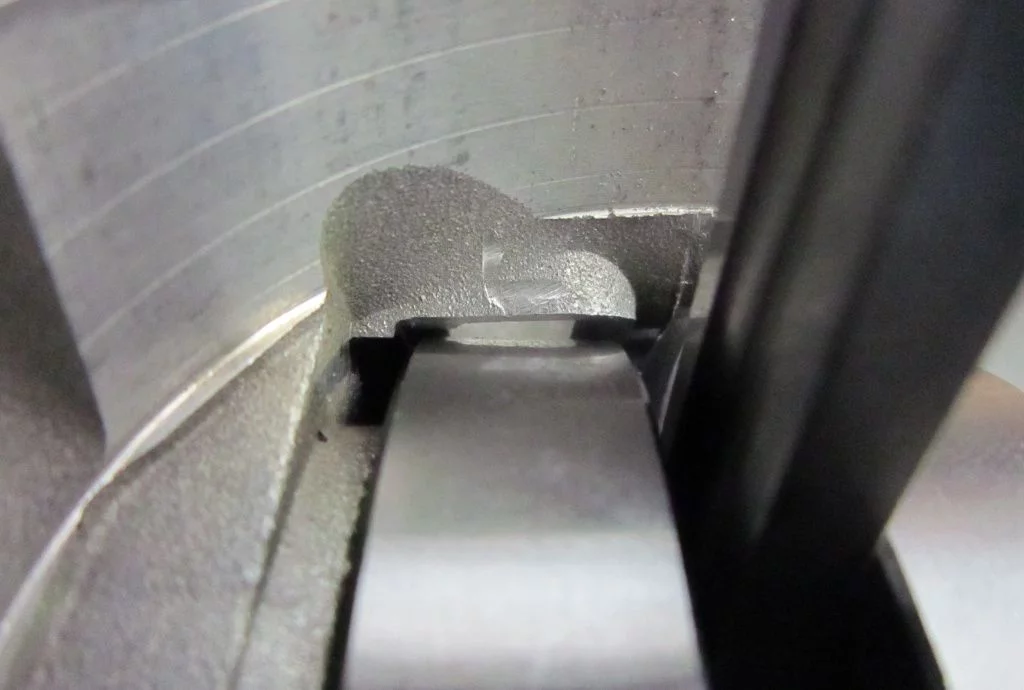
Copy of 25.03/003/XNUMX

When building the engine, we recommend that you store the crankshaft Ball bearings with increased internal clearance and FPM shaft seals to use. These can still work trouble-free and permanently even at higher speeds.
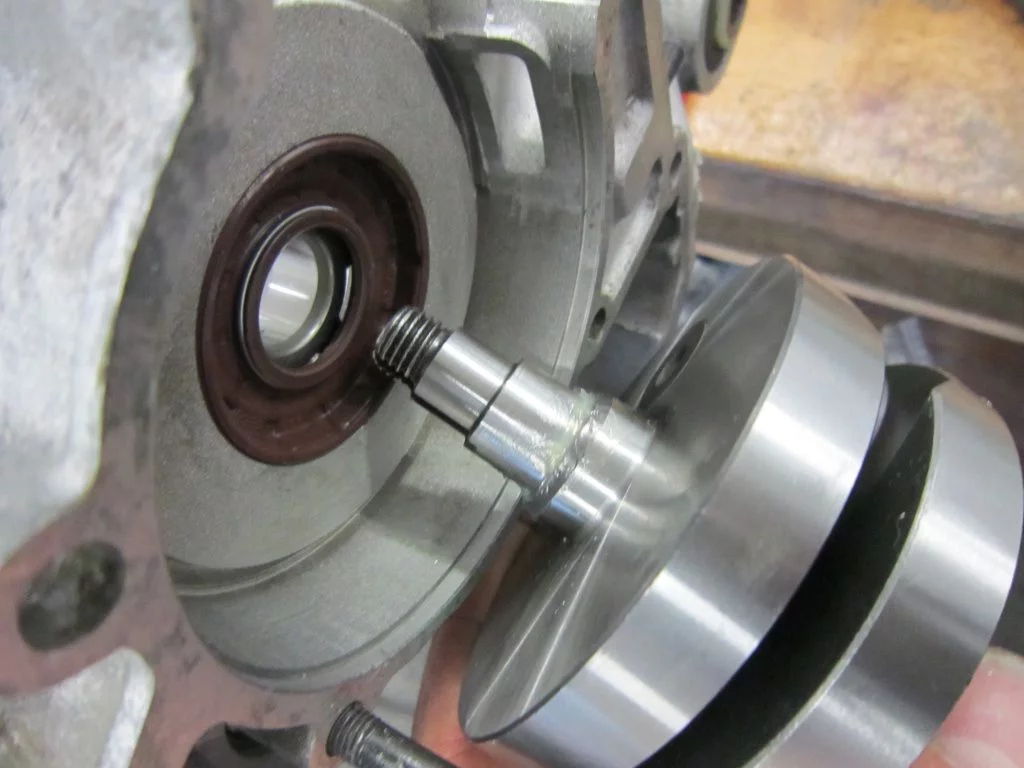
25.03 030

Cylinders / overflow channels / cylinder base

Every now and then it can happen that the coating on the cylinder base creates a few burrs. It is therefore advisable to deburr the edges before assembly.
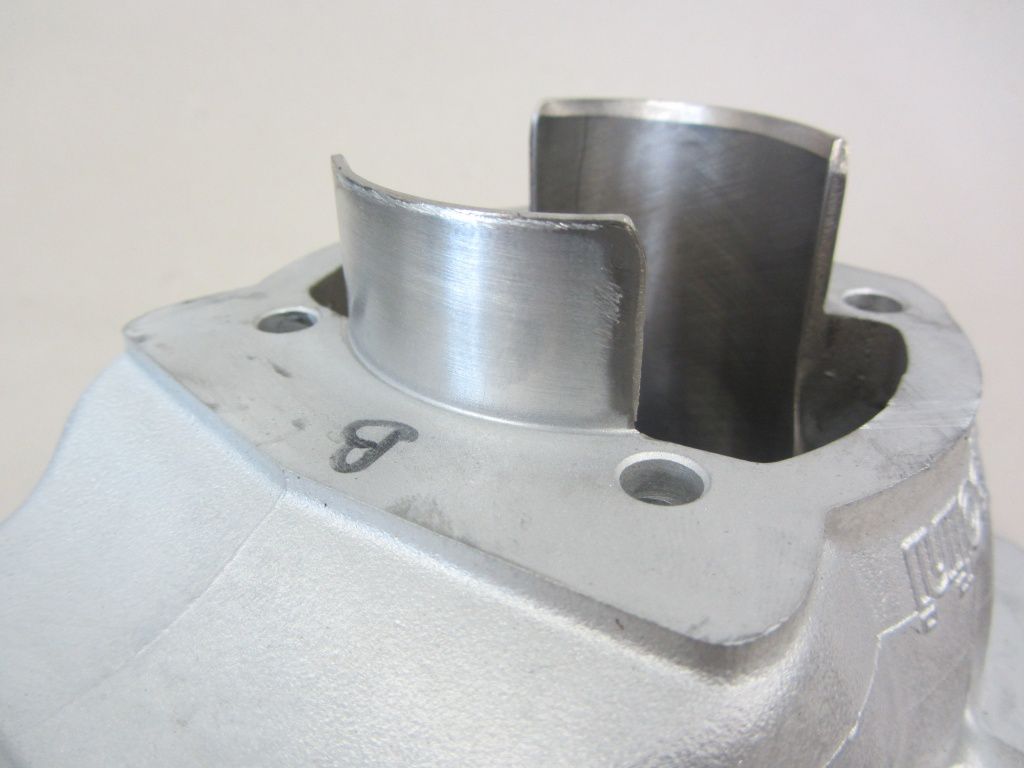
K1 EHK 003

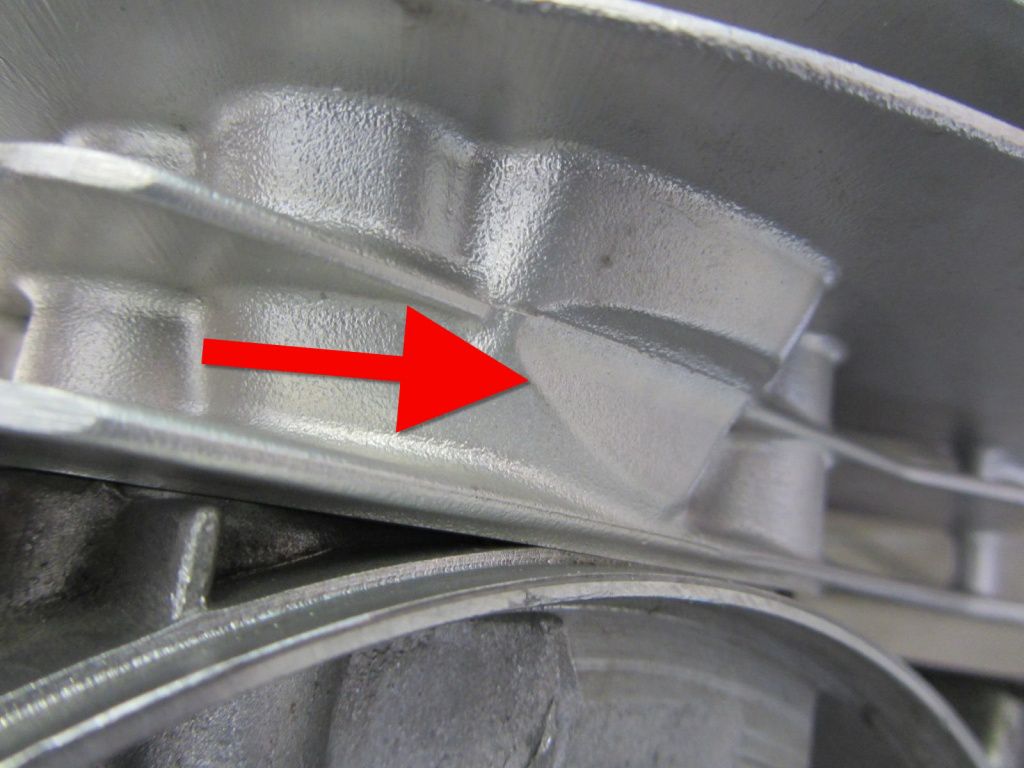
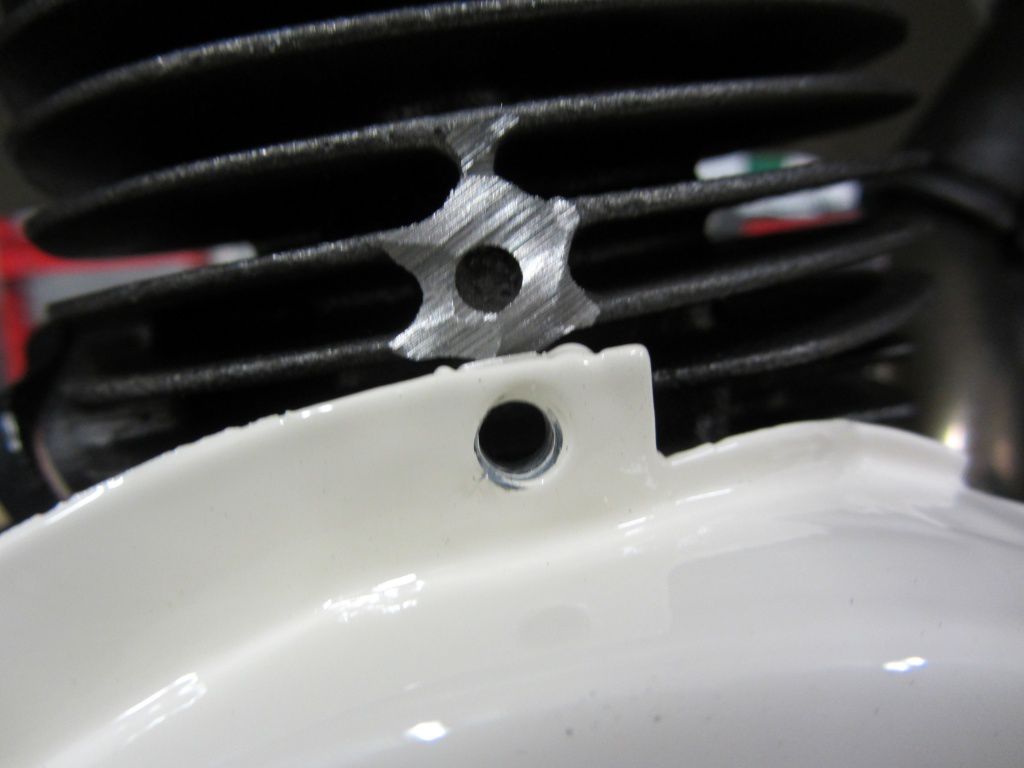
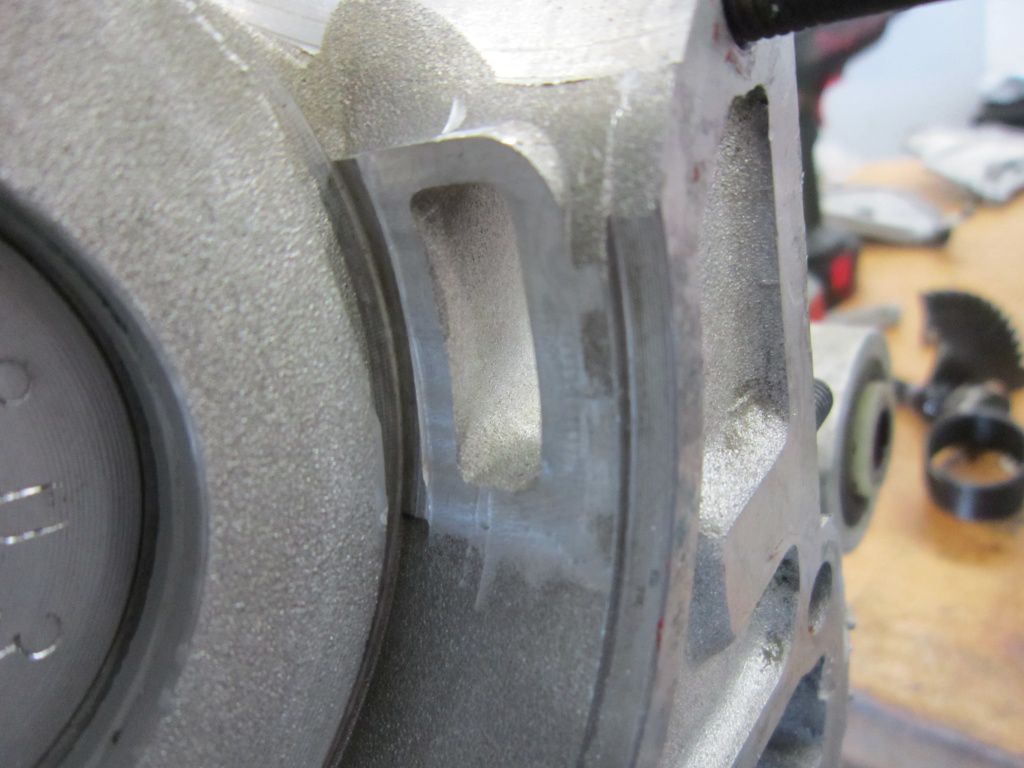
In order to accommodate the large overflow channels, the Polini cylinder is significantly larger in the area of ​​the channels than, for example, a gray cast iron cylinder. Therefore you have to edit your stator housing.
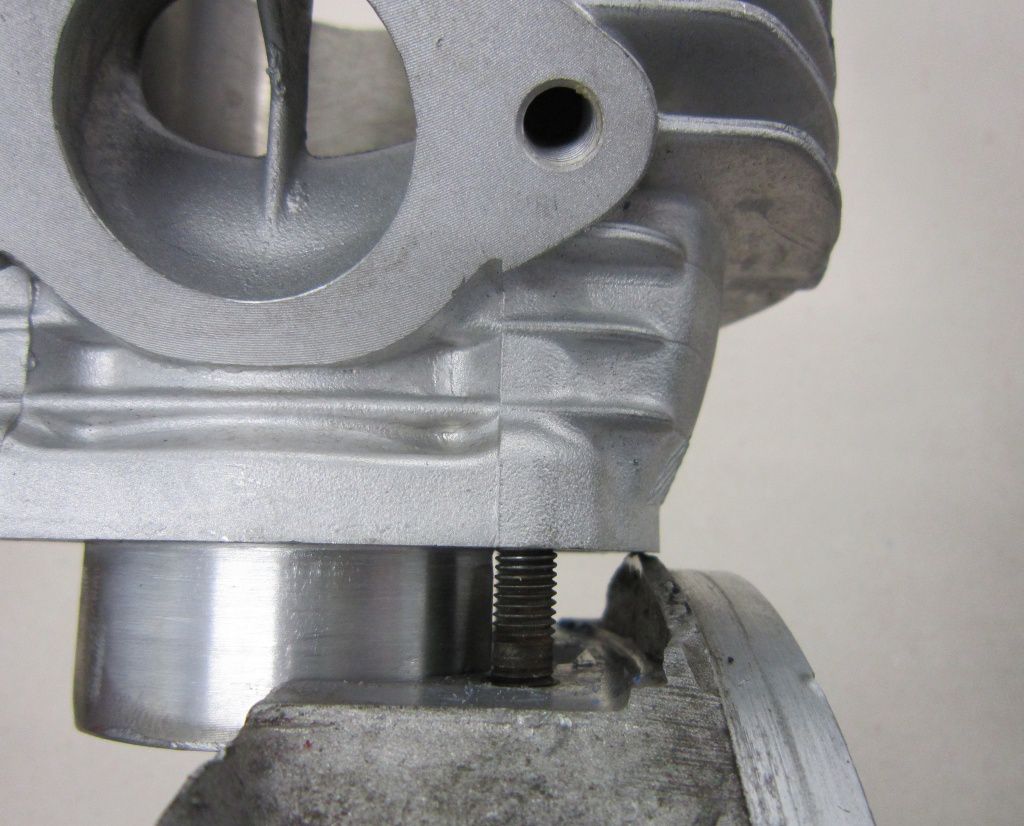
25.03 018

It is not absolutely necessary to plan the motor housing by machine. The part of the stator housing can also be easily removed with a saw.
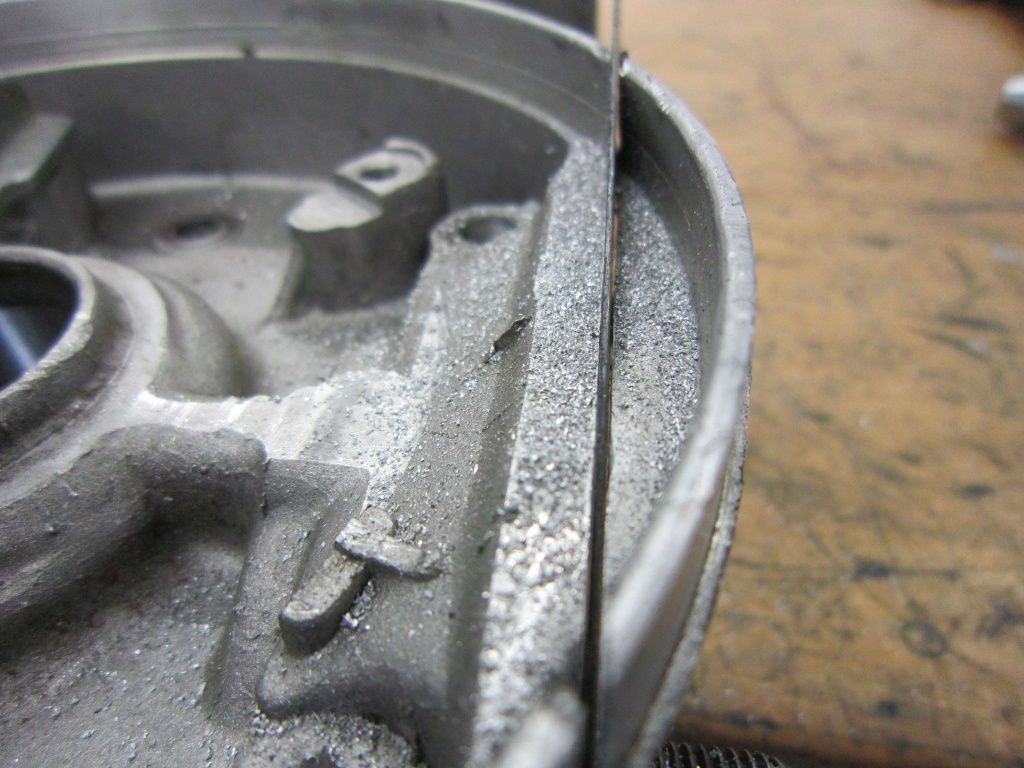
25.03 021

Since there is no need to seal the surface, you can simply align the surfaces with a file.
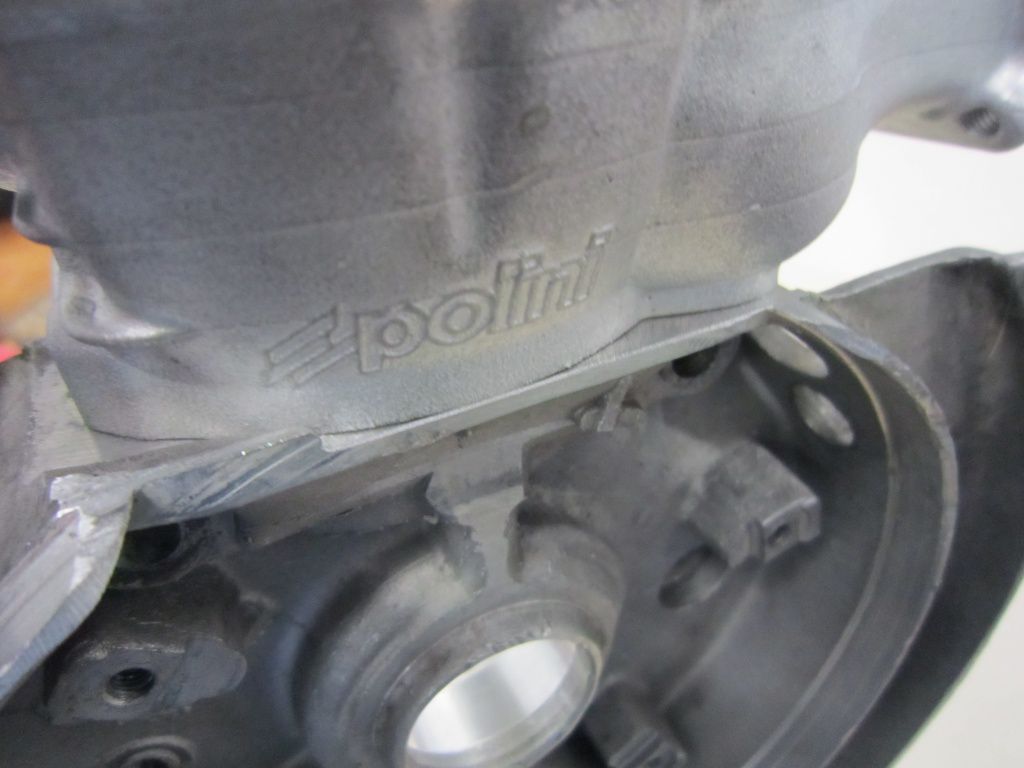
25.03 025

You do not necessarily have to adjust the overcurrent channels in the motor housing. According to the rules of the ESC, however, this is permissible. We could not determine a performance or speed advantage through adapted overcurrent channels in the housing on the test bench. The overflow system clearly lives from the direct ventilation from the direction of the membrane.

Intake manifold / membrane / spacer

Due to the fact that the cylinder is ventilated directly, the housing inlet must be closed.

This can be done on the one hand by filling the intake tract with so-called. Cold metal happen or through a Locking plate , the latter is available for 2-hole and 3-hole motors

When using cold metal, the inlet channel can only be reused with increased effort. With the locking plate, you have the option to use a housing-sucked cylinder at any time.

We used a locking plate on our engine.

After the assembly you have to adapt the locking plate to the cylinder.
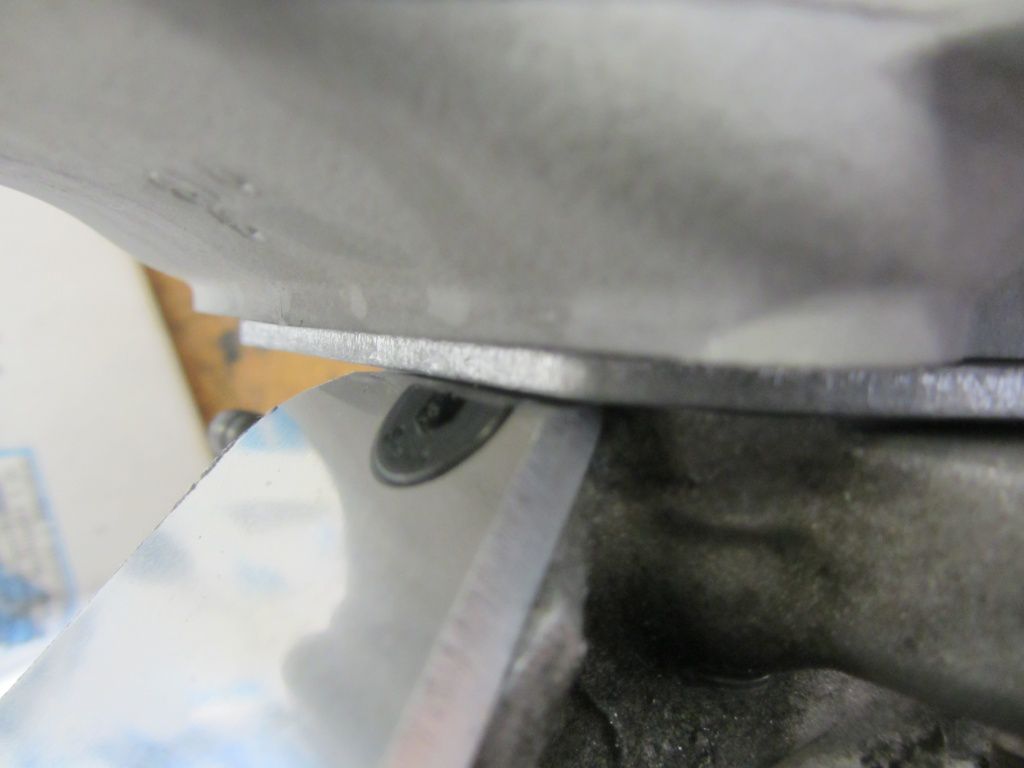
ESC K1 EHK 004

Optionally, you can also edit the spacer to create the necessary space for the closure plate.
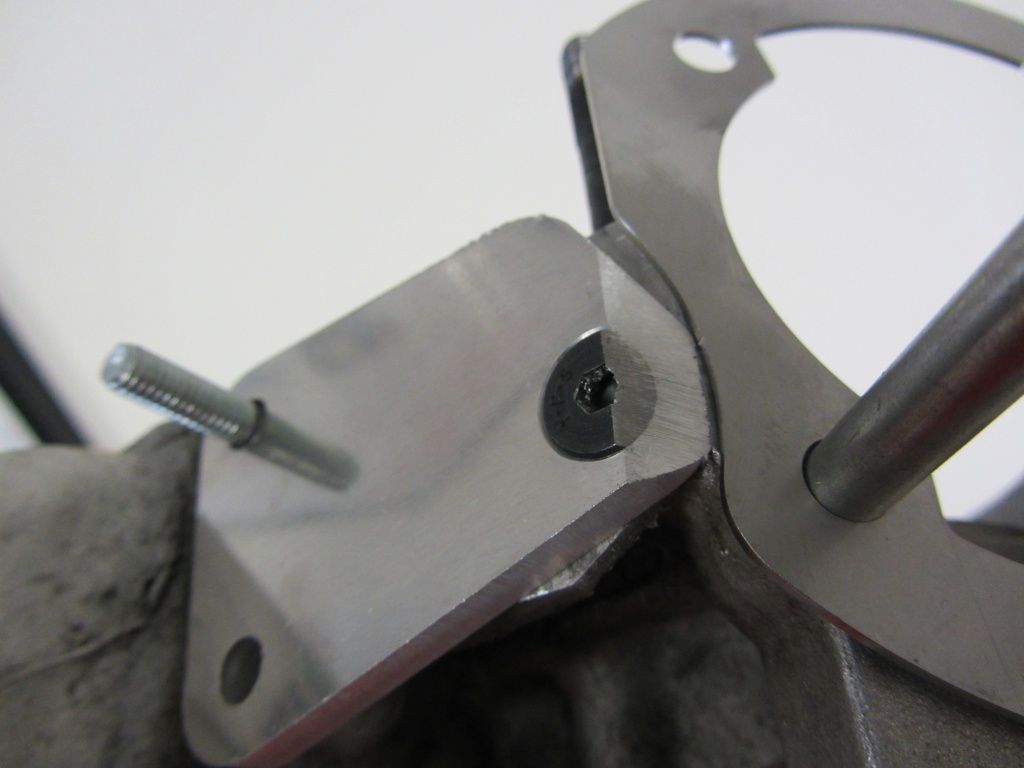
05.03.2014 005

The intake manifold of the Polini cylinder is designed for good flow and thus for good performance. However, the shape of the suction means that space must be created accordingly on the frame. Depending on the model used, V50 or PK, more or less large modifications are necessary here.

If you do not want to change your (racing) frame appropriately, you may optionally also use one according to the rules Intake manifold from MRP use. Due to the other course, the intake manifold fits into your scooter without major changes.
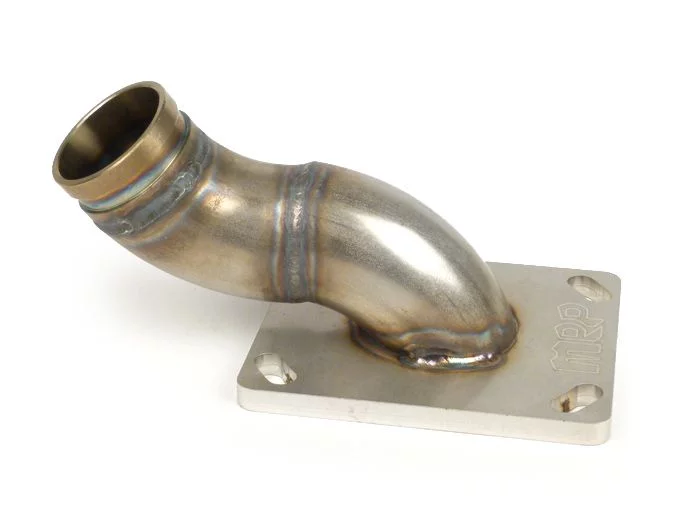
7675515

The good fit is unfortunately due to the performance compared to the Polini intake manifold.

You may not process the Polini Memrban any further, for example by separating out the bars, etc.

As a replacement or optional you can Carbon plate material or use one-piece membrane plates in any material thickness. You are not allowed to use Boyesen membrane plates, a similar, multi-part principle or any other membrane in class 1.

CARBURETOR

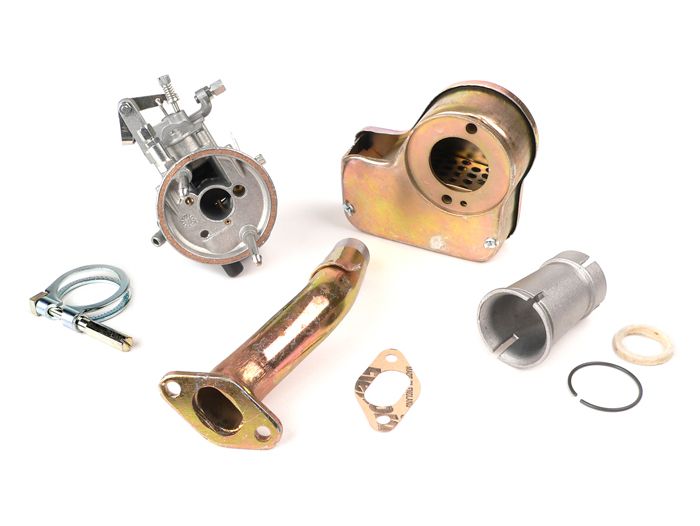
We used a Mikuni TMX 30 and a Keihin PWK 28 on the test engine we assembled.

Since our test engine has already driven almost all ESC routes, we can also give you some tips on how to set it up correctly. Of course, these tips are only intended as a guide. You have to find out the exact setting yourself on your engine, but so that you don't have to start from scratch, we have briefly summarized the jets we use on the routes.

MIKUNI TMX 30

Idle jet 20-22,5

5EL-68 needle 2 ° -3 °

Main jet 260-280 (with PJ!)

Powerjet 85-100

Keihin PWK 28

Idle jet 38-42

Needle JJH 2 ° -3 °

Main jet 142-148

IGNITION

Here, with our test engine, we have the "Polini tronics ” resorted to. Somewhat more interesting than that in terms of acquisition and equipment Vespatronic. Meanwhile, Malossi offers another interpretation of the IDM based ignition system. A ZZP of 26 ° -18 ° turned out to be the basic setting on our test engine. This ignition setting offers the best compromise between early torque and good speed behavior after peak performance. On racetracks with significantly longer straight sections, such as the club course in Magny-Cours or the new course in Mirecourt, you should take the ignition back 1 ° -2 °. When it comes to ignition timing, you have to try out what works best on your engine and what suits you best in terms of character.

EXHAUST

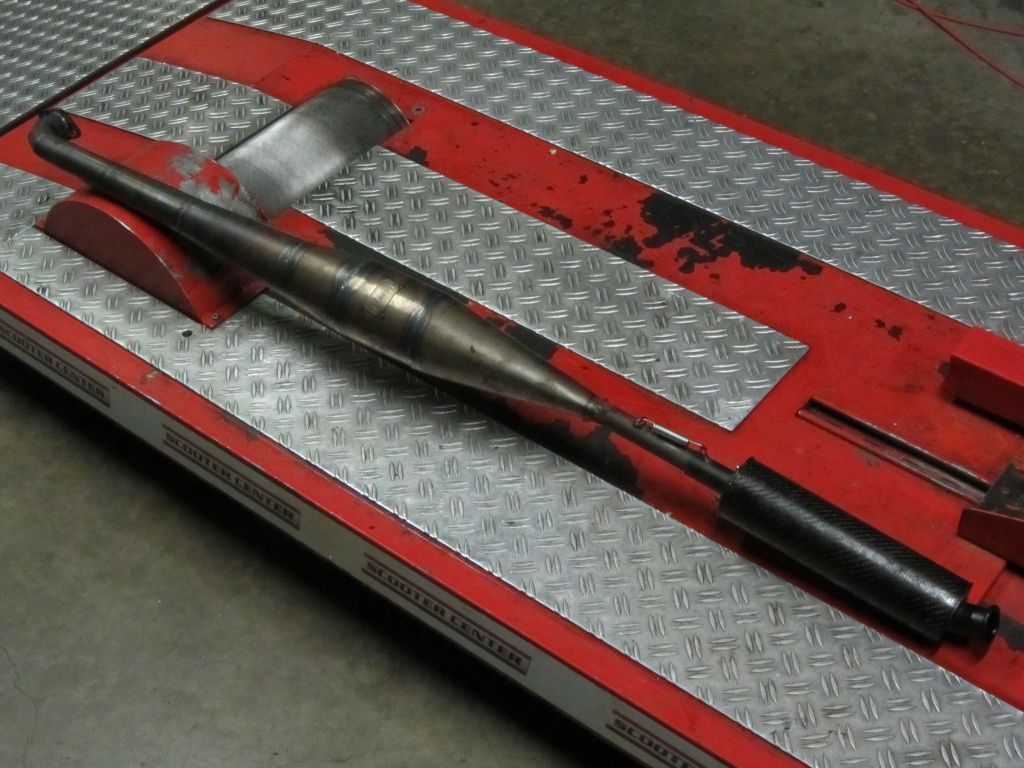
The current ESC K1 exhaust is based on a prototype of the ALEX1, which works very well on class 1 cylinders with suction from the housing and enables performance well above the 25pS limit there.
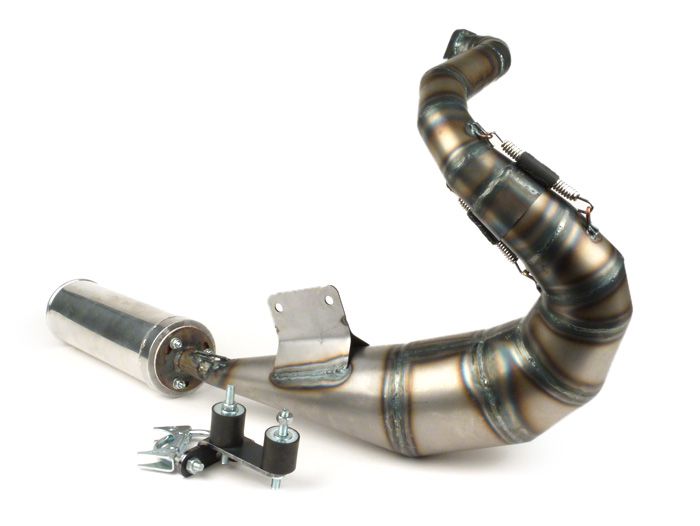
7676365

The new routing makes it an ESC-K1 exhaust
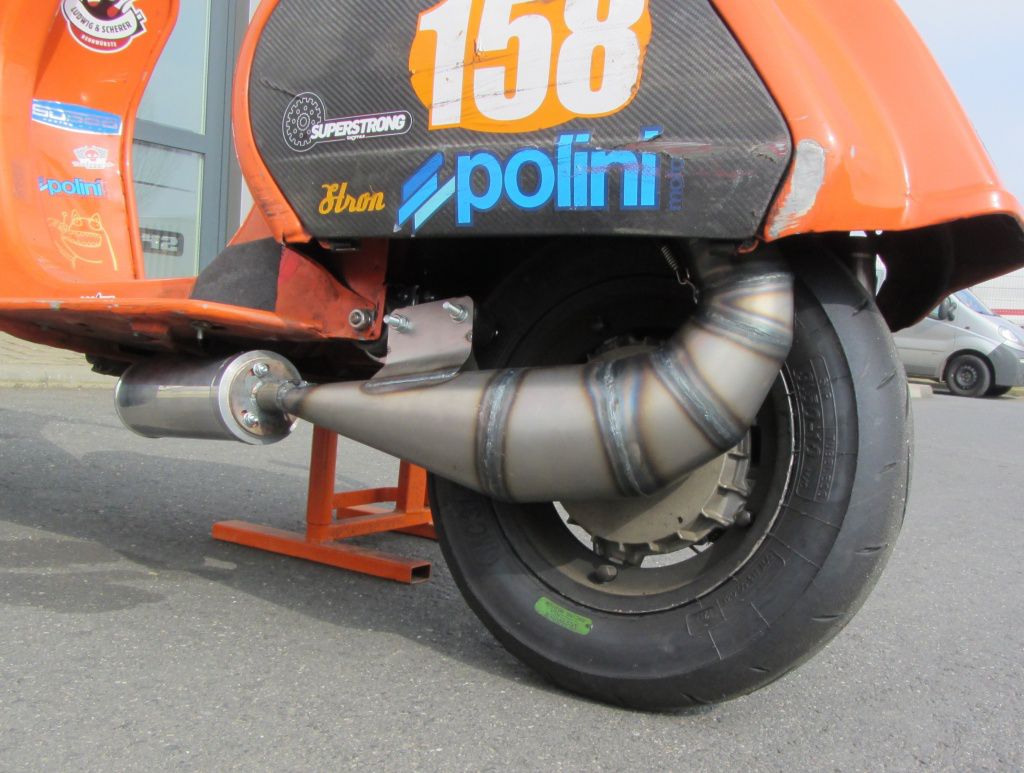
05.03.2014 002

with good lean angle.

05.03.2014 003

ZUSAMMENFASSUNG

Permissible pinch edge 1,0 - 1,2mm

Spacer 3mm (included in delivery) to adjust the pinch edge more spacers should be used.

Spark plug:

Ignition setting (IDM based ignitions, KyTronik curve no.7)

  • 26 18 ° °

Carburettor and jets:

Mikuni TMX 30

Idle jet 20-22,5

5EL-68 needle 2 ° -3 °

Main jet 260-280 (with PJ!)

Powerjet 85-100

Keihin PWK 28

Idle jet 38-42

Needle JJH 2 ° -3 °

Main jet 142-148
Polini 221cc cylinder

Update: Malossi MHR 221ccm cylinder for Vespa PX 200 available Malossi MHR 221ccm cylinder

As with the new one Malossi Sport and MHR cylinders , we also dedicate ourselves to the details of the Polini 221cc cylinder for 60mm stroke crankshafts. We had already measured timing & co for the Polini 221 cylinder for the Vespa here: Polini 221ccm 60mm long stroke.

compression

The one included in the cylinder kit cylinder head is also with the current Polini 210cc used. Polini regulates the adjustment of the compaction simply by changing the pinch edge.

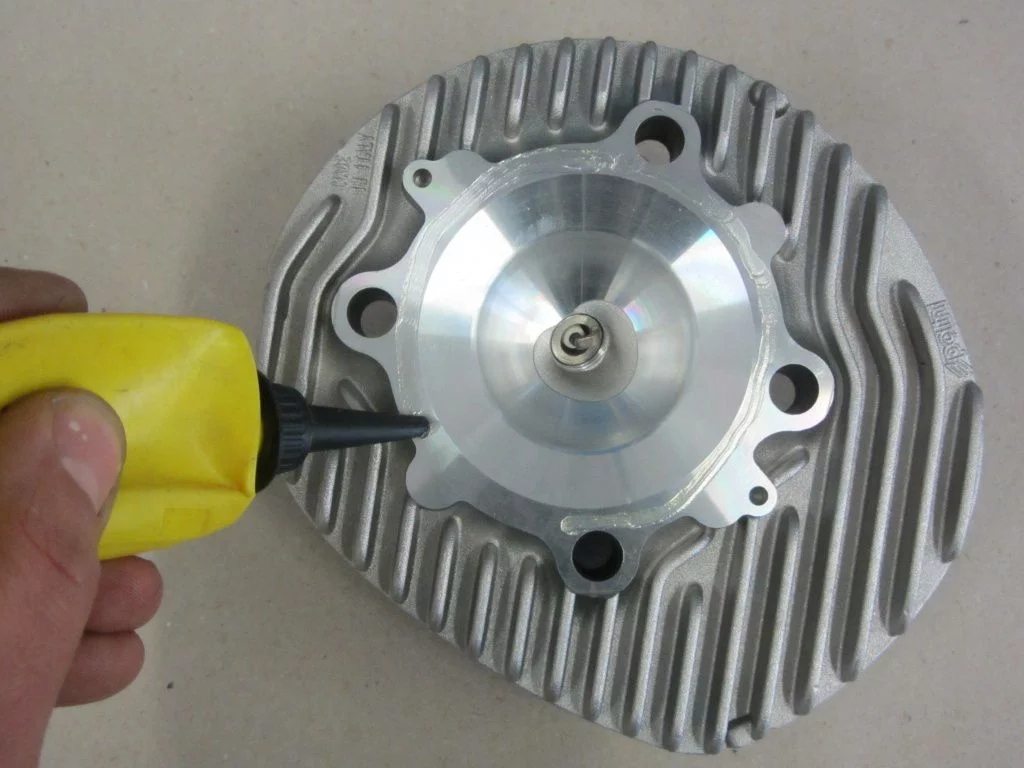
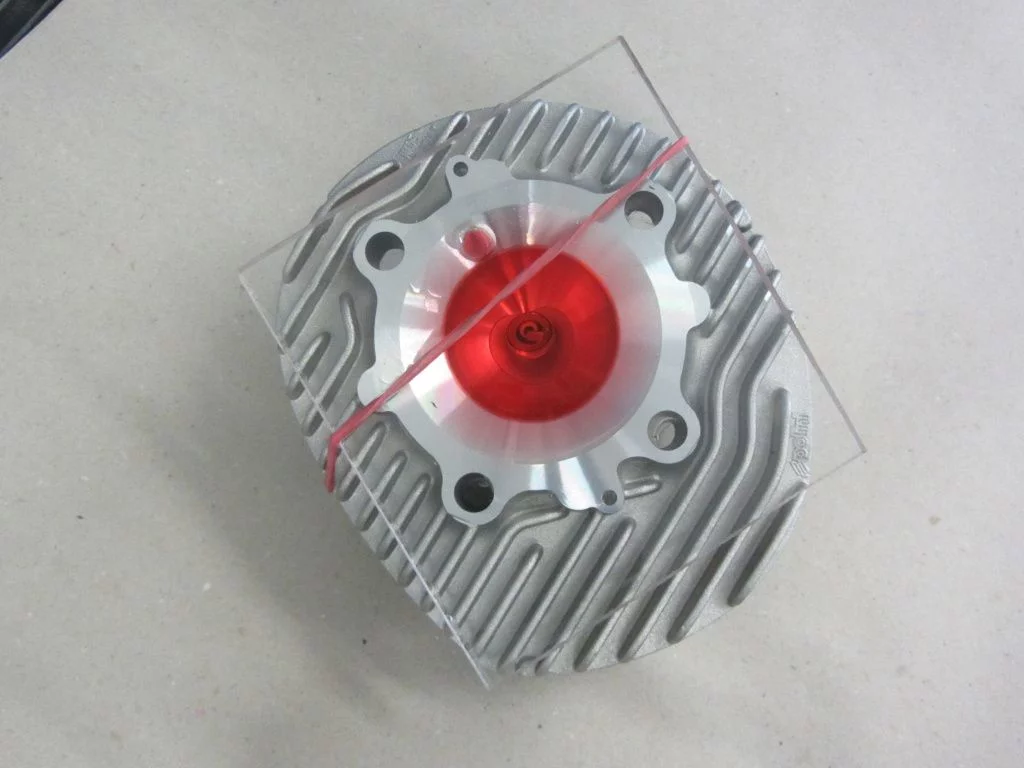
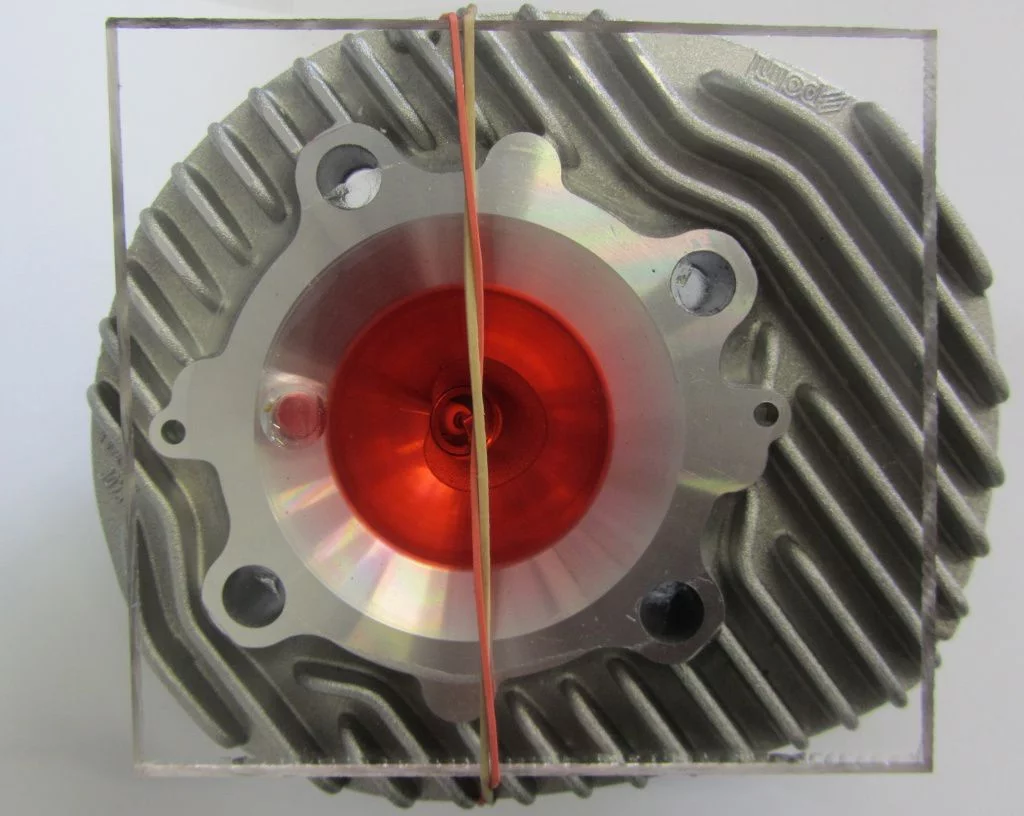
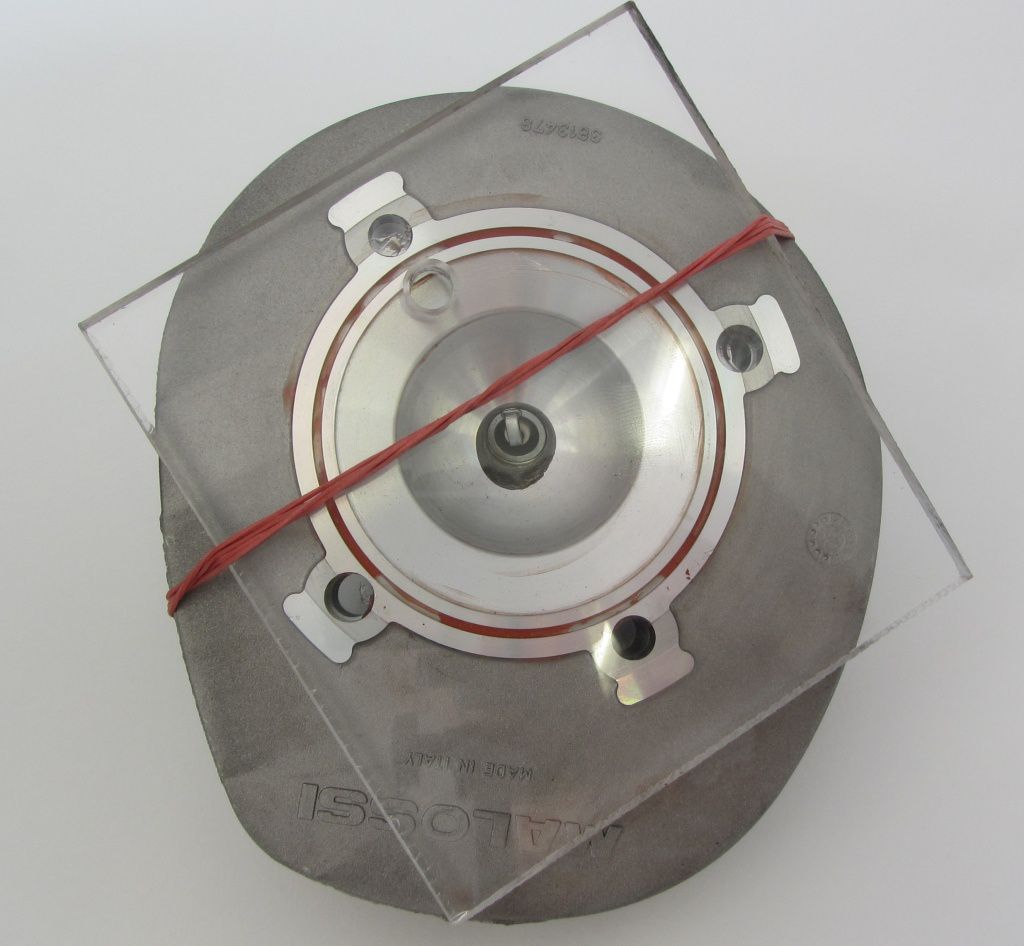
So let's grab the head and give it a suitable one Long thread spark plug and simply apply grease as a seal for our plexiglass instrument.

Cylinder head Polini221

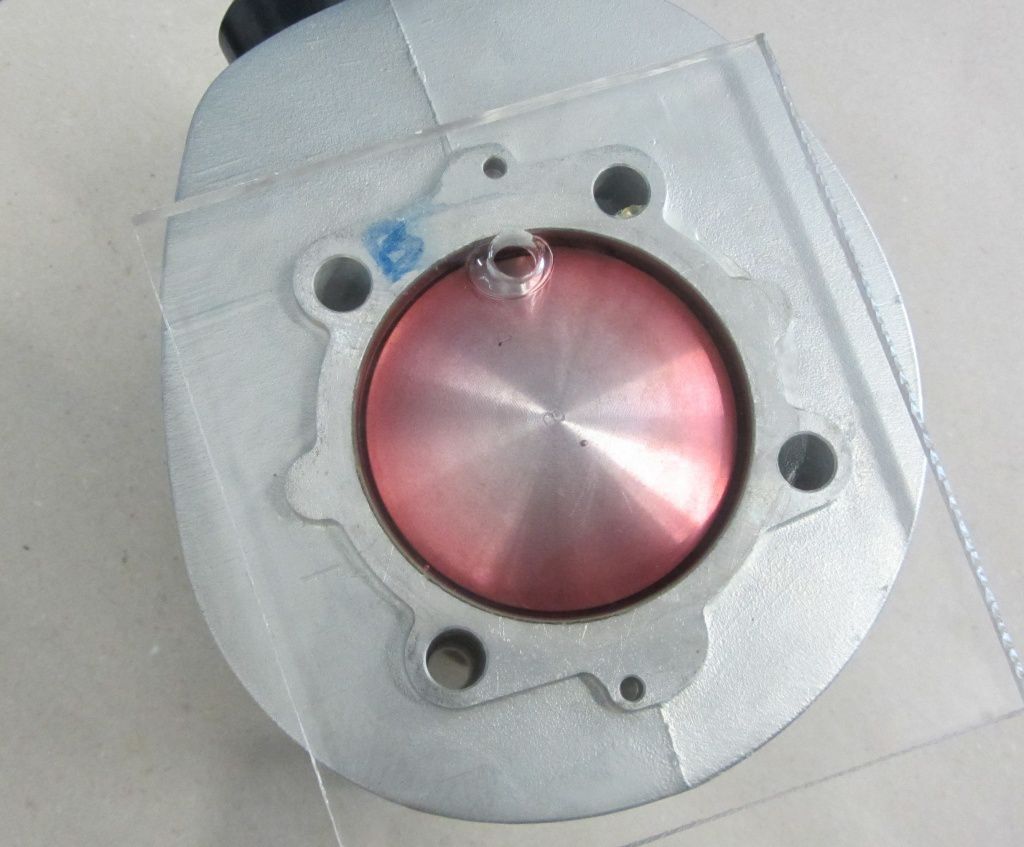
With the Plexiglas plate in place, we fill the cylinder head with the burette in order to determine the exact cylinder head volume.

Cylinder head Polini221_2

The meniscus remains in our burette at 25ml. The volume of the combustion chamber in the cylinder head is therefore 25ccm.

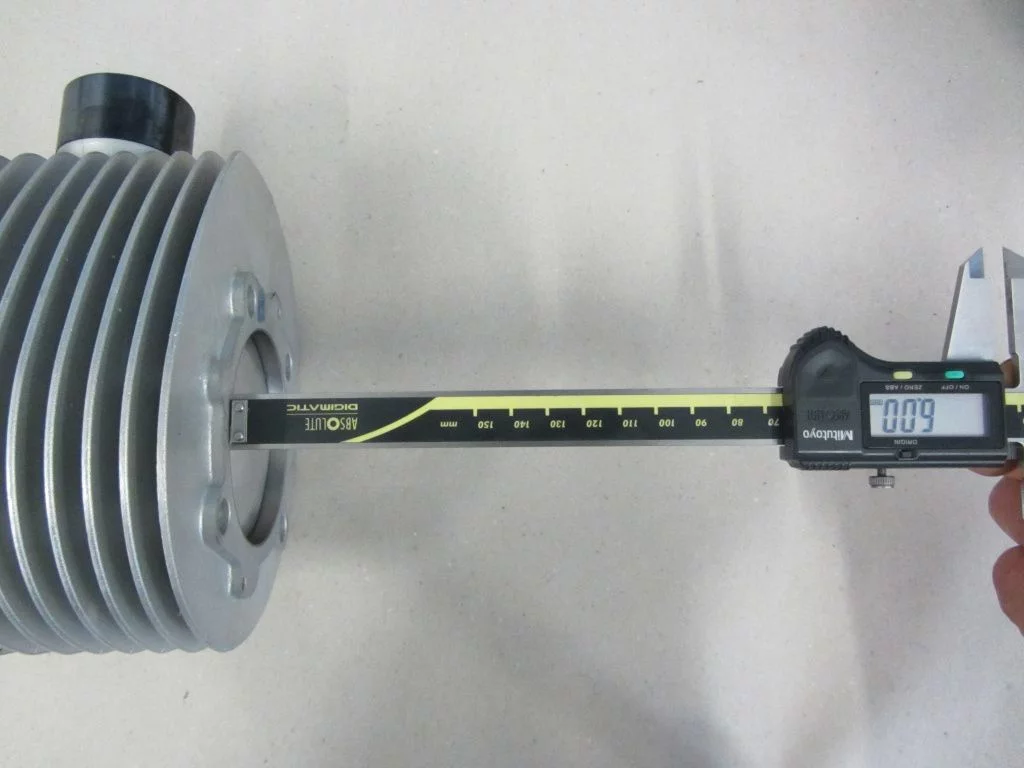
To get the entire combustion chamber volume (Vc), we still need the volume of the domed piston crown. With a defined piston backing, in our case 6mm, we first calculate the volume of this “cylinder”.

piston head polini221
6,85 x 6,85 x 0,785 x 0,6 = 22,1ccm so is the volume.

Also sealed with grease and filled with lamp oil in a playful delicate rose, the burette reveals a value of 14,6ccm. So 22,1 - 14,6 = 7,5ccm for the Volume of the piston crown.

3_bottom polini221

The last ingredient is missing Volume of the pinch edge. Measured directly on the living object, i.e. directly on the engine, this is 2,2mm, which in turn has a volume of 8,1ccm requirements.

Combustion chamber volume

So we come to a total combustion chamber volume of:

Cylinder head 25ccm + pinch edge 8,1ccm - piston bottom 7,5ccm
= 25,6ccm

compression ratio

Does this result in a compression ratio? from
Cylinder displacement 221ccm + combustion chamber volume 25,6ccm / combustion chamber volume 25,6ccm
= 246,6ccm / 25,6ccm
? = 9,63

Polini 221ccm cylinder put to the test

Here is another example of the Polini 221 based on a customer engine.

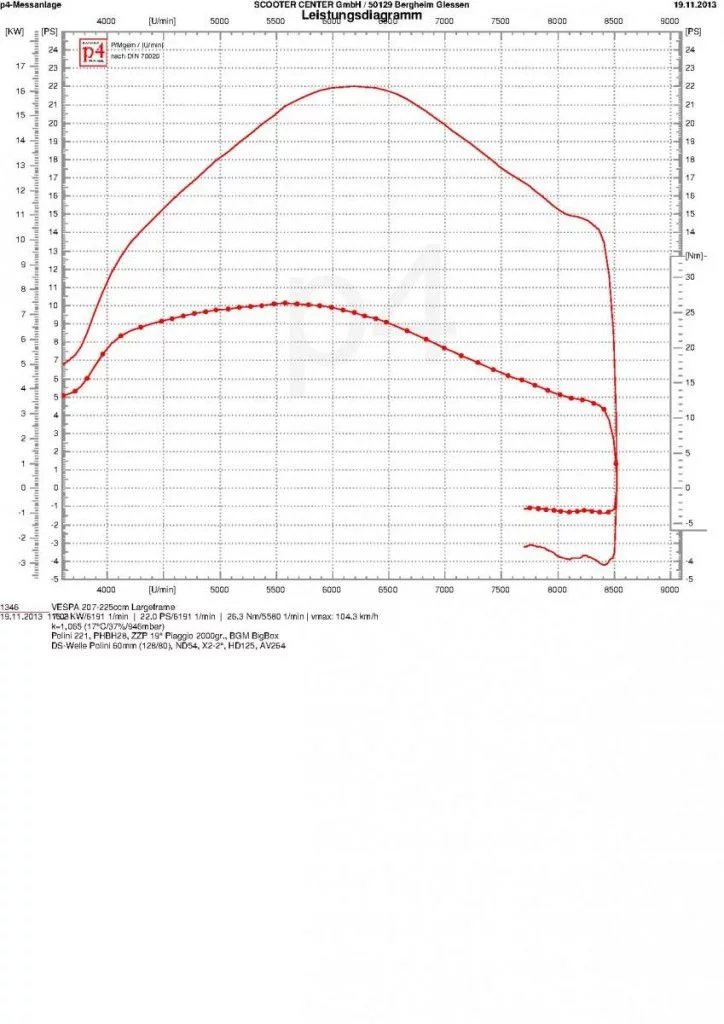
So Polini 221cc, Polini crankshaft 60mm stroke, Dellorto PHBH 28, Polini intake manifold for rotary valve and ours bgm BigBox. With the original cylinder base seal, control angles of 120 ° / 170 ° result. For more information, see the diagram below.

Polini221

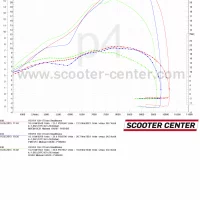
For a motor that is only plugged together, i.e. has not undergone any machining of the channel surfaces, 26Nm is a reasonable amount of torque. Especially when power and torque are available that early.

At 4000 rpm, 20Nm are already available, which is at least twice the value that an original PX200 reaches as a maximum.

Depending on the gearbox setting and application preferences, one can confidently longer primary can be used to achieve a solid cruising speed at low speeds on the motorway. The low-vibration running of the Polini crankshaft then contributes to the rest of the comfortable journey ...

120km / h cruising speed

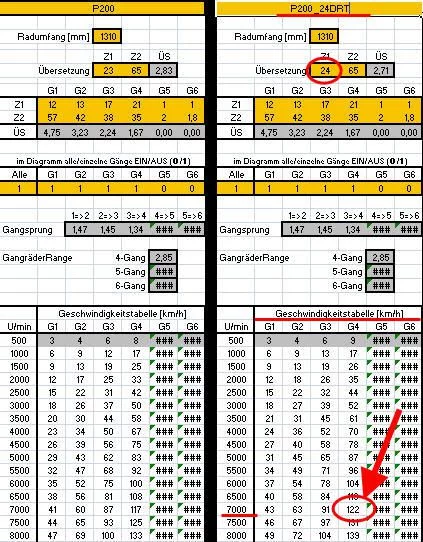
With this motor and a longer reduction ratio should permanent 120km / h to be possible. Here ** as an example, once with the original gearbox and once with our bgm Superstrong clutch and DRT pinion extended by one tooth on the original primary of the PX200 with 65 teeth.

PX200 24_65

Since there are still 7000PS at 20rpm, it is possible to crack the often cited 120Km / h mark.

** The gear calculator "GearCalc" was kindly made available to us by GSF member Motorhead. Thanks very much!

Cylinder -POLINI 221 cc aluminum, 60mm stroke- Vespa PX200, Rally200

Article no. P1400084 http://www.scooter-center.com/product/P1400084

Vespa exhaust gasket Smallframe

  • 7675330 Gasket exhaust manifold / cylinder -VESPA XL, M8 hole punch 55-62mm, Ø inside = 36mm- Vespa V50, PV125, ET3, PK-S-XL
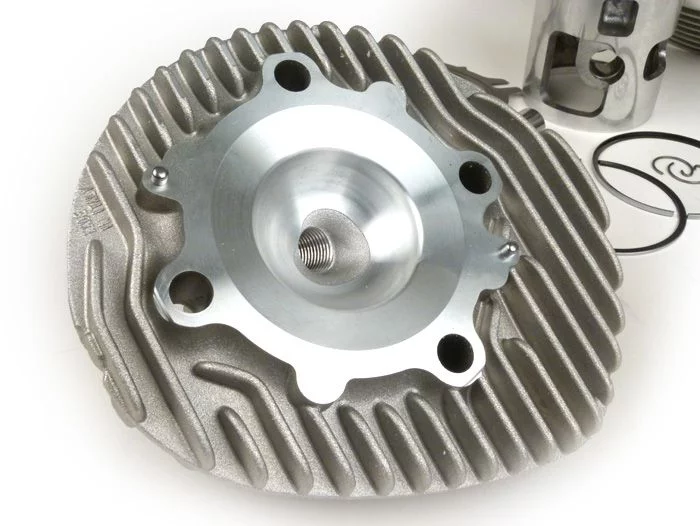
  • 7675852 Gasket exhaust manifold / cylinder -VESPA XL, M8 hole punch 55-62mm, Ø inside = 33,5mm- Vespa V50, PV125, ET3, PK S, PK XL
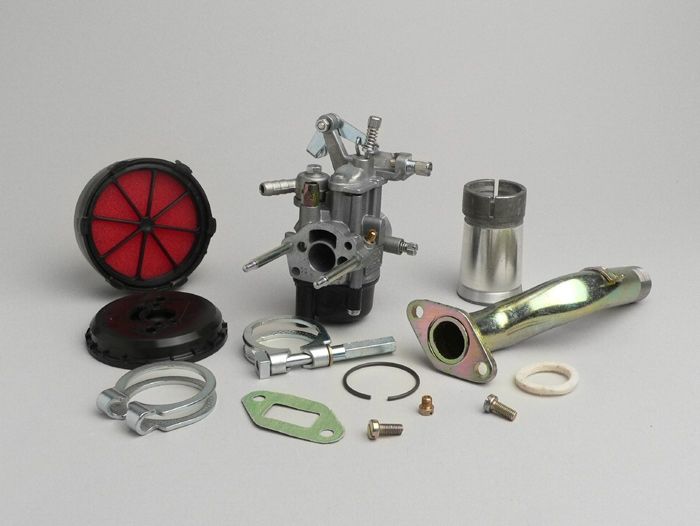
What's new?

  • available with an inner diameter of 33,5mm and 36mm
  • Suitable for exhaust stud distances of 54mm - 62mm
  • Material thickness 1,6mm
  • with metal insert

Modern, powerful exhaust systems and cylinders usually also have a corresponding outlet flange diameter. These diameters can no longer be adequately covered with the standard seals.

That is why we have exhaust gaskets / exhaust gasket Vespa for this requirement Smallframe with an inner diameter of 33,5mm (e.g. Ludwig & Scherer Franz and LTH Road) and 36mm (Ludwig & Scherer Big Bertha, Falc, etc). The Vespa exhaust gasket Smallframe has elongated holes for the exhaust studs, which allow a hole stitch of 54mm to 62mm and thus on the current cylinder of Paramkit, Falc, Quattrini and Polini fit.

The material thickness is 1,6mm, so that the often sensitive flange plates of the racing exhaust systems do not dip into the sealing material by tightening the exhaust nuts and thus permanently deform.

Vespa exhaust gasket Smallframe

Vespa exhaust gasket Smallframe here using the example of one Parmakit SP09 EVO-C

Vespa exhaust gasket Smallframe Parmakit, Falc, Polini and Co

Vespa exhaust gasket Smallframe Parmakit, Falc, Polini and Co

From now on is the new one Polini 221cc Vespa cylinder available from us.

What's new?

  • suitable for 60mm stroke (long stroke shaft)
  • reinforced outlet with steel ring
  • massive, centered cylinder head with large cooling surface
  • also fits E-start engines

Dimensions and data:

  • Cylinder height 99,7mm
  • Outlet height 39,2mm
  • Overcurrent height 50,2mm
  • Support channel height 53mm
  • Cylinder base gasket 0,25mm
  • Cylinder head gasket 0,25mm
  • Outlet chord 36,8mm
  • Compression ratio 10,2: 1 (with QK 2mm)

Polino 221 (3)

We took a closer look at the Polini 221ccm cylinder for you.

Polino 221 (5)

Solid cylinder head

At first glance, it impresses massive cylinder head. Equipped with additional cooling fins on the underside, it ensures sufficient heat dissipation at all times, even with engine concepts that are subject to high thermal loads. The spark plug thread is designed for long threads, i.e. a B9ES or Bosch W3CC for NGK.

Polini 221 centering pins cylinder head (4)

Precise centering thanks to centering pins

It also has centering holes together with the cylinder. With the included centering pins, the pinch edge can be set safely and precisely.

Polini 221 Centering Pins (7)

Reinforced outlet nozzle

You can find another nice detail on the outlet nozzle.

Polini 221 outlet nozzle (6)

Here the sensitive aluminum socket is reinforced by a resistant steel ring.
The steel ring effectively protects the sensitive aluminum nozzle from damage by exhaust systems that are fastened with a clamp. Exhaust systems suspended by springs no longer “gnaw” off the exhaust port.

Suitable for engines with an electric starter

A little trick in the truest sense of the word adorns the outside of the right overcurrent duct.

Polini 221 franking e-start pole wheel

With the 221, Polini offers one of the few cylinders available on the market that can be installed and driven with an electric starter without any changes.

Polini 221 franking e-start pole wheel (13)

Measurement results

Here are the usual ones Scooter Center - Measurement results:

Height cylinder: 99,7mm
Outlet height (from OK): 39,2mm
Overcurrent duct height (from OK): 50,2mm
Support channel height (from upper edge): 53mm
The piston residue is 2,0mm with the included cylinder base gasket

This results in the following control angles:

Outlet 168 °; Overcurrent 120 °; Support channel 104 °

Compression ratio and combustion chamber volume:

In order to determine the combustion chamber volume and thus the compression ratio, we rented out the cylinder head and determined the volume of the dome of the piston crown.

Polini 221 combustion chamber volume (11)

The combustion chamber volume of the head is 24,9ccm.

The volume of the elevation of the piston crown is 8,1 cm³

With a piston residue of 2mm and the resulting squishy edge (without the enclosed cylinder head gasket 0,25mm), the compression ratio is 10,2: 1

Based on the moderate control angle and the combustion chamber design, together with the Polini crankshaft, we would expect an engine with good running smoothness and a lot of torque in the lower to medium speed range.

We are excited to see when you will put the first real Polini 221ccm on our test bench!
Polini 221cc Vespa cylinder now cheap at Scooter Center Kaufen.

Malossi 210cc Vespa

The new Malossi 210ccm under the microscope

After we are in ersten Teil of the post have already looked at the overflow, exhaust ports and control angles of the new Malossi 210ccm cylinders for the Vespa, today follows the cylinder head.

The new Malossi 210cc cylinder head

The cylinder head is also of crucial importance in the two-stroke engine. The design of the squeeze area and the compression can significantly influence the character of the engine.

The fact that Malossi believes the Malossi 210ccm Sport and MHR cylinders have a significantly better filling is also noticeable in the compression ratio.

The combustion chamber volume

Briefly measured and calculated using the example of the Malossi MHR with a 57mm crankshaft stroke:

Malossi MHR 210 Vespa 011

The pure combustion chamber volume of the head is 26,5cm³.
The volume of the screwed-in cylindrical part in the head is deducted from this (h = 0,8mm = ~ 3cm³)

The volume of the elevation of the piston crown is 6,8 cm³

Malossi MHR 210 Vespa 014

The volume of the pinch edge (0,9mm) is 3,3cm³

So we come to the following calculation:

Combustion chamber volume 23,5cm³ - piston dome volume 6,8cm³ + pinch edge volume 3,3cm³ = 20cm³

Displacement 210cm³ + combustion chamber 20cm³ / combustion chamber 20cm³ = Vc 11,5: 1

An absolutely useful value for a fast, performance-oriented engine.

The value is identical on a long stroke motor with a 60mm stroke and a pinch edge adapted to 1,3mm. Without adjustment, i.e. also here with a 0,9mm squeeze edge, you would get a value of 12: 1

We are excited about the engines that show what “the new Malossi 4ccm can do with a made-up Malossi Sport or MHR cylinder on our P210.

The Malossi 210cc You get cylinders in the different variants in the Vespa Scootershop from Scooter Center

The new Malossi 210 in detail

Malossi sends with him Malossi 210 Sport and the Malossi 210 MHR two new variants of the well-known 210ccm cylinder into the race. Now in Vespa shop available.

We took a closer look at the new Malossi 210 cylinders for you.

New support channels

From a purely visual point of view, the new three-part support channels, larger channel surfaces of the overcurrent channels and the open cylinder base at the overcurrent inputs are striking.

Malossi 210

Changed inflow angles

Compared to version 2008, the areas and inflow angles have also been changed to match the expanded support channels.

Malossi MHR 210 Vespa

While the V2008 flushes relatively steeply towards the cylinder wall at an angle of approx. 60 °, the Sport and MHR versions seem to have an inflow angle adapted to the impulse of the larger support channels and flush relatively flat into the cylinder at approx. 42 °.

Malossi MHR 210 Vespa channels

Next week we will delve into the whole Malossi 210 topic.

The different models in comparison

[table id = 1]
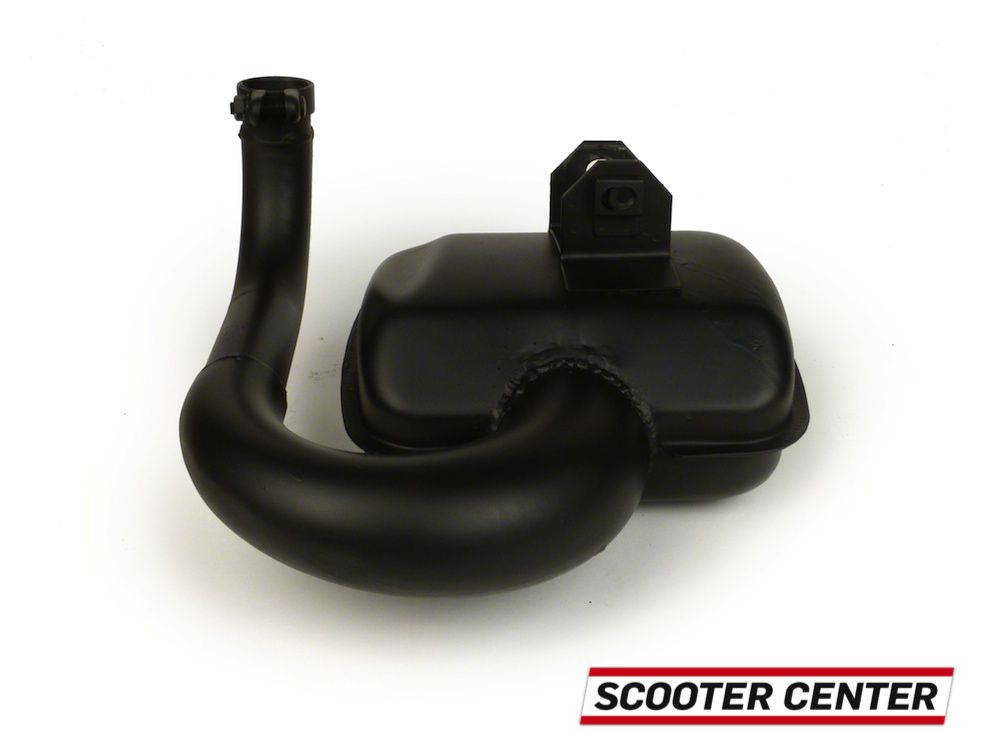
Vespa exhaust Exhaust bgm PRO MB Big Box Prototype

Vespa exhaust bgm PRO

NEW: Vespa sports exhaust Big Box Sports

Today we proudly present you the first pictures and the first results of the test bench runs of our new one bgm PRO exhaust systems for the Vespa.

The Vespa Big Box exhaust was developed in close cooperation with MB in England and is also the result of over 20 years Scooter Center Experience.

Advantages of the exhaust:

  • More efficient:
    • powerful like a resonance exhaust
    • significantly easier to turn than SIP Road
    • very wide speed range
    • no performance hole like a reso exhaust
  • Looks like the original
  • Quieter than racing exhaust
  • 200 mm outlet socket with Viton® Oring -> no more cracked exhaust ports on 200 mm aluminum cylinders
  • massive, thick-walled material
  • so far without approval
  • with serial number

Purpose of use:
Due to its original look and its low volume, the exhaust is particularly suitable for original tuning or touring setup.
Due to its power delivery, it can be used universally on original as well as heavily tuned engines at home.

First pictures:
Here are the images of the prototype. The exhaust will be available for the following models:
- Vespa PX 200 / Vespa Rally 200
- Vespa PX 125 / Vespa PX150 / Vespa SPRINT etc.

launch
We expect the exhaust from the beginning / middle of summer and are really looking forward to it. The test drives were great.

Test run performance diagrams:
The exhaust systems were made on the professional Scooter Center Ammerschläger P4 test bench tested with laboratory software:
Result: Significantly more power! eg:

  1. + 2PS more on PX200 compared to the original exhaust with significantly improved revving = top speed
  2. + 3PS more on Malossi 210 compared to comparable road exhaust systems
  3. + 5PS more on Malossi 166 (60mm shaft, exhaust made, 28mm carburettor on rotary valve) opposite Vespa Road exhaust

As a Test roller the following candidates were available:

The test runs were all done with the engine warm. The tests were carried out against the existing exhaust systems on the vehicles and against the SIP Road exhaust.
Almost all scooters were then tested for several kilometers on the road in order to really feel the change. That was the very subjective so-called Popometer test ;-)

The conclusion
Awesome part - this is how a Vespa exhaust has to be!
Both for the "laboratory test" with performance diagram and for subjective testing on the road:
The new bgm PRO exhaust puts you in a good mood. The engine turns out much more freely, the Vespa becomes much more flexible and faster and without the consumption or volume increasing noticeably.

Vespa racing engine with 35HP + part 2

Today the first part of the innards of the Vespa racing engine is on.

Special requirements call for special solutions.

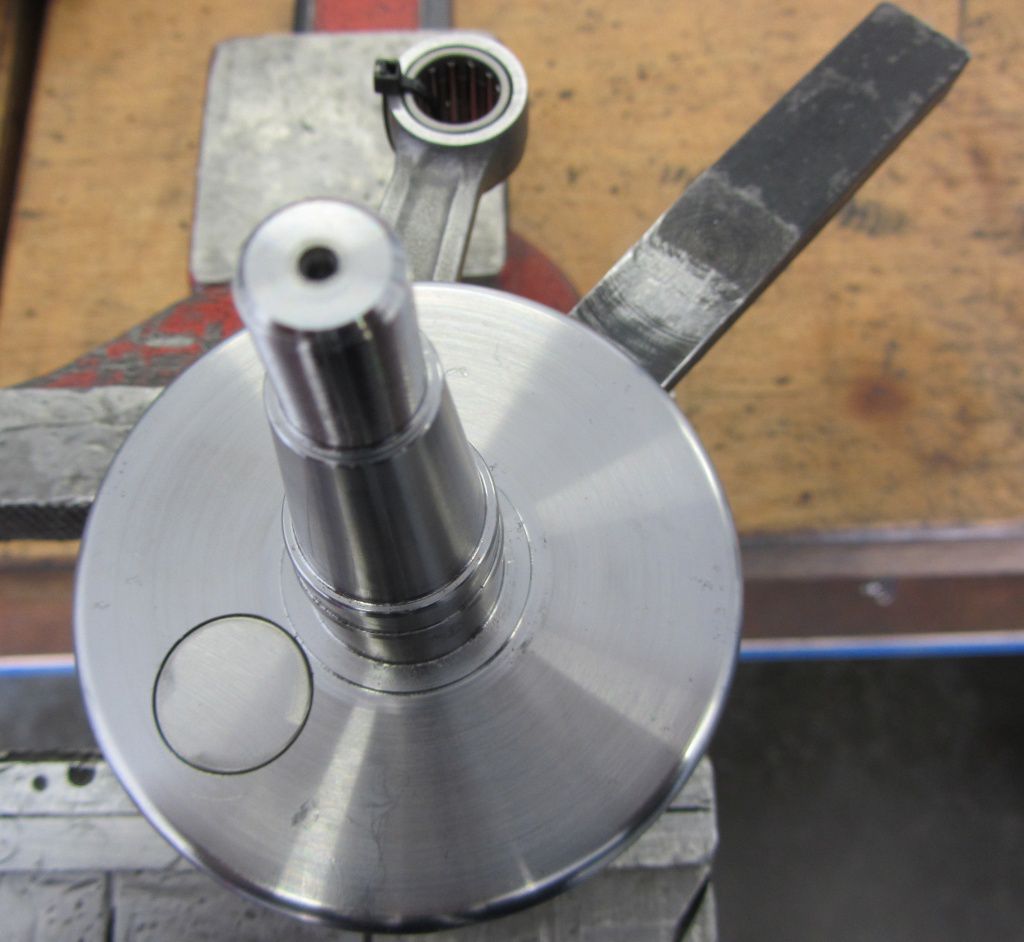
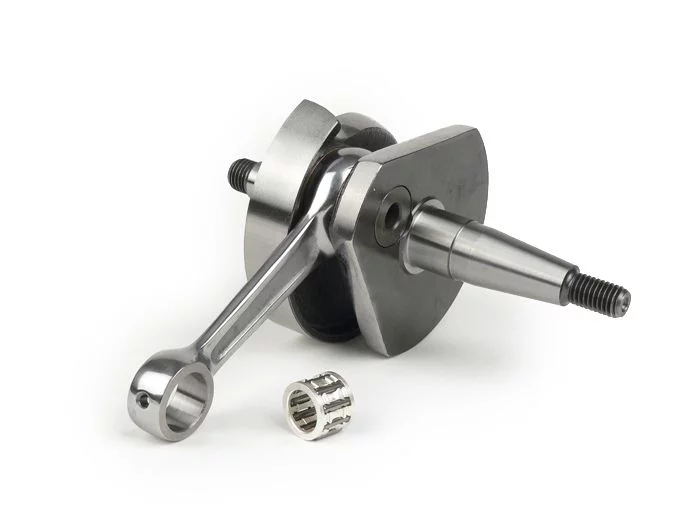
The crankshaft is subject to very high loads. It has to transmit the pressure generated by the combustion in the cylinder to the drive in a translatory manner and is subject to rapid jumps in engine speed during racing. Our special shaft weighs almost 2000 grams. and is therefore a lot more massive than an already quite officially balanced Polini rotary valve crankshaft with 1400gr.
In direct comparison, a V50 crankshaft weighs just 900 grams. a real flyweight.

The high mass of the crankshaft allows the engine to run very smoothly and is less likely to be disturbed by a rather heavy piston.

However, the rotating heavyweight requires proper storage, after all, with increasing speed, the loads and forces acting on the bearings increase exponentially.

quattrini falc03 (1)

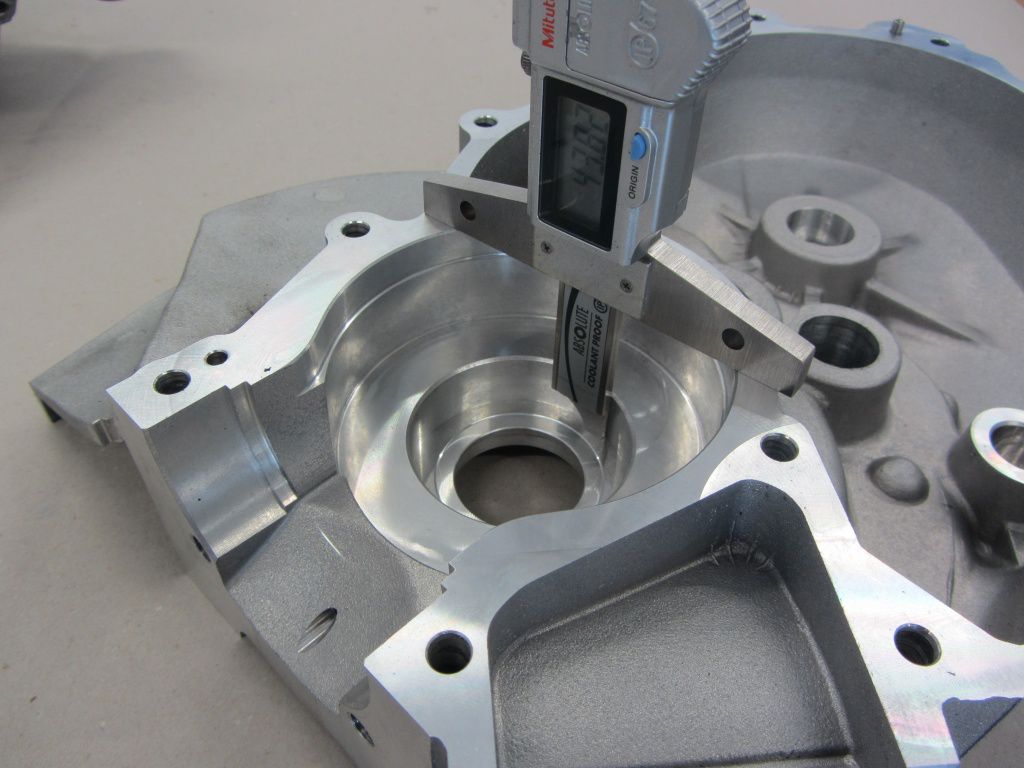
The inner ring of the bearing is used for lateral guidance in the housing. Therefore, the axial play in the housing must be measured in advance for installation.

With a depth gauge, measuring is very easy and accurate. For self-control, we carry out several measurements at different positions in order to avoid a measurement error.

quattrini falc 004

The dimensions of both housing halves add up to an installation width of 78,05mm. We do not need to consider the strength of a housing seal. As is customary with modern assemblies, the Quattrini housing is made without a solid seal and only with Sealant put together.

In order to know before installing the bearing with which thickness of shim rings we need to insert the bearings in the housing, we need the installation dimension of the crankshaft.

The inner rings are shrunk onto the stub shaft. To be on the safe side, if an inner ring should jam during assembly, we fix the crank webs with one more to the crank pin Directional wedge and put one Recoil-free plastic hammer ready.

quattrini falc2 015

The crankshaft is with Cooler spray cooled down ...

quattrini falc2 017

and which heats the inner rings in the assembly tool.

quattrini falc2 019

As expected, the heated inner rings fell onto the crankshaft stubs without any problems and we can measure the installation width of the shaft.

quattrini falc2 021

The micrometer gives us a dimension of 77,58mm. With a desired installation clearance of 0,20mm - 0,40mm, we need a shim of 0,20mm. With that we end up in the middle of the tolerance field.
In our case we only need to compensate 0,20mm. If the dimension is larger, it is advisable to compensate for the axial play on both sides, as otherwise one-sided pressure load can occur on the connecting rod and connecting rod bearing. In the performance and speed category we strive for, the cornerstone for a reasonable defect ...

All other bearings are also used by shrinking.

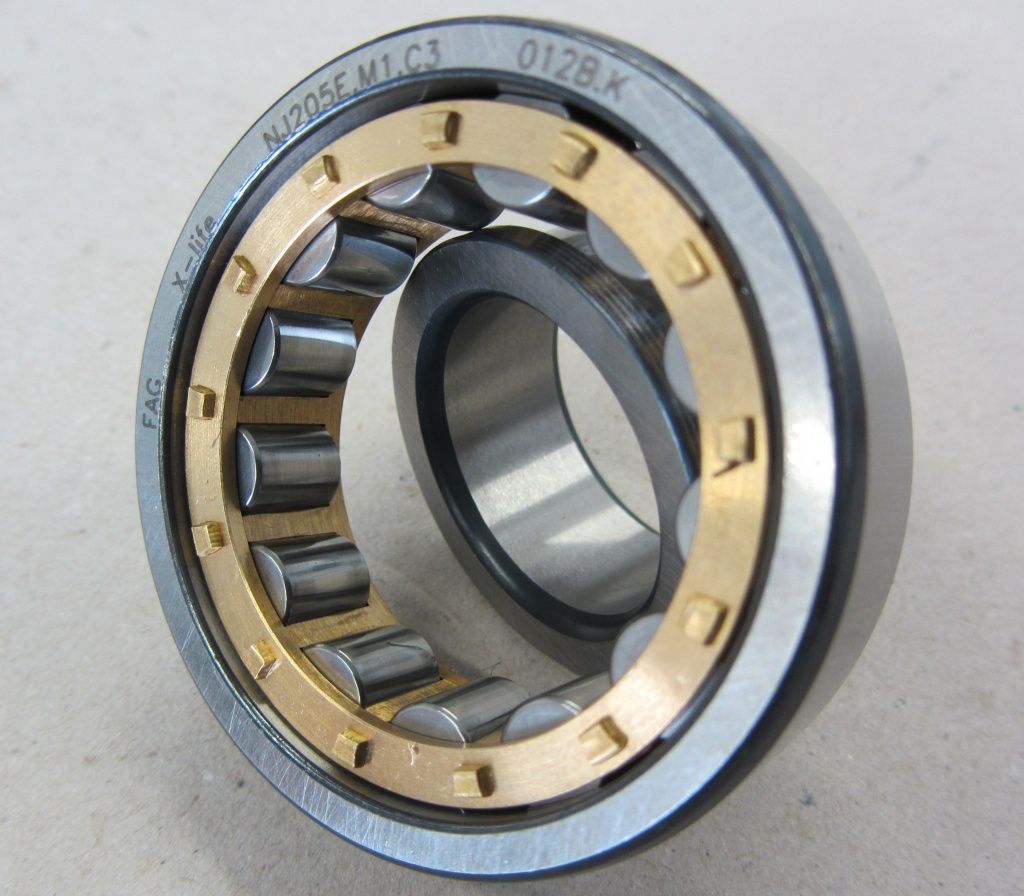
At the primary bearing, the 16005 , we consciously choose a bearing with increased internal clearance “C3”.
The bearing fit in the Quattrini housing is in the lower tolerance range, so it is rather tight.
After shrinking, the housing moves back in and increases the pressure on the bearing outer ring. By installing the primary, the inner ring of the bearing is also expanded, which further reduces the bearing clearance. If the bearing clearance is too small, the bearing would run too tight and thus be damaged in a relatively short time.

At the camp for the Main shaft on the wheel side, we use a 6204RSH, i.e. with a one-sided seal.

This means that the brake anchor plate can be removed without losing oil when changing the primary or working on the clutch.

Before the auxiliary shaft and auxiliary shaft bearings go into the engine, we check the installation clearance of the crankshaft.

The simplest method is to control via Feeler gauge.

falc quattrini3 002

The crankshaft is simply inserted into the housing and the housing is screwed into the stator housing. Then the shaft is pulled once to the stop on the gear side and measured between the cheek and the flat surface in the housing. The crankshaft is then pulled to the alternator side and the gap is measured again. The resulting difference in dimensions is therefore our installation clearance. In our case the values ​​are 0.70mm and 0,50mm, so the installation clearance is in a healthy range of 0,20mm.

Next we check the seat of the clutch spider on the auxiliary shaft. The cons must fit perfectly so that the force can also be transmitted on this tiny surface.

Copy of falc quattrini4 014

The contact pattern can be determined very well with valve grinding paste. When the cone is flat, the auxiliary shaft is ready for installation.

The spurious and 6200 we use it together because the installation position is deep in the housing and the small bearing is difficult to handle when loose.

falc quattrini3 006

Once the auxiliary shaft has taken place, we can start measuring the clutch.

Vespa racing engine with 35HP +

The racing season is approaching with giant strides. Only a few weeks until the first ESC race begin.

You can find information about all classes and the ESC racing series at www.eurochallenge.de

Our Vespa racing engine is used in class 2, the premier class of the Euro Scooter Challenge.
In this class there is practically only a displacement limitation of <150ccm as a regulation.
The top units in this class produce between 35HP and 38HP

Therefore, in most cases you will find a stroke / bore combination of 53/60, which results in 149,85ccm.

In our case, too, we pay for our Vespa engine Falc cylinder with 60 mm bore and a special crankshaft with 53mm stroke, suitable for the Quattrini motor housing, for use.

So that you can get an overview of which parts can be used in such an engine, we first laid everything out nicely ...

Vespa racing engine Smallframe Quattrini FALC all parts for the Vespa tuning project racing engine 35HP +


... and wrote you a shopping list on which you can find all the items you usually need.
This CSV file you can simply upload it to our online shop and then take a close look at all the items in your shopping cart.

We are only now taking a closer look at the motor housing. In the performance range we strive for, even small mistakes can have devastating effects. Therefore, each individual part should be carefully checked before assembly. Especially when partially used parts are used, as in our case, because proven ones can of course be used again as long as the parts are in good condition.

In the case of the motor housing, we first check all sealing surfaces and bearing seats.
In the area of ​​action the spurious if a franking is noticed ...

Vespa racing engine gearbox Smallframe Quattrini FALC

Here it would be included in the later installation Warehouse get into trouble. Later on, on the racetrack, this can lead to further problems if a different gear ratio should be necessary due to the route profile.

So we have to rework the undercut so that the auxiliary shaft can simply be pulled out of the bearing and against a longer translated version lets swap.

Motor housing Vespa racing engine Smallframe Quattrini FALC

Furthermore, there are no more special features in the transmission.

The “small” half of the case, however, still has a problem.
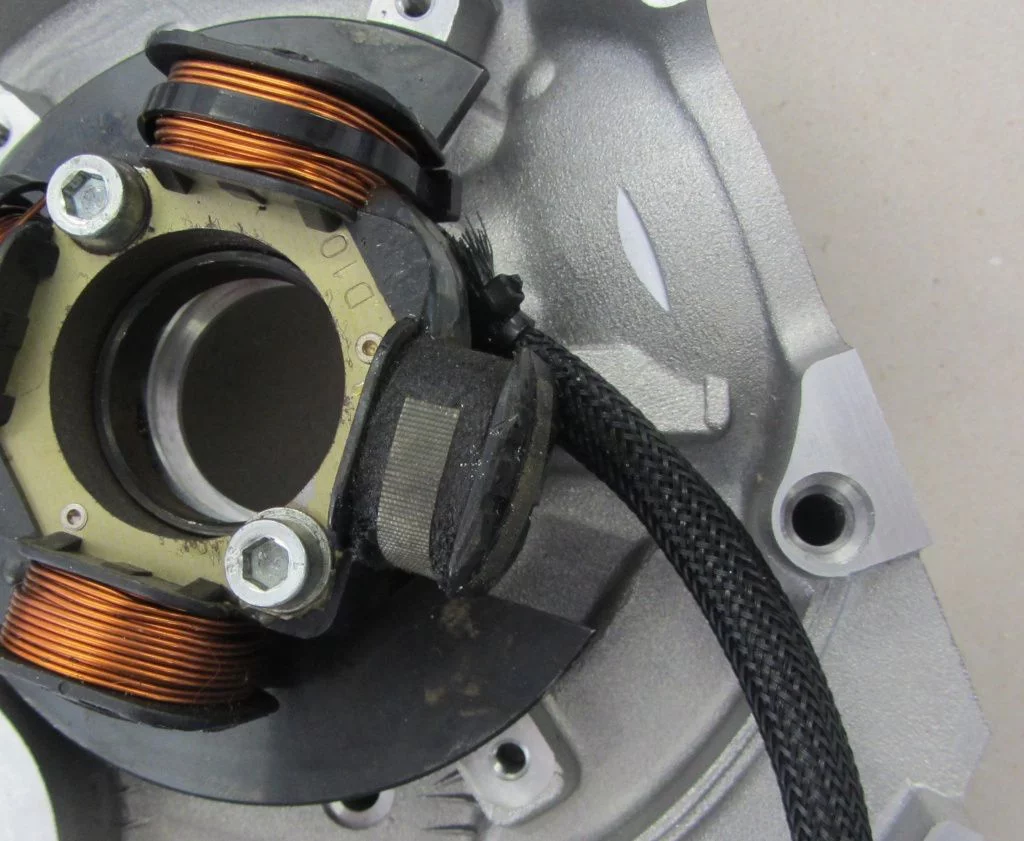
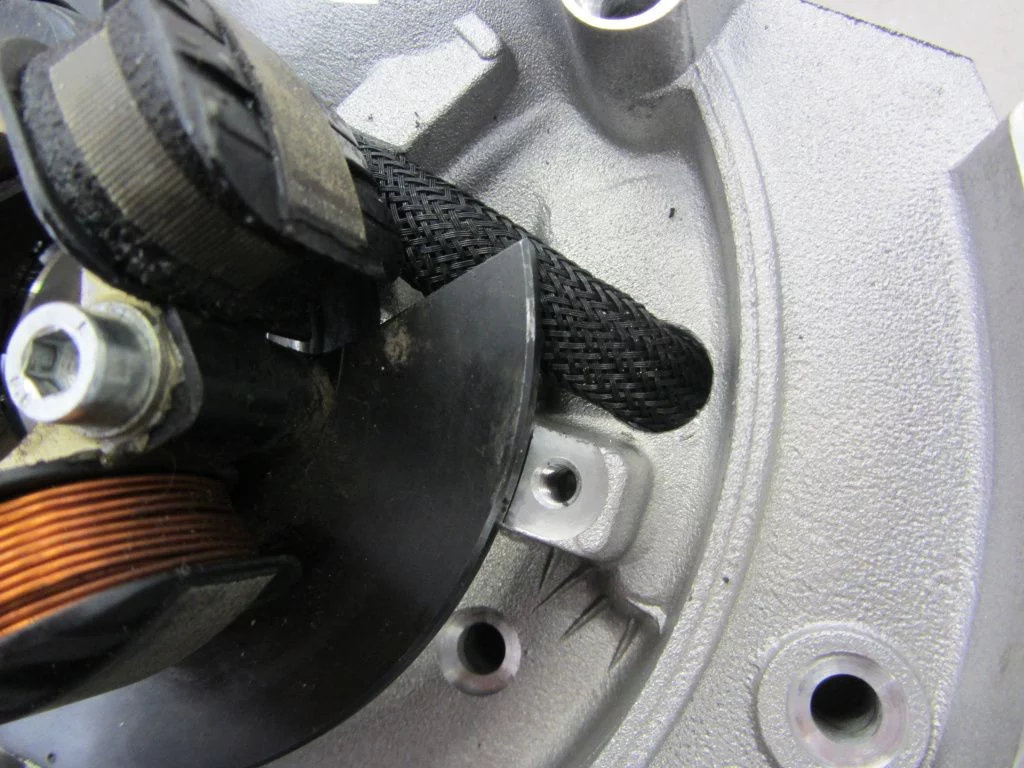
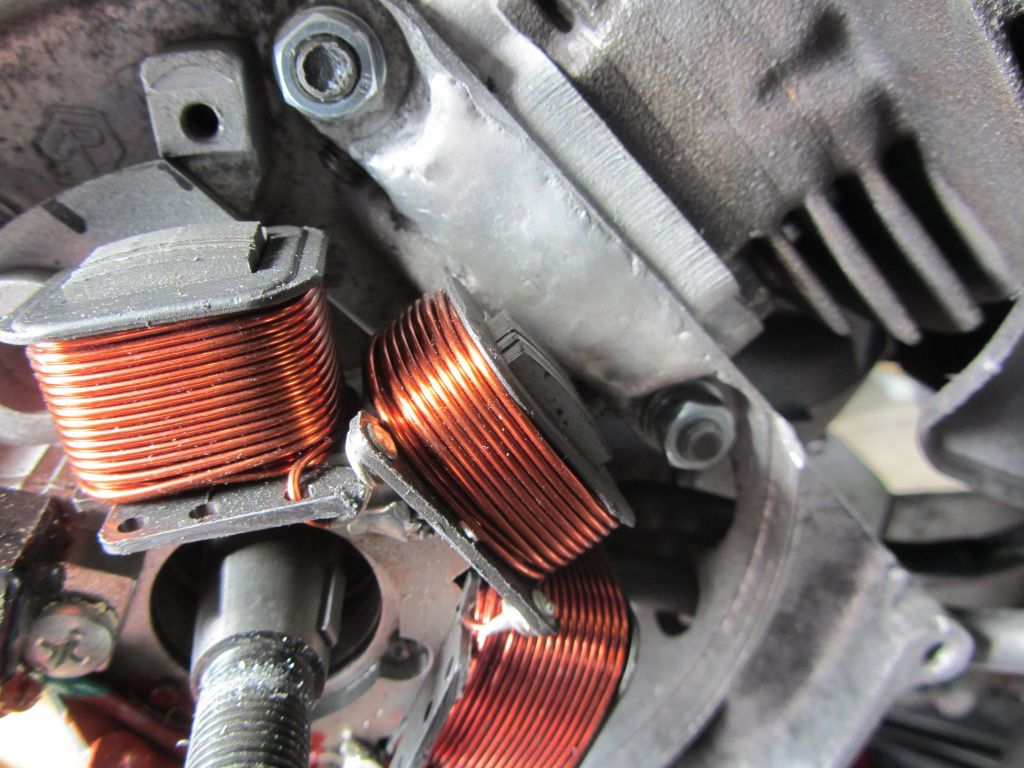
Normally you simply screw the stator the ignition tight, fumble the cables and ... uh ..

Ignition Vespa racing engine Smallframe Quattrini FALC

you definitely don't get one here Cable branch of the stator out of the danger area of ​​the rotor.
Since we unfortunately cannot provide a WiFi ignition in the short time, a suitable outlet must be created.
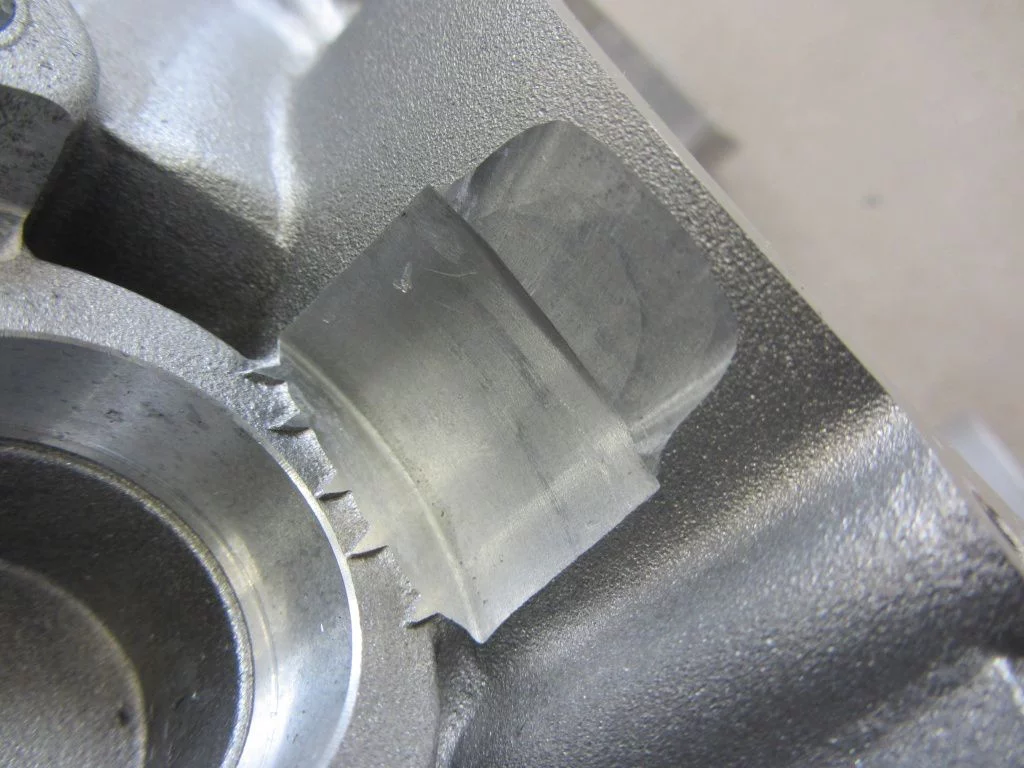
It is important that you do not drill randomly anywhere into the housing and create additional, unsuitable ventilation holes.
You should also make sure that the cable branch is still held down by the stator plate in order to avoid really abrasive contact with the rotor.

For the sake of simplicity, we use one as protection in the implementation Rubber grommet of the V50.
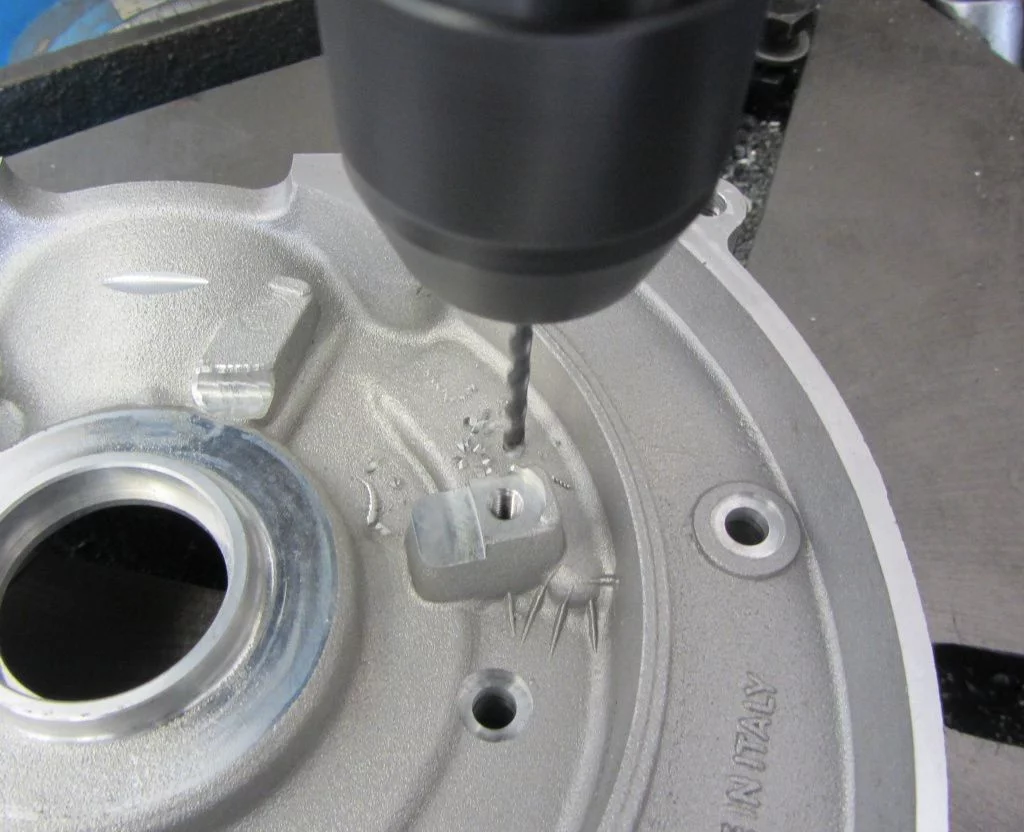
The appropriate hole for this is 12,5mm.

Holes over a diameter of 10mm should always be pre-drilled smaller.

Drilling Vespa racing engine Smallframe Quattrini FALC

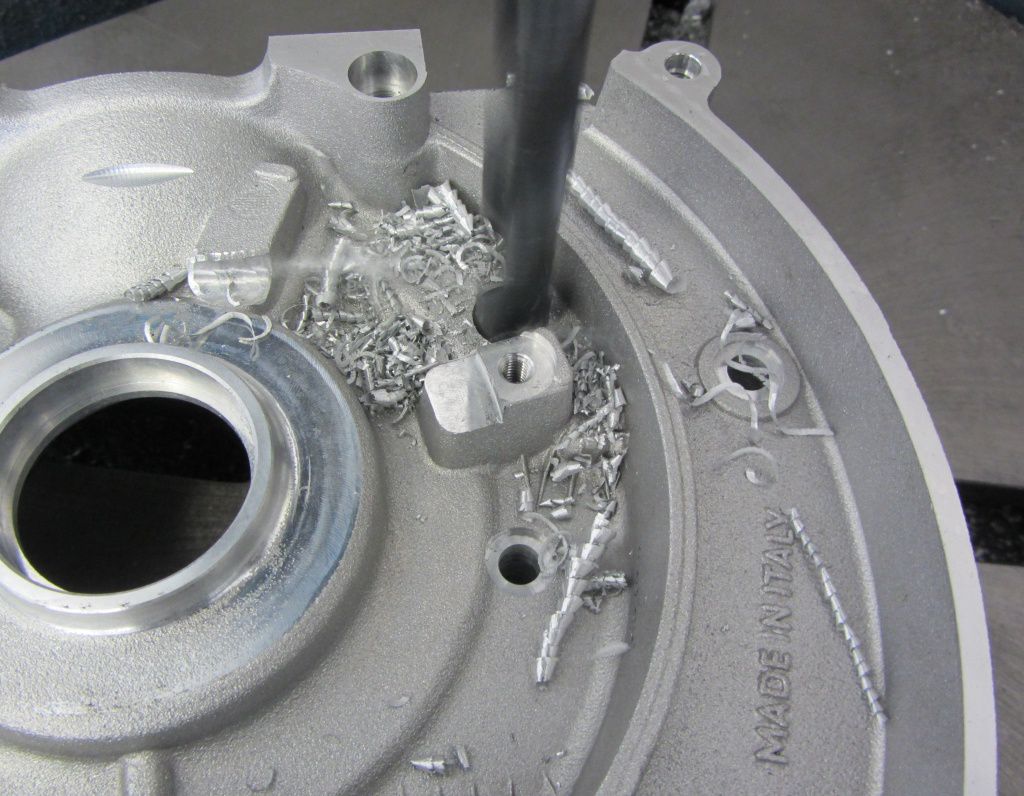
... and then bring it to the desired level.

Engine casing drill Vespa racing engine Smallframe Quattrini FALC

Deburr the hole and try it on briefly.

Test Vespa racing engine Smallframe Quattrini FALC

All fine. The small half of the case is done with the rough adjustments.

Next, the area of ​​the cylinder base comes into the focus of our assessment.

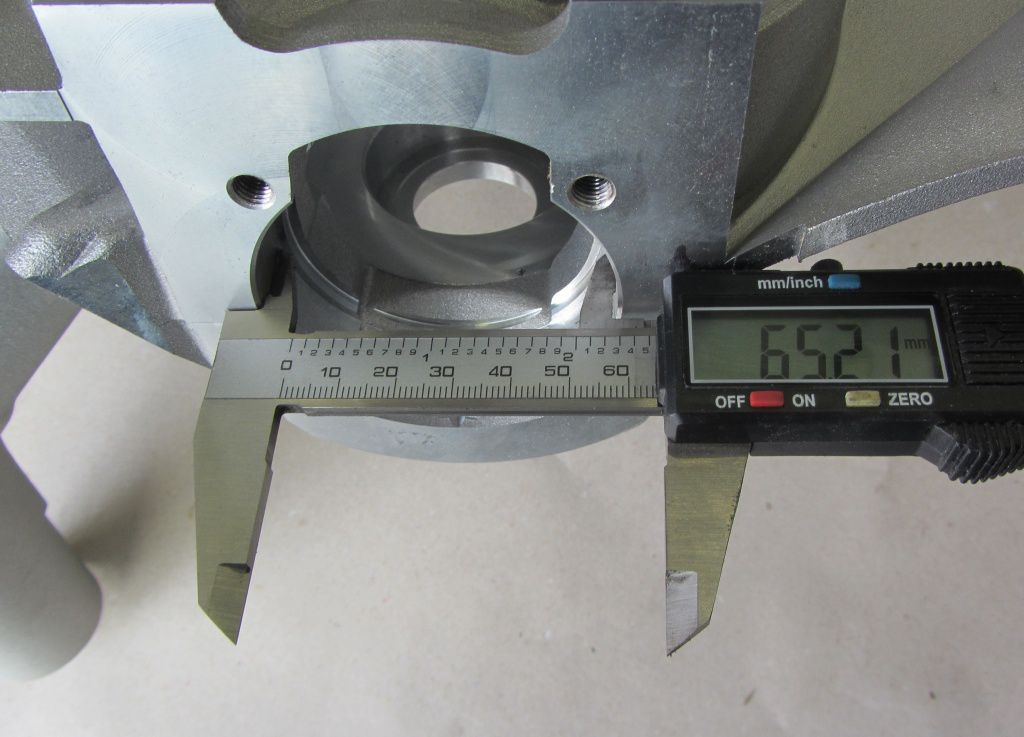
The Falc cylinders are manufactured with a cylinder base diameter of 66,5mm. Of course, Mr. Quattrini designed his motor housing for a diameter of 65,2mm, just to match his cylinders.

Measure Vespa racing engine Smallframe Quattrini FALC
This results in two possible options:

1. The motor housing can be spindled to the appropriate cylinder base diameter

2. The cylinder base of the Falcen is given a new outer diameter

We choose option number two.

So if you wanted to go back to one at some point other cylinder turn around, all options remain open. The wall thickness of the cylinder base is completely sufficient for this step.

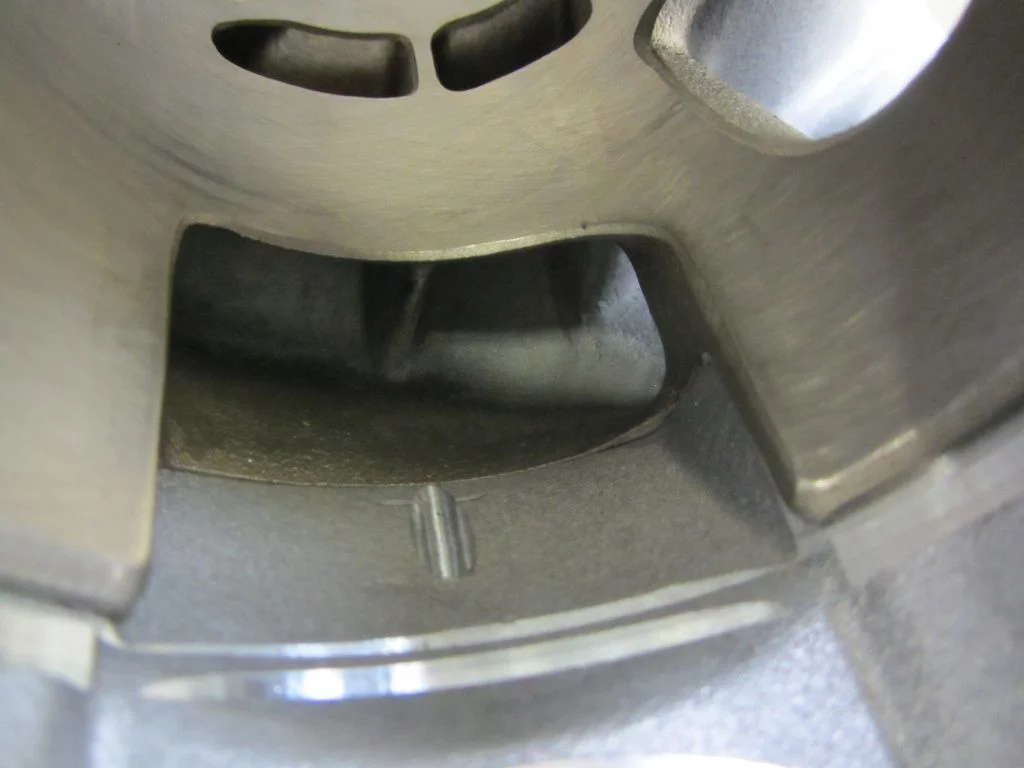
Turned off briefly, the cylinder can be held in the housing for a test to determine the extent to which the processing of the overflow channels still requires.

Cylinder duct vespa racing engine Smallframe Quattrini FALC

Almost perfect, we only have to rework the outer edges of the channel in the cylinder. The case remains untouched at this point. We make the necessary changes after determining the control angle on the cylinder.

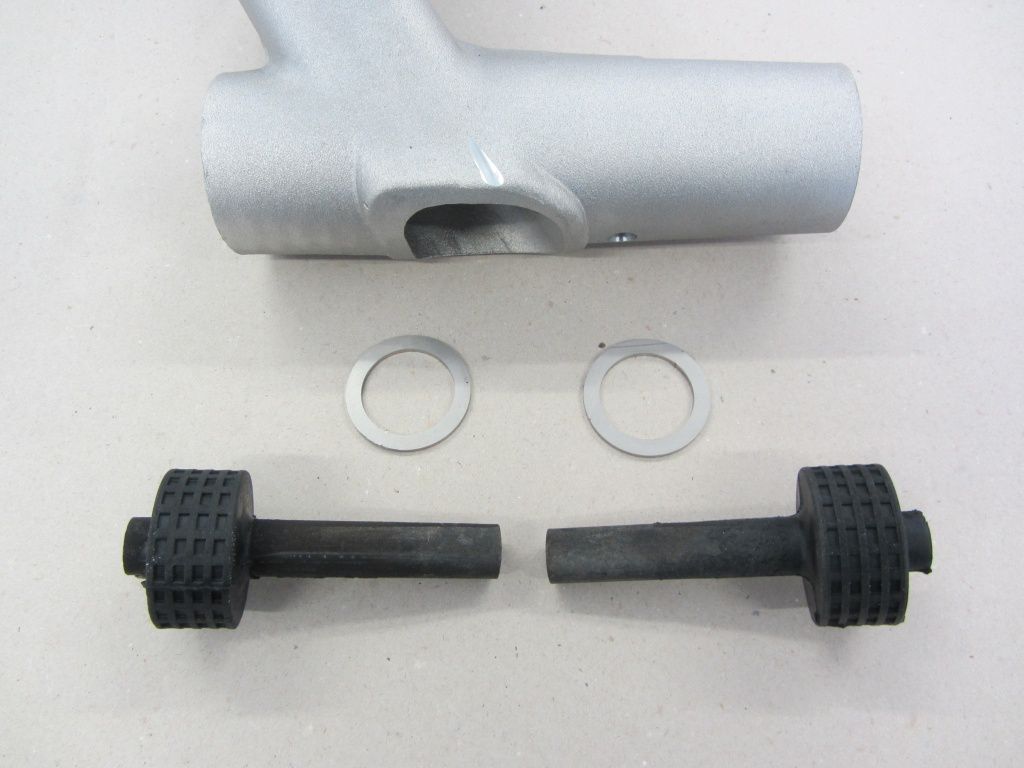
The motor housing is delivered without silent rubbers. There are some more or less sensible solutions for the traverse available on the market. Personal preferences also play a role in racing. The rubbers shouldn't be too hard. “Blocks” with more than 70 Shore hardness are certainly justifiable for fast straight-ahead driving, but as soon as you start doing gymnastics exercises on the scooter to quickly circle the bullet around the curves on a kart track, the requirements are more like the rest of the chassis: “as hard as necessary, as soft as possible ”.

Therefore, in our case, we use the Silent rubbers of the V50 / Primavera Models with approx. 50 Shore hardness.

Silent rubbers motor housing cross member Vespa racing engine Smallframe Quattrini FALC

On closer inspection of the traverse holes, it is noticeable that the stops for the silent rubbers turn out to be rather small. In order to avoid that the rubbers slowly walk into the bore with the high lateral forces and the housing can begin to move sideways, we use the additional stops from the PK models.

Here is the small stop surface ...

Stop traverse Vespa racing engine Smallframe Quattrini FALC

The stop ring of the PK is simply inserted and afterwards, when installed, is fixed by the silent rubbers.

Traverse Vespa racing engine Smallframe Quattrini FALC

The soft truss rubbers can be moved relatively easily with talc or a little Montagepaste used.

“He who is lazy is also clever”; therefore we leave the slightly strenuous work to the workshop press. In an emergency, the two-part silent rubbers can also be easily replaced by hand.

Pressing in silent rubbers Vespa racing engine Smallframe Quattrini FALC

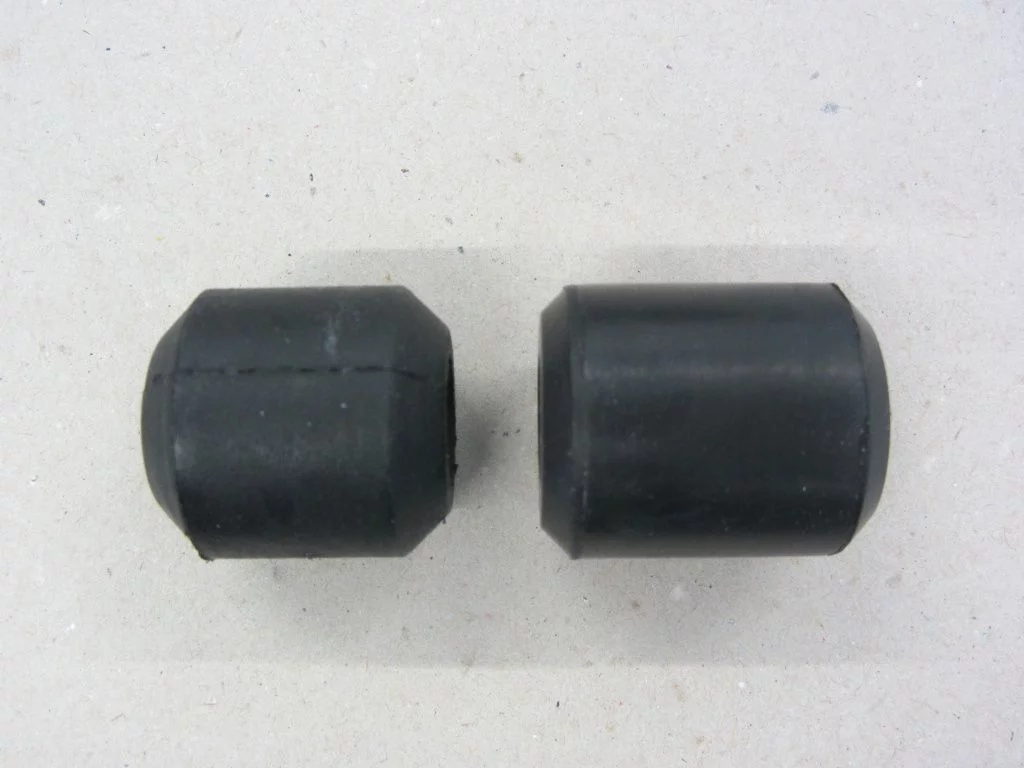
For the rear mount for the shock absorber, we use our own silent rubbers with the original case.

Compared to the Piaggio rubbers make our silent rubbers laid out a little wider ...

Comparison of silent rubbers Piaggio vs. Tuning Vespa racing engine Smallframe Quattrini FALC

and in the assembled state they are flush with the shock absorber eye on both sides. This gives you better lateral support.

Silent rubbers finished Vespa racing engine Smallframe Quattrini FALC

The next post is about installing the ball bearings and calibrating the crankshaft ...

Cylinder kit 75cc Polini Racing modified for Vespa V50 1st series

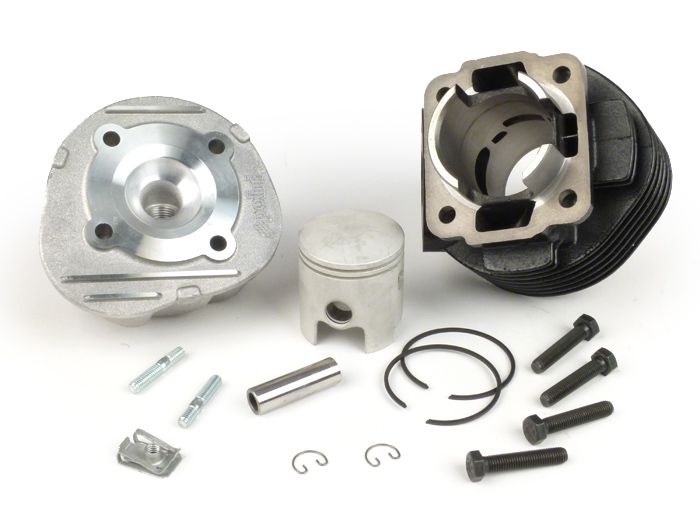
Now available in the shop: Cylinder Vespa V50 first series 75cc Polini Racing

The early Vespa V50 models, colloquially known as the V50 first series, surprise their owners in some details compared to the widespread, later V50 models.

The early models include, for example, the chassis numbers V5A1 * 1001 * to * 92877 and V5SA1 * 1001 * to * 15325 *

Whether it is the front wheel suspension, the fastening of the rear brake anchor plate with M6 studs, the 3-speed gearbox, the 9 inch tires or the short wheelbase, the V50 models of the first generation are special in many details.
This is also the case when it comes to increasing the performance of the prime mover.

The first V1,2 engines put their drivers at the disposal of a little more than a horse, 50 HP in numbers. This is paired with a reasonably long translated primary of 3.72 and a miserable jump from gear 2 to gear 3 doesn't exactly make these engines into real sprinters.

So what could be more obvious than giving the engine a boost with a new, more powerful cylinder kit.

Here, however, the next surprise awaits. The early V50s have a smaller cylinder base bore in the engine housing - this probably dates from the time when the engine was used as a starter engine for Piaggio aircraft. As a result, the current cylinders do not match.

The motor would have to be completely dismantled in order to properly spindle the cylinder base bore.
In order to avoid this effort, we have machined cylinders appropriately. So you can install the cylinder directly.

Our choice fell on that Polini 75cc in the racing version. With a very nice speed range and an output of over 4HP, it is exactly the right candidate to pull the slightly too long gear of the V50. The wide speed range clearly helps to overcome the rather long jump from second to third gear.

7675516

The cylinder base is turned to fit ...

04.04.6 004

and the fastening point for the fan wheel cover and cooling hood shortened to match.

04.04.6 006

You will find one as an accessory in our cylinder kit Sheet metal nut M6, this serves the screwing point between Flywheel and Cooling hood and can simply be plugged onto the fan wheel cover for this purpose. This is necessary because the fastening points on the V50 are oriented 1 ° differently.

09.01.13 012

Polini specifies an ignition point of 17 ° for this cylinder. If you are still using contact ignition on the engine, you can use the test lamp to set the ignition point to 1,4mm before TDC.

1010003 Polini Racing 75

Depending on the exhaust and whether one Racing wave is built into your engine, you should have the Main jet adjust accordingly in the carburetor. In the installation instructions, Polini recommends a main jet of 16-66 for the SHB 68 carburetor. However, we cannot confirm this value in this way. Experience has shown that the carburettor should be equipped with a 74-84 jet.

Matching carburetor kits

SHB 16/16

1510020

SHB 19/19

1510022

When you are faced with the decision to open the engine and do the usual wear parts like Shift claw, Sealing kit and Shaft seals to replace, we definitely recommend using one Racing crankshaft ...

BGM2403

and a short 3rd gear think.

BGM01805

The racing crankshaft enables the engine to develop a higher torque and the short 3rd gear ensures a better connection when shifting from gear 2 to gear 3.

With such a powerful engine, you can enjoy the summer on your V50 even better.

Modern cylinders and exhaust systems nowadays bring very powerful engines to the Smallframe Sector. Combinations such as the Polini Evo With a Big bertha on our Generation XI, press over 24Nm over the rear wheel onto the road.

The power flow between the crankshaft and the rear wheel is routed through the clutch.
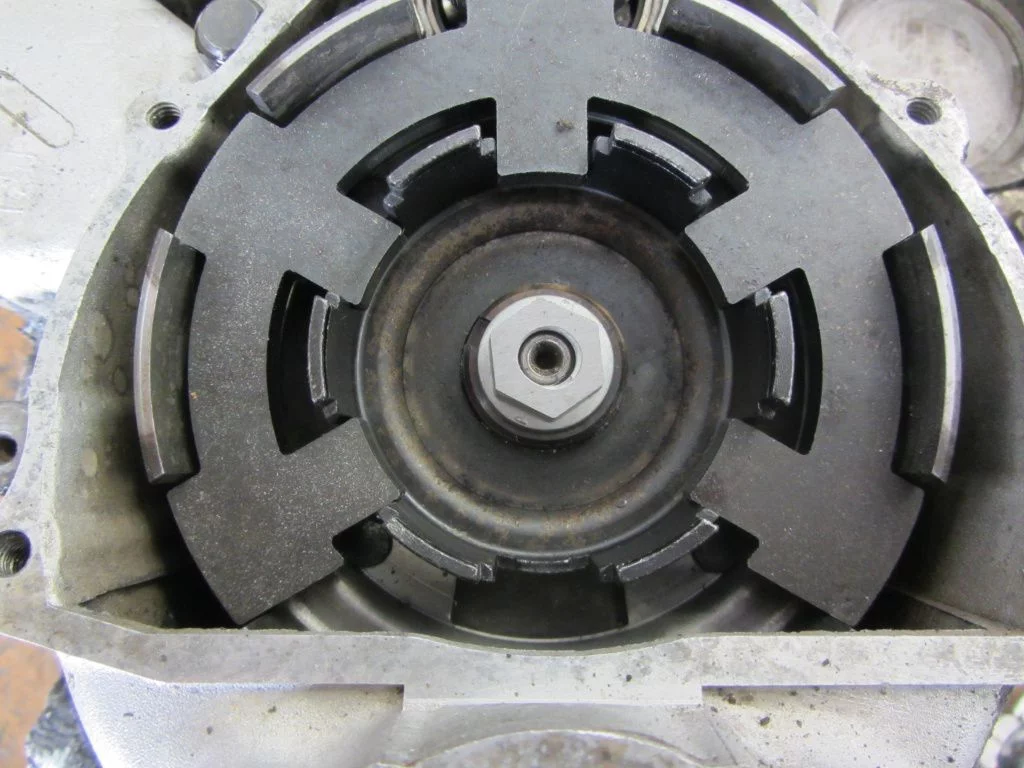
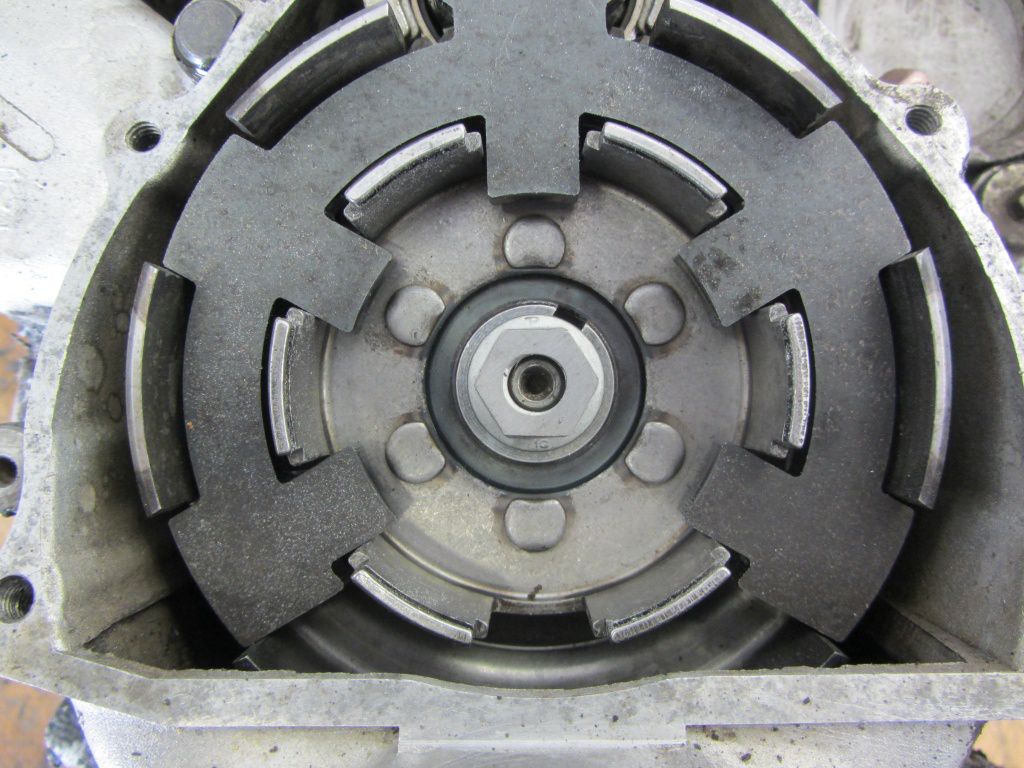
All coupling components are subject to the highest stress, so the connection and correct assembly of the individual components must be of the utmost importance.

The meanwhile common in this area Grinding in the clutch on the countershaft cone with abrasive paste This is just as important as the subsequent assembly of the primary and coupling nuts with increased tightening torque, rarely not below 70Nm.

We have especially for you for these high requirements Clutch and primary nuts with a higher strength in the range. With a hardness of “10”, these nuts also withstand tightening torques of well over 70Nm. Designed as a collar nut, the usual lock washers are not required. We recommend you for higher loads threadlocking to use.

So that the clutch basket and the primary drive are not damaged when the nuts are tightened, and to be able to counter such high tightening torques at all, we have a fine one Coupling holder included in our program.

With the holder both Inner baskets of the V50 / XL1 Couplings

Inner basket V50 / PK XL1

Inner basket V50 / PK XL1

As well as Inner coupling baskets of the PK XL2 be held against.

Inner basket PK XL2

Inner basket PK XL2

Due to the usual wedging of the primary without a suitable holding tool, sometimes such high forces act on the components that the pinion, clutch basket, cush and in some cases even the bearing seats can be affected.

Our coupling holder can be used against a Socket on the primary nut or a housing screw.

pictures 18.03/011 XNUMX This means that the high tightening torques cannot be transferred to the bearing seats and shock absorbers via the shearing action of the pinion.

Bring the essence of summer, sun, beach, and sea directly into your glass with our Mojito cocktail syrup. By topping it with soda, garnishing with fresh mint, and a slice of lime, you can quickly mix yourself a spritz cocktail. The premium lime-mint flavor ensures a pure beach feeling. multi-tool the clutch can be opened without any problems assemble in the engine.

The trains were installed quickly and we are looking forward to the first runs!

The engine came to us with jet nozzles: without a needle, with a 50 mm auxiliary nozzle and 150 mm main nozzle.

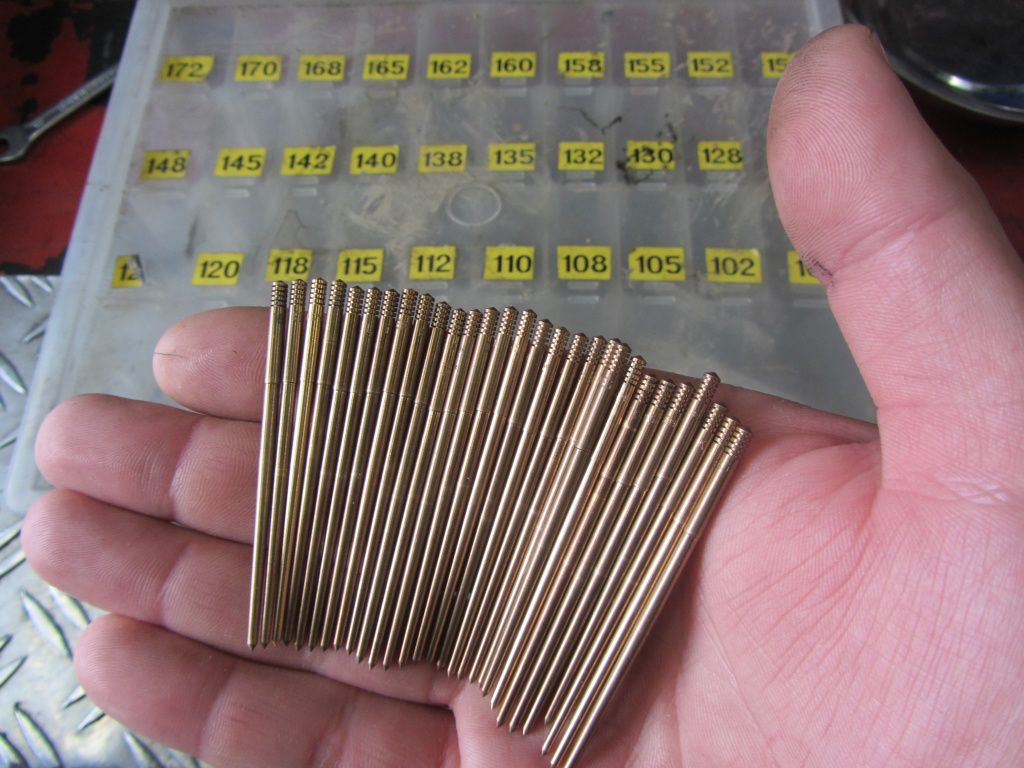
The needles are the crux of the vote when it comes to tuning. Picking the supposedly right one from a seemingly endless offer of carburetor manufacturers is often quite difficult or, better, very time-consuming.

A small selection of needles from various manufacturers are always available on the test bench.

Small selection of Keihin needles

Small selection of Keihin needles

Experience has shown that rotary vane motors of this type feel quite comfortable with a DGL needle. The DEK needle installed as standard in the 35 mm Keihin is usually a bit too bold in the lower partial load range.

All that remains is to check the ignition.
Since the motor housing was welded to the outside of the overcurrent ducts, the ignition base plate had to be machined - unfortunately exactly at the point where the markings for ignition setting are attached to the base plate in the unchanged condition.

gsf wsm2012 018

So that we can control the ignition point, we have to mark the top dead center, the TDC and the desired pre-ignition value.

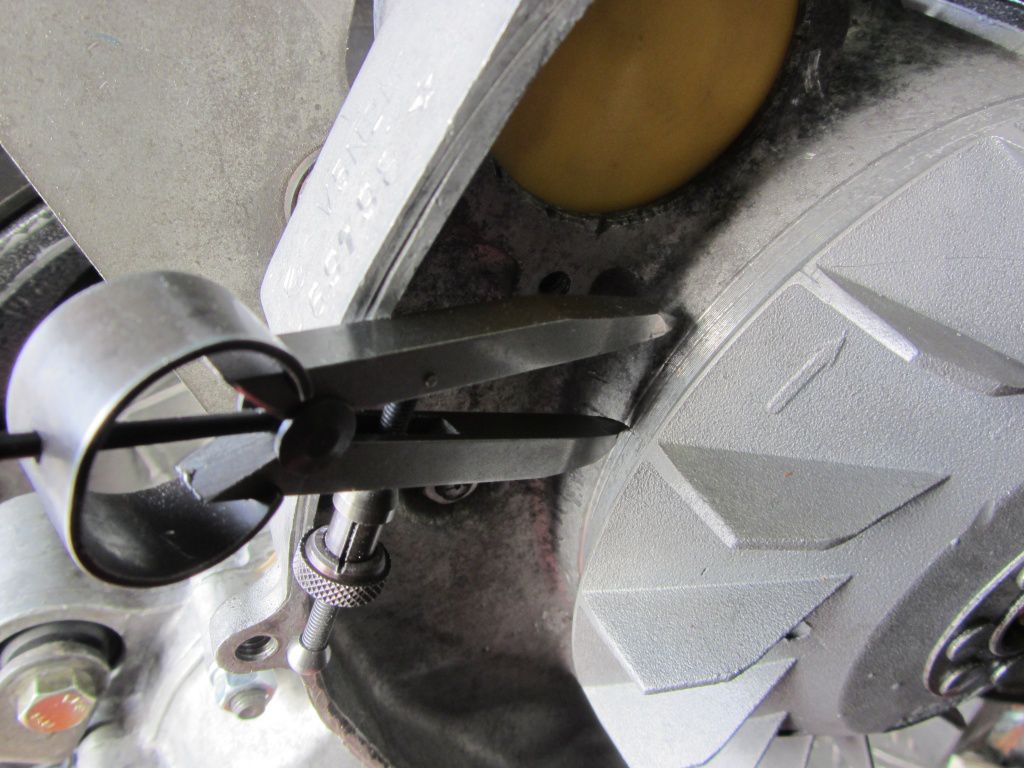
As always, we determine the OT by means of a reversal measurement.

For this purpose, the piston is prevented from overcoming top dead center with a piston stopper.

Piston stopper for reversal measurement

Piston stopper for reversal measurement

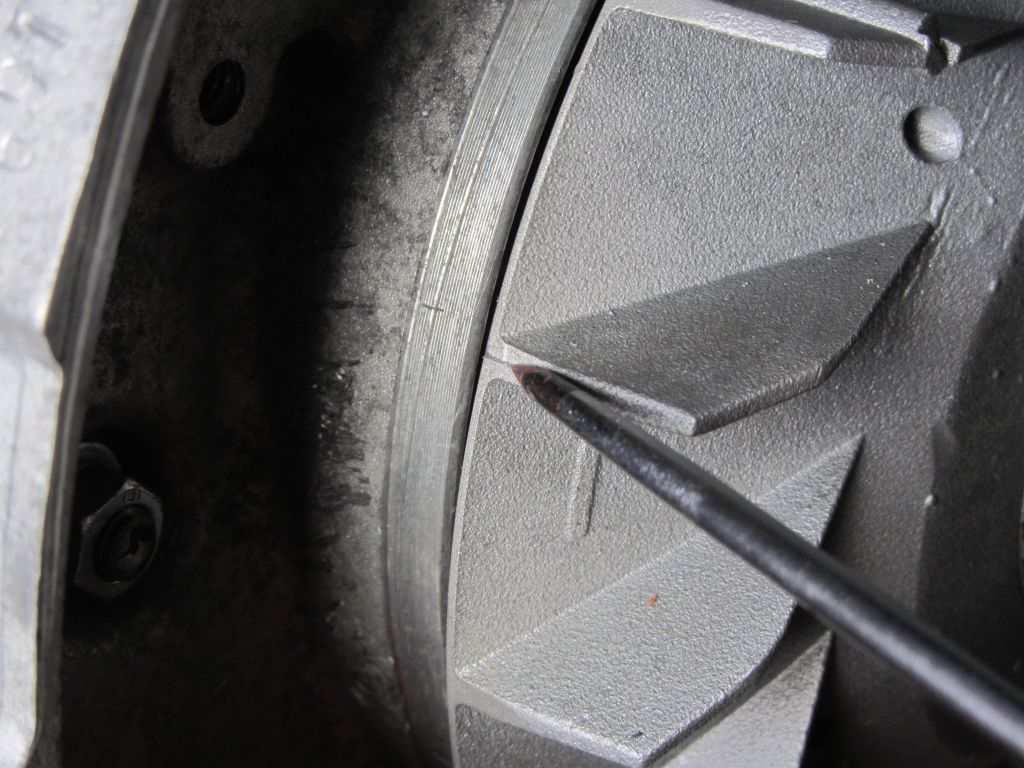
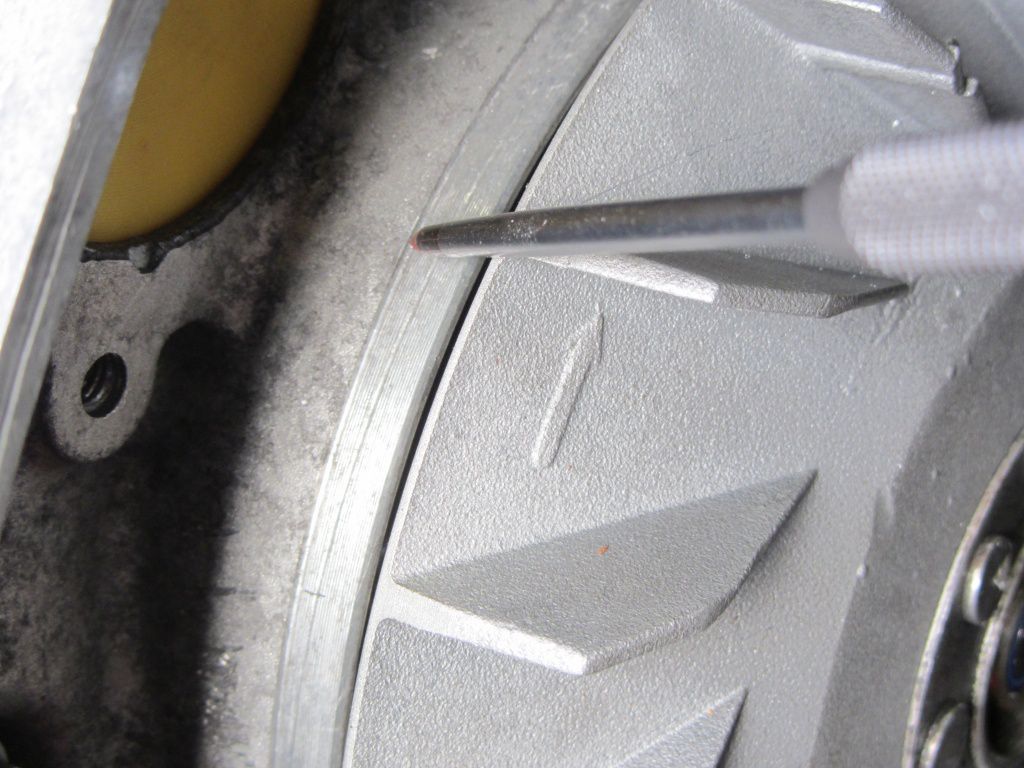
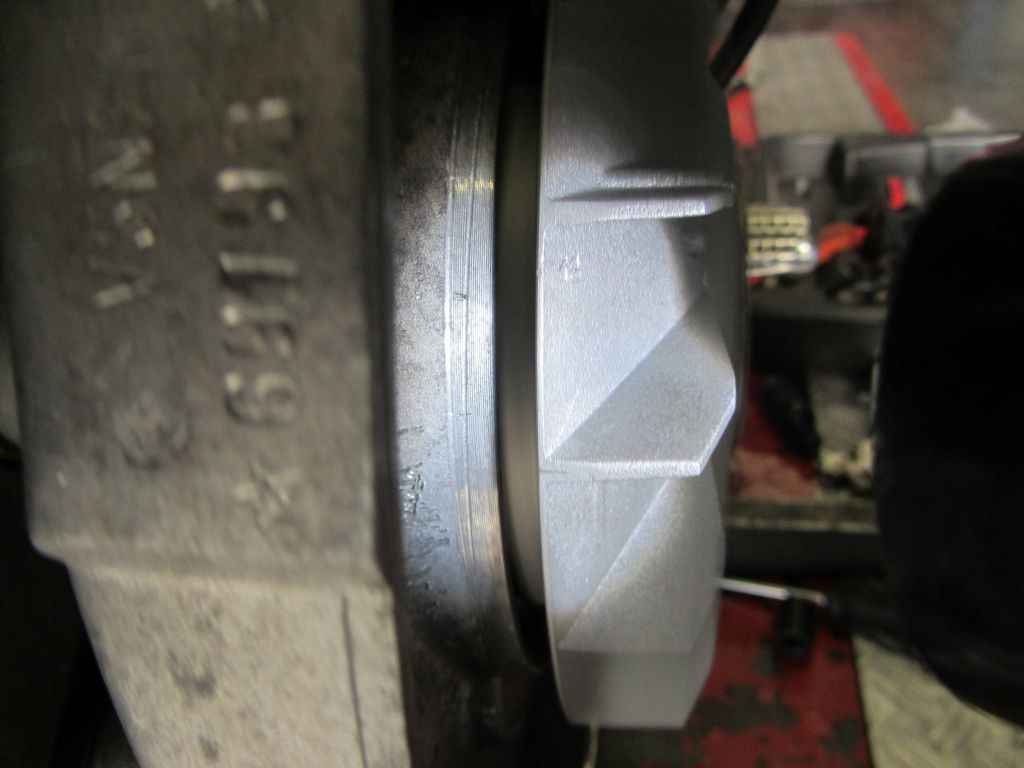
We mark the pole wheel with a scriber and then transfer this mark to the motor housing at the first “stop”. The markings should of course be exactly in line. Here, in the picture below, the camera's angle plays a trick on us.

OT mark 1

OT mark 1

After the pole wheel has been turned once against the second stop, we also transfer the marking from the pole wheel to the motor housing.

gsf wsm2012 007

With a scriber you can now determine the exact position of the top dead center between these two markings on the motor housing.

gsf wsm2012 009

Ok, now we know where the piston is at the top, but we're aiming for an ignition point of 18 °. This means that we now have to set a corresponding marker.

We also need the circumference of the pole wheel. This value can be simply measured or determined using the calculation method (D *?).

The pole wheel has a circumference of 529mm. If you divide this value by 360, you get the value for 1 °. This value must then be multiplied by the desired value for the number of degrees.

In our case 529/360 * 18 = 26,45mm.

This value is then marked on the circumference of the pole wheel, starting with the “0” marking.

gsf wsm2012 010

During the subsequent check, the 18 ° marking should be congruent with the OT marking on the housing.

The control is carried out with a stroboscope lamp.

As you can see, the ignition point is around 2 ° next to our desired value of 18 °, i.e. 16 °. We reserve the right to adjust it for now and let the engine run as it is - you have to start somewhere.

gsf wsm2012 013

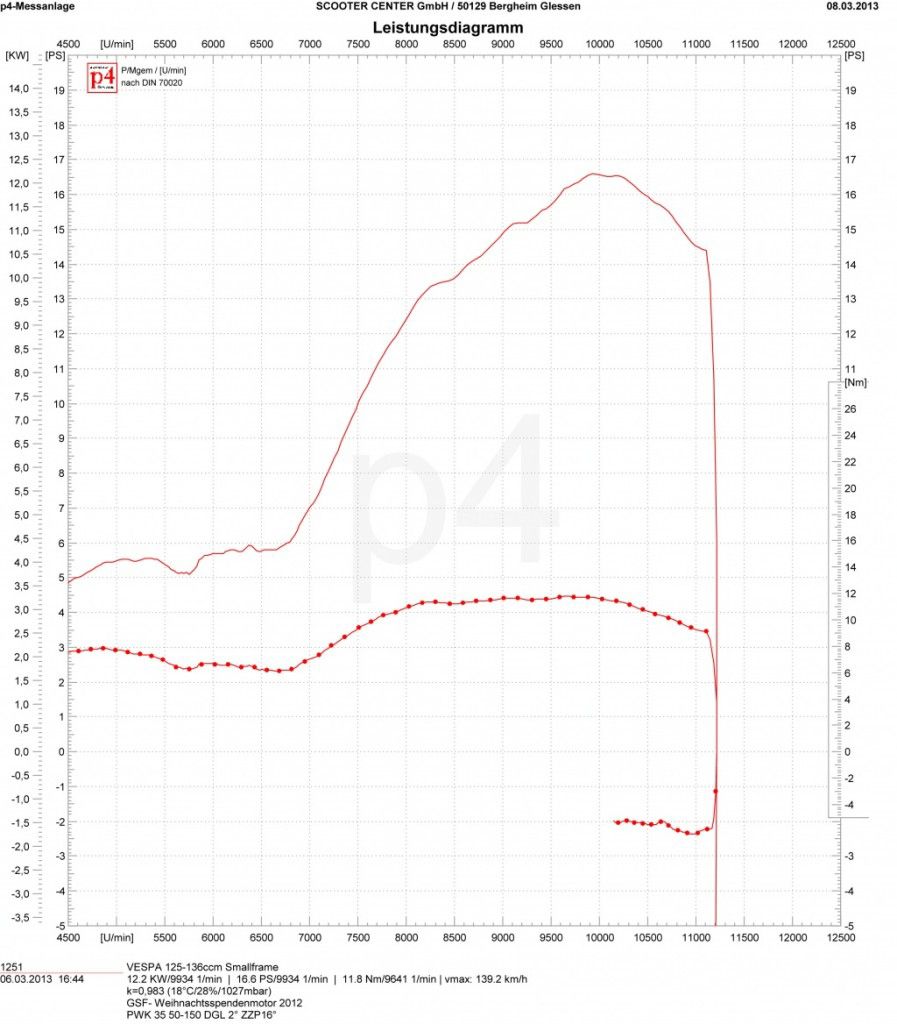
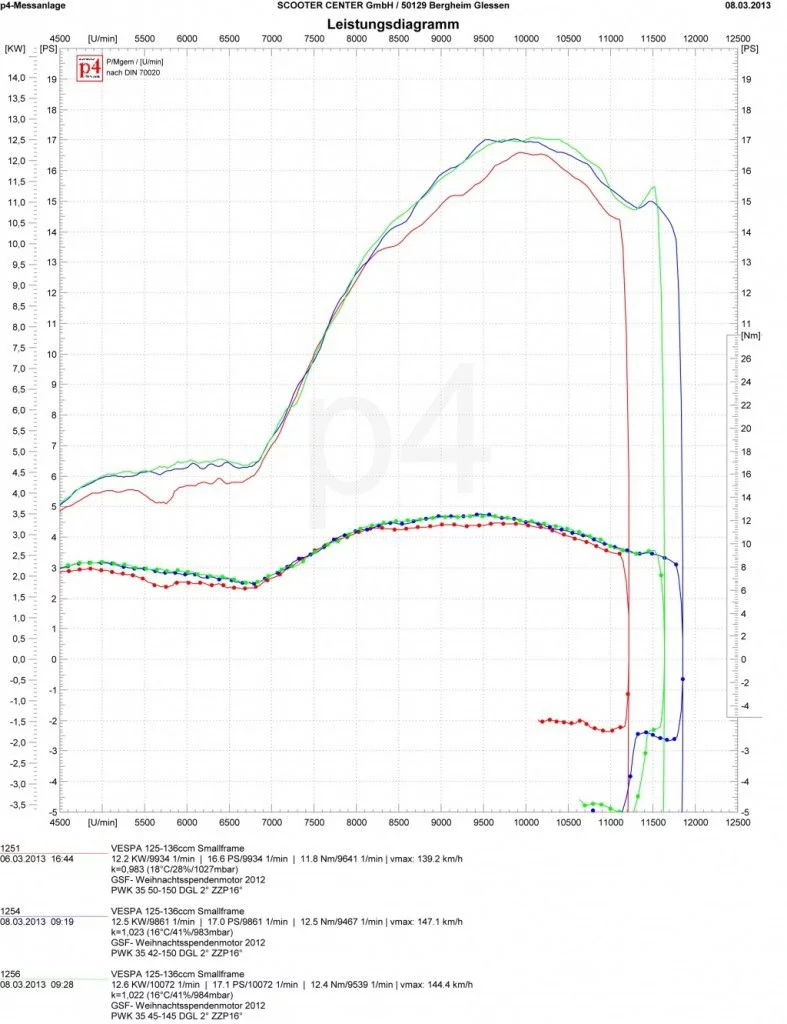
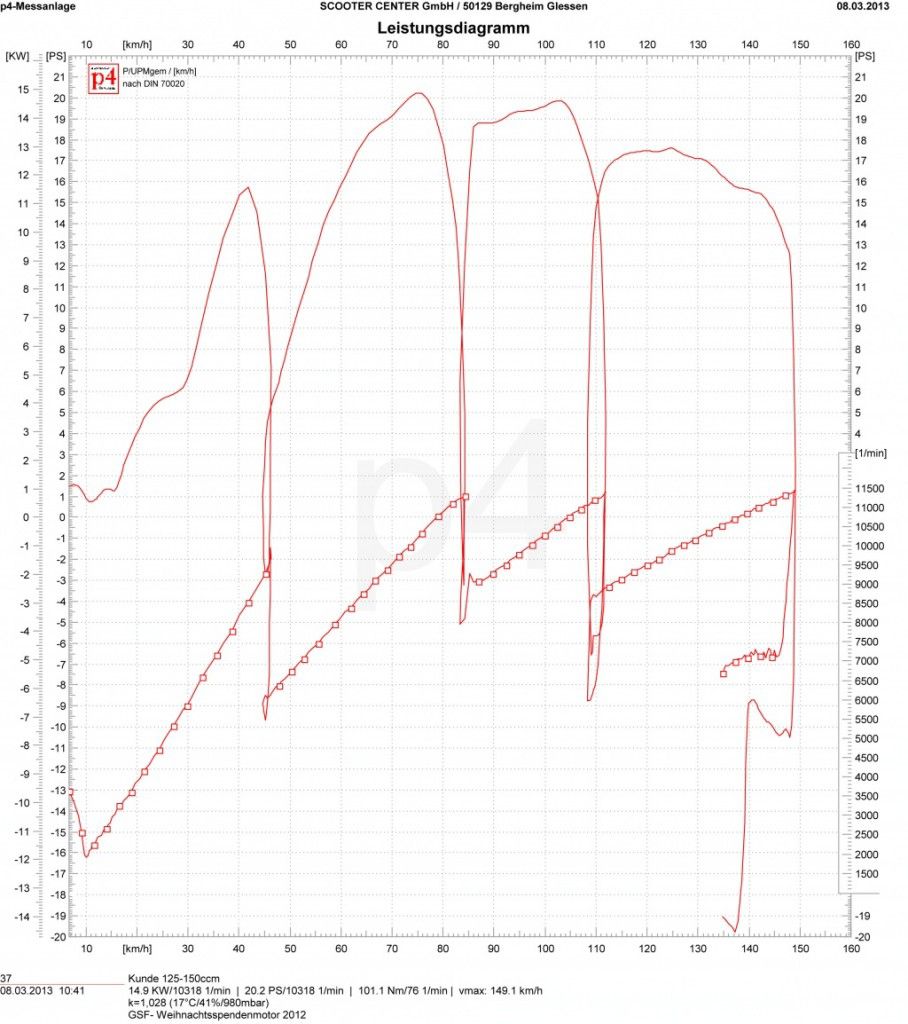
When warming up the engine, it is unfortunately noticeable that third gear jumps out under load. Mmmmh .. stupid. Unfortunately, the problem cannot be remedied in the short term, so we drive the tests in fourth gear. The gearbox is practically the lever against which the engine has to work. This lever is of course much longer in fourth gear, so it “brakes” more than in third gear, which is usually used for measurements. The peak power on the graph with the dynamic measurement, power versus speed, will therefore be significantly smaller than would be the case in third gear.

As a final check, we may try a static run, performance against km / h and hope to be able to hold third gear in position at least once with the shift handle.

Ok, first try ...

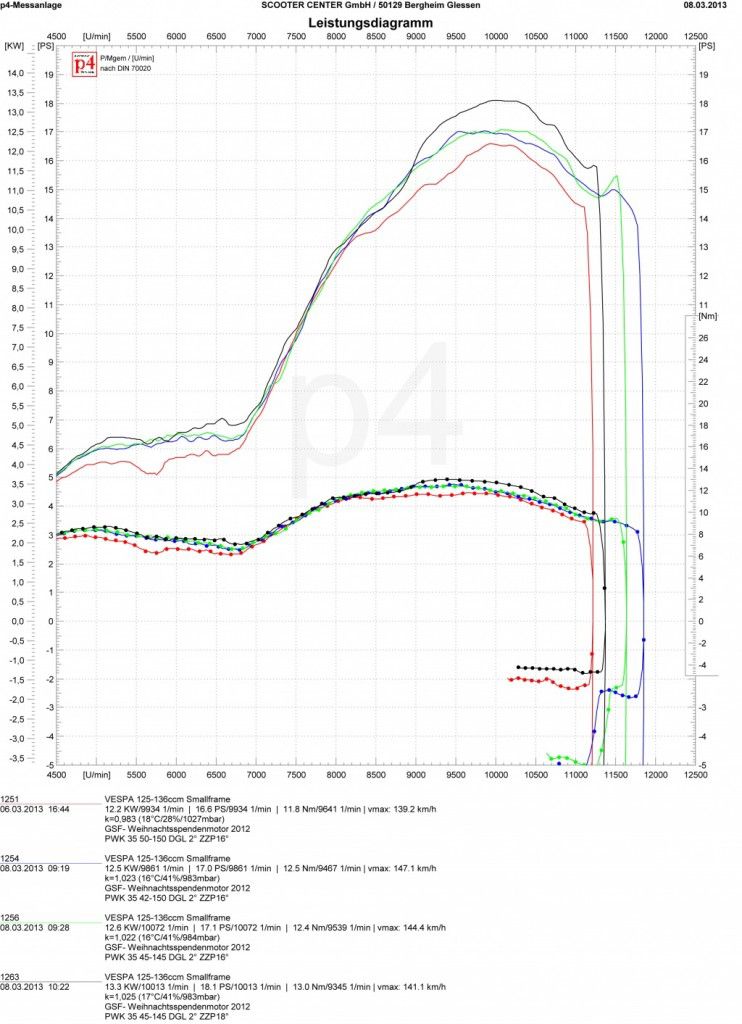
1 GSF Christmas donation engine 2012

As suspected, the spray is too bold. The performance drops badly, especially in the pre-reservation area.

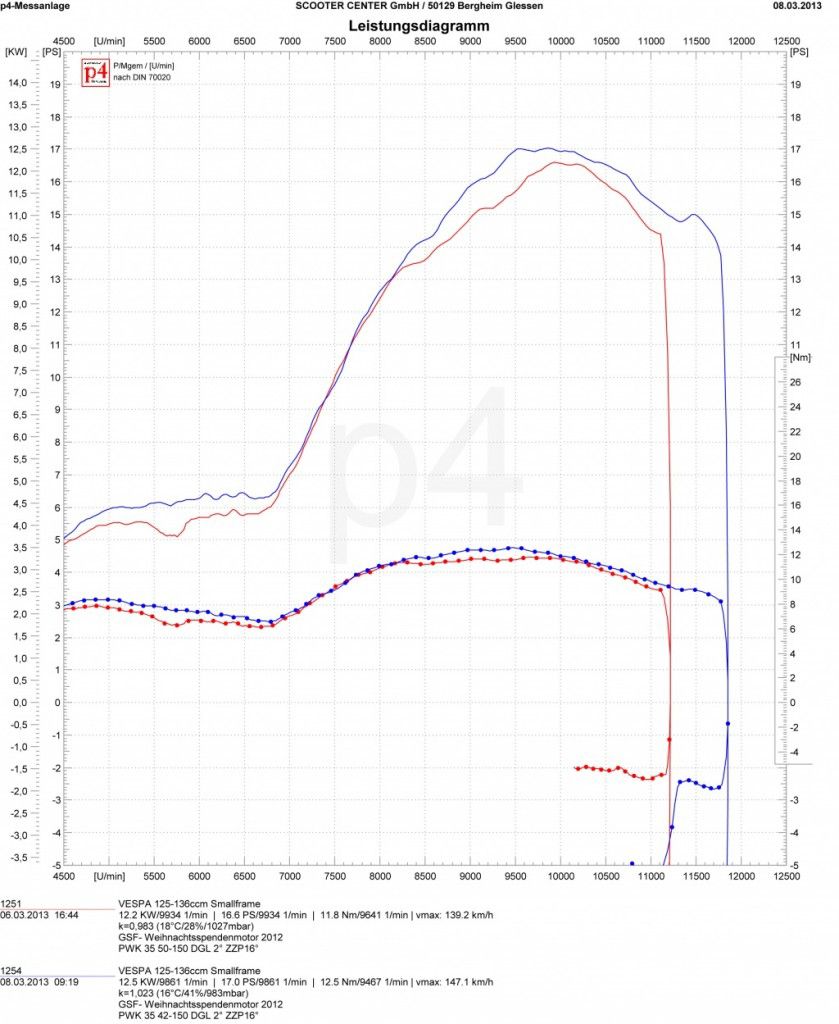
We change the auxiliary nozzle to 45 ...

2 GSF Christmas donation engine 2012

Well, something positive is happening in the pre-resso area - now we're going to 145 with the main jet

3 GSF Christmas donation engine 2012

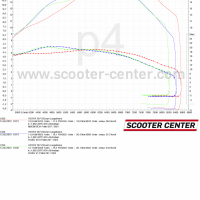
We haven't found top performance by changing the main jet. The curve becomes much smoother and the engine starts more willingly in fourth gear against the load of the roller. These are subjective impressions that no graph can depict.

What remains is the change in ignition timing to 18 ° ...

4 GSF Christmas donation engine 2012

The ignition brought it again. More power in the pre-resol and peak area with more torque. 18HP in fourth gear with the longest transmission brake is okay.

Finally, a run over all four gears ..

GSF Christmas donation motor 2012 kmh

Well, almost 20 horses in third gear ...

The difference in fourth gear is nice to see in this run. After all, the longer translation swallows almost two and a half horses.

In terms of spraying, we would leave the engine like that for now. The remaining fine adjustments should be adjusted according to the geographical conditions of the new owner on the road.

Today we put a TS1 tuned by MB Development RaceTour to the test.
The trunk engine was the same as in the first part of our test.
The cylinder has been redesigned by Mark Broadhurst himself, equipped with Tassinari V-Force, MB forged pistons and a moderately compressed head. The Mikuni TMX30 carburetor was still used, the following was tested:

TS1 from Test1 against TS1 with MRB RaceTour Tuning and the bgm PRO Clubman exhaust:

Exhaust test Scooter Center Lambretta TS1 touring vs TS1 race tour tuned


[break]

bgm PRO Clubman compared to Sito Ancillotti:

Exhaust test Scooter Center Lambretta TS1 racetour tuned bgm PRO Clubman vs SITO Ancillotti

[break]

bgm PRO Clubman compared to JL3:

Exhaust test Scooter Center Lambretta TS1 bgm PRO Clubman versus JL3

Against the well-known JL Road (JL3 or similar KRP3) was of course also tested. In this case, you should by no means be blinded by the maximum value achieved. Even if the peak on the JL3 is around 3 hp higher, you shouldn't lose sight of the width of the band. A sovereign engine should have enough reserves, especially in the area where you mainly spend your day-to-day life. The bgm PRO Clubman is clearly ahead of the JL with over 3,5PS / 3NM. As a result, with every shift you will almost certainly end up in an area in which there is sufficient power immediately.
The JL3 has to take a breath first, i.e. one would have to downshift for rapid progress. On the road, the bgm PRO Clubman will represent the more coherent concept and comes very close to the driving characteristics of a powerful TDI engine.
[break] Exhaust test Scooter Center Lambretta TS1 bgm PRO MRB Big Box Clubman versus JL3

[break]

For all less experienced curve fans, we have also entered the mean value of approx. 4.600 rpm up to 9.500 rpm below. In the area in the curve marked with hatched bars, the performance advantage is put into perspective to just under 0.5 hp.

Conclusion: The bgm PRO Clubman works on mild touring cylinders as well as on strong sports setups with long control angles. Build on it and look forward to it ...

With our new bgm PRO MRB Big Box Clubman Exhaust we were able to do a few test runs today.

The everyday GP von Ulf had to serve as a test victim.

With a TS1 and a TMX30 equipped, the engine offers a good test basis for the typical everyday engine.

In comparison we have one Ancillotti and one JL Road KRP3 tested against the bgm PRO MRB Big Box Clubman.

Here in comparison to the Ancilotti by Sito.

Compared to the Ancillotti, the Big Box scores with more power and torque across the entire speed range. Over 2,5 Nm and 2 HP more in the range from 4700 rpm to 6700 rpm push noticeably better than the Ancillotti. The band, which is 1000 rpm wider, ensures a good gear connection with every gear change.

In direct comparison to the KRP3 or JL Road.

Although the top of the JL offers just under half a horsepower more power, half the horse is bought at the cost of a significant lack of power and, above all, a lack of torque in the range from 4500 rpm to 5500 rpm. If you want to accelerate quickly out of this speed range, first shift down to the next lower gear with the JL. When shifting gear you should also hit the right speed with the JL Road, otherwise you will end up in the exact torque hole from which you have to struggle with a lot of effort.

And here again all tourers in comparison.

[Nggallery id = 22]

Here is the evaluation of our P4 duel.

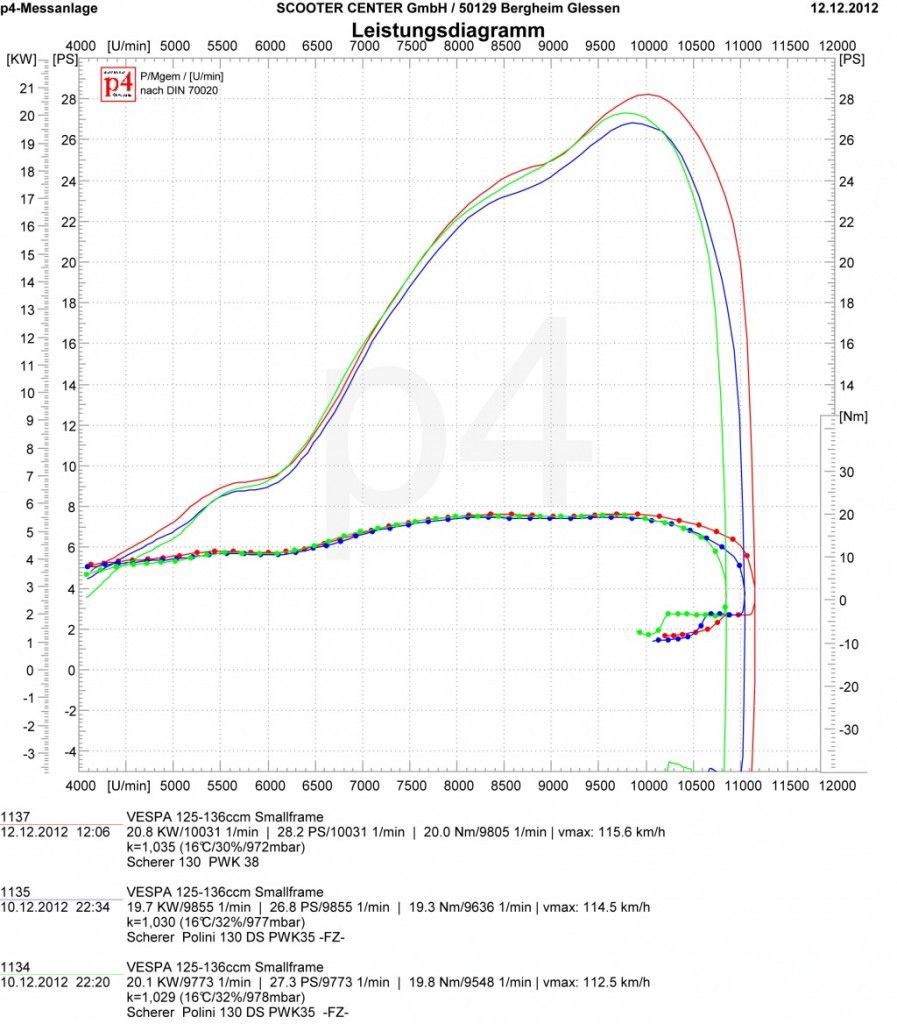
The target was to beat the 29,9 HP mark. Set by one Cast iron Polini 133 with 54er bgm crankshaft, Carburetor Keihin PWK35AS and Fire magic Exhaust.

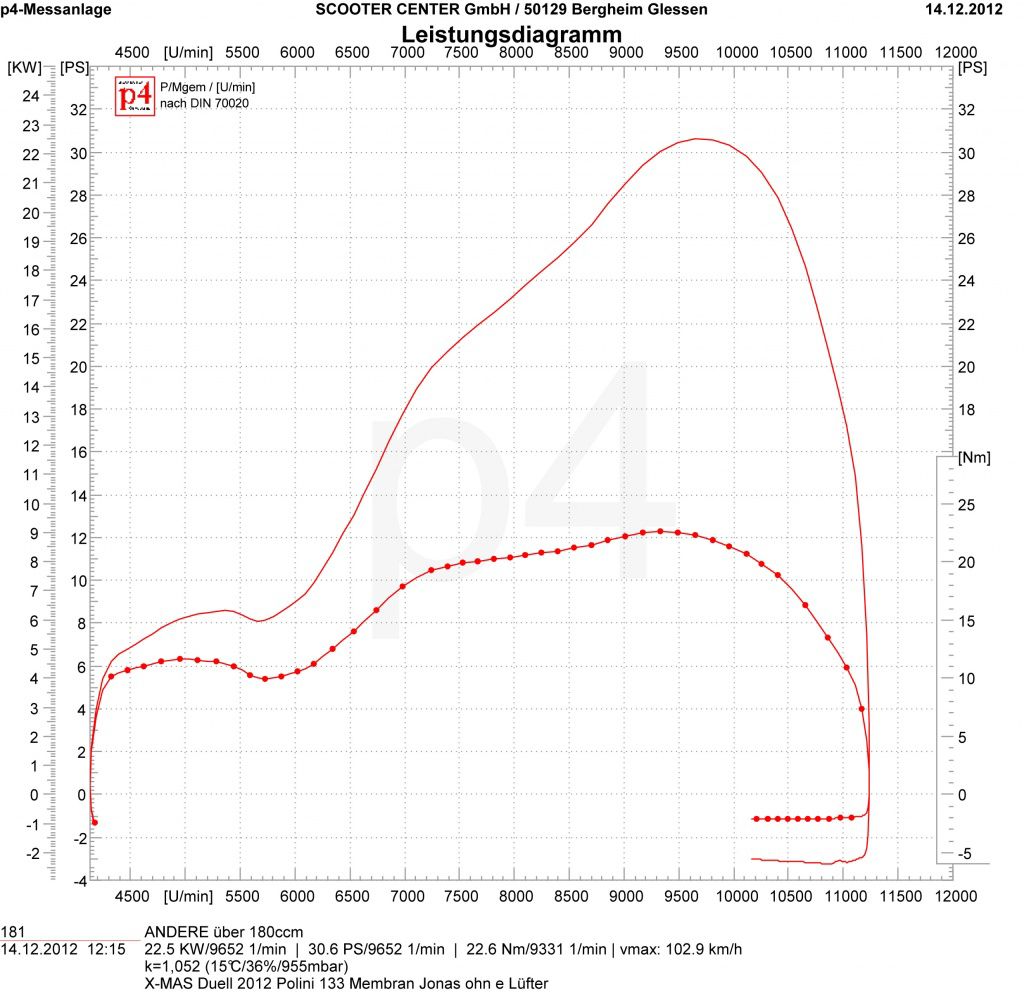
With 29,3PS, Jonas just missed the mark. Close behind with 29,2HP is Matthias with his 133 Polini rotary valve engine.

In a joint agreement, we, Jonas and the Scooter-Center decided to give the promotion voucher worth 100 euros "Scooterist-chairty / GSF donation campaign" let it come.

We also add the necessary test bench time for the donation engine on our test bench.

In the gallery findet you a few selected runs of the X-mas duel.

In reality, small, angry SF motors are of course much more popular - so just be part of the next P4 campaign!

We would like to thank all participants of the x-mas campaign, it was really fun to spend the whole day with you “on the roll”.

[nggallery id = 19] [nggallery id = 18]

On Friday the 14.12th of December was the first day of our X-Mas duel.

Despite sub-zero temperatures, some performance seekers came to our test bench.

For refreshment, hot coffee with a shot and warm pretzels were available in our workshop

To begin with, we would like to briefly introduce you to the engine that needs to be beaten - the duel class, Vespa Smallframe, max.140ccm, one-piece outlet and sucked in via the motor housing.

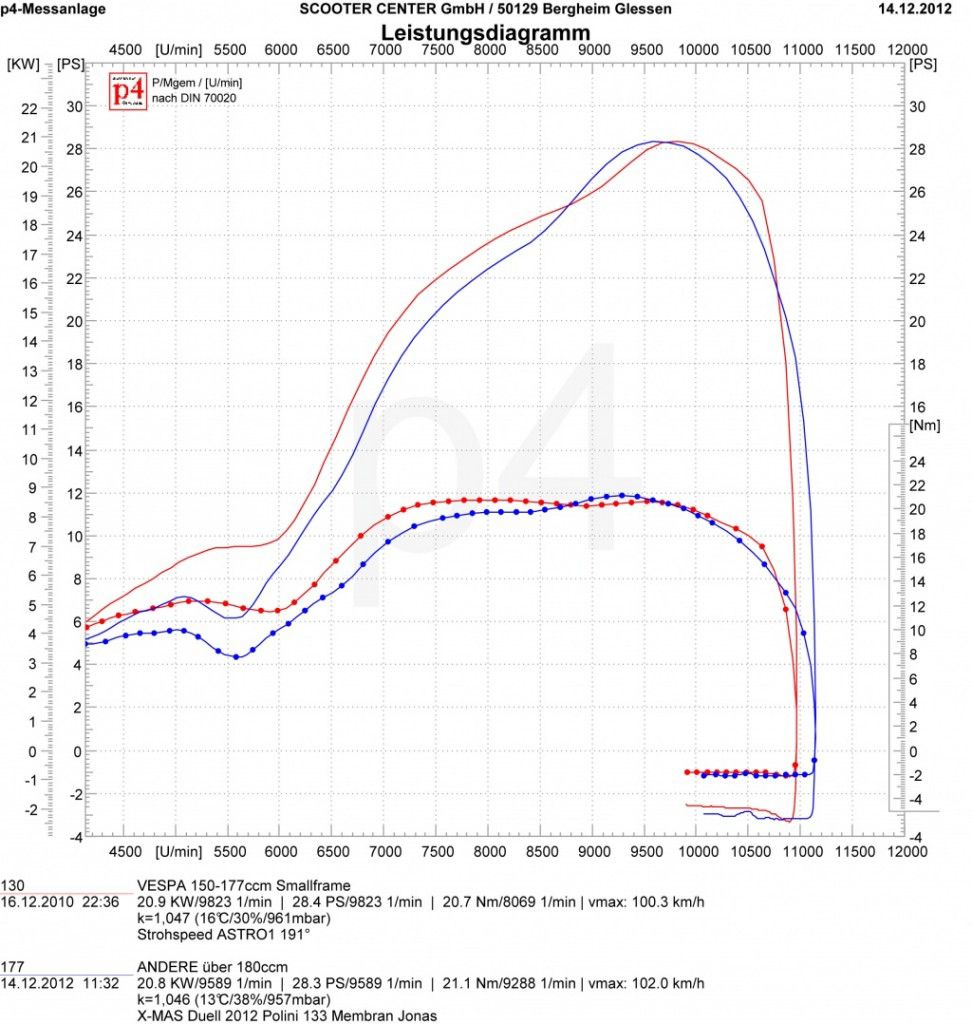
The current state of affairs is 28,4HP at 9800U / min, from December 16.12.2010, XNUMX with a 133 gray cast iron Polini, bgm crankshaft, Magic fire exhaust and 35 Keihin PWK Carburetor with Strohspeed intake manifold and Polini membrane.

Among other things, the Strohspeed intake manifold was developed and tested on this engine, from the first prototype made of steel, through the cast samples made of aluminum to the finished intake manifold.

Today's fire magic exhaust also brought its first horsepower to the role on this Polini engine - the first Proto was still a straight pipe and was called Astro1.

We would like to show you some meaningful runs in the duel class:

Mathias Scherer from Ludwig & Scherer, currently with 28,2 HP, also with a Polini gray cast iron cylinder. The rotary valve (!) Is operated by a 38 Keihin PWK fed and currently provided with enough horses by a fire magic.

Jonas from Nettetal should of course not be absent from this campaign. In the Germanscooterforum you can be constantly advancing "Summer-Winter Project" admire.

It also fires a Polini 133 made of gray cast iron. The motor is also equipped with a Polini membrane and is ventilated via a 35 Keihin PWK. With the last changes to the control angles, now 128/196, a lot has happened here too!

In the first attempt with the air filter, the limit of 28,4 HP could not be cracked….

Without the fan ring of the Vespatronic, the output rose to over 30 HP….

... mmhh, then after almost exactly 2 years I have to get the Polini motor out of the corner and put it back on again - or maybe just unscrew the fan ring ;-)

There is still some time until the second day of the duel - but for December 2st. also announced numerous comrades-in-arms whose engines should also be able to exceed the 21.12HP limit ...

It will definitely be exciting.

At the end of the year we let it rip again. On the last two Fridays before Christmas, December 14th and 21st, 2012, we invite you all to join us again in Glessen from 10 a.m. to 17 p.m. Waiting for you:

· Test bench competition in different classes

· Steaming coffee with a shot

· Warm pretzels

· Solid engines

20% in store sales (code word: Xmas)

· WHO IS BEATING THE ALEX on our P4? *

* With Smallframe up to 140ccm, one-piece exhaust & housing suction!

Waiting for the winner Scooter Center Voucher worth 100 € !!!

Good tools are fun when screwing. Or better, that makes screwing even more fun.

Our bgm multitool tool bgm8819 consists bgm8811 and bgm8812.

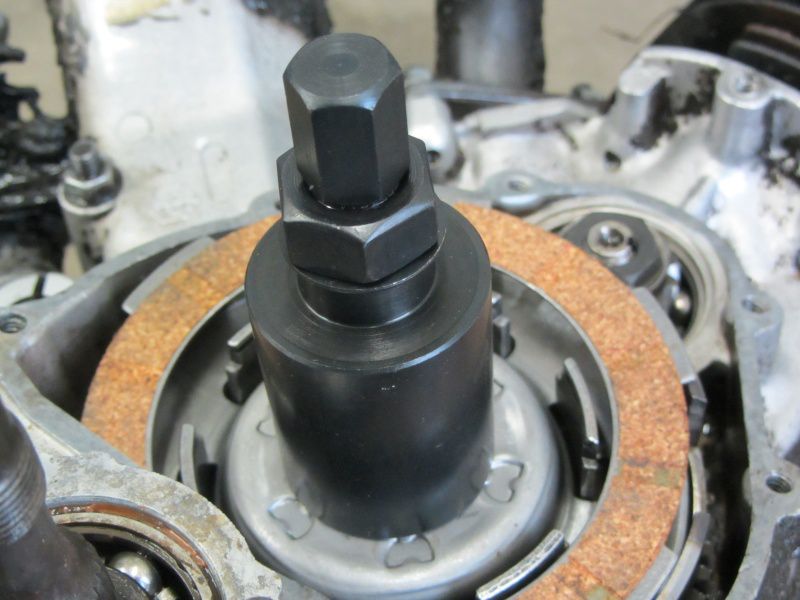
The bgm8811 is a flywheel puller (M28x1) for all Vespa with electronic ignition, including our ignitions for converting the Vespa Sprint / VBB and V50 / Primavera and clutch puller for the Vespa Smallframe Models in one.

Together with the toolbgm8812 this also results in a clutch compressor
for the Vespa Smallframe models. Here it is possible to replace the clutch linings with the clutch installed in the engine. The part of the program: "Blocking the primary to loosen the clutch nut" is therefore deleted without replacement. Especially for converted PK-XL2 couplings with 12 springs a good help. The springs remain installed when the pads are changed and the Sisyphean task of sorting the springs back in is no longer necessary.

Of course, the clutch compressor also fits all common PK and V50, Polini double spring Couplings with 3 and 4 discs.

After the clutch cover and the Pressure plate removed, we screwed in the puller bgm8811.

Then the clutch compressor bgm8812 is attached and

Pre-tensioned with the enclosed nut, washer and screw from bgm8811.

As soon as the friction disks can rotate freely, the locking ring and the linings with the steel disks can be changed.

Before loosening the clutch compressor, you must of course not forget to reassemble the oil baffle and the circlip.

Install pressure plate and cover - done!